

February is such a short and sweet month and sadly that means today marks the final performance of our fantastically fabulous February Leading Lady, Rebecca Luminarias. I anticipated each of her posts so I could be entranced by the wondrous photos and magnificent projects along with her writing being informative and entertaining. I really can't think of a better person to have this month as our Leading Lady to help celebrate our 3rd birthday and I feel so honored to have Rebecca grace the w&w blog this month.
If you missed her smashing debut you must see it...CLICK HERE or her stunningly sensational second performance CLICK HERE or triumphant third performance CLICK HERE. Today she pulls out all of the stops with more pretty packaging and tempting tips!
Lucky for us all we have her final command performance today.

Oh, I'm sad! It's my last
Saturday with you wonderful folks here Winnie & Walter. I've had a
blast, challenged myself in more ways than one, worked with amazing products,
and connected with a bunch of new friends--it's been an awesome month!

I'm leaving you with a few fun little
DIY tricks. The beauty of many paper crafting products is all the
different ways you can use them. A designer may have one intention, but
then another creative comes along and shows us all a different way to work with
it. Those are my favorite products because of their versatility. So
I took one of the best W&W dies and used it in a few different ways,
essentially making do-it-yourself embellishments.

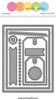
If you don't have the Lulu Fringe cutaway,
go and buy it right now. It is the best thing ever! I started by
using it to make the fringe hearts that are all the rage right now. I'm
sure you've seen them, so here's one way to make your own...(okay, two ways ;)

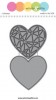
I started by cutting a heart out of
white card stock using the True
Multifaceted Heart cutaway. Then I picked a few papers to
fringe. All the papers seen here today are Pink Paislee's Fancy Free line
by Paige Taylor Evans. I used prints with smaller patterns from the 6x6
paper pad.


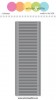
I cut small strips for the hearts,
approximately 3/4" by 6". When I had a few strips cut, I lined
them up on my heart, starting from the bottom up. Be sure to put
adhesive only on the flat, un-fringed part of your strip or
the fringe won't stick up and be fringy! You can trim the excess as you
go or trim all at once in the end. Either way, when you've finished, you
have a pretty fringe heart!

(*Here's a tip that might be even
easier, but it was one of those things that didn't dawn on me until I was
writing up my post: Take a 4"x4" piece of white card stock and adhere
your fringed strips to it, just as I did with the heart. When you've
reached the top, run it through your die cutting machine with the heart die.
Done! Way less trimming, and much faster! But, if you don't mind
taking your time, you can try my first way!!)

To show it in use, I've simply used it
as a gift topper here with some seam binding and a simple tag,
also cut from Fancy Free paper. The hearts are pretty enough to not need
much else on a small package.

The second embellishment I made with
the Lulu
Fringe cutaway is a paper tassel. If any of you stopped by my
blog during the W&W World Card Making Day Blog Hop, you saw me use them
on a card there. It's still my favorite thing to make with the die and
it's so easy!

Again, trim your papers--longer this
time, around 1 3/4" long. If your paper stock is thin, 6" is a
good width; if it's thick, 5" is best.

You will need some tassel caps--I've
used these small gold plated pieces here,
which are 4mm in diameter.


Starting at one end, start rolling
your strip. It should look like this when you're done:

Pop your cap on (some adhesive inside
the cap will ensure that your paper doesn't slip out) and you're done!
Super easy!

I made a fringe tag next, similar to
the heart. I actually had white shipping tags that I used, but the tag
from Essentials:
Katharine Cutaways would be a great die to use if you wanted to do it
the card stock way. Again, had I thought of that trick earlier, I would
have done it!! But, honestly, this way is not hard. I didn't put
fringe all the way up, but opted instead to use coordinating paper for a hole
reinforcement.


It's all about the fringe on this
present! Yup, I absolutely did cover the box top with fringe strips, too,
because once you start fringing, it's difficult to stop fringing!

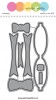
For my last DIY embellishment, I made
a little bow clothespin. While I didn't use the Lulu Fringe die to make
it, I'm including it because it still qualifies as a DIY embellishment.

I used the Take A Bow cutaways
to make the big looped bow and adhered it to a chunky wood clip. That's
all. Easy, again, but effective, especially with a few fringe scraps on a
plain white gift box.

That's a wrap! I hope you try
some of these fun DIY embellishments! Thank you so, so much for welcoming
me into the W&W family and being so hospitable. It's been awesome to
be here--don't forget to stop by my blog to enter the giveaway! You have
until Monday, February 27th to leave a comment on this week's post or last week's (but OVER THERE!) to be
eligible for the $30 W&W gift card. I'll announce the winner (OVER THERE) on
Tuesday, February 28th.

Thank you, thank you, thank you, Winnie & Walter (and friends)
for making my February AMAZING!!

Rebecca's style is just simply beautiful. Her work is consistently WOW!
ReplyDeleteSuch a fun look with the fringe! Love the tassels! I'll be checking out the Lulu Fringe Cutaway!
ReplyDeleteSuch fabulous pieces! Love the fringe! Makes me want to make something right this minute!
ReplyDeleteAbsolutely GORGEOUS embellishments!!! The Fringe Cutaway is one W&W product that I don't see featured very often. I wasn't totally sure how to even use it! Thank you for your lovely post today and for the inspiration your fabulous art brought to us all month!! Heading over to your blog now!
ReplyDelete<3 J
jwoolbright at gmail dot com
HerPeacefulGarden.blogspot.com
OH PLEASE STAY, Rebecca ... every single piece of paper you touch turns into some magical little bit of sweetness! LOve, love, LOVE everything fringed and tasseled ... SHAY can you please get these tassel tops?!?!!!xo
ReplyDelete=] Michele
Oh my goodness Rebecca, there are so many awesome tips and ideas in here I never even KNEW about! I haven't seen the fringed hearts before....SO AWESOME! I can hardly think of anything else since I read (and saw) this! A great stint as Leading Lady! Love your ideas!
ReplyDeleteI love this fringe idea! The tassel tops are brilliant and really do finish off the paper tassel. I'm pinning this! Love it!
ReplyDeleteStunning! So sad to see this month end.....Rebecca has been fabulous!
ReplyDeleteFantastic projects and I just love the photography. The fringe heart is too cool!
ReplyDeleteHey these fringe
ReplyDeletehearts are so fun
and all of the
projects are so
pretty.
Carla from Utah
Wow!!! I would never have thought of so many creative ways to use the fringe, and I just love it with patterned paper. I'm going to have to give this a try with my fringed die, which I've actually never used. Thanks for a fabulous month of really unique ideas!
ReplyDeleteYou have been the most amazing Leading Lady--thank you so much! I really love your style--unique & wonderful! I'll be adding the fringed die to my next order--maybe you can get a commission--haha!
ReplyDeleteLove the colors and patterns and the pretty fringing.
ReplyDeletewow! these are such pretty DIY paper embellishments, would never have thought to use it this way :) thanks a lot for sharing so many cool gift wrapping ideas, loved them all.
ReplyDeleteWow!!! Rebecca, your paper embellishments are really gorgeous!!! Love the fringe!
ReplyDeleteI truly enjoyed reading your post; it’s both informative and engaging. Your detailed approach reminded me of the quality guidance offered by nursing research proposal help experts.
ReplyDeleteThis article by February's leading lady, Rebecca Luminarias, is a critical one in which it continues to flow how Lady Rebecca has spent her entire life in design, and the sad thing about this article is that today, our wonderful February leading lady, Rebecca Luminarias, has performed her last performance. She also provides professional CV writing services to her customers, and Lady Rebecca impresses people with her best designs.
ReplyDelete