Showing posts with label bubble talk. Show all posts

Friday, September 16, 2016

Say Cheese with Lydia

Hi there everyone. Hope you are having a great day! Today I sharing a super fun card that I made with a plethora of Winnie & Walter stamps and dies.

  Winnie & Walter mickey_1
I started by stamping the background using the larger of the small circles from Scenery: Big Bang Confetti - I just love how you can really play with shapes to create things that you don't see first try. For the mouse head embellishment I die cut three circles using Big Bang Confetti Cutaways from black card- I stuck the two smaller circles into place. Added some Wink of Stella over it and covered with glossy accents and then left to dry.

  Winnie & Walter mickey_2

I just love how the die cut star (using True Multifaceted Star Cutaways) frames the mouse head and the sentiment. For the sentiment I used the speech bubble and words from Bubble Talk.

  Winnie & Walter mickey_4

I hope you liked my card today, and I'll see you again soon.

Hugs, Lydia x

w&wDT_lydiaevans_blog-sig 2


w&w-supplies


Wednesday, April 27, 2016

Hello New Hair Style with Kelly

Hi Folks! Today I have a scrapbook page in the "Hello xxx" series, documenting my progress in making life changes (large and small) in my 45th year. This page celebrates a new hairstyle for me, only 19 years in the making. The row of photos on top shows my very similar hairstyles along the years, and then the large focal point photo has my hairstyle from today (literally, today ... I had my son go on the deck with me after school to take a current photo!)


I'm really looking forward to collecting several of these pages and putting them in a book I can leave out on the coffee table. It would be a great reminder for me to keep making progress on my goals for this year. 

Let's take a look at some of the elements ...

        
The In a Word: Hello cutaway serves as the title again. So versatile, I love that it will work for every single page in this series. The banner that I use to specify the theme of the page is from The Big, the Bold and Extras. Below the banner you'll notice tiny, scripted sentiments from one of my favorite older stamp sets called Bubble Talk. I picked out the three sentiments that fit this page, and then stamped them around the photos to act as a border.


To go with the large flowers on the page, I adhered tiny butterflies from the Essentials: Audrey Cutaways and added the year each hairstyle was from. Boy, it was a long time ago that I had bangs!!


 More dates on butterflies for the other two photos, and part of the large bloom.


The Winnie & Walter exclusive for Simon Says Stamp, Big Bloom, is a great spot for journalling. The empty center allows you lots of space to get your thoughts down. I stamped the big bloom on several papers, fussy cut them, and layered them up. The background paper is from when we shared the love with Pinkfresh Studio.


I added a few more Big Blooms to draw your eye through the page and to jazz it up a bit. You'll see in the bottom corner where I added a disclaimer on why, exactly, I opted to color my hair : )

Thanks so much for taking a look!

-Kelly 


w&wDT_kellygriglione_blog-sig

w&w-supplies


Wednesday, September 2, 2015

Winner of Rerun No. 3 Challenge | Bubble Talk

It is that time to announce the random winner of our Rerun No. 3 Challenge | Bubble Talk, but first let's celebrate *all* of the lovely entries!  

Thankfully it is chance rather w&w that has to pick a winner! :-)

Rerun3a

Many thanks to: Joyce M. Diane Jaquay, Berina Febin, Tenia Nelson and Penny Ward for taking on the Rerun Challenge and making such beautiful projects!  We feel very blessed that you joined in.

The random winner of the $20 gift credit to the w&w shop is No. 1: Joyce M.!

joycem_P1070096_edited

Joyce, please email us at info {at} winniewalter {dot} com to claim your prize.

Don't forget to enter our latest Rerun Challenge focusing upon This Awesome House!  Find out how HERE.

Friday, August 21, 2015

Mayuri's Version: Rerun No. 3 | Bubble Talk

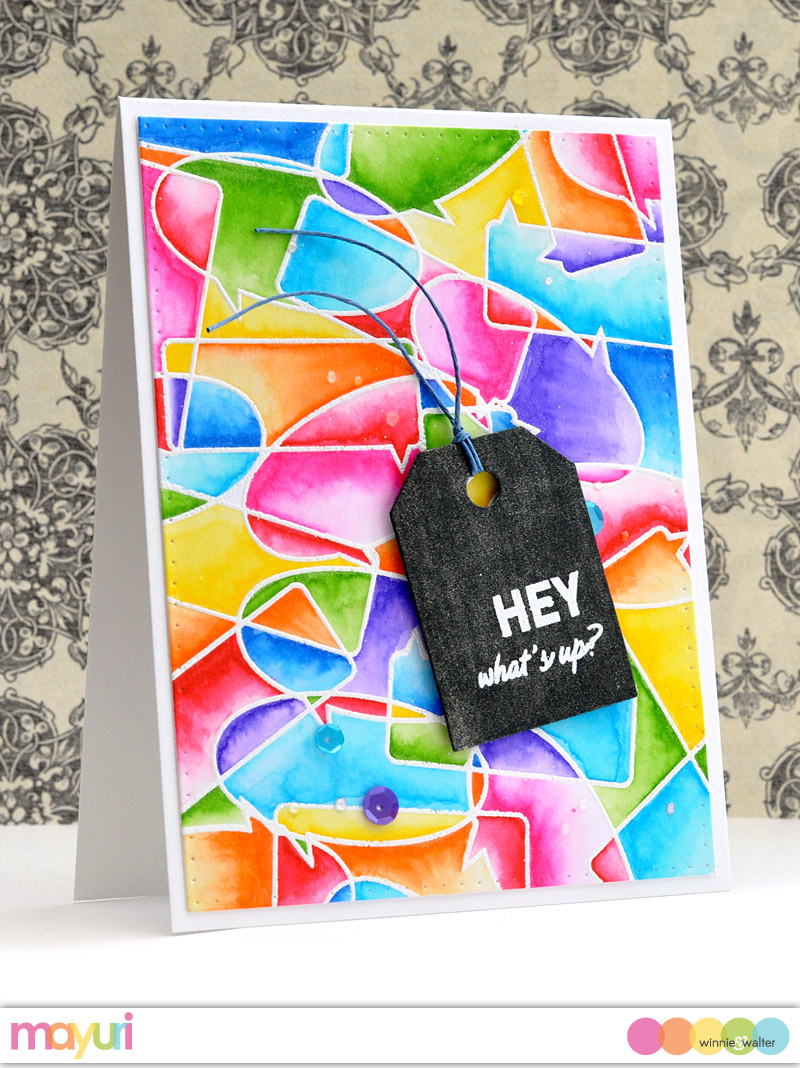
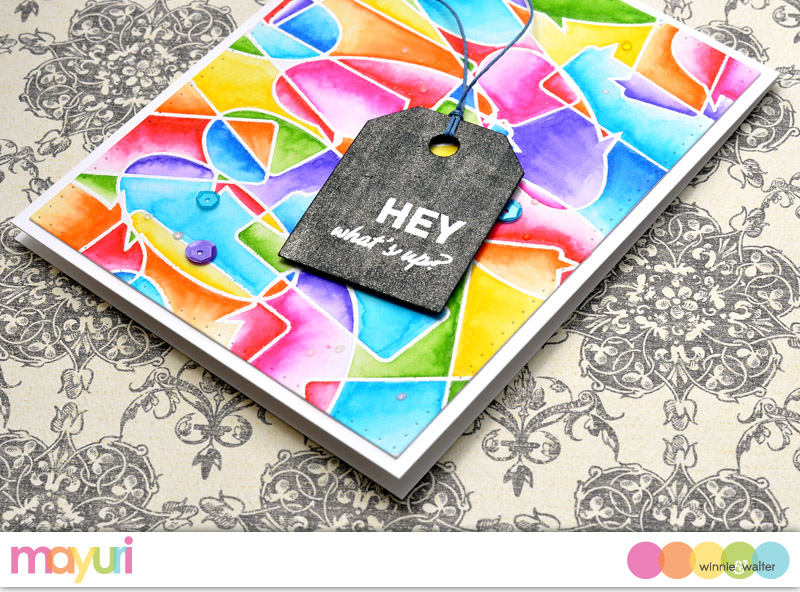
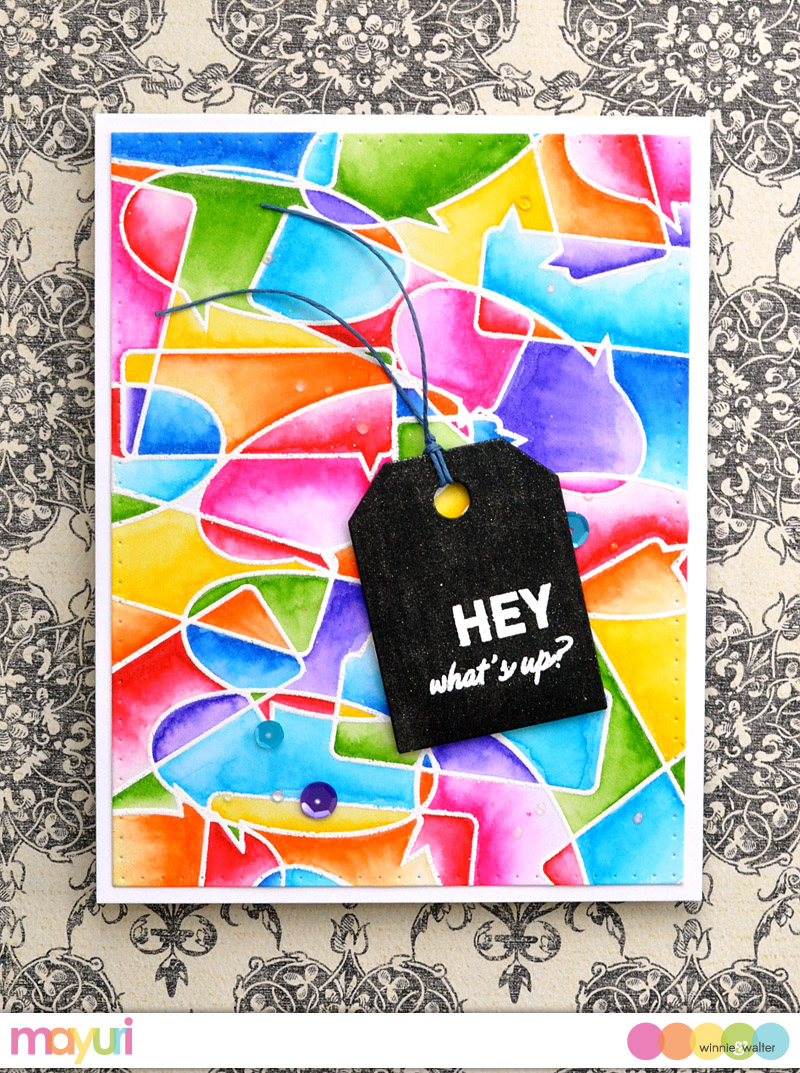
Hello there - Mayuri here to share a card using Bubble Talk to create a fun, colourful background and card.
WW_MAYURI_AUG2015_IMAGE01


I began by repeatedly stamping both of the speech bubble outline images with Versamark ink onto a panel of white cardstock, sprinkling with white embossing powder and heat setting. You get a really fun background from all the overlapping speech bubbles, just asking to be coloured!
WW_MAYURI_AUG2015_IMAGE02


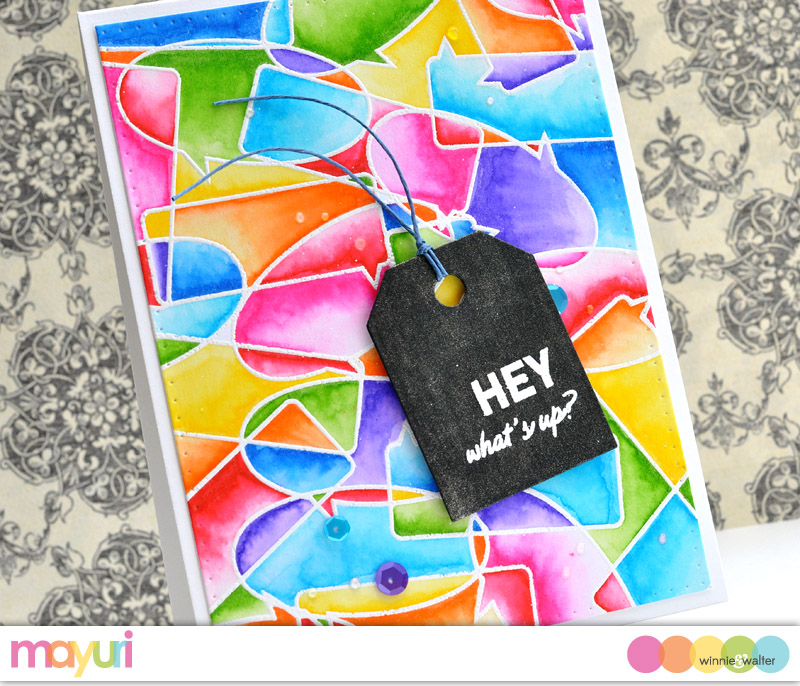
I used a rainbow assortment of ZIG Clean Color Real Brush Pens to colour each of the spaces created from the overlapping shapes - I laid down the colour first and went in with a wet paintbrush to drag the colour out for a sort of gradient effect. 
WW_MAYURI_AUG2015_IMAGE03


Once the whole panel was coloured, I trimmed it down using the largest frame die from Essentials: Katharine Cutaways. I then adhered it straight down onto a white card base.
WW_MAYURI_AUG2015_IMAGE04


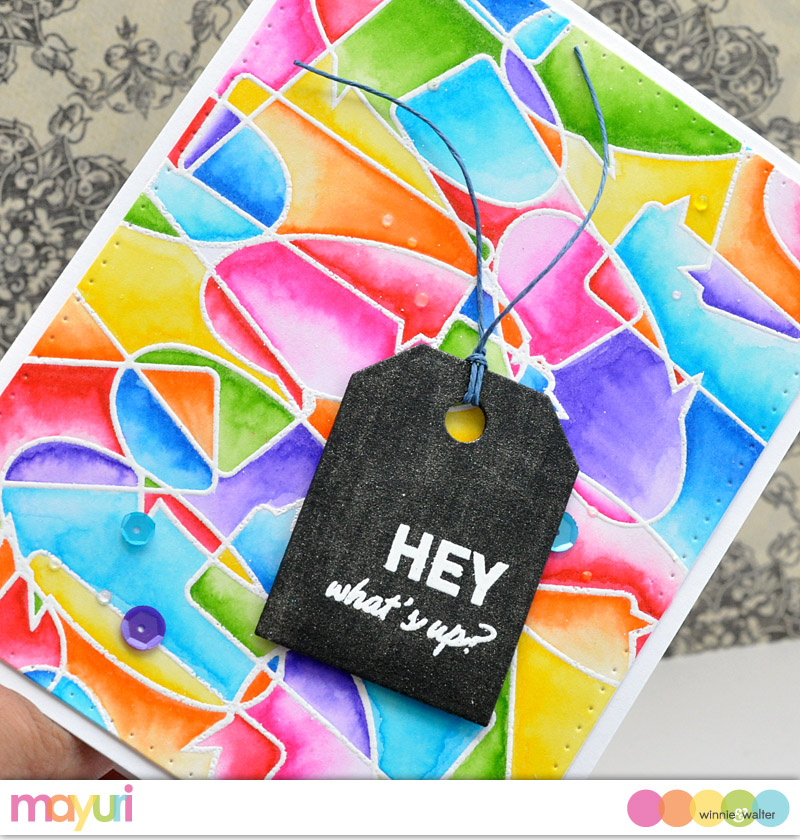
The sentiment was stamped onto a piece of black cardstock, again with Versamark ink, and heat embossed in white. I trimmed it out using the small tag die from Essentials: Katharine Cutaways, threaded a piece of twine through the hole and foam mounted to the card front.
WW_MAYURI_AUG2015_IMAGE05


To finish, I added a few sequins and dots of Glossy Accents. I hope you'll have fun creating your own backgrounds and colouring them in!

Thanks for stopping by ;-)


w&wDT_mayuri_blog-sig

Editor's Note: If you are interested in seeing more Bubble Talk inspiration and for a chance to win $20 credit to the w&w shop please CLICK HERE.


w&w-supplies

Monday, August 17, 2015

In Focus with Gayatri Murali No. 4 | Style #2

in-focus-banner-title_640px

Welcome back for the second tutorial this month. Here is the first tutorial using the tiny border cutaway.

Using border cutaways

This month I am focusing on using the tiny border cutaways that come in Essentials: Audrey Cutaways. On my first tutorial I die cut the tiny border cutaway from the set , trimmed it down and used as a layer over colour washed background. 

Gayatri Style banner copy

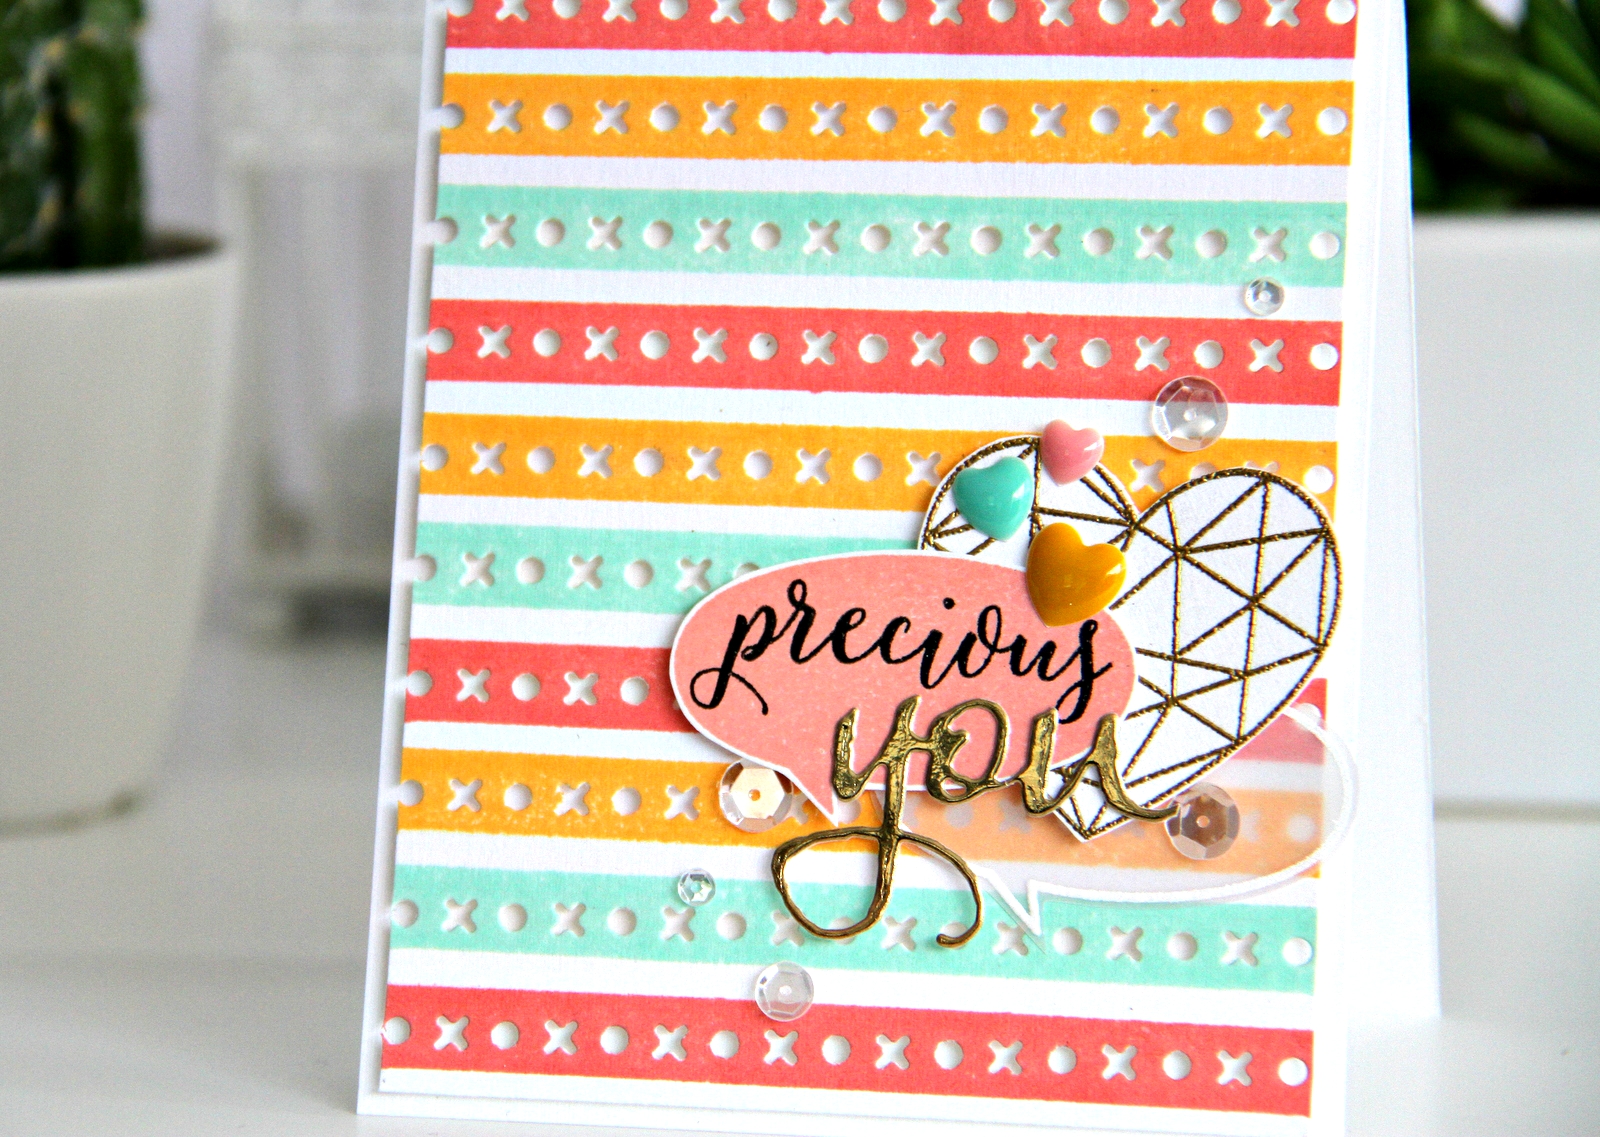
In this tutorial, I am using the xoxo border cutaway from Essentials: Audrey Cutaways set to make a cover model plate.


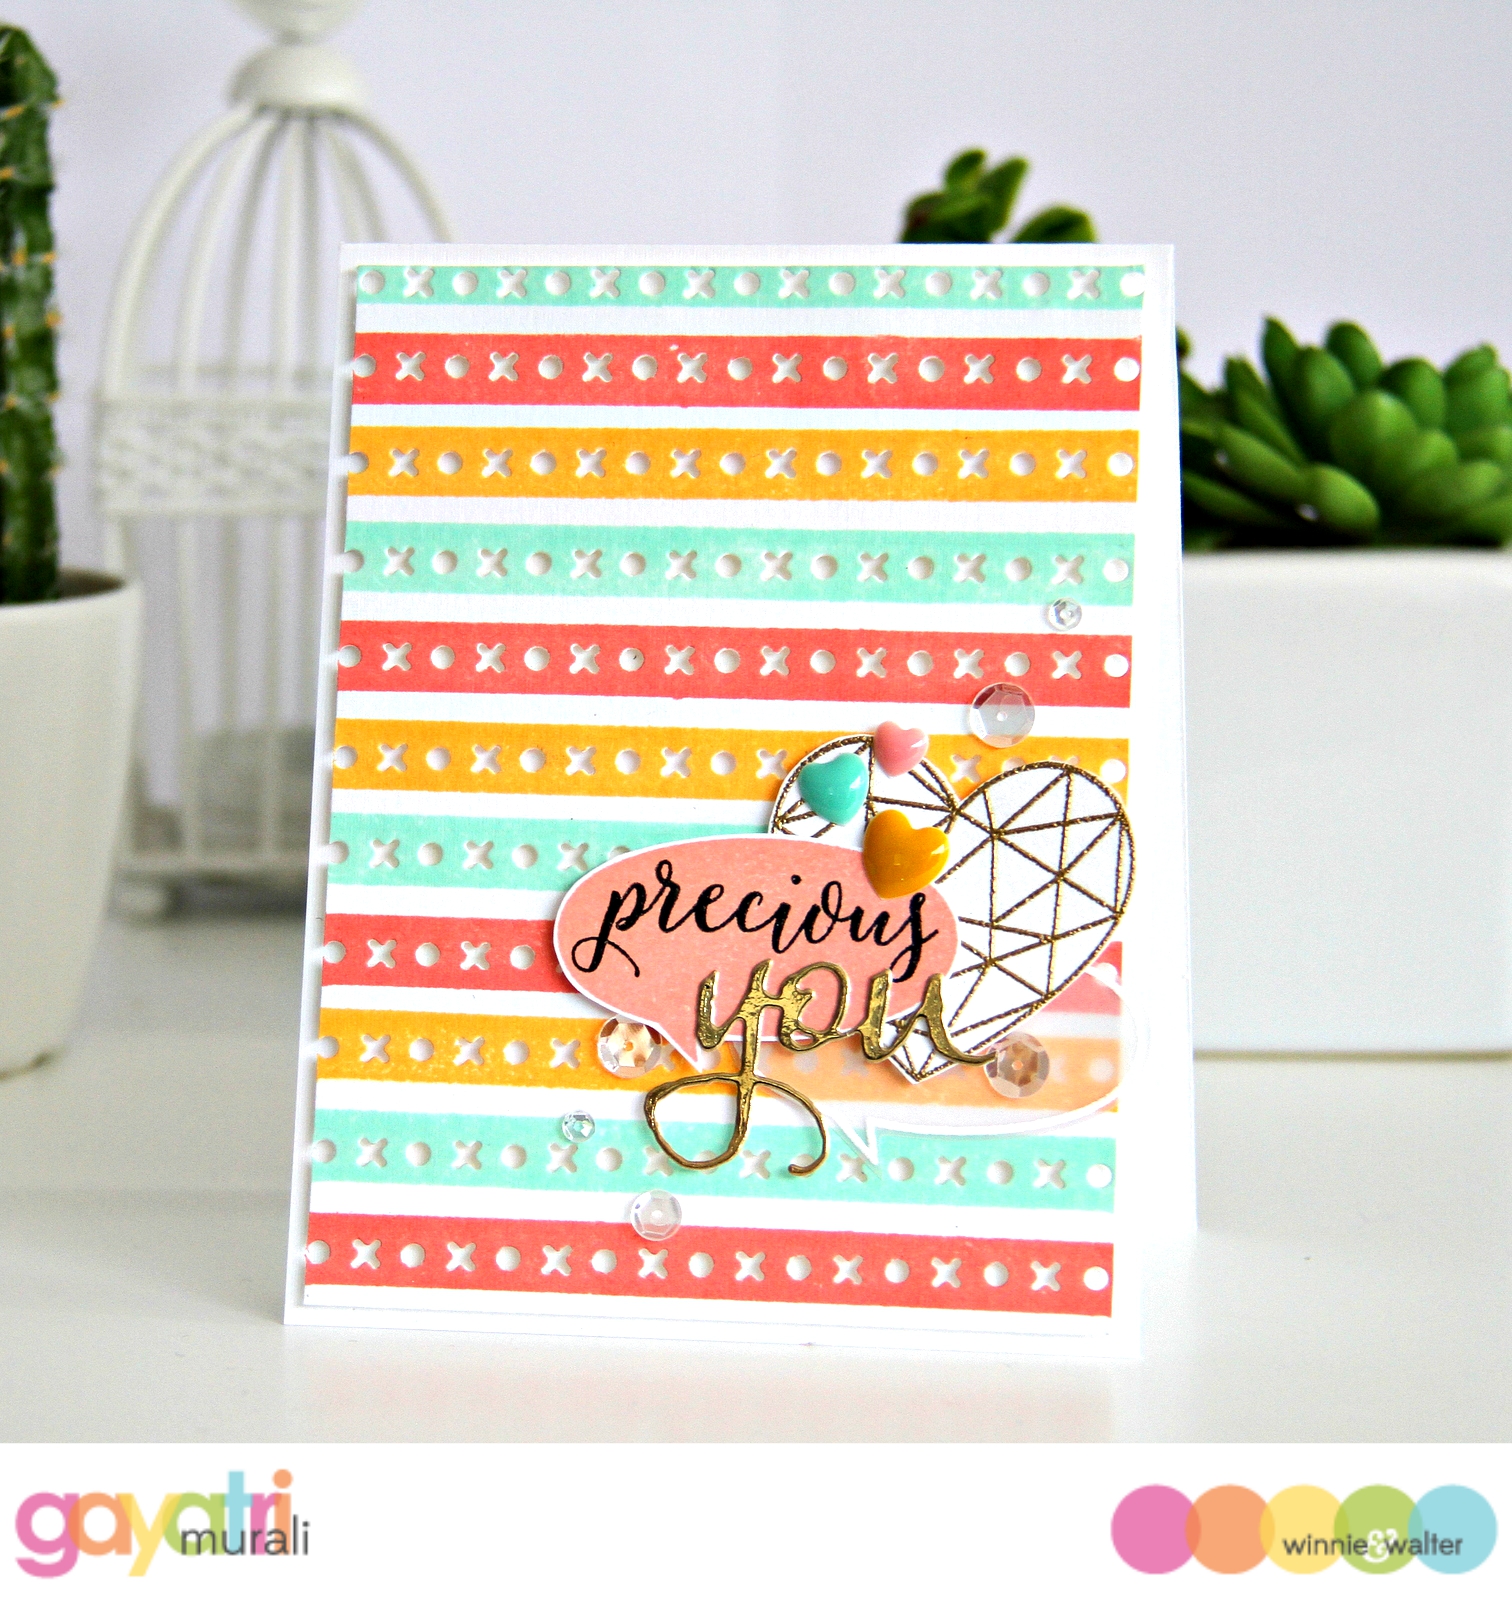
Here is the finished card.

Precious You card


photo-tutorial_banner

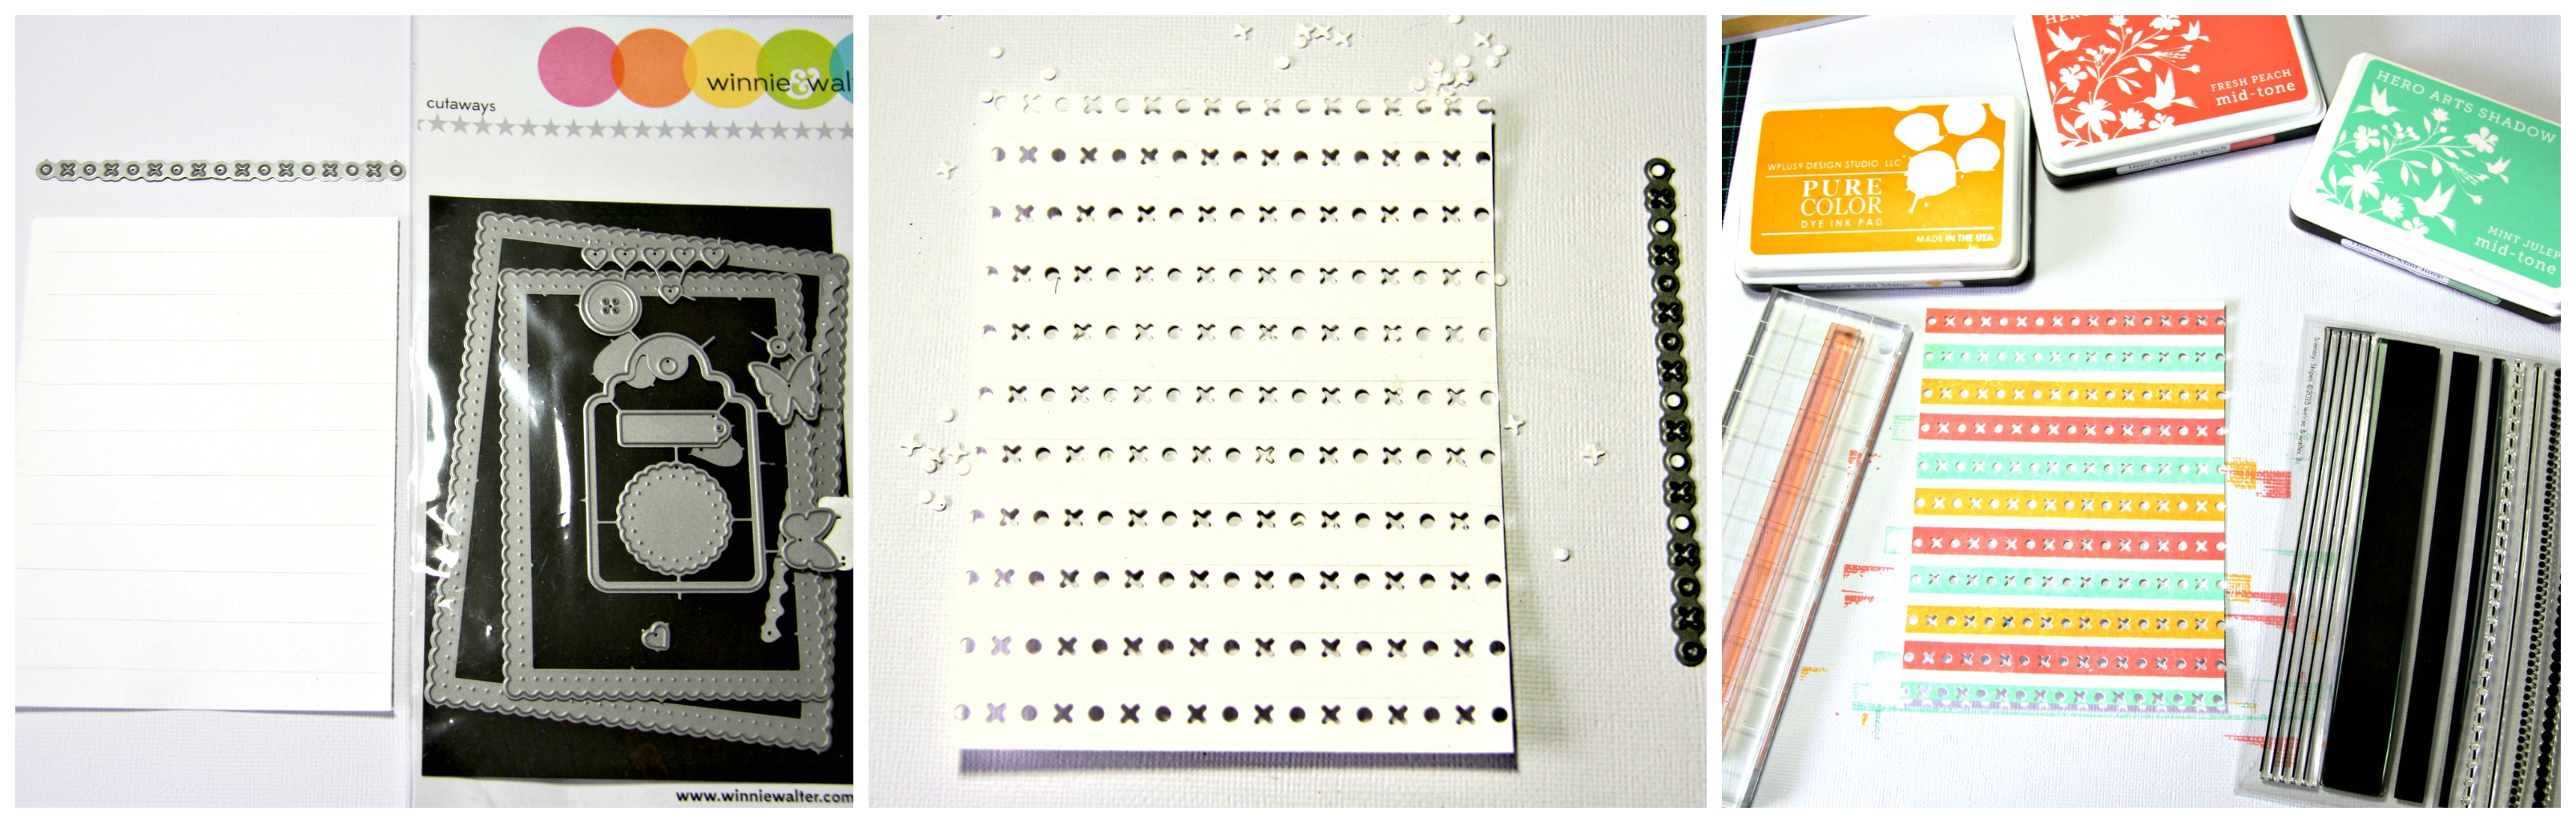
Here is a collage of photos showing how the card is made.

photo tutorial


brief_banner

The Essentials: Audrey Cutaways is a versatile die set. There are so many dies in this set that it is worth the investment. In today’s tutorial, I have used the “xoxo” border die in the set to make your own cover plate. A started with trimmed a cardstock to 4” x 5 ¼” in size and drew lines horizontally at equal intervals with a pencil. This pencil lines helped me line up the border die while die cutting.

After lining up and running through my cuttlebug, I ended with a cover plate with “xoxo” on it. To make this cover plate more interesting, I used the medium striped stamp from Scenery: Stripes stamp set and dye inks and stamped over the die cut on the panel. I chose three colours that matched well with each other. This time I chose to go with dye ink for only one reason - I was able to see through the inked stamp to line up and stamp. Pigment ink makes the inked stamp opaque making it difficult to see through the stamp to line up.  I really loved how my cover plate panel looked now with the colourful stripes.

I mounted this panel to a white card base using foam adhesives. For the focal point, I gold heat embossed and cut out the heart from True stamp set. I also had couple of speech bubbles from Bubble Talk stamp set already with me. One speech bubble is white heat embossed on vellum and the other stamped using Fresh Peach ink and cut out.  On the peach speech bubble, I stamp the sentiment “precious” from My Precious stamp set in black. I clustered the speech bubbles and golden heart and adhered using foam adhesive. I then die cut “you” from The Big, the Bold and You Cutaway in gold foil cardstock and adhered below the stamped sentiment.

Finally I added three heart shaped enamel dots and Sparkly Clear sequins from Pretty Pink Posh to bring the card together.


Here is a closeup shot of the card.

Precious you closeup 1

You can do anything over the cover plate to make it your own – sponge inks, watercolour, stamp images… It is up to your liking. Or you can also sponge ink on the card front and layer the cover plate panel. Hope you like my cover plate idea using the tiny border dies from Essentials: Audrey Cutaways.

Thanks for stopping by!


w&wDT_gayatrimurali_blog-sig

>>>LINK UP<<<


w&w-supplies