Showing posts with label in a word: happy cutaway. Show all posts

Friday, July 27, 2018

Happy Birthday with Gayatri

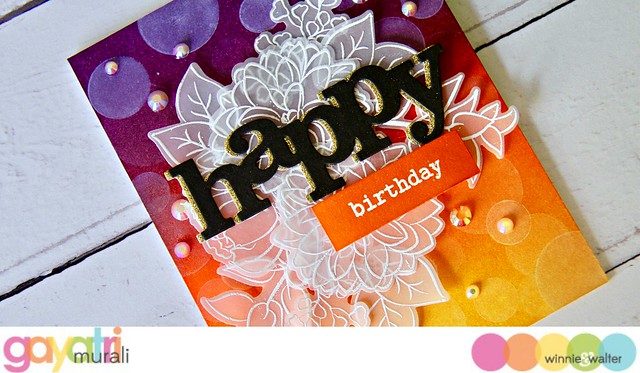
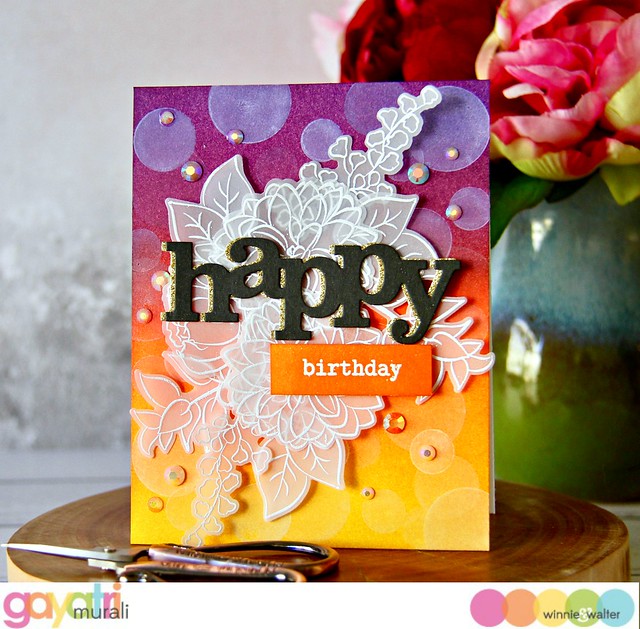
Hey everyone, Welcome! This is Gayatri with you. My last project for July here. I have a floral card to share with you today. I also created a bokeh background for the floral cluster. Here is the card for you.
gayatri_W&W July card #3a

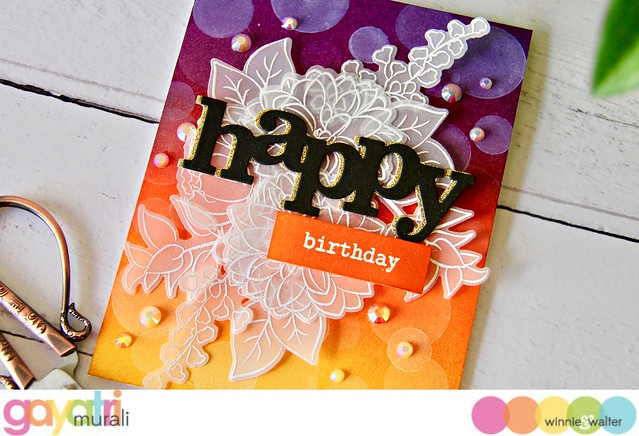
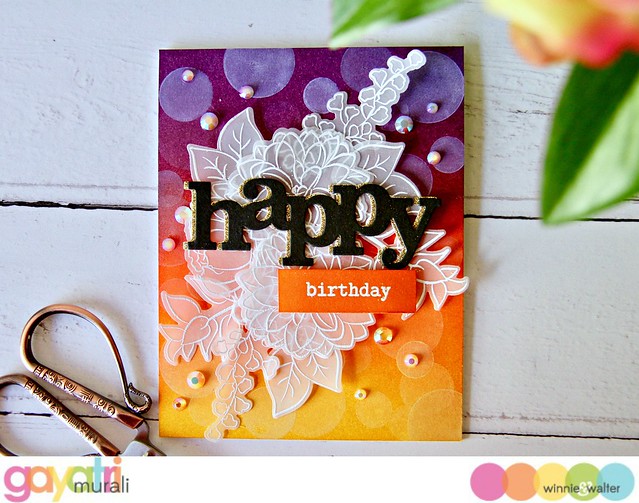
If you are following me on Instagram, you will know I am sharing distress ink blends each day. The background I used here is blend #4. The colours I have used on this background are Dusty Concord, Seedless Preserve, Ripe Persimmon, Carved Pumpkin and Mustard Seed Distress inks.  Then I used W&W’s Scenery: Bigger Bang Confetti stamp set (limited edition) to stamp solid circles on the background using white pigment ink to create bokeh background. Since the background is colourful and busy, I want to keep the focal point simple and clean. So I white heat embossed the images from In Bloom Addie’s Garden stamp set on heavy weight vellum. Then used the coordinating cutaway to die cut them and glue to form a floral cluster. I adhered this cluster on the middle of the background panel.

For the sentiment, I die cut In a Word: Happy cutaway in black and gold glitter. I glued them slightly off set to make the gold glitter as the drop shadow for the black die cut. I know its not traditional. Usually its black die cut that is the drop shadow. I adhered the Happy sentiment on the middle of the floral cluster. The secondary sentiment is white heat embossed on a strip fo white cardstock and sponged with Carved Pumpkin distress ink. I adhered this below the large die cut sentiment using foam adhesive. Finally to finish off some sparkle from jewels.

Here are couple of closeups of the card.
gayatri_W&W July card #3 closeup1 gayatri_W&W July card #3 closeup

Love the card. The colours are a bit unusual for a birthday card. But if you have a friend who has birthday that falls on Halloween, here it the birthday card inspiration. :) Hope you are inspired by my project. All supplies used to make this card below.
gayatri_W&W July card #3 flat

Thank you very much for stopping by. Have a lovely day!

My blog signature

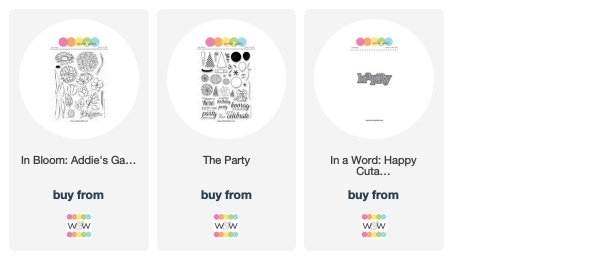
w&w-supplies

Monday, July 16, 2018

Two Versions: Warm + Cool with Gayatri

Oh Hello everyone, Gayatri with you today. Hope you had a lovely weekend. I certainly had a relaxing weekend. Got back into craft after a minor finger injury. So I have a set of cards to share with you just using W&W’s Cutaways. 

gayatri_W&W July Cards #2a gayatri_W&W July Cards #2b

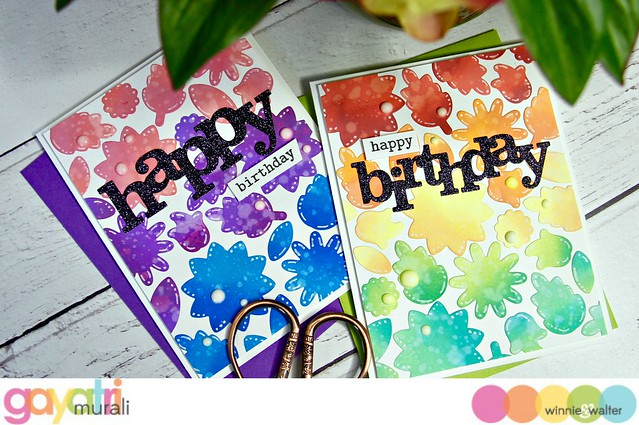
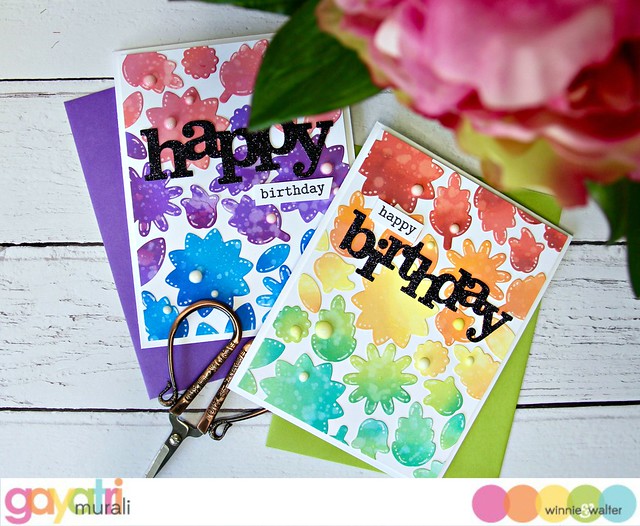
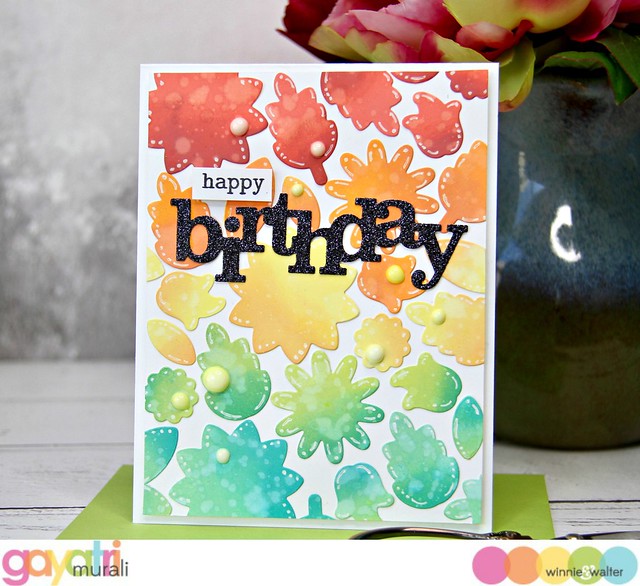
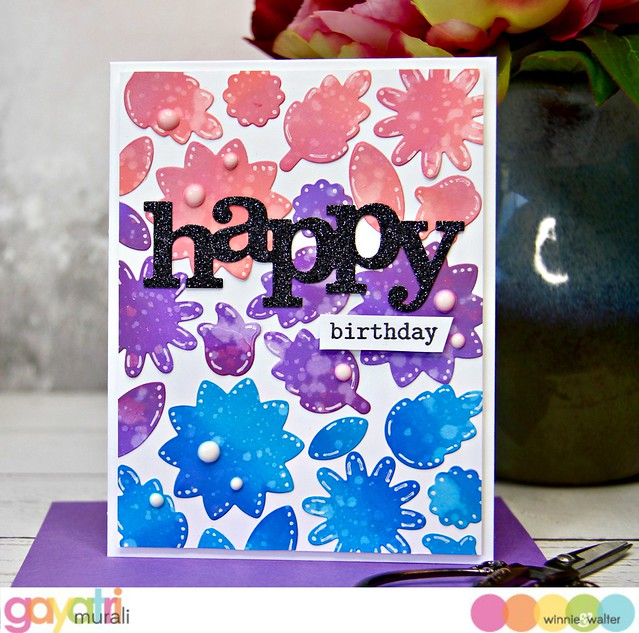
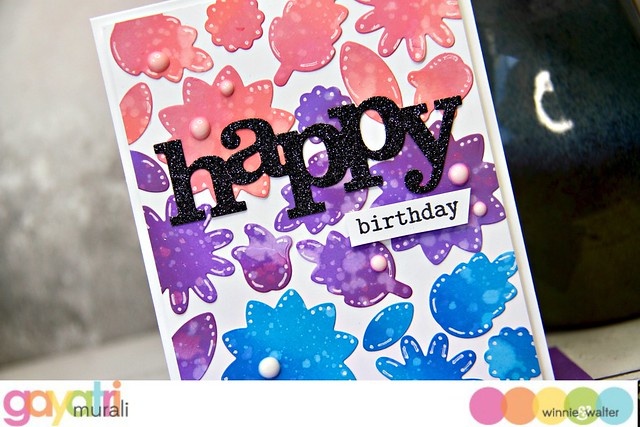
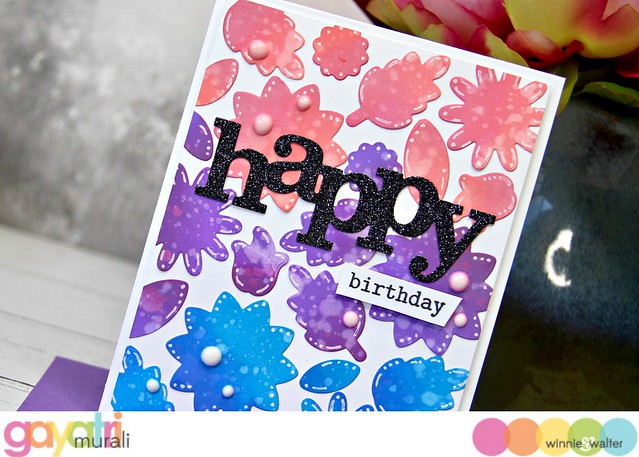
I actually started with the intention of making just one card. I got carried away and made lots of elements that I ended up making two cards and plenty of die cuts left over as well. I love the large floral dies from the In Bloom: Eva’s Favorite Flowers Cutaways. I wanted to use the dies on its own and spruce the die cuts to create colourful background.

So I sponged four white panels with Worn Lipstick, Abandoned Coral, Carved Pumpkin, Squeezed Lemonade, Salty Ocean and Wilted Violet distress oxide inks. So each panel has two colours each. Then I used just a few of the dies from In Bloom: Eva’s Favorite Flowers cutaways to die cut through all the panels. I now have six coloured sets of the same die cuts to use. 

To spruce them, I sponged a darker colour of each colour to one side of each die cut to add a bit of depth. The colours I used are Candied Apple, Picked Raspberry, Lucky Clover, Mustard Seed, Spiced Marmalade, Blueprint Sketch and Seedless Preserve distress oxide inks. Then used white gel pen to add details to each of the die cut.

Then I glued the die cuts on to two white panels trimmed to 4”x5.25”. On one panel I used all the warm coloured die cuts and on the other I used all the cool coloured die cuts. So I have two panels to make two cards. I adhered the panel on white card base using foam adhesives.

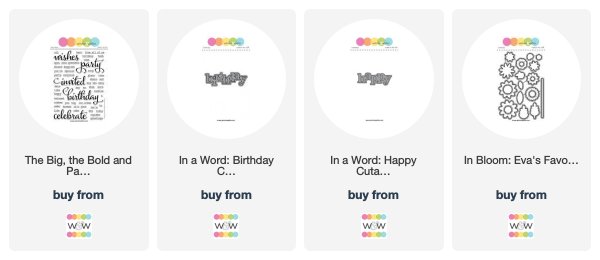
For the sentiment I used In a Word: Happy and Birthday Cutaways. I die cut them using black glitter cardstock and adhered directly on the background panels. The secondary sentiment is from the The Big, the Bold and Party stamp set. I stamped them using black ink on a white strip of cardstock, trimmed and adhered using foam adhesives. Finally, I added white Nuvo Crystal Drops to finish up the cards. The white drops picked up some colour from the die cuts on the edges. It looks so cool. I love it. 

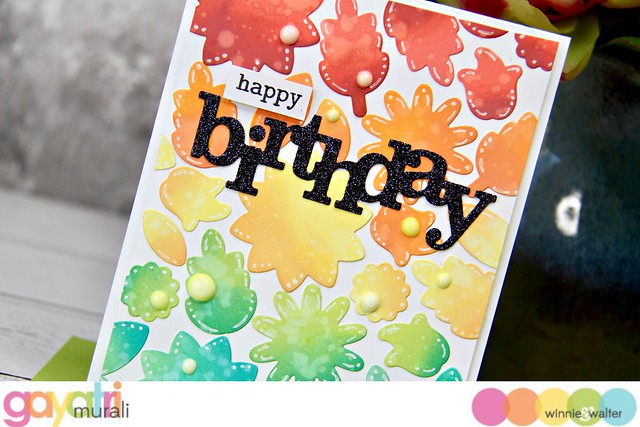
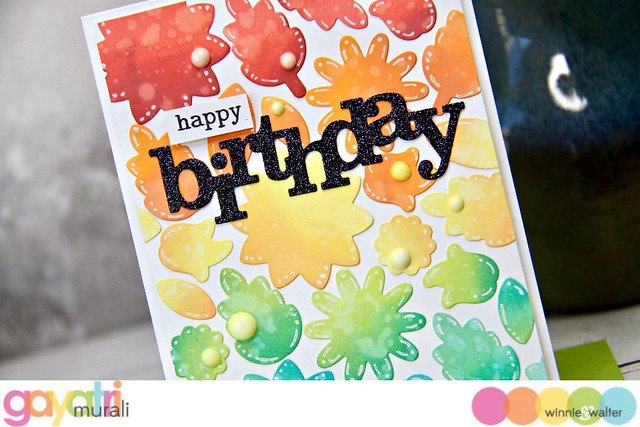
Here are the photos of the cards individually and closeups.

gayatri_W&W July card #2 warm gayatri_W&W July card #2 warm closeup1 gayatri_W&W July card #2 warm closeup

gayatri_W&W July card #2 cool gayatri_W&W July card #2 cool closeup1 gayatri_W&W July card #2 cool closeup

No stamping at all. Just using Cutaways to make a set of two cards. Something different to try right? If you make a card using this technique, share it on social media and tag us. All w&w supplies used to make this card are listed below.

Thanks so much for stopping by today.

My blog signature

w&w-supplies

Thursday, February 1, 2018

w&w 4th Birthday Bash | Four Challenge with Shay

challengeb

Hello fellow party goers!  It's Shay here.  I am so excited to bring you my challenge.  To commemorate our 4th birthday I am following up on my One Challenge from our first year and Two Challenge from our second year and Three Challenge from last year.  This year it is the Four Challenge!

>>>CHALLENGE DETAILS<<<

Make a new project using the number 4 or four, four colors, four patterns, four layers, four embellishments, four photos, four words or four stamp sets (and so on)...really anyway to incorporate four into your project!  You can focus on a single option or combine the options (for instance a four layer card using four colors + four embellishments).

>>>MY PROJECT<<<

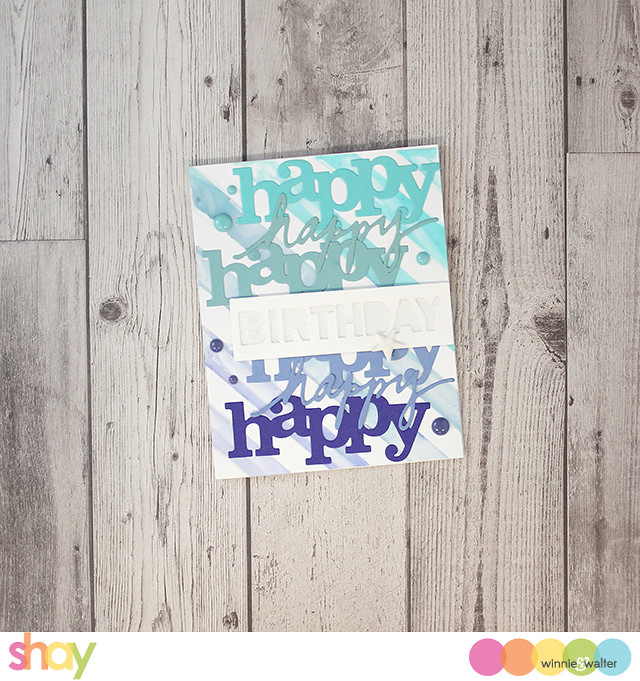
shay_IMG_4273 

I began with a background I had created some time ago using mixed medium and distress ink along with Scenery: Classic Diagonal Creative Screenings.  When I have a little time to play I create backgrounds and I find having some background panels sitting awaiting me whenever I need them really a great jumping off point and time saver.

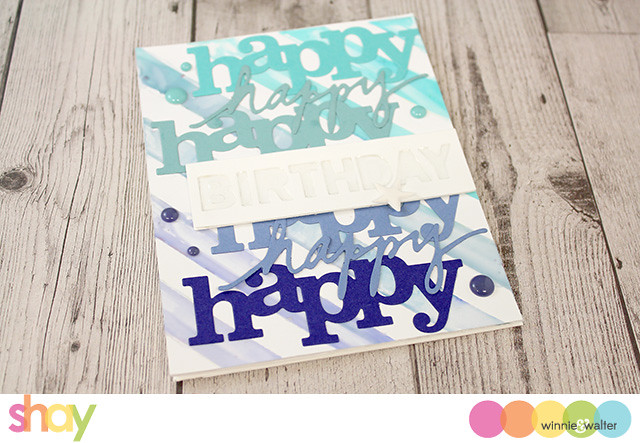
shay_IMG_4274 

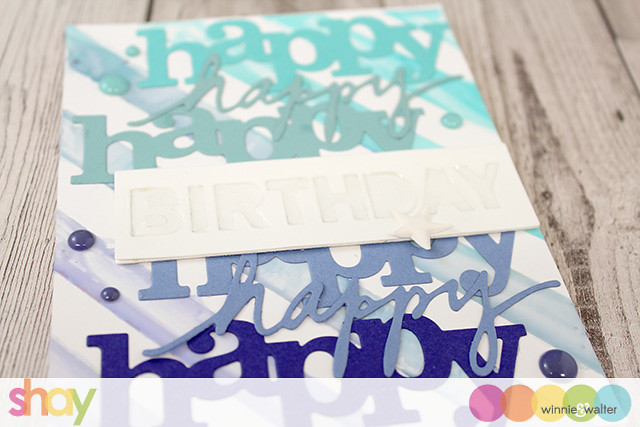
I pulled out 4 colors (first use of the number 4) from the background and cut In a Word: Happy Cutaway from each of the cardstock colors so I have 4 happy's (4 again).  I adhered the four happy's to the background panel.  I also cut out the handwritten "happy" from In a Word: Happy Coordinating Cutaways from the 4 same colors and adhered 2 of them to fill in some of the space on the background.  Next I cut out the birthday tile from In a Word: Birthday Tiles Cutaways 3 times out of white cardstock with the last not cutting the "birthday" all the way through.  I glued the fully cutout tiles on top of the one that did not cut out fully.  I adhered the birthday tile to the panel.  Then I filled in the open area of the "birthday" with Nuvo Crystal Drops for some shine and interest.

Last I added 3 greenish enamel dots to the top panel and 3 purple enamel dots to the bottom of the panel and added a white puffy star to the white panel so that there are 4 embellishments on top including the white star and 4 embellishments on the bottom of the card including the white star (4 again!)

shay_IMG_4276

Now it is your turn to link up your Four Challenge project!

>>>GIVEAWAY<<<

Link up your take on this challenge for a chance to win a $75.00 gift card (gift code) to the w&w shop.  One random winner will be chosen.

For more information on how to enter to become our Guest Star for the next release CLICK HERE.  Please remember you need to include GS in the Link Title to be considered for the Guest Star competition.

Friday, October 23, 2015

Black & White | Happy Haunting with Lydia Evans

DSC06437c

Hello there! Lydia here with you today and with a new video too! I may have added a little orange to this months 'Black and White' theme , but as we are nearing Halloween I thought I lil poetic licence was ok ;) 

Shakers, cards and tags, seem to be the big thing at the moment and I wanted to show you how I used this months Re-Run set 'Moonlight' to make a cute little shaker tag.

DSC06437 

I have used the Fuse Tool to go around the large tag from Essentials: Katherine's Cutaways to create a seal, but leaving the bottom edge so I can add things in. I used the same tag and cut it out of some grey card, before adding this to the tag pocket I embossed the web from Moonlight onto it in white. I also embossed the large spider onto some heat resistant acetate and added him to the web, then added the grey tag inside the tag pocket. Once this piece was in place I added in some shaker elements before sealing up the bottom of the tag with the Fuse Tool.

  DSC06439

For the sentiment I cut two, one orange and one black, of the In A Word: Happy Cutaway, I added the black on top of the orange one but slightly off-set it so you can still see the orange peeking through. Then added 'hunting' from the Moonlight set heat embossed in white onto some heat resistant acetate. For more details and a step-by-step I have a video ..... 


Or go directly to the video here:


I really hope you liked the video and tag, I would love to know what you think. 

Thank you so much for stopping by! 

Hugs Lydia xxx


w&wDT_lydiaevans_blog-sig


w&w-supplies


Thursday, October 8, 2015

Spotlight On...Cecilia Hsieh!

spotlight-cecilia-hsieh

We are proud to bring you our next Spotlight On...Cecilia Hsieh!  Cecilia caught our attention with her lovely entries in our challenges like this pretty card from our last The Gossip Column challenge HERE.  Her clean and simple aesthetic allows the color and/or pattern she uses to really make a great impact.

Wait until you see the awesome projects she's made today...you will see Cecilia shine!       

About Me (Cecilia Hsieh)


Hi Everybody! First of all, thank you to Winnie and Walter for asking me to be part of their blogpost! 

My name is Cecilia from Cecilia's Cards and I’m from Melbourne, Australia. I’m a Scientist during the day and Crafter at night.  I’ve been blogging since March 2012 and have met a lot of virtual as well as real life crafting friends during this time. My crafting journey have started at a very young age and paper craft is something that I’ve always gone back to. I have knitted, painted on ceramics, painted, sewed and have even tried scrapbooking. A lot of the projects I have made are in the hands of my friends and relatives. My card making style has evolved over the years and I am really comfortable with what I make now. I have had a few cards published in three magazines and have won a several online crafting challenges. This is where Julie and Shay found me – submitting madly to some of W&W challenges! I love the W&W stamps, and love using them in a lot of my projects.

Projects – Black and White Challenge

My first card is made with my newly acquired Winnie and Walter In Bloom: Addie’s Garden. I love the versatility of the flowers in this set. I white embossed a flower on black cardstock and fussy cut the flower. The background is stamped with the various stamps from the set. The sentiment is from The Big, the Bold, and the Happy stamp set using the ‘In a Word: Happy’ Cutaway. The ‘Happy’ die is layered with 3 layers of black cardstock. The ‘birthday’ was stamped in red just to give it a hint of colour. The white embossed flower was mounted on dimensional foam. Lastly, some pearls were added to the card to finish it off.


My second card was made with the The Party and Scenery: The Party Hangover stamp sets. Again one image was white embossed on black cardstock and mounted on dimensional foam. The ‘happy’ diecut  was layered with just black cardstock with a bit of red behind the diecuts. I added some droplets to the card to finish it off.


Thank you Shay and Julie for the Spotlight. Pop back next week for two more black and white projects to share!

Saturday, October 3, 2015

WCMD 2015 | Make it Masculine with Julie

To get all the information about w&w WCMD 2015 CLICK HERE. 

WCMDblogbanner2014


Hello w&w family!  It’s Julie here ready to celebrate World Cardmaking Day and my challenge is focused on creating Masculine Cards. Today, I want to share a card I created for my Dad’s birthday.

I think Shay is a genius at making cards for boys and men, but it is always a challenge for me to come up with something new and hopefully he will like it.  This one features a few items I have been hoarding for a long time - a sheet of real wood paper I bought ages ago and my wood veneer stars from Studio Calico.  

My Dad lives in Houston, and he is a baseball fan, and when I first started thinking of a card for him, I thought about using the Scenery: V for CheVron set in the Houston Astros Colors, and their symbol is a star.  Take a look!

jmog_dad-birthday_chevron


I used my Fiskars stamp press to align the chevrons so that they could be easily centered and try to leave the same white spacing between each.  The inks are Chalk Ink in Tangerine and Blue Iris.  I thought the real wood paper would be great to cut the In A Word: Happy Cutaway and would have the same look of a baseball bat. I cut 5 more “happy” words with white cardstock to give the word some height.  I was able to place the word happy along the same angle of the chevron and stamp “birthday” from Sugar Rush tucked between the hanging p and y using versamark and white embossed. For the final accent, 5 wood veneer stars sprinkled around.


jmog_dad-birthday_chevron2


This card could be easily replicated for any sports theme and what guy wouldn’t love to get a birthday card featuring their favorite team?  Need more ideas and inspiration for Masculine Cards? How about graphic and bold, or other geometric shapes? Also, consider the hobbies your guy likes, such as cars, fishing, hunting, camping, boating, sports and more? Another idea could be to use bold words or lettering or even textures (both raised or visual) like wood grain, distressing with stamps or tools, or printed text to give interest to the background. I'm so excited to see what you come up with! Have a fun and fabulous card making day!


Prize: One randomly chosen project that is linked up will win $50.00 gift credit to the w&w shop.


>>>LINK UP<<


w&w_julie_blog-sig

Tuesday, September 29, 2015

Spotlight on Lisa Lahiff...Part Deux!!

spotlight-lisa-lahiff

We are so happy to have Lisa Lahiff back with us for another stupendous post with an emphasis on the metallic!  If you missed learning more about Lisa and seeing her first post full of beautiful and innovative metallic projects CLICK HERE!


Now, it's Lisa's time to sparkle and shine...  


Hello!  It is Lisa back here with you today, and I am so thrilled to have one more day to share some metallic awesomeness with some amazing Winnie and Walter goodies!!!!  Let's dig in...


For this first card I had a lot of fun layering up various patterned papers by My Minds Eye for a bright and eclectic background.  I then went ahead and ran my In a Word Happy cutaway through my machine three times with three different foiled papers.  I love not only the thickness, but by stacking them up slightly to the side of each other, you are able to see all three colors.  I then diecutted the tag from the Essentials:Audrey Cutaways, and stamped the birthday sentiment from The Big the Bold and the Happy Stamp Set.  I finished my card off with some twine tied at the top of the tag, faux stitching down the side of the card and some sequins that came with my Winnie and Walter happy mail!


This next card was created using The Big, the Bold, and the Merry Creative Screenings. I wanted to create a metallic background for my sentiment to really pop in the shaker frame so I started by using reposition-able adhesive on the backs of the "merry" and "christmas" creative screens.  I then used a gold metallic ink and applied it to the entire background with a blending tool.  I carefully removed my screens and had a nice negative of my sentiment.  Next I used the  Essentials:Audrey Cutaways to create my frame with patterned paper, adding various sequins including 4 mm Metallic Gold Cupped Sequins, and 6 mm Sparkling Clear Sequins by Pretty Pink Posh which can be found in the Winnie and Walter Boutique to create my shaker element!  I added a sparkly paper bow to the corner as a finishing touch.


I am so excited to show you this last card as it has a lot of firsts for me on it!  For one the background was diecut with household aluminum foil, which was so fun to try! (Warning make sure you pull the die cut out gently as the foil is very fragile and thin to work with.)  Then I was trying to think of what else I could do with this cut, and how to add some color when embossing popped into my mind.  So that's what I did!  Using the In Bloom: Lola's Bouquet with Joni Andaya Stamp set and a watermark ink pad I embossed and double embossed various images for a fun floral design.  I then stamped and embossing my "hello" sentiment from The Big the Bold and the Happy Stamp Set.  Finally, I propped it up with foam adhesive onto a panel of vellum with foil before adding it to my cardbase.  I wish you could see the beauty of this card in person, the shine of the aluminum and the layers of embossing are just gorgeous!  Anywho, I hope I was able to capture just a little of its beauty for you to envision the real look of it!

I want to end my post with a warm and most sincere thank you to both Shay and Julie for shining the spotlight on me.  I have had an amazing time just playing and having fun with lots of Winnie and Walter products, and I know I will continue to do so for a long time to come.  You both are so welcoming, warm, and encouraging that you make the crafting community a better place.  Many hugs for you both!  I must also thank Winnie and Walter for letting me come on this blog to play!  And finally a heartfelt thank you to you for stopping by and visiting my work, your kind words have been so motivating and appreciated.

Happy Crafting!
Lisa

Sunday, August 2, 2015

Rerun No. 3 | Bubble Talk

w&w_rerun_logo

Welcome lovelies to our next monthly Rerun!

Each Rerun will provide plenty of inspiration focusing upon a featured product, a month-long sale on the featured product and a challenge.

w&wBubbleTalk_WEB_wm

For our third Rerun we are concentrating on Bubble Talk.  Bubble Talk has some speech bubbles with fun and quirky sentiments perfect for everyday celebrations and more!

DT_lydia-evans_600
As August begins we wanted to introduce our next Talent in Residence, Lydia Evans, who will be joining us in taking on the challenge to work with Bubble Talk.  Lydia was our April Leading Lady, producing incredible projects that really dazzled us.  We anticipate some sensational months ahead!

We had such a joyous four months with our very first Talent in Residence, Heather Hoffman and we could not have had a better inaugural Talent in Resident.  She does everything with elegance and grace.  We love you, Heather!

Now on to the cards!

Shay

I made a simple and easy layered card with Bubble Talk for this Rerun.

shay_bubbletalk1

I wanted to make some patterned paper with the outline bubbles and did so with black Versafine ink on white cardstock for a very dramatic and graphic look.  I then stamped "hey girl" from Bubble Talk in one of the bubbles and "birthday" from Sugar Rush in another making sure I stamped in bubbles that would work well the placement of the In a Word: Happy Cutaway I cut out twice in a yellow and teal and stacked together slight offsetting them.  I then added some black sequins and layered the speech bubble layer to the larger layer from Essentials: Audrey Cutaways cut from black cardstock.  These layers were then adhered to a card base covered in the front with some floral patterned paper from the 6x6 Soho Garden paper pad by American Crafts.

shay_bubbletalk1b This card design could be really easy to mass produce and customize.  I love that changing out the "girl" with "dude" from Bubble Talk and changing out the patterned paper would make this card a great one for a guy...even a teenager!

Wait until you see what Gayatri, Vanessa and Lydia did with Bubble Talk !

>>>THE TALENT<<<

gayatri_Bubble Talk card
CLICK HERE to see more from Gayatri.

vanessa_rerun3
CLICK HERE to see more from Vanessa.

lydia_DSC05762
lydia_DSC05759
CLICK HERE to see more from Lydia.

>>>CHALLENGE<<<

Now it's your turn to play along with Rerun!
  1. Create a new project using Bubble Talk (and/or the coordinating cut files).  An alternative to using Bubble Talk (and/or the coordinating cut files) is to create a new project using one of the projects featured in this post (or any Rerun post throughout July) as your inspiration.  Make sure you use at least one (1) w&w product (this can include a freebie) in your project.  If you choose the alternative to using Bubble Talk (and/or the coordinating cut files), please include in your post or project description which project inspired you and how.
  2. Link up your project here by 11:55 p.m. CST on August 31, 2015.  
  3. Enter as many times as you want before the deadline.
  4. This Rerun Challenge may be combined with other challenges found here on the w&w blog or elsewhere.
One project will be randomly chosen to win $20.00 credit to the w&w shop!  The winner will be announced on the Giveaway Winners page.