Showing posts with label friendship. Show all posts

Friday, August 28, 2015

Friendship | Dear Fabulous Friend with Gayatri

Hey there everyone, Gayatri here today with a card share for the friendship theme this month.

Here is my card.

gayatri_dear fabulous friend card1

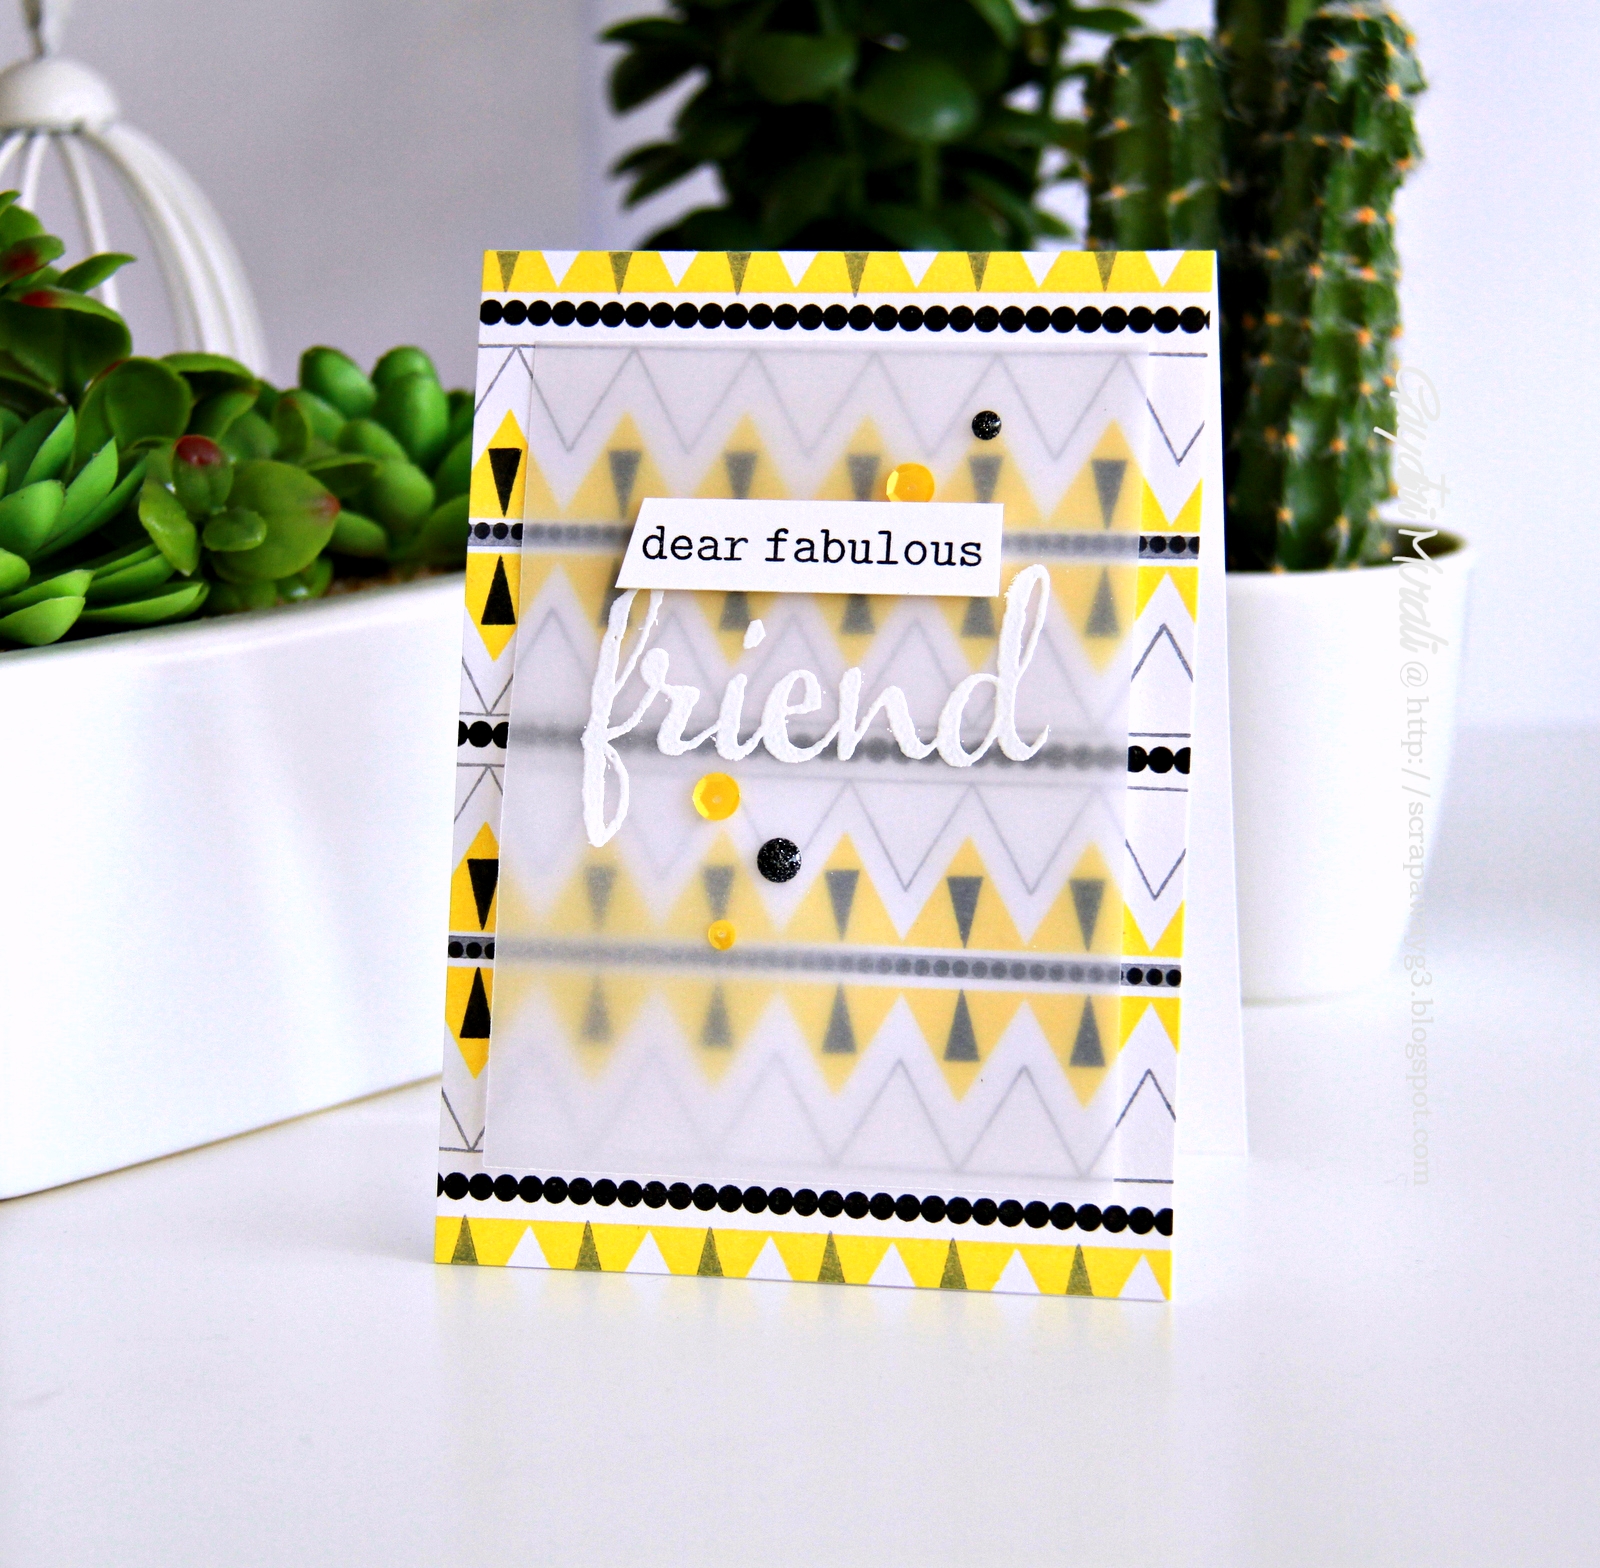
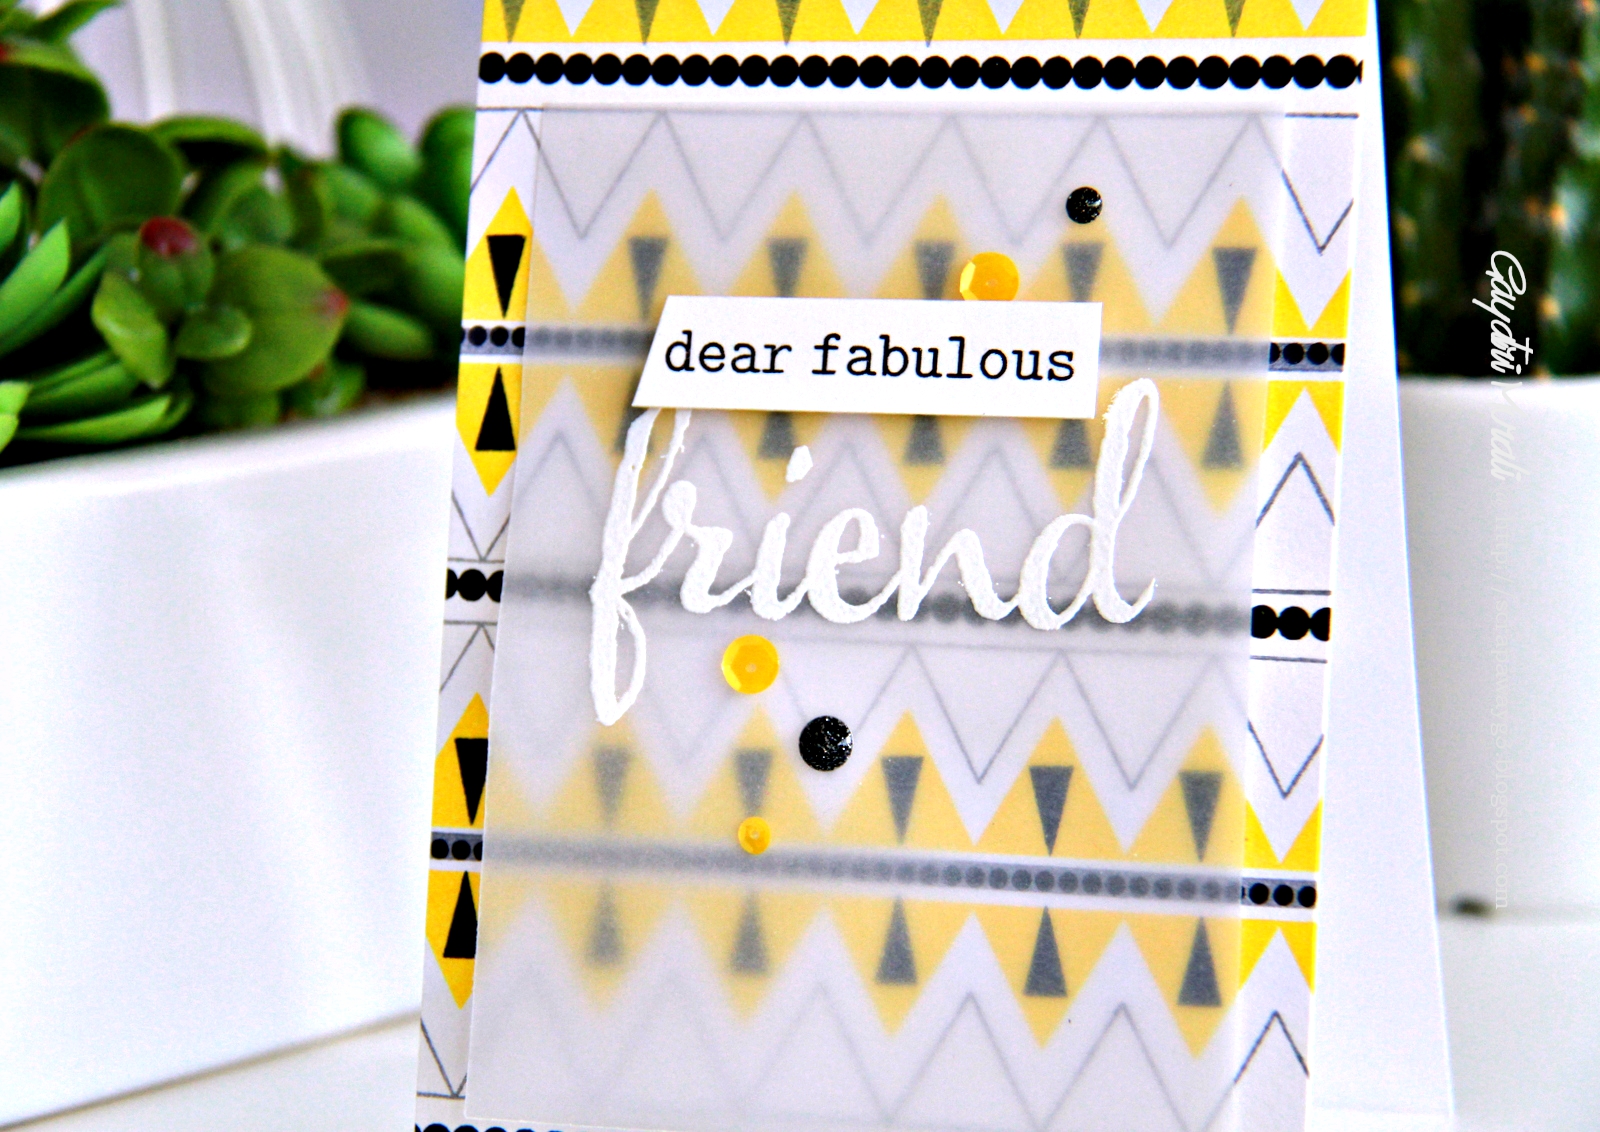
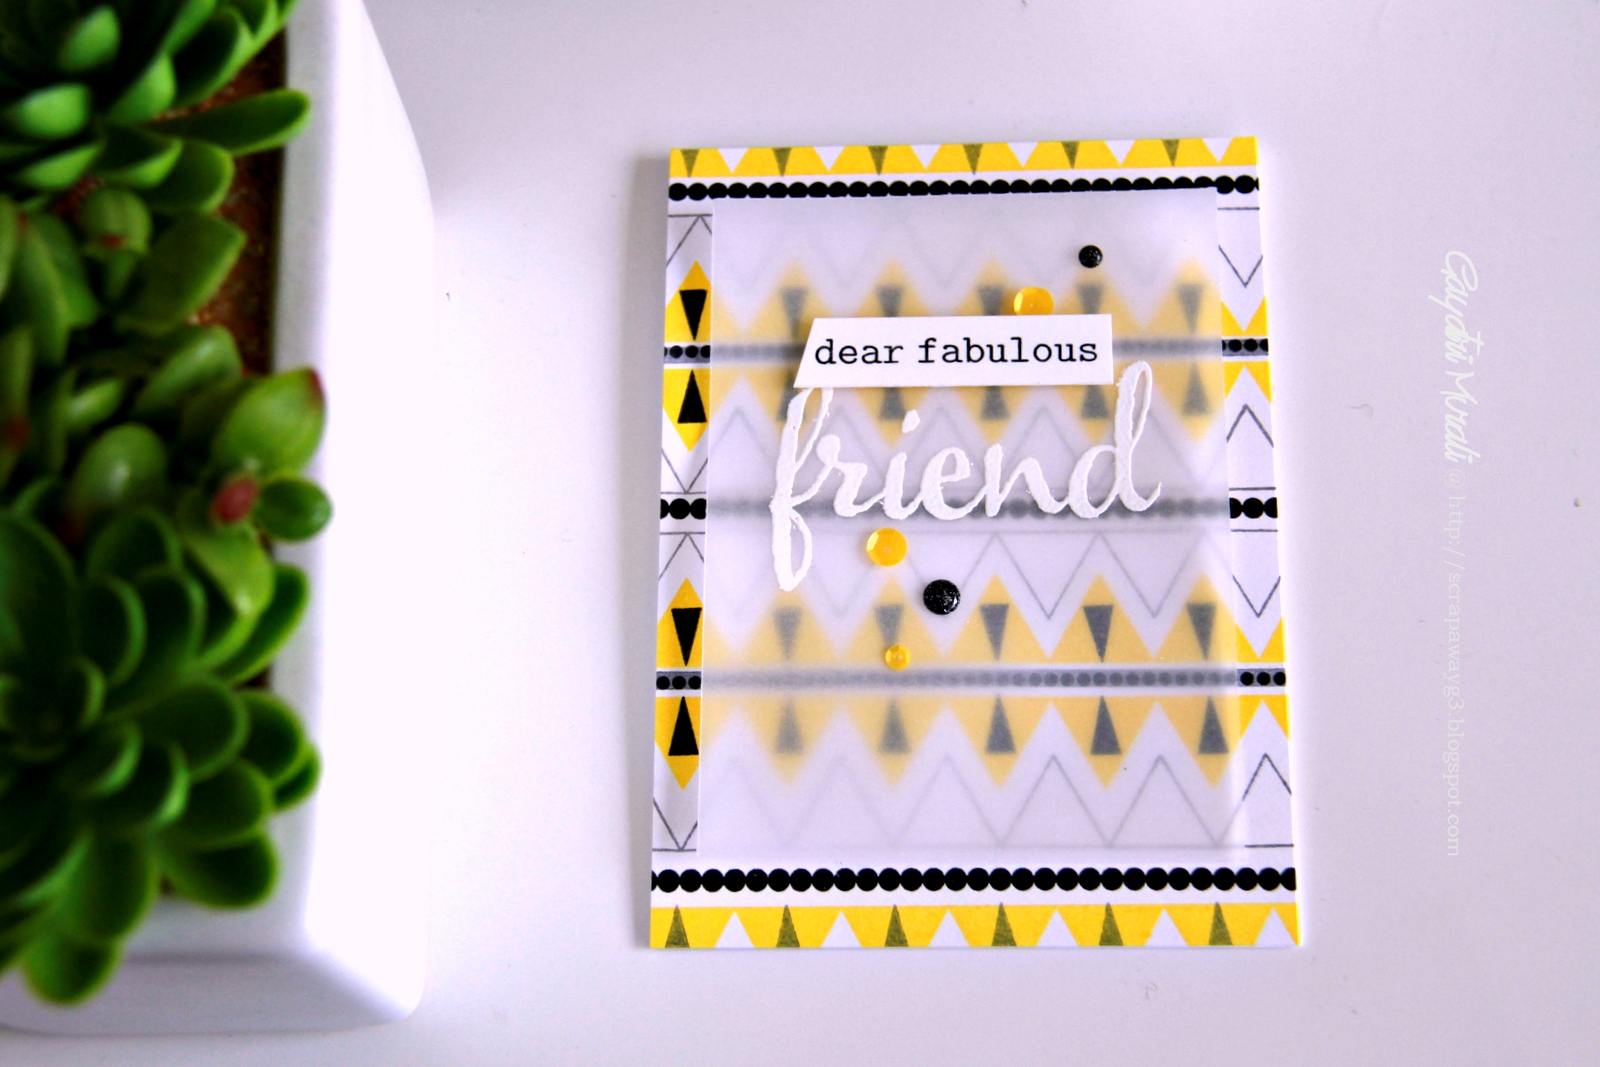
I love stamping and thereby making my own background. This makes your card unique and I find it so much fun. To make this card, I pulled out all the geometric stamps sets - Scenery: Rectangled and Triangled, Scenery: It’s a Wonderful Pennant and Scenery: Stripes. I stamped a geometric pattern on the background using both solid and outline triangle border stamp with the circles border stamp in between and finally adding tiny triangle inside the larger triangles. I used a combination of black, yellow and grey inks. I stamped the pattern to cover the entire card front. I loved the background. Looks more like a tribal pattern.

gayatri_Dear fabulous friend closeup

But I wanted the tone down the pattern as the black was too out there and the entire pattern was busy. I added a piece of vellum upon which I white heat embossed the sentiment Friend from The Big, the Bold and Friend stamp set. I stamped the smaller sentiment on a strip of white cardstock, trimmed an angled edge and adhered using foam adhesives. I used more foam adhesives below this strip on the vellum panel to adhere the vellum on the card front. Finally embellished using Lemon Drops sequins from Pretty Pink Posh and sparkle black enamel dots from Doodlebug.

gayatri_Dear fabulous friend flat

Hope you like my friendship themed card with custom background stamping.

Thanks for stopping by today!


w&wDT_gayatrimurali_blog-sig


w&w-supplies

Wednesday, August 26, 2015

Friendship | I Will Always Be There for You with Lydia Evans

Hi there this is Lydia and I'm here sharing with you my second post as Talent In Residence. Today I'm going to be focusing on how smaller dies can create a big impact on a card if they are used in multiples. I have chosen to use one of the small butterflies from Essentials: Audrey Cutaways.

DSC05974
 
So to start I took a piece of watercolour card, and moistened it with clear water. Once the piece was all wet I dropped in watercolour randomly until the piece was mostly covered. I left some spaces on the card as I like the effect when the butterflies are cut and they have lots of difference in shade and colour on them. Once the piece was dry I took the small butterfly die from Essentials: Audrey Cutaways and cut it as many times I could from the painted piece.

DSC05975

The card layer and tag shape are also from Essentials: Audrey Cutaways, I must say that this is a must have die set as there are so many things that you can do with it. I cut the largest of the scalloped card layers from a piece of woodgrain card and the tag from some smooth white cardstock. Once I cut the tag I added the sentiment from A Tree For All Seasons, I just love the sentiments and fonts on this set- although this is an autumn set the sentiments can be used all year round. I added the tag in place on the card layer with some foam tape.

DSC05976

Once the tag was in place I took the die-cut butterflies and played around with them flowing up the card before sticking them down. To finish I added some clear sequins and some liquid pearls. I really hope you liked my card today and have a go yourself of using small dies to create a big impact.

See you again soon, Lydia.

w&wDT_lydiaevans_blog-sig


w&w-supplies

Tuesday, August 25, 2015

Spotlight On...Michele Ferguson! Part Deux

spotlight-michele-ferguson

We are thrilled to have Michele Ferguson back with us for another incredible post that will inspire you to make beautiful projects for your friends!  If you missed learning more about Michele and seeing her first post that will stun you with their loveliness CLICK HERE.


Now, it's Michele's time to sparkle and shine...      

Hello again!  I'm back this week for a few more of my favorite ways to use Winnie & Walter products ... so many ways, one day just wouldn't do! 

I seem to design "in the round"!  Does that make sense to any of you?  In other words, when an idea strikes, I set about putting it to paper ... sometimes, while creating the first, another design will come about - like with the positive and negative idea from last week. 

This week [besides those carrots] I've latched onto a few favorite colors, or color combos, and just let my Winnie & Walter products shine - with a bit of my own favorite touches thrown in - like texture*, and humor ... does anyone appreciate my sense of humor?  =|

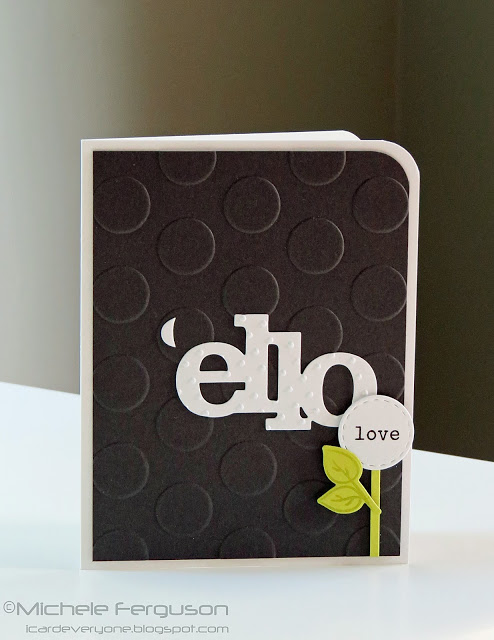
Enter exhibit #1: Yes, black IS one of my favorite colors!

michele_2image001
Hello Cutaway - adapted by simply turning

the die around, and partial die-cutting!

Pretty little leaves from Maggie's Roses... and a snippet for

the perfect placement of the perfect word - found
in the "Big, Bold and Happy" set.

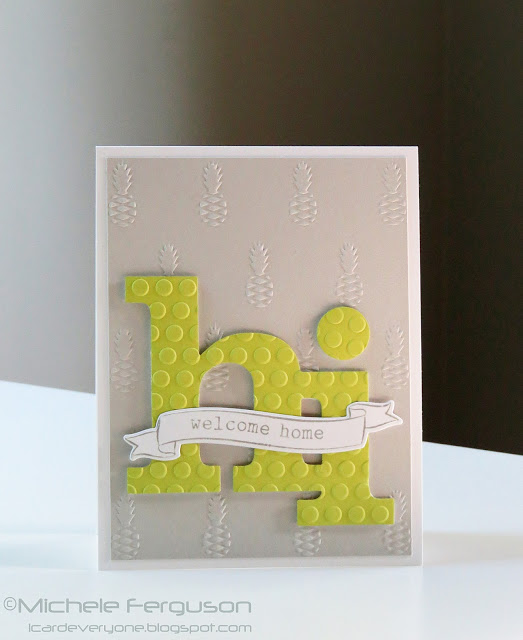
Card #2:  Putting the accent on the happy green with another way to say hello:

michele_2image002

Hi Cutaway - this time the positive cut, and perfect
words from The Big, the Bold and Seasons - welcome;
and The Big, the Bold and Extras - home, and the beautiful banner.

You had to know I planned ahead while cutting that hi - right?

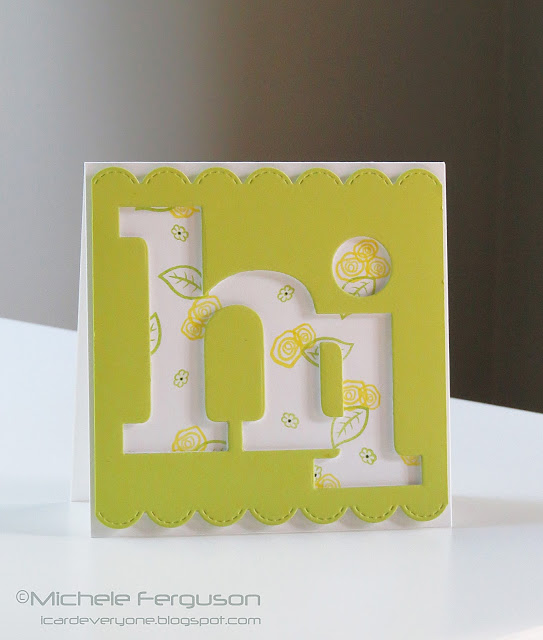
Enter card #3:

michele_2image003

In Bloom: Lola's Bouquet has a very, very special place in my heart.
Darling yellow roses - My Mom's favorite, and mine -
strategically placed, they do indeed 'dot the i.'

My final card is my way to say 'thank you' to Winnie & Walter for inviting me to share my creations using their fabulous products.   Also for their generous hearts, and continued support of all of us, and our love of paper-crafting.  I am pretty new to this blogging world, so I can't help but feel ever so special to be among those of you Winnie and Walter have shone their ever-lovin' spot-light on!

For you, Shay & Julie:

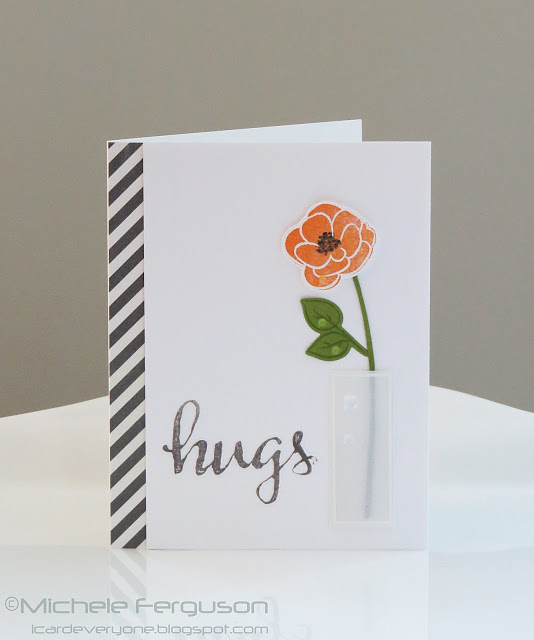
michele_2image004

Another one of Lola's Blooms - this time in orange - another favorite color, and a remake of this card - I couldn't wait to make that cool square vase!
Hugs provided by The Big, the Bold and Friends Cutaways and Stamps.
LOve that brilliant hand-written font!

Thanks for hanging out with me today, and thanks always for all the love and sweet comments from you, my card-loving, card-making, fabulous friends!

=]  Michele


*Embossing folders, patterned paper, and embellishments are from my stash and not W&W products.

Monday, August 24, 2015

Friendship | Hello Friend with Vanessa

Hello everyone! It's Vanessa here and I am happy to share with you a cute card for the August Monthly Theme: Friendship today. 

I wanted to combine a lot of different, yummy Winnie & Walter products on my card and used stamps, cutaways and creative screenings.


This penguin is so cute and I thought he would look great on a non-winter card as well. So, I started my card with a panel of white cardstock and temporarily adhered the Scenery: Classic Diagonal Creative Screenings over it. Then I inked the stripes softly with light blue Distress Ink. After I had removed the mask, I added drops of the same ink to the background. Now I stamped the penguin onto another piece of cardstock, colored it with Copics and cut it out. I lay it onto my panel to see where to stamp my string for the balloon and stamped it. Then I adhered the panel to the card and adhered the penguin. Now I colored a piece of white cardstock with Copics to create a gradient effect and die-cut the word from In a Word: Friend Cutaway. I adhered it to the card with foam tape. Next, I stamped the balloon from The Party and colored it with Copics. I cut it out and adhered it to the card with more foam tape. Finally, I stamped and heat-embossed the hello from The Big, the Bold and the Happy onto a strip of black cardstock and adhered it to the penguin. 

Here comes a closer look at the card:


I hope to have inspired you today! Thank you so much for stopping by!


w&w-supplies


Wednesday, August 12, 2015

Friendship | You are a True Star with Lydia Evans

Hi there everyone, Lydia here! I'm so exited to have my very first post as Talent In Residence on the Winnie & Walter blog. Today I'm sharing with you a card that is inspired by Gayatri and this months In Focus, where she created her own 'cover plates' with small border dies. I love the idea of creating my own cover plates and I thought it would be fun to create my own. I choose to used smaller dies too but I have used two of the star dies from 'Big Bang Confetti Cutaways'.

DSC05840

To create this 'cover plate' I first cut the large star into place, I then drew out lines from the stars points with pencil and a circle around the star to line up the second smallest star. Once these five stars were cut I then cut the same star again in between the ones I had already cut. I then drew another circle around these, I used this circle and the lines from the centre star to line up the last ring of stars.

DSC05841
 

When I was finished all of the die cutting I used a marker spritzer and some Copic markers to create a night sky effect. I also added in some silver splatters using a silver Gelato and stippling brush. Once this piece was dry I cut it out using the large layer die from Essentials: Katharine Cutaways and added some silver craft metal behind the cut out stars.

DSC05843
 

To finish the card I stamped a sentiment using 'True' and 'My Precious' onto a vellum strip and embossed in silver glitter embossing powder.

I hope you like the card and I will see soon again soon.

w&wDT_lydiaevans_blog-sig


w&w-supplies

Wednesday, December 3, 2014

We Love You Paper Crafts & Scrapbooking Magazine Blog Hop

papercraftshop1

Hello there friends!  Welcome from Amanda Coleman's blog!

This is a blog hop we are honored to be participating in because we love Paper Crafts & Scrapbooking Magazine, but due to our love we are also heartbroken that this blog hop is necessary.  We have been avid readers and subscribers of Paper Crafts and Creating Keepsakes for years and we were subscribers of Paper Crafts & Scrapbooking Magazine.  It was a dream come true to have our stamps featured upon the pages of this great magazine and thanks to our talented friend, Heather Hoffman, our stamps even made the cover!

It is not an exaggeration to say that the people behind Paper Crafts & Scrapbooking Magazine are a contributing factor in winnie & walter becoming a reality.  They were a model, an ideal, a mentor even though we had never met them.  They inspired us to go further, give more, be engaged and involved in this awesome community.  They fostered friendships and generosity.  They introduced us to new talent, hot trends, classic design and sensational products.  They inspired us, encouraged us, challenged us and supported us.  We love every single person who made our beloved magazine not just a magazine, but an epicenter of our crafting community.  We will cherish their legacy and honor what they have taught us.

Julie

Honestly, I’m at a loss for words.  I have these magazines in at least 4 rooms in my house, always at arms reach.  It was an absolute thrill for my husband Davis, Walter and I to see winnie & walter inspired projects on the pages of the magazine by such talented artists and the creations made by the fabulous Go To Gals were amazing!  We feel very blessed!  

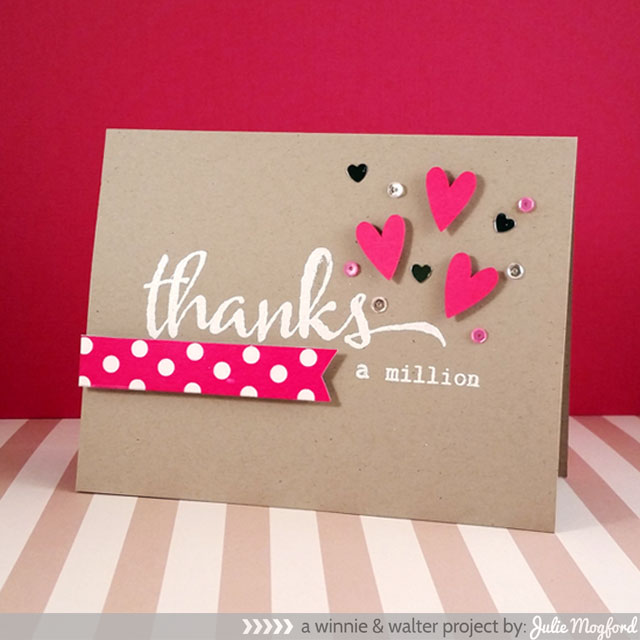
jmog_thanks-a-millionPCSMag-3

I created this one with the tried and true big word"thanks" and small words from The Big, the Bold and You set, stamped and embossed in white.  Can't get enough of white on kraft at the moment.  I found some pink hearts on my desk that I had cut for another project using the single heart from Parentville Extras Cut Files.  In my washi bin, I found the perfect pink and white polka dot pattern that I put down on white paper so the white would be true, and then cut it in a banner shape.  I popped both the hearts and the strip with foam tape.  Love the dimension!

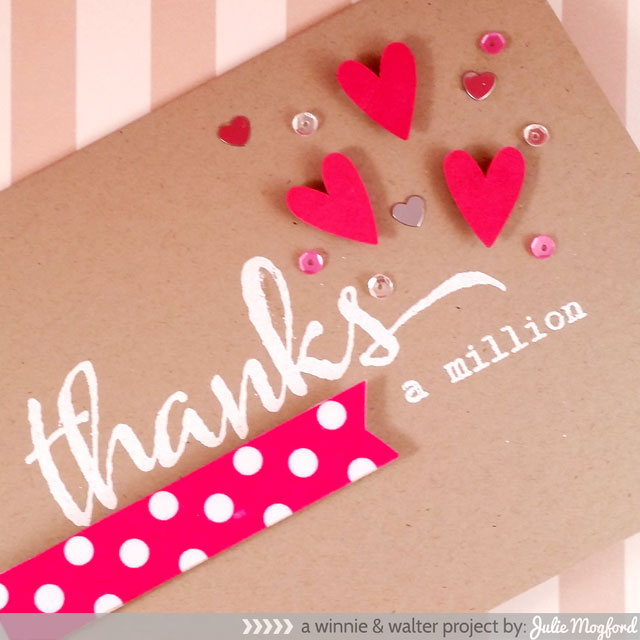
jmog_thanks-a-millionPCSMag-2

To add to the exuberance of my gratitude, I added silver heart confetti, 4mm pink peonies and 4mm sparkling clear sequins from Pretty Pink Posh. “Thanks a Million” to everyone at Paper Crafts & Scrapbooking Magazine for their hard work and dedication to this creative pastime we love so much. Wishing you all the best!

Shay

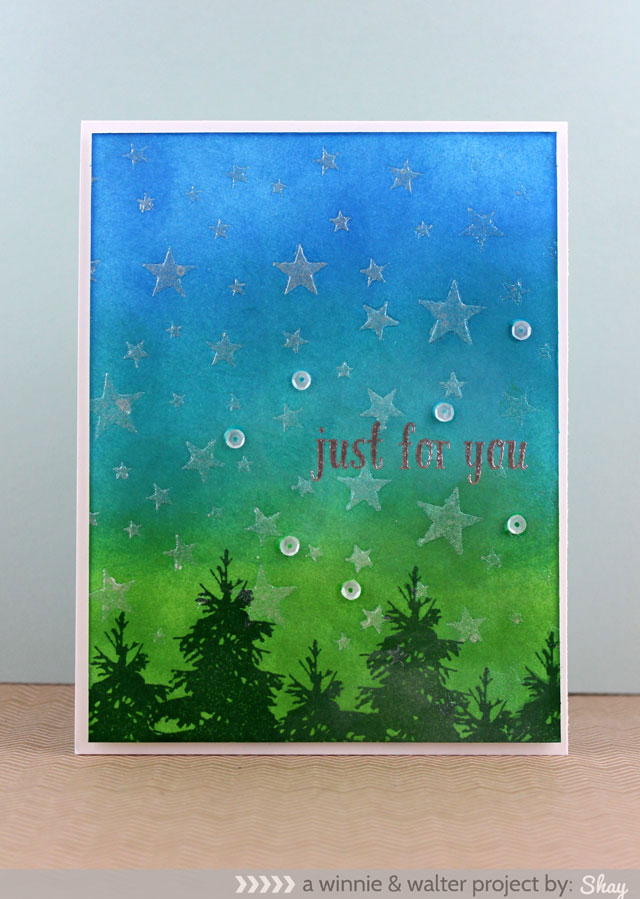
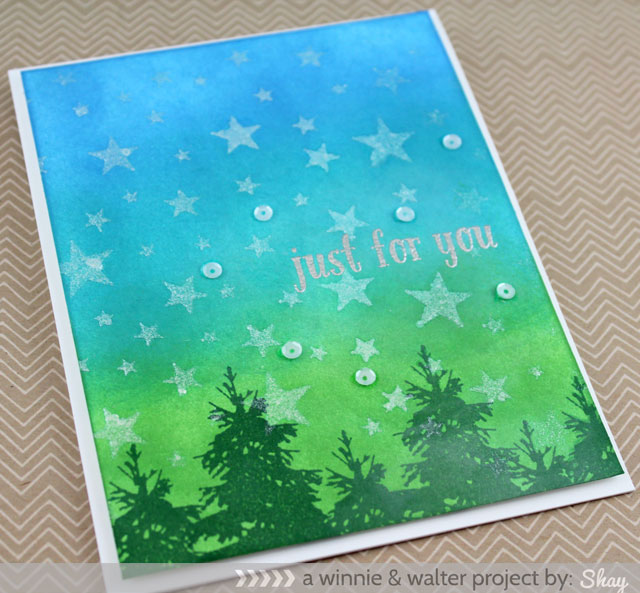
I remember stumbling on Paper Crafts magazine for the first time and being engrossed in the magazine I had discovered.  I just went back to my collection and looked up the year..2004!  I have been reading Paper Crafts since 2004 and subscribing for nearly that long.  It has been one of the constants in my life this last decade even as things have changed, I think of Paper Crafts & Scrapbooking like the stars in the sky that shine bright and light the way even on dark nights.  So I created my own little ode to the ladies and gents of Paper Crafts magazine with a simple card because they also taught me to embrace clean and simple.
shay_pcs_hop1

I used distress ink in salty ocean, peacock feathers and mowed lawn to create an ombre effect on a panel of white cardstock.  Then I used one of our Scenery: Big Bang Classic Star Creative Screenings (stencil) and sprayed Calico Shine Mister Huey's by Studio Calico for shimmer and shine. :-)  Then I ran the panel and stencil through my Cuttlebug to emboss the stars a little and give them more definition.   At the bottom of the panel I stamped the top of tree from Winter Woodland several times in pine needles distress ink.  I stamped in Versamark and embossed the sentiment from the same stamp set with silver embossing powder.  Last I added some 4mm marshmallow sequins from Pretty Pink Posh because you just can't have a card without sequins, right?  The panel was then added to a white A2 card base using foam dimensional adhesive.
shay_pcs_hop2

Thank you so much for stopping by and sharing in our love for Paper Crafts & Scrapbooking magazine and all the amazing people who made it so much more!  They have blessed us and we hope that life blesses them with much success as they venture into another chapter in their lives.

With love, appreciation and our humblest thanks,
Walter, Julie, Winnie & Shay.

>>>NEXT STOP<<<

Now we are sending you off to the ever-awesome Cheiron Brandon's blog.


w&w supplies: