Showing posts with label in bloom: carolina's florals with angelica suarez. Show all posts

Monday, August 27, 2018

Rubeena's Crafting Anniversay 2-Day Blog Hop (Day One)

Print

Hello lovelies!  Shay here to welcome you to Rubeena’s Crafting Anniversary 2-Day Blog Hop! You should have arrived from the fabulous Power Poppy Blog, but if not don't worry a full blog list for today's hop can be found later when you scroll down or you can start at Rubeena's blog HERE.

This hop is epic with more than 70 guests and over $1,000 in sponsored prizes! Not only are we celebrating four years since Rubeena first discovered cardmaking but also crafting in general. This industry is made up of wonderful individuals who are creative, inspirational, kind, and incredibly supportive! Hop along so you can learn about why we create and how much joy it brings us!

GIVEAWAYS

In celebration of this anniversary, we have several amazing sponsors. Let’s thank them for their generosity! Winners will be randomly selected from comments left on all the blogs. The winners will be announced by Wednesday, September 5 on THIS PAGE. Winners will have up to 2 weeks to contact Rubeena at ararerubycrafts@gmail.com to claim their prize before another winner is selected.
Studio Katia - $50 gift card
Hello Bluebird - $50 gift card
Altenew - $50 Gift card
Pinkfresh Studio - $30 gift card
Gina K. Designs - $50 gift card
Clearly Besotted - £25 gift card
Simon Says Stamp - $25 gift card
Spellbinders Card Kit ($55 value).
Jennifer McGuire - $50 Simon Says Stamp gift card
Winnie & Walter, LLC - $40 gift card
Mama Elephant - $25 gift card
Hero Arts - $25 gift card
Nichol Spohr LLC - Custom-sewn rainbow pencil case filled with brand new Spellbinders dies
Danielle Flynn - $25 Simon Says Stamp gift card
Picket Fence Studios - four $25 gift cards
Ellen Hutson - two $25 gift cards  
Pretty Pink Posh - two $30 gift cards
The Stamp Market - July 2018 Release (estimated $100 value)
Indigojade Art Shop - $50 gift card to Art Prints & Gifts Shop
Flora & Fauna - a 4x6 stamp set
Waffle Flower - $25 gift card
Power Poppy - $50 gift card


DAY ONE BLOG HOP LIST

Winnie & Walter Blog <==YOU ARE HERE
Maria Peters (Instagram)

MY PROJECT

First, I just wanted to say what a privilege it is to celebrate and participate in this blog hop honoring Rubeena's 4th Crafting Anniversary.  Rubeena is not only superlatively talented, but incredibly generous, dedicated, friendly and all-round an awesome sweetheart of a person.   What a treat to commemorate her and her contributions to our crafting community!  
shay_IMG_4364

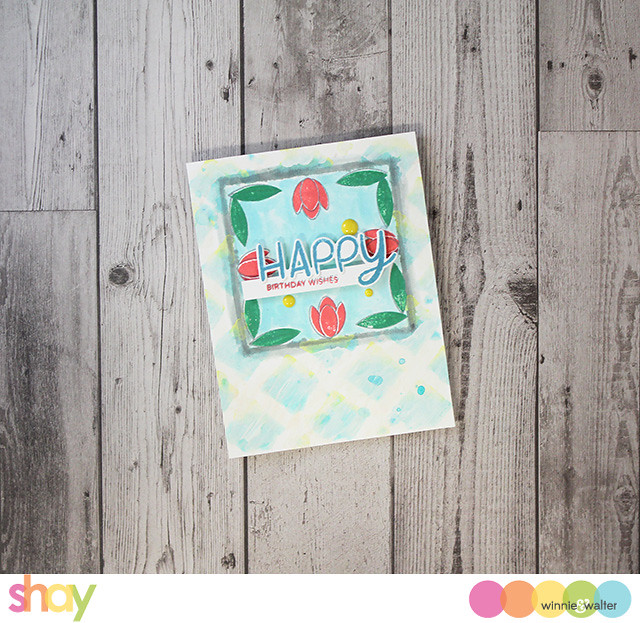
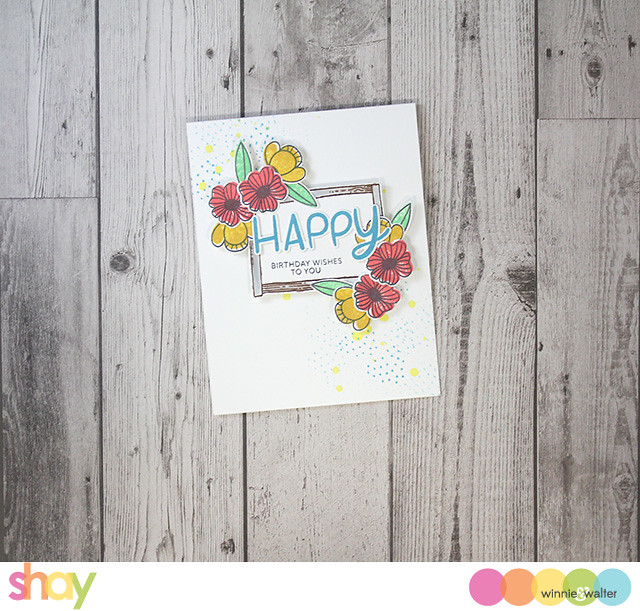
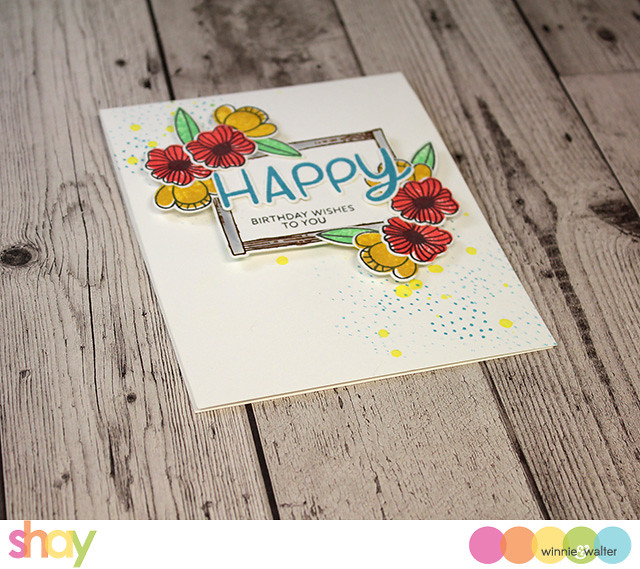
So I thought I would create a pretty floral card, but I somehow stamped the wrong sentiment. lol  Do you ever do this?  I meant to stamp "so happy for you", but I accidentally stamped "to you" rather than "for you" so I had to change the sentiment so it will be a birthday card.  Fiddlesticks!  We can pretend I meant to do that, but we both know better.

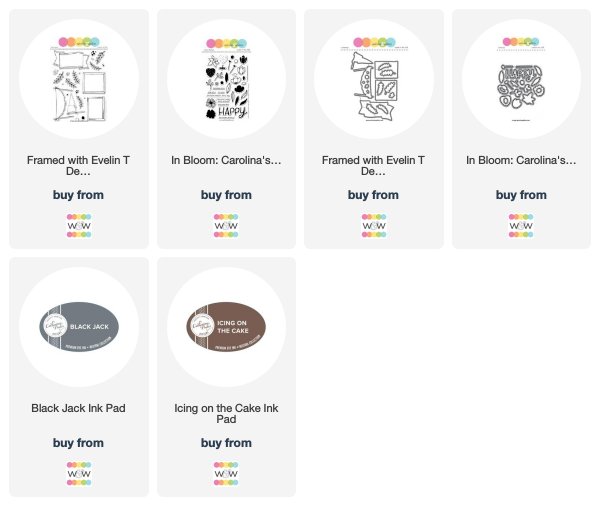
Most of this card is stamped using In Bloom: Carolina's Florals with Angelica Suarez with the notable exception of the frame which is from Framed with Evelin T Designs.  I used Catherine Pooler Designs Inks in black jack for all the outline flowers and leaves and icing on the cake for the frame.  For the solid layer of the flowers I used Distress Oxide Inks in abandoned coral and fossilized amber and the leaves are cracked pistachio and the "happy" in broken china.  I then cut them all out using In Bloom: Carolina's Florals with Angelica Suarez Cutaways.  

I stamped the frame and then colored it in with watered down black jack.  I then arranged the flowers and leaves on two corners of the frame and glued them on.  I figured out the placement of the happy and then stamped the supporting wrong revised sentiments in black jack in the frame.  I glued on the "happy".

On the actual card base I stamped the strawberry seeds from the stamp set in broken china in a sort of meandering wave across the front and flicked yellow spray in the same diagonal direction.

I then adhered the frame to the card base with foam dimensional adhesive.  Pretty simple card.
shay_IMG_4365

That's it for me, but there are so many much more marvelous cards to behold by the jaw-droppingly talented people after me.  Your next stop is the incredible Clearly Besotted Blog!!

Happy hopping,
Shay.


w&w-supplies

Wednesday, August 22, 2018

Brutus Monroe + Winnie & Walter Collaboration Week | Day 3

Happy Wednesday lovelies!

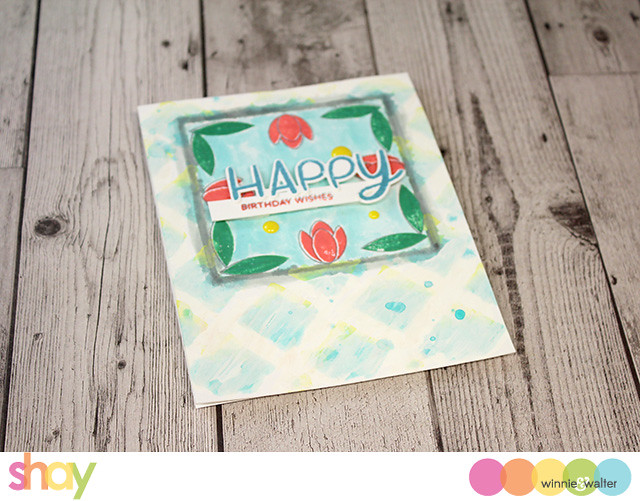
It's Shay here again with a card I created using Brutus Monroe's Simple Blend - Square and some w&w products.  I am having fun with the Simple Blends and different ways to use them.  For this card I used both the stencil (the stencil with the square cut out) and the square mask.

shay_IMG_4363

I began with the stencil over a card base and stamped the outline leaves in grey ink from In Bloom: Carolina's Florals with Angelica Suarez in each corner and then the matching solid leaf in Distress Oxide in lucky clover.  I also stamped the outline tulip 4 times from the same stamp set in grey ink and then used the solid tulip in abandoned coral over it.  I used Waterbrush (medium tip) and some turquoise spray to color in the rest of the square.  I then placed the square mask in the square hole and removed the stencil but kept the square mask in place.

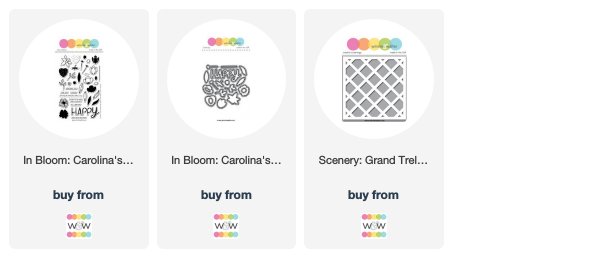
I placed the Scenery: Grand Trellis Creative Screenings over the square mask (feel free to use washi or other tape to keep the masks and stencils and even the card base in place as it really helps) and used the waterbrush again with some watered down turquoise spray to color in most of each diamond and then finished painting in the upper portions of each diagonal with some watered down yellow spray.  I then used some watered down grey ink and the waterbrush to color around the square and give it definition and shading.

As I thought the background was a bit busy I brushed on with a dry brush some white acrylic paint over the diamond background (much better and softer).

Next I stamped the "happy" from the same stamp set in broken china and cut it out using the matching die from In Bloom: Carolina's Florals with Angelica Suarez Cutaways.  I stamped the smaller sentiment from the same stamp set in abandoned coral and then again in grey ink onto a strip of cardstock and adhered the happy onto the strip before adhering it all to the card using dimensional foam adhesive.

I added some yellow enamel dots.  And because I adore splatters (who knew, right?) I masked off the square again and flicked some turquoise ink onto the card.

shy_IMG_4362

I am loving that I could get those 2 layers (the focal square and trellis background) without the bulk of actual layering by using the Simple Blend - Square.  What do you think?

Don't forget to enter to win a $25.00 Brutus Monroe gift card HERE and check out the Brutus Monroe blog for more extraordinary inspiration!


w&w-supplies

Saturday, August 11, 2018

August Leading Lady Tracey McNeely | Take Two

Our August Leading Lady, Tracey McNeely is back for her sensational second performance!  If you missed her smashing debut you must see it...CLICK HERE.   Today's awesome cards are sure to inspire you to stamp your own patterns (I know I will)!

Ladies and gentlemen, Tracey...

Happy Saturday and I am back again taking over the Winnie & Walter blog today with my Week 2 post as the August Leading Lady.


Last week I gave you some tips on ways I personally add extra to my CAS cards without adding extra weight both physically and design wise. This week my theme is creating background papers. I'm going to share some tips on how I create my own background papers by using images from the same or multiple stamp sets.

When creating a background with multiple stamps I follow some basic rules to make the design look more authentic and whimsical.

1) Stamp some of the images off the edges.
2) Rotate the images so that they are no all the same direction.
3) I either leave the same amount of space between all my images or I vary the spacing once again encouraging the artistic and whimcical feel.
4) I personally always start my design in the upper left corner of my panel and then as I build the design I work down and towards the centre of the panel filling in the spaces as I stamp. There is less chance of getting cornered where you can't fit an image into the space and end up leaving an awkward space.

For my first card I used Purrfect with Evelin T Designs to create a fun background for this playful kitty. To reinforce that the playful theme of the card the balls of wool are all turned all different directions and the spacing varies to represent that this naughty kitty left the balls of wool all over the house! All my stamped was done with Copic friendly ink and the images were coloured with Copic Markers--R00, G12, B000, V01, Y13, T0 and T1.


 closer look--


For my second card I used In Bloom: Carolina`s Florals with Angelica Suarez. I stamped using the outline images with VersaFine Onyx Black ink and then clear embossed on Bristol Smooth cardstock for using ZIG Clean Color Real Brush Markers. On this card I kept the spacing between the images the same but I did continue to turn the images around on the panel. I used the two tiny branches to fill in the gaps. The ZIG colours I used were--021, 028, 050, 052, 036, 031 and 041. Once the watercolour was dry I added my sentiments. The happy and `birthday wishes`was white heat embossed on black cardstock. The happy was popped up with foam tape.


a closer look--


I have a  $30 gift certificate for Winnie & Walter gift certificate to giveaway on my blog, In My Creative Opinion. Visit all four of my Leading Lady posts this month and leave me a comment. On September 3rd I will draw a name from all my comments from over the month to win.  You can enter once each week so you will have four chances to win., good luck!


I hope you had fun learning how I create my own patterned backgrounds with stamps. See you again next Saturday for another Leading Lady post. Have a great day.


w&w-supplies

Saturday, June 9, 2018

June Leading Lady Caly Person | Take Two

Our June Leading Lady Caly Person back for her sensational second performance!  If you missed her smashing debut you must see it...CLICK HERE.   Today's card is so very pretty and expertly composed and designed!

Ladies and gentlemen, Caly...

Welcome back, Friends! It's week two for me as a Winnie & Walter Leading Lady! Last week, I shared a shaker card made using simple stamping and adding shading using colored pencils. I'm focusing on a different medium every week and this week's card is made using Copics.

  Caly_Person_june2018 

Copics are my go-to coloring medium because I love how they blend. I have to admit - they take a lot of time to perfect sometimes and I know that's intimidating for a lot of people. Fear not! I'm here to tell you - you don't have to be a professional to color beautifully. Every color choice and blending is all in the artistry of the marker holder - that's you!

  WW In Bloom-Carolina's Florals

I die cut a dotty heart from the True Dotty Heart Cutaways using pink cardstock to create a focal point on my card. I propped it up using some foam squares to give it some dimentsion. Then I stamped and colored a bunch of flowers and leaves from the In Bloom: Carolina's Florals with Angelica Suarez stamp and coordinating cutaways sets. I find that googling a flower sometimes, helps me visualize. That's what I had to do for the daffodils on this card, anyway. I really didn't spend too much time on the coloring either - it helps to have images that are smaller ;).

  WW In Bloom-Carolina's Florals 1

I layered all the pieces on this die-cut heart and imagined where I wanted all the pieces to sit and once I as happy, I started gluing it all down. Some of the flowers and leaves are under the heart also. To complete the card, I stamped the sentiment from the Sentimental: Gift set on black paper and embossed with white powder. I left a lot of white space on the card because I felt this focal point is all the card needs.

This month-long feature will be every Saturday in June. If you stick around until the end of the month, you could win a fabulous gift card from Winnie & Walter. I will be drawing a winner from comments on my blog (on the final post) at the end of the month!

  w&w_30giftcard

 Thanks for joining me this week! I'll be back next week to share more WW love!

I hope you enjoyed this card! See you back here next week for the next installment of my Leading Lady features!
 XOXO, Blog Signature

SUPPLIES: *NOTE: To view where these items can be purchased, click on the linked abbreviations below (SSS for Simon Says Stamp, EH for Ellen Hutson, AMZN for Amazon, etc.). Affiliate links may be used (at no additional cost to you) – thank you for your support!

WW True Dotty Heart Cutaways WW True Dotty Heart Cutaways 
WW In Bloom:  Carolina's Florals Cutaways WW In Bloom: Carolina's Florals Cutaways 
WW Sentimental:  Gift WW Sentimental: Gift 
WW In Bloom:  Carolina's Florals WW In Bloom: Carolina's Florals
Versamark Ink Versamark Ink HMSB | EH | SSS Embossing Powder Bag Embossing Powder Bag HMSB | EH | SSS | SU HA White Embossing Powder HA White Embossing Powder HMSB | 
 SSS | EH 
SU Heat Tool SU Heat Tool
Memento Tuxedo Black Ink Memento Tuxedo Black Ink HMSB | EH | SSS | AMZN 
Pink Pirouette Cardstock Pink Pirouette Cardstock 
Basic Black Cardstock Basic Black Cardstock Neenah Solar White 80 lb Neenah Solar White 80 lb HMSB | EH | SSS
Copic Sketch Markers Copic Sketch Markers EH | SSS | MERRIARTIST 3D Foam Squares - Mixed 3D Foam Squares - Mixed HMSB | EH | SSS | AMZN ATG Gun ATG Gun EH | SSS | AMZN Mini Multi Medium Matte Glue Mini Multi Medium Matte Glue HMSB | EH | SSS
 

Friday, April 27, 2018

April Documentarian Jen Gallacher | Take Two

It is time for the second and final project post by our April Documentarian, Jen Gallacher.  

Don't miss out on her introduction HERE or her first gorgeously layered layout HERE.  

It has been such a privilege to have Jen as our Documentarian this month.  Her keen use of color, patterns, layering and exceptional skill at balancing her layouts are so inspiring!.  I hope you will try some of her techniques on your memory keeping projects or even on other crafting projects.   

Today's layout is not only beautiful, but so very artfully executed!  

Once again, Jen....


Stamping on a layout is a great way to add dimension and customized designs to a scrapbooking page. In this layout, I'll share some tips and tricks for using a stamp set to create a beautiful layout that features a wreath and diagonal design. Keep reading for some tips and to shop the beautiful stamps and dies from Winnie and Walter. Want to get your hands on some of these amazing products? Be sure to leave a comment on this blog post HERE for your chance to win a $30 Gift Certificate. All entries are due by April 30th, 2018 to qualify for the drawing. 

How to Stamp on a Layout:

* Use stamping inks in the same color but in different tones. For the strawberries, I stamped a lighter red for the middle of the berry and then used a cherry red to stamp the seeds in the berries.THIS layered stamp set makes quick work of the details for this page.

* Use the corresponding die set to quickly cut out all of your stamped images.


* Layout out the shape of your wreath first. Then I go back and adhere each piece with glue dots or strong adhesive.


* Stamp your title and journaling in bright colors. I used green and yellow for the title and then stamped the journaling with bright, red ink.


* Create your own patterned paper. Repeatedly stamp an image onto cardstock to create a polka dot, stripe or random pattern. This way you can ensure you get the exact pattern you want to coordinate with the rest of your embellishments like the berries on this page.

Here's another look at this layout. Be sure to pin your favorite images for inspiration later!


w&w-supplies 

Saturday, November 11, 2017

November Leading Lady Alice Wertz | Take Two

Our our November Leading Lady Alice Wertz is back for her sensational second performance!  If you missed her smashing debut you must see it...CLICK HERE.   Today's card is all about easily making a colorful impact!

Ladies and gentlemen, Alice....
Alice_Wertz_november2017

Happy Weekend, my friends! =) Here is my card for this week's Winnie & Walter Leading Lady post.


Ahh... Colorful stamped background is one of my favorite techniques for a clean and simple card, too!


All the flower and leaf stamps are from the In Bloom: Carolina's Florals with Angelica Suarez set. By stamping them all over the card base provided a colorful background without mass and bulk.


The "happy" word is cut from the In a Word: Happy Coordinating Cutaways with black shimmer cardstock for some subtle shine and "everything" is included in the In a Word: Happy stamp set.

That's all for now. Hope this has inspired you to create a colorful background for your next project! =)

Thanks so much for stopping by!

hugs,
alice

supplies:
cardstock: (Rustic White, black shimmer) Papertrey Ink
clear stamps: (In Bloom: Carolina's Florals with Angelica Suarez, In a Word: Happy) Winnie & Walter
dye inks: (Bright Buttercup, Berry Sorbet) Papertrey Ink
hybrid ink: (Limelight, Orange Zest, Blu Raspberry, Wild Wisteria, Bubblegum, Black Licorice) My Favorite Things
accents: (Twinkle Lights, Tutu, Kaleidoscope sequins) Lucy's cards
die: (Ink a Word: Happy Coordinating Cutaways) Winnie & Walter
tool: (die-cut machine) Provo Craft

card size: 3 5/8" x 5 3/8"


w&w-supplies