

Our February Leading Lady, Rebecca Luminarias, is back for her triumphant third performance! If you missed her smashing debut you must see it...CLICK HERE or her stunningly sensational second performance CLICK HERE. Today she shows how a little planning can produce quick, easy and beautiful results!
Without further ado, Rebecca....
Without further ado, Rebecca....
Hi, friends! I have to say that Winnie & Walter

I actually had a different project in mind for this week than the
one I'm sharing here today, but life got a little out of control last week and,
as my deadline for submitting this post was approaching, I realized there was
no way I'd be able to complete it on time AND be thorough in my photos and
written content. The good news is, you'll still get to see it as my
finale next week!
So without my planned project, I was facing a nerve-wracking
dilemma. What can I come up with in 24 hours to share this week?!
Remember, I'm not a super-fantastic-amazing-mindblowing stamper...but I do
really love to make cards and I do have other awesome Winnie & Walter
products at my fingertips--like Cutaways! And after a somewhat panicky
brainstorming session, I had a few ideas for some quick and simple cards.

The first one I made was the simplest, and it inspired the two
that followed. I have acquired a W&W product collection that would
make most people drool and I set out to use as many different sets as I could,
while still keeping the feel of each canvas clean and easy. A thank you
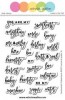
card is always useful, I thought, eyeing the bold brushed style of the From the Bottom of My
Heart stamp set (January/February 2017 Release free with qualifying $25.00 purchase until Friday, February 17, 2017 at 11:59 p.m. CST and will be released for purchase later this year). So I started by die cutting some leaf stems
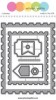
with the Framed with Evelin T Designs Cutaways in different
papers. All the papers seen here are from Pinkfresh Studio's gorgeous
Indigo Hills line.

I clustered 3 of them together and added a tiny glitter heart at the bottom. There's always a careful
laying-out process to all of my projects, and this card trio was no
different. I was about to stamp RIGHT ON THE CARD, which is always an
anxiety-ridden task because what if I mess up?! It's right there on the
card! So planning for these kinds of things is a must, and honestly,
while each of these cards maybe took 10 minutes to put together, the concept
and layout of each one probably took over an hour! (So when I say quick
and easy, I really mean: these are quick and easy after the whole design and
layout finally came together :)

I carefully stamped "thanks" on the card, emitting a huge sigh
of relief when I lifted the stamp and found a complete image, sans smears and
weird discoloration. Then I stitched on a strip of lace with some gold
thread, adhered the leaf cuts, and added a few sequins. See? Quick,
easy, simple...after all of the mind-changing and anxious hemming and hawing
over the actual design of the card! But surely we've all been there,
right?!

My second card was a a bit less agonizing as I was using a much
smaller stamp this time and it isn't one of the main focal points. I
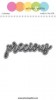
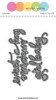
wanted to be sure I got to use the In a Word: Precious Script die at least once during my
LL tenure because it's gorgeous. I had the idea to cut the word out of
floral paper and pair it with the phrase "You are." "You
are my" is one of the sentiments from the Sentimental: Endearments set so I masked off the my.
It worked, yay!

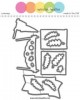
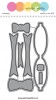
I decided to take the small flag die from the Essentials: Lana Cutaways and create a little bunting
(who can resist buntings?!) to accompany my statement. A little bit of
lace underneath, because precious and lace go together like milk and
cookies. When I adhered the flags for the bunting, I didn't glue down the
entire piece, leaving the bottoms raised and even curling them up a bit with my
fingers for some extra dimension.

Just for a little interest, I stitched a few doily scraps along
the bottom edge of the card. It adds another kind of texture without
making the card too busy.

I had a different idea for my last card, but when that wasn't
really working so well, I scrapped the original idea and decided to use a few
less elements, which actually made me like the card a lot better when it was
all done. I was going to do another bunting-type card, but with a
different die. In my mind I pictured a drapey sort of look with scalloped
lace, a banner-type stamp, and this other bunting, however, the scale of the
card was much too small to achieve this and it ended up just looking way too
chaotic. I got rid of the DIY bunting and just went with the lace and the
stamp, which is from the New Release set of Scenery: Stripes 2 and I curved it when I placed it on
the acrylic block to make it look like a party banner. I like the
simplified look much better.

Again here, though, I had to stamp directly onto the
card--TWICE!--and let out a huge sigh of release when it worked again!
This time, I used the new 'sweet' cutaway from The Big, the Bold, and Baby and paired it with 'heart' stamped
in pink. I stitched pale pink tulle to the bottom edge this time, added
another doily remnant and glitter heart. (*Those hearts are pieces I've cut over and over again because
they're the perfect finishing touch item to almost everything. The last
time I needed one, I went ahead and cut 20 just to have at the ready!)

While my original bunting idea was unsuccessful, I still felt as
though this card needed a little something more so I tested out a glitter bow (another item I cut and assemble in bulk)
and it was perfect! It's such a cute card for a baby or little girl,
don't you think?

Well, hopefully the cards don't look too thrown together in haste
(because, remember, the concepts took me quite awhile :). I'm actually
pretty pleased with them and feel they are definitely MY signature style.
I'm really looking forward to sharing my LL finale with you next week,
though. I hope it's fun for everyone! Until then, I've got the
Winnie & Walter Giveaway going on my blog this week and next! I know
you don't want to miss your chance at a $30 gift certificate to the shop so pop
around over there for all the details! Then I'll see you right back here
next week!


oh my, such GORGEOUS projects!
ReplyDeleteHow very pretty! What a fabulous colour combination and one I've never thought of before. Great cards!
ReplyDeleteYour style is unmistakable--so unique, modern & beautiful! I'm totally in awe once again & CAS is certainly not simple! If only I could come up with something like this in an hour--would take me all day to figure out these designs! By the way, a MISTI or similar tool takes away the agony of stamping on a card directly--so worth it for us stampers! Anyway, the little stamped border under the lace on the last card is an incredible element I would never have thought of--love it! Thanks for all the inspiration & now I'm going to go use some dies with printed paper!
ReplyDeleteThese are beautiful, and W& W Cutaways are so inspiring to use!
ReplyDeleteThese are just wonderful!! I adore the fresh colors of blue/white with gold and pink! Your designs are just gorgeous. I love how you use the doilies and gold sparkly hearts for the perfect embellishments.... so elegant, refined, and feminine. I'm off to your blog.......
ReplyDelete<3 J
jwoolbright at gmail dot com
HerPeacefulGarden.blogspot.com
Beautiful cards! Love all the Cutaways you used! Great colors and patterns! Can't wait to see your next post!
ReplyDeleteAll so beautiful!
ReplyDeleteSuch a fun and detailed post! I love the cards you've created, they look very sweet and the cutaways look gorgeous. I agree, sometimes it does take more time to think of layouts and decide what to do. I find that a stamping tool like the misti helps a lot with the anxiety of stamping. Stamping directly on a project makes me nervous too! Thanks for sharing. Loved your work :)
ReplyDeleteCheers
preety
Your cards are beautiful even if you were short on time.
ReplyDeleteWhat a beautiful project, with exquisite detailing. I love the blue, white and gold color combo, and that gold stitching on the lace. I'm looking forward to seeing the project you started on but didn't complete, because this "last-minute" one is awe-inspiring!
ReplyDeleteRebecca, these are all precious AND sweet. They really are lovely.
ReplyDeleteBeautiful! Love the blue
ReplyDeleteI love the mix of colour tones and textures...and who can resist a bit of sparkle and shine.
ReplyDeleteJust gorgeous!
ReplyDeleteGorgeous gorgeous cards all of them!
ReplyDeleteBeautiful cards!!! Love all the details and the amazing colors!!!
ReplyDelete