Showing posts with label happiest of holidays with evelin t designs. Show all posts

Saturday, November 3, 2018

November Leading Lady Jill Vickers | Take One

It's an exciting day as I get to introduce you to our November Leading Lady Jill Vickers!  I first met the lovely Jill a few years ago where we bonded over our shared love of stamping (of course) and imagine how delighted I was to see her awesome submissions to our challenges.  Her cards are bright, happy and full of brilliant ideas and techniques.

I am really excited to see what Jill will be creating this month as she takes us on an adventure of her own design on Saturdays in November on the w&w blog.

Please give Jill a big round of applause to welcome her as she steps onto the stage for her first performance as our November Leading Lady! 


I am absolutely thrilled to be joining Winnie & Walter as their November Leading Lady - I am still in complete disbelief that Shay asked me to do this. I have been a huge fan of Winnie & Walter products ever since the beginning but I am an ever bigger fan of Shay and her generosity. Winnie & Walter has sponsored so many different challenges in blogland, along with all the all the challenges on the Winnie & Walter blog - her kindness is inspirational to us all. I am truly honoured to be part of her blog this month.

We just turned the page on the calendar - November already! I can't believe how quickly this year has flown by and it is now time to get ready for the end of year holidays. Of course, this includes making lots of holiday cards :) One of my favourite things about holiday cards is that I can apply copious amount of glitter to my projects - all in the spirit of the season :) My Leading Lady debut is going to be about some different ways to apply glitter to holiday cards.

My first project features glitter applied with Stickles. This seems to be the only time of year that my Stickles make it out from my craft drawer but I don't know why since they are so much fun. They are absolutely perfect for adding little touches of colourful glitter - like I did on this walrus card: 


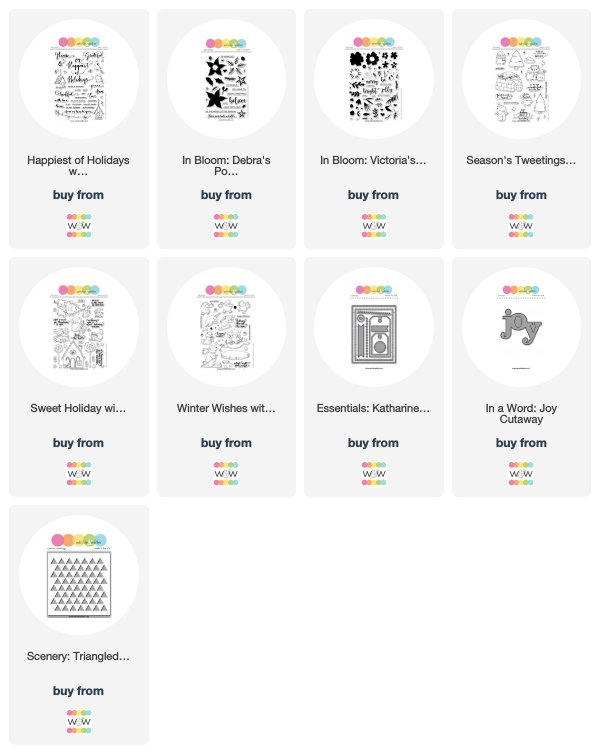
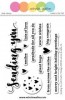
Isn't this walrus the cutest? I stamped him from the Winter Wishes with Evelin T stamp set and then masked him and stamped the iceberg as well. More masking before inking the background with a few different colours of Distress Inks (Tumbled Glass, Faded Jeans, and, of course, Salty Ocean). I coloured the image with Copics, added some white gel pen detail - and then I added four different colours of Stickles to the lights and some Crystal Stickles to the white parts of the Santa hat. I created a card front by first cutting the panel with the largest rectangle from the Essentials: Katharine Cutaways, and then cutting the aperture with another die. This card front was added to the card with foam tape, along with a white embossed greeting from the In Bloom: Debra's Poinsettia with Lydia Evans stamp set. Here is a close up of some of the Stickles:


My next projects are all about adding glitter to the background. I die cut the card front panel using the largest rectangle from the Essentials: Katharine Cutaways, and I also die cut an aperture using a basic circle die. I then added some transparent embossing paste to the card front through the Scenery: Triangled Creative Screening. After removing the stencil, while the paste was still wet, I sprinkled some Distress Glitter over it and set it aside to dry. While the paste was drying, I stamped and cut out a lot of different floral images from the In Bloom: Debra's Poinsettia with Lydia Evans and the In Bloom: Victoria's Very Merry Flowers with Lydia Evans stamp sets. I also stamped the greeting from the same stamp set directly onto the card base. Once the paste was dry, I assembled all the components with a lot of foam tape :)


I actually made two (almost) identical cards - one with the transparent embossing paste and Distress Glitter, and the second one with Cosmic Shimmer Texture Paste in Platinum. Here they are side by side:


My last cards feature inlaid die cut glitter card stock. I started off by creating my own ombre glitter cardstock: I coloured a piece of plain white card stock with several different red Copics - blending between the different shades. I then covered the coloured card stock with a large piece of Be Creative tape (this tape is relatively transparent), removed the protective sheet from the adhesive and applied micro fine glitter over the card stock. I pressed the glitter in really well, and burnished it with my teflon bone folder. The key to this is using a transparent glitter - I used Glitter Ritz Warm Highlight glitter. 

I die cut the ombre glitter card using the In A Word: Joy cutaway - and die cut the card panel using the same die so I could inlay the ombre die cut into the card front. I stamped and Copic coloued a couple of images on the card front as well - the bird from Sweet Holiday with Evelin T and the bird house from Happiest of Holidays with Evelin T. I also added a white heat embossed "Season's Tweetings" (from Season's Tweetings with Evelin T)onto a foam mounted piece of brown card stock. 


I decided that I wanted to include a glittery candy cane stripe in my design so I stamped the stripe from Scenery: Holiday Trimmings with dark red ink onto the card base. I then covered it with a piece of Be Creative tape and a layer of glitter - just like I did with the ombre card stock. I love how this looks on the finished card.

While I had my supplies out, I created an (almost) identical card - but using store bought red glitter card stock instead of custom ombre glitter card:


Finally, I used the cutout from the ombre glitter card stock and inlaid a die cut from gold glitter card stock. I kept the rest of the card very simple.


Shay has kindly offered up a $30 Winnie & Walter gift card for me to give to one lucky commenter on my blog, My Life in Paper For your chance to win, leave a comment on this post and/or any of my leading lady posts and I will randomly pick a winner from all the comments left by November 30th.

Thanks so much for stopping by! 
Jill


w&w-supplies

Saturday, September 30, 2017

September Leading Lady Hussena Calcuttawala | Take Four

As we come to the end of September, we also close out with the final fabulous performance of our September Leading Lady, Hussena Calcuttawala!  I am sure I am not alone in being dazzled by Hussena's beautiful and layered projects this month.  Such loveliness, bursting with happy color has graced the w&w blog week after week.  I feel so blessed to have had Hussena as our leading lady this month.

If you missed her smashing debut you must see it...CLICK HERE or her sensational second performance which included a duet of beautiful, bright, happy celebratory cards CLICK HERE or her triumphant third performance full of delightful projects beyond the card CLICK HERE.   

Lucky for us all we have her final command performance today.  

hussena_calcuttawala_sep2017
Hello everyone,
Today is my final post as a Leading Lady this month on the Winnie and Walter blog. I am really honoured to have been given this opportunity and I had so much fun working with their old and new releases to create cards and other projects. Today, I have two cards to share and I've gone floral all the way :D


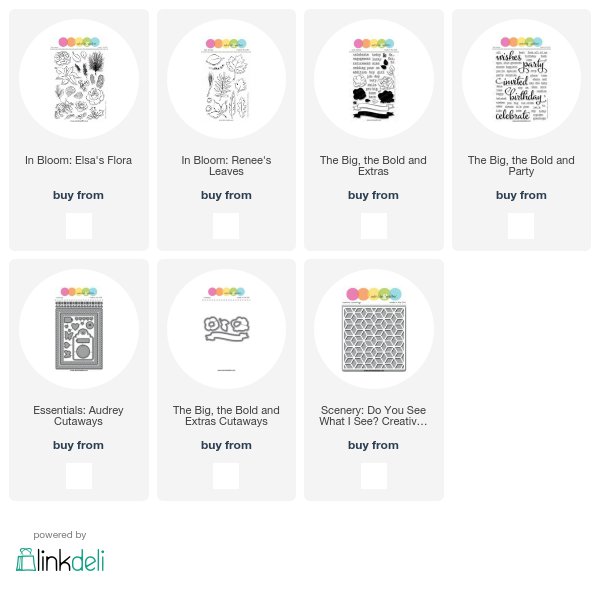
For my first card, I have used the flower from the In Bloom : Elsa's Flora set. I lightly coloured it using Peacock Feathers Distress ink and did my shading using Prismacolor pencils.


The leaves, berries and the entire foliage is also from the In Bloom: Elsa's Flora stamp set. I wanted to go with a monochromatic look by highlighting only the colour of the flowers against the grey background so I coloured my leaves and other foliage in grey. 


I also added a pop of colour here and there by adding the stamped and fussy-cut berries. If you see closely, I have also done some light yellow stenciling using the Scenery: Do You See What I See? Creative Screening.  The sentiment banner is from the The Big, the Bold and the Extras stamp and die set. I finished off the card by adding few black paint splatters and silver sequins.


Moving on to my second and last project.


This card has a riot of things going on. Haha :) It's a rather full design and I tried to do something different. I love the way the colours pop against the black background!

I have used the flowers and leaves from the In Bloom: Anna's Flora and In Bloom: Renee's Leaves. I stamped the images on watercolour cardstock using Versafine Onyx Black ink and did loose watercolouring using various shades of Distress inks. I fussy-cut the images and have popped some using foam-dots while others are stuck directly on the card  panel.


For the sentiment, I have heat embossed the word 'thankful' from the Happiest of Holidays with Evelin T Designs stamp set and the 'for your friendship'  is also from the same set. The butterflies have been die-cut using the Essentials: Audrey Cutaways die set and watercoloured. The sequins are from Pretty Pink Posh.


I added some white paint splatters to make the look more bold and dramatic :)


So with that, we come to an end to this post. I had a wonderful time sharing my projects and hope you liked them too. I would love to hear what you think of today's cards :)

Thank you so much for dropping by! I hope you will stop by my blog and leave a comment there too as I will be giving away a $30 gift card to one lucky winner.


Have a nice day everyone!


w&w-supplies

Wednesday, May 17, 2017

You Are 3 with Kelly


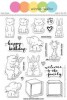
Hi Folks! Today I've got a sweet little card for a sweet little three-year-old. This card gets most of its sweetness from one of my favorite sets, Welcome to the Family with Evelin T Designs, featuring a toppling tower of animals trying to balance themselves on a block. To keep this a one-layer card, the animals and block are all masked. The only tough thing about masking is figuring out which stamp goes first! In this case it's the elephant, and then I can stamp the block and remaining animals. I intentionally stamped them crooked to give the scene a little more energy. Since this card is for a toddler, I kept the coloring to bright solids for the animals.

 
Love how the block is just the right place to put your sentiment. When an image serve a purpose in a scene and is also the sentiment that's a win-win! I borrowed a portion of a sentiment from Happiest of Holidays from Evelin T Designs for the "you are." The number is from Typecast: Cary and fits  perfectly in the block.
 

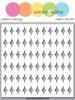
The side panel was created by sponging ink through Scenery: Harleen Creative Screening. If you double up the design by shifting it slightly to the side and down for your second color of ink, it gives you a more dense background. I really like the negative spaces in this design too.

It's bordered by the secondary sentiment "giant hugs & lots of love" from Sending You with Evelin T Designs. I like how it serves as an end of the stenciled area, and also adds a little to the message to the card.


Love that with everything going on in this card, it's still one layer for mailing! It's always amazing to me how all of the Winnie & Walter sets mix so well together. This card has elements from five different sets and one stencil and you would never know it. They all get along so well : )

Thanks so much for looking!
-Kelly


w&wDT_kellygriglione_blog-sig

w&w-supplies


Wednesday, February 15, 2017

Grateful for Your Friendship with Kelly

Note from Shay:  Today is Kelly's birthday!  Please join me in wishing her a brilliant day full of laughter, joy and love.  

Hi Folks! We're right in the middle of the birthday festivities here at Winnie & Walter, with tons of prizes, challenges and inspiration.  There are no less than 10 challenges happening RIGHT NOW, and the best part is that there's still plenty of time left. They will all stay open through March 6th (see this post for further details.) It's so fun to see projects being added to the birthday challenge galleries every day!

Now before you go dashing off to your craft space to get started, I wanted to quickly share some projects for my Stencil Challenge. All you need to do for this challenge is use a stencil. Easy Peasy!

 
This card is similar to one I shared during release week. Instead of sponging ink through the Scenery: Madison Creative Screening stencil all the way to the edges of the card, I just sponged ink through the stencil around the focal point and then let it fade away.


Speaking of focal point, this little fella grew to be my favorite animal in the last release, which is saying a lot given how simply adorable all the critters are. He's the huggable bear from Welcome to the Family with Evelin T Design. I stamped him first, placed a mask on top, and a sticky note on top of that. I sponged gray ink below the sticky, in the middle of the card only, to get the ground the bear is standing on. Then I moved the sticky on the other side of that line (covering the part that is now gray), placed the stencil on top of that, and sponged blue ink through. For a one layer card, there were sure a lot of layers of masks that went into making it! 1) the bear mask, 2) the sticky note to mask the ground/wall, and 3) the stencil.


Playing with layers of inks are fun too. The "grateful" sentiment from Happiest of Holidays with Evelin T Designs is just the right size to fit slightly over the bear when turned 90 degrees. Layering the sentiment makes the composition a little more interesting, while still allowing the bear to show through in all his glory. The secondary sentiment is also from the Happiest of Holidays set.


Once I had the order of the layers figured out, and all the stamps in position, it seemed a shame not to make a few more of these cuties. I chose to make tags, because they're a little quicker, and I often need a little something to go with any baked goods headed off to a neighbor's house. These are perfect! Oh, and since we all know bears can't talk, I have him speaking the universal language of love, compliments of the Sketchy Thoughts stamp set. That's really all you need!

Hope to see you join in a few of the different challenges this month, especially the Stencil Challenge!


Thanks so much for stopping by!
-Kelly


w&wDT_kellygriglione_blog-sig

w&w-supplies

Monday, January 9, 2017

January Color Combo with Heather H.

Good morning! Heather; here stopping by this morning to share another card using a color combo from Pinterest and also inspired by Taheerah's recent Winnie and Walter Gossip Column - all about Marble. (There is a challenge to play along too in case you want to play along and be entered for one of the fabulous prizes!)


My color inspiration this time isn't a direct color combo - but just sort of a mood board with lots of bright happy colors that I was drawn too - and so many ways to interpret it:


I started off by using the fabulous little background stamp set Mini Scenery: Marbelize and stamping it two times in embossing ink on watercolor paper and heat embossing in clear. Now, it doesn't match up perfectly in the center, but since I clustered my embellishments there over the transition - it still worked perfectly as a background for my entire A2 card front.


Next, I applied lots of fun colors in random splashes on my background with watercolors, then misted it with water to help it blend even more, then blotted once with a clean baby wipe to pick up some of the color and soften it a bit - totally just playing, but as soon as I did that, I knew I had exactly what I was wanting so I stopped there!


I die cut In a Word: Happy Cutaway four times from white cardstock and adhered them together so it was a nice thick 3-dimensional embellishment, then heat embossed a couple tiny phrases from Happiest of Holidays with Evelin T Designs (always love stretching those holiday sets!) heat embossed on a bit of black cardstock.


Added some silver thread to the front, adhered the large "happy" over that, and added the small phrases with foam adhesive, then coated the word "happy" with a good thick coat of Glossy Accents to make it pop a little extra. Yep - I was a little giddy at how this one came out!


What do you think? Do you enjoy using color combos? Does this one inspire you? If you decide to use it to create something - I'd love to see what you make! Leave a link in the comments - I'd love to come visit and see what you created!

Thanks for stopping by - have a wonderful day!


w&wDT_heatherhoffman_blog-sig 2

w&w-supplies