Showing posts with label lulu fringe cutaway. Show all posts

Saturday, February 25, 2017

February Leading Lady Rebecca Luminarias | Take Four

Rebecca_Luminarias_february2017

February is such a short and sweet month and sadly that means today marks the final performance of our fantastically fabulous February Leading Lady, Rebecca Luminarias.  I anticipated each of her posts so I could be entranced by the wondrous photos and magnificent projects along with her writing being informative and entertaining.  I really can't think of a better person to have this month as our Leading Lady to help celebrate our 3rd birthday and I feel so honored to have Rebecca grace the w&w blog this month.

 If you missed her smashing debut you must see it...CLICK HERE or her stunningly sensational second performance CLICK HERE or triumphant third performance CLICK HERE.   Today she pulls out all of the stops with more pretty packaging and tempting tips!

Lucky for us all we have her final command performance today. 


Oh, I'm sad!  It's my last Saturday with you wonderful folks here Winnie & Walter.  I've had a blast, challenged myself in more ways than one, worked with amazing products, and connected with a bunch of new friends--it's been an awesome month!


I'm leaving you with a few fun little DIY tricks.  The beauty of many paper crafting products is all the different ways you can use them.  A designer may have one intention, but then another creative comes along and shows us all a different way to work with it.  Those are my favorite products because of their versatility.  So I took one of the best W&W dies and used it in a few different ways, essentially making do-it-yourself embellishments.


If you don't have the Lulu Fringe cutaway, go and buy it right now.  It is the best thing ever!  I started by using it to make the fringe hearts that are all the rage right now.  I'm sure you've seen them, so here's one way to make your own...(okay, two ways ;)


I started by cutting a heart out of white card stock using the True Multifaceted Heart cutaway.  Then I picked a few papers to fringe.  All the papers seen here today are Pink Paislee's Fancy Free line by Paige Taylor Evans.  I used prints with smaller patterns from the 6x6 paper pad.


I cut small strips for the hearts, approximately 3/4" by 6".  When I had a few strips cut, I lined them up on my heart, starting from the bottom up.  Be sure to put adhesive only on the flat, un-fringed part of your strip or the fringe won't stick up and be fringy!  You can trim the excess as you go or trim all at once in the end.  Either way, when you've finished, you have a pretty fringe heart!


(*Here's a tip that might be even easier, but it was one of those things that didn't dawn on me until I was writing up my post: Take a 4"x4" piece of white card stock and adhere your fringed strips to it, just as I did with the heart.  When you've reached the top, run it through your die cutting machine with the heart die.  Done!  Way less trimming, and much faster!  But, if you don't mind taking your time, you can try my first way!!)


To show it in use, I've simply used it as a gift topper here with some seam binding and a simple tag, also cut from Fancy Free paper.  The hearts are pretty enough to not need much else on a small package.


The second embellishment I made with the Lulu Fringe cutaway is a paper tassel.  If any of you stopped by my blog during the W&W World Card Making Day Blog Hop, you saw me use them on a card there.  It's still my favorite thing to make with the die and it's so easy!


Again, trim your papers--longer this time, around 1 3/4" long.  If your paper stock is thin, 6" is a good width; if it's thick, 5" is best.


You will need some tassel caps--I've used these small gold plated pieces here, which are 4mm in diameter.


Starting at one end, start rolling your strip.  It should look like this when you're done:


Pop your cap on (some adhesive inside the cap will ensure that your paper doesn't slip out) and you're done!  Super easy!


I made a fringe tag next, similar to the heart.  I actually had white shipping tags that I used, but the tag from Essentials: Katharine Cutaways would be a great die to use if you wanted to do it the card stock way.  Again, had I thought of that trick earlier, I would have done it!!  But, honestly, this way is not hard.  I didn't put fringe all the way up, but opted instead to use coordinating paper for a hole reinforcement.


It's all about the fringe on this present!  Yup, I absolutely did cover the box top with fringe strips, too, because once you start fringing, it's difficult to stop fringing!


For my last DIY embellishment, I made a little bow clothespin.  While I didn't use the Lulu Fringe die to make it, I'm including it because it still qualifies as a DIY embellishment.


I used the Take A Bow cutaways to make the big looped bow and adhered it to a chunky wood clip.  That's all.  Easy, again, but effective, especially with a few fringe scraps on a plain white gift box.


That's a wrap!  I hope you try some of these fun DIY embellishments!  Thank you so, so much for welcoming me into the W&W family and being so hospitable.  It's been awesome to be here--don't forget to stop by my blog to enter the giveaway!  You have until Monday, February 27th to leave a comment on this week's post or last week's (but OVER THERE!) to be eligible for the $30 W&W gift card.  I'll announce the winner (OVER THERE) on Tuesday, February 28th.


Thank you, thank you, thank you, Winnie & Walter (and friends) for making my February AMAZING!!


w&w-supplies

Tuesday, February 21, 2017

w&w 3rd Birthday Bash | Special Guest Star Cheiron Brandon

birthdaybashspecialgueststar-cheiron

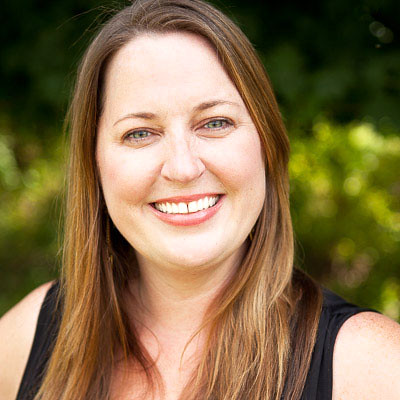
Our next Special Guest Star is new to the w&w blog, but such a lovely and gifted designer. I had the pleasure of meeting Cheiron in person and she really is a delight! I am so happy to have her make her stunning debut today.  Please give her a very warm w&w welcome. 

Now it is time for Cheiron to take over....

cheiron 400_

Hi there! My name is Cheiron Brandon and I am delighted to be a guest star at Winnie & Walter this month to help them celebrate their big Birthday Bash.  Thanks so much for having me.

I have been card making and stamping for a little over 10 years now. I live in New Jersey (right outside of NYC) with my husband and our two adorable rescue pups Big Boy and Oreo. During the day, I work in the financial district and at night, I love to come home and create in my studio. I share my love of creating by teaching monthly card making classes at The Ink Pad in New York City.

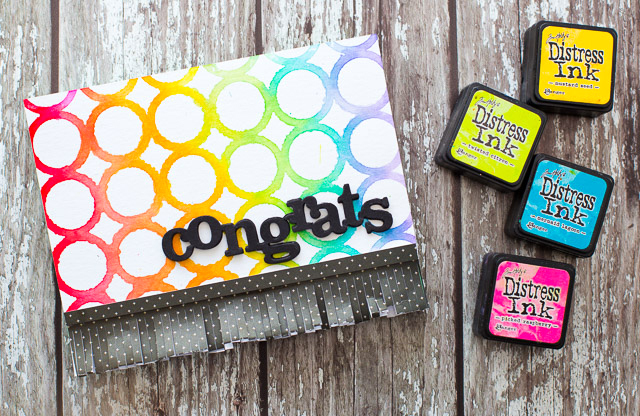
I decided to celebrate by playing along with two of the super fun challenges going on this month, the first being Kelly’s Stencil Challenge. I love the idea of using stencils as a background and created a card using the Scenery: Pattern of the Rings Creative Screening Stencil.

cheiron-winniewalter-1

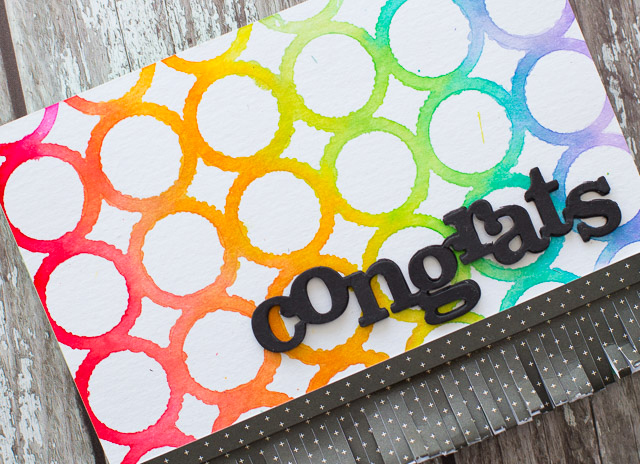
This card uses a monoprint technique on the stencil to create the background. Simply apply Distress ink to your stencil, mist it with water and press it onto watercolor cardstock to create a monoprint, then lift it off .  Since the background is so fun and colorful, I added just a big bold In a Word: Congrats Cutaway to finish it up and a bit of contrasting trim using the Lulu Fringe Cutaway.  

cheiron-winniewalter-2

This is a great way to play with new supplies and color combos. Simply create a bunch of backgrounds and keep them to turn into cards later with a simple, bold greeting.

cheiron-winniewalter-3

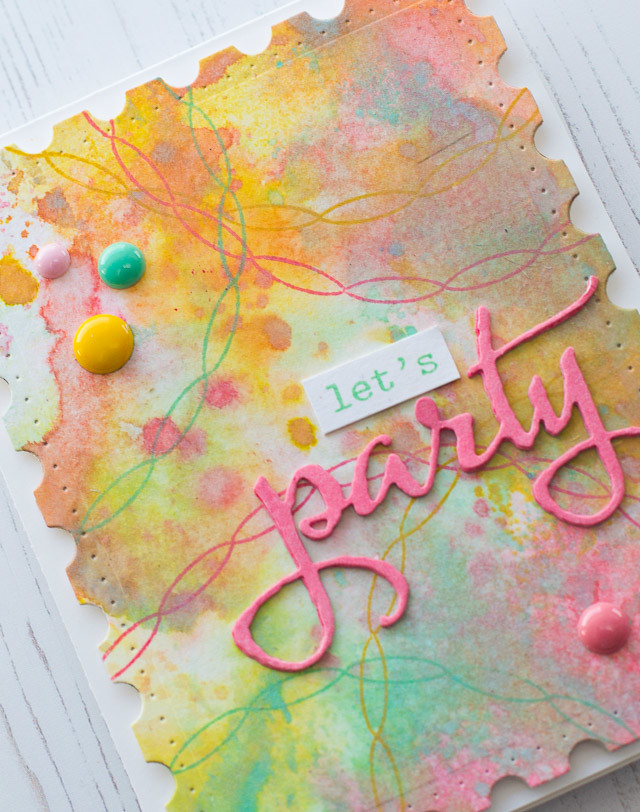
For my second card, I played along with Mayuri’s Pattern Making Challenge. I love creating my own patterns with stamps and thought the streamers from the Scenery: The Party Hangover set would make a fun, subtle pattern over my Distress Oxide inked background. I just love the festive touch they add over these soft colors. I added the phrase party using stamps and dies from The Big, TheBold and Party Cutaways. I created a coordinating color die cut by applying the same inks direct to paper then cutting out my word. 

cheiron-winniewalter-4

Thank you again for having me today. Wishing you the very best of birthdays and so glad I could come along to the party!


w&w-supplies

Monday, August 8, 2016

August Color Combo with Heather H.

Good morning! Heather here stopping by this morning to share a card using a color combo from Pinterest - something I have been having lots of fun with lately! Color combos used to stress me out for some reason, so it is kind of funny that I have developed a love of them recently! Without further ado - here is my card for today:


And here is the color combo that I was inspired by:


As I was flipping through my Winnie and Walter supplies, I came across my Lulu Fringe Cutaway die and realized it had been a long time since I had used it, so that was where I started for my inspiration. I die cut it 3 times in white cardstock, then applied some distress inks in an ombre effect. Once I finished that, I tore along the bottom edge to remove one of the solid portions so that the fringe hung free - I love the rough look that the tearing accomplished!


I layered those onto my cardbase with some strong tape, then die cut the thanks word from The Big, the Bold, and the You Cutaways and attached it with a bit of machine stitching along the bottom. Finished off with some various sizes of clear sparkling sequins, and then used the same distress inks to mix water and add some splatters, just because it felt like it needed a little something more!


What do you think? Do you enjoy using color combos? Does this one inspire you? If you decide to use it to create something - I'd love to see what you make! Leave a link in the comments and I'll come visit you!

Thanks for stopping by - have a wonderful day!

w&wDT_heatherhoffman_blog-sig 2

w&w-supplies


Saturday, February 20, 2016

February Leading Lady Emily Leiphart | Take Three


Our February Leading Lady, Emily Leiphart is back for her triumphant third performance!  If you missed her smashing debut you must see it...CLICK HERE or her sensational second performance taking on the positive and negative CLICK HERE.   Today Emily shows her mastery by using the same products to create two cards with two different and awesome looks.

Without further ado, Emily....

Hello, hello! It's Emily here and I'm back with my third Leading Lady post!! Every Saturday this month, I'll be sharing projects with a weekly theme. Today's theme is monochromatic versus colourful. Both cards use the exact same products!


The monochromatic card features five Winnie & Walter dies and one stamp set in shades of white, greys and black. Across the middle of the Essentials: Katharine Cutaways die cut, I dry embossed with the Lulu Fringe Cutaway.


The In a Word: Hello die was sponged with three distress inks, splattered with water and misted with shine spray, then stamped with the dots from the Scenery: Big Bang Confetti stamp set. The In Bloom: Paulina's Greenery Cutaways wreath was layered with vellum and linen white cardstock.


This colourful version features the same six products as the monochromatic version, just in different formulations. Here, the Lulu Fringe Cutaway is used in its originally intended format on the edges of the Essentials: Katharine Cutaways frames.


In Bloom: Paulina's Greenery Cutaways was dry embossed as well as used as accents on the ends of the sentiment that uses In a Word: Hello Cutaway, as well as The Big, the Bold and the Happy Cutaways. The dots from Scenery: Big Bang Confetti were heat embossed with silver glitter embossing powder.


GIVEAWAY

Winnie & Walter has given me a $30 gift card to share with my readers! All you need to do is head to my blog and comment on all four of my Leading Lady posts this month and you'll be entered to win. Good luck! :)


w&w-supplies