Showing posts with label in a word: love. Show all posts

Saturday, September 15, 2018

September Leading Lady Maryam Shalaby | Take Three (Video)

Our September Leading Lady, Maryam Shalaby is back for her triumphant third performance!  If you missed her smashing debut you must see it...CLICK HERE or ethereal and enchanting cards from her sensational second performance CLICK HERE.   Today's cards are incredible inky masterpieces!

Without further ado, Maryam...


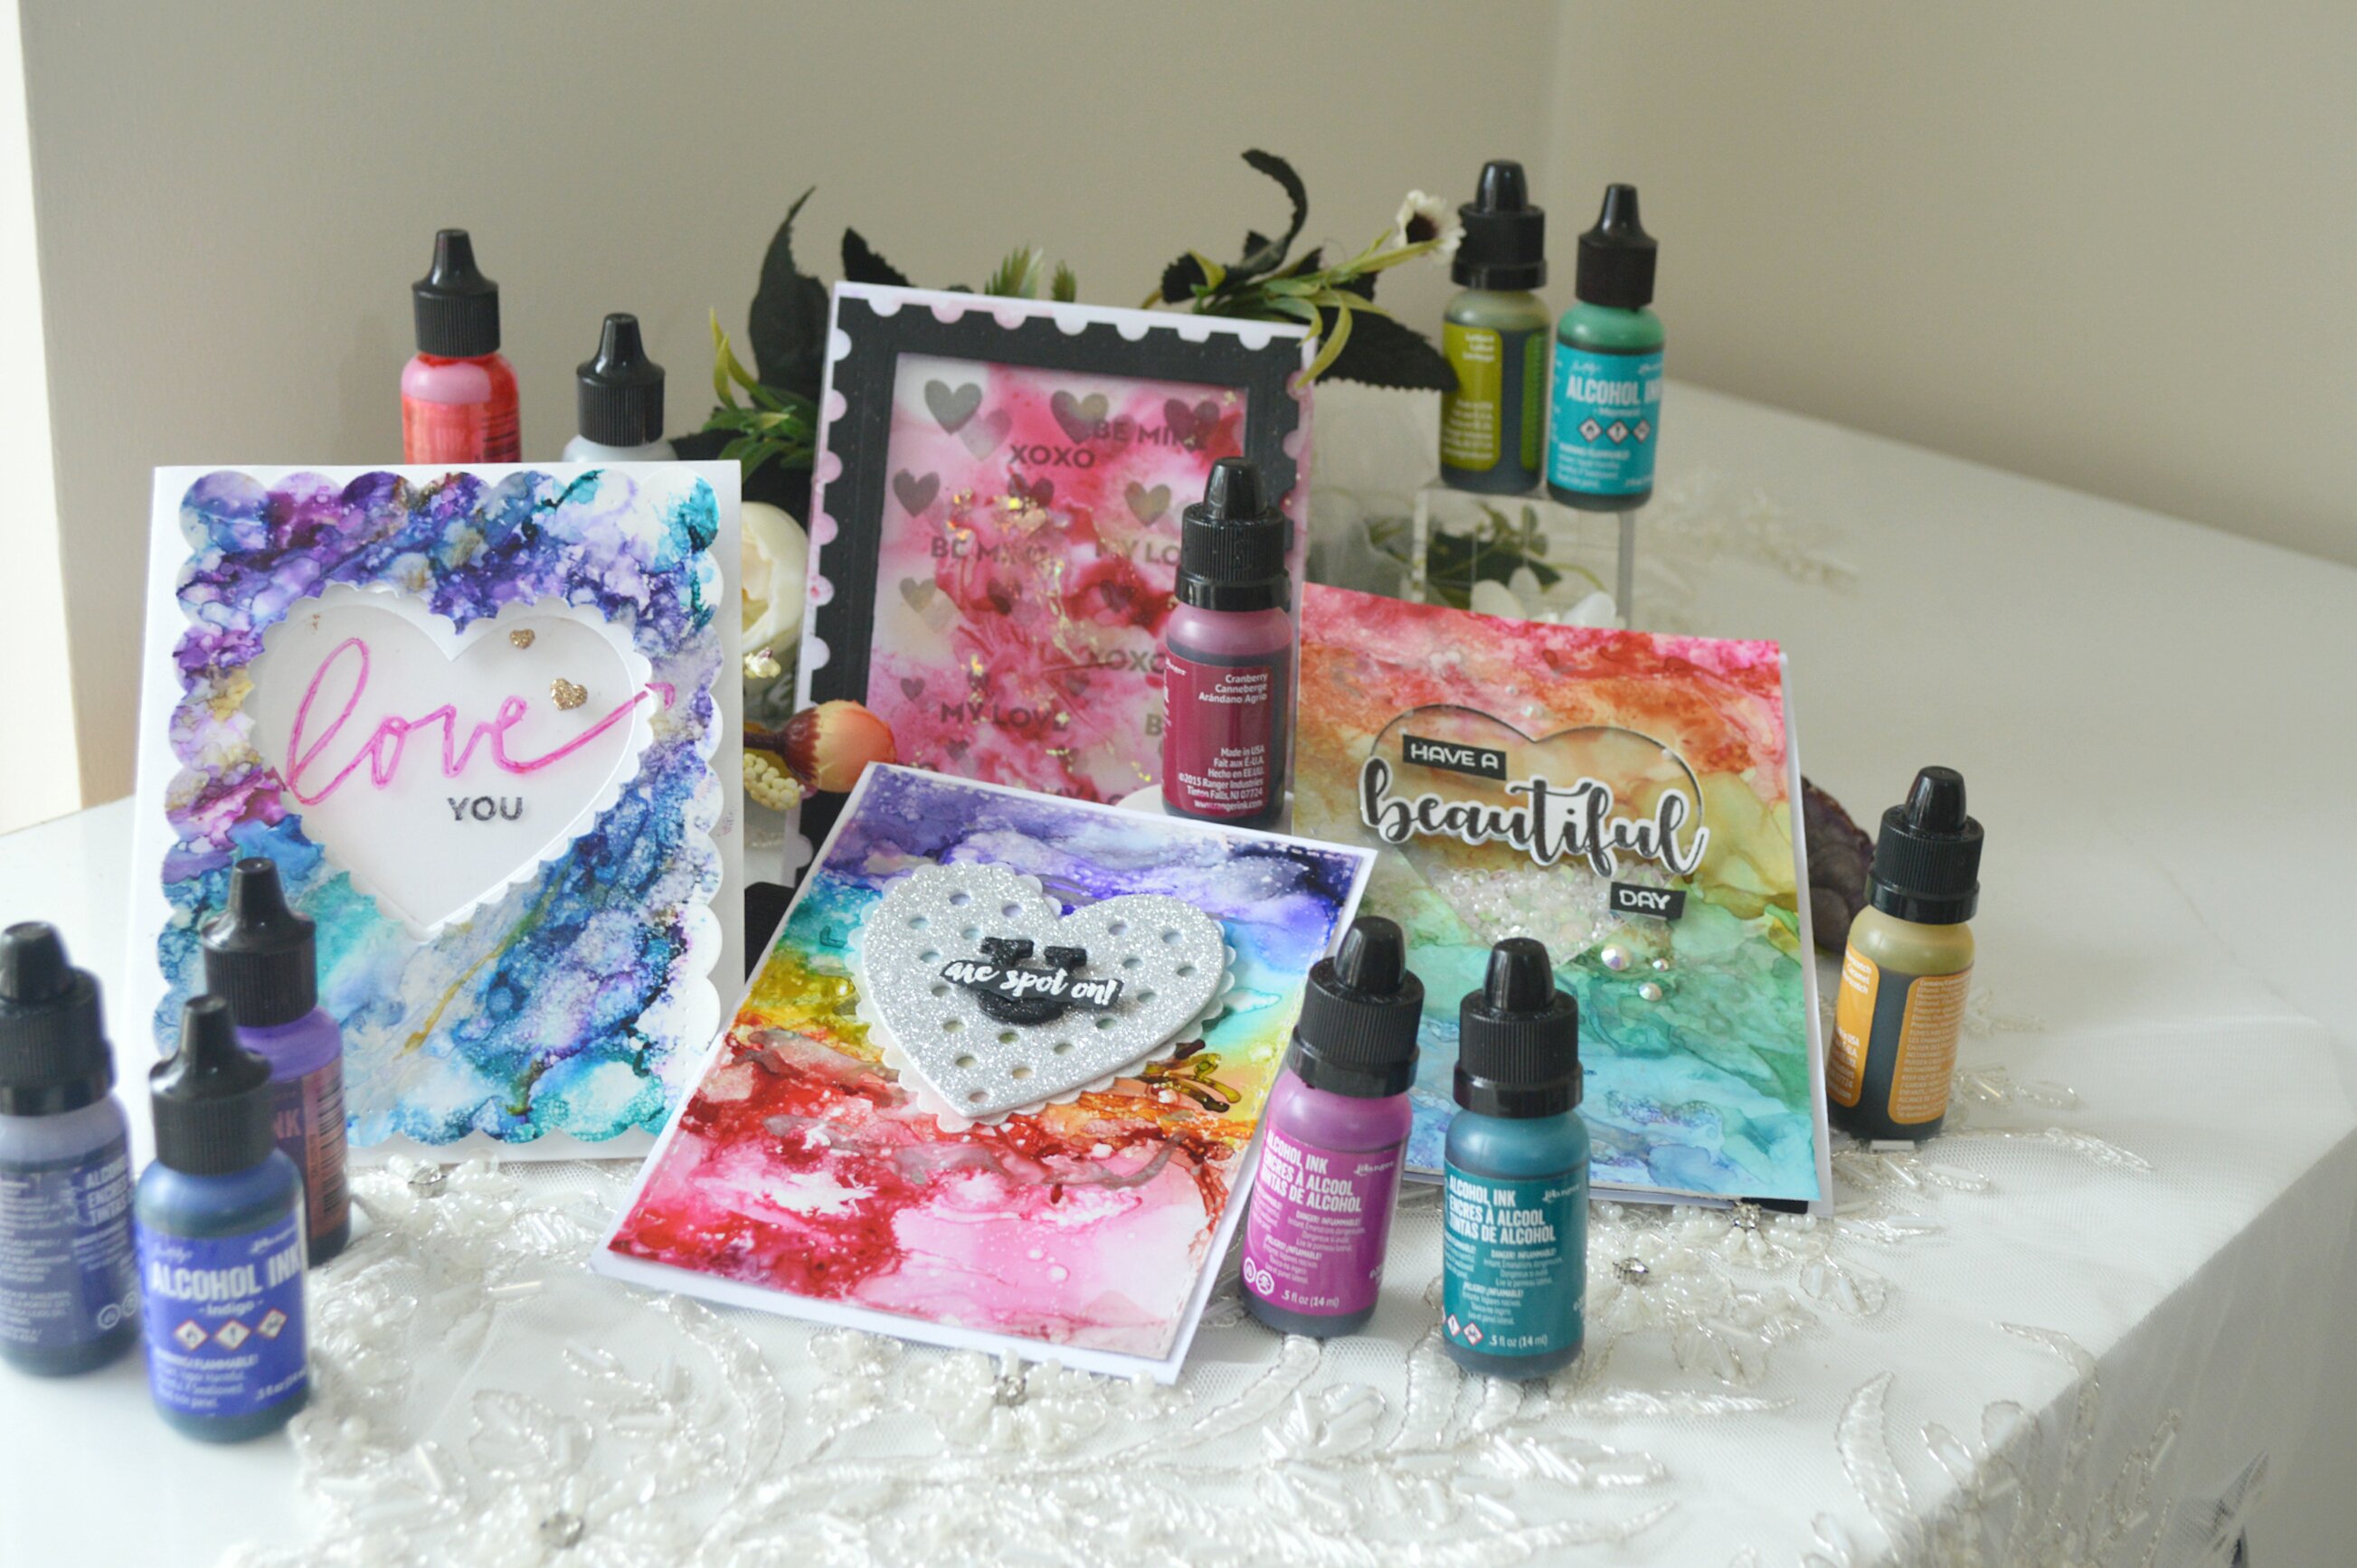
A little story about how I mad these cards. I was trying for the whole week to make a cards that I would like to share it with you . I was writing a list for the techniques that I would like to share with you in this month but I wasn't in the mood to make any of them . And after few days of trying I realized that I lost my mojo .It’s a Bad timing, for not to be in the crafty mood .I Wondered if I should try my magical description for returning back my mojo. Usually when I loose my mojo I grap some of ranger alcohol ink and play with them there vibrant colors elevate my mood and brighten my mind.
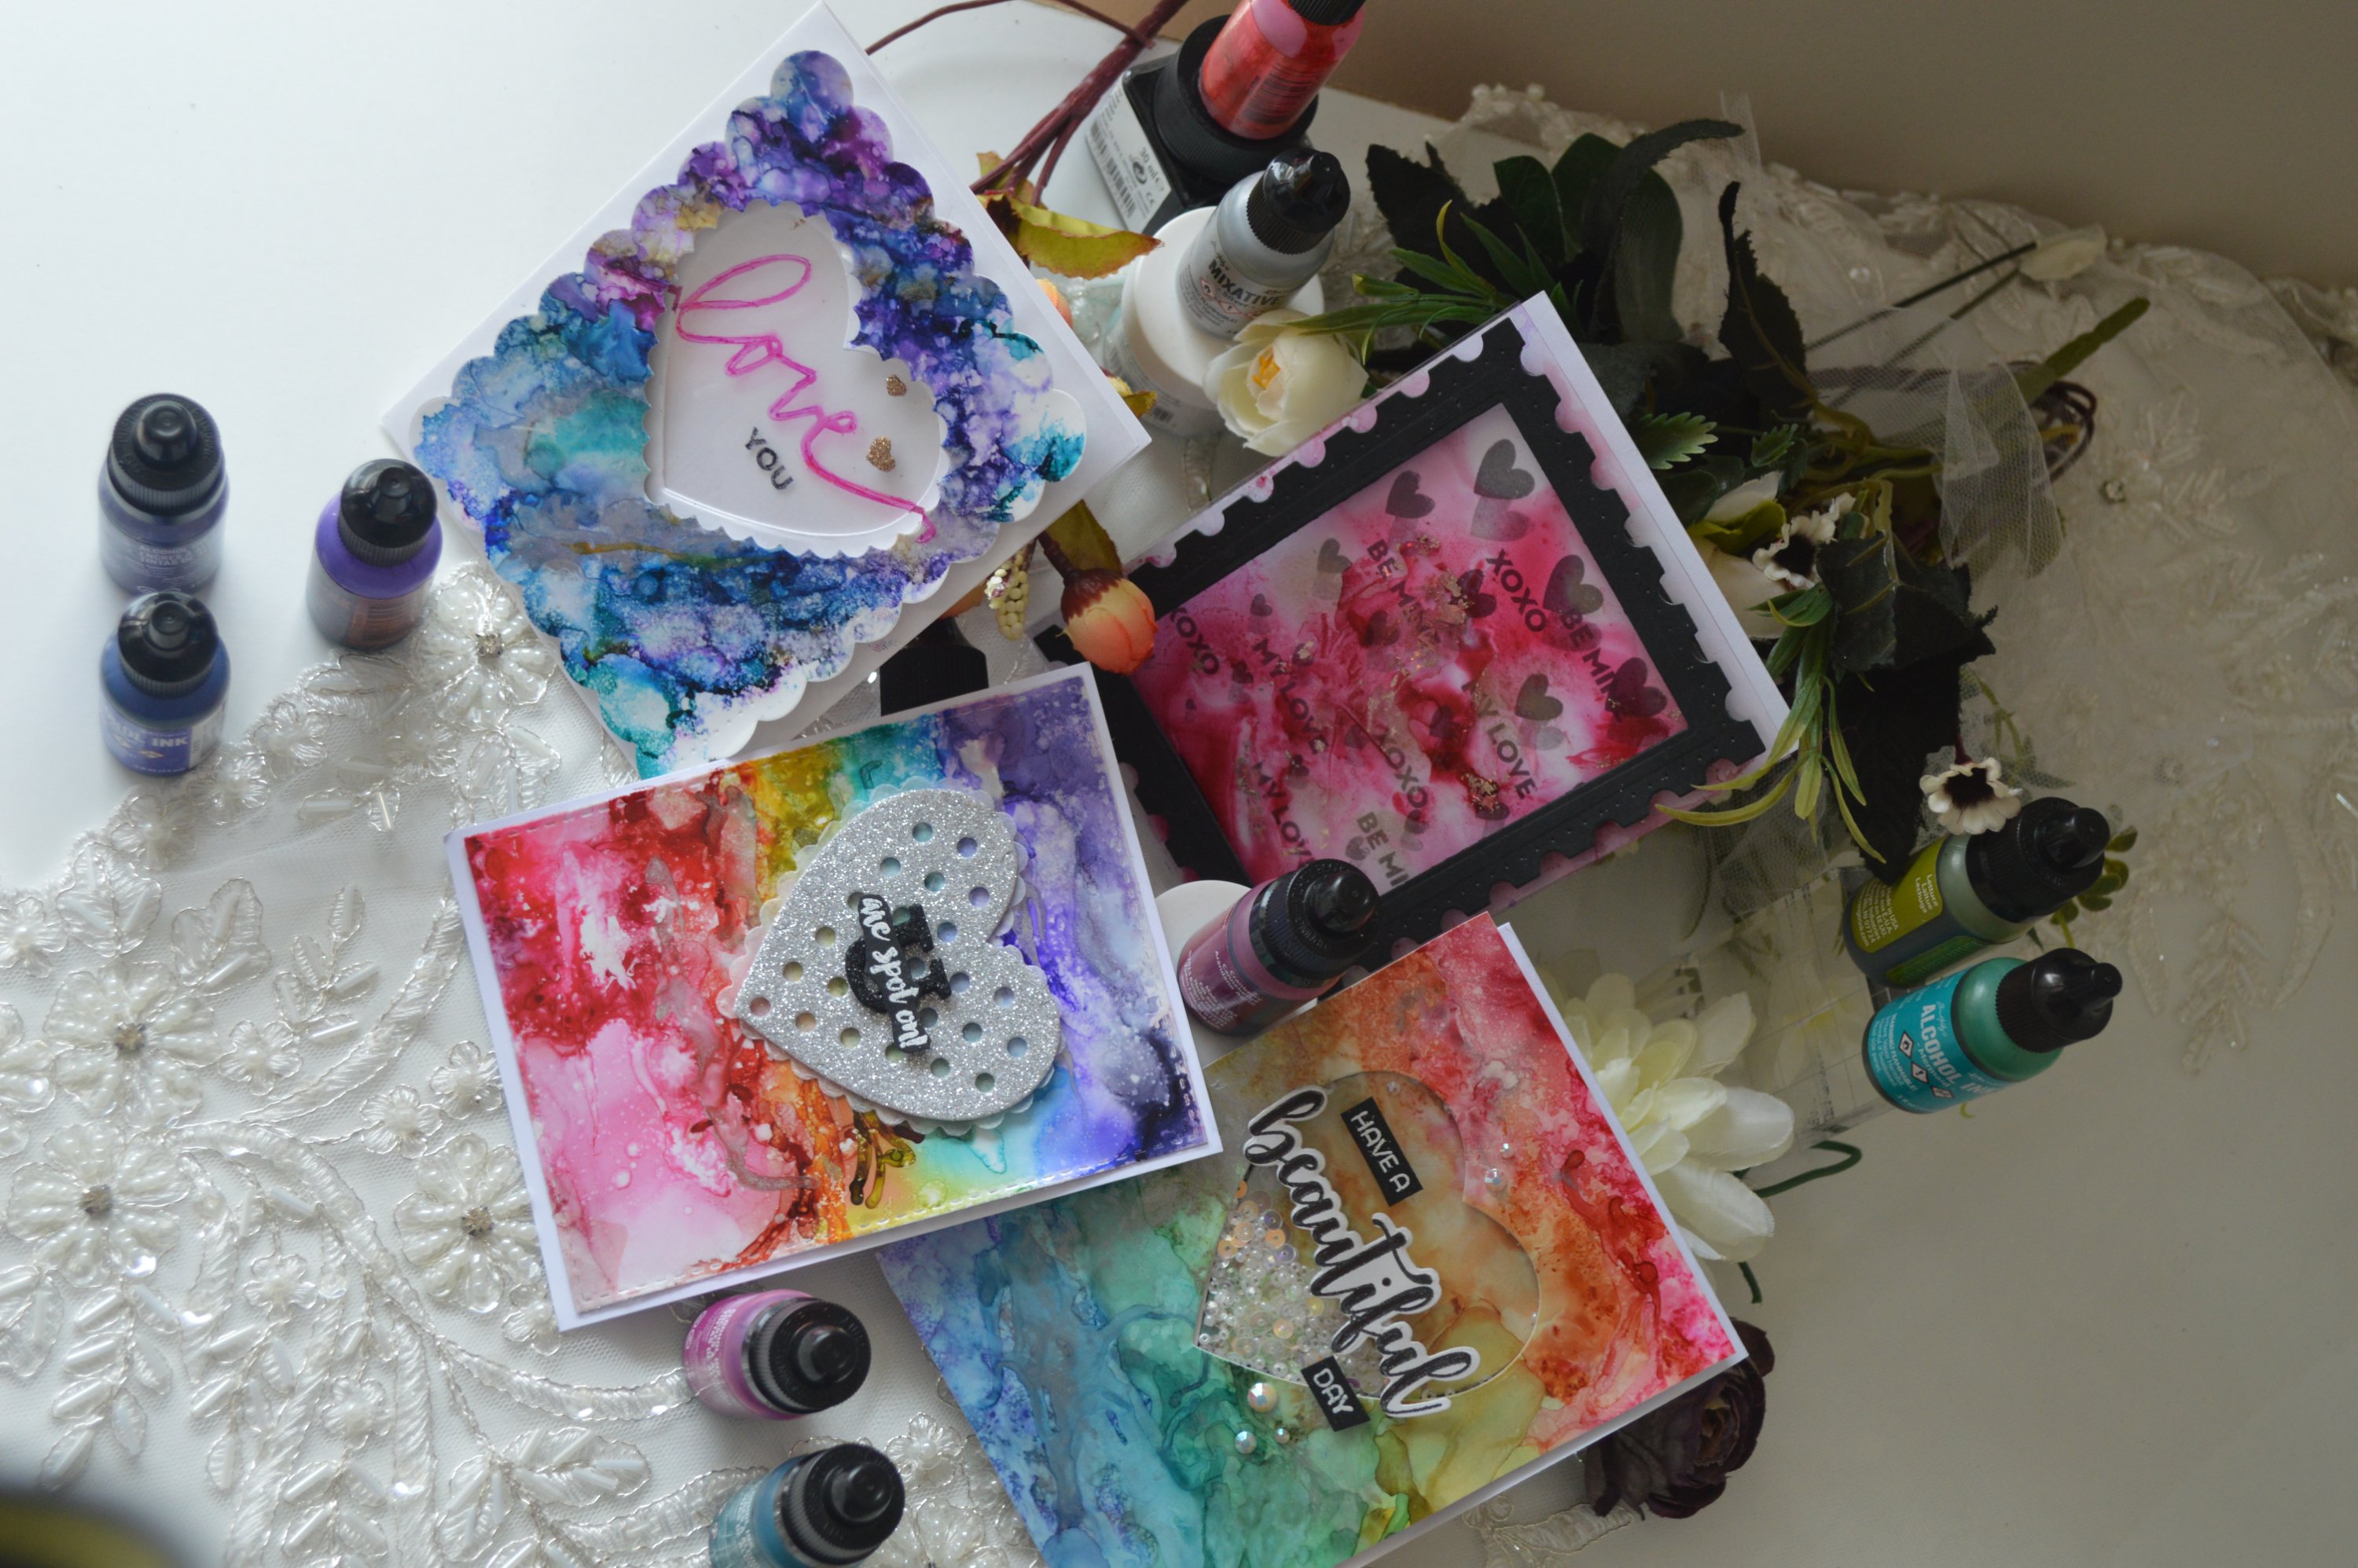
 

I usually found it's a little tricky to design a cards with alcohol inks with all these vibrant colors and busy backgrounds., I was so happy that I figured out how to over come that in this post . You can watch the video for these cheerful cards here :


Let's start the fun part. For my first card I tried these dark vibrant colors from ranger alcohol inks on a yupo paper . Here is some tips for making this card...


# I wet a yupo paper with alcohol solution ( I don't have an alcohol blending solution so I used isopropyl alcohol instead)
# I applied these alcohol inks ( butterscotch , willow, indigo, patina , amethyst, and purple twilight ) as little strips next to each other then I let them to blend , because the underneath alcohol solution it made this blending is going easy .
# I sprayed more blending solution over the blending ink to get them more blended and move the colors around .


# I wanted to add a texture so I added a little strips of silver metallic mixative ink and more blending solution to get every thing smooth
# I used the scallop heart from winnie and walter True Dotty Heart Cutaway to cut in the center of the inked card, then I mounted it over a white card stock
# I wanted this card to be a window card to brighten these strong colored background . So I die cut the white base card with the smaller dotty heart border from the same True Dotty Heart Cutaway in a place that fit with the upper layer


 # I stamped the love and you from winnie and walter In a Word: Love stamp set with permanent inks over a piece of vellum to preserve the open window effect on this card .

For my second card I wanted to try something different, instead of using these vibrant colors I want a less pigmented colors so I diluted a little of inks with blending solution, then I started the fun...
   

here is a little tips for who I achieved this background .
# I applied a little amount of the solution for the base before applying the ink over them .
# when I used the diluted ink it was harder to control the blending I think because it was too fluidly.
# It took more time to dry than the concentrated one over a yupo paper.
# I used almost the same technique as the first card by applying stripes on the yupo, blending them with more solution, then adding the silver tone .
   
# for this card It was a not that vibrant like the others ones so I used the whole paper in making the card , I turned it to shaker I die cut the yupo paper with winnie and walter true dotty heart cutaway fill it with a white sequin to brighten the card.
# for the sentiment I used W&W winnie and walter In Bloom: Ashlee's Rosie Posies with Lydia Evans stamp set.

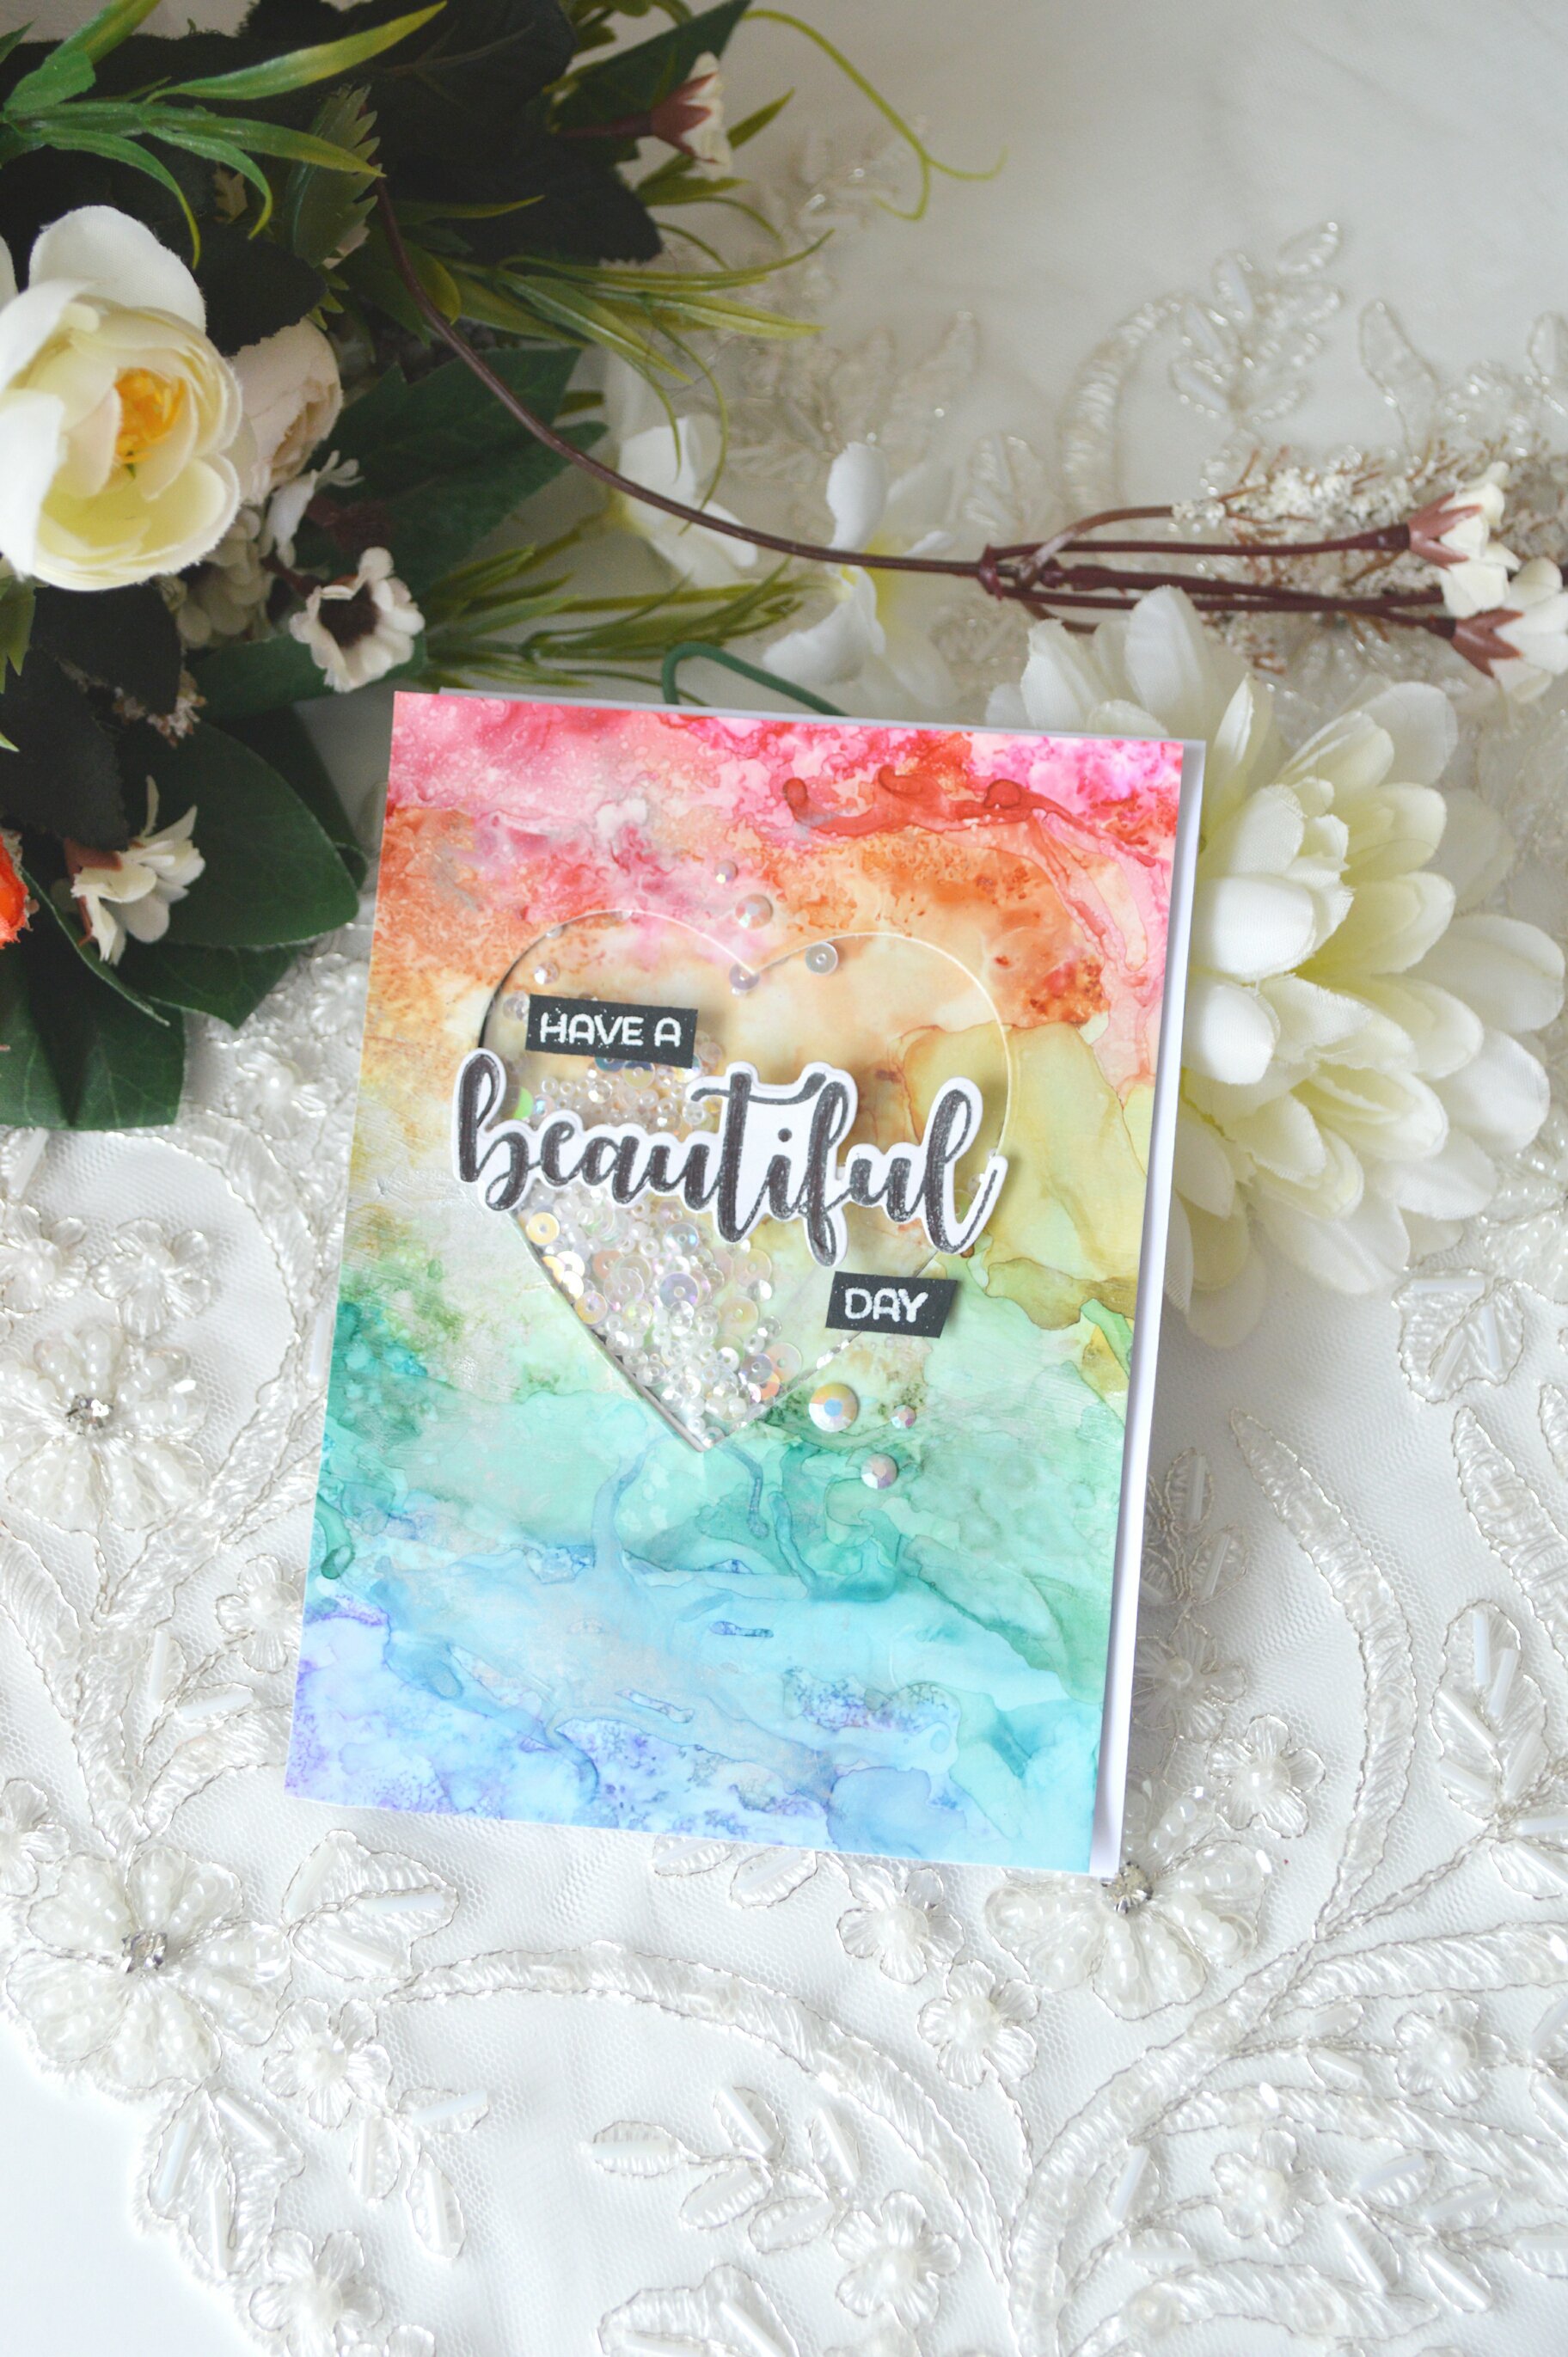
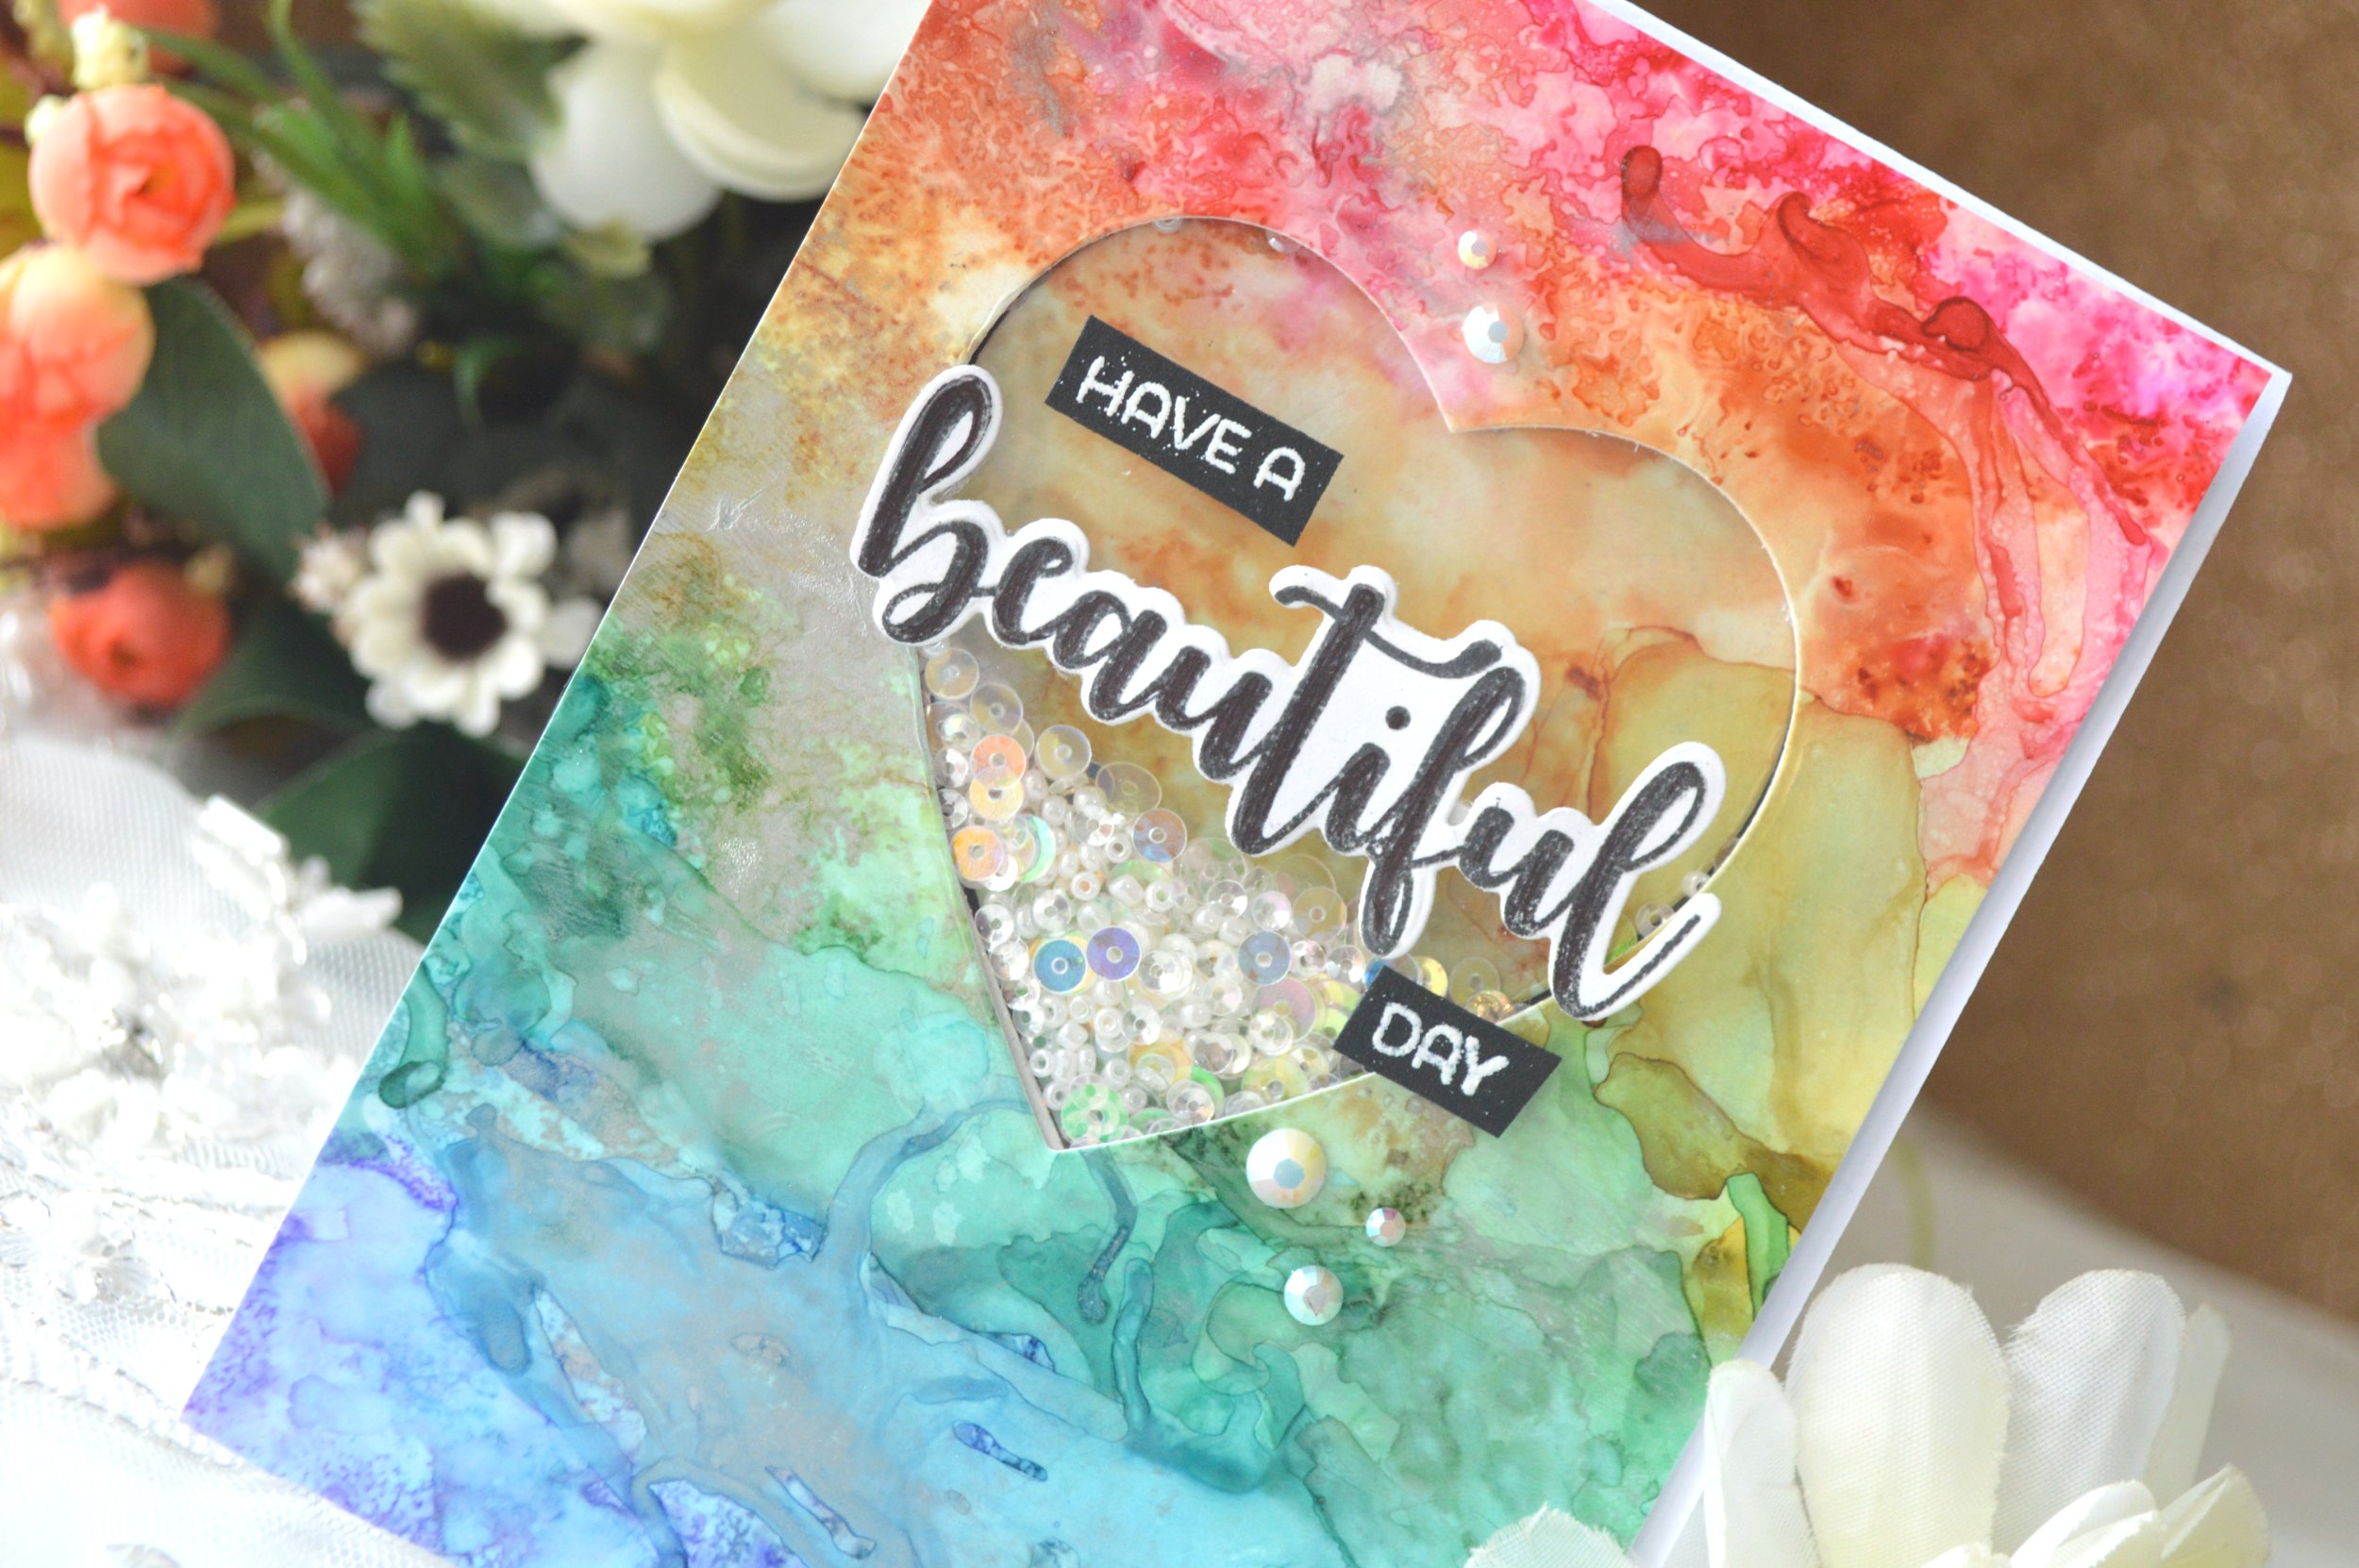
My 3rd card was almost the same like the second but I used the full strength of the alchol ink to make this vibrant rainbow card.


I die cut the spoty heart from winnie and walter true dotty heart cutaway in a silver glittery sticky foam , I placed it over the larger scallop heart from the same die cut set.


For the u I die cut from winnie and Walter Typecast: Cary Letters Cutaways . with 3 heavy black cardstock the upper one was glittery . Then I white embossed this perfect sentiment for this card from winnie and walter Dotty About You with Lydia Evans stamp set.


Finally my last card, although bright red is not my color at all ,but I like this card so much.


In this card I wanted to share with you who I can get almost the same brighter and vibrant colors even if I didn't use yupo , by using acetate over a white card stock .
# I applied some blending solution at the acetate , then I used different shades of pinkish red ranger alcohol ink over it.
# I placed a white scrape of paper under the acetate to see who they blend . I added some gold metallic mixative inks .
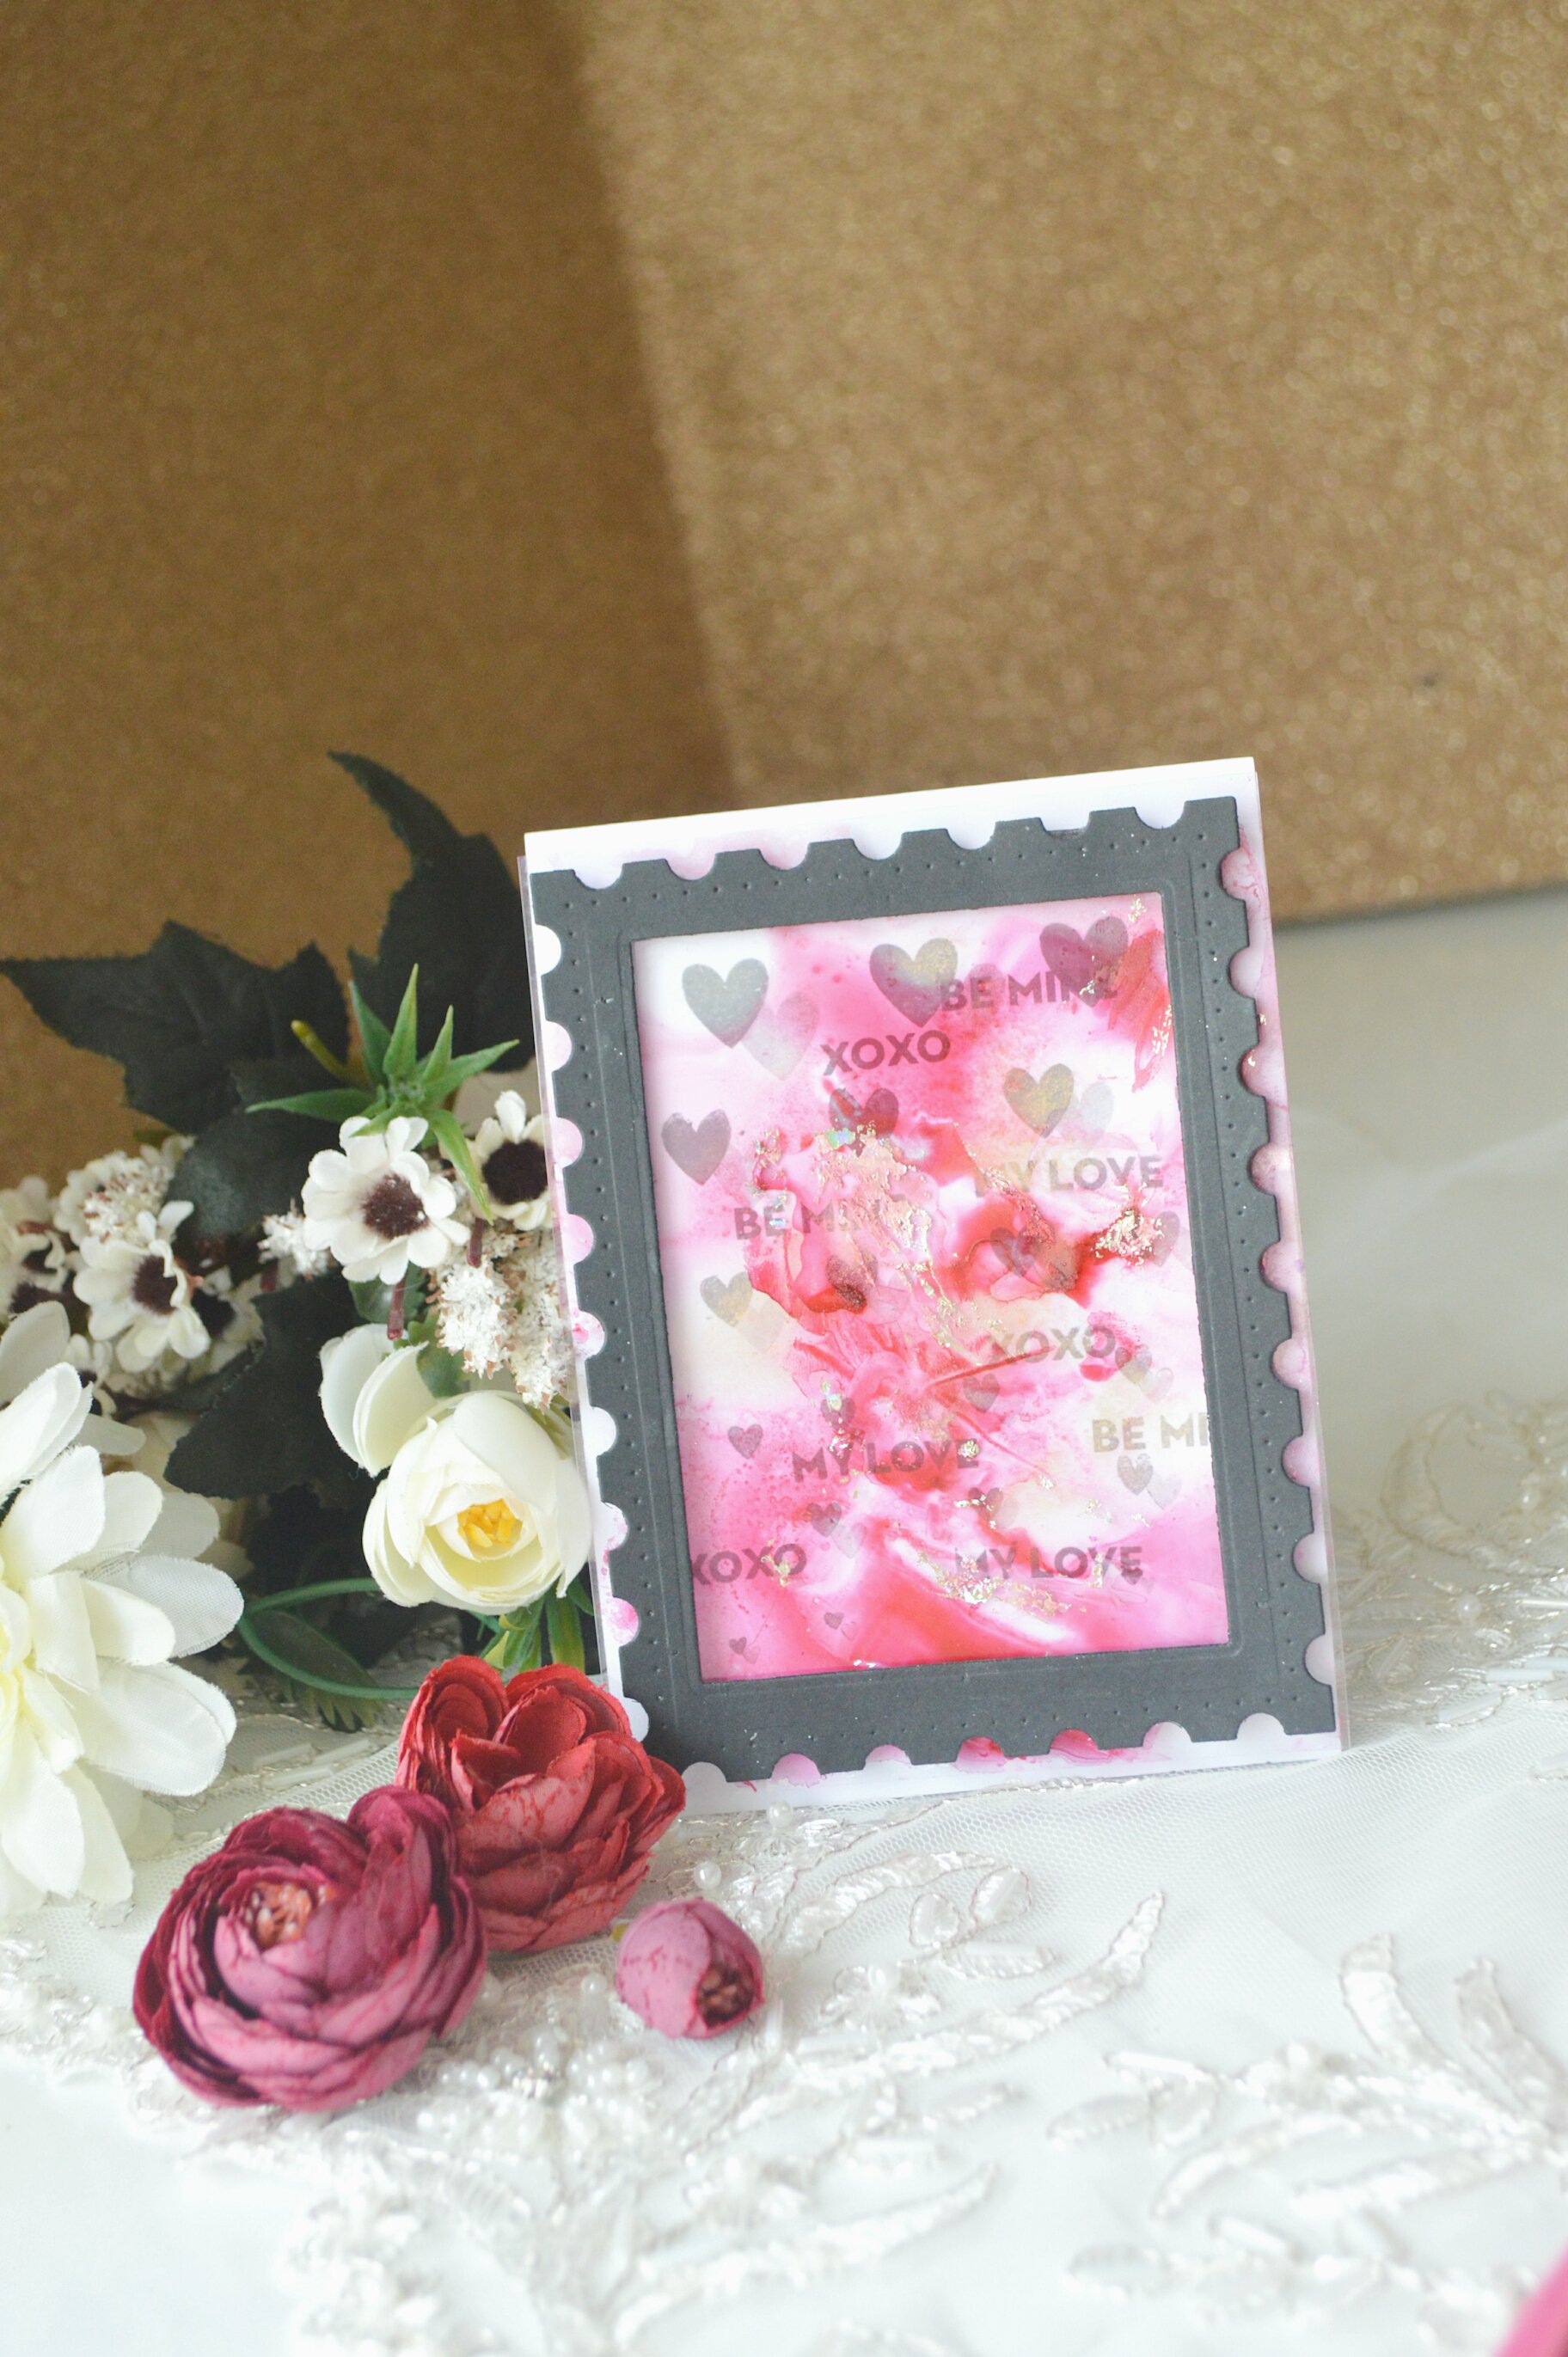
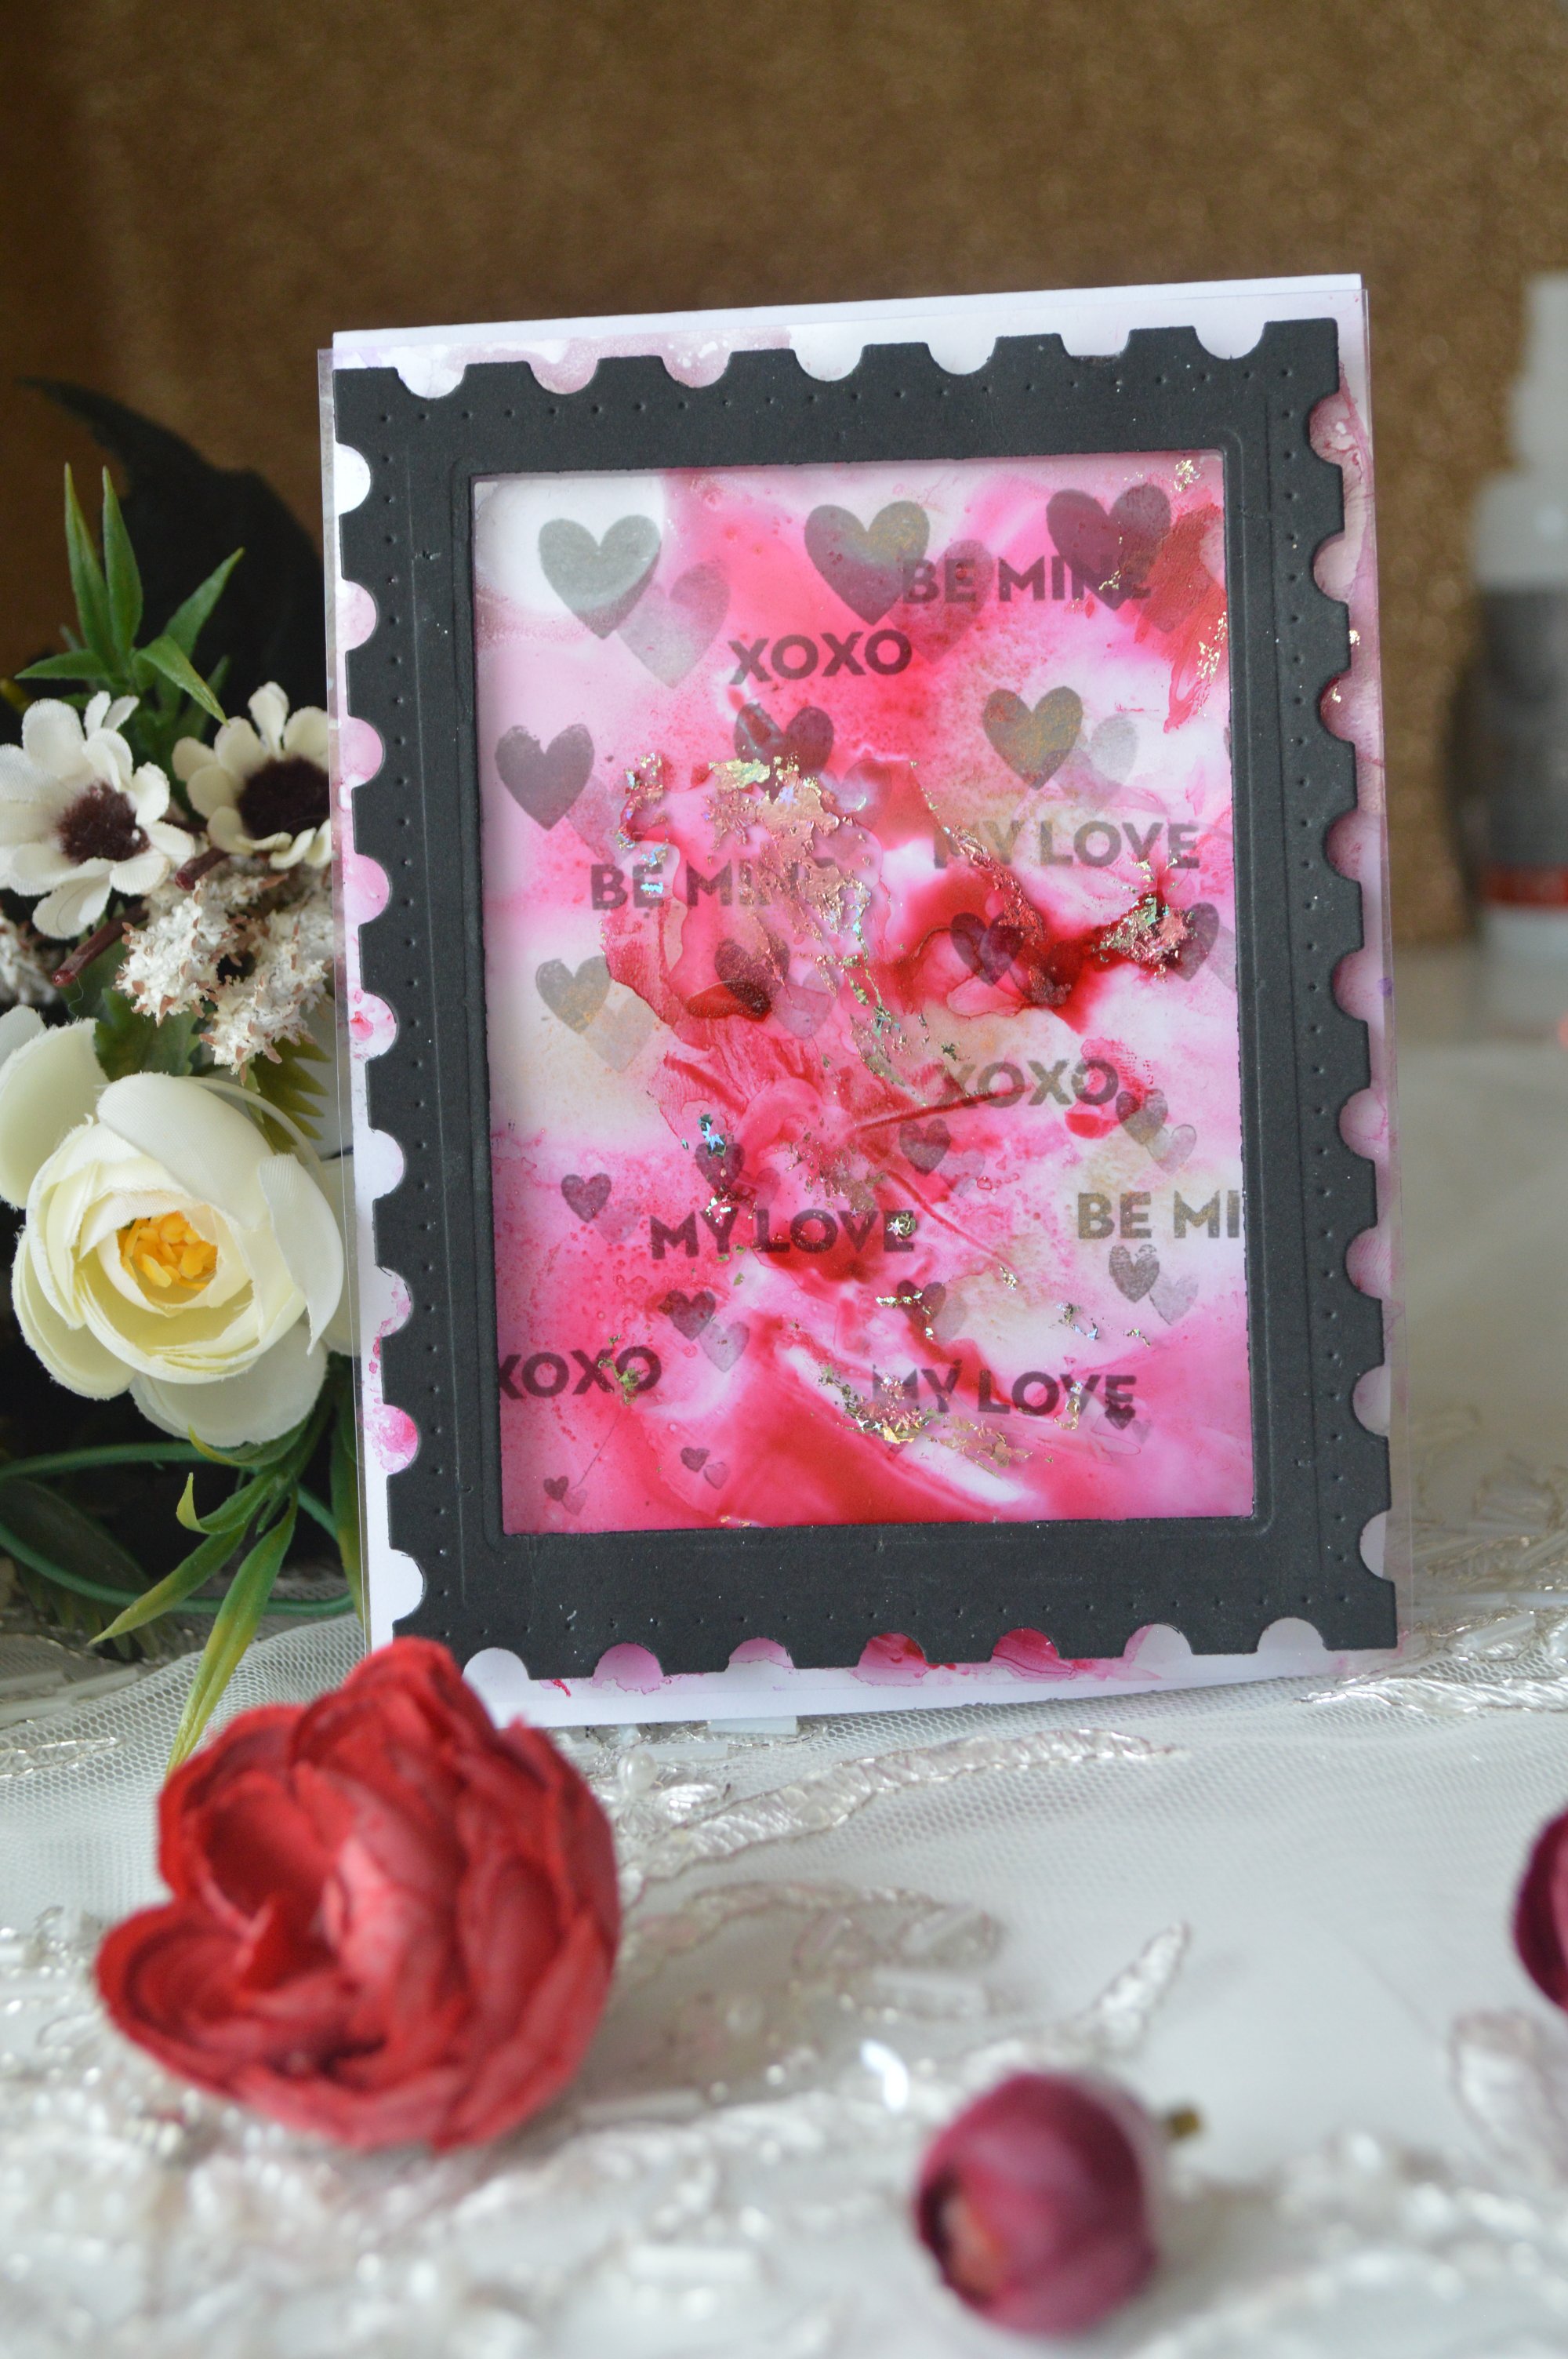
 

# before the inks were almost dried . I applied foil sheet randomly over some area . Stick on the sticky ink and got the glittery foil accent.
# I designed the white base card . I stamped these heart from winnie and walter Scenery: Seeing Hearts with first full strength ink and second faint generation trying to follow some order by placing the biggest heart in the top then the smaller in the down . I stamped the smallest one at the bottom .
# I stamped randomly some mini love sentiments from winnie and walter In a Word: Love stamp set between the hearts .
# I placed the acetate over it with some dimensions foam tape. Then I die cut this frame from winnie and walter Essentials: Lana Cutaways using heavy stock black cardstock
# I found this card would be extra busy if I added extra sentiment so I left the card without any more main sentiment.


Thank you so much for joining me today ! Don't forget to head over to my blog maryams craft and leave a comment on all of my Leading Lady posts for a chance to win a $30 gift certificate to winnie and walter store , generously provided by Shay!!


Have a great weekend all.
Maryam


w&w-supplies

Saturday, August 18, 2018

August Leading Lady Tracey McNeeley | Take Three

Our August Leading Lady, Tracey McNeely is back for her triumphant third performance!  If you missed her smashing debut you must see it...CLICK HERE or her sensational second performance all about backgrounds CLICK HERE.   It's time to get inky as Tracey has a couple of awesome cards to share!

Without further ado, Tracey...

Here we are back to Saturday once again and I am taking over the Winnie & Walter blog with my Week 3 post as the August Leading Lady.


This week I am focusing my projects on ways that I love to use Distress Oxide inks with my stamped projects! For me I was instantly in love with the properties of these inks and how much fun they are to use and blend together. I use them for blending, for smooshing, for watercolouring and even for stamping.

For my first project I combined embossing with blending to create this card that I made for my husband for today which is our 28th wedding anniversary! I actually made two cards the same but used different ink colours. I started by white heat embossing the hearts from Scenery: Seeing Hearts across the top of my panel of Bristol Smooth cardstock. I use Bristol Smooth cardstock for most of my Distress Oxide ink projects because of the way the inks blend so smoothly on it and also because it can take a bit of water. After I embossed the hearts I blended my background on the first card with Tumbled Glass, Mustard Seed, Ripe Persimmon and Warm Lipstick Distress Oxide ink. As I blended the inks I used clean pieces of white copy paper to hold the paper as I blended so that I didn't get any fingerprints on the panel as I worked.

After a blended the ink I use a clean paper towel to wipe the excess ink off of the embossed hearts. I flicked some water on to the panel and absorbed it back along with some of the colour with clean paper towel so you can see some of the oxidization. My sentiment 'love you' came from the In a Word: Love clear stamp set. It was clear heat embossed with VersaFine Onyx Black ink.


For the second project, with the same design, I blended Tumbled Glass, Squeezed Lemonade and Worn Lipstick Distress Oxide inks.  I flicked some water on to the panel and absorbed it back along with some of the colour with clean paper towel so you can see some of the oxidization. Once again my sentiment 'love you' came from the In a Word: Love clear stamp set. It was clear heat embossed with VersaFine Onyx Black ink.


My third and final project was done with my most favourite technique to do with Distress Oxide inks--smooshing. I laid some Shaded Lilac, Seedless Preserves and Crushed Olive Distress Oxide inks on to my craft mat and spritzed the inks with water. Then I took a 5 1/4" x 4" panel of Bristol Smooth cardstock and quickly swiped into through the inks, on an angle, in one pass and set it onto a piece of paper towel to dry. Once dry I stamped my image from Welcome to the Family with Evelyn T. Designs and the tiny 'sweet baby' on to the panel. The In a Word: Cuddles Cutaway was cut three times from white cardstock and glued together for dimension before it was adhered just above the 'sweet baby' sentiment.


I have a  $30 gift certificate for Winnie & Walter gift certificate to giveaway on my blog, In My Creative Opinion. Visit all four of my Leading Lady posts this month and leave me a comment. On September 3rd I will draw a name from all my comments from over the month to win.  You can enter once each week so you could have up to four chances to win...good luck!


I hope you enjoyed learning how I use Distress Oxide inks to created backgrounds for my cards. See you again next Saturday for another Leading Lady post. Have a great day.


w&w-supplies

Saturday, June 2, 2018

June Leading Lady Caly Person | Take One

Today is a wonderful day as I get to introduce our June Leading Lady Caly Person.  I am not sure what Caly can't do...seriously this lady impresses me mightily!  Not only is she a dedicated wife and mother, she is incredibly intelligent, kind, sweet, organized, meticulous, ambitious and did I mention she is extremely talented?!?  She also has a cool head in a hot situation. :-)  

I am really excited to see what Caly will be creating this month as she takes us on an adventure of her own design on Saturdays in June on the w&w blog.

Please give Caly a big round of applause to welcome her as she steps onto the stage for her first performance as our June Leading Lady! 


Hi Friends! Thanks for joining me for my month-long Leading Lady feature for Winnie & Walter! I've said this before from meeting Shay (the owner) at Stamping Away - but I can't say enough nice things about this wonderful woman! She's funny, she's talented, she's kind, and wonderfully generous! I'm so happy to be her Leading Lady for the month of June!

  Caly_Person_june2018 

Ok...so my profile doesn't look like that - but let's pretend I'm '30s-classic for the month, shall we? I LOVE IT! For the month, I want to focus on different color mediums. Today, we have some simple stamped images that are lightly shaded with colored pencils for added depth. My first card is made using the WW In a Word: Love stamp set. Let me first say that I adore (trying to use a word other than love here) WW's In a Word cutaways. If you don't know what I'm talking about, you seriously need to go to the WW shop and check it out. They're word dies and what makes them special is the words are all staggered - so unique (see what I mean in the image below)! In this set - you get all different styles of the word love.

  WW Love Shaker 1  
I decided to make a shaker using one of the dies. I wanted the word to stand out - so I kept the panel stark white. Then I used the flowers from the set The Big, The Bold and Extras and its coordinating dies to accent the card. I stamped the flowers using Catherine Pooler Inks (Polished, It's a Girl, Mandarin Spice, and Garden Party) and shaded the flowers and leaves with some colored pencils. For the shaker space, I decided to give it some ombre color and inked the background up with Abandoned Coral Distress Oxide ink.

  WW Love Shaker

I had some extra leaves and tucked them into the word and I really think that balanced out the card. I used Pretty Pink Posh Sequins (pink peonies, watermelon, pink blush) to fill the space and called it good. The sentiment is from the In a Word: Love stamp set - simple and elegant.

This month-long feature will be every Saturday in June. If you stick around until the end of the month, you could win a fabulous gift card from Winnie & Walter. I will be drawing a winner from comments on my blog (on the final post) at the end of the month! w&w_30giftcard

 Thanks for joining me this week! I'll be back next week to share more WW love!

XOXO, Blog Signature

SUPPLIES: *NOTE: To view where these items can be purchased, click on the linked abbreviations below (SSS for Simon Says Stamp, EH for Ellen Hutson, AMZN for Amazon, etc.). Affiliate links may be used (at no additional cost to you) – thank you for your support!

WW In a Word:  Love WW In a Word: Love 
WW In a Word:  Love Cutaways WW In a Word: Love Cutaways 
WW The Big, the Bold and Extras WW The Big, the Bold and Extras 
WW The Big, the Bold and Extras Cutaways WW The Big, the Bold and Extras Cutaways
Catherine Pooler Inks Catherine Pooler InksCP | WW Memento Tuxedo Black Ink Memento Tuxedo Black Ink HMSB | EH | SSS | AMZN 
Recollections 110 lb Recollections 110 lb Prismacolor Pencils - 72ct Prismacolor Pencils - 72ct AMZN | SSS
ATG Gun ATG Gun EH | SSS | AMZN Mini Multi Medium Matte Glue Mini Multi Medium Matte Glue HMSB | EH | SSS 
White Foam Sheet 12x18 10pk White Foam Sheet 12x18 10pk Tim Holtz Distress Oxide Set 3 EH | HMSB | SSS | SBC
PPP Pink Peonies 4mm PPP Pink Peonies 4mm EH | SSS | PPP PPP Pink Peonies 6mm PPP Pink Peonies 6mm EH | PPP PPP Watermelon 4mm PPP Watermelon 4mm EH | SSS | PPP PPP Watermelon 6mm PPP Watermelon 6mm EH | SSS | PPP
PPP Pink Blush 4mm PPP Pink Blush 4mm EH | SSS | PPP PPP Pink Blush 6mm PPP Pink Blush 6mm EH | PPP Neenah Solar White 80 lb Neenah Solar White 80 lbHMSB | EH | SSS
 

Saturday, May 5, 2018

May Leading Lady Cynde Whitlow | Take One (Video)

Today is a very exciting day as it is the debut of our May Leading Lady, Cynde Whitlow!

I think I am not alone when I say I am dazzled by Cynde's coloring skills along with her stunning use of color and design.  If you have not seen Cynde's work I think you will be mightily impressed and inspired!  


I am really excited to see what Cynde will be creating this month as she takes us on an adventure of her own design on Saturdays in May on the w&w blog.

Please give Cynde a big round of applause to welcome her as she steps onto the stage for her first performance as our May Leading Lady! 


Hey folks!

My name is Cynde and I'm so excited to be here for Winnie & Walter as a Leading Lady. I've been a big fan of Winnie & Walter for a long time and it's a huge honor to design for them!

This month I'm going to bring you four different projects showcasing the fabulous February Release. For my first take I'm going to focus on creative masking. Masking is hands down my favorite techniques for making cards. The sky is the limit folks. I know for some folks it seems intimidating, but it's really not hard. It just takes a little bit more time, but totally worth it in the end.

If you're interested in seeing how I made my card, I have a video to share! You can see that HERE.


To start my card, I'm using the outline LOVE from the In A Word: Love Stamp Set. This Stamp set has a Coordinating Cutaway available as well.  I also use In Bloom: Addie's Garden and In Bloom: Anna's Flora.

Whenever you're going to stamp a more complicated scene like this, it's always helpful to stamp out a plan first. When I do this, I take a piece of plain ol' copy paper, cut it to the same dimensions as my card panel and just stamp away. No masking, nothing terribly strategic. I just want to stamp the images until I find something I like. Or close to it. I can always adjust things when I'm ready to stamp my panel.


The other thing and probably the most important thing to keep in mind when masking and stamping you stamp your images front to back. In other words, foreground to background. I think this is where folks gets nervous. Again, its helpful to stamp out a plan or do as I did in the video and pre build your scene by laying them out how you will want them stamped. So they're going to look piled on top of each other, but it gives you an excellent idea of what order they need stamped in. Just remember, whatever stamp is on top is the one that gets stamped first.

You could definitely do this technique in any medium you want. Watercolor, color pencils, whatever makes you happy. I love Copic Coloring so that's what I did with my card today. I really wanted those colors to pop and I thought a rainbow of flowers would be super fun. Plus the In Bloom: Addie's Garden and In Bloom: Anna's Flora images are large enough they can handle the bolder colors really well.


Coloring in the LOVE was super fun and I can think of lots of different ways you could do that. I wanted my to read more ombre, so I colored darker on the bottom and worked my way out to my lightest color at the top. I also really enjoy how those flowers hang over the word!

To finish off my card, I stamped the smallest heart from the Scenery: Seeing Hearts Stamp Set with black ink. I think they look like tiny embellishments and tie in to the theme of the card.

That's it. I hope you enjoyed my card today!


Be sure to follow along with me this month folks! I will have a super fab giveaway (Thanks Shay!) at the end of the month. All you will need to do is leave a comment on my blog telling me which one of my projects was your fave and why!

Thanks so much for stopping by! Until next time.

Cynde


Supplies used: