Showing posts with label dotty about you with lydia evans. Show all posts

Saturday, November 24, 2018

November Leading Lady Jill Vickers | Take Four

As November ends we sadly must bid adieu to our superb November Leading Lady Jill Vickers.  The last few weeks with Jill has been a spotlight for her dazzling depth and scope of skill, innovation and terrific techniques.  Jill has exhibited her tremendous talent and astounding creativity week after week.  I feel so fortunate Jill shared her talents with us this month and made this month something special.

If you missed her smashing debut you must see it...
CLICK HERE or her sensational second performance sure to ensnare your focus CLICK HERE or her triumphant third performance with a plethora of cards that will have you reaching for dies CLICK HERE!  Today's projects !

Lucky for us all we have her final command performance today.  


I can't believe how quickly November has flown by and that it is already time for my last act! I want to thank Shay for her generosity and her invitation to join this wonderful Winnie & Walter blog for the month. I also want to thank everyone for their wonderful comments - both here and on my blog - they have brought me such joy and I am truly grateful that you took the time to leave them.


So now - onto my finale :)

Last week, I focused on building backgrounds using die cuts - so this week, I am focusing on stretching my stamps to create fun backgrounds.

For my first cards, I used the Scenery: Holiday Trimmings stamp set - this is one of my favourite sets for decorating holiday card envelopes - but the border images are perfect for building backgrounds as well. I stamped the tree image repeatedly across the card fronts in Versamark ink- I did shift the border to the left and the right to change the styles of trees on each row. On one card front, I embossed with detail clear embossing powder, and on the other, I embossed with clear sparkle embossing powder. I then sponged ink across the panels- on the clear embossed panel, I used Picked Raspberry, Mustard Seed, and Salty Ocean to create a rainbow effect. I used Cracked Pistachio, Peacock Feathers, and Blueprint Sketch on the sparkly one. I added a simple white embossed greeting from In A Word: Merry to each of the panels, and a few silver star sequins to a few of the trees before adhering the foam-mounted panels to some cards bases dressed up with silver glitter washi.


For my next cards, I wanted to create a "knit sweater" style background - there a quite a few background stamps that do this but I was pretty sure that I could make my own. I used two more borders from the Scenery: Holiday Trimmings set, a border from the Julie's Roses set (a 2016 Black Friday W&W Special set), and a row of hearts from Scenery: Seeing Hearts. I stamped two panels - both using light grey ink - one onto a white panel and one onto a light grey panel for a tone-on-tone look. This process is really straightforward using the MISTI - the hardest part is deciding what the pattern should look like but once the stamps are lined up, it is just a matter of shifting the panel up and down to create the pattern.


To complete the grey tone-on-tone card, I used some stamped images from In Bloom: Debra's Poinsettia with Lydia Evans and In Bloom: Victoria's Very Merry Flowers with Lydia Evans as well as an embossed greeting from Sentimental Winter and a scattering of crystal gems. To complete the white panel card, I added a pink ombre stamped mug from Warm Wishes To You, a greeting from Sentimental Birthday and a few pink gems.


For my last card, I used the swirl stamps from the Dotty About You with Lydia Evans set to create a Van Gogh inspired wintery background. I stamped the panel using a light blue ink - I did do some masking as well to avoid the overlaps but it was pretty easy to cut the masks. I added the panel to a light blue card base. To complete the wintery scene, I added the skiing bear from Winter Wishes with Evelin T Designs (seriously - how cute is he?), Copic coloured in soft colours. To finish the card, I silver embossed sentiment from the same set (after doing some minor stamp surgery to position it linearly) and a few iridescent silver-blue snowflake sequins.


I love creating backgrounds like this, and I could have easily done many more with all the wonderful Winnie & Products but unfortunately, I ran out of time....  I do hope that this post has given you some ideas on how to stretch your stamps to create backgrounds, and that you enjoy it as much as I do.

Shay has kindly offered up a $30 Winnie & Walter gift card for me to give to one lucky commenter on my blog, My Life in Paper For your chance to win, leave a comment on this post and/or any of my leading lady posts and I will randomly pick a winner from all the comments left by November 30th.


Thanks again for all your lovely comments and your support for my Leading Lady act - it was so much fun! 
Jill


w&w-supplies

Saturday, October 6, 2018

October Leading Lady Trina Pham | Take One

Happy World Card Making Day!  Hope you are enjoying your day so far.  You can find more details HERE.

We have another awesome post for you today introducing our October Leading Lady Trina Pham!  Trina caught my eye with the incredible cards she submitted to our challenges.  Her cards are impeccably designed and executed with a flair for the dramatic and full of humor and cleverness.

I am really excited to see what Trina will be creating this month as she takes us on an adventure of her own design on Saturdays in October on the w&w blog.


Please give Trina a big round of applause to welcome her as she steps onto the stage for her first performance as our October Leading Lady! 


Hello there!  Look who's the lucky Leading Lady this entire month at Winnie & Walter!?  I KNOW!... oops, didn't mean to yell.  Can you tell I am thrilled and excited?  When I first saw the e-mail from Shay inviting me to guest design this month, I was shocked, ecstatic, overwhelmed and nervous all at once!  I think I'm still in a little disbelief, but don't pinch me because I don't want to wake up from this amazing dream! 😜   I love their products and I am so honoured to have this opportunity.  I hope you will join me every Saturday this month.
So for my debut week, I am hash tagging it #favourites.  My cards are mostly clean and simple (CAS), and masking is my favourite technique I use quite often to help preserve that white space indicative of CAS cards.  I also love bright, cheery colours, so incorporating rainbow colours into my cards is another favourite.  These two favourites are the basis for my cards today.


FIREWORKS

First up is a rainbow birthday card.  Birthday cards are needed all year round, and I make these cards the most.


Started by trimming a piece of X-presss It cardstock down to A2 size.  Stamped the cats from Purrfect with Evelin T Designs with black Copic friendly ink.  Masked them, then die cut a reverse circle mask from masking paper using Big Round Balloon cutaways.  Adhered the reverse mask over the cats,  then white heat embossed the images from Dotty About You.  Sponged Picked Raspberry, Wilted Violet, Squeezed Lemonade, Peacock Feathers, Twisted Citron, Tumbled Glass, Faded Jeans and Chipped Sapphire distress inks to create the fireworks background.  Wiped off excess ink with a paper towel.


For some sparkle, spritz with a DIY shimmer spray.  Removed the masks, then coloured the cats with warm and cool grey Copic markers.  The sentiment from Wishing You with Evelin T Designs were heat embossed.  'Wishing you' was black heat embossed directly on the panel and the rest was white heat embossed on a black strip.  Adhered the panel to a white card base to finish.


CRITTERTREE

My second card is a Christmas card.  Christmas is a my favourite season.  I cherish the many fun festivities spent with family and friends.  And no surprise, Christmas cards are my favourite cards to make.  I am using my favourite critter penguin from Season's Tweetings with Evelin T Designs.  In fact, I posted a card a few days ago with him.  I didn't think he could get any cuter,  but how about a whole group of him in a crittertree?


This card is masking on steroids! *lol*😂  It is actually my second attempt because I smeared black ink on the first one.  On Neenah cardstock and starting at the bottom with the middle guy, stamped and masked, working my way up to the top.  Masked a slope next, then blended Broken China distress ink for the background.


Removed all masks and coloured them in with Copics.  Black heat embossed the sentiment from Sentimental Winter.  For some interest, die cut the panel using Essentials: Audrey's Cutaways.  Mounted with white fun foam onto a white card base for some dimension.  Clear shimmer on the hat brim and pom-pom finished off the card.  It was difficult to capture it in the photo.


And as I was cleaning up, I had an "ah-ha" moment.  The ink smear on the first one was in the background, leaving the crittertree untouched.  What a shame to see all that stamping and masking go to waste.  I fussy cut the crittertree out and create a bright and colourful non-CAS card.


The rainbow background was created with Distress Oxide inks (Squeezed Lemonade, Picked Raspberry, Salty Ocean and Twisted Citron) on mix media paper.  I used my favourite method and added a flurry of snow with a white gel pen.


And just like that, I have two rainbow crittertree cards two ways!


GIVEAWAY

Shay has kindly offered up a $30 Winnie & Walter gift card for me to give to one lucky commenter on my blog Phamtastic Design.  For your chance to win, leave a comment on this post and/or any of my leading lady posts and I will randomly pick a winner from all the comments left by October 31.


That does it for me this week.  As it is World Card Making Day (WCMD), I want to wish you happy WCMD!  If you haven't done so, check out the challenges Winnie & Walter is hosting in celebration of this event HERE.  Thank you for spending your time with me.  Have a wonderful week.


w&w-supplies

Saturday, September 15, 2018

September Leading Lady Maryam Shalaby | Take Three (Video)

Our September Leading Lady, Maryam Shalaby is back for her triumphant third performance!  If you missed her smashing debut you must see it...CLICK HERE or ethereal and enchanting cards from her sensational second performance CLICK HERE.   Today's cards are incredible inky masterpieces!

Without further ado, Maryam...


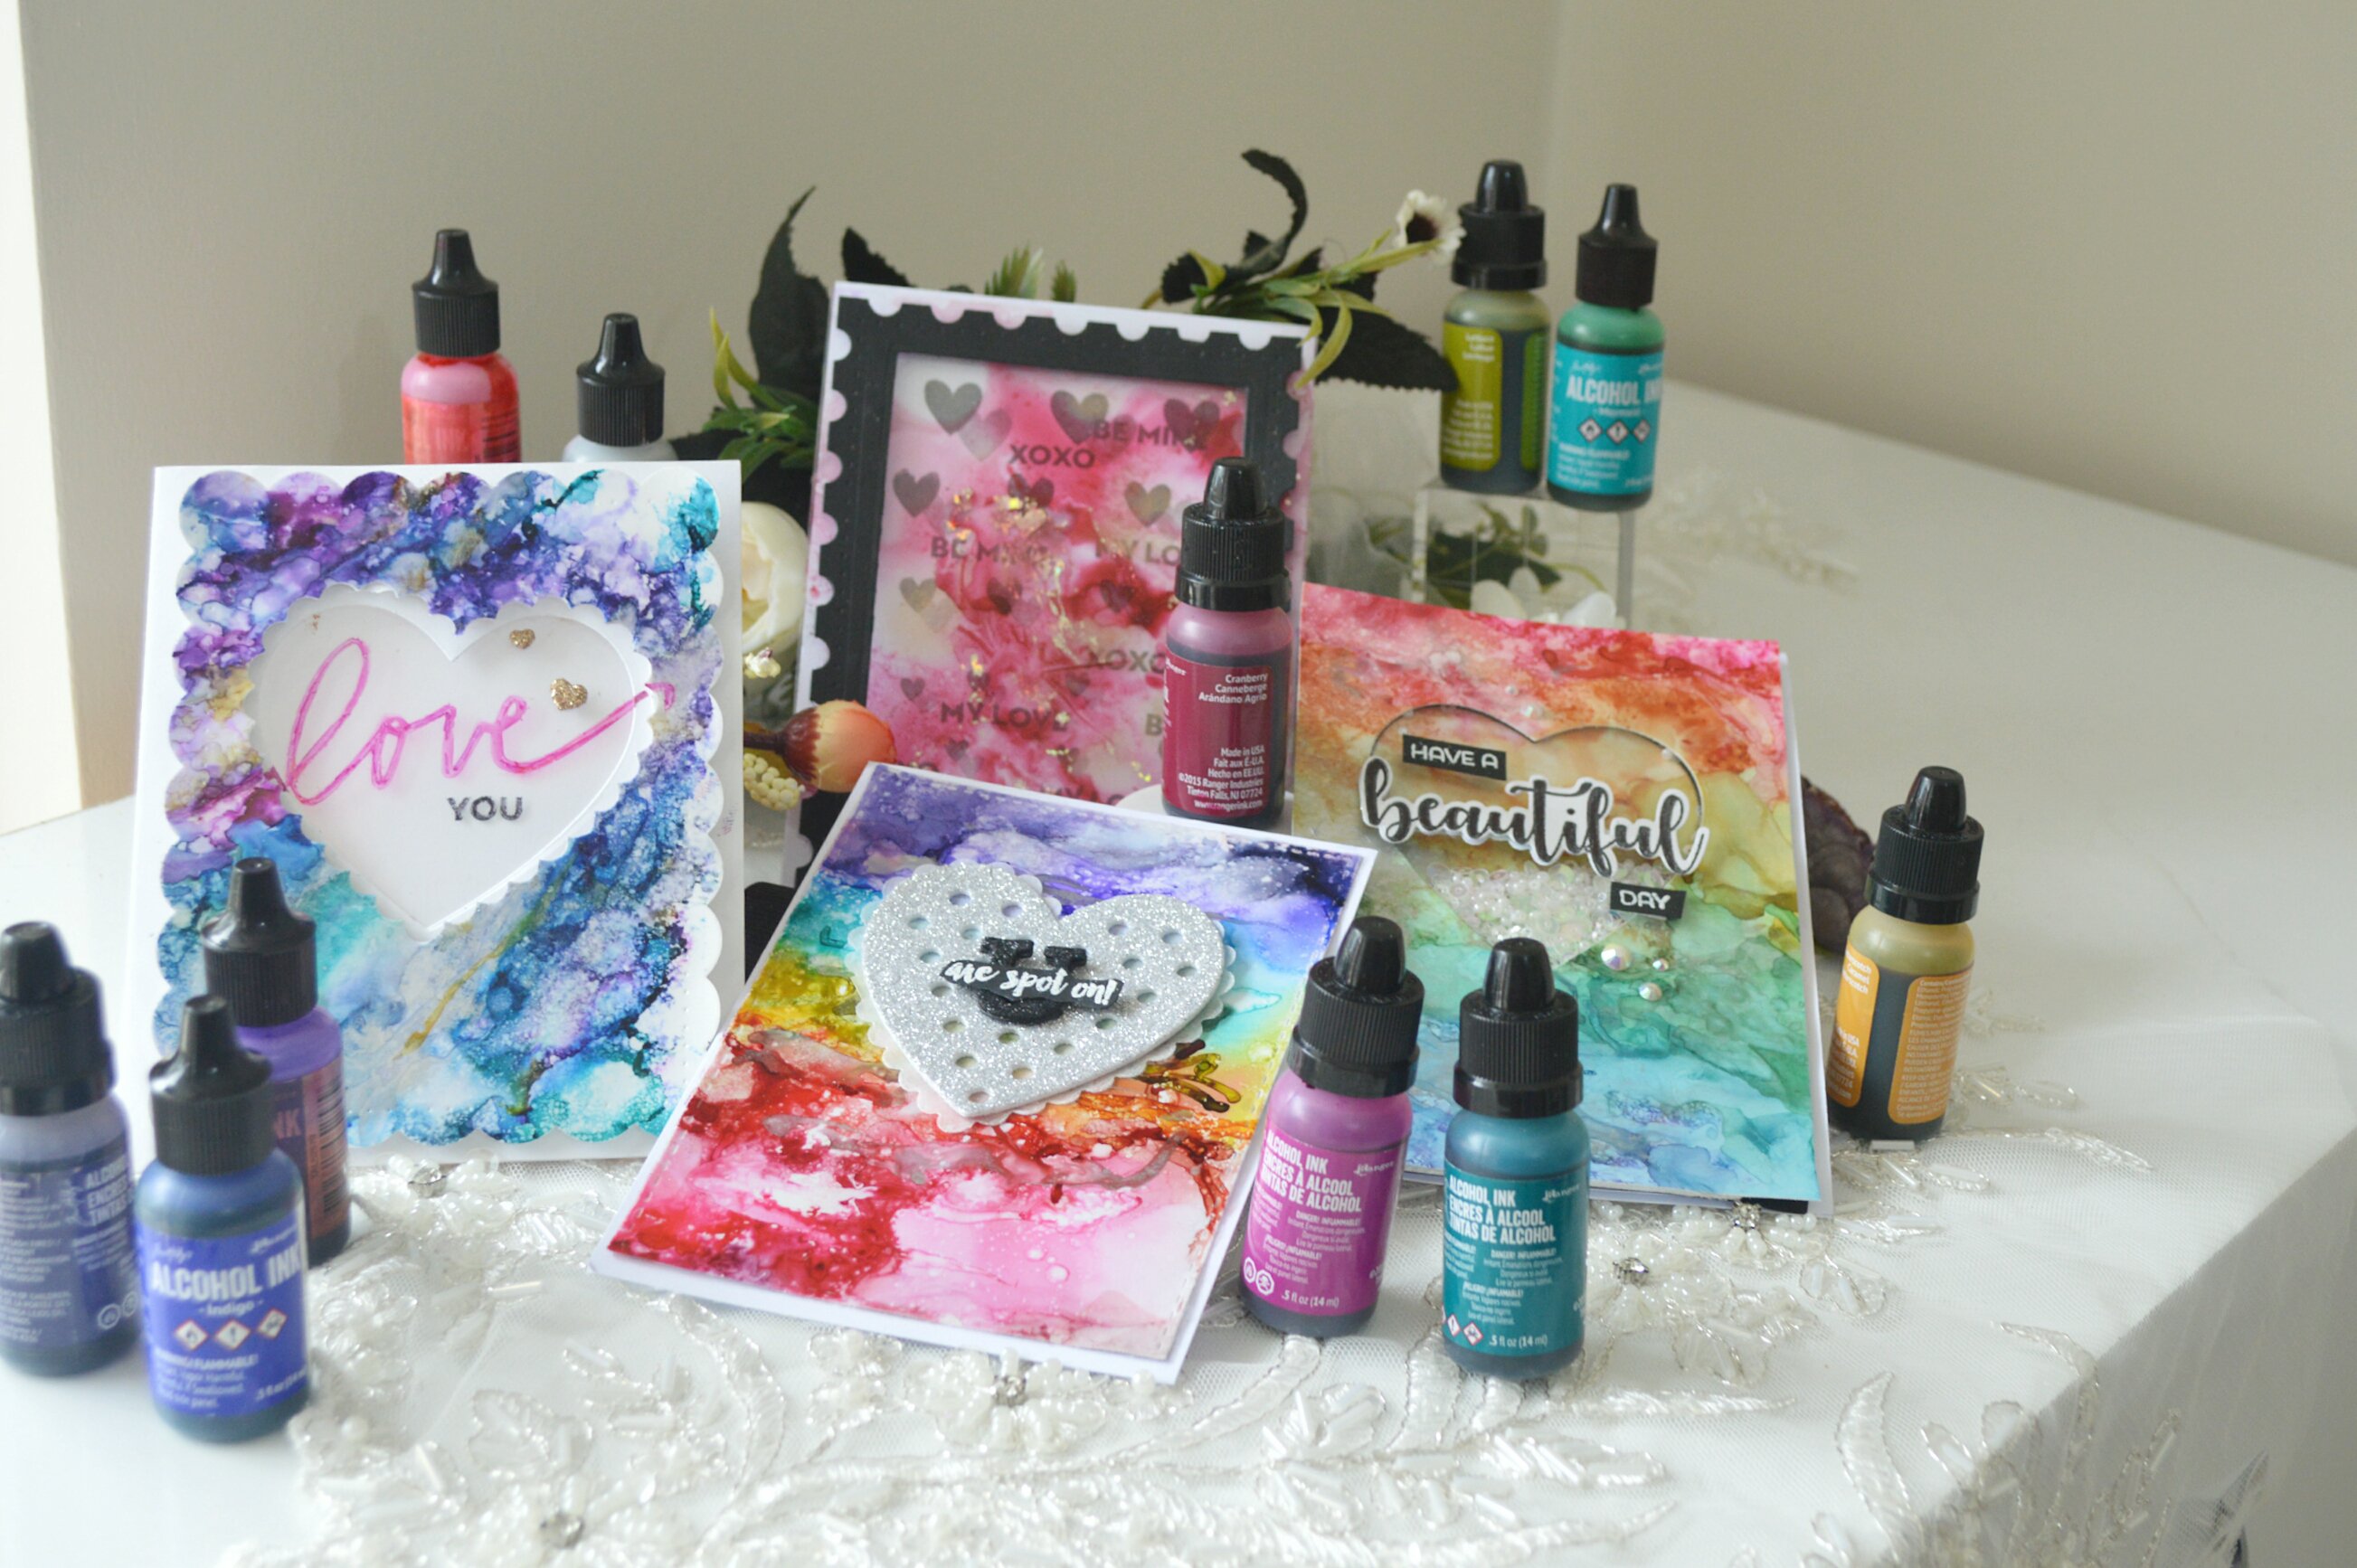
A little story about how I mad these cards. I was trying for the whole week to make a cards that I would like to share it with you . I was writing a list for the techniques that I would like to share with you in this month but I wasn't in the mood to make any of them . And after few days of trying I realized that I lost my mojo .It’s a Bad timing, for not to be in the crafty mood .I Wondered if I should try my magical description for returning back my mojo. Usually when I loose my mojo I grap some of ranger alcohol ink and play with them there vibrant colors elevate my mood and brighten my mind.


I usually found it's a little tricky to design a cards with alcohol inks with all these vibrant colors and busy backgrounds., I was so happy that I figured out how to over come that in this post . You can watch the video for these cheerful cards here :


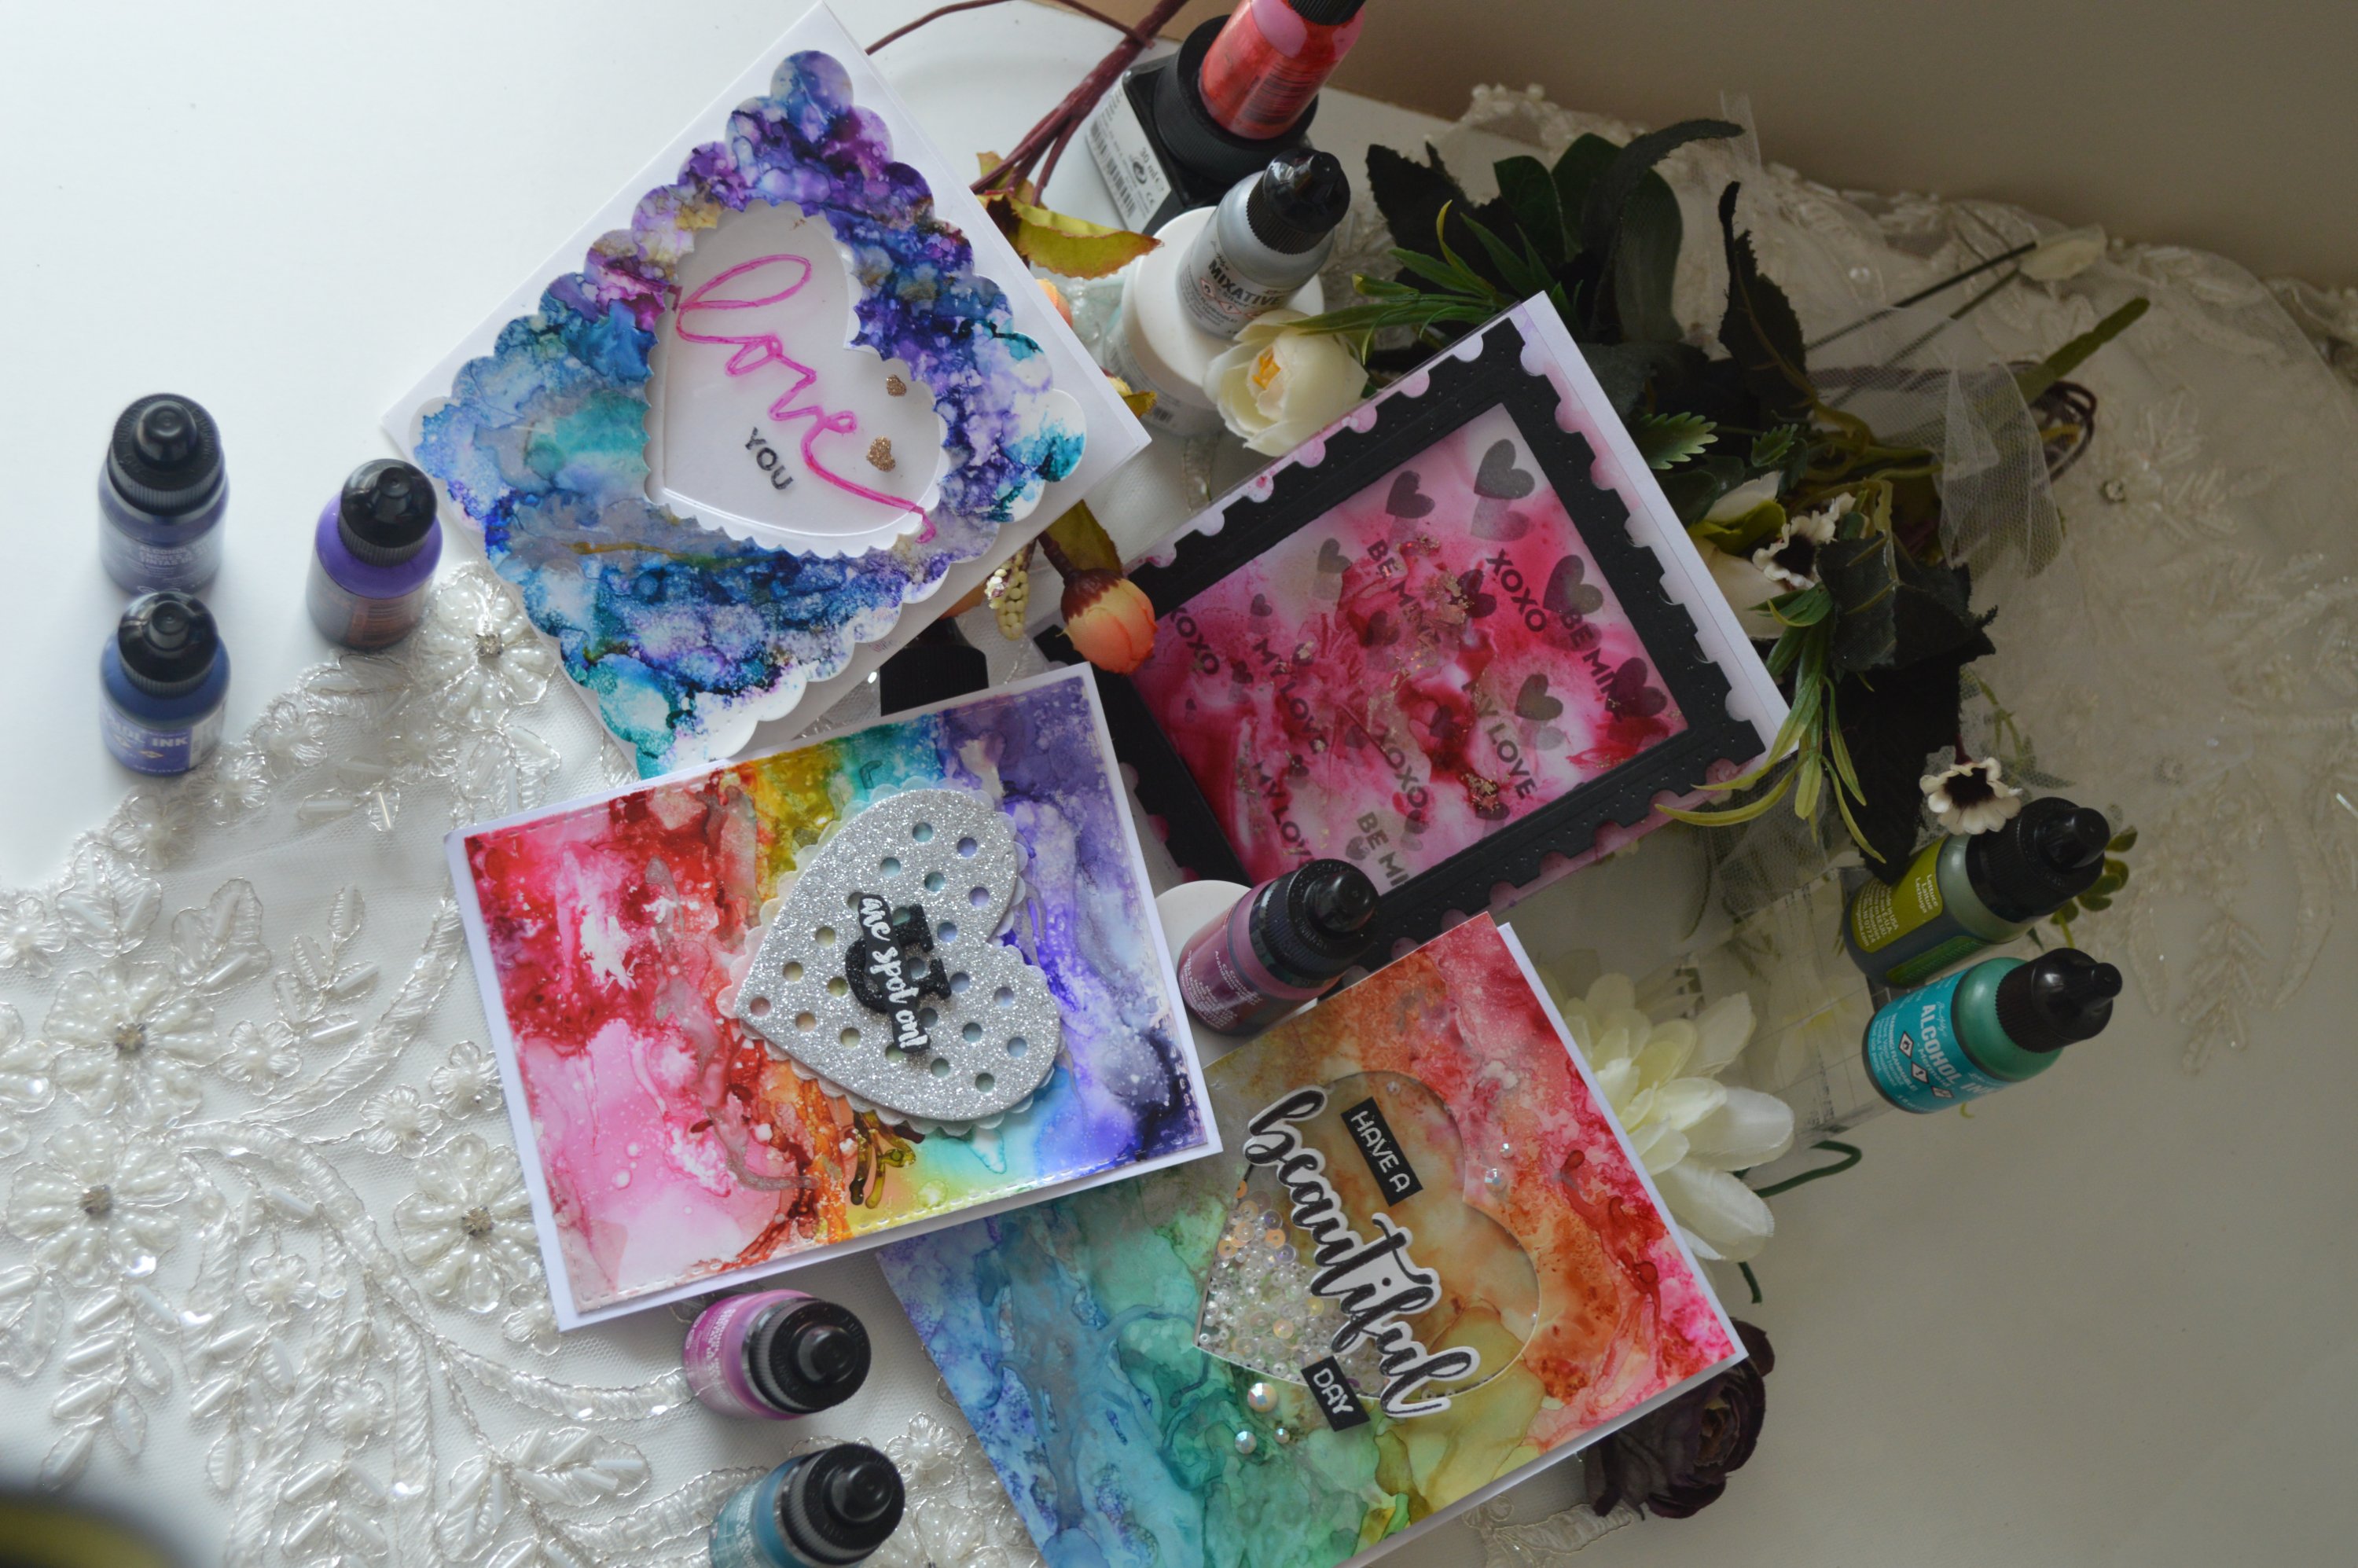
Let's start the fun part. For my first card I tried these dark vibrant colors from ranger alcohol inks on a yupo paper . Here is some tips for making this card...


# I wet a yupo paper with alcohol solution ( I don't have an alcohol blending solution so I used isopropyl alcohol instead)
# I applied these alcohol inks ( butterscotch , willow, indigo, patina , amethyst, and purple twilight ) as little strips next to each other then I let them to blend , because the underneath alcohol solution it made this blending is going easy .
# I sprayed more blending solution over the blending ink to get them more blended and move the colors around .


# I wanted to add a texture so I added a little strips of silver metallic mixative ink and more blending solution to get every thing smooth
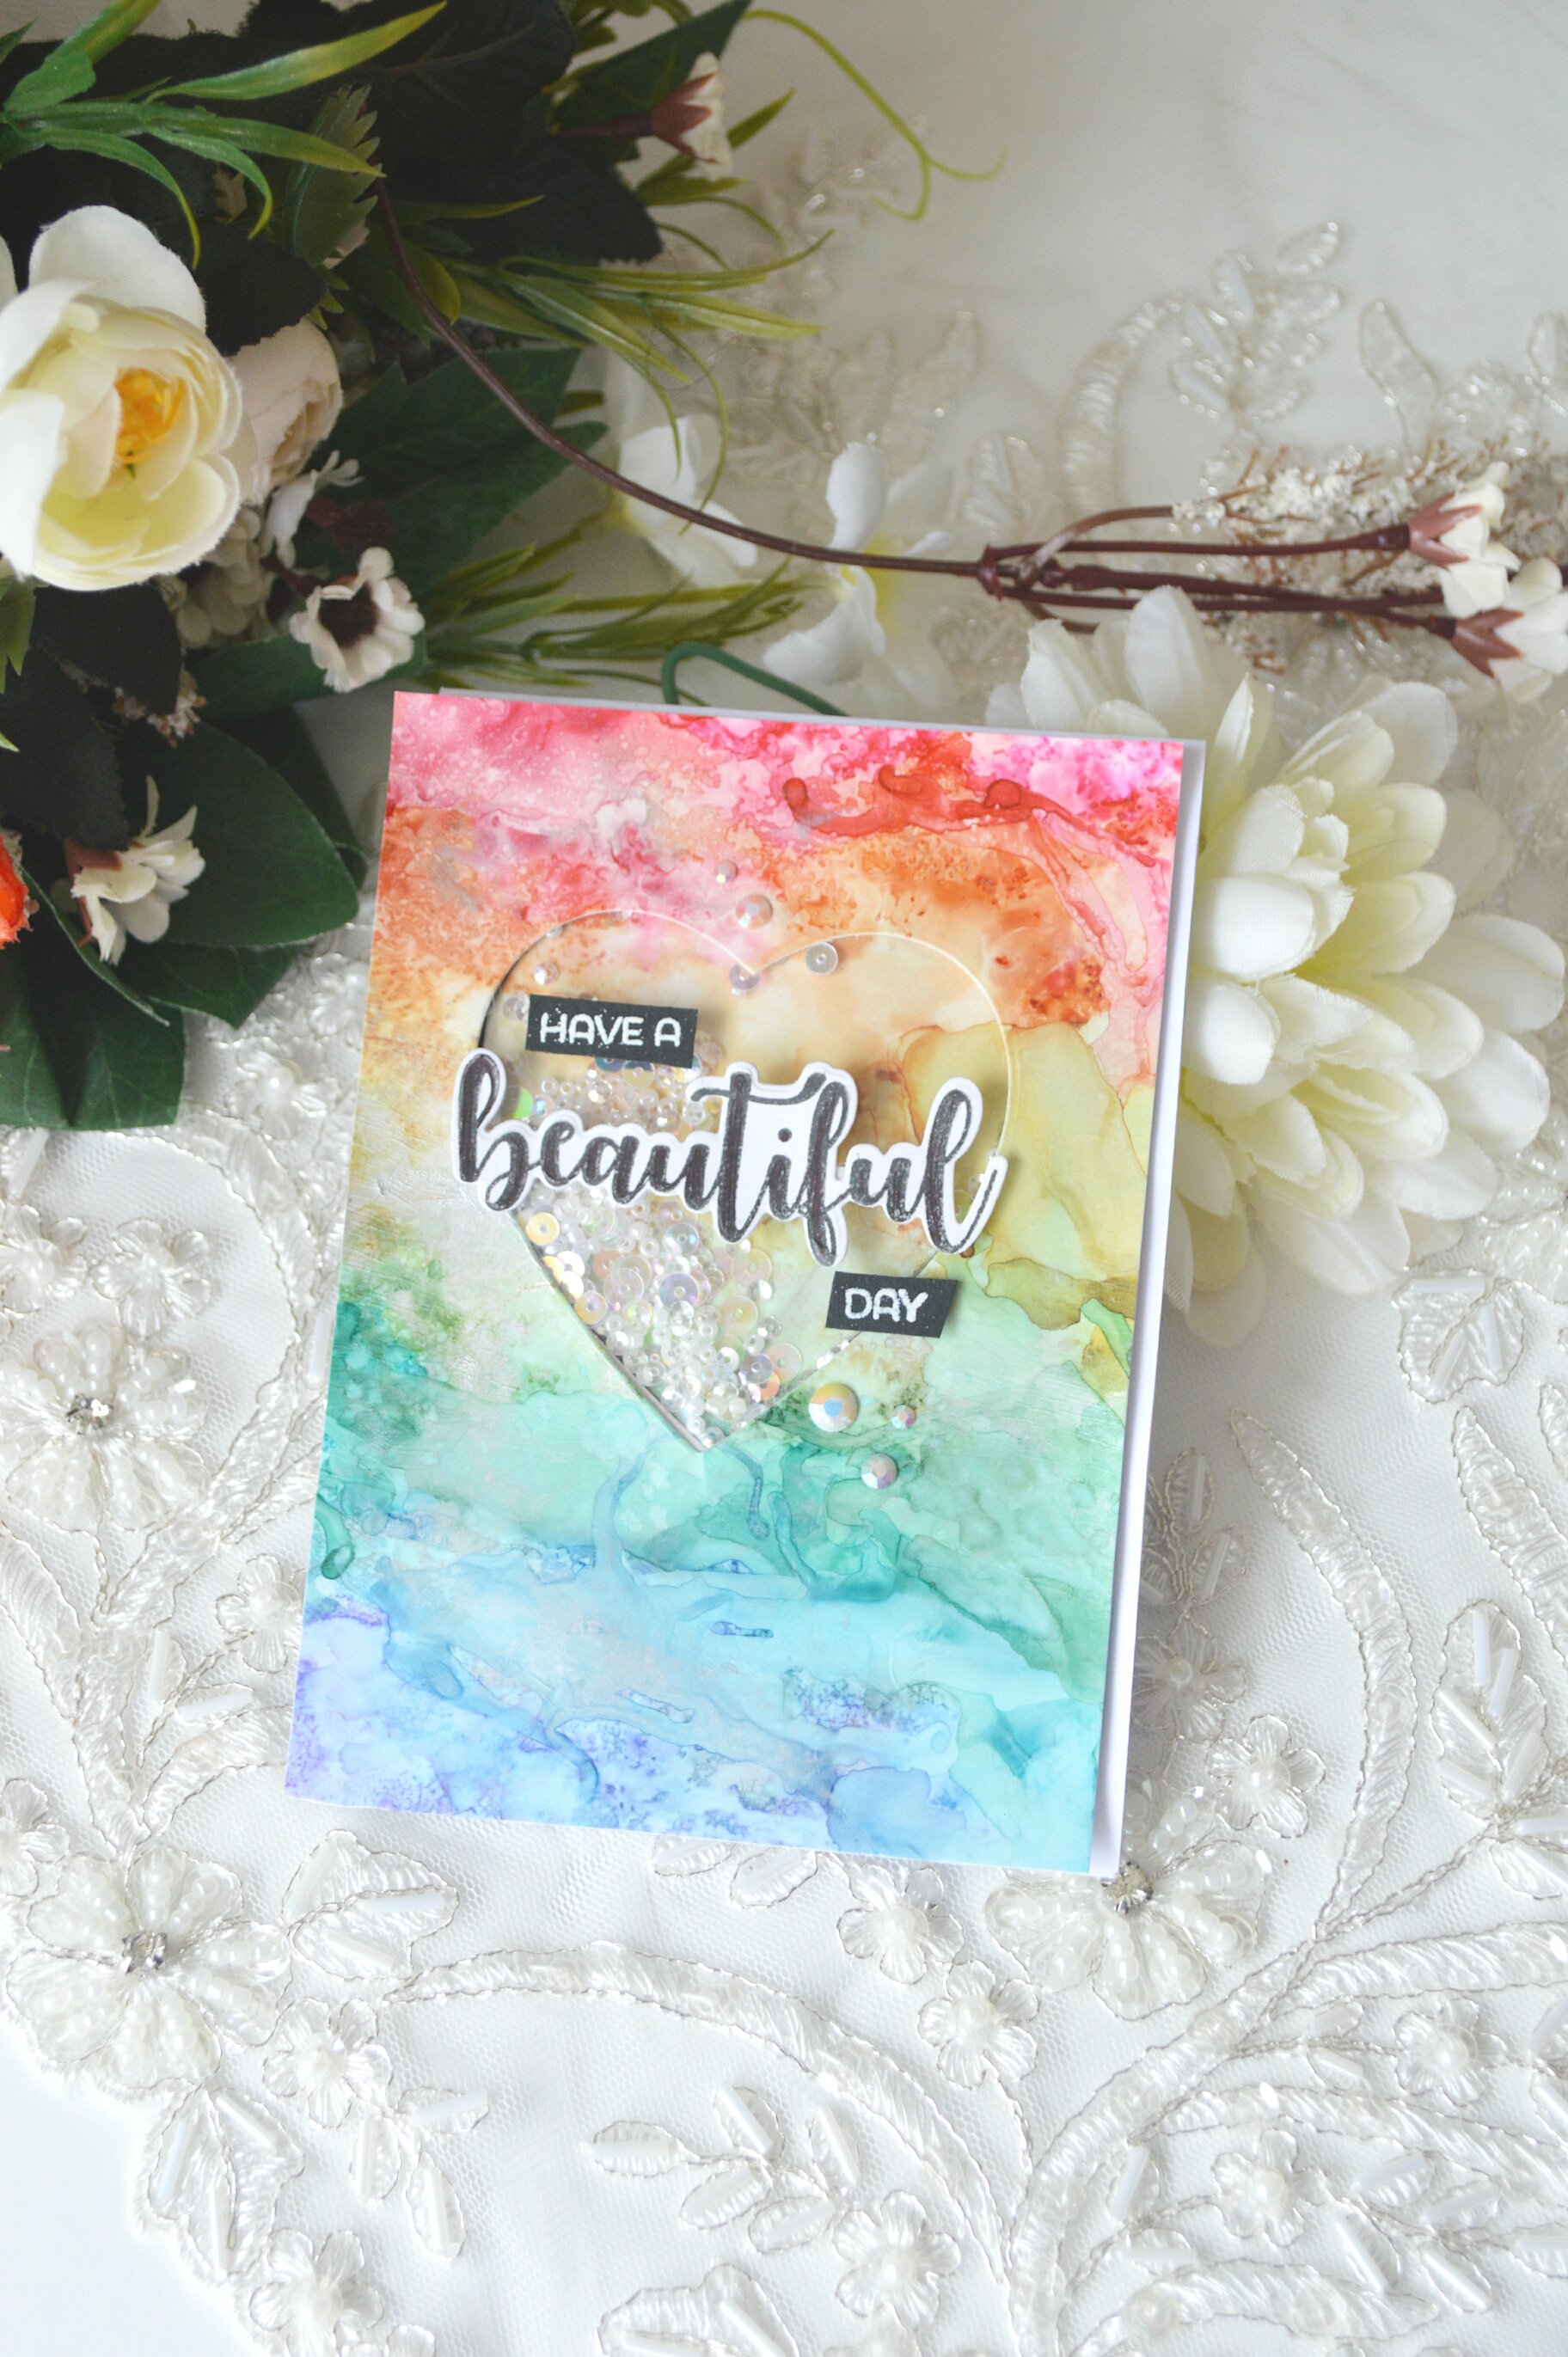
# I used the scallop heart from winnie and walter True Dotty Heart Cutaway to cut in the center of the inked card, then I mounted it over a white card stock
# I wanted this card to be a window card to brighten these strong colored background . So I die cut the white base card with the smaller dotty heart border from the same True Dotty Heart Cutaway in a place that fit with the upper layer


 # I stamped the love and you from winnie and walter In a Word: Love stamp set with permanent inks over a piece of vellum to preserve the open window effect on this card .

For my second card I wanted to try something different, instead of using these vibrant colors I want a less pigmented colors so I diluted a little of inks with blending solution, then I started the fun...


here is a little tips for who I achieved this background .
# I applied a little amount of the solution for the base before applying the ink over them .
# when I used the diluted ink it was harder to control the blending I think because it was too fluidly.
# It took more time to dry than the concentrated one over a yupo paper.
# I used almost the same technique as the first card by applying stripes on the yupo, blending them with more solution, then adding the silver tone .

   
# for this card It was a not that vibrant like the others ones so I used the whole paper in making the card , I turned it to shaker I die cut the yupo paper with winnie and walter true dotty heart cutaway fill it with a white sequin to brighten the card.
# for the sentiment I used W&W winnie and walter In Bloom: Ashlee's Rosie Posies with Lydia Evans stamp set.

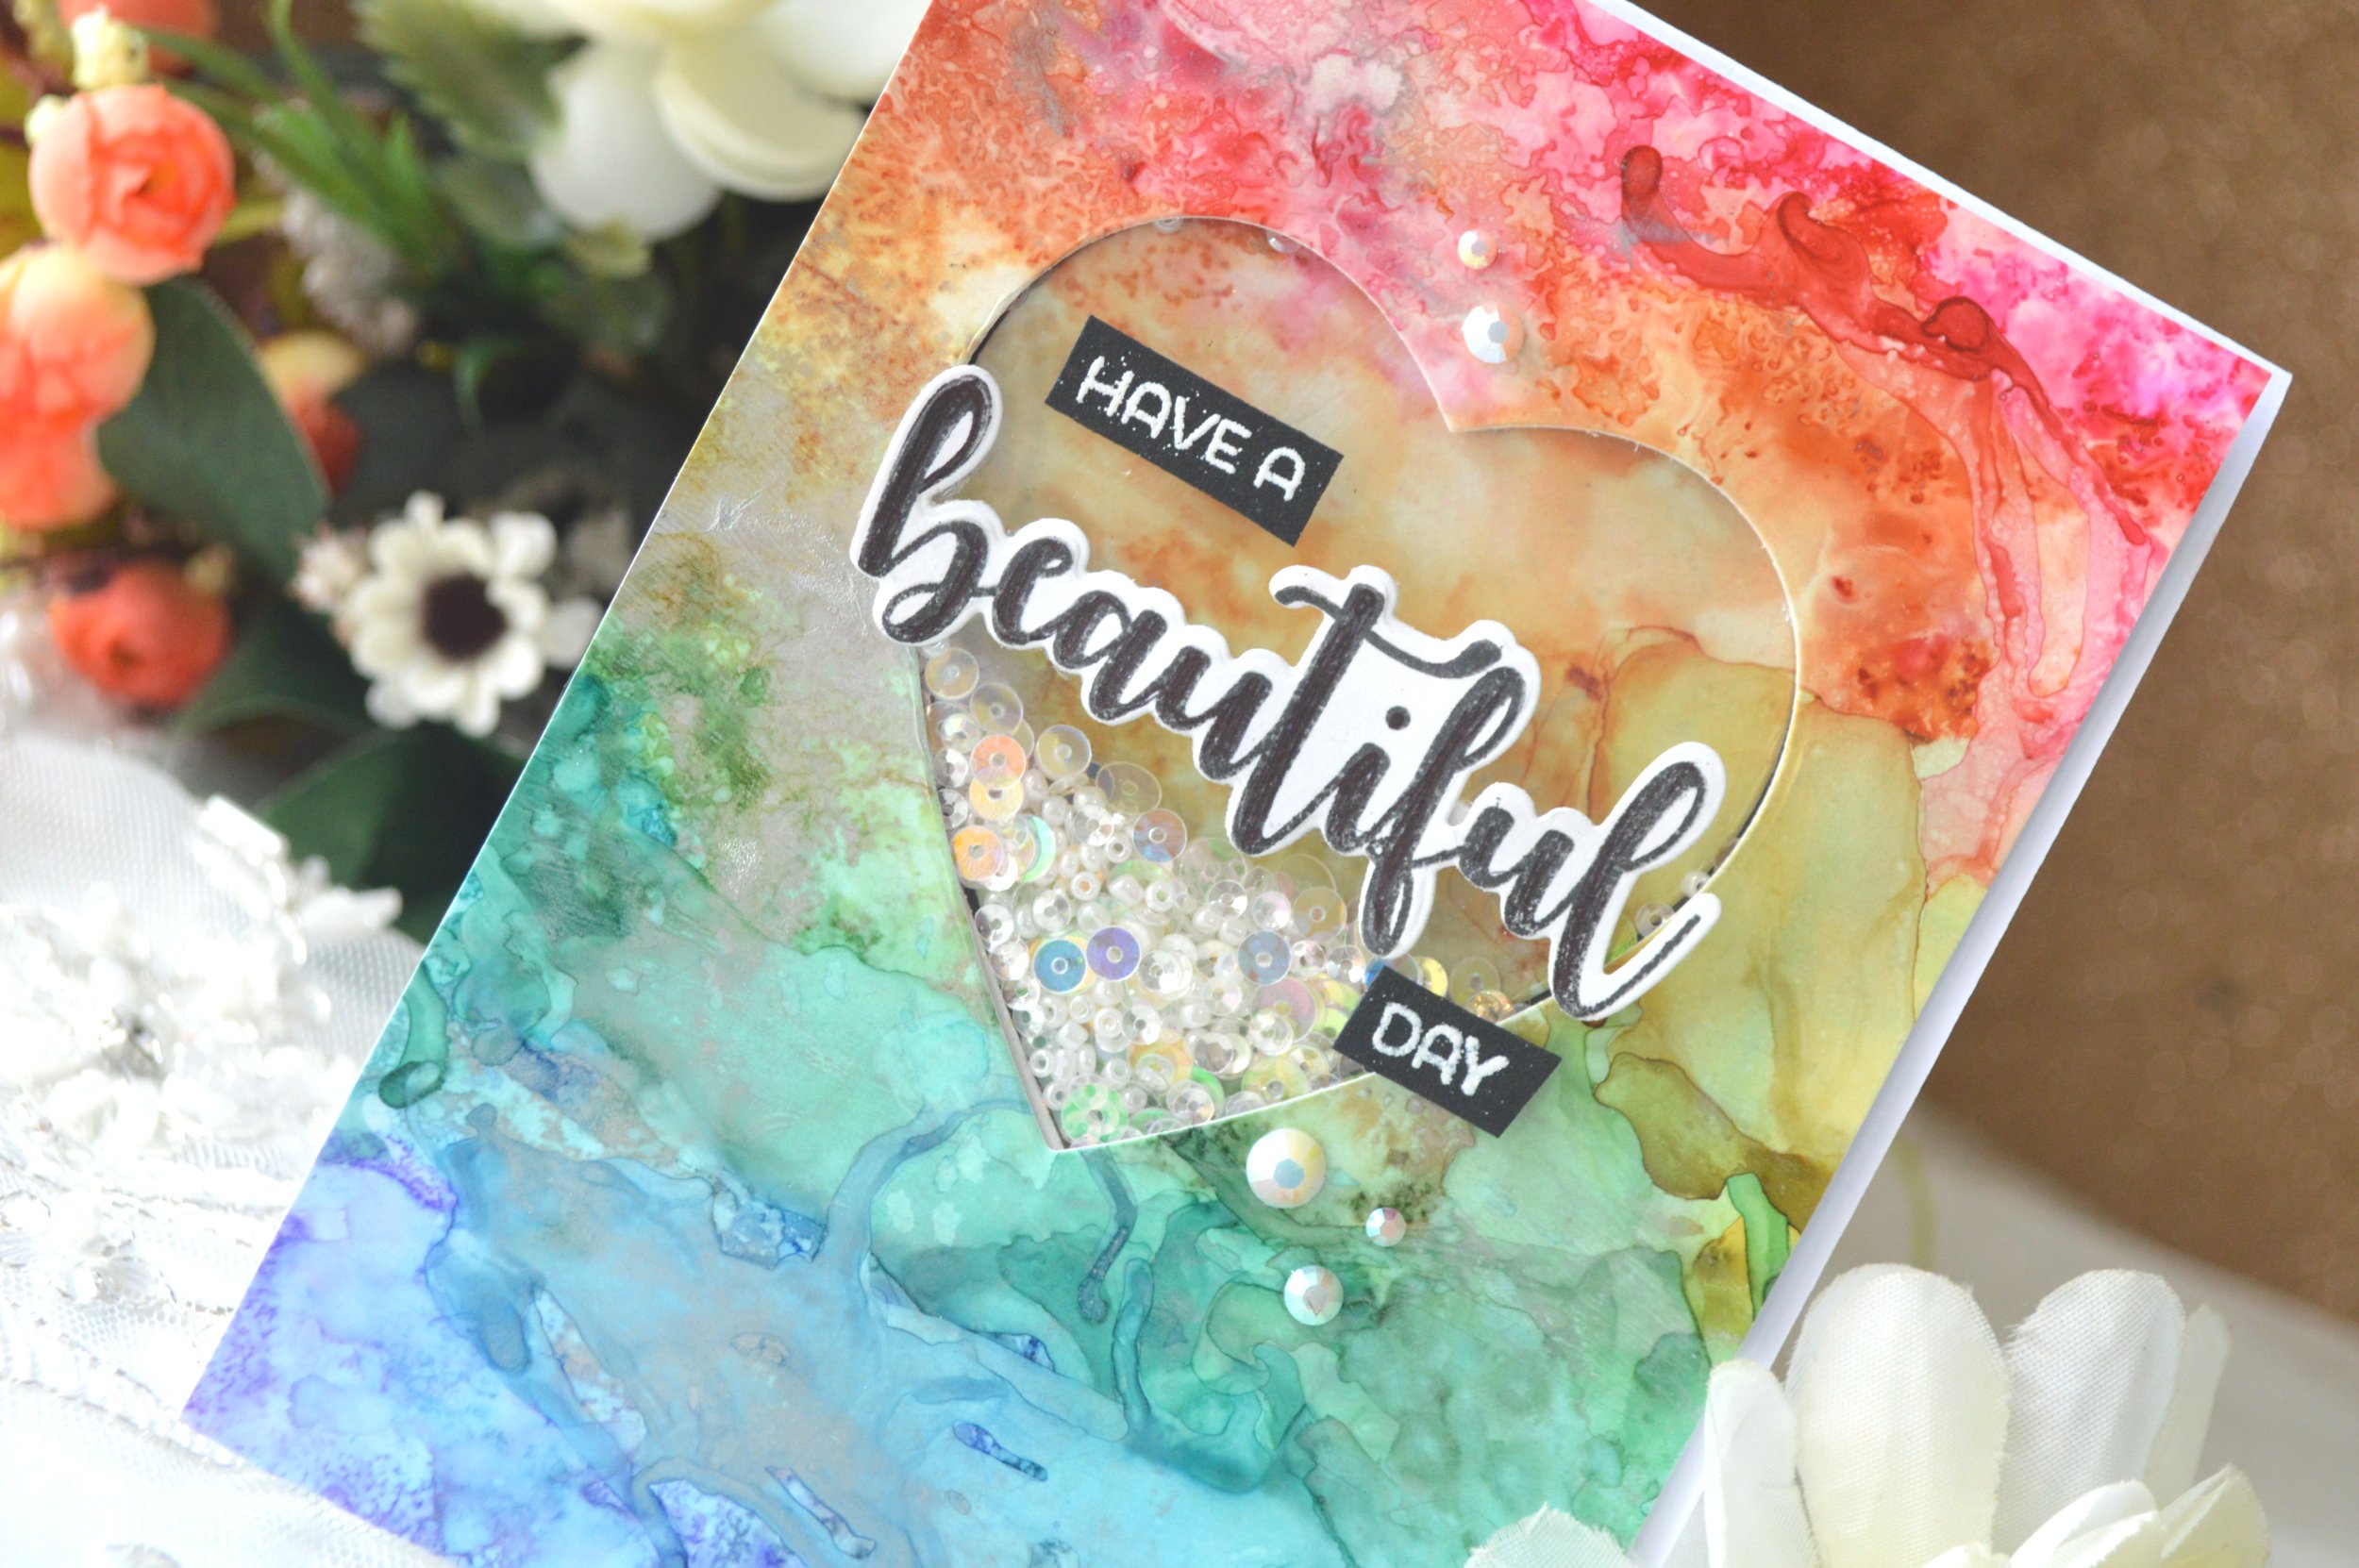
My 3rd card was almost the same like the second but I used the full strength of the alchol ink to make this vibrant rainbow card.


I die cut the spoty heart from winnie and walter true dotty heart cutaway in a silver glittery sticky foam , I placed it over the larger scallop heart from the same die cut set.


For the u I die cut from winnie and Walter Typecast: Cary Letters Cutaways . with 3 heavy black cardstock the upper one was glittery . Then I white embossed this perfect sentiment for this card from winnie and walter Dotty About You with Lydia Evans stamp set.


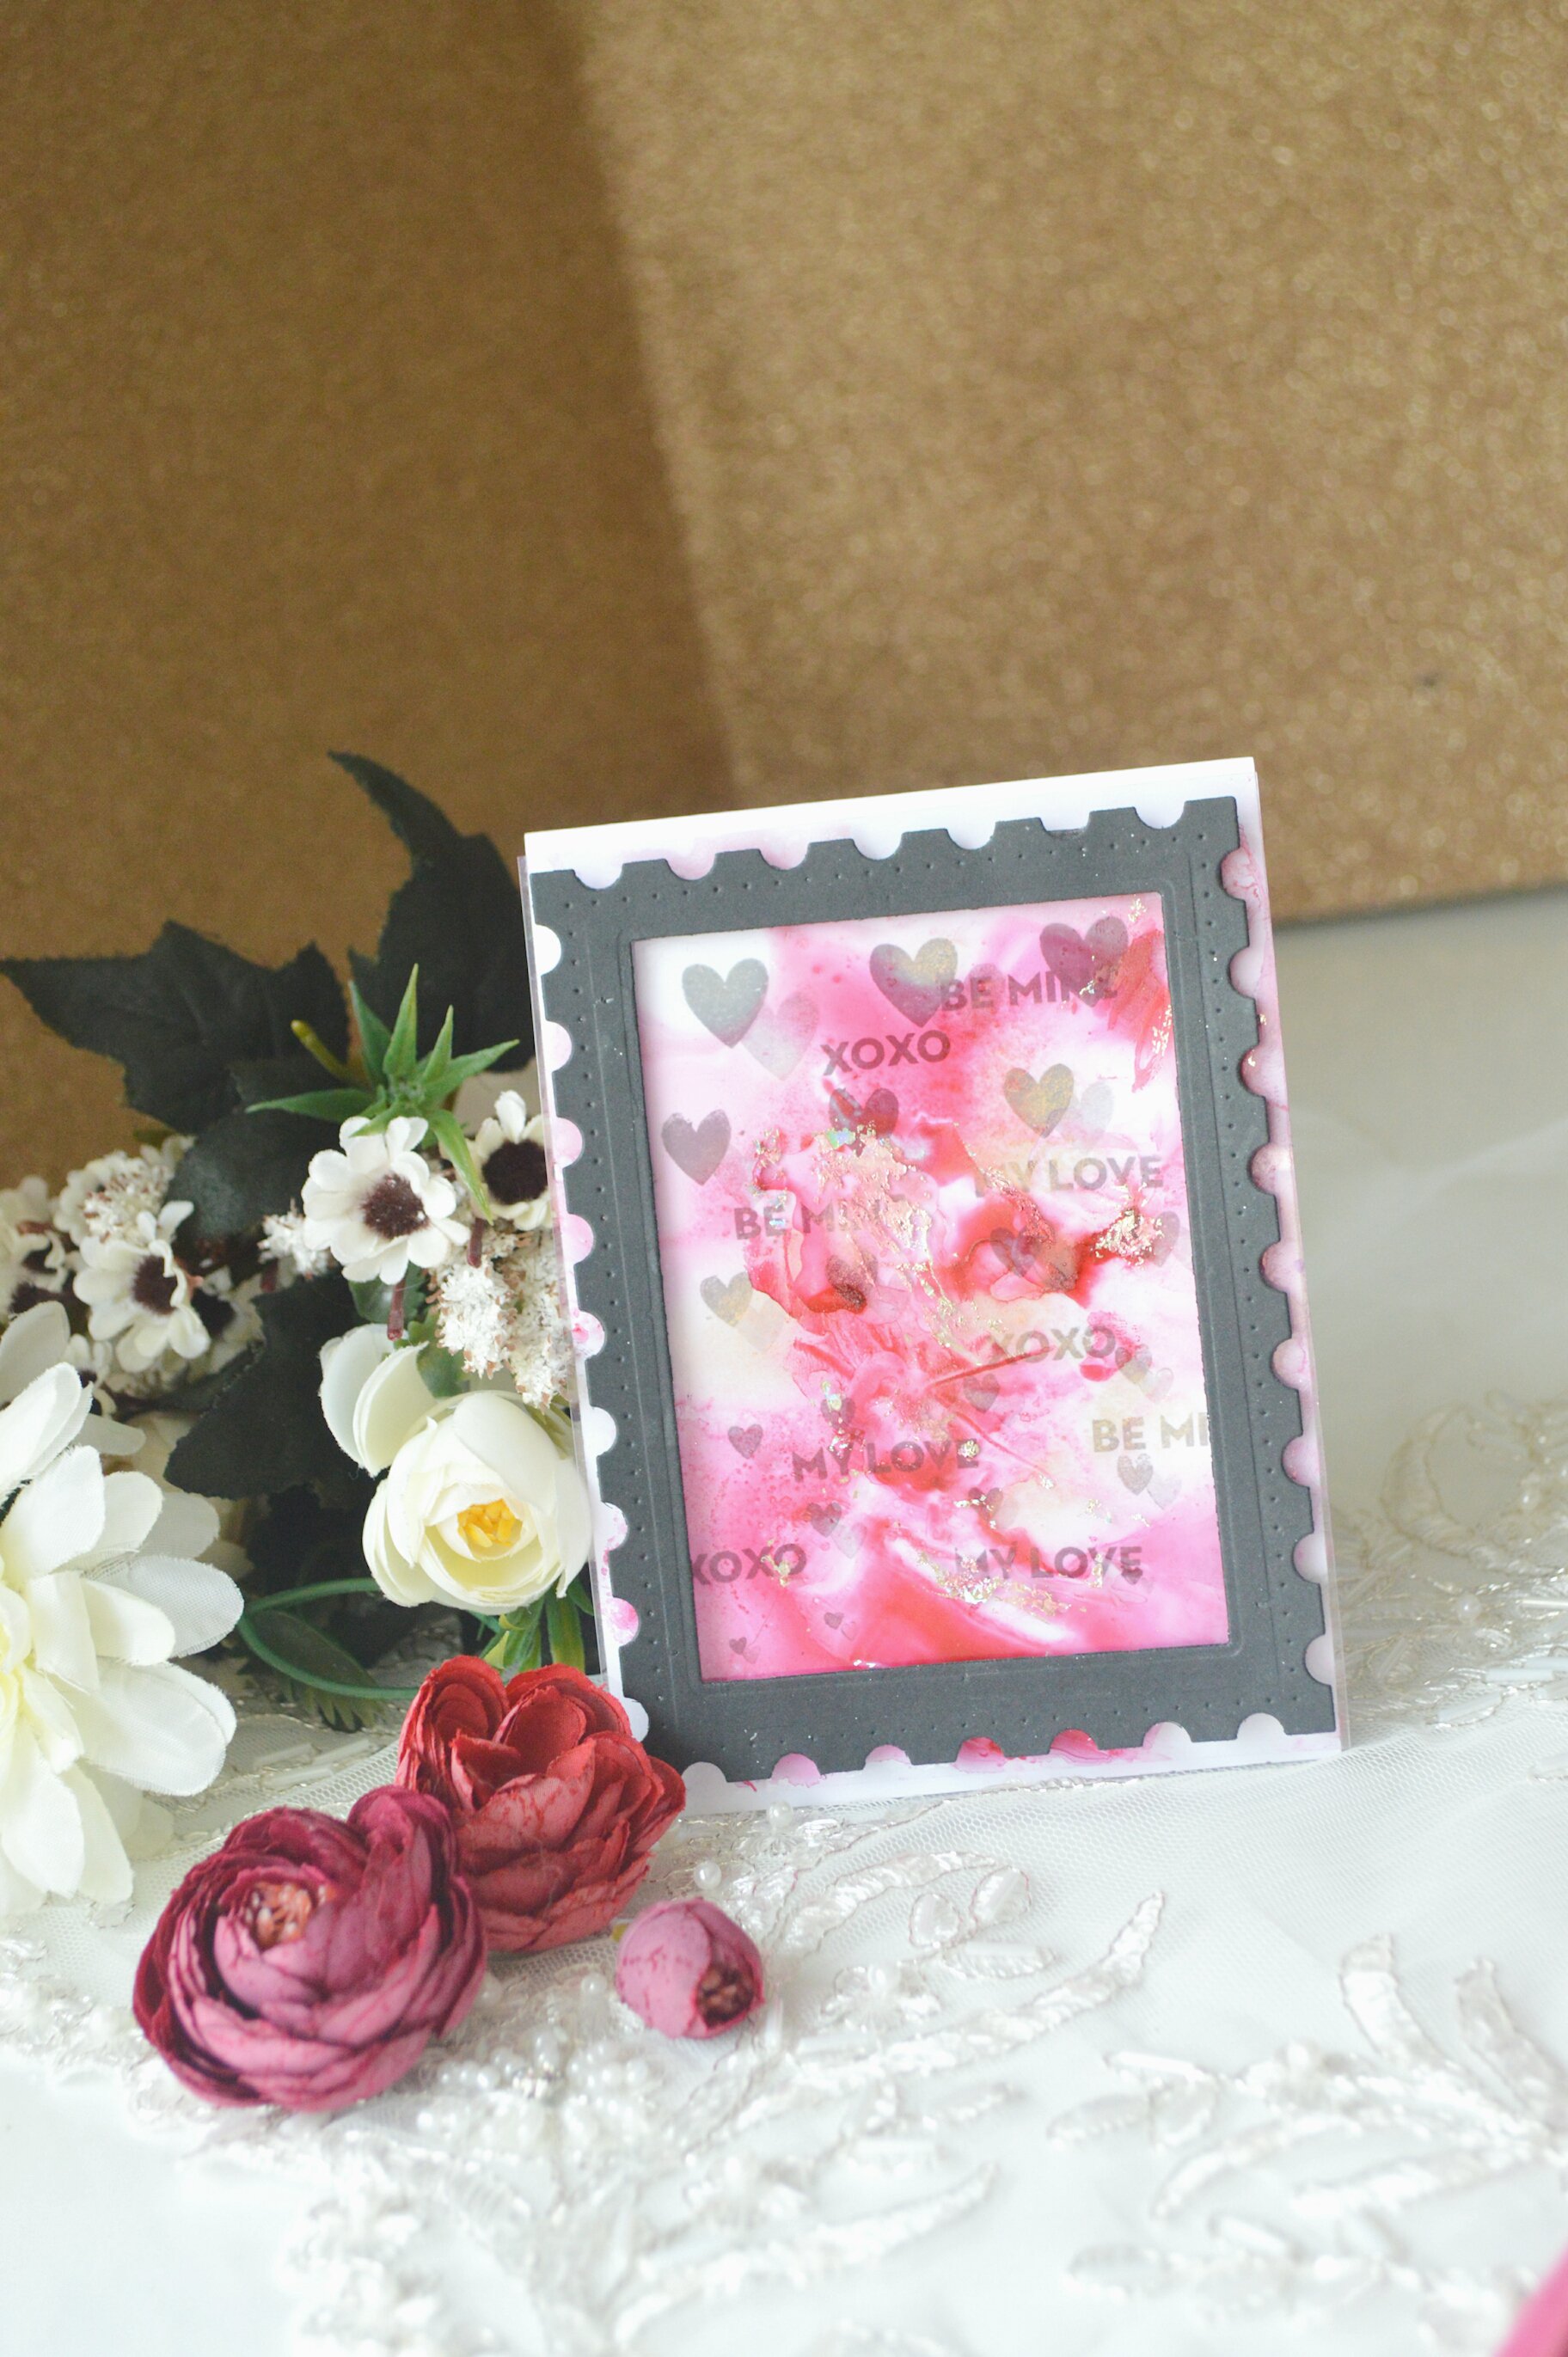
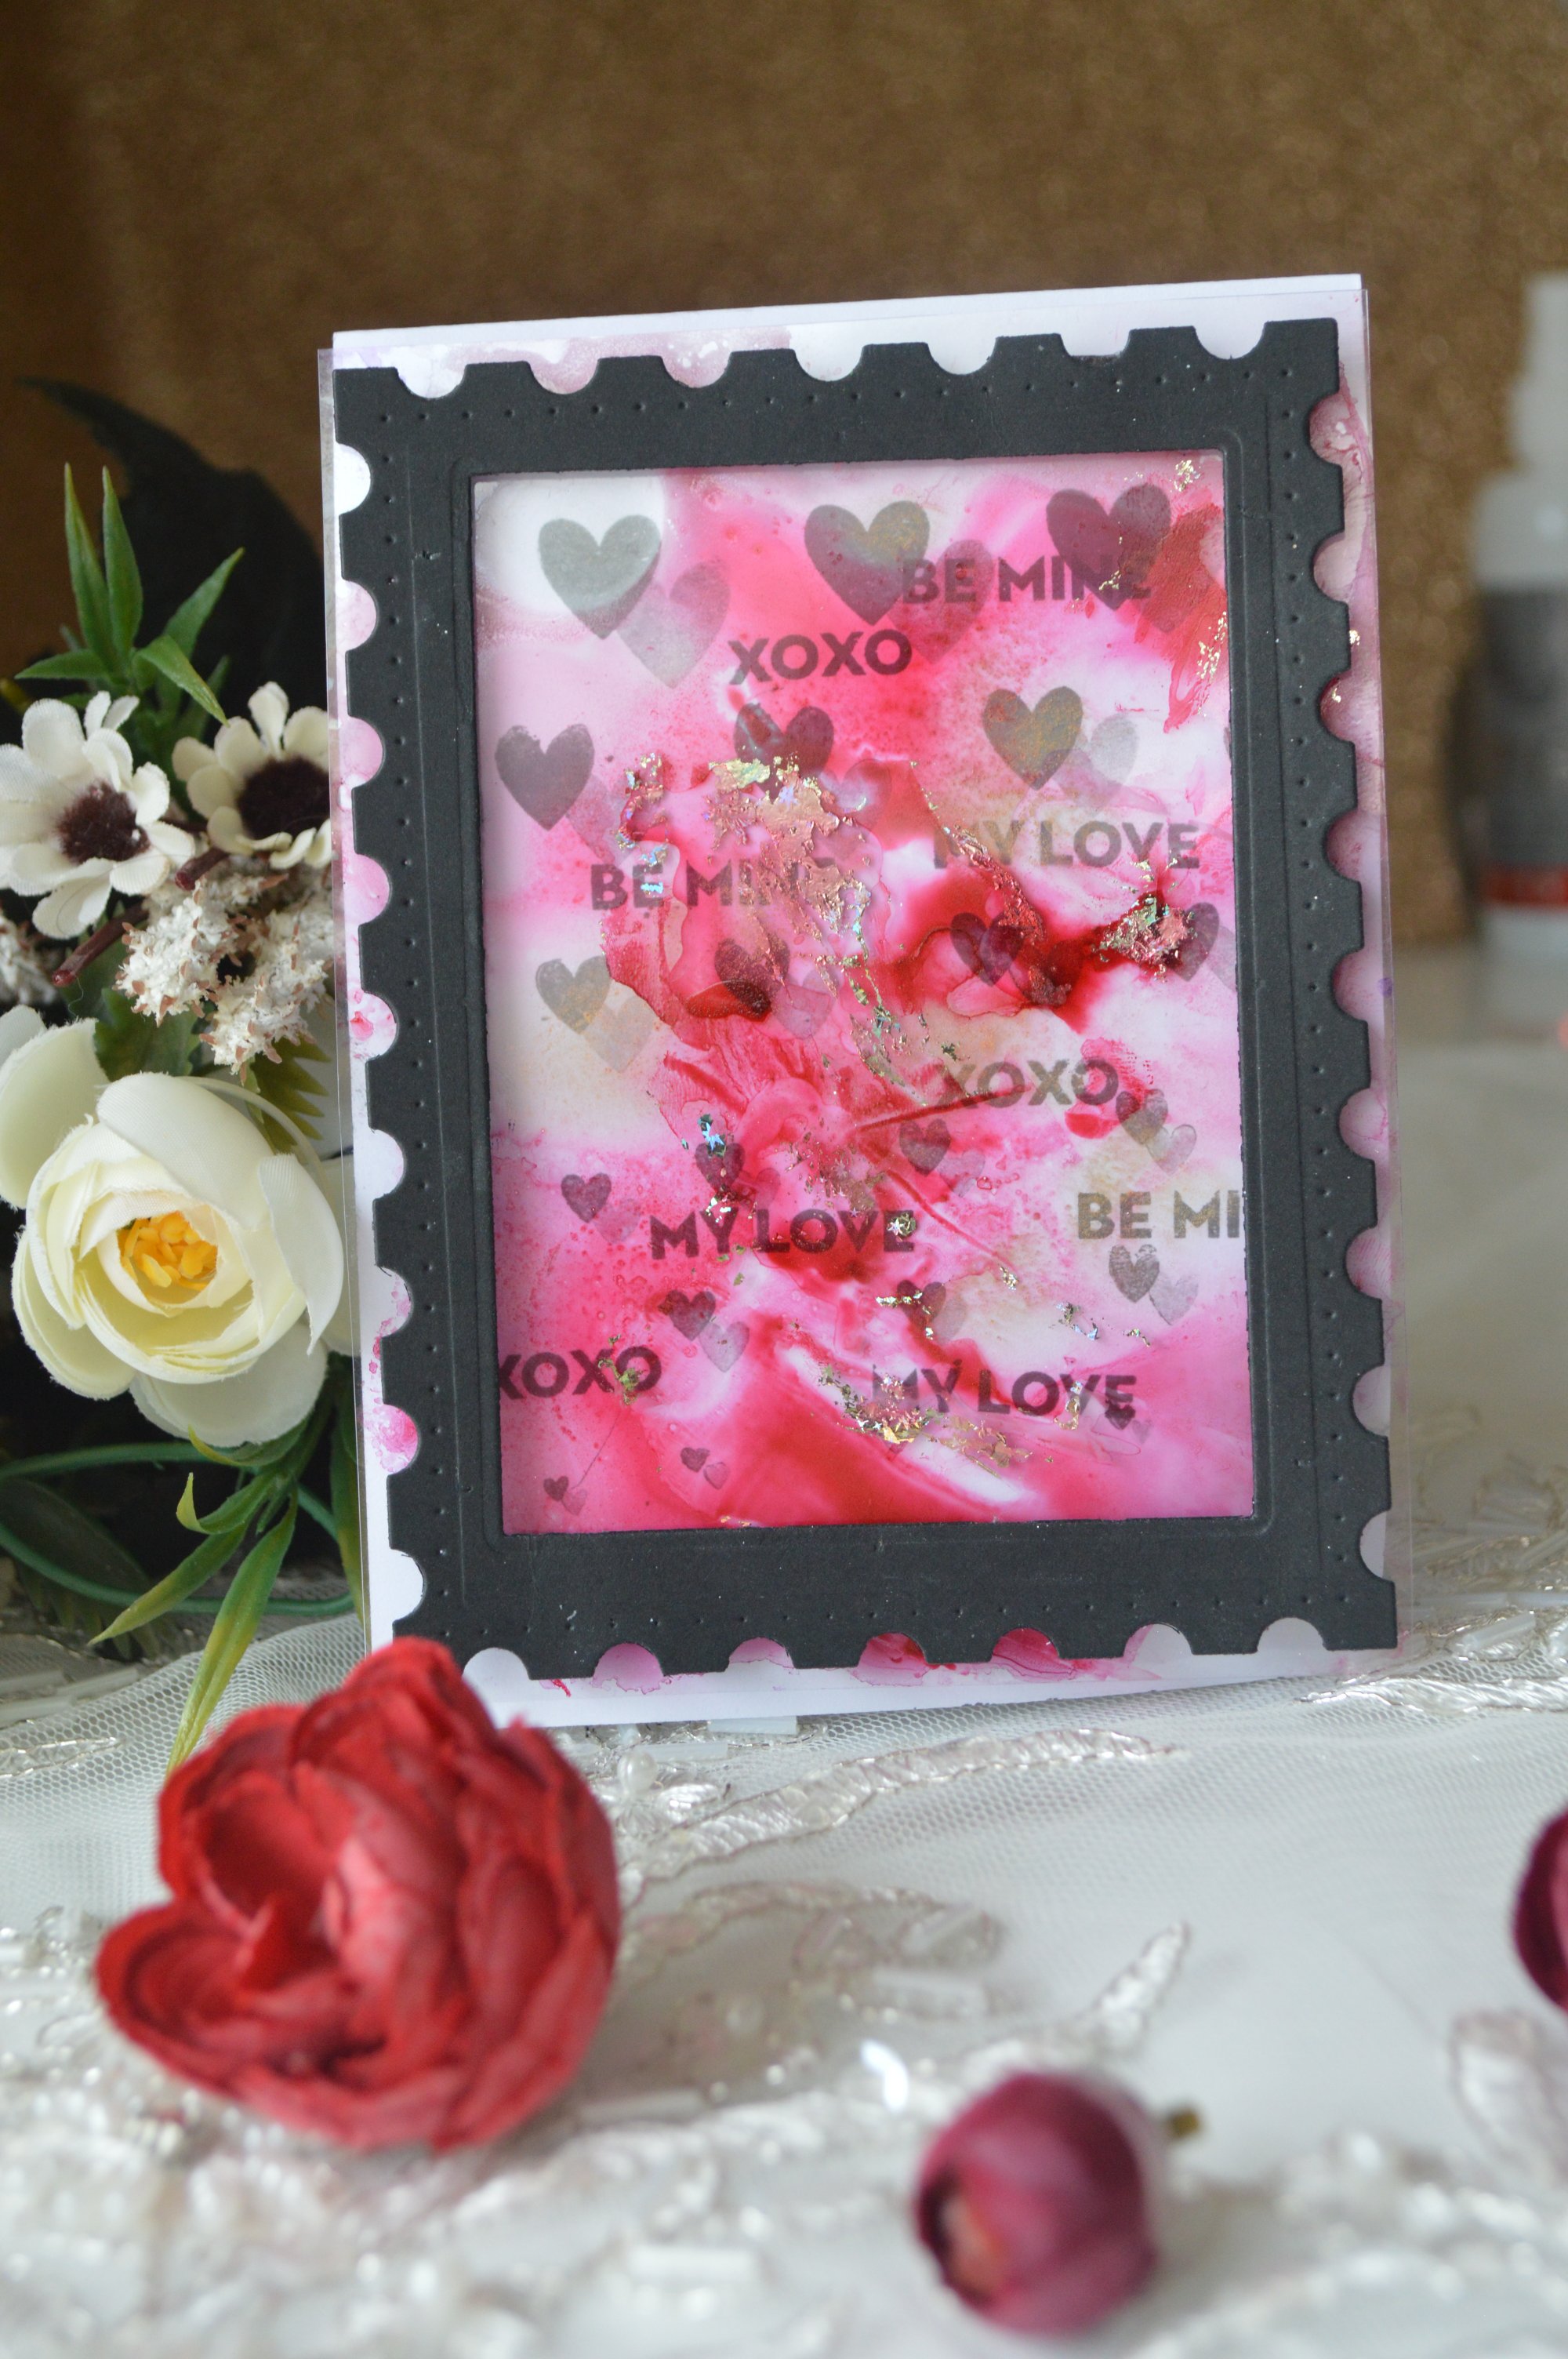
Finally my last card, although bright red is not my color at all ,but I like this card so much.


In this card I wanted to share with you who I can get almost the same brighter and vibrant colors even if I didn't use yupo , by using acetate over a white card stock .
# I applied some blending solution at the acetate , then I used different shades of pinkish red ranger alcohol ink over it.
# I placed a white scrape of paper under the acetate to see who they blend . I added some gold metallic mixative inks .


# before the inks were almost dried . I applied foil sheet randomly over some area . Stick on the sticky ink and got the glittery foil accent.
# I designed the white base card . I stamped these heart from winnie and walter Scenery: Seeing Hearts with first full strength ink and second faint generation trying to follow some order by placing the biggest heart in the top then the smaller in the down . I stamped the smallest one at the bottom .
# I stamped randomly some mini love sentiments from winnie and walter In a Word: Love stamp set between the hearts .
# I placed the acetate over it with some dimensions foam tape. Then I die cut this frame from winnie and walter Essentials: Lana Cutaways using heavy stock black cardstock
# I found this card would be extra busy if I added extra sentiment so I left the card without any more main sentiment.


Thank you so much for joining me today ! Don't forget to head over to my blog maryams craft and leave a comment on all of my Leading Lady posts for a chance to win a $30 gift certificate to winnie and walter store , generously provided by Shay!!


Have a great weekend all.
Maryam


w&w-supplies

Saturday, August 4, 2018

August Leading Lady Tracey McNeely | Take One

It's the first Saturday of the month so that means a new Leading Lady!  This month I have the absolute pleasure of introducing our August Leading Lady, Tracey McNeely.  Not only is she incredibly talented, but truly one of the most down-to-earth and soul-deep sweet, kind and nice people you will ever meet.  She also hosts an annual 25 Days of Christmas Tags event which is always a delight.

I am really excited to see what Tracey will be creating this month as she takes us on an adventure of her own design on Saturdays in August on the w&w blog.

Please give Tracey a big round of applause to welcome her as she steps onto the stage for her first performance as our August Leading Lady! 

Tracey_McNeely_august2018 

Hi Friends!

I am super excited to be posting today as the Winnie & Walter Leading Lady for the month of August! I was so thrilled when my friend Shay invited me to be one of her Leading Ladies. Shay is smart, crazy talented and overall just a wonderful person that I have had the pleasure of meeting two times on crafting retreats in Kansas. This past retreat she was my 3:00 am cab ride buddy to the airport to catch our early flights!

When I was trying to decide what to do for my first post for this month, I had so many ideas but when I sat down to play with the stamps and dies the answer of my question became very obvious to me. If you were to ask me what type of designer I am my answer will be 'Clean and Simple'. I love white space, designs that are not cluttered but mostly designs that have breathing room. Not all of my cards are clean and simple, I do love to make a mess sometimes too, but my roots are clean and simple. Creating a CAS card is not always simple, in fact sometimes it can take hours to finish off a design that feels right. I thought for this week I could share with you some ideas of things I do to add interest to my CAS cards that take them from plain to wow.

I used the Dotty About You with Lydia Evans clear stamp set to create a rainbow of dotted circles onto a white panel. I stamped all three sizes overlapping some of them. The panel was trimmed down so that I could mount it on to the card base.The sentiment was stamped on to the panel and the YOU die cut was adhered below it.


To add more interest I popped up the panel with foam tape for dimension. Just doing that one step makes such a difference. Next I added some sparkling clear sequins, just a few to create a visual triangle. Finally I filled the sequin with some silver Stickles for some sparkle. Three small changes that ramp up the card without adding weight to the overall design.

For my second card once again I kept the design CAS. The basic design is the two dogs cuddling and the cute sentiment.To add more interest to the card I cut the scalloped panel from watercolour paper and then created a loose watercolour background using some Distress Oxide inks. I love the way they dry. The sentiment was stamped directly on the panel. The two dogs were Copic coloured and added with foam tape an finally the wee heart was watercoloured die cut was added.


I have a  $30 gift certificate for Winnie & Walter gift certificate to giveaway on my blog, In My Creative Opinion. Visit all four of my Leading Lady posts this month and leave me a comment. At the end of the month I will draw a name from my comments from over the month to win!


I hope you enjoyed today's post and can't wait to show you what I have planned for next week!


w&w-supplies

Wednesday, July 25, 2018

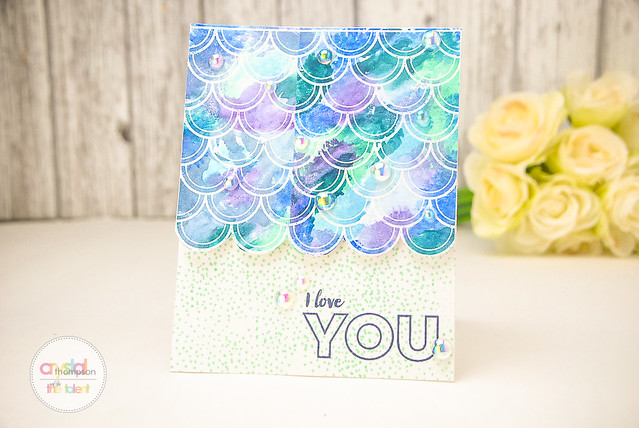
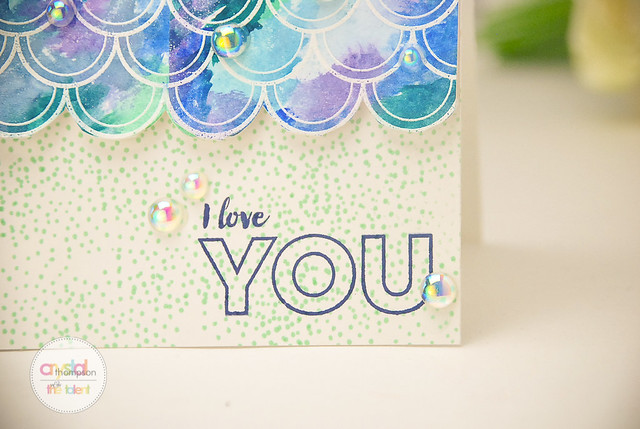
Rerun No. 32 | Mini Scenery: Madison-- Watercolor Scallops with Crystal (Video)

crystal_Madison- watercolor scallop

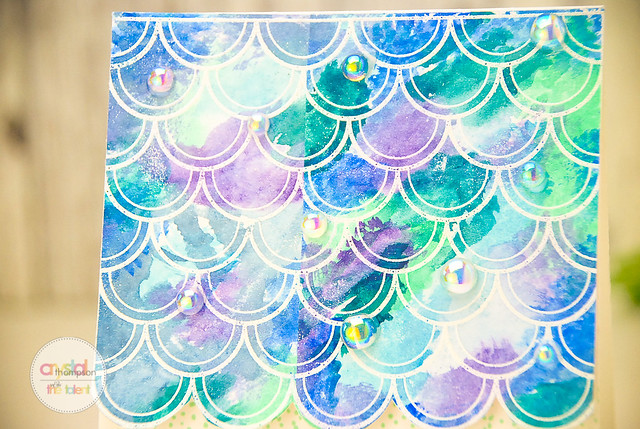
Crystal has an awesome new video for you today creating watercolor scallops featuring our July Rerun stamp set Mini Scenery: Madison!


Here are some lovely close ups:

crystal_madison-watercolor sca-3 crystal_madison-watercolor scallop2

Are you as in love with how this turned out as I am?

Remember you have time to play along with the challenge and/or enter to win this stamp set.  All the details can be found HERE!

Have an incredible day!

Shay.


w&w-supplies

Saturday, June 23, 2018

June Leading Lady Caly Person | Take Four

Our June Leading Lady Caly Person is back for her fantastic fourth performance! If you missed her smashing debut you must see it...CLICK HERE or her sensationally lovely and expertly designed card from her second performance CLICK HERE or her triumphant third performance with that is too dog-gone cute CLICK HERE!  Today's card is an explosion of awesome!

We now present Caly...

I can't believe it's already week 4 of my Leading Lady feature for Winnie & Walter! Time Seems to be flying!
  Caly_Person_june2018 

We've been talking about different coloring mediums on previous posts. Today though, I decided not to do any coloring because the stamp set I chose didn't have any outlined images...ha! The Dotty About You stamp set jumped out at me for a tone-on-tone card. Then I used the coordinating die set to add some contrast.

  WW Dotty About You

Stamp sets like this are great for creating backgrounds! So I started with a light craft paper and used a matching ink to create the tone-on-tone look. I put all the stamps I wanted to use on a long acrylic block and flipped to alternate the sizes and patterns until the panel was covered. Then I took some gold glitter stickles and added dots to the center of the bursts.
  WW Dotty About You 1

The coordinating dies were cut out in gold and black cardstock and helped give this card some added dimension and interest. To give it more contrast, I added a sentiment strip on black cardstock embossed with white. This card is quick and easy and I hope you'll try it!


This month-long feature will be every Saturday in June. If you stick around until the end of the month, you could win a fabulous gift card from Winnie & Walter. I will be drawing a winner from comments on my blog (on the final post) at the end of the month!

  w&w_30giftcard
Thanks for joining me this week! There are 5 weeks in June so I'll be back one final week to share my last card next Saturday. See you then!

XOXO, Blog Signature

SUPPLIES: *NOTE: To view where these items can be purchased, click on the linked abbreviations below (SSS for Simon Says Stamp, EH for Ellen Hutson, AMZN for Amazon, etc.). Affiliate links may be used (at no additional cost to you) – thank you for your support!


WW Dotty About You WW Dotty About You 
WW Dotty About You Cutaways WW Dotty About You Cutaways 
SU Heat Tool SU Heat Tool HA White Embossing Powder HA White Embossing Powder HMSB | 
 SSS | EH

Sahara Sand Ink Sahara Sand Ink 
Sahara Sand Cardstock Sahara Sand Cardstock ATG Gun ATG Gun EH | SSS | AMZN Mini Multi Medium Matte Glue Mini Multi Medium Matte Glue HMSB | EH | SSS
Ranger Stickles - Gold Glitter Glue Ranger Stickles - Gold Glitter Glue EH | SSS