Showing posts with label metallic. Show all posts

Friday, October 2, 2015

Metallic | Happy Halloween with Heather P.


Hi, everyone! Heather P. here, and it's my turn on the Winnie & Walter blog today to share the card I've created using the Metallic theme as inspiration. 

To create my card, I started with a piece of white paper and stamped the spiderweb image from Moonlight in Versafine Ink to create the background.  I then photocopied the design onto a piece of white CS, then ran it through my Minc machine with silver foil.  Next, I die cut three scallops using one of the border dies from the Goldie Trim Cutaways on black CS, then adhered them to the foiled CS layer.


I adhered the foiled layer to a piece of coral CS, then attached it to a light orange card base.  I stamped one of the sentiments from Moonlight onto coral CS in black ink, trimmed one end into a banner shape then adhered it to the card front with pop dots.  To finish up, I used the Big, Bold and Happy Cutaways on a piece of silver foil CS and adhered it to the card front before embellishing with light orange enamel dots.

That wraps it up for me today, thanks so much for stopping by! :)

w&wDT_heatherpulvirenti_blog-sig


w&w-supplies


Wednesday, September 30, 2015

Metallic | I Heart You with Lydia Evans

DSC06278v

Hi there, it's Lydia here with you again on the Winnie & Walter ! I'm so excited to be sharing another video with you again today! Again as this months theme is 'Metallic' I wanted to share with you another technique to put some metallic shine into your crafty makes. This time I have focused on craft metal and how you can hand emboss stamped images to create a super 3D effect.

  DSC06278

I have used the heart shaped gem from 'My Precious' and stamped on the back of the craft metal and embossed it from behind to get the heart to really pop! I love the way that the heart jewels catch the light in all different ways, so fun.

  DSC06280

The sentiment is from 'True' and I just think it is so fun to match with those pretty embossed 3D hearts.

  DSC06282

Here's the video on how I created this card....


Here's a direct link:

https://www.youtube.com/watch?v=cBHCyfbKesY

I really hope you enjoyed the video and like my card!

I'll see you again soon!

Hugs, Lydia x

w&wDT_lydiaevans_blog-sig


w&w-supplies


Tuesday, September 29, 2015

Spotlight on Lisa Lahiff...Part Deux!!

spotlight-lisa-lahiff

We are so happy to have Lisa Lahiff back with us for another stupendous post with an emphasis on the metallic!  If you missed learning more about Lisa and seeing her first post full of beautiful and innovative metallic projects CLICK HERE!


Now, it's Lisa's time to sparkle and shine...  


Hello!  It is Lisa back here with you today, and I am so thrilled to have one more day to share some metallic awesomeness with some amazing Winnie and Walter goodies!!!!  Let's dig in...


For this first card I had a lot of fun layering up various patterned papers by My Minds Eye for a bright and eclectic background.  I then went ahead and ran my In a Word Happy cutaway through my machine three times with three different foiled papers.  I love not only the thickness, but by stacking them up slightly to the side of each other, you are able to see all three colors.  I then diecutted the tag from the Essentials:Audrey Cutaways, and stamped the birthday sentiment from The Big the Bold and the Happy Stamp Set.  I finished my card off with some twine tied at the top of the tag, faux stitching down the side of the card and some sequins that came with my Winnie and Walter happy mail!


This next card was created using The Big, the Bold, and the Merry Creative Screenings. I wanted to create a metallic background for my sentiment to really pop in the shaker frame so I started by using reposition-able adhesive on the backs of the "merry" and "christmas" creative screens.  I then used a gold metallic ink and applied it to the entire background with a blending tool.  I carefully removed my screens and had a nice negative of my sentiment.  Next I used the  Essentials:Audrey Cutaways to create my frame with patterned paper, adding various sequins including 4 mm Metallic Gold Cupped Sequins, and 6 mm Sparkling Clear Sequins by Pretty Pink Posh which can be found in the Winnie and Walter Boutique to create my shaker element!  I added a sparkly paper bow to the corner as a finishing touch.


I am so excited to show you this last card as it has a lot of firsts for me on it!  For one the background was diecut with household aluminum foil, which was so fun to try! (Warning make sure you pull the die cut out gently as the foil is very fragile and thin to work with.)  Then I was trying to think of what else I could do with this cut, and how to add some color when embossing popped into my mind.  So that's what I did!  Using the In Bloom: Lola's Bouquet with Joni Andaya Stamp set and a watermark ink pad I embossed and double embossed various images for a fun floral design.  I then stamped and embossing my "hello" sentiment from The Big the Bold and the Happy Stamp Set.  Finally, I propped it up with foam adhesive onto a panel of vellum with foil before adding it to my cardbase.  I wish you could see the beauty of this card in person, the shine of the aluminum and the layers of embossing are just gorgeous!  Anywho, I hope I was able to capture just a little of its beauty for you to envision the real look of it!

I want to end my post with a warm and most sincere thank you to both Shay and Julie for shining the spotlight on me.  I have had an amazing time just playing and having fun with lots of Winnie and Walter products, and I know I will continue to do so for a long time to come.  You both are so welcoming, warm, and encouraging that you make the crafting community a better place.  Many hugs for you both!  I must also thank Winnie and Walter for letting me come on this blog to play!  And finally a heartfelt thank you to you for stopping by and visiting my work, your kind words have been so motivating and appreciated.

Happy Crafting!
Lisa

Monday, September 28, 2015

In Focus with Gayatri Murali No. 5 | Style #2

Hello and welcome back to September In Focus tutorial. This is Gayatri Murali.

in-focus-banner-title_640px

Keeping with this month’s theme of Metallics, I am focusing on the Gold Trend.

The-Gold-Trend-technique


Gold is trendy and hot at the moment. But gold has been traditional for holiday and Christmas cards. Gold brings instant festivity to the occasion. So in keeping with the tradition, I am sharing with you another way of adding gold to your projects.

Gayatri Style banner copy

In this tutorial, I am sharing with you the gold foiling technique on stamped images.

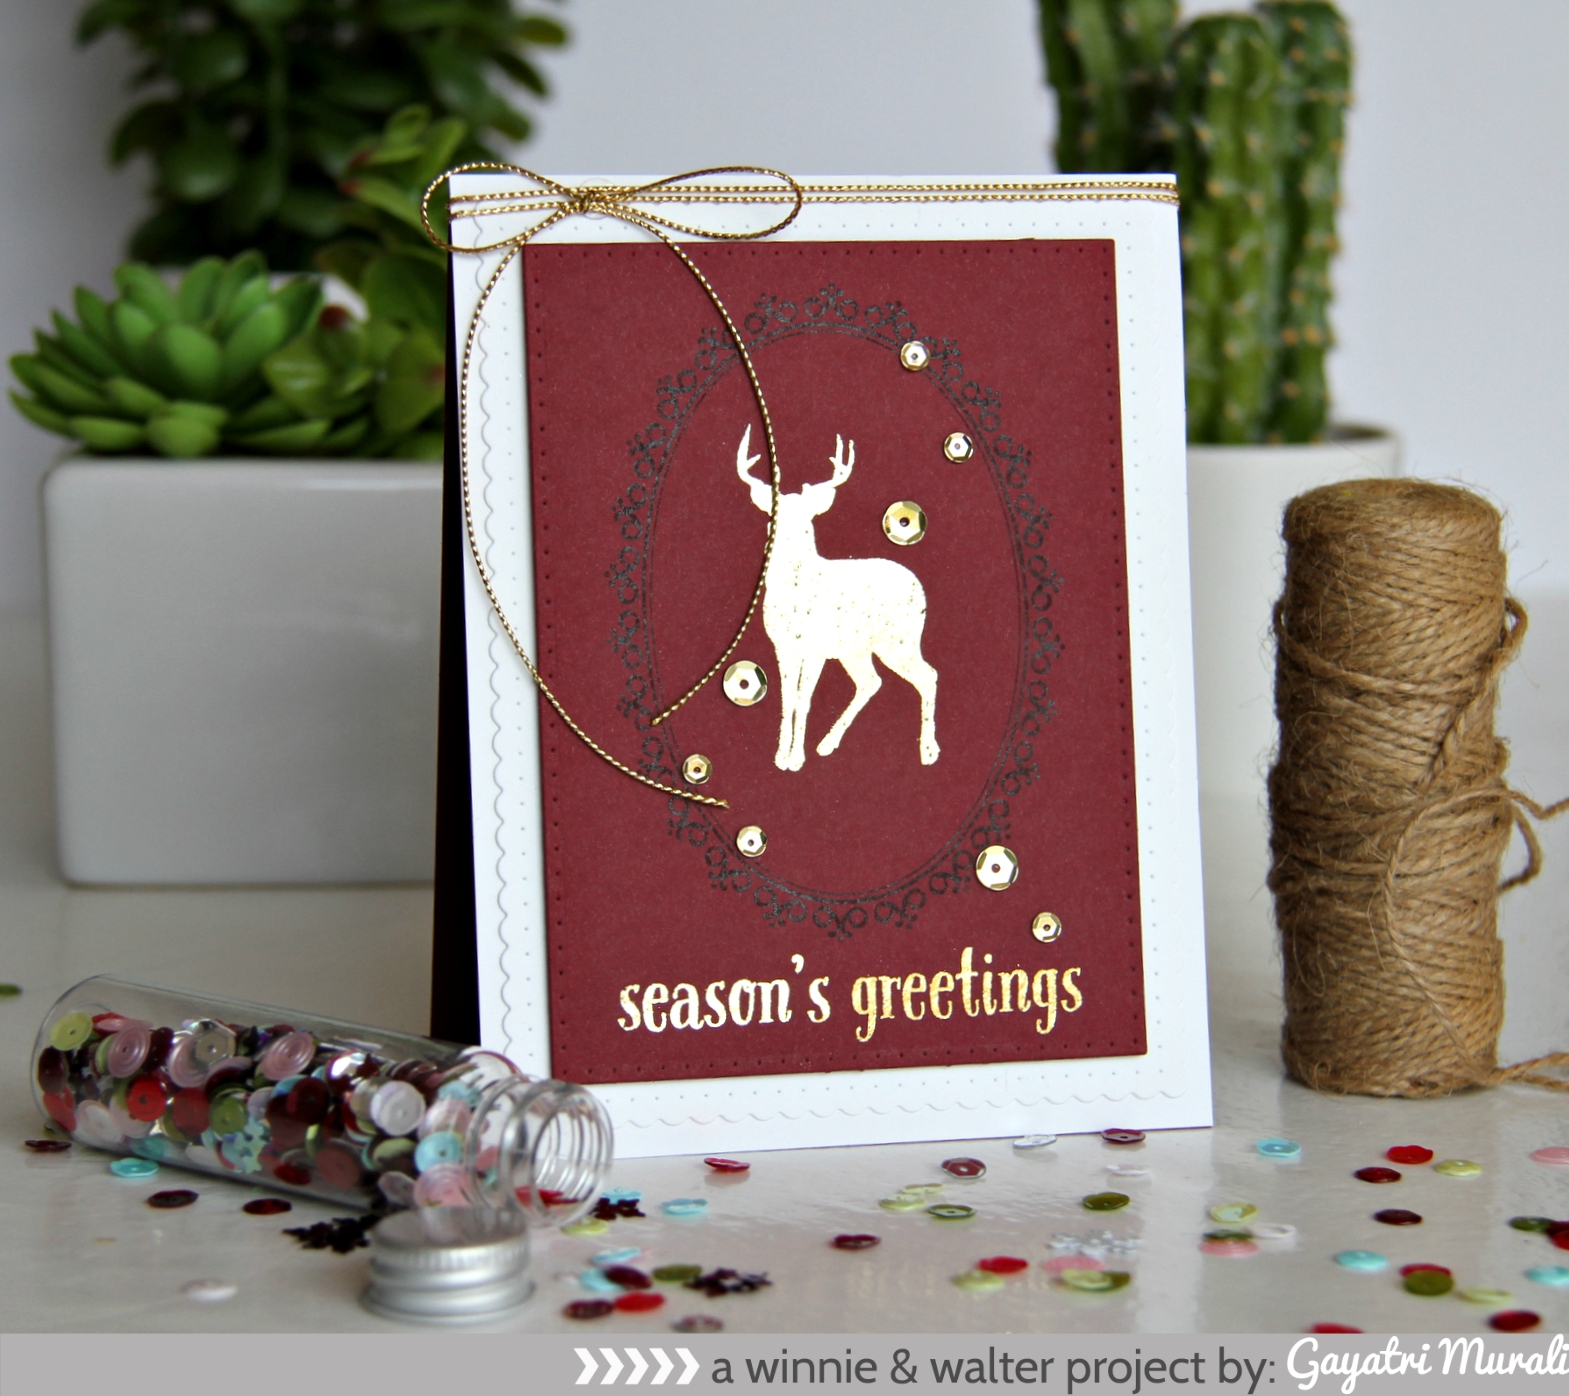
I have couple of finished cards here. The first card shows gold foiling on white cardstock and the second shows on coloured cardstock. Just some variations.


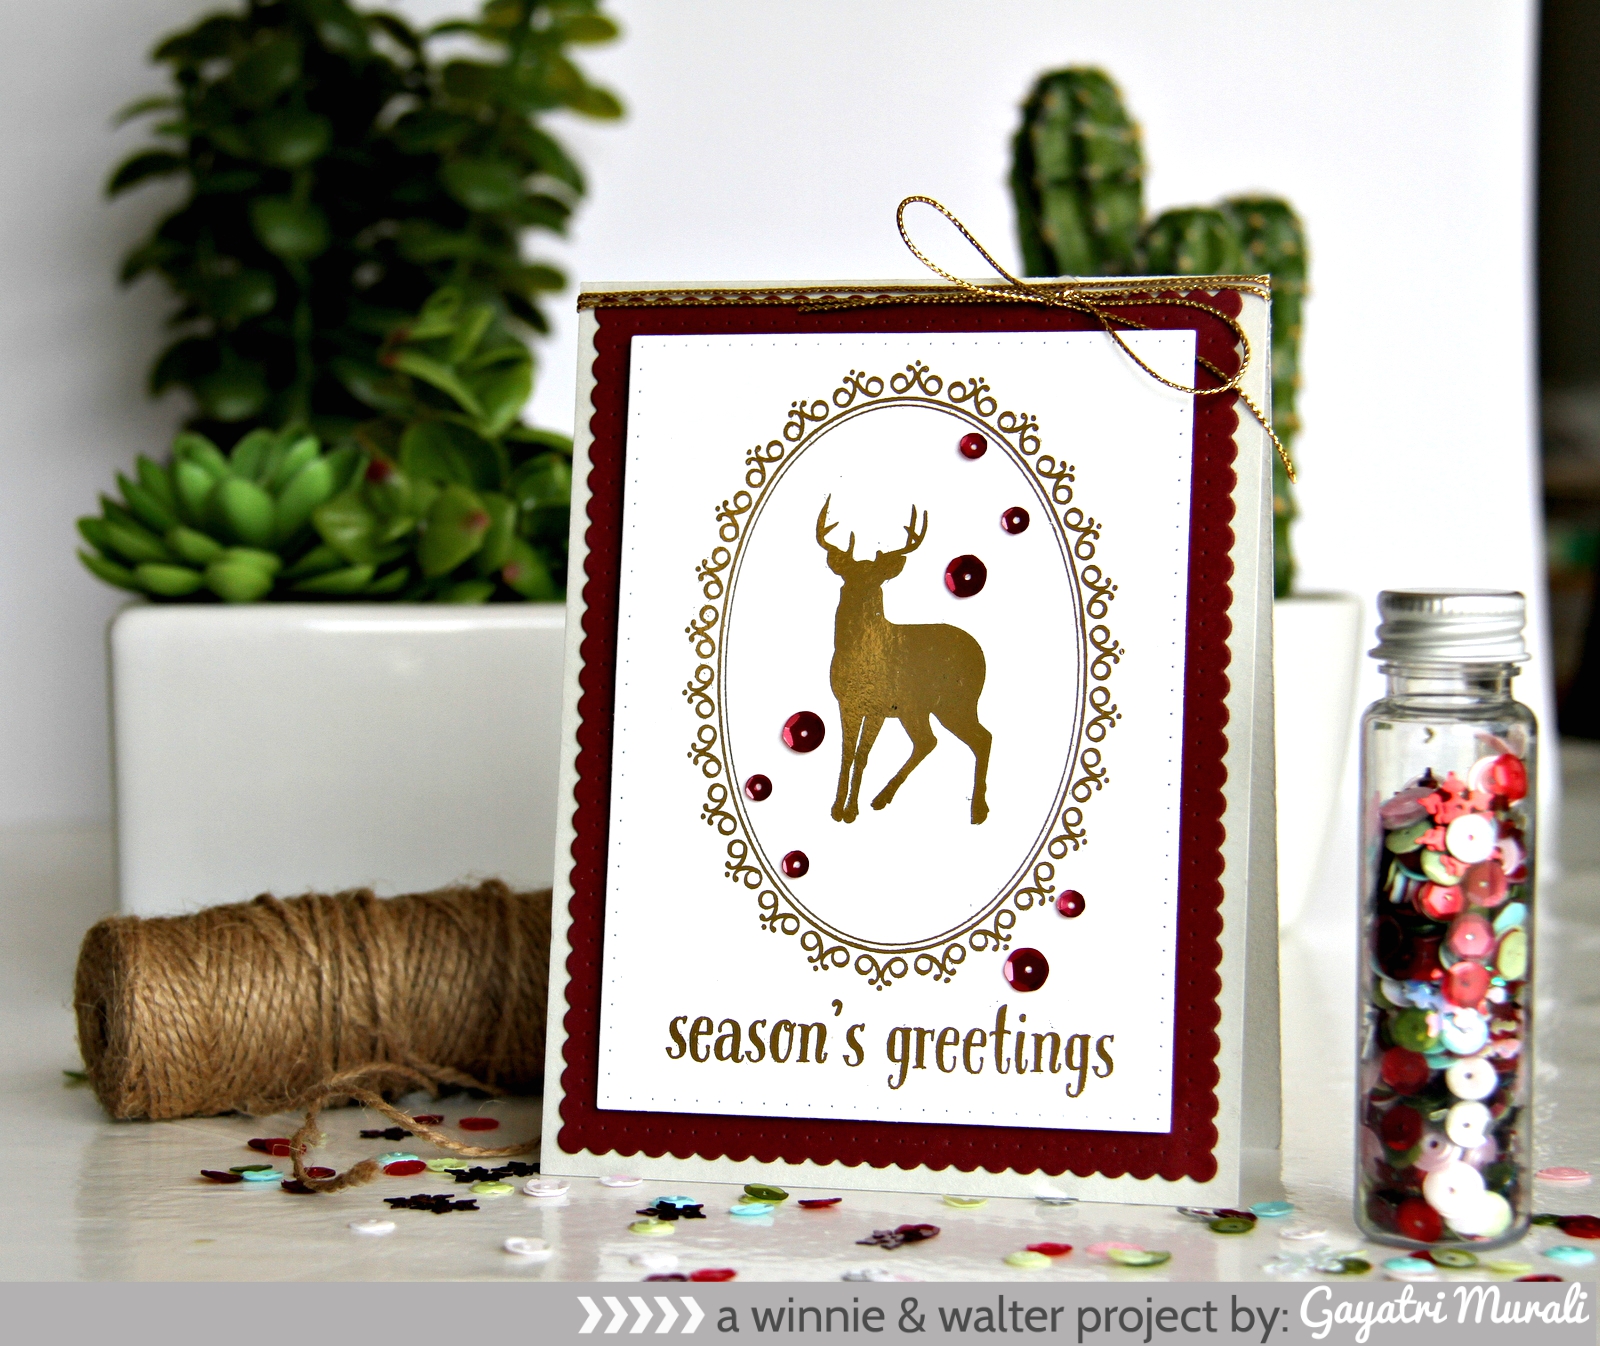
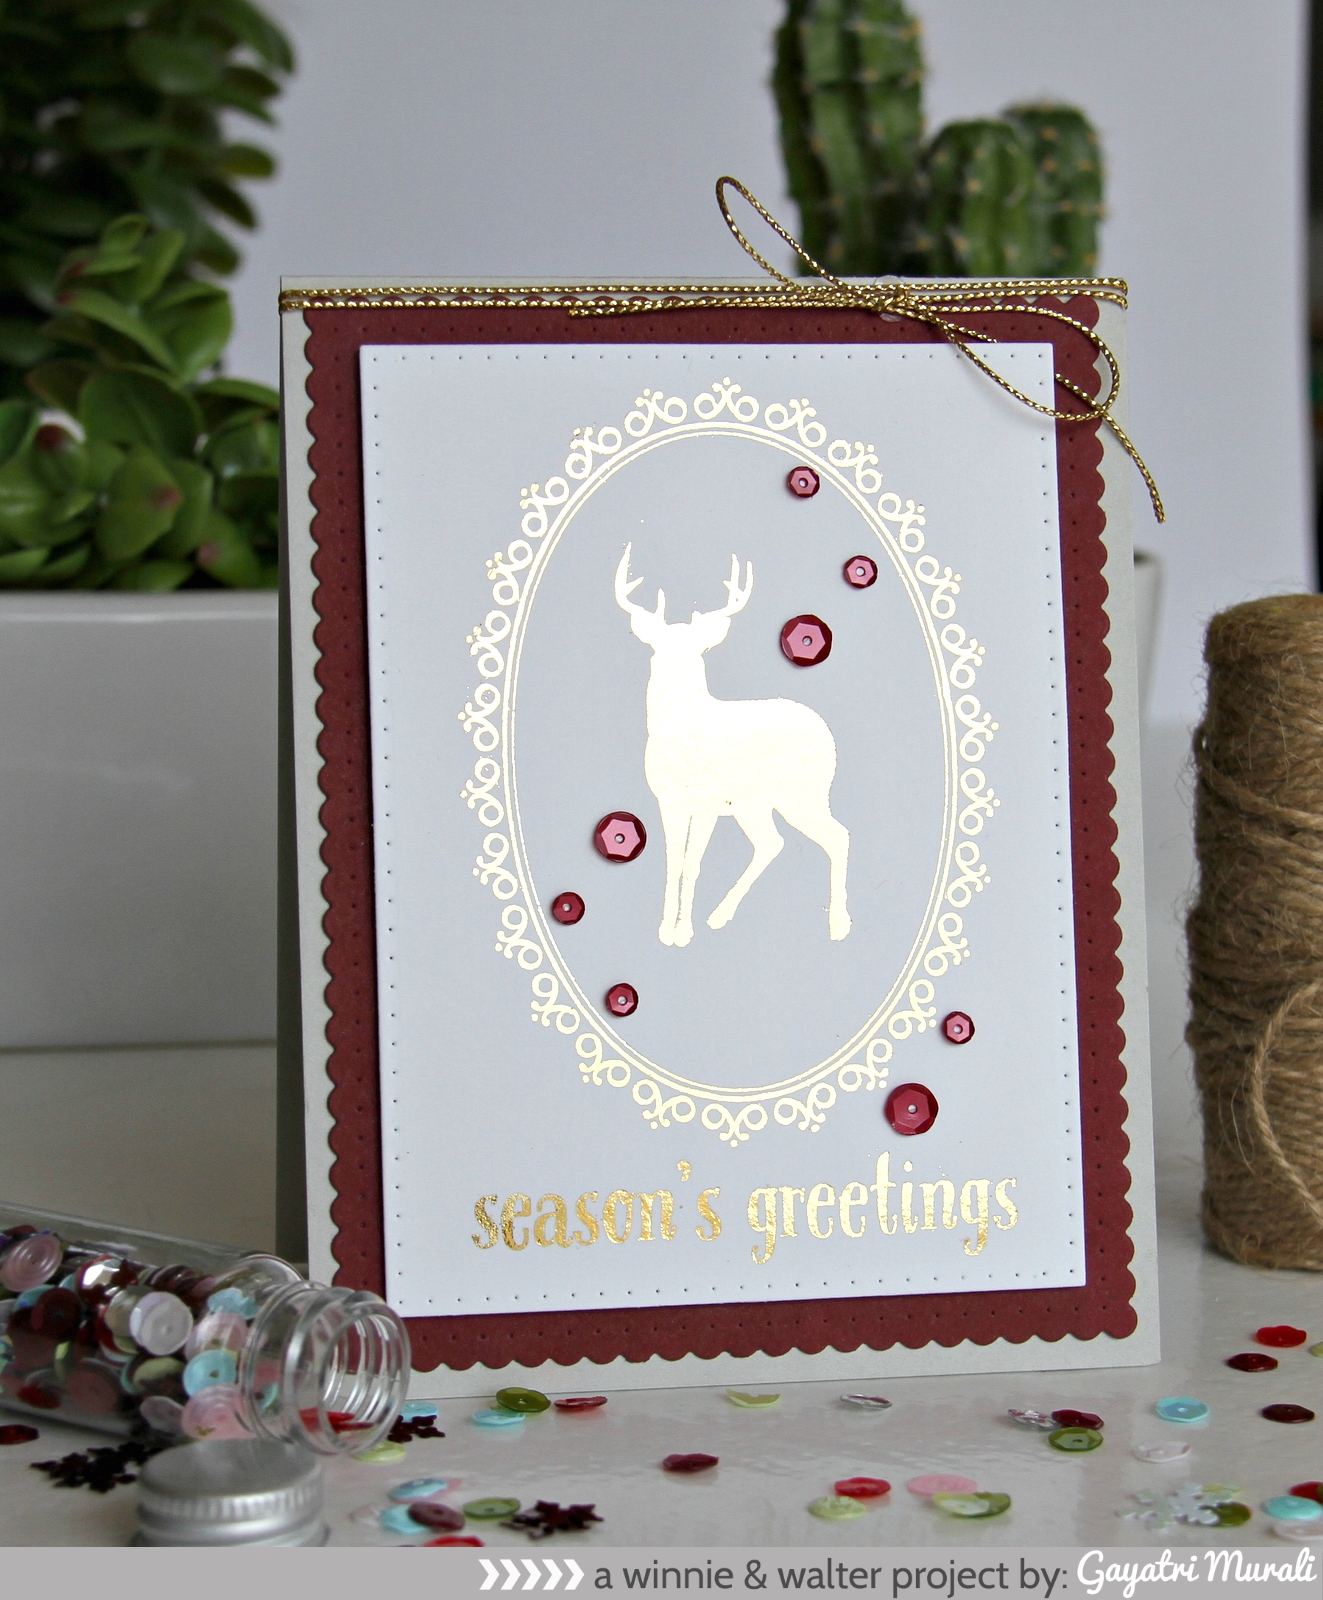
Season's Greeting card

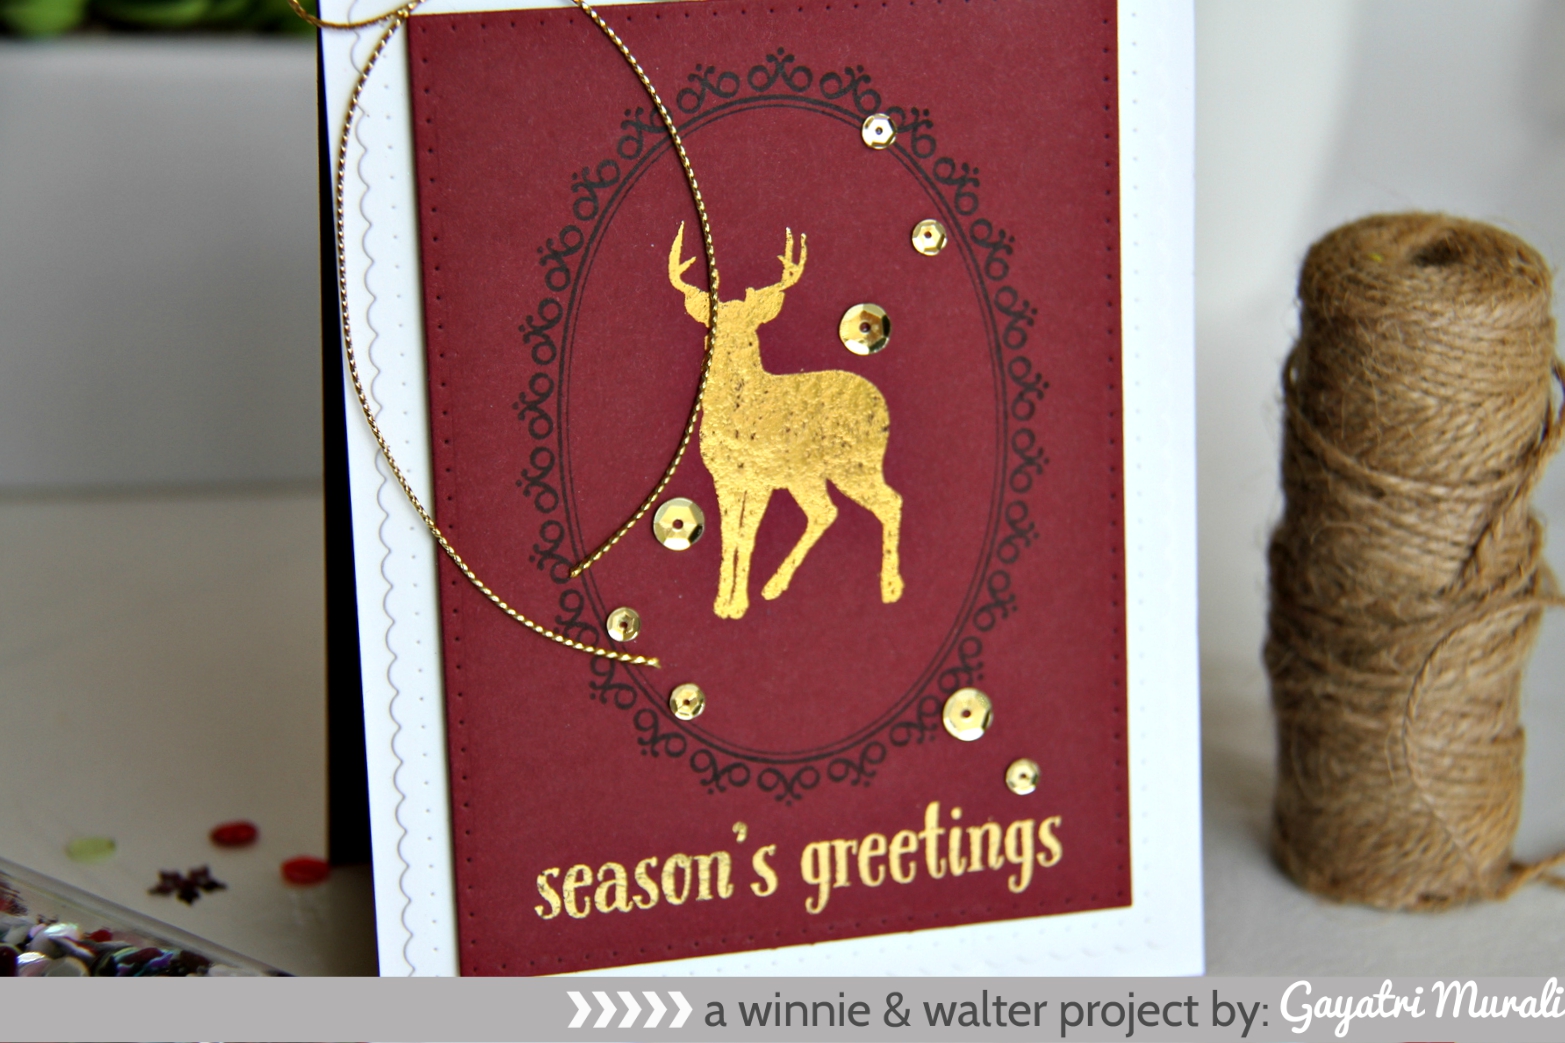
Season's Greetings Foiling on coloured cardstock

photo-tutorial_banner

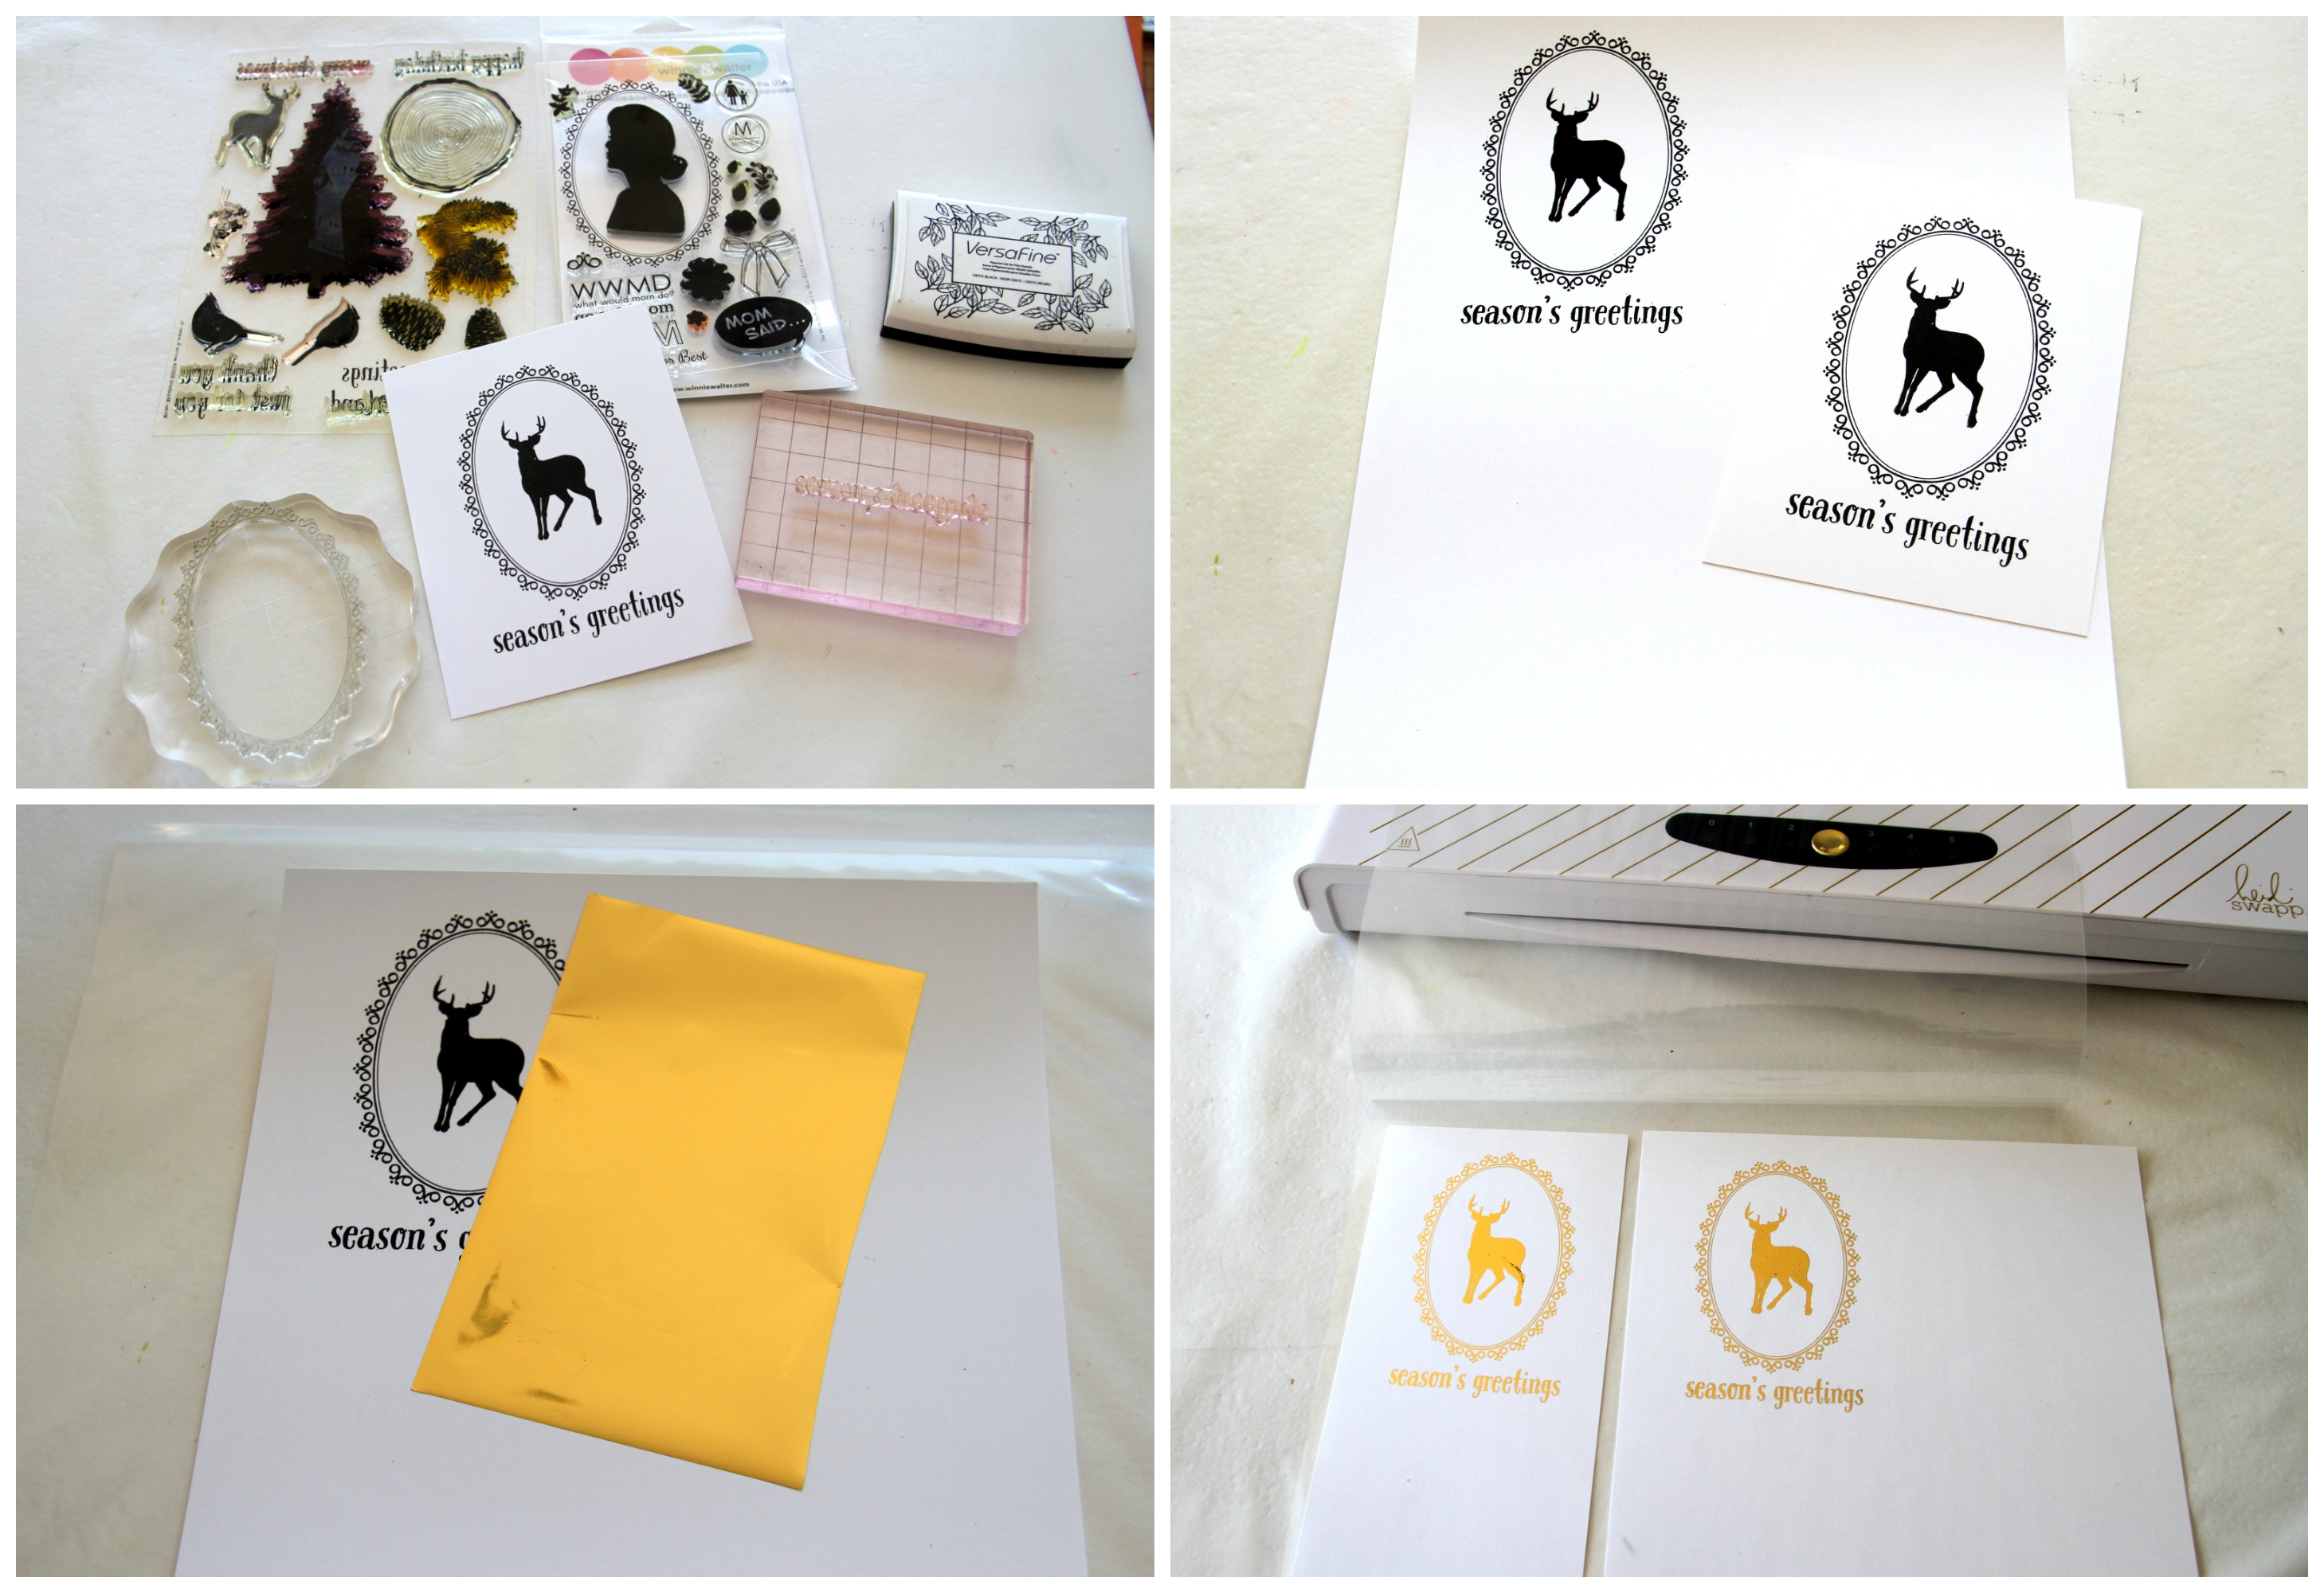
tutorial collage

brief_banner

I started with stamping the reindeer in black from Winter Woodland stamp on the centre of white cardstock panel trimmed to card front size. Then the frame from The Write Stuff: Leave it to Mom stamp set to frame reindeer and the sentiment from Winter Woodland. I used Versafine Black ink as it is a pigment ink and gives nice coverage on detailed images.

Next I scanned and copied this panel on an 80-pound Neenah cardstock using my laser printer. Make sure the flatbed scanner is clean of any dust. Otherwise the dust will be picked on the copied cardstock and foil will stick to it. If you are mass producing this card, just copy multiple times on the cardstock using the settings on your scanner printer. Since this is my first time, I just copied once. So I trimmed the copied cardstock to the size of the card front.

Now, I am using a Minc machine to foil the images. I set my setting to three and foiled the images using gold foil paper. I ran it twice just to make sure the details on the frame picked up the foil. With the white cardstock, the foiled images came out smooth and lovely. There were a few spray dots which was not noticeable. I believe the dots were the dust from my scanner bed. You can see my photo above, the left foiled panel has a scratch on the reindeer but then when I scanned my second time, wiped my flatbed off dust, then darkened x2 on my settings to get a nice dark image. That image when foiled came out perfect. Loved it.

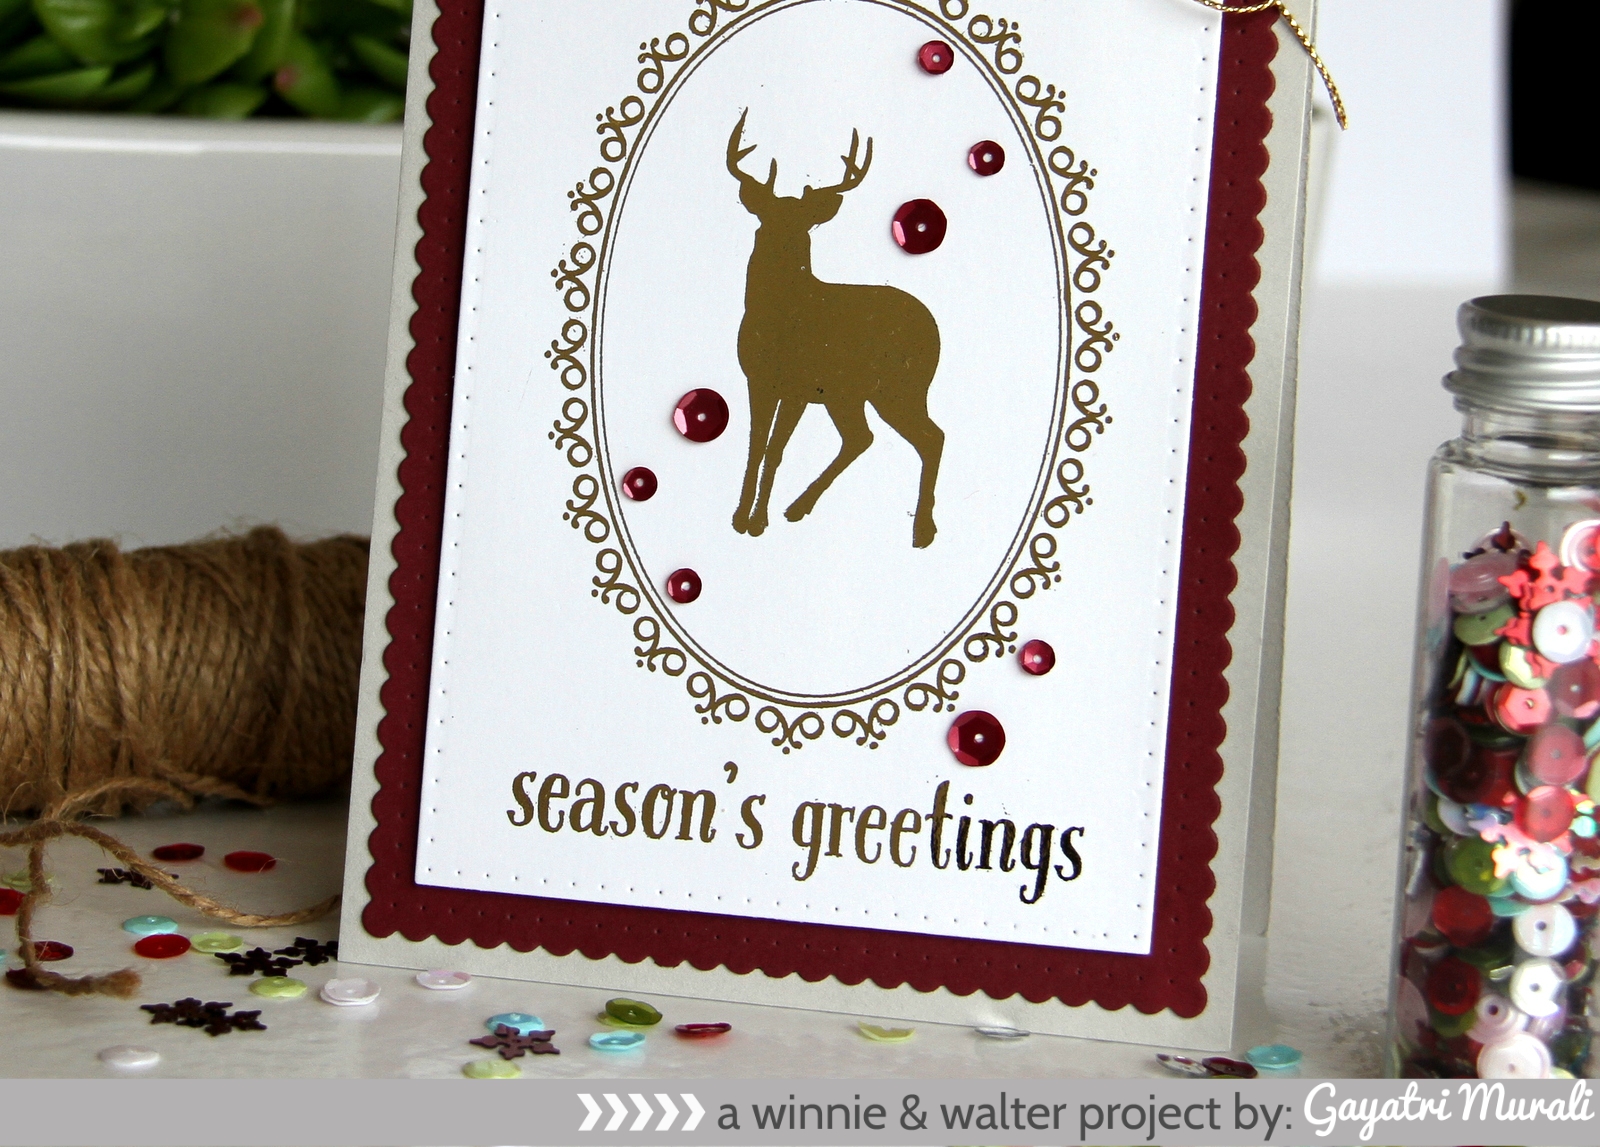
Season's Greetings closeup


On this angled photo below you can see the gold foil better.

Season's greeting card #1 angle

Then I wanted to see how this works on coloured cardstock. So I copied the image on a dark coloured cardstock and foiled only the reindeer and sentiment. The image was not as smooth as on white cardstock. This one has streaks. It does not look like a mistake but looks like distressed. You know what I mean. It is cool. But the sentiment came out smooth though.

Season's Greeting closeup1

I then used Essentials: Katherine cutaway to die cut panels out of the foiled panels, then using Essentials: Audrey cutaway to die cut the layering panels. I kept the card simple by layering the panels, adhering on the card front, then using gold twine to tie and add bows on top of the card. Finally embellishing with Cranberry sequins from Pretty Pink Posh on the white and gold sequins on the coloured.

Tips:

If you don’t have a laser printer, get your stamped images laser printed at any stationary store. In Australia, Officeworks does it on cardstocks. They do have thicker cardstocks so you do not have to take yours in. If you don’t have Minc machine yet, run it through a laminator to foil. Play around your settings to find what works well.

The foiling technique takes stamping to another new level. It is so much fun. Hope you are inspired to give this technique a try. Enjoy foiling!

Thanks for stopping by!

w&wDT_gayatrimurali_blog-sig

>>>LINK UP<<<


w&w-supplies

Wednesday, September 23, 2015

Metallic | You Make Life Sparkle with Lydia Evans

Hi there and happy Wednesday! It's Lydia here with you today and I have a little surprise ..... a video.

This month's theme is 'Metallic' so I decided to do and bit of foiling. I love foil it adds such a beautiful and expensive look to cards, and foiling a stamped image is easy ... I will show you how.
The video takes you step-by-step how I created this card....

  DSC06152
I have used lots of the 'Sparkle' set on this card and for a little set it packs a big punch! There are lots of different occasions this set would work for too.

I have used Essentials: Audrey Cutaways for the card layer, I love this die-set as it's just so versatile, I mean that scalloped edge is just a perfect touch!

DSC06156

Here's the video I do hope you enjoy it!   


To see the video on YouTube:
https://www.youtube.com/watch?v=2F0X7XnlHgs&feature=youtu.be  

See you again real soon!

Hugs Lydia x

w&wDT_lydiaevans_blog-sig


w&w-supplies


Monday, September 21, 2015

Metallic | Wishing You Happy Holidays with Gayatri Murali

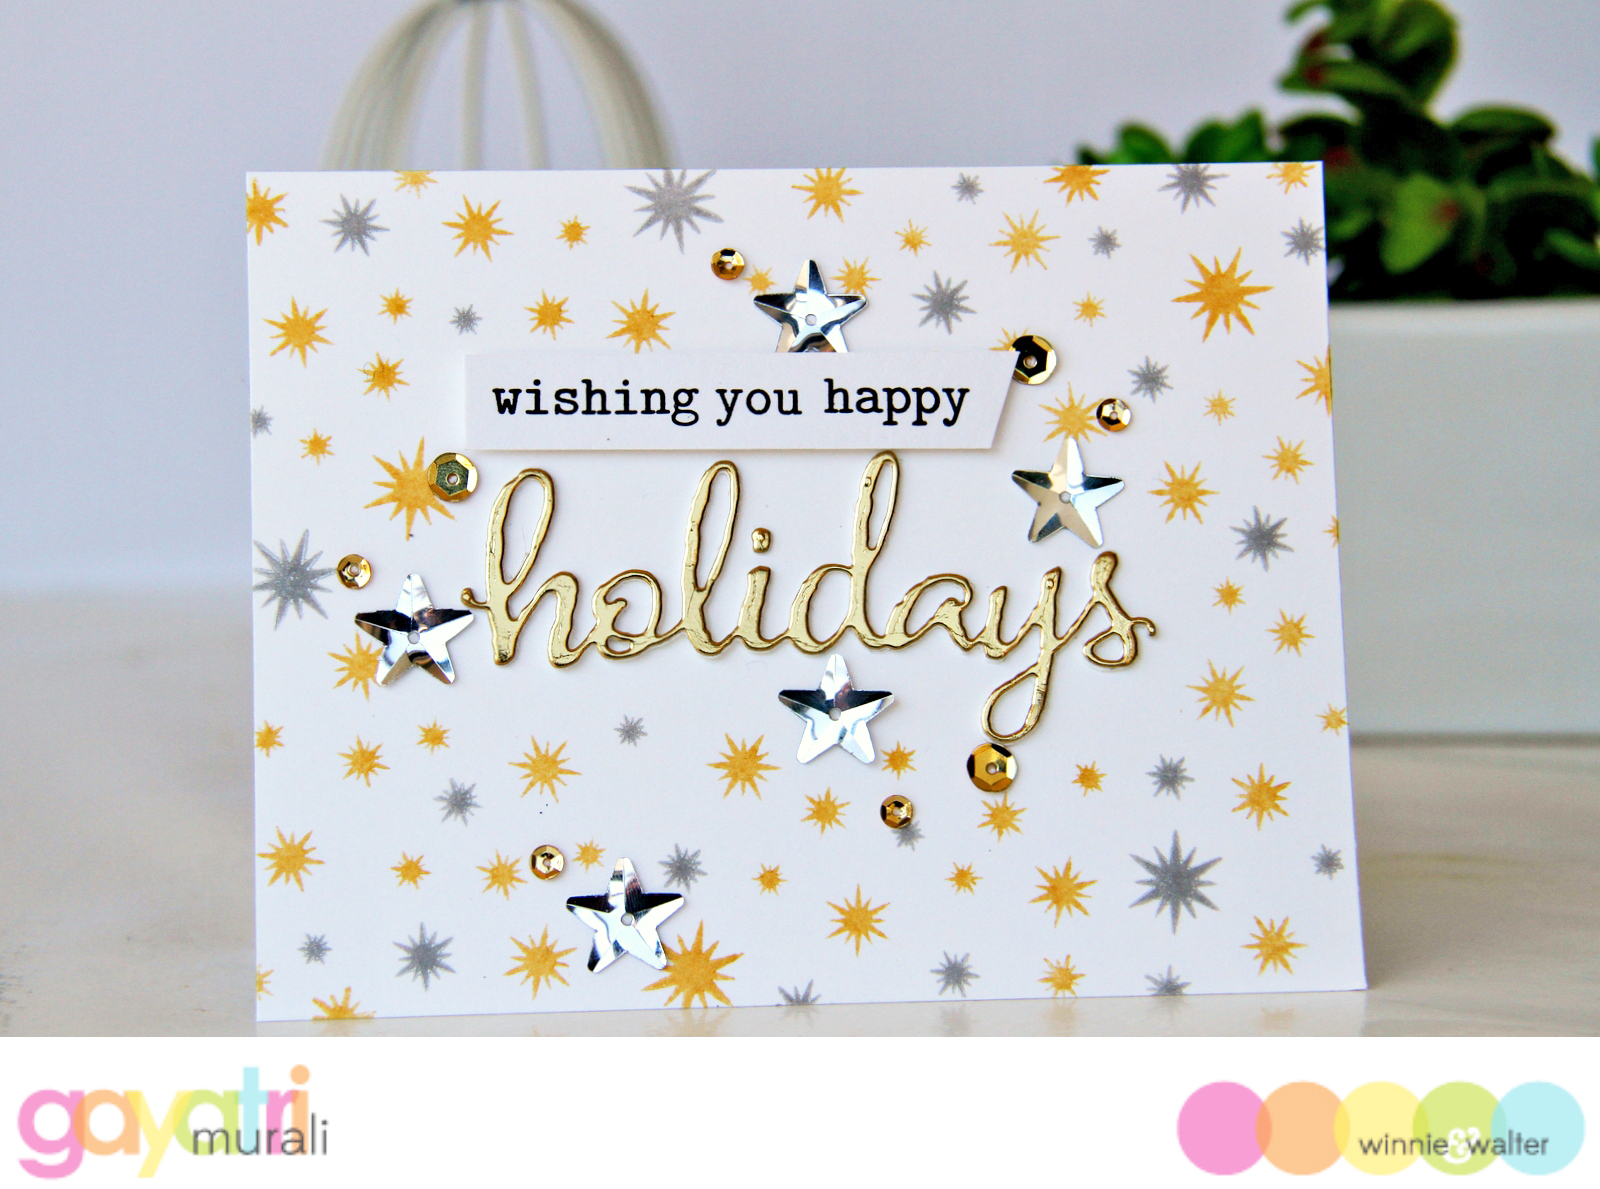
Hello everyone, Gayatri here today with a holiday card for this month’s metallics theme. This is my card:

gayatri_Wishing you happy holidays2


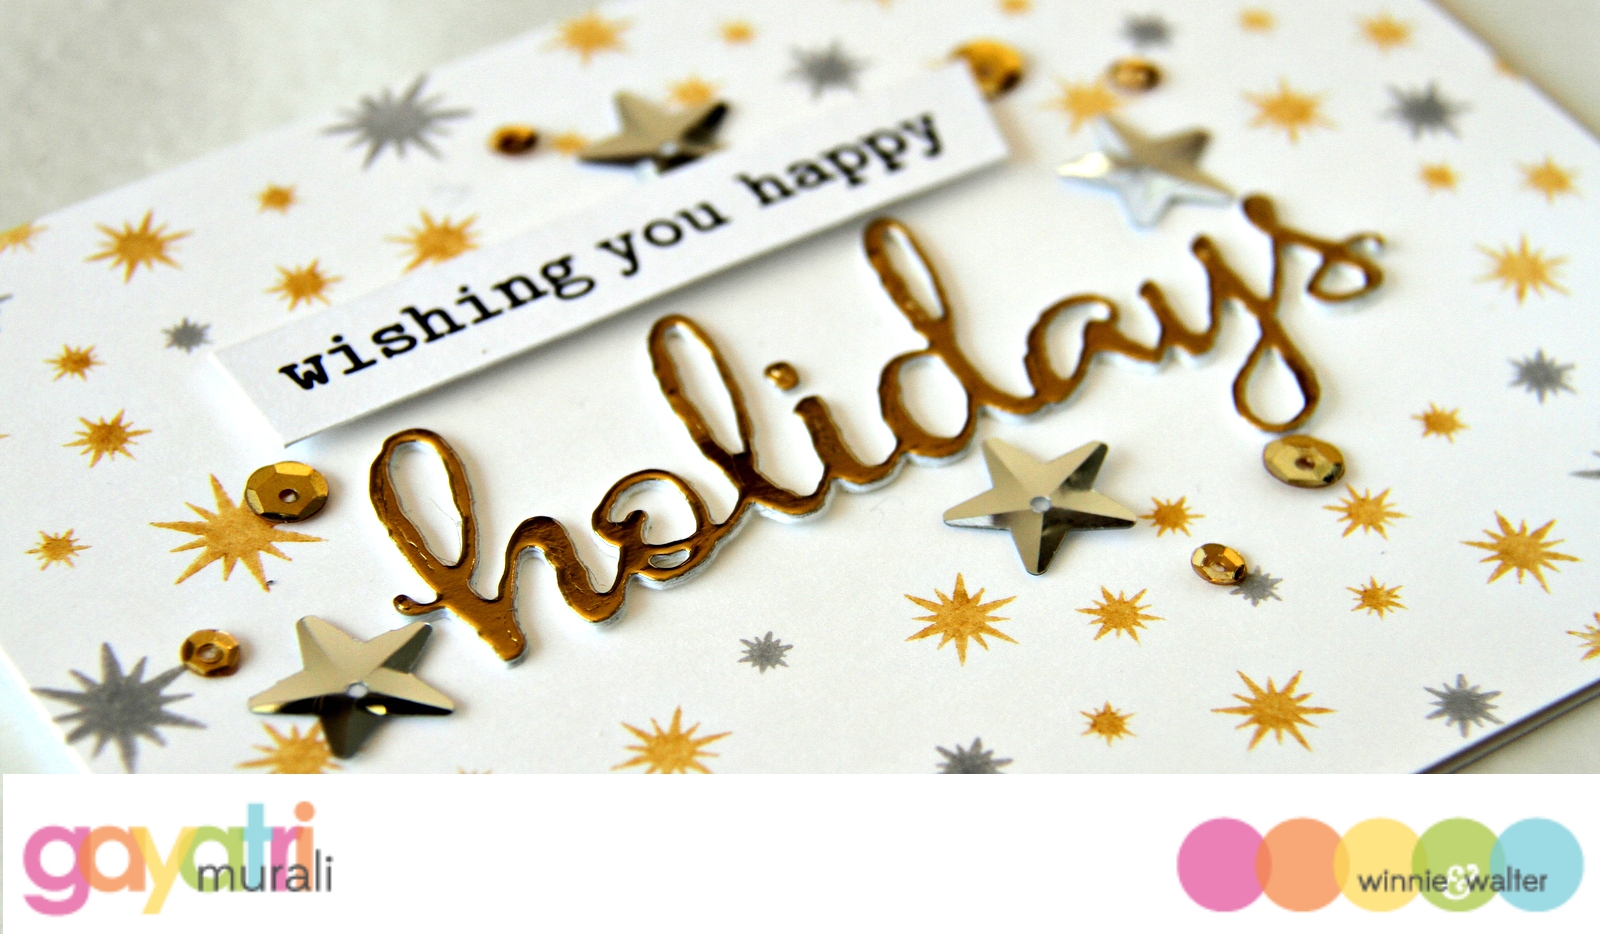
This is a quick and easy card which can be mass produced. I started with making a landscape card base using white cardstock. I preferred the thicker 110 pound cardstock from Neenah as I am going to stamp on the card front. I placed the holiday die from The Big, the Bold and Merry Cutaways set in the middle of the card front and temporarily secured it. Then I stamped the shining star image from Scenery: Big Bang Flurries stamp set using Tsukineko Gold Delicata pigment ink around the die, then filled in the gaps with Tsukineko Silver Delicata pigment ink using the same stamps. I love the gold and silver combination on white base. I then removed the die, and die cut one gold and two white die cuts using the Holiday die. I stacked and glued them with the gold die cut on the top. I adhered this dimensional die cut to the centre of the card front. The smaller sentiments are from The Big, the Bold and Merry stamp set which I stamped on a strip of white cardstock, trimmed at an angle and adhered using foam adhesives. Finally adhered silver stars and gold sequins from Pretty Pink Posh to bring the colours together. Here is closeup photo of the card.

gayatri_wishing you happy holidays closeup


You can change the colours and add some traditional red and green or blue stars in between to vary the card a bit. Similarly, use different die cut from The Big, the Bold and Merry cutaway set and different smaller sentiment to get entirely different card but keeping the design the same. Hope I have inspired you to start your Christmas card collection.

Thanks for stopping by today!

w&wDT_gayatrimurali_blog-sig


w&w-supplies