Showing posts with label in a word: birthday titles cutaways. Show all posts

Wednesday, April 18, 2018

In a Word: Birthday Titles Cutaways with Kelly


Hi Folks! Kelly Griglione here to share a fun set of cards using In a Word: Birthday Tiles Cutaways. (Editor's Note: these will be back in stock very soon!)


This project started while Spring cleaning my craft room ... I made an honest effort while evaluating all my scraps and random pieces of projects laying around to "use it or lose it." Awhile ago I made this packaging as part of the August 2017 product release (see blog post). I haven't had an occasion to use it right away, and I really didn't want to keep storing something that bulky, so I removed the metallic purple bands and cut them down to size.

I wanted to put each metallic purple band on the bottom of the card, so for the top of the card I taped together three different cutaway phrases. As a bonus, all but the white card base are leftovers from prior projects as well!

 Once the words are set on the card base, all that's left to do is add some adorable critters ... Evelin T Designs to the rescue! The elephant from Happy Dance with Evelin T Designs looks so celebratory, especially with a balloon in hand. 


On the charcoal card, I added a cupcake from Wish Big with Evelin T Designs and got some puffy texture with my Tsukinekeo Radiant Neon Amplify liquid that magically gets puffy when you heat it. It's so fun to watch! The bird guarding the cupcake is from LS Exclusives: So Tweet with Evelin T Designs. 

The foxy flutist from Party On with Evelin T Designs is another leftover I was able to enlist for a focal point. As with the previous cards, I like that the die cuts extend over on top of the text so that you know the words are there, but they're not 100% visible. Kind of like how magazine covers are laid out so the main images are often covering a portion of the magazine title. You know what it says, but you don't see all the letters. 

Sometimes I hesitate on getting the companion die set because I think I can just get away with stamping all the images onto the card. This is a case where the dies were necessary ... both for the main image, and for the tiny music notes drifting through the negatively cut letters. 
One more thing to mention, the tree stump the fox is standing on for his performance is actually the cupcake turned upside down!
 

The last card has the kitty playing an accordion on a leftover heart from True Dotty Heart Cutaways. For all the critters I tucked the far leg behind whatever they were standing on so it looked more like they were dimensional. Also, on several of the cards I added some arrows from Scenery: Stripes 2.

It's been awhile since I've used a side fold card, and honestly I only did this because the leftover card bases I wanted to use were all folded that way. But in the end I rather like them this way, and might consider doing this more. Plus anytime you can see through to the inside of the card, I think that's a fun element to have. It's a chance to show off any patterned paper you have inside. 
Three cheers for a more efficient workspace (those long metallic purple strips were really a pain to store!) and for a new set of birthday cards. I'm happy with how they turned out!

Hope you're able to get some Spring cleaning done in your workspace. Every little bit helps!

Thanks for stopping by!
- Kelly


w&wDT_kellygriglione_blog-sig


w&w-supplies

Thursday, February 1, 2018

w&w 4th Birthday Bash | Four Challenge with Shay

challengeb

Hello fellow party goers!  It's Shay here.  I am so excited to bring you my challenge.  To commemorate our 4th birthday I am following up on my One Challenge from our first year and Two Challenge from our second year and Three Challenge from last year.  This year it is the Four Challenge!

>>>CHALLENGE DETAILS<<<

Make a new project using the number 4 or four, four colors, four patterns, four layers, four embellishments, four photos, four words or four stamp sets (and so on)...really anyway to incorporate four into your project!  You can focus on a single option or combine the options (for instance a four layer card using four colors + four embellishments).

>>>MY PROJECT<<<

shay_IMG_4273 

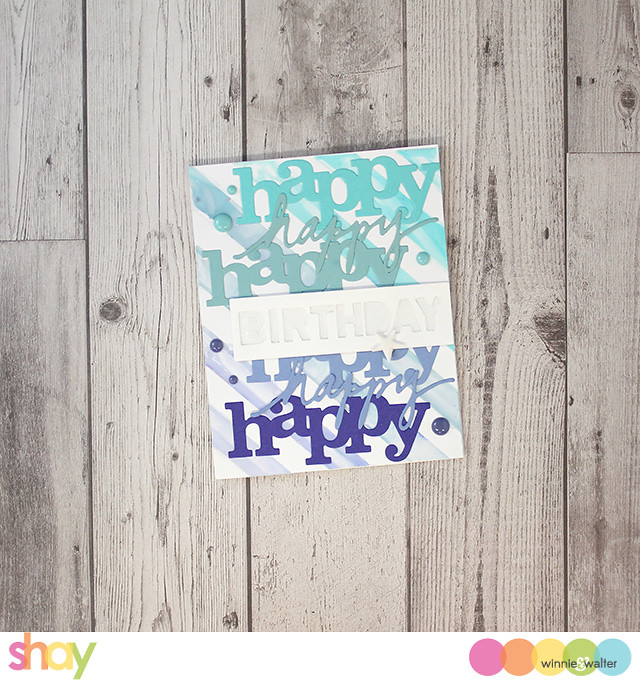
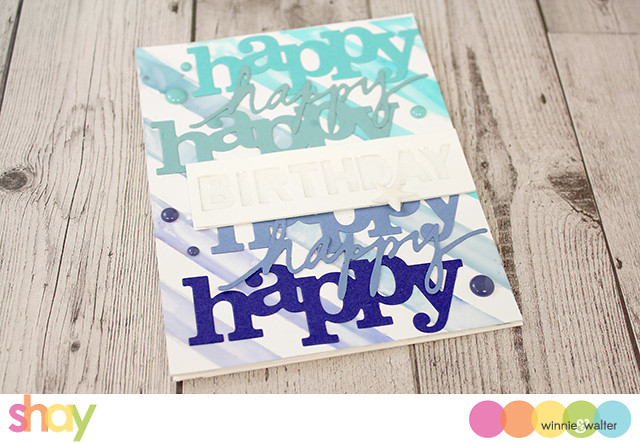
I began with a background I had created some time ago using mixed medium and distress ink along with Scenery: Classic Diagonal Creative Screenings.  When I have a little time to play I create backgrounds and I find having some background panels sitting awaiting me whenever I need them really a great jumping off point and time saver.

shay_IMG_4274 

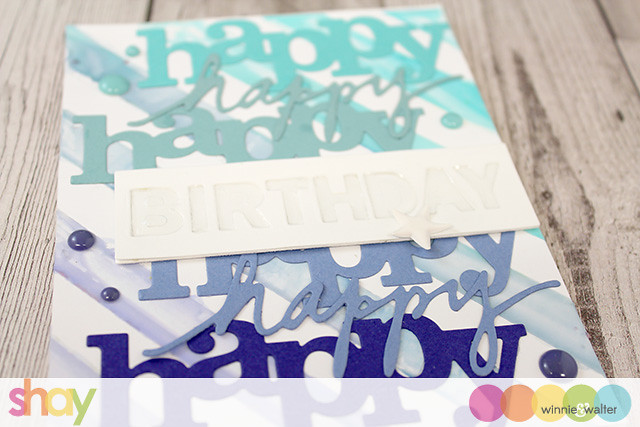
I pulled out 4 colors (first use of the number 4) from the background and cut In a Word: Happy Cutaway from each of the cardstock colors so I have 4 happy's (4 again).  I adhered the four happy's to the background panel.  I also cut out the handwritten "happy" from In a Word: Happy Coordinating Cutaways from the 4 same colors and adhered 2 of them to fill in some of the space on the background.  Next I cut out the birthday tile from In a Word: Birthday Tiles Cutaways 3 times out of white cardstock with the last not cutting the "birthday" all the way through.  I glued the fully cutout tiles on top of the one that did not cut out fully.  I adhered the birthday tile to the panel.  Then I filled in the open area of the "birthday" with Nuvo Crystal Drops for some shine and interest.

Last I added 3 greenish enamel dots to the top panel and 3 purple enamel dots to the bottom of the panel and added a white puffy star to the white panel so that there are 4 embellishments on top including the white star and 4 embellishments on the bottom of the card including the white star (4 again!)

shay_IMG_4276

Now it is your turn to link up your Four Challenge project!

>>>GIVEAWAY<<<

Link up your take on this challenge for a chance to win a $75.00 gift card (gift code) to the w&w shop.  One random winner will be chosen.

For more information on how to enter to become our Guest Star for the next release CLICK HERE.  Please remember you need to include GS in the Link Title to be considered for the Guest Star competition.

w&w 4th Birthday Bash | Inspiration Challenge with Gayatri

challengeb

Hello and welcome to my Inspiration Challenge. This is Gayatri Murali for you. First I like to wish Winnie and Walter Happy Happy 4th Birthday and many more such birthdays to come. So happy to be part of the celebrations this year. Hope you participate and celebrate with us.

I have an inspiration challenge for you as part of the Birthday Bash. 

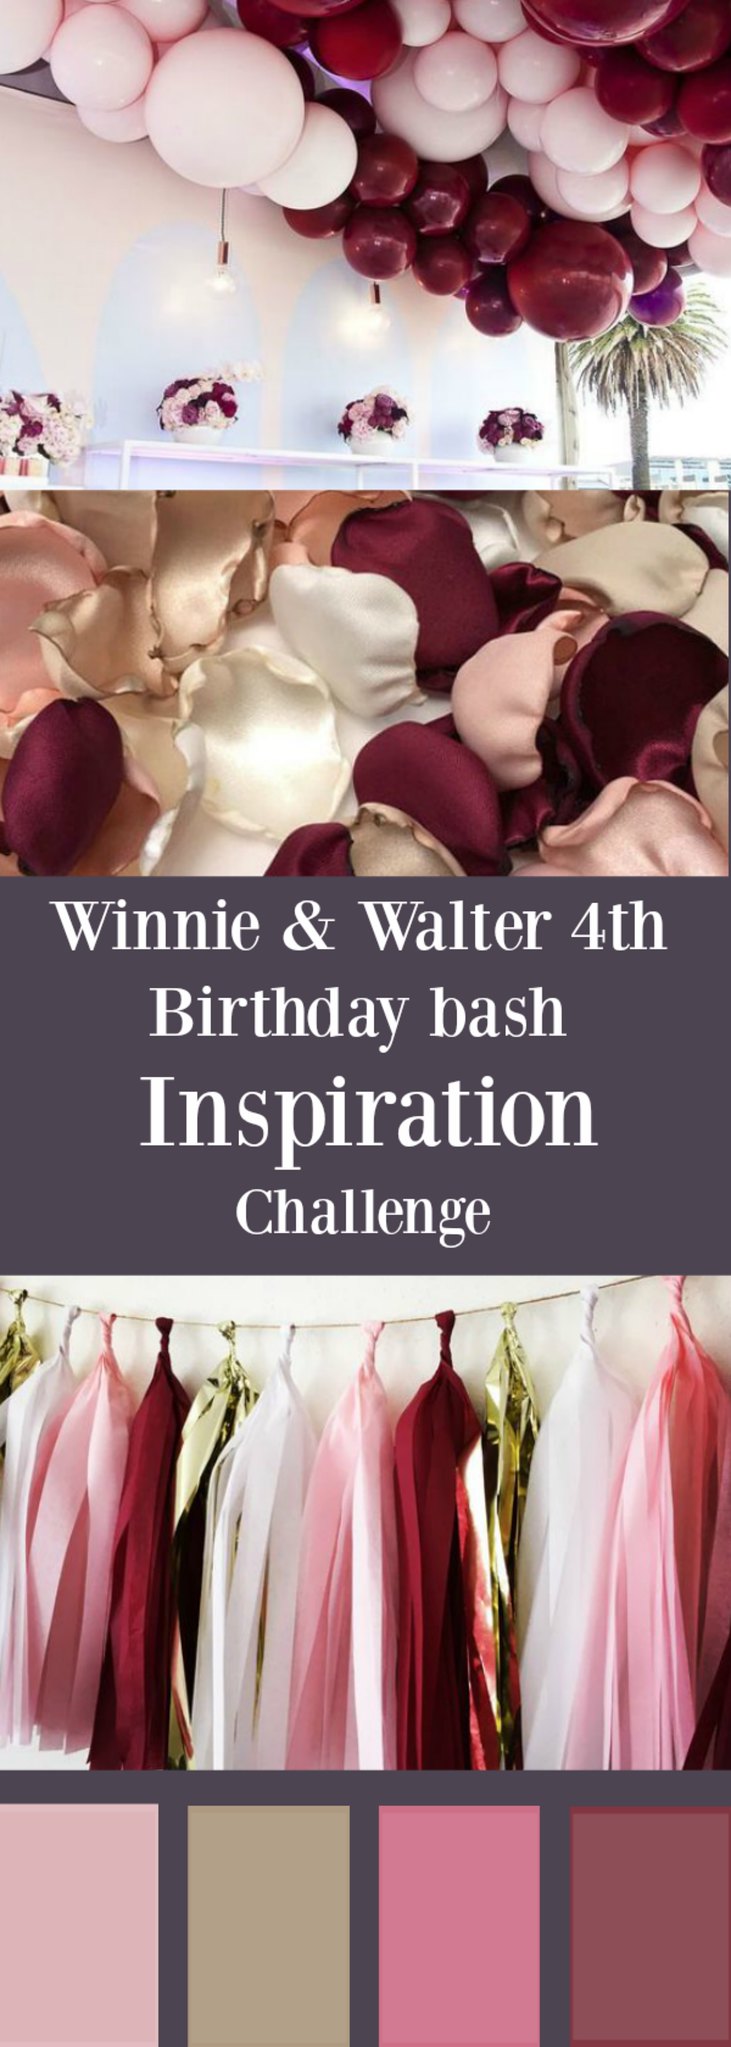
Gayatri Color Board for Winnie & Walter birthday bash

You can use the photos as your inspiration for your card or you can use the colours as your inspiration. I have used both on my card for the challenge.

gayatri_W&W Inspiration challenge.

Here is how I made the card.

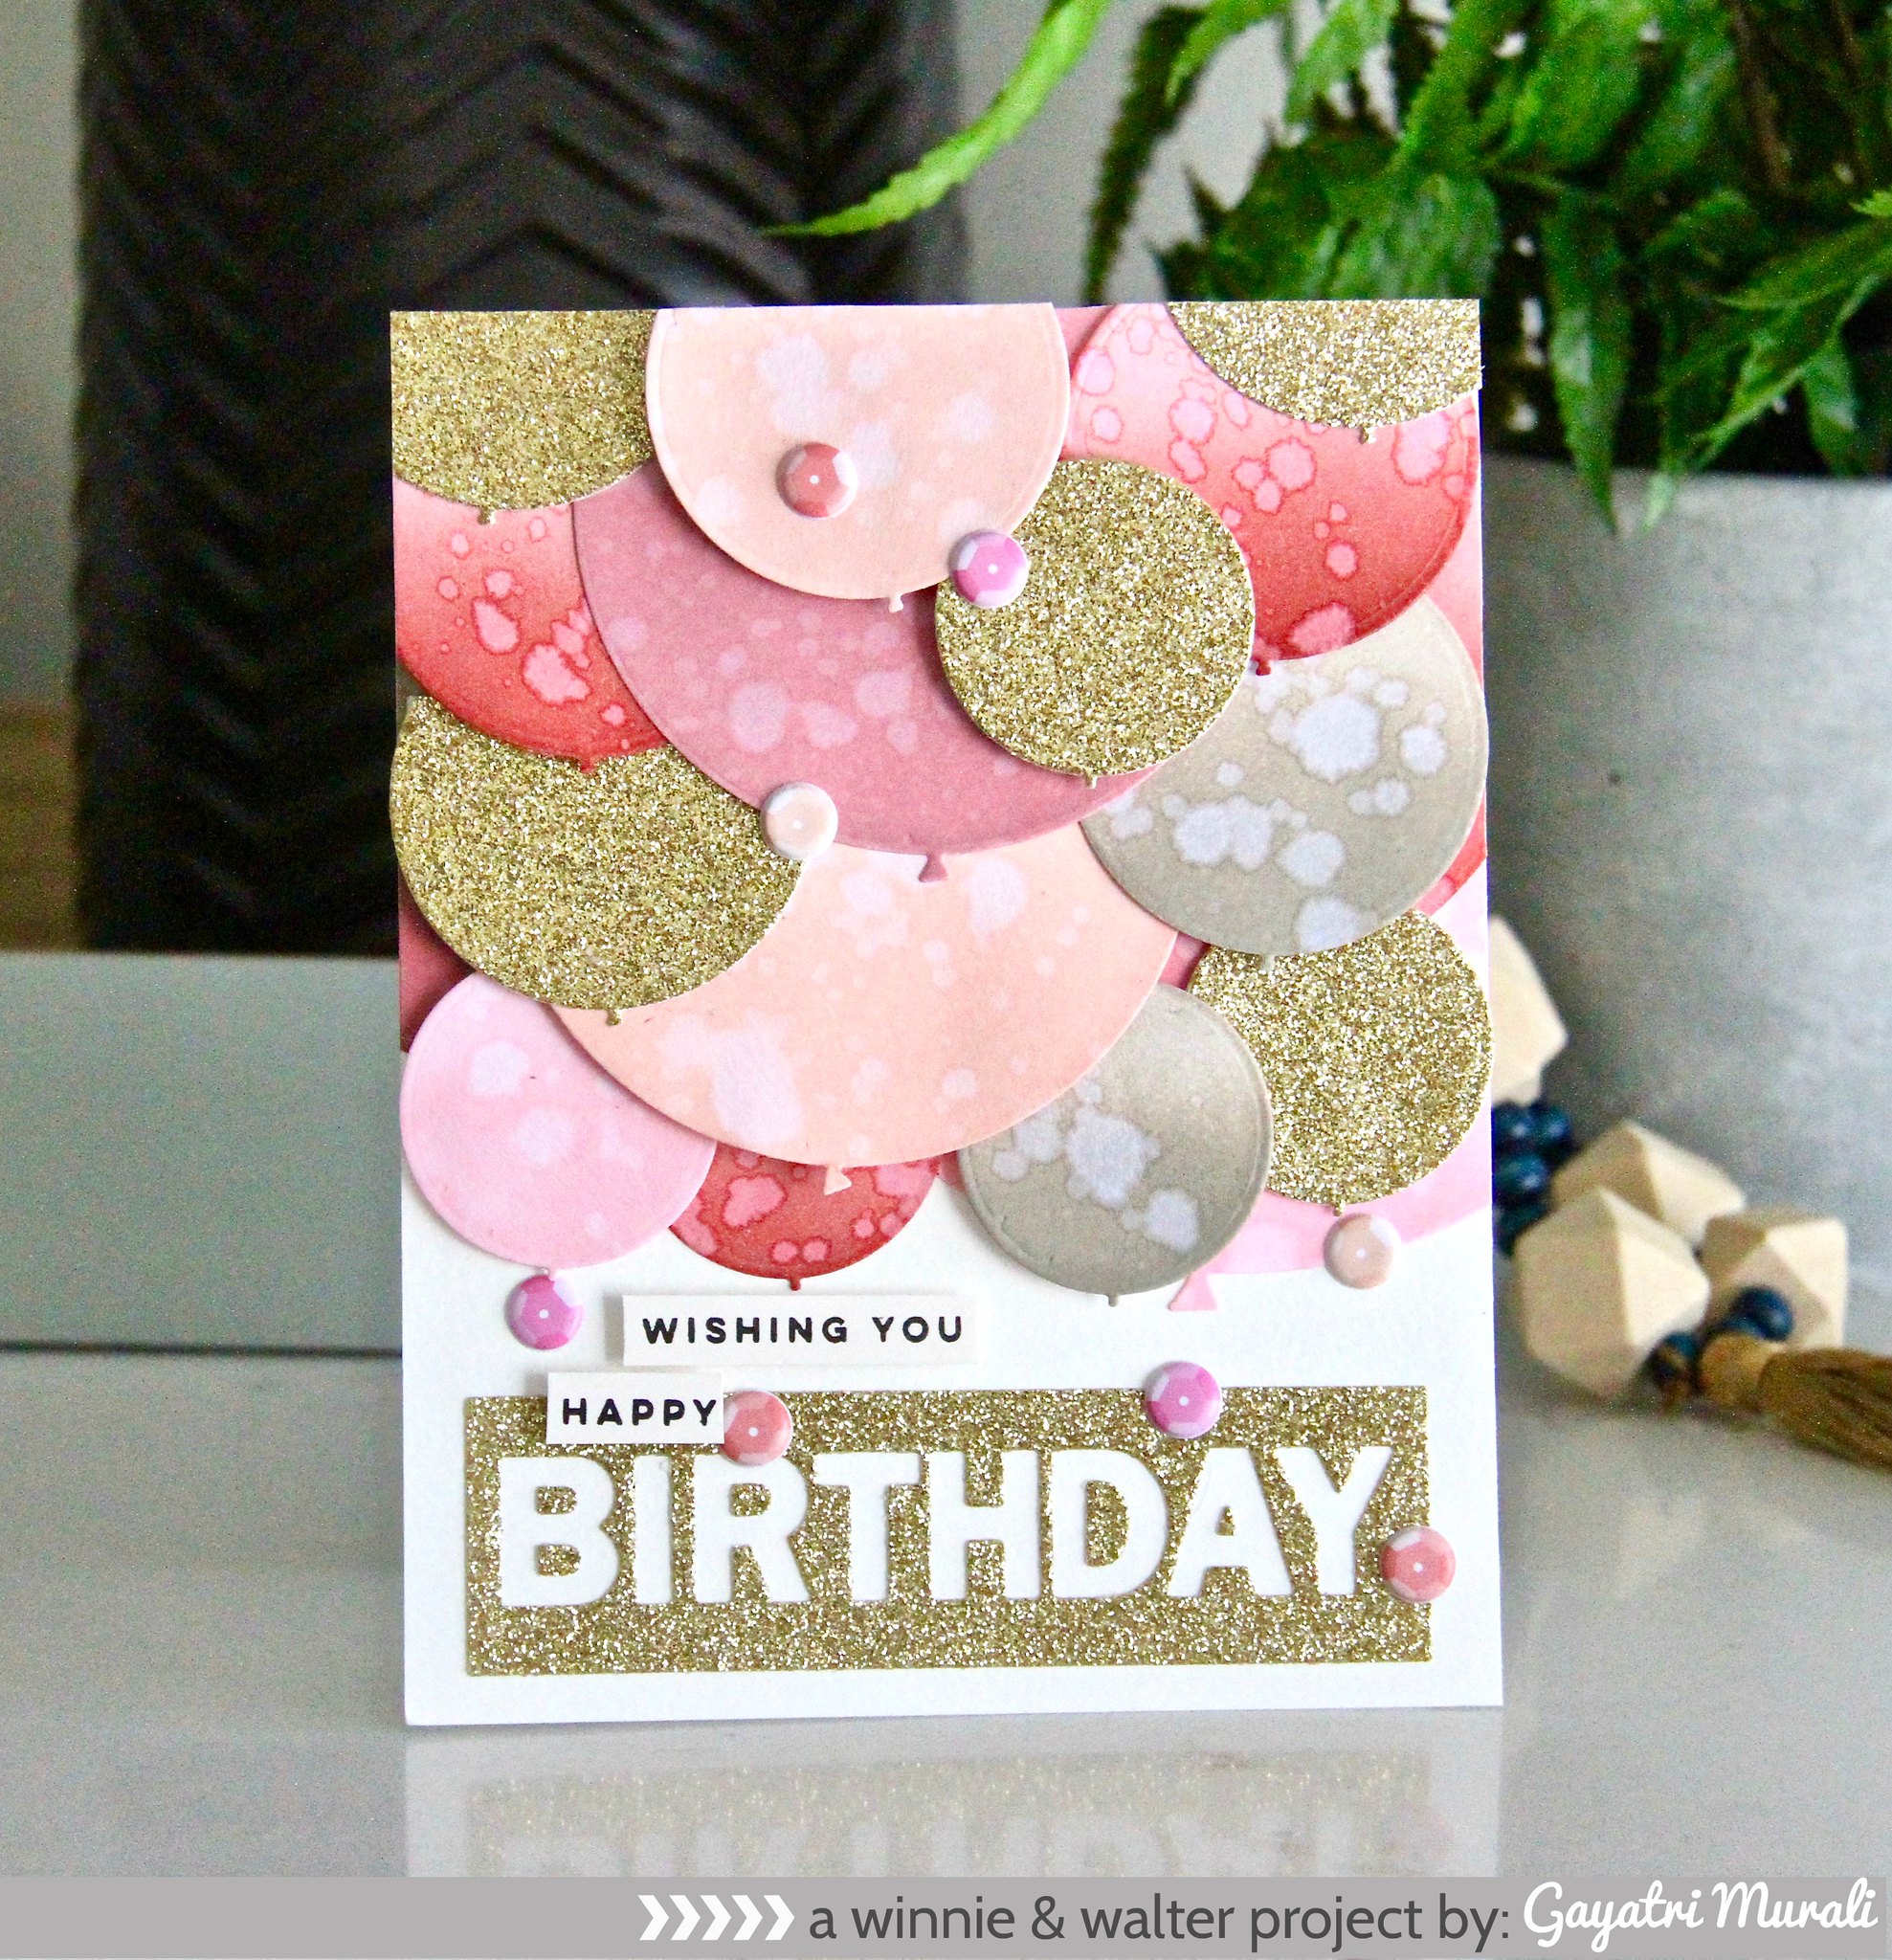
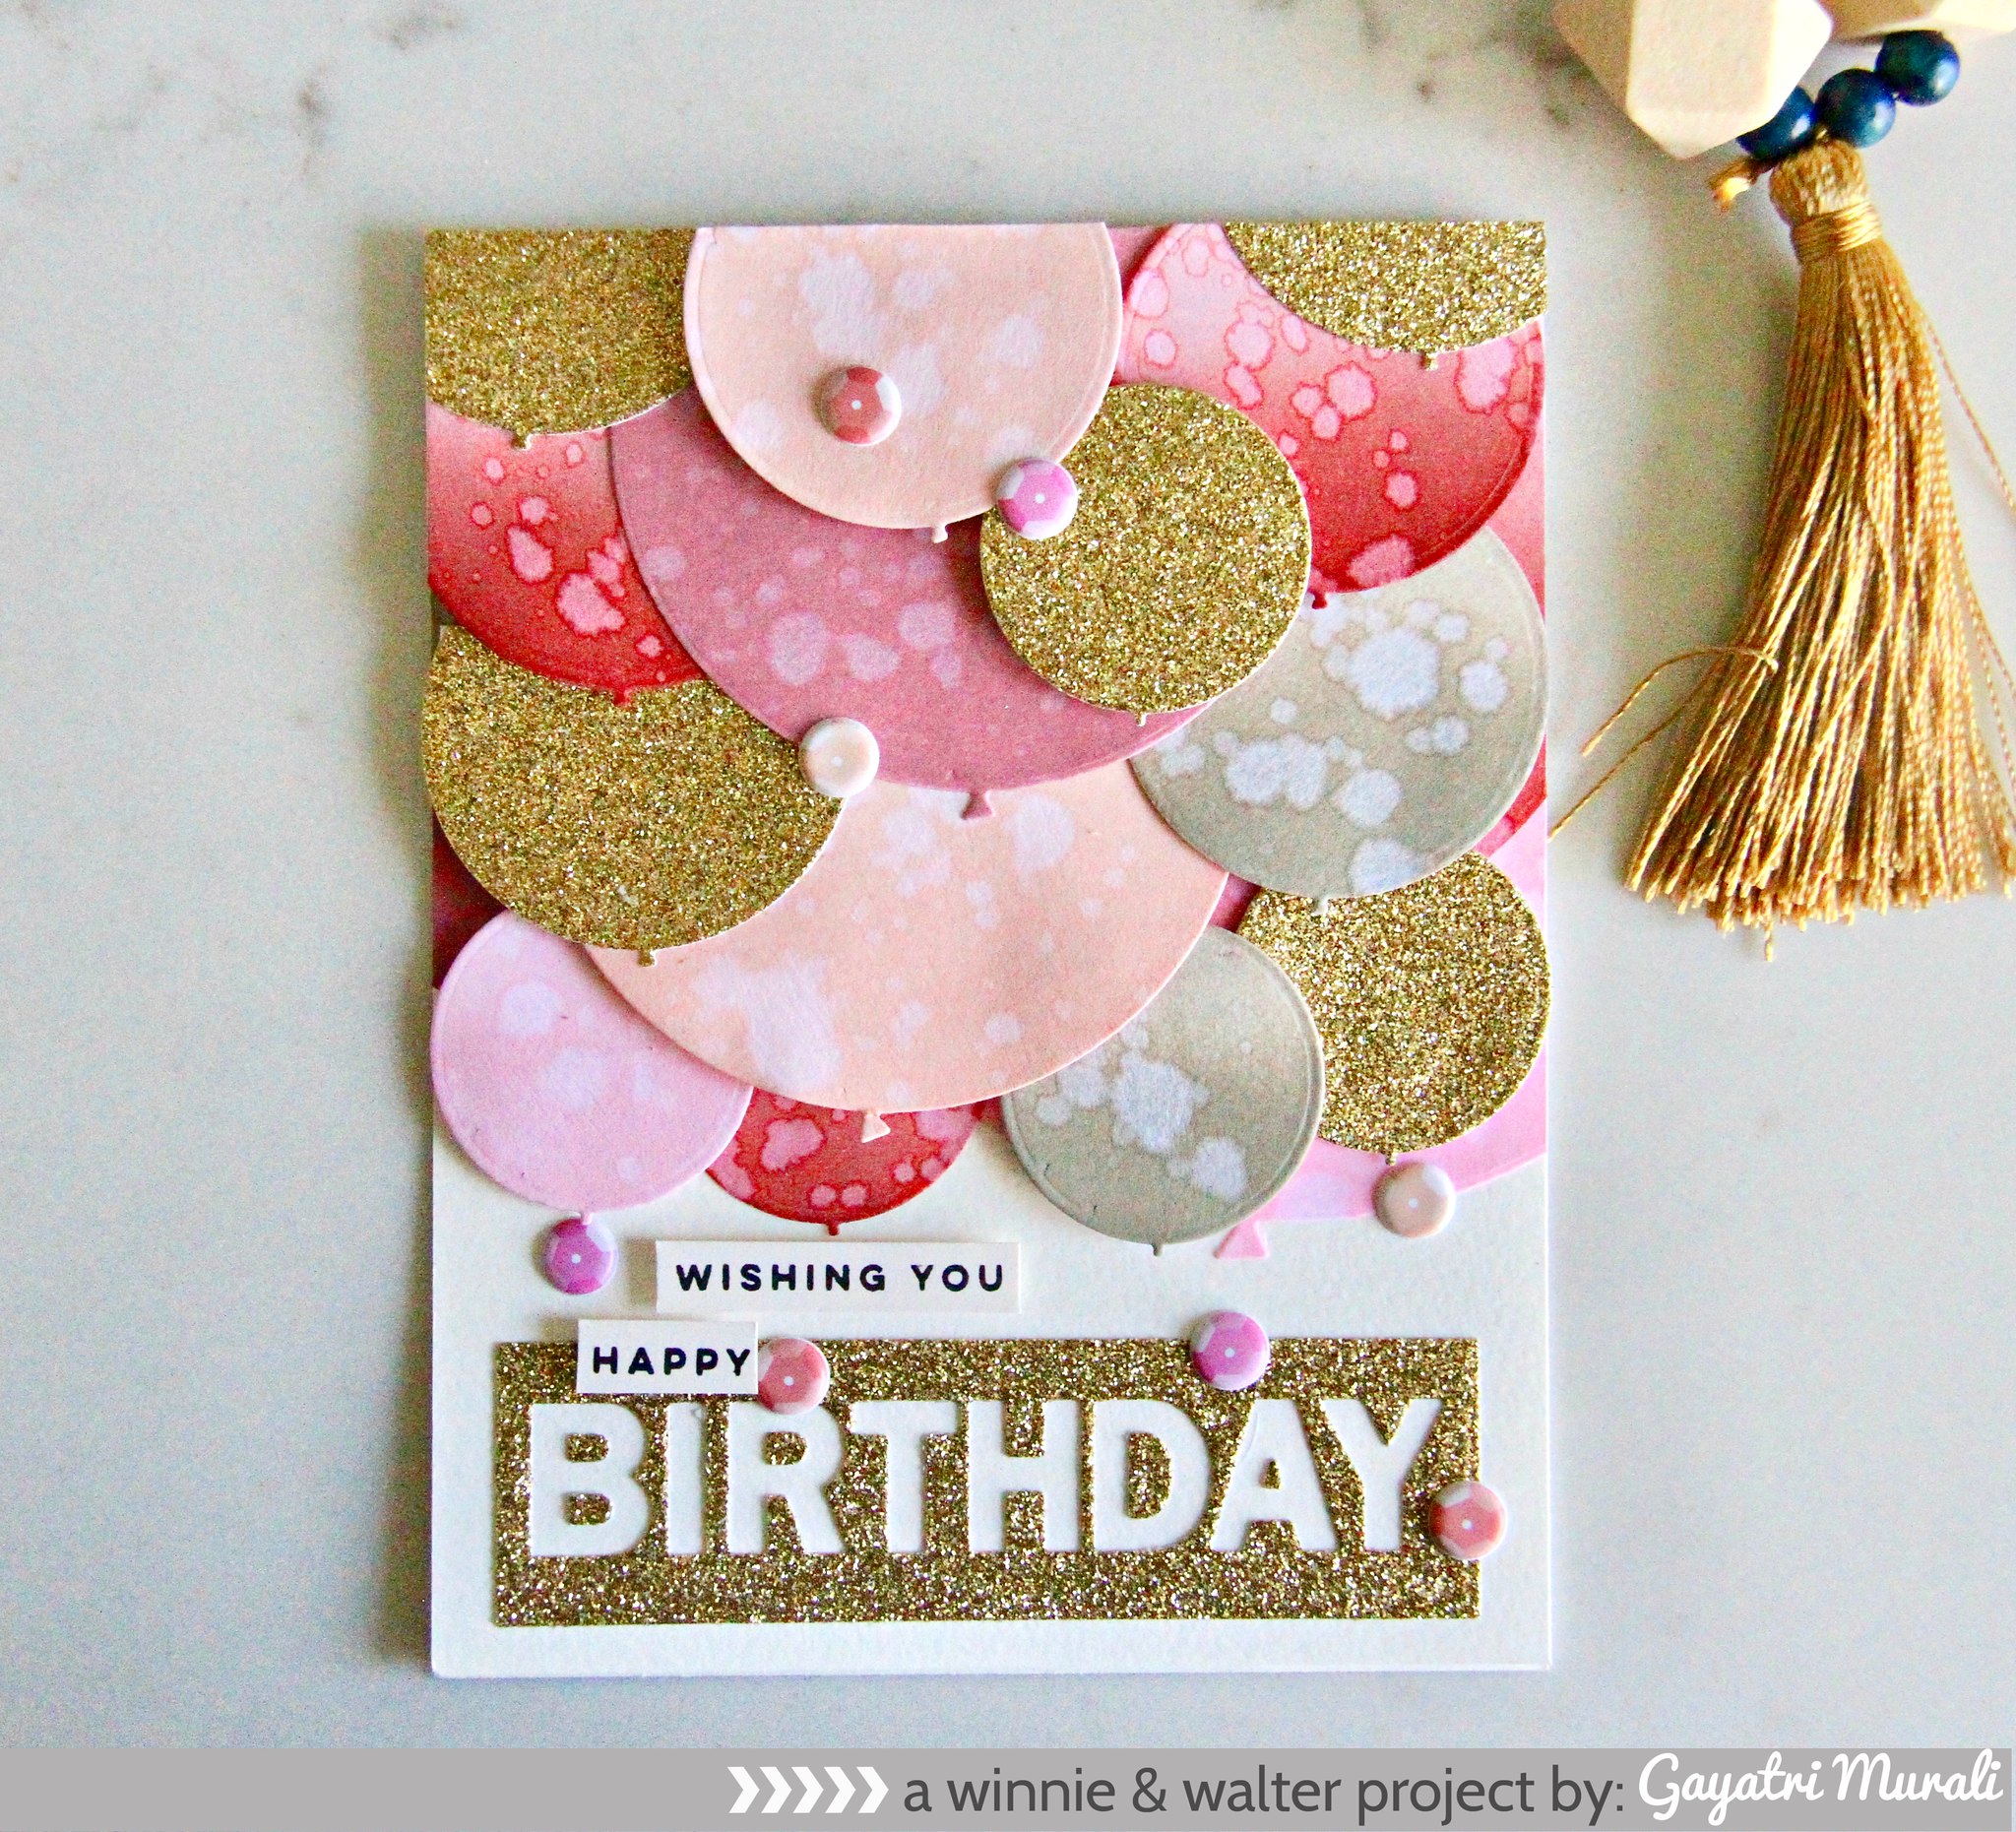
1. I have used W&W’s Big Round Balloon Cutaways and In a Word: Birthday Tiles Cutaways to make my card.
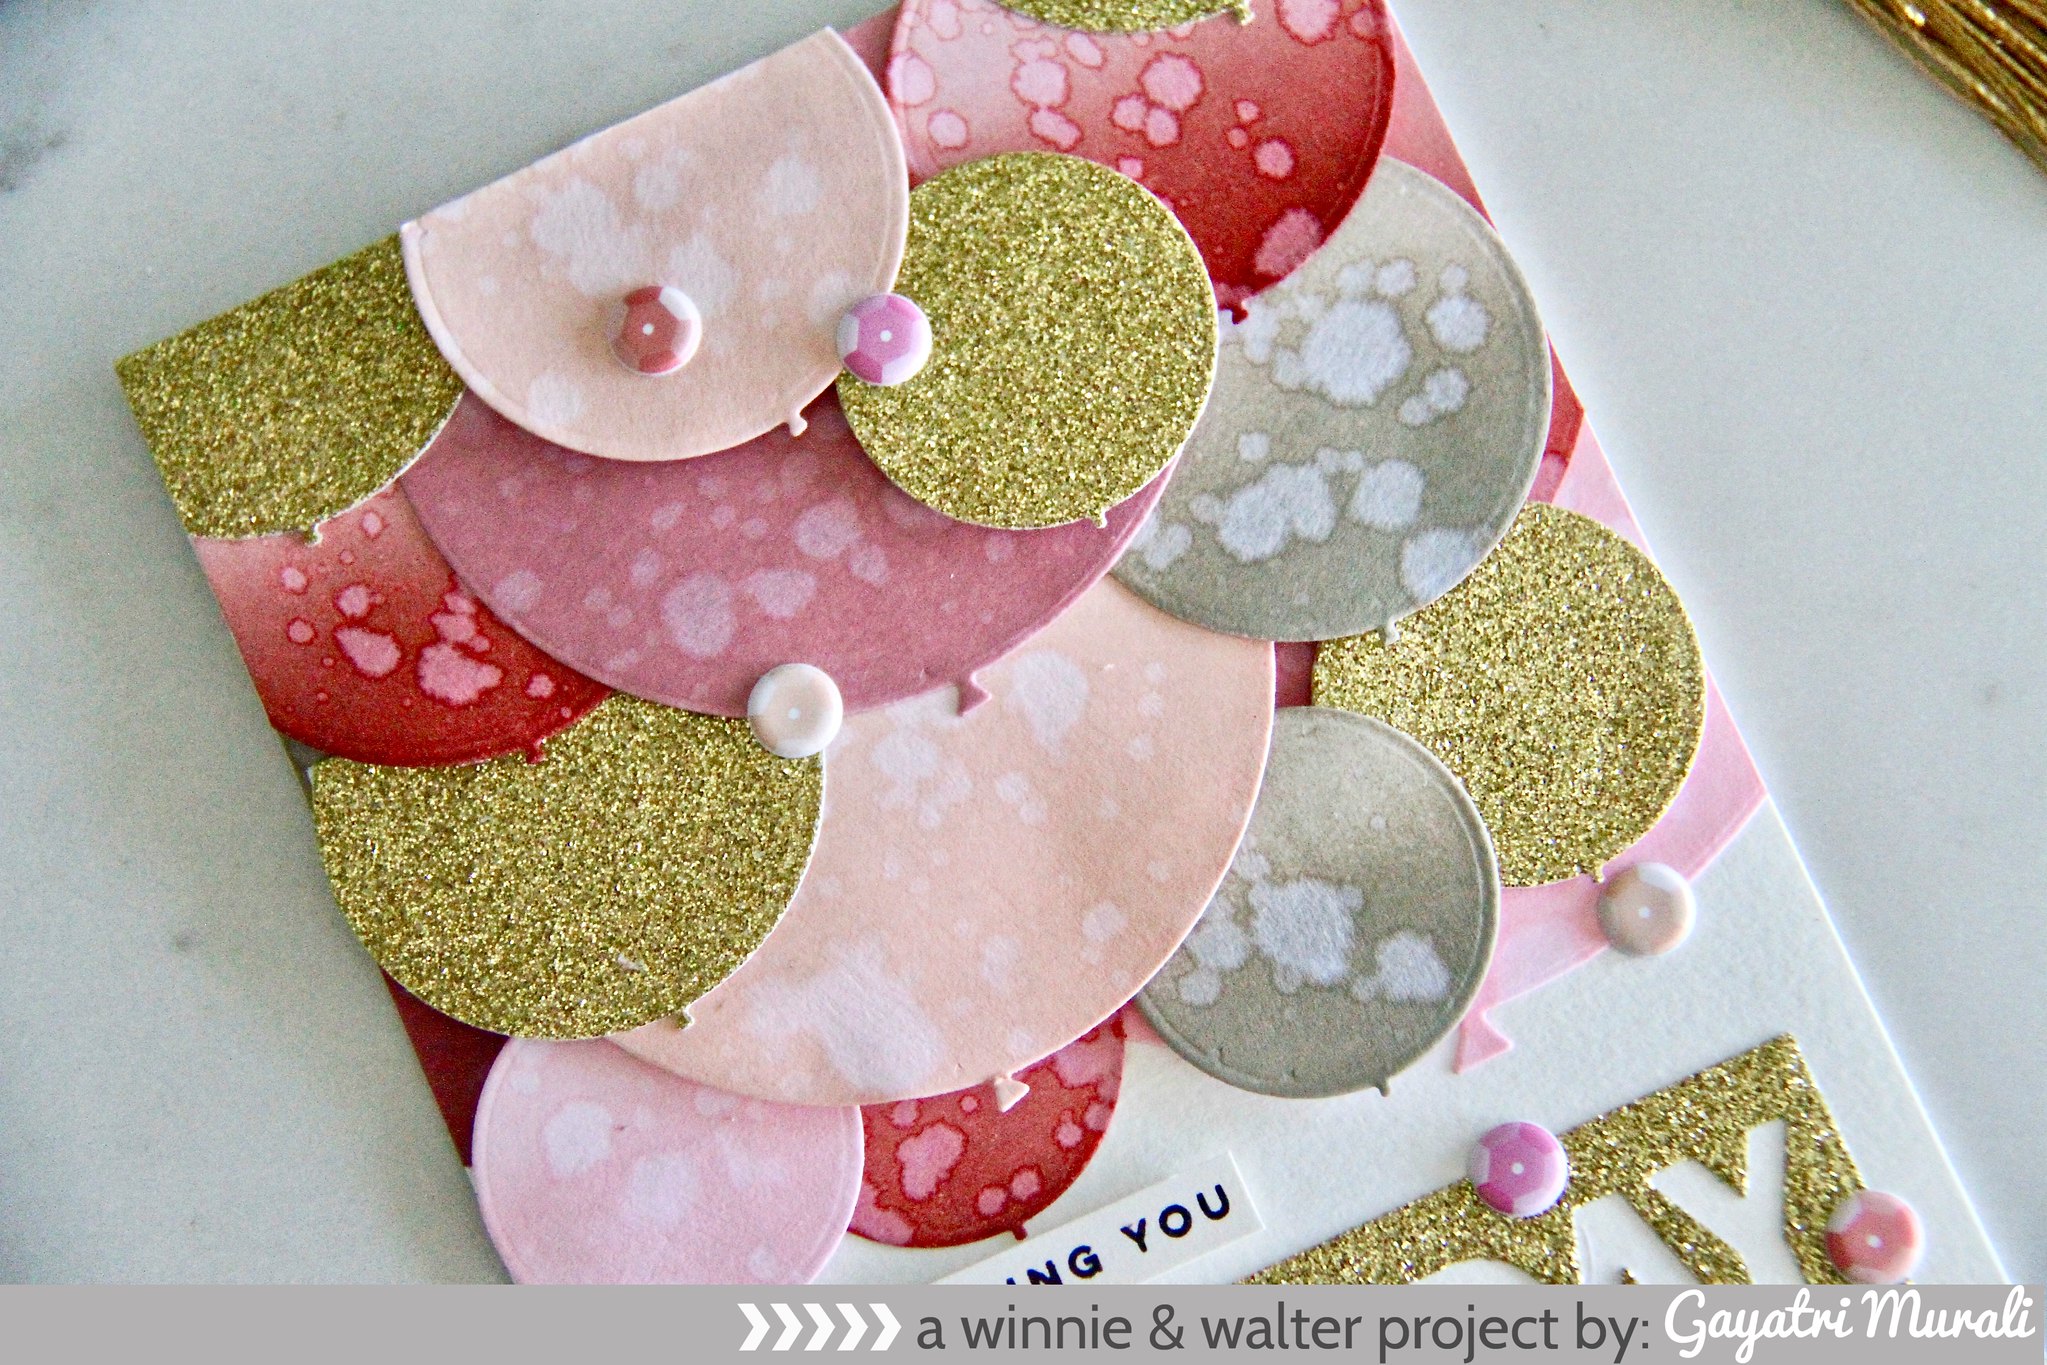
2. I die cut a few of the Big Round Balloons using white cardstock. Then I sponged distress inks in Aged Mahogany, Spun Sugar, Tattered Rose, Victorian Velvet and Pumice Stone on each of the sizes of the balloons in ombre fashion.
3. Then I also die cut couple of balloons in gold glitter cardstock.
4. I then randomly layered the balloons and adhered on the top of the card front.
5. For the sentiment I die cut the birthday tile cutaway using gold glitter cardstock and adhered flush on the bottom of the cardfront.
6. The smaller sentiment is from Sentimental: Birthday stamp set simply stamped on strips of cream cardstock and adhered using foam adhesives.
7. Finally embellished with with puffed sequins from PinkFresh Studio. Here are couple of closeups for you.

gayatri_W&W Inspiration Challenge closeup2 gayatri_W&W Inspiration Challenge closeup3

Now its your turn to play the challenge. Hope you are inspired by my card. I cannot wait to see what you do.

gayatri_W&W Inspiration Challenge flat

There is a lot of giveaways for the birthday bash celebrations.  More details below. Thanks for stopping by. Lets celebrate and have fun.

>>>GIVEAWAY<<<

Link up your take on this challenge for a chance to win a $75.00 gift card (gift code) to the w&w shop.  One random winner will be chosen.

For more information on how to enter to become our Guest Star for the next release CLICK HERE.  Please remember you need to include GS in the Link Title to be considered for the Guest Star competition.


Monday, December 18, 2017

One Panel, Two Cards with Lydia {Video}

Hello there everyone and happy Monday! Today I have two cards to share using the same stamped and die cut panel, I have to say I love a technique that you can get two cards out of one panel!


To start I took a 4 1/4" x 5 1/2" white cardstock panel and stamped a full floral background using Victoria's Very Merry Flowers Stamp Set. I used a soft, spring like colour palette to show that these floral images are not just for Christmas and can be used to whole year through.


Once my stamping was complete I then cut the panel using a few of the phrases from Birthday Tiles Cutaways- I just love this set and keep going back to it again and again! When die cutting the words from the panel I tried to keep as many of them in place as this helped out in the next step...


I then glued down the words onto a card base (the video below shows how I did it) and then glued the negative panel onto another card base and ta-da ! Two cards from one panel!

For a step by step on how I made these cards please check out the video below or over on YouTube:


Thanks so much for stopping by!

Hugs, Lydia


w&wDT_lydiaevans_blog-sig 2

w&w-supplies

Monday, November 20, 2017

It's Your Day with Lydia

Hello there and happy Monday!

 Boy do I have a bright and cheery card to share with you today. I must admit its not my usual flowery style but I was in a rainbow mood...


I started with a 4 1/4" x 5 1/2" panel of white cardstock that I die cut using Winnie & Walter: In a Word: Birthday Tiles Cutaways. I cut them all once at the top and then all again at the bottom.... they just fit perfectly!


I then did some ink blending on my card base using CP inks in Rockin' Red, Orange Twist, Tiara, Lime Rickey, Aquatini, Flirty Fuchsia and Party Dress. I then added the die cut layer over to the card base.


I then felt it just needed a little something more so I white heat embossed a little added sentiment on to black cardstock using Sentimental: Birthday.

Thanks so much for stopping by and I hope my rainbow card made you smile a little.

Hugs, Lydia x


w&wDT_lydiaevans_blog-sig 2

w&w-supplies

Saturday, November 4, 2017

November Leading Lady Alice Wertz | Take One

As it is the first Saturday in November, we have the pleasure of the dazzling debut of our November Leading Lady Alice Wertz!  I have been an admirer of Alice's work for several years.  Her coloring skills, artistry and ability to create vignettes are phenomenal.      

I am really excited to see what Alice will be creating this month as she takes us on an adventure of her own design on Saturdays in November on the w&w blog.

Please give Alice a big round of applause to welcome her as she steps onto the stage for her first performance as our November Leading Lady! 

Alice_Wertz_november2017

Happy weekend, all! =) I am thrilled to be the November Leading Lady for Winnie & Walter! It's such an honor and I have been having a lot of fun with some super cool products!


For my first project as the Leading Lady, I am sharing my love for texture and dimension.


I love adding textures with tone-on-tone die cuts for backgrounds on my cards. I know this process could take time sometimes, but it's well worth it! =) The background is created using two layers of In a Word: Birthday Tiles Cutaways cutouts. I usually use a negative of the cutouts as a guide when I glue them down.


The sentiment is cut using In a Word: Celebrate Cutaway and colored in rainbow colors with Copic markers.

This is probably one of my most favorite ways to create a clean background and I hope you find it worth trying!

Thanks so much for stopping by! =)

supplies:
cardstock: (white) Papertrey Ink
color medium: Copic markers
accents: sequins
dies: (In a Word: Celebrate Cutaway, In a Word: Brithday Tiles Cutaways) Winnie & Walter
tool: (die-cut machine) Provo Craft

card size: 3 5/8" x 5 3/8"


w&w-supplies

Saturday, October 28, 2017

October Leading Lady Priyasarshini Deshpande aka Piyu | Take Four

Another month is coming to an end which means we sadly are going to be bidding adieu to our October Leading Lady, Priyasarshini Deshpande also known as Piyu, with her final fabulous performance.  Each project by Piyu has been so thoughtful and full of beautiful color, artistry and care.  I don't think I am alone in being delighted with the projects she created for us each week.  It has been an honor to have Piyu as our leading lady this month.

If you missed her smashing debut you must see it...CLICK HERE or her sensational second performance showcasing her glorious coloring CLICK HERE or her triumphant third performance with a trio of beautiful cards using one stamp set CLICK HERE!

Lucky for us all we have her final command performance today.  

piyu_oct2017

Hello Friends!

Today is my last post here as the October Leading Lady. So before proceeding to my projects, I wanted to thank you all for all the love and encouragement in the form of your comments here and on my blog. I had lot of fun here. Thanks so much Shay for this opportunity!

For my final post, I wanted to have something different, something other than cards. And hence I selected the theme "Décor".

I will start with the cupcake toppers.


I stamped the pretty flowers from the In Bloom: Shirley's Blooms stamp set and used the coordinating In Bloom: Shirley's Blooms Cutaways.


I created various combinations of layered flowers and  added some glitter with wink of stella.


Finally I adhered a toothpick at the back and added a bow to complete the look.

My second project is also made using In Bloom: Shirley's Blooms stamp set. I made a rainbow flower wall hanging.


To make one 5 Dimensional flower, I stamped the flower 5 times in different colors. I then die cut it, scored and folded it in half. Finally adhered all 5 flowers together.


I made some tassels using silk thread and added it to the hanging along with some beads.


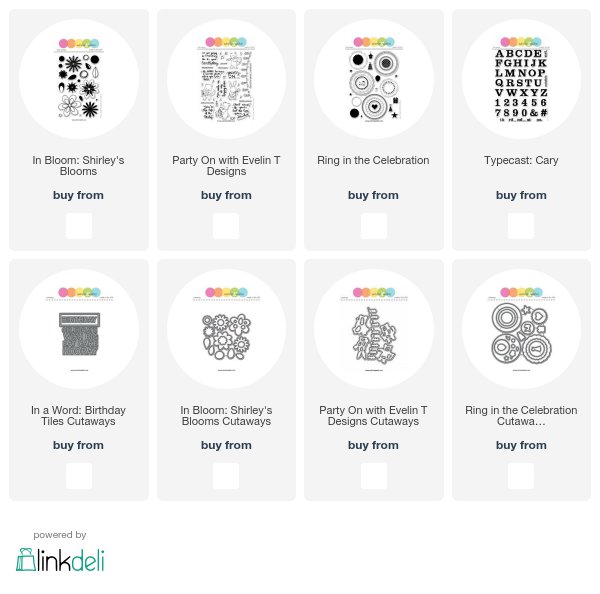
And now the last project. I made a birthday banner using 3 stamp sets - Ring in the Celebration, Party On with Evelin T Designs and Typecast: Cary.


The Ring in the Celebration and Typecast: Cary are two "must-have" stamp sets along with the coordinating cutaway - Ring in the Celebration Cutaways.  These are so versatile and one can make a lot of combinations with them.


I have also used In a Word: Birthday Tiles Cutaways in my banner to add some interest.


And here's a close up of the cute critters from the Party On with Evelin T Designs stamp set.


With this, I sign off as the October Leading Lady. I hope you liked all my posts. Do leave some love on this post and my blog here. I would love to know which project you liked the most or inspired you. I have  a 30$ Gift card for a lucky commenter.


Winner will be announced on my blog on 4th Nov.
Love,
Piyu


w&w-supplies