Showing posts with label penny ward. Show all posts

Thursday, September 10, 2015

Spotlight On...Penny Ward! Part Deux

spotlight-penny-ward 

We are thrilled to have Penny Ward back with us for another incredible post that will inspire you with her inventiveness and creativity!  If you missed learning more about Penny and seeing her first post that will stun you with their loveliness CLICK HERE.

Now, it's Penny's time to sparkle and shine...      

I'm backkkkkkk...Penny here again today with more Metallic fun using Winnie & Walter goodness.

Fall is in the air....somewhere. Living in Florida, we only have one season and that is the Hot season. Isn't it wonderful though that we card makers can achieve Fall through our art?

This card is a fun way to maximize your stamps. 
You just thought those were leaves in that stamp set, but there are so many ways to use them.


Let's get started

  • Start with a piece of Authentique Durable pattern paper trimmed to 4.25 x 5.50 inches. Stamp and heat emboss the "hugs" sentiment from The Big, the Bold and Friends set as shown using WaterMark ink and Stampendous Bark embossing powder.
  • On White cardstock, draw a 3 inch circle (Ok, so I traced around a 3 inch circle die). Stamp leaves from the In Bloom: Lola's Bouquet with Joni Andaya stamp set around the circle using Memento inks Olive Grove, Rich Cocoa, Peanut Brittle and Rhubarb Stalk. Stamp over these same leaves again using Encore Metallic Green, Bronze, Copper inks as well as Delicata Golden Glitz.
  • Trim panel into a 4 inch square. Notch corners with a circle punch, stamp top portion of sentiment and adhere to pattern paper with foam adhesive.
  • Stamp "fern" using VersaFine Onyx Black, then ink with Encore Metallic Green, trim and adhere to side of wreath.
  • Ink up a few strips of light weight cardstock with the Encore inks. Trim very closely (about 1/8 inch) so the cardstock curls. Add a few sprigs of these curls over the "fern".
  • Tie a bow from jute, add to card front along with sequins as desired.
  • Cut White cardstock to 4.25 x 11 inches, fold in half for a base card. Adhere card front to base card.

I just couldn't let my time here as a Guest Designer end without doing something with watercolors.


Shaker cards are still very popular and so fun to make as well as receive.
Look closely at my shaker filler...yep, it is tiny die cuts from the Essentials: Audrey Cutaways.
Too stinkin' cute!


  • Cut watercolor paper 4.25 x 5.50 inches. Stamp and heat emboss Mini Scenery: Multifaceted with WaterMark ink and White embossing powder. Watercolor in the triangles with Blue and Aqua watercolors. Use the same colors for the rest of the panel.
  • Die cut the small scalloped rectangle from Essentials: Audrey Cutaways with Aqua cardstock. Trim inside this panel leaving approximately a half inch all the way around (or die cut with a rectangle die, if you have one). Adhere acrylic sheet to backside of opening. Die cut the same scalloped rectangle from white fun foam, trim center. Adhere to Aqua frame on the backside.
  • Fill "shaker" area with sequins and the adorable tiny die cuts from the Audrey Cutaways. Adhere Aqua panel over the shaker filler. Let dry.
  • Cut a piece of Vellum 1 x 4 inches. Using the Audrey Cutaways large scalloped rectangle die, run through your die cutting machine at an angle as shown. Adhere to card front at the bottom right.
  • Die cut "hugs" from The Big, the Bold and Friends Cutaways die set, paint with All Purpose Ink Frost White and adhere over Vellum.
  • Cut White cardstock 4.25 x 11 inches, fold in half to make base card. Adhere card front to base card and add sequins as desired.


Saving a new to me technique for last hoping you love it as much as I do.


Metallic shine?  Yes, please!
Super simple, easy peasy Mr. Sneezy!!!
Run into the kitchen and grab the aluminum foil....go on, I will wait.

  • Cut White cardstock 4.25 x 11 inches, fold in half for a base card.
  • Die cut Bright Pink cardstock with the large scalloped Essentials: Audrey Cutaways die. Adhere to base card.
  • Die cut a small scalloped rectangle from the Audrey Cutaways using Purple cardstock. 
  • Take a piece of aluminum foil about 8 x 6 inches. Crinkle it pretty good, then smooth it out with a brayer. Using 2 drops each of alcohol inks Wild Plum, Stream and Sunshine Yellow, swirl it around a bit with a paintbrush. Let dry.
  • Adhere foil to White cardstock measuring 5 x 4 inches. Die cut with small scalloped rectangle. Trim a small section of the center away. Adhere to Purple scalloped panel. Wrap sheer ribbon around panel, tie bow and adhere to card front.
  • Die cut "friends" from The Big, the Bold and Friends Cutaways set 3 times, stack and adhere together. Ink top half with Memento Rose Bud ink and bottom half with Memento Angel Pink ink. Adhere to card front along open section.
I am so hoping you found inspiration today for making your own Metallic cards. 

I want to thank Julie and Shay for inviting me to be a part of their family for this short time. It was such fun creating with their wonderful products.
 Hoping YOU have a wonderful crafty day.
Many hugs,  :)

Thursday, September 3, 2015

Spotlight On...Penny Ward!

spotlight-penny-ward 

We are proud to bring you our next Spotlight On...Penny Ward!  Penny really caught our attention by entering our The Gossip Column challenge and Rerun challenges with projects that showcase her clean, bold style and clever touch as seen in this amazing card HERE.

Wait until you see the awesome projects she's made today...you will see Penny shine!    

>>>ABOUT PENNY<<<


Hello crafty friends.... 
I am a daughter, sister, wife, mother, Nana and one year Breast Cancer Survivor.
I married my high school sweetheart back in the stone ages. We have two grown sons, a beautiful Daughter in Love and two adorable grandsons. My shadow is my small white dog Snowy.
I am retired from a Fortune 500 company after 20 years of helping others achieve their dreams. Before my grandson was born, some really great friends had a First-time Grandma shower for me (how cool is that?), and I wanted to make some personalized thank you cards. I walked into my local craft store, saw all the pretty papers and tools, and I was hooked.
Many watched videos later, I have been published in magazines more than 100 times. I am currently on the Imagine Crafts Design Team, and designed for Penny Black and others.
I was beyond thrilled to be contacted by Julie and Shay about being in the Spotlight for September. What an honor! I do believe a happy dance was involved.
I would love for you to visit my blog Penny Ward Ink, take a look around, maybe be inspired by something you see there. Questions and comments are encouraged!

>>>PENNY's PROJECTS<<<

Let's make some cards.....


This month we are featuring Metallics on our projects, though beautiful to look at, they are not very easy to photograph. Just imagine the sheen on each of these cards! :)

Let's start with Metallic cardstock.
Easy Peasy Mr. Sneezy

  •  Cut White Metallic cardstock 4.25 x 5.50 inches. Run the top half through embossing machine using a We R Memories Geometric folder.
  • Wrap Offray ribbon around card front.
  • Die cut Winnie & Walter In a Word: Hugs Cutaway two times from same cardstock. Stack and adhere together. Adhere to card front as shown, placing a small amount of Gold Metallic thread behind it.
  • Adhere this panel to a card base of white cardstock cut to 4.25 x 11 inches, folded in half.


Now let's try something a little more challenging:


This one is a little more complicated, yet still easy enough to accomplish in a short time...ok, don't count drying time...I hate that, don't you?

  • Cut Teal cardstock to 4.0 x 5.50 inches. Lay this panel on a craft mat and lay the Winnie & Walter V for CheVron stencil on top. Using a palette knife, spread Metallic Blue Creative Medium over stencil. (HINT: I spray the backside of stencil with Temporary adhesive to keep it in place). Let dry.
  • Stamp and heat emboss large Smiles sentiment from the Winnie & Walter Big, Bold & Friends stamp set using WaterMark ink and White embossing powder.
  • On a scrap of Black cardstock, heat and emboss the small sentiment from the same stamp set. Trim and adhere to card front with foam adhesive.
  • Attach the card front to a base card of Black cardstock cut to 4.25 x 11 inches and folded.
  • Make a couple of small banners from trimmed Washi tape, adhere to top of card. Die cut the small button from the Winnie & Walter Audrey Cutaway. Adhere to card front and coat with irRESISTible Pico Shimmer. Add Pretty Pink Posh Sparkling Clear sequins as shown.


 Foil is all the rage right now, and it is so perfect for Holiday cards:


This is fairly simple to make. You will need to download the Winnie & Walter The Big, Bold and the Merry cut file. 

I then took this file into my Silhouette software, deleted the "s" from the word Holidays, made a thick black border at 4.0 x 5.25 inches, positioned the word "holiday" where I wanted it and sent it to my laser printer. I then cut the panel to 4.25 x 5.5 inches, adhered the foil and ran it through the laminating machine.
  • Die cut In a Word: Hugs Cutaway from Blue cardstock, stamp it with Winnie & Walter Mini Scenery: Multifaceted using WaterMark ink and Silver embossing powder.
  • Paint some of the angles with All Purpose Platinum ink. Randomly add irRESISTible Pico Shimmer to some of the angles. Let dry. Adhere this embellishment just below the word "holiday".
  • Die cut a heart from the Winnie & Walter Audrey Cutaway, adhere thin Metallic Silver cord to back and adhere to card front as shown. Coat heart with Pico Shimmer and add bow.
  • Adhere card front to a base card cut from White cardstock measuring 4.25 x 11 inches folded in half. Run the edges along a Delicata Shimmery Silver ink pad.
Well, that is going to do it for today. I had so much fun playing with all my new Winnie & Walter stamps, dies and digitals. It's your turn. What Metallic creations are you going to come up with?
Until next time...hugs!!!!   :)

Monday, July 13, 2015

The Gossip Column with Taheerah Atchia No. 3 | Hot Gossips + Gossip Queen Announced

Welcome back, fellow Gossipers! We've been so thrilled with the response to the latest issue of The Gossip Column! We continue to be ever thankful all for your kind words, comments, shares, and your enthusiasm for this exciting new feature on the w&w blog!

We were bowled over by the quality of each and every entry - you really seemed to channel your inner Jocelyn and we were so impressed!!

Just to recap, for this challenge we wanted to see you channel your inner Jocelyn Olson and create a card using elements of her signature style, or CASE one of her creations but put your own spin on it! We loved the results - some of the entries were off-the-scale amazing!!

We thought long and hard, and finally arrived at our decision for this column's Hot Gossips (runner-ups) and Gossip Queen (winner)!!

Drumroll please... 

hussena


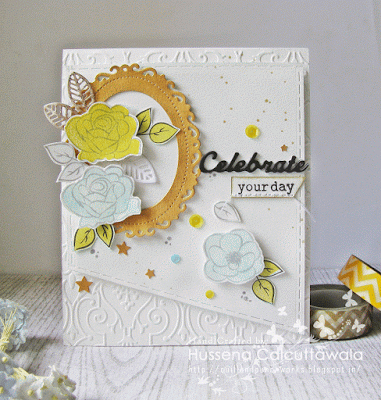
Hussena created a stunning CASE of one of Jocelyn's cards! Her layering, composition, colours and sprinkling of embellishments were all spot-on but introduced her own style in places too! I loved the wonderful embossing, white space and those gorgeous watercoloured blooms! Hussena this card is definitely Hot Gossip!!

penny_ward_hellofriend


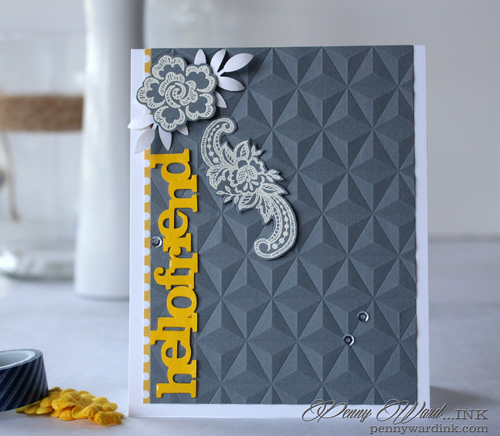
Penny Ward's amazing card kept us mesmerised with that amazing background embossing! I loved how she turned white space on its head, using grey as her main colour - but at the same time this card doesn't feel oppressive, it feels light and is such a great twist! The remaining elements are perfectly placed and very Jocelyn-inspired! Penny this stunner rightfully makes you Hot Gossip!!

And that brings us to our geometric-tastic Gossip Queen... 

diane_jaquay_IMG_0878


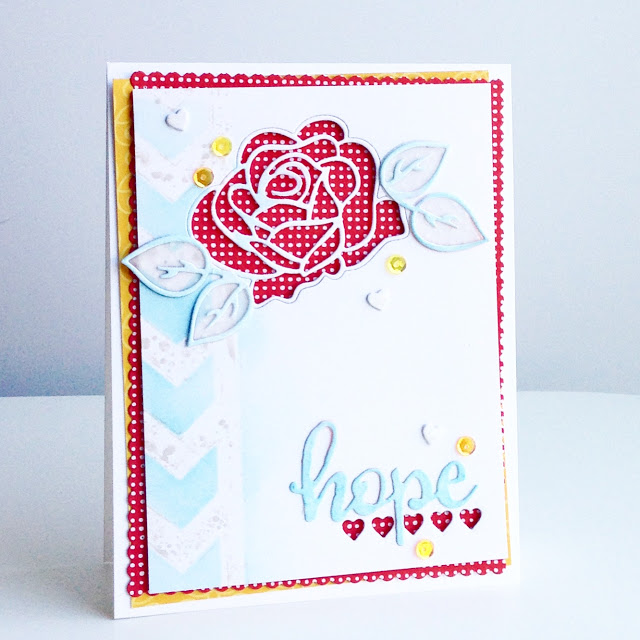
Diane Jaquay... her card channelled Jocelyn's style to a T! With fantastic pops of colour, clever negative die cutting, perfect positioning of elements and just all-round *wow*, this card packed a punch in all the right ways, was light, bright and fantastic! I couldn't help but name her Gossip Queen!!


Hussena and Penny you both win a $15 credit to the w&w store, and Diane you walk away with a $30 credit! Congratulations!! Please contact info {at} winniewalter {dot} com to claim your prizes!!

Please join us in congratulating these fantastic ladies and their amazing creations!! Everyone's entries were of such a high standard and you all deserve the plaudits too!! Please do take some time to browse the gallery to see everyone's work - you can find them at the bottom of the last The Gossip Column here.

For all you Gossipers who are keen to get the latest scoop, issue 4 of The Gossip Column will be hot off the press on Friday 7th August! We'll see you back here to get the exclusive on the latest gossip then!!

'Til then - keep on gossiping!


Taheerah