Showing posts with label cover model: the leaf effect cutaway. Show all posts

Thursday, August 30, 2018

On Your Engagement with Gayatri

Hey everyone, This is Gayatri again with you. My last project for the month of August. Hope you have enjoyed my other two projects this month. Today I have an engagement card to share with you.
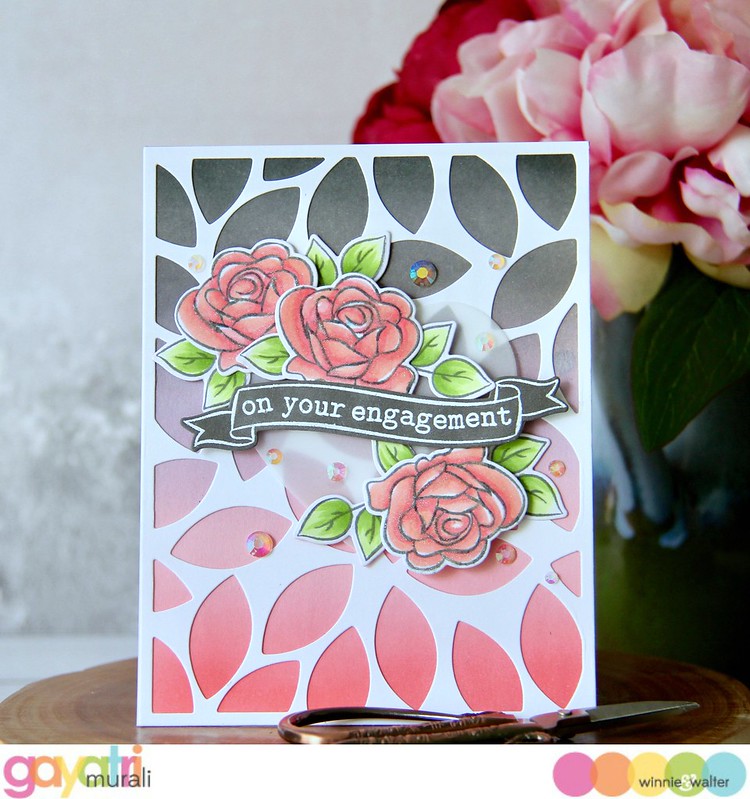
gayatri_W&W On your engagement card

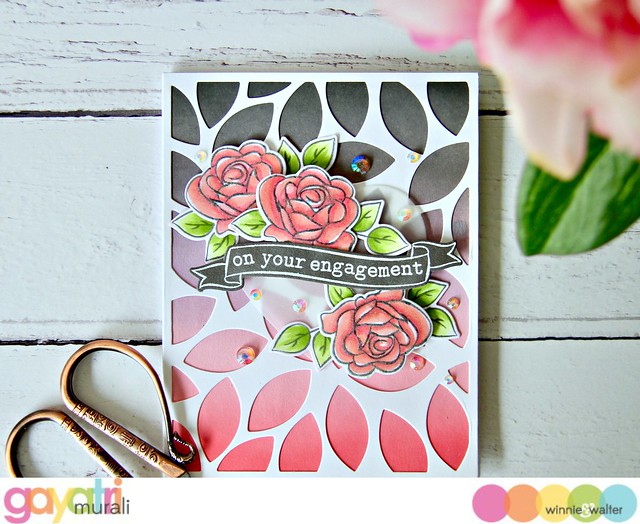
For this card, I used one of my distress ink blends I have been doing for a little while now as my background. The colours of distress inks used are: Worn Lipstick, Spun Sugar, Milled Lavender, Hickory Smokes and Black Soot. On top the background panel I added die cut using The Leaf Effect Cutaway in white. Love the colours peeking out of the die cut and the white die cut softens the grey and pink colours.
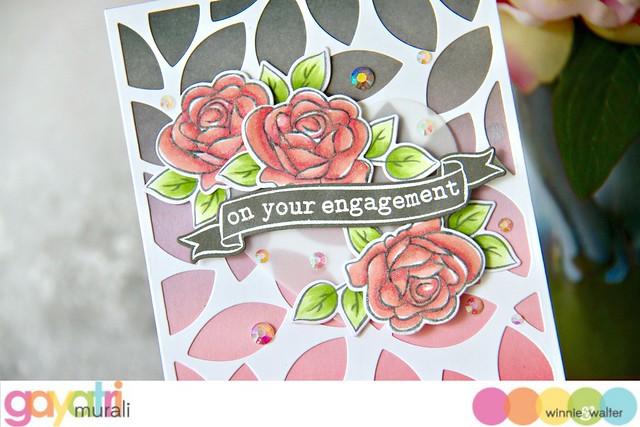
gayatri_W&W On your engagement card closeup

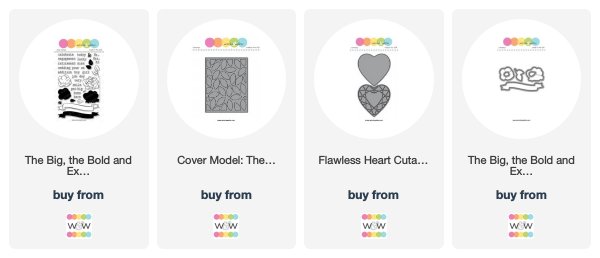
For the focal point, I used vellum heart die cut, cut using the Flawless Heart Cutaway as the base. Then I stamped the flowers and leaves from The Big, the Bold and Extras stamp set using grey moments ink and coloured using Altenew Artist markers. Then using the coordinating cutaway, I die cut them all out. I stamped and coloured three flowers and seven leaf images in all. 

For the sentiment, I white heat embossed the banner with the sentiment from the same stamp set on slate tray cardstock and die cut using the coordinating cutaway.
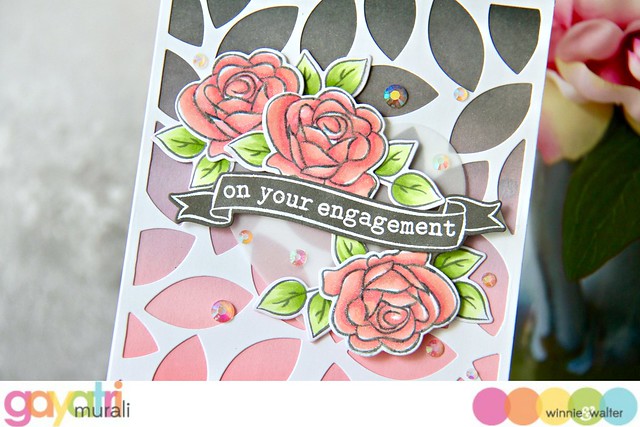
gayatri_W&W On your engagement card closeup1

Then assembled the sentiment banner with the floral clusters on the vellum heart die cut as shown in the card. All the images except the leaves are adhered using foam adhesive for dimension and the leaves are glued down. This entire cluster is adhered now adhered to the card front panel using foam adhesive hidden behind the banner and floral cluster. The panel is glued to the white card front. To finish off the card, I used some jewels from Pretty Pink Posh.
gayatri_W&W On your engagement card flat

I love the colours on this card. No sharp contrast because I used grey and soft pink with white instead of the black and fuchsia pink colours. Vellum heart die cut also soften and the jewels brings the bling to the card. Hope you like the engagement card. All the w&w supplies used to make this card are listed below. 

My blog signature

w&w-supplies

Saturday, June 16, 2018

Blog Hop for The Daily Marker 30 Day Coloring Challenge (Giveaway)


IMG_6163

Hello there lovelies! Shay here to welcome you to the w&w blog for Day 2 of a two day hop to celebrate the tenth 30 Day Coloring Challenge.

You should have made your way from the awesome Whimsy Stamps, but if not don't worry as there is a blog line up further on in this post to get you right on track. :-)

Have you heard of “The Daily Marker’s 30 Day Coloring Challenge” hosted by Kathy Racoosin? Right now it’s in the middle of the challenge and it’s a great time to take a leap, jump in and get your feet wet!  Don’t feel like you are jumping into the middle of the challenge I hope you will think of it as a new beginning.
The premise of “The Daily Marker 30 Day Coloring Challenge” is to color something everyday even if it’s for five minutes. However feel free to  jump in or out as time permits.
Any coloring medium is welcomed. Click here for DAY 1. TO UPLOAD YOUR COLORING  or here on Instagramor here on Facebook (FB is a closed group). Please remember to use the hashtag #thedailymarker30day  and tag @kathyrac . For kids & young adults #thedailymarker30daykids
If you have any questions about “The Daily Marker 30 Day Coloring Challenge” you can refer to this post.  

>>>BLOG LINE UP<<<


>>>COLORING PROJECT<<<

I know you have seen some incredible projects with mad coloring skills so far on the hop, but now we are going back to the kiddie pool of coloring. I went very stress-free and easy with my card today (it is the weekend after all and almost officially summer). This is something *anyone* can do and do well as there are no rules for coloring on this sort of project.

shay_IMG_4345

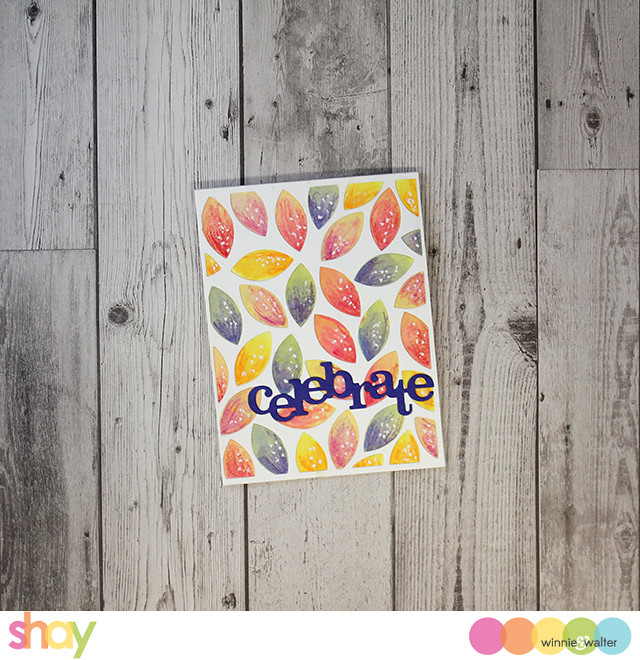
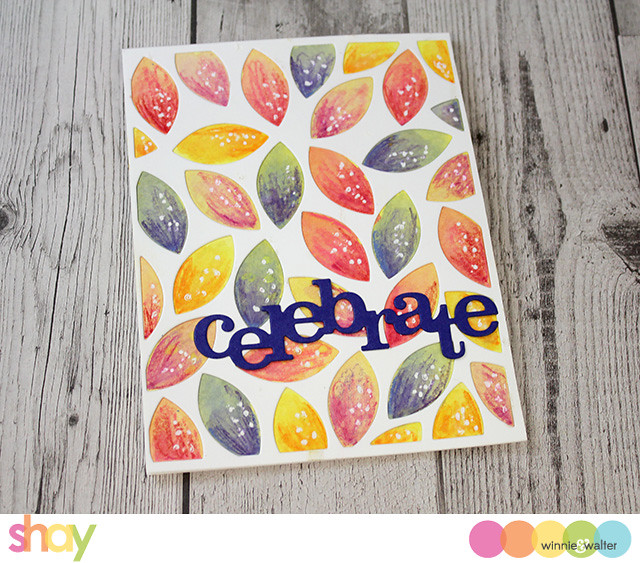
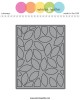
I began by die cutting Cover Model: The Leaf Effect Cutaway using 2 layers of paper--top layer was white cardstock and bottom layer was watercolor paper. I did this intentionally as I wanted the watercolor paper embossed and not cut out and the regular cardstock cut.

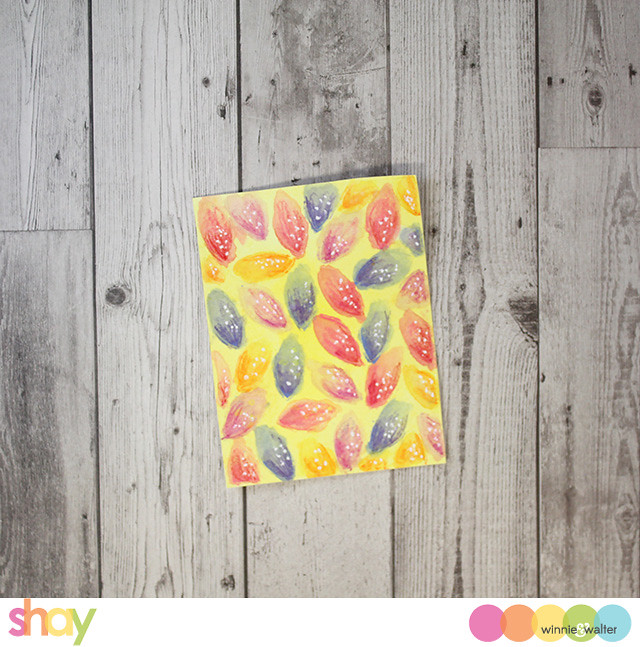
I watered down some mustard seed Distress Ink I smeared on my craft sheet and then smooshed the paper into the color as I wanted a bright and happy base.  Next, I took Caran d'Ache Neocolor II Aquarelle water-soluble wax pastels and colored in the leaves which I then blended with a waterbrush.  For each leaf I used mostly a paler color and then next brought in a darker shade at the base.  After this all dried I went in with colored pencils in similar colors and added some more dimension.  Last, I added some white dots using a Uniball Signo pen.  Here was what the watercolor panel looked like after all of that:

shay_IMG_4344

As you can see it looks a bit of a mess, but also organic, loose and free.

I pasted the white die cut over the watercolor panel and then adhered the purple die cut In a Word: Celebrate Cutaway and adhered it all to a white card base to finish off this simple, but fun card.

shay_IMG_4347

I can see using this technique with all sorts of dies you probably already have in your stash.  You can also decide not to follow the overlaying panel's pattern (I chose to color using the leaf pattern as a guide, but that isn't necessary) and go for a totally different look (imagine if you color in stripes, dots or something random on the bottom layer!). 

Hope this inspires you to have some carefree, kiddie pool coloring in your future! :-)

Your next stop is the awesome YOUR NEXT STAMP and you won't want to miss it!!

>>>GIVEAWAY<<<

In honor of The Daily Marker 30 Day Coloring Challenge we are giving away $30.00 (naturally!) credit to the w&w shop.  Simply tell us your favorite current color combo to create with along with your name and email address (this makes it easier to find the winner) in a comment on this blog post by Sunday, June 24, 2018 at 11:59 CST and we will pick one randomly chosen winner.

Happy hopping,
Shay.


w&w-supplies

Wednesday, June 14, 2017

Congrats with Vanessa

Hi everybody! Vanessa here with an airy flower card. I love to combine blues, whites, pinks and purples in my garden beds and everything is about to burst open every minute. So I thought a bouquet of flowers using my favorite colors would look good on a card, too!

I combined a lot of stamps and dies for today's card. Here is what I came up with:

I started with a panel of white cardstock that I had trimmed slightly smaller than my card base. For more texture, I embossed the panel with Cover Model: The Leaf Effect Cutaway and adhered it to the card. Now I die-cut the tag from Essentials: Noelle Cutaways from vellum and cardstock, layered them and adhered them with foam tape. I stamped and die-cut the various flowers and leaves from In Bloom: Frenchy's Festive Florals with Angelica Suarez, In Bloom: Lola's Bouquet with Joni Andaya and In Bloom: Eva's Favorite Flowers and arranged them onto the tag.

Now I die-cut In a Word: Congrats Cutaway from white cardstock and adhered it with foam tape. Finally, I added sequins.

I hope you like my little flower arrangement! Thank you for stopping by today!!


w&wDT_vanessamenhorn_blog-sig

w&w-supplies


Saturday, October 22, 2016

October Leading Lady Maya Isaksson | Take Four

Maya_Isaksson_october2016

Our October Leading Lady, Maya Isaksson, is back for her fabulous fourth performance!  If you missed her smashing debut you must see it...CLICK HERE or her sensational second performance adding an unexpected element CLICK HERE or her triumphant third performance taking on stripes CLICK HERE. Today Maya is focusing upon a little bit of an obsession of mine crafting staple (and maybe yours well) with fantastic results.

And now we present Maya!

It's finally Saturday again, I hope you all have had a good week. Today I wanted to challenge myself a bit. My first encounter with paper crafting was actually scrapbooking. I still do the occasional layout but I mostly stick to cards. One habit that I've had problems breaking is the patterned paper hoardi... ehm... collecting. The problem is that I almost never use any patterned paper for my cards. It's pretty and all but it's so much fun to make backgrounds that I always forget to use patterned paper. So today's theme is patterned paper. Let's be honest. The amount paper I used to make these four card is so small that it will take like five... hundred... cards to actually make a difference in my paper stash, but I had fun so lets go on to the cards.

Maya isaksson winnie walter patterned paper leafs


For card number one I used cutaways and nothing else. Seriously. You can make a million of these cards in a day with different patterns, it's so easy. I used two of my favourite cutaways for this. I made the big "hi" from fun foam and a pretty graphic patterned paper using the In a Word: Hi Cutaway. The size of this die is perfect! I don't have anything like it in my collection. And for the background just white cardstock embossed with the Cover Model: The Leaf Effect Cutaway. Instead of cutting the leafs out I placed my embossing pad under the paper and ran it through the die cutter folding up one of the flaps on the platform of my Big shot to reduce the pressure just a bit to make it easier to run through. 

Maya isaksson winnie walter patterned paper leafs


For my second card I used one of the In Bloom: Eva's Favorite Flowers Cutaways To cut out a pattern in the card front. I also used the scalloped rectangle from Essentials: Audrey Cutaways to make sure it looked nice. I cut out an extra panel from patterned paper to place under the cardfront and attached it using foam adhesive to raise it up a bit. The card actually looked pretty good that way but I wanted some color too so I also stamped the flower from the coordinating stamp set and colored it a bright yellow. For my sentiment I used the word Happy from Merry & Bright with Evelin T Designs together with birthday from The Big, the Bold, and the Happy and white embossed that on black cardstock to make sure your eyes was drawn to it instead of the pattern.

Maya isaksson winnie walter patterned paper leafs


For card number three I used a lovely watercolor print as background. I cut out the Cover Model: Multifaceted Cutaway and covered it in several layers of glitter embossing powder, finishing with a layer of clear embossing powder to make it smooth and shiny. I cut out the big and lovely diamond from Flawless Diamond Cutaways. I did the background from Vellum and the detailing from glitter cardstock and added clear sparkle pen to the vellum. It's super sparkly and pretty under the light. I embossed a sentiment on matte gold cardstock. The stamp is from Wishing You with Evelin T Designs and it fits very nicely with the diamond.

Maya isaksson winnie walter patterned paper leafs

This last gard was too sparky for my camera to be able to focus it seems. I'm so sorry for the blurriness. I used the Cover Model: The Leaf Effect Cutaway again. It is to pretty. I did the same embossing technique as on the last card but used some teal powder with speckles of gold in it. Super pretty! I paired it with a smaller print with pink dots. They look so nice together. I cut out the word Kindness from the Kindness with Evelin T Designs Cutaways in gold glitter paper and added it to a piece of Vellum stamped with the text from the coordinating stamp set.

W&w_30giftcard


So that's it for today. I will be back next week for my last performance here as Leading Lady. I hope you will be back then. In the meantime you can hop on over to my blog Little Outbursts of Creativity where I will be giving away a gift card to the Winnie & Walter shop to one of the people commenting on any of my Leading Lady posts there during the month. Thank you for all the lovely comments so far, I'm very happy for each and every one.


w&w-supplies


Saturday, October 1, 2016

WCMD 2016 | CASE with Lydia

To get all the information about w&w WCMD 2016 CLICK HERE.


Hi there,and happy World Card Making Day! I hope you are enjoying WCMD here on the Winnie & Walter blog so far, and we do have lots more in store for you with lots of prizes too…. so what’s not to enjoy?!?! So on to my challenge……. ‘CASE A Card from a W&W DT'. So it can be any card that you find on the Winnie & Walter Blog, I would like you to share the card you were inspired by as well pretty please. Here’s the card I was inspired by made by the very lovely Heather...


  heather_100315_1024x1024  
So as you can see I left in some of the die-cut leaves- only I took it a little further and I popped them back into place using foam pads to add some dimension. From the background behind the Cover Model I ink blended a background and splashed some water drops onto it to get a variant in colour.
I wanted to add some gold into my design so when I had placed my die-cut cover piece over my background and attached the leaves I added a few splats of gold. To tie this in I mounted this onto some gold metal paper and stamped and heat embossed the sentiment from Happiest Of Holidays with Evelin T Designs.
Really hope you play along, we would love to see what you come up with! Hugs Lydia x


I was inspired by her use of the Cover Model: The Leaf Effect Cutaway, the way she left in some of the die-cut leaves and also the way she had a variant of colour peeking through the leaves she removed. Also I used the same stamp set for the sentiment. Here's my CASE of Heather's card...

  winnie-walter-the-leaf-effect_1

  winnie-walter-the-leaf-effect_2

  winnie-walter-the-leaf-effect_13


Prize: One randomly chosen project that is linked up will win $50.00 gift credit to the w&w shop.

>>>LINK UP<<


Monday, July 25, 2016

Happy Birthday with Lydia

DSC00131b  

Good morning (or afternoon) all! It's Lydia here with you today and I have a very soft and airy card to share with you today.

  DSC00129

I started with a card base slightly smaller than normal (4 x 5 1/4") so that Cover Model:The Leaf Effect Cutaway would cover the card without the outside edge. To do this I stuck the white card die-cut Cover Model over my card card and then cut the edges off so it was nice and flush.

DSC00131

I stamped and white heat embossed some flowers from In Bloom: Addie's Garden and then die cut these using the coordinating die set, In Bloom: Addie's Garden Cutaways. Once I had these all die cut I gently blended in some ink, from the top on the flowers and around the edges for the leaves. I do love the soft effect that ink blending gives and it's such a quick and easy way to colour in images.

  DSC00132

The sentiment is from Winter Woodland and I stamped this onto a strip of white card. I attached this to my Cover Model covered card base and then arranged my flowers to frame the sentiment.

That's it from me today, I really hope you like my card! 

Hugs, Lydia x


w&w-supplies