Showing posts with label flawless heart cutaways. Show all posts

Wednesday, March 20, 2019

Little One with Kelly


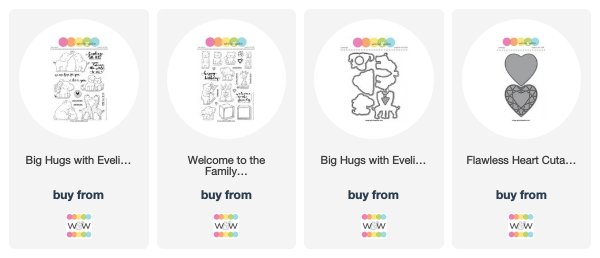
Hi Folks! Kelly here with a sweet little pair of elephants from Big Hugs with Evelin T Designs for a happy pregnancy card. This card came about after working on a card for Winnie & Walter's 5th Birthday Celebration where I wanted to combine 3 different stamp sets and have a family of elephants on the card. After coloring the parents in gray, and then coloring the baby in gray, it looked kind of blah. So I scrapped that card and moved on to something else.


Meanwhile, I still wanted to do something with these cute gray elephants, especially since I had worked on coloring them. So I grabbed a card base, did a little blending in the middle with the Life Changing Blending Brushes, added the heart diecut from Flawless Heart Cutaways, added the tiny sentiment from Welcome to the Family with Evelin T Designs, and I had myself a card!

It's a simple card, but I do think that's a good choice for a baby card. 


I just love these sweet elephants twisting their trunks together to make a heart, and then there's a big heart behind them. I intentionally picked a tiny sentiment so the heart would have lots of white space. And, because this is for a tiny human. It seemed to fit.


In the past I totally would have set these guys aside to use in a card "later" and then I'd probably never see them again. So I'm glad I took the extra couple minutes to find a forever home for them on this card. So worth it!

Thanks so much for looking! Next time you end up with some leftovers, consider giving them a shot on another card before putting everything away.
-Kelly


w&w-supplies

Wednesday, January 16, 2019

Love Mail with Kelly


Hi Folks! As fun as the holidays were this year, now that everything is packed away it's time to start turning attention to all things pink and red for Valentine's Day! In this post I'm sharing a fun and inexpensive Valentine's Day craft. These are the mini valentine mailboxes we made for friends/neighbors/teachers/office-staff last year. They are inspired by the craft project I led for Jackson's fourth grade class at the school Valentine's Day party. (also inspired by the pile of left over mailboxes I was going to need to return to Target!!)


 The mini tin mailboxes come from the Target dollar spot; aren't they the cutest?! The glass candlesticks you can pick-up anywhere for pretty cheap (especially at garage sales!) These are just from the dollar store. I spray painted them with whatever paint I had left over in the garage, making sure to check the label that it was fine to spray on glass. After hot gluing the mailbox onto the spray-painted stand I was ready for the fun part ... decorating them!


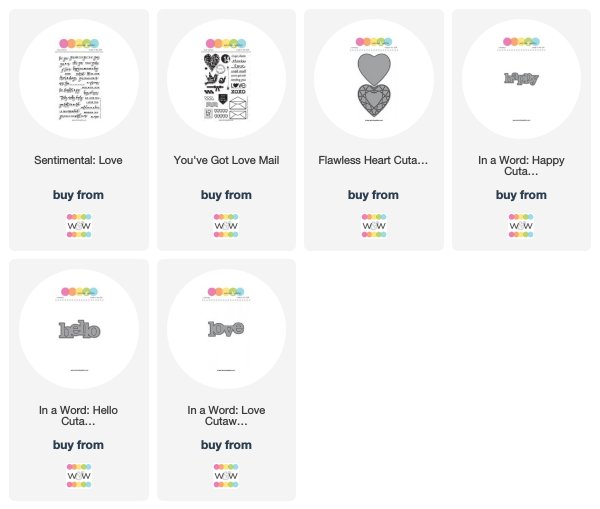
 For mass-produced projects like this I like to stick with the same basic template. Each mailbox has the sentiment on the left side, a collage of a heart and other elements on the front lid, and a cluster of tiny hearts on the right side. This particular mailbox uses the happy die from In a Word: Happy Cutaway, and the embossed sentiment from Sentimental: Love. The heart is from the Flawless Heart Cutaways, and then the postmark, envelope and 14 are from an oldie but goodie, You've Got Love Mail.


A similar mailbox here, except we have a "hello" instead of a "happy" greeting (from In a Word: Hello). And a birdie decided to land on this one, direct from the dollar store ... a package of 3 for $1.


Knowing the general layout is the same makes assembling the one-of-a-kind mailboxes that much easier. You just need to plan ahead a little. For example, I die cut several different large words at a time (one red piece of cardstock is enough to cut Love, Hugs, and Hello in the same pass through the die cutter, along with several small hearts) and I stamp several key phrases with versamark on a piece of black cardstock, emboss them all at once, and then cut them into strips with my trimmer. Starting off with a nice pile of words and phrases to choose from makes it really fun to try new combinations along the way.


 You've really got to love those In a Word dies ... this mailbox is "sending hugs" with the help of, you guessed it, In a Word: Hugs.

Now it's confession time as someone with a stamping blog: I did not stamp super cute Valentine's Day greetings to go inside of each mailbox.  


But, while I was in the dollar spot at Target I found these ADORABLE Valentine's Day band-aids that came 20 to a pack for only $1. Score!!!


Just add a "stuck on you" pun, and you've got yourself a sweet little valentine that's easy to mass-produce. Bonus: you don't even have to add adhesive to the band aid!!! : ) Just peel off the strips. Extra bonus: they work just as well for boys as they do for girls, which is sometimes hard to find.


 I used an envelope punch board to make custom-sized envelopes out of patterned paper for each valentine, addressed them and stamped a heart on each one. Don't they look cute after cupid has made his little deliveries?!


Here the all are, waiting to be left on doorstops across town.

Being as detail-oriented as I am, I matched up each mailbox with how I thought the colors would go in their homes ; )


Packed up for delivery. I was a little sad to see them all go.


Since I made these a little ahead of time I was able to hand-deliver some to my out-of-town friends  when I met them for lunch dates and such.


Finally, here are the mailboxes the kids designed during their fourth grade school Valentine's Day party (stop by to see these adorable kids in action). I mostly gave them glitter-foam stickers and adhesive gems to work with since they only had a few minutes in their station to assemble the mailboxes. But, I started them off with several of the patterned paper hearts on the front. It was pretty incredible, and very fulfilling, to see them so proud of their masterpieces which they can display for years.

Thanks so much for stopping by!
-Kelly


w&w-supplies

Thursday, August 30, 2018

On Your Engagement with Gayatri

Hey everyone, This is Gayatri again with you. My last project for the month of August. Hope you have enjoyed my other two projects this month. Today I have an engagement card to share with you.

gayatri_W&W On your engagement card

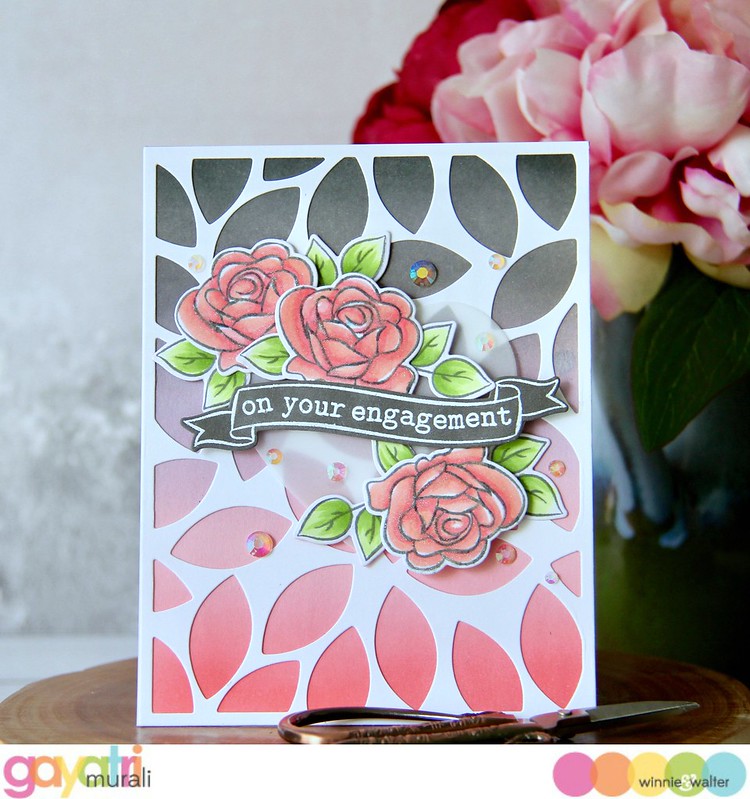
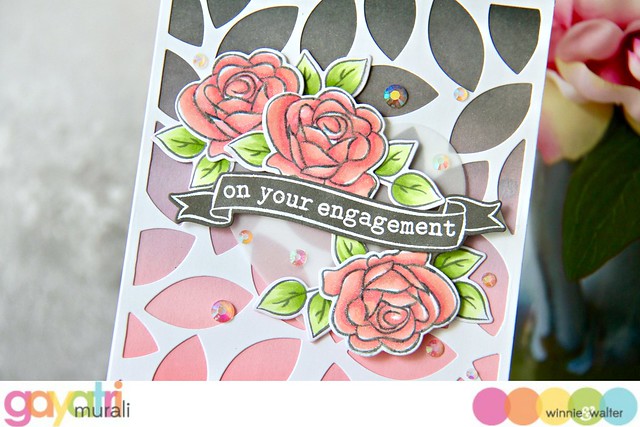
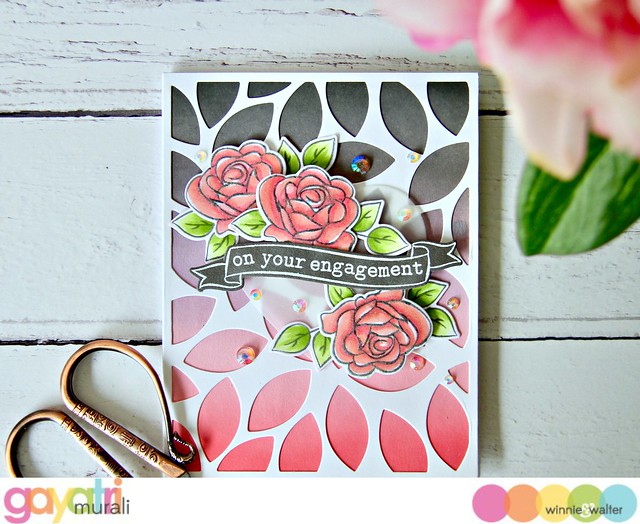
For this card, I used one of my distress ink blends I have been doing for a little while now as my background. The colours of distress inks used are: Worn Lipstick, Spun Sugar, Milled Lavender, Hickory Smokes and Black Soot. On top the background panel I added die cut using The Leaf Effect Cutaway in white. Love the colours peeking out of the die cut and the white die cut softens the grey and pink colours.

gayatri_W&W On your engagement card closeup

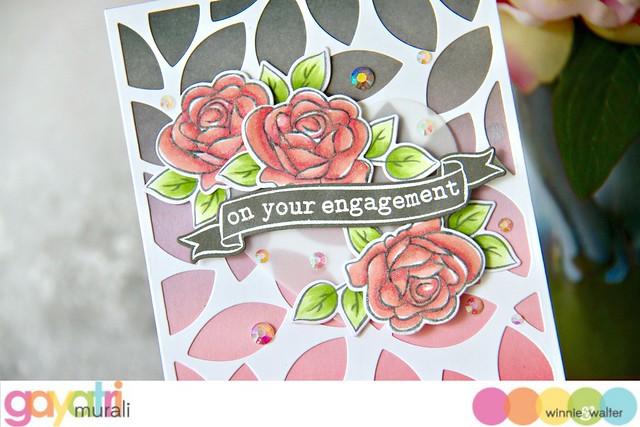
For the focal point, I used vellum heart die cut, cut using the Flawless Heart Cutaway as the base. Then I stamped the flowers and leaves from The Big, the Bold and Extras stamp set using grey moments ink and coloured using Altenew Artist markers. Then using the coordinating cutaway, I die cut them all out. I stamped and coloured three flowers and seven leaf images in all. 

For the sentiment, I white heat embossed the banner with the sentiment from the same stamp set on slate tray cardstock and die cut using the coordinating cutaway.

gayatri_W&W On your engagement card closeup1

Then assembled the sentiment banner with the floral clusters on the vellum heart die cut as shown in the card. All the images except the leaves are adhered using foam adhesive for dimension and the leaves are glued down. This entire cluster is adhered now adhered to the card front panel using foam adhesive hidden behind the banner and floral cluster. The panel is glued to the white card front. To finish off the card, I used some jewels from Pretty Pink Posh.

gayatri_W&W On your engagement card flat

I love the colours on this card. No sharp contrast because I used grey and soft pink with white instead of the black and fuchsia pink colours. Vellum heart die cut also soften and the jewels brings the bling to the card. Hope you like the engagement card. All the w&w supplies used to make this card are listed below. 

My blog signature

w&w-supplies

Wednesday, August 15, 2018

Family Recipes with Kelly


Hi Folks! Kelly here with a few more pages from our final Family Recipe Scrapbook. For those who haven't seen my prior posts throughout the years, for each of my husband's 8 cousins, our family has gathered their favorite recipes to present the bride-to-be at her wedding shower. I've made the recipes, along with photos, into a scrapbook. Our intention is to show the new couple that they're surrounded by loving family who are always around if they need help (especially on what to cook for dinner!)


This page uses the gorgeous sunflower from In Bloom: Anna's Flora to make a little collection of flowers in the lower right corner. The "family" from The Big, the Bold and Blessings Cutaways is cut from gold foil, again to compliment all the yellows and golds. The secondary sentiments "smiles," "lots of love," and "giant hugs" are all from Sending You with Evelin T Designs.

I have to admit, it had been awhile since I'd done much scrapbooking and I was surprised at how much I missed it. I was also surprised at how much I had to think about how to us a canvas that wasn't 4 1/4" x 5 1/2"! Layering the words and flowers over the photos helped. I chose the sunflowers because they pull in the gorgeous yellow sweater, golden light, and yellow grasses from the photos. 


The sunflowers were really fun to watercolor. A few different yellows and browns for the petals, and then a shaded center. I inked the dots in an orange/brown and then before stamping them in the center I inked the edges of the dots in a darker brown. 


 This page is a simple one and relies just on and angled "hugs" from The Big, the Bold and Friends Cutaways being cut from the heart in Flawless Heart Cutaway. 


Even though it's simple, there's still a little something to it with the gold sparkle cardstock. Again, the hearts are layered over the photos.


I have to admit, even though these take a ridiculous amount of time, I will miss not working on a recipe scrapbook anymore. I guess that just means that I need to get back to scrapbooking my own family! : ) Hopefully before they all graduate!!

Thanks for looking!
Kelly


w&wDT_kellygriglione_blog-sig


w&w-supplies

Saturday, January 27, 2018

January Leading Lady Andrea Shell | Take Four

As we come to the end of January, we also close out with the final fabulous performance of our January Leading Lady Andrea Shell!  Andrea has delighted each and every week this month with her sensationally colored projects.  Her projects are so wonderfully joyful, vibrant and inspiring.  I feel so blessed to have had Andrea as our leading lady this month.

If you missed her smashing debut you must see it...CLICK HERE or her pink and plaid extravaganza from her sensational second performance CLICK HERE or her triumphant third performance in which she takes your breath away with her garden inspired card CLICK HERE!

Lucky for us all we have her final command performance today....
Andrea_Shell_january2018

Hello, again! I can't believe January is almost over, and so is my time as Leading Lady. I have had a blast sharing my creations with you, and I hope I've inspired you even just a little. Thank you, Shay, for this wonderful opportunity! It was really hard to decide which "favorite thing" I would share for my last post, but in the end, I chose interactive cards. I love all kinds - from shaker cards to slider cards to cards that wobble. They are all so much fun to make AND to receive! If you haven't tried them already, I hope you will.


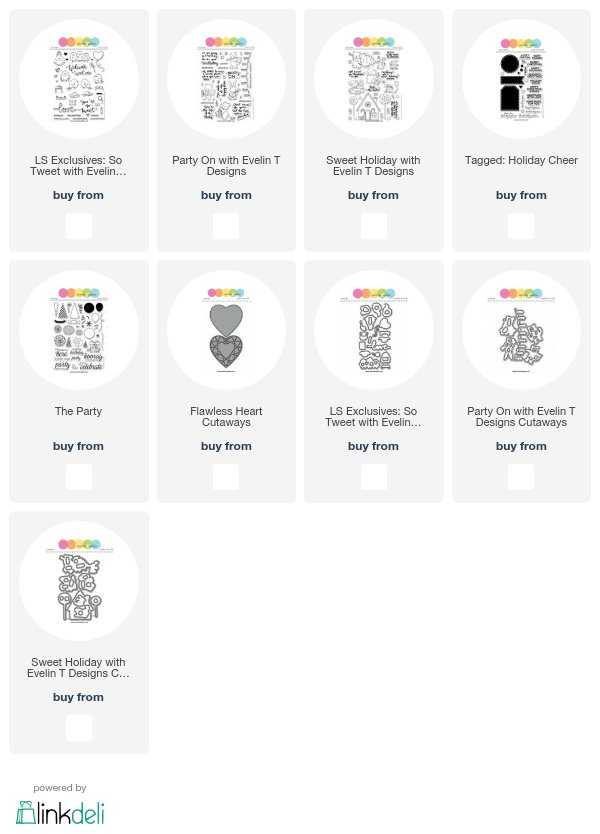
For my first project, I went with a simple shaker card. I just love this card - it would make a great Valentine for a child or even a sweet thank you note. That adorable birdie is from LS Exclusives: So Tweet with Evelin T Designs, and the vine is from Party On with Evelin T Designs. I stamped both with Memento Tuxedo Black ink and colored them with Copics. To the bird I also added some details with a white gel pen and some sparkle with Spectrum Noir Clear Sparkle Overlay.


Onto a white card, I white heat-embossed a sentiment from So Tweet. After ink-blending with Fossilized Amber distress oxide, I flicked on some water and blotted it dry. I inked up some Bristol Smooth paper with Worn Lipstick distress ink and flicked on some water. Once the panel was dry, I die-cut it with the heart cutaway. The Flawless Heart Cutaways frame that gorgeous sentiment perfectly!


I backed the heart opening with clear acetate and covered the panel with foam tape. I placed some iridescent sequins in the opening and topped the panel with my card. I adhered the vine and bird to the card and finished with a scattering of heart sequins.


This next card may be my favorite! I really wanted to combine a shaker element with a slider, and this is what I came up with. I started with that adorable image from Sweet Holiday with Evelin T Designs. I stamped the image twice with Memento Tuxedo Black ink - once with the bear's face masked and the other with the full image - and colored both with Copics. I fussy-cut both images, trimming the gift from the bear's face, and went around the edges of both images with a black marker.


The balloons are from The Party. I die-cut three balloons from Bristol Smooth paper. Onto the die-cut panel, I gold heat-embossed a sentiment from The Party before ink-blending with Squeezed Lemonade and Cracked Pistachio distress ink. To give the background a little more interest, I flicked on some water and blotted it dry. Onto another panel of Bristol paper, I marked where the balloons would be and ink-blended with Worn Lipstick, Wilted Violet, and Peacock Feathers distress ink, being sure to use masks to prevent getting ink from one balloon on the others.


Ta da! A peekaboo bear! To make him I used a ruler and my Xacto knife to cut a track into my die-cut panel. I adhered a plastic slider disc to a small white circle and placed the panel on top so that the disc was in the track. To the disc I adhered a small white banner and adhered the bear on top. I placed tiny bits of foam tape on the bottom of the gift and adhered it on top of the bear. I dressed up the banner with a sentiment from Tagged: Holiday Cheer and added some white details and sparkle to my image. I built my shaker element just as I did for the first card (I wish I had used some anti-static powder to prevent my sequins from sticking to the foam tape, but I was impatient to see the final result.) and adhered the whole thing to a white card.

Thank you for stopping by! If you'd like a chance to win a $30 gift certificate to Winnie & Walter, leave a comment on all of the Leading Lady posts on my blog by January 31st at midnight CST. I will randomly draw a winner from all of the comments and post it on my blog on Saturday, February 3rd.

w&w-supplies

Monday, January 8, 2018

January Color Combo with Heather H. (Challenge)

Good morning! Heather here stopping by this morning to share a new Color Combo Challenge with you! Thanks again to everyone who has played along so far - make sure and look for winners and a few featured players at the bottom of this post! I decided to break out the pink and gold and start thinking of Valentine's Day for my card today!


Here is my color inspiration for this month - the different shades of pink, paired up with the chocolaty brown and touch of elegant gold was perfection for a love theme card:


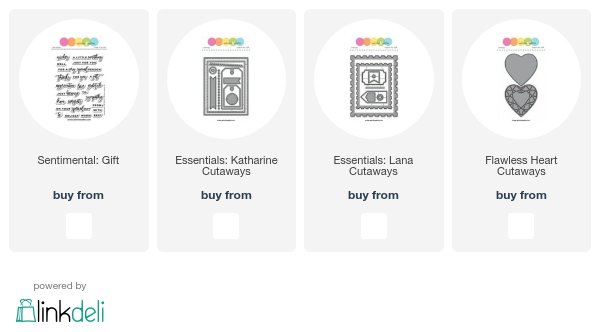
I began by die cutting the faceted heart from Flawless Heart Cutaways from shiny gold cardstock. I then die cut the solid one from a brighter pink cardstock, and layered them together. I fit the center heart back in and glued it in place as well.


Next up, I stamped and heat embossed a sentiment from Sentimental: Gift on a strip of dark brown cardstock that I hand trimmed into a banner, I mounted that with foam adhesive over the heart. 


Finally, I die cut a white panel using Essentials: Katharine Cutaways, and layered it over a paler pink panel cut with Essentials: Lana Cutaways. I then mounted the heart with foam adhesive, and then mounted the entire stack - again with foam adhesive - onto a cardbase made with the deeper pink. This is a nice, thick, bumpy card - perfect for hand delivering! Check out the shine from the gold - I love the touch of elegance it adds!


Now - I have a few favorites from the last Color Challenge to feature! I LOVED all the entries this month - you guys rocked it! This turned out to be one of my favorite color combos yet - I think I may find myself using this one more in the future! 

First up - this card by Ashwini - literally GORGEOUS!!! I'm pretty sure I gasped when I saw it - in LOVE!!!! Bravo!!!


Next up, LOVE this sweet little number by Maryam! Love the colors on the background - looks like that little penguin is enjoying the northern lights and snow with his cozy hat! SOOO adorable!


Then there is this adorable soft and sweet card by Marianne - I adore your background - and the soft coloring of the image is DARLING!!! 


And finally, how sweet are these little penguins on this card by Nonni, skating away on their own little ice skating rink?!?!? The masking and inking are fabulous, not to mention the perfect coloring on the penguins!


>>>RANDOMLY CHOSEN WINNERS<<<

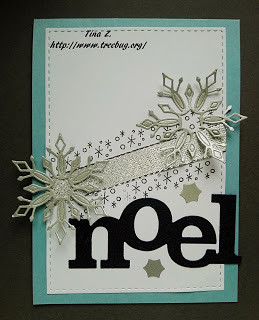
treebug_2017-12-22 14.45.43
No. 4 | treebug aka Tina Z.

Tina entered with this pretty glittery card.  Love all that shimmer!

And since we had so many gorgeous, colorful entries (and because I just feel like it and one the perks of being the boss at w&w is I can do these things on a whim!) I randomly chose one of the Heather's favorite cards featured above to also win as well!

No. 15 | Marianne
Marianne's card is simply delightful!  The watercoloring is spot on and love the flecks of white all over the card to give it a snowy appearance.   

Tina and Marianne, please email us at info {at} winniewalter {dot} com with the subject "December Color Combo Challenge Winner" to claim your prize.

>>>CHALLENGE<<<

New challenge will post on the second Monday of each Month (except in February when we have our Birthday Bash so we are adding another month for you to play), and will end on the Friday before the next challenge begins to allow time to pick a winner and some favorite entries to feature.

Now it's your turn to play along!
  1. Create a new project using the January Color Combo. 
  2. Use at least one (1) winnie & walter product.  This can include Cutaways (dies), Creative Screenings (stencils/masks), printable/digital items, cut files and/or stamp sets.  Remember we offer freebies in our shop.  Our freebies can be used to create your project(s) for this challenge.
  3. Link up your project below using the InLinkz Link-up by 11:55 p.m. CST on Friday, March 9, 2018.  
  4. Enter as many times as you want before the deadline.
  5. This January Color Combo Challenge may be combined with other challenges found here on the w&w blog or elsewhere. 
One randomly selected entry will receive a $25 gift certificate to Winnie and Walter. YAY!!! I can't wait to see your entries! 


Thanks for stopping by - have a wonderful day!


w&wDT_heatherhoffman_blog-sig 2


w&w-supplies