Showing posts with label purrfect with evelin t designs cutaways. Show all posts

Saturday, August 11, 2018

August Leading Lady Tracey McNeely | Take Two

Our August Leading Lady, Tracey McNeely is back for her sensational second performance!  If you missed her smashing debut you must see it...CLICK HERE.   Today's awesome cards are sure to inspire you to stamp your own patterns (I know I will)!

Ladies and gentlemen, Tracey...

Happy Saturday and I am back again taking over the Winnie & Walter blog today with my Week 2 post as the August Leading Lady.


Last week I gave you some tips on ways I personally add extra to my CAS cards without adding extra weight both physically and design wise. This week my theme is creating background papers. I'm going to share some tips on how I create my own background papers by using images from the same or multiple stamp sets.

When creating a background with multiple stamps I follow some basic rules to make the design look more authentic and whimsical.

1) Stamp some of the images off the edges.
2) Rotate the images so that they are no all the same direction.
3) I either leave the same amount of space between all my images or I vary the spacing once again encouraging the artistic and whimcical feel.
4) I personally always start my design in the upper left corner of my panel and then as I build the design I work down and towards the centre of the panel filling in the spaces as I stamp. There is less chance of getting cornered where you can't fit an image into the space and end up leaving an awkward space.

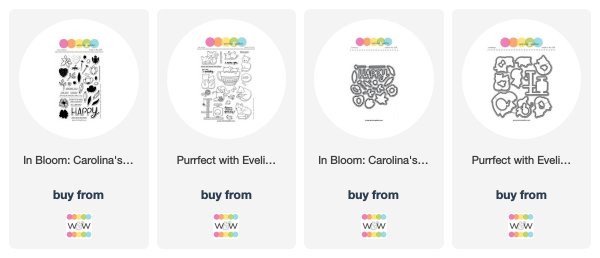
For my first card I used Purrfect with Evelin T Designs to create a fun background for this playful kitty. To reinforce that the playful theme of the card the balls of wool are all turned all different directions and the spacing varies to represent that this naughty kitty left the balls of wool all over the house! All my stamped was done with Copic friendly ink and the images were coloured with Copic Markers--R00, G12, B000, V01, Y13, T0 and T1.


 closer look--


For my second card I used In Bloom: Carolina`s Florals with Angelica Suarez. I stamped using the outline images with VersaFine Onyx Black ink and then clear embossed on Bristol Smooth cardstock for using ZIG Clean Color Real Brush Markers. On this card I kept the spacing between the images the same but I did continue to turn the images around on the panel. I used the two tiny branches to fill in the gaps. The ZIG colours I used were--021, 028, 050, 052, 036, 031 and 041. Once the watercolour was dry I added my sentiments. The happy and `birthday wishes`was white heat embossed on black cardstock. The happy was popped up with foam tape.


a closer look--


I have a  $30 gift certificate for Winnie & Walter gift certificate to giveaway on my blog, In My Creative Opinion. Visit all four of my Leading Lady posts this month and leave me a comment. On September 3rd I will draw a name from all my comments from over the month to win.  You can enter once each week so you will have four chances to win., good luck!


I hope you had fun learning how I create my own patterned backgrounds with stamps. See you again next Saturday for another Leading Lady post. Have a great day.

w&w-supplies

Monday, May 14, 2018

May Color Combo with Heather H. (Challenge)

Good morning! Heather here stopping by this morning to share a new Color Combo Challenge with you! This month is kind of that lovely in between spring and summer season - so I wanted to be bright and happy to celebrate the return of sunshine, flowers, and getting outdoors - plus, I really wanted to play a little more with the adorable kitties in the Purrfect with Evelin T Designs stamp set!


Here is my color inspiration for this month - I don't know about you, but I would just love to step into that scene!


I began by stamping a sentiment from another Evelin T stamp set - Wish Big using Black Jack Catherine Pooler Ink. I then did some distress ink blending on the top half using Spun Sugar Distress ink, then mixed a little of the same ink with some Worn Lipstick, mixed with a bit of water, then used it to add some splatters over my card front. I also added some white ink splatters over the top for even more texture.


Finally, I colored up my adorable image with Copics and a white gel pen for accents, then die cut with the coordinating dies and mounted with foam adhesive on my card.


Now - I have a few favorites from the last Color Challenge to feature! This challenge had a few less entries than lately - I'm blaming the weather making everyone want to get outside instead of craft! But there are still some GORGEOUS entries! Sooooo...on to the favorites!

First up - this soft and dreamy beauty from Maryam...seriously - this is breathtaking! Maryam had several beautiful entries - but this one stole my heart!


Next up, this fun and happy baby card by Rosali - LOVE those beautiful stripes, the cute critters so beautifully colored, and the sentiment and stars! Just a lovely card all around!


And finally, despite everyone being ready for spring these days, Trina P made the CUTEST little snowmen cards for her entries! I love the inky backgrounds and fun techniques - but this little cutie using the body of the snowman for the "o" in "snow" was SOOO cute!


>>>RANDOMLY CHOSEN WINNERS<<<

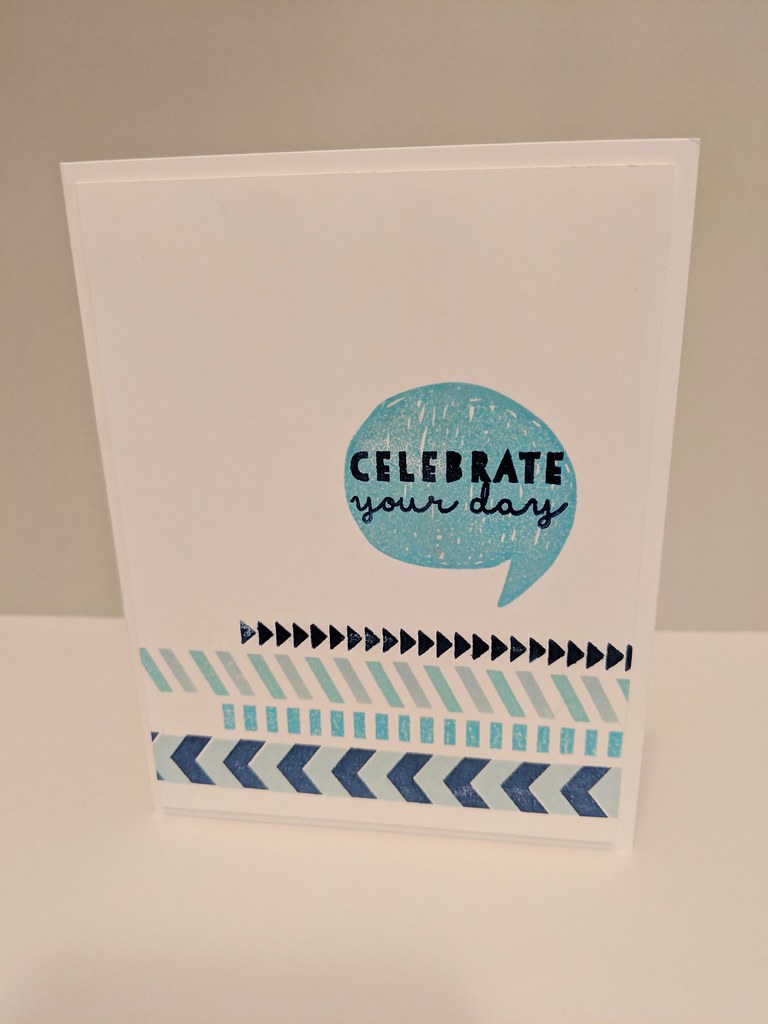
Celebrate your Day
No. 1 | MeganBeth
This is just such a fun card for any gender and age!  I love the movement on this card too!

And since we had so many gorgeous, colorful entries (and because I just feel like it and one the perks of being the boss at w&w is I can do these things on a whim!) I randomly chose one of the Heather's favorite cards featured above to also win as well!

No. 7 | Maryam
What an amazingly beautiful card!  I love the use of the wide swath of organic color behind the fabulously colored all-in-shades-of-greys flower.  Just lovely!

MeganBeth and Maryam, please email us at info {at} winniewalter {dot} com with the subject "April Color Combo Challenge Winner" to claim your prize.

>>>CHALLENGE<<<

New challenge will post on the second Monday of each Month, and will end on the Friday before the next challenge begins to allow time to pick a winner and some favorite entries to feature.

Now it's your turn to play along!
  1. Create a new project using the May Color Combo. 
  2. Use at least one (1) winnie & walter product.  This can include Cutaways (dies), Creative Screenings (stencils/masks), printable/digital items, cut files and/or stamp sets.  Remember we offer freebies in our shop.  Our freebies can be used to create your project(s) for this challenge.
  3. Link up your project below using the InLinkz Link-up by 11:55 p.m. CST on Friday, June 8, 2018.  
  4. Enter as many times as you want before the deadline.
  5. This May Color Combo Challenge may be combined with other challenges found here on the w&w blog or elsewhere. 
One randomly selected entry will receive a $25 gift certificate to Winnie and Walter. YAY!!! I can't wait to see your entries! 


Thanks for stopping by - have a wonderful day!


w&wDT_heatherhoffman_blog-sig 2


w&w-supplies

Saturday, May 12, 2018

May Leading Lady Cynde Whitlow | Take Two (Video)

Our May Leading Lady Cynde Whitlow back for her sensational second performance!  If you missed her smashing debut you must see it...CLICK HERE.   Today's card is utterly charming and magnificently colored!

Ladies and gentlemen, Cynde...

Hey folks!

It's Cynde and I'm back today for Take 2 with Winnie & Walter as the May 2018 Leading Lady! Today we're going to take a look at using colored pencils on kraft cardstock. I say kraft, but honesty just about any color will do! More on that in a moment.

My last card was all about masking a scene and coloring in that scene with Copic's. The idea was to build up those images with layering and color. Today, I wanted to focus on colored pencils which is another medium folks can find frustrating and intimidating. Colored pencils can be just as fun as Copics! I promise! I kept today's card super clean and simple. I really just wanted to keep the focus on the coloring and the paper. Let's get started!


If you're interested in seeing how I made my card, I have a video to share! You can see that HERE.


I wanted to use those darling kitties in the cup from Purrfect with Evelin T Designs, but before I stamped them I needed to choose my cardstock. You can have the best colored pencils, but if your paper isn't as good, then you're still going to struggle folks. Prismacolor and Polychromos are super popular pencils (They should be. They rock!), but what about the cardstock?

The beauty of colored pencils is you can color on virtually any color of cardstock, but it needs two important features in order to work the best. The first thing is it needs some tooth. Ultra smooth cardstocks generally don't work the best. For the purposes of this tutorial, lets just say if you can feel even light texture on your cardstock, you probably good go.


The other thing I like in a cardstock (for color pencils) is I want it to feel little soft. Now this is mostly a personal preference, but I think it helps a bunch. This way I don't feel like I need to add as much pressure with my pencils right away. You should be able to feel a slight amount of "give" when you start coloring. I talk more about this in the VIDEO.

When I chose the colors for my card I purposely chose colors that would pop. I wanted colors that would stand out so you could see how they go down on to the cardstock and so you could see how those colors can really build up.


To finish off my card, I added a few hearts from the Scenery: Seeing Hearts Stamp Set and colored those in with he same colors as the hearts on the cup. They're pretty tiny and it's always important to keep your pencils sharpened when you color anyway, but that much more when your coloring in those tiny lil images.

I had left the stamp in my MISTI Stamping Tool so After I had everything colored in, I put the panel back in it and stamped it again with Versafine Onyx Black Ink to get those lines nice a crisp again.

That's it! I hope you enjoyed my card today


Be sure to follow along with me this month folks! I will have a super fab giveaway (Thanks Shay!) at the end of the month. All you will need to do is leave a comment on my blog telling me which one of my projects was your fave and why!

Thanks so much for stopping by! Until next time.

Cynde


Supplies used:

Monday, March 26, 2018

Have a Meowy Good Day with Gayatri

I have had so much fun playing with Winnie & Walter’s February release products and sharing them with you. I have you have enjoyed all my projects as much as I did. This is my last one for the month. Hope you like this one too.
This card uses Winnie & Walter’s Purrfect with Evelin T Designs stamp set and coordinating cutaways.


Here is how I made this card:
  1. I stamped the cat images from Purrfect stamp set and coloured them using copic markers. Similarly I also stamped the accessory images and copic coloured them.
  2. The coloured images are die cut using the coordinating cutaway.
  3. On the card front, I masked a large part of the top and a small part of the bottom to give me a rectangle area to sponge inks. I used distress inks to sponge. The colours I used are Mustard Seed, Mermaid Lagoon, Blueprint Sketch and Chipped Sapphire. I also spattered clear water to add texture.
  4. I stamped the sentiment from Purfect stamp set using black ink to the top right of the sponged area.
  5. I then arranged and glued the cat die cuts on the bottom of the sponged area and the accessory die cuts around the cats and sentiment.
  6. To embellish I added blue sequins and silver stickles in the centre of them. I picked up the idea of adding silver stickles to the centre of the sequins from Stephanie Klauck.
Here are some closeups of the card.

I just love these cats together. So so adorable. Hope you like my project. All the w&w supplies used to make this card are listed below.


Thanks so much for stopping today. Will see you with more projects soon.

My blog signature


w&w-supplies