Monday, June 29, 2015

Hugs with Joni

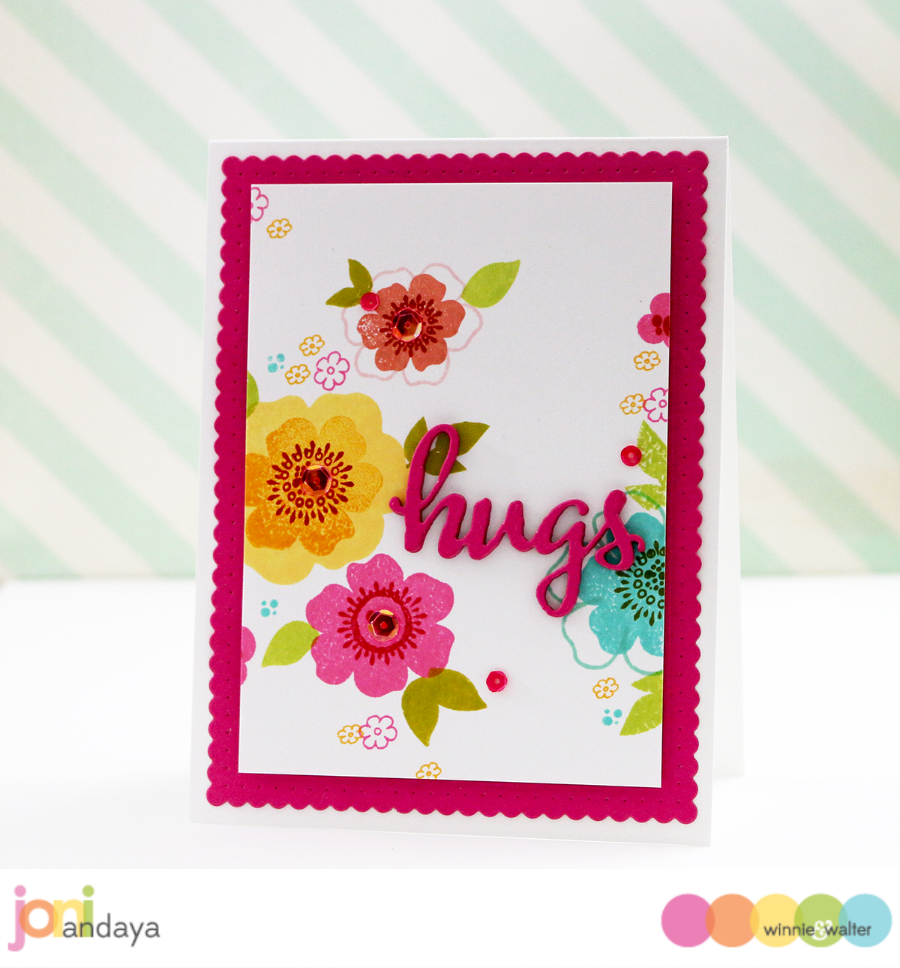
Hello Everyone, Joni here created a simple to mass produce card using the Essentials: Audrey Cutaways, The Big, the Bold and Friends Cutaways and In Bloom: Lola’s Bouquet with Joni Andaya stamp set.

joni_inbloom-ww

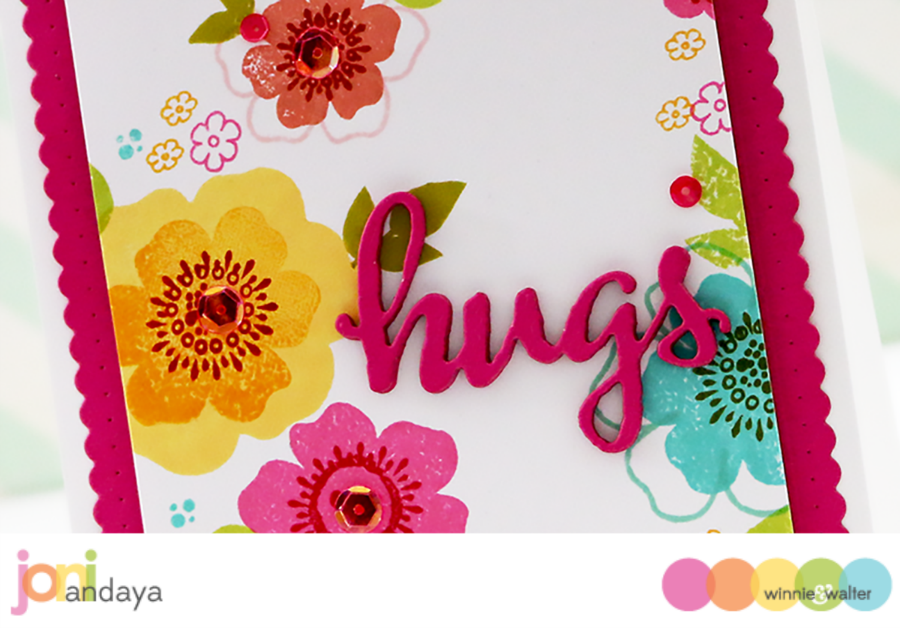
To begin I first die-cut the Essentials: Audrey Cutaways “larger frame” and adhered on the white card base. Then I stamped some of the flower images using the In Bloom: Lola’s Bouquet on the white card panel. For the sentiment I die-cut the sentiment die “hugs” using The Big, the Bold and Friends Cutaways. To finish off the card I added some Pretty Pink Posh sequins in watermelon and Strawberry Burst sequins.

joni_inbloom2-ww

I hope you guys enjoyed this simple card!

Thank you so much for stopping by!

Have a Wonderful Week :-)

w&wDT_joniandaya_blog-sig


w&w-supplies


Saturday, June 27, 2015

June Leading Lady Charlene Cundy | Take Four

As June comes to an end we reach the last Saturday with our incomparable June Leading Lady, Charlene Cundy.  These four weeks with Char have been incredible and all too short.  We wish to express our heartfelt gratitude to you, Char, for the depth, scope and artistry of each of your performances.  It has been a delight and honor to have you as our leading lady.  

If you missed her smashing debut you must see it...CLICK HERE or her inktastic second performance CLICK HERE or her wonderful take on the watercolor trend in her third performance CLICK HERE!

Lucky for us all we have her final alluring performance today.  

Hi Friends! Happy Saturday! I'm so excited to be back for another round of fun! This month flew by!  I've had a blast being here and sharing some fun techniques.  I have been a big fan of Winnie and Walter from the beginning and was over the top excited to be June's  Leading Lady!  Shay and Julie are wonderful !! I can't tell you how much I appreciate you girls! Thank You for your  kindness and generosity !


The topic today is Vellum!

Vellum is a translucent paper that is used by a lot of card makers. It can adapt itself to lots of different techniques. Because it's a different type of paper, it has to be handled differently than other papers,  It can add lots of dimension to your cards. Vellum comes in many different colors. I just used the clear but it comes in many colors! 


On this card I used the fabulous Cover Model: Multifaceted Cutaway to start. I added bits of patterned paper for interest. I tore some vellum and placed on top of the die. then I layered some hearts, die cut some xoxo's  from Essentials: Audrey Cutaways to place on top of that . For the top piece I die cut the word "always" on a plain piece of card stock, backed it with patterned paper and stamped "Love You" on you on top with "The Big, The Bold and the Happy" I finished off with some cut hearts and a beautiful gold embossed rose from In Bloom: Maggie's Roses Cutaways, and some water colored leaves from the same set.


I love this stamp set called In Bloom: Lola's Bouquet with Joni Andaya and thought it would be fun to stamp with different flowers and ink colors to make my background. I then added a layer of vellum over the top to soften. Sometimes I like to sew the vellum, it adds character to the card ! I then added an additional square of vellum under the dark blue  sentiment. The sentiment is from In a Word: Hello Cutaway. I love all these big dies because I feel they make a wonderful impact on your cards, or projects!


I  stamped a heart from the True stamp set, embossed with gold embossing powder and then colored the back of the heart with red copics. The tag is from Essentials: Audrey Cutaways. (LOVE THESE) , I also stamped strips from True in gold embossing powder and vellum. The sentiment is also from the same set. The border is from Essentials: Audrey Cutaways. I love the sweet scallop in this versatile set! I finished off the a small tag from the same set, tied it to the heart and added another heart on top. Added gold accents.


This card was fun to make. I love to get inky! I started by cutting  a circle, used a blending tool and some pink and purple distress ink and blended the two colors. After that was  dry, I splattered some water drops because water reacts with the distress ink and causes the ink to lighten where the water lands. Kind of looks like a bokeh effect to me. I used the stamp set Sparkle and embossed the stamp with silver embossing powder. The sentiment is embossed in white. I splattered some silver paint on the base of the card, and added sequins to finish.
  

And my last card is water colored with vellum flowers. I started by cutting a stencil of sorts with the Multifaceted die and acetate running it  through my bigshot to cut. If you don't get a clean cut try using a metal shim, and if you still don't get a clean cut, use an exacto knife to cut away any leftover pieces.. I wasn't going for a solid cover with my water colors, I just wanted to get some of the lines in the background. I embossed some flowers from In Bloom: Lola's Bouquet with Joni Andaya  with some bright green embossing powder, and the leaves were embossed with white. After embossed, I hand cut them and placed on top of some gold thread. The sentiment is from The Big, the Bold and Friends


Also as Julie and Shay are so generous they have given me a $30 gift card to the Winnie & Walter store over on my blog  so if you hop over there and leave me some love I will choose a random winner from all the comments left on my Leading Lady posts through  June! You have until next Saturday until I choose the winner.

This has been so much fun! Thank You for your support and new friendships made! Have a wonderful day! Hugs, Char


w&w-supplies


Friday, June 26, 2015

Dapper + Dashing | Dad You're the Best with Gayatri

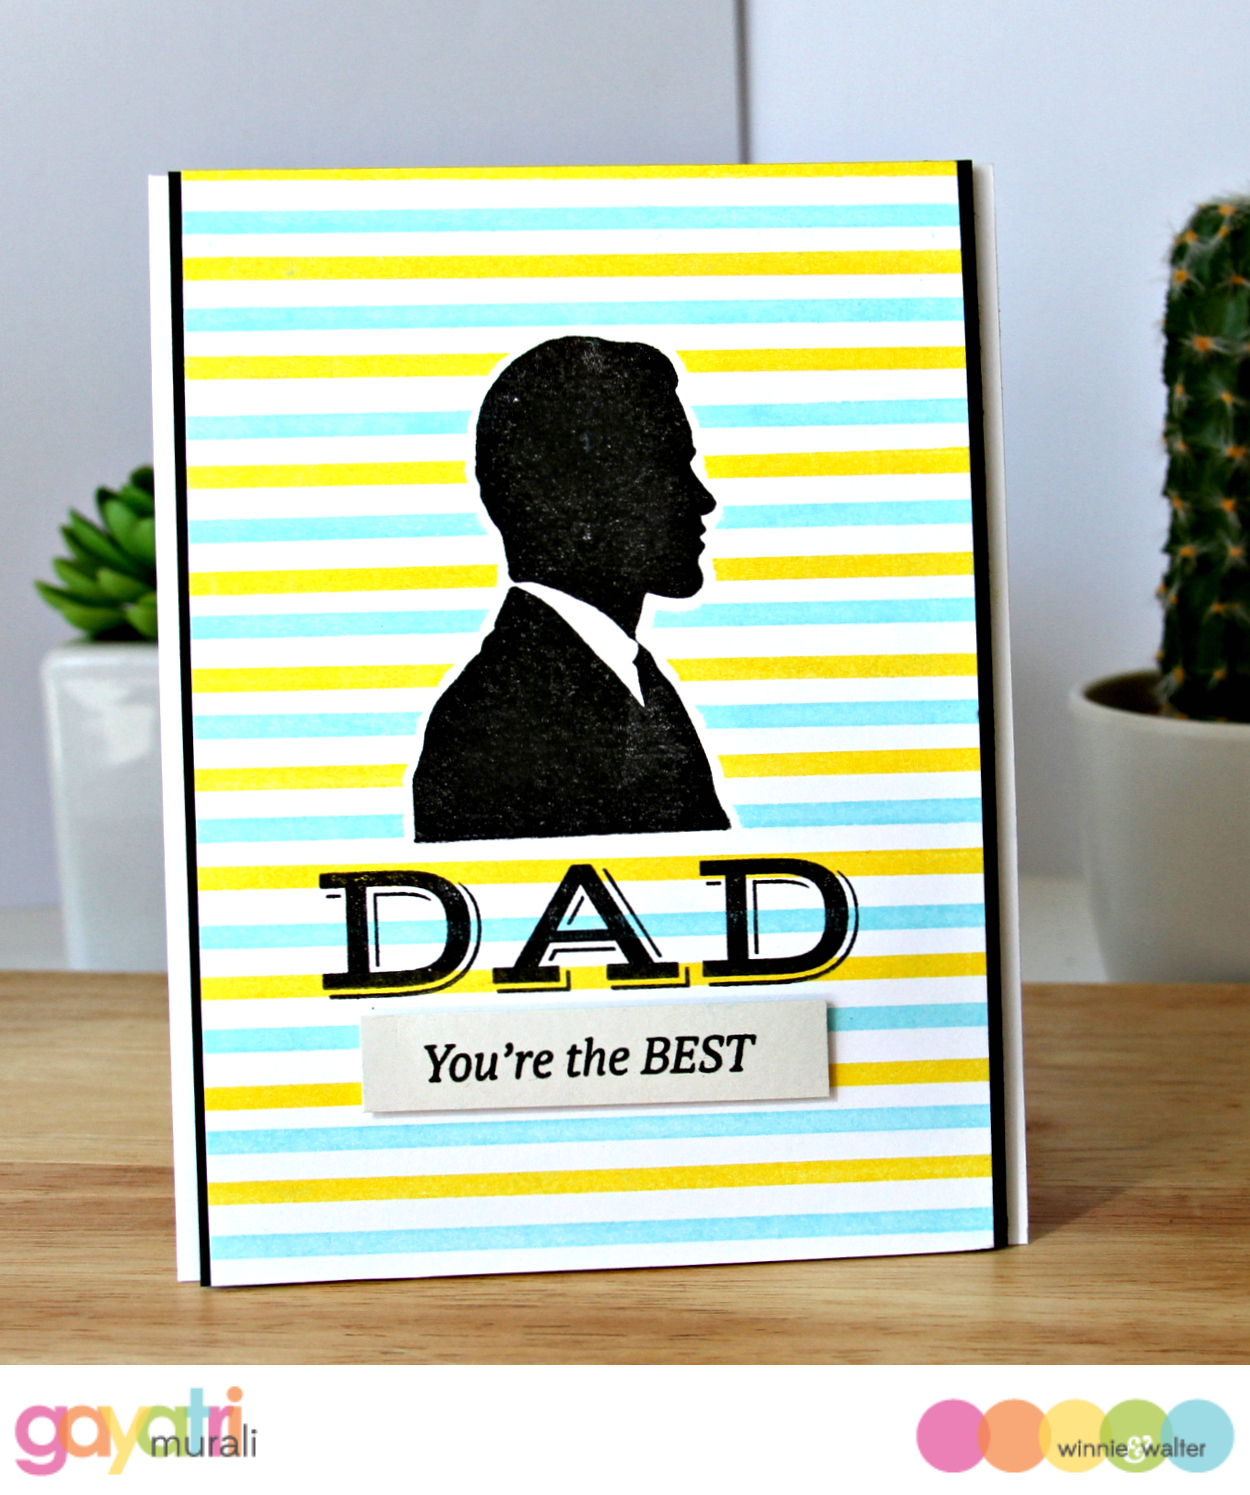
Hello again! This is Gayatri with you bringing a dapper card using masking technique. Here is the finished card.

gayatri_Dad You're the best card 2

To make this card, I started with stamping the man’s image from The Write Stuff: Leave it to Dad stamp set on masking paper. I trimmed this image out with a little white space around the edges. This will help me later when I am stamping the image inside the masked area. After applying this mask on the white cardstock panel, I used the medium solid strip image from Scenery: Stripes stamp set to stamp in blue and yellow pigment inks. Pigment inks sit on top of the cardstock and the masking paper. They do not get absorbed therefore you get a clean crisp image around the masked area and no ink stains inside the masked area. I left this to dry for a while as I did not want the pigment ink to smudge trying to remove the mask.

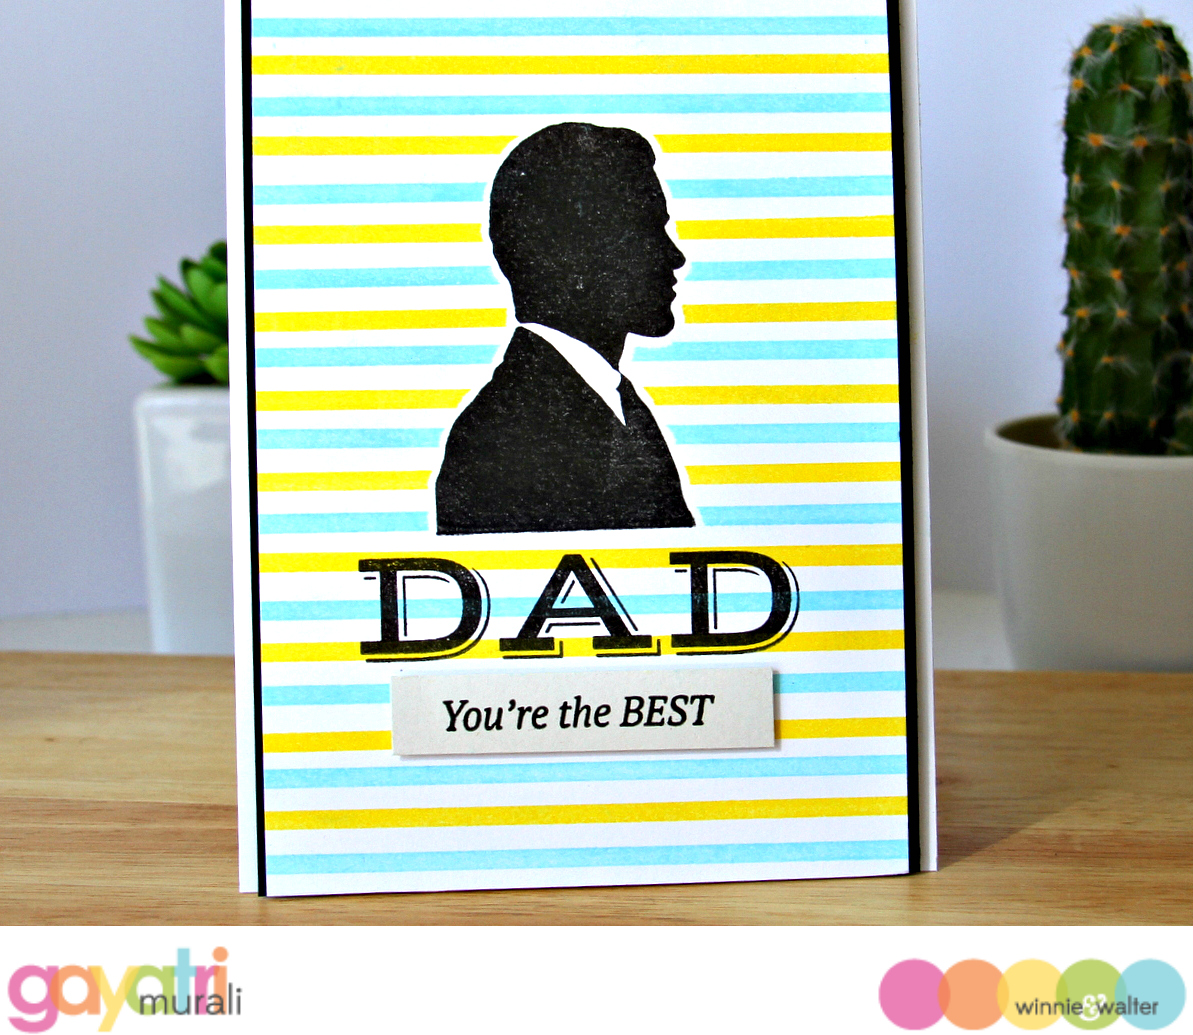
After the pigment inks have dried, I carefully removed the mask. I stamped the man’s image back inside the masked area. You can now see that the tiny white space helps to stamp the man’s image without having to overlap on the stripes. Hope I make sense here! Anyway, the sentiment is from Parentville stamp set. The big and bold “DAD” I stamped directly on the card panel. The smaller sentiment, I stamped on a strip of grey cardstock, trimmed and adhered using foam.

gayatri_Dad you're the best closeup


Two thin strips of black cardstock on the edges of the panel, ties the card together. This completed panel is adhered to the card base using fun foam. I did not feel the need to add any embellishment on this card as I wanted the masking technique to be highlight of the card. Love that the eyes are drawn to the man’s image and sentiment. And colour is added through the stripes. A dapper card would you say?

gayatri_Dad You're the best flat

Thanks so much for stopping by today.
Gayatri


w&wDT_gayatrimurali_blog-sig


w&w-supplies

Thursday, June 25, 2015

Spotlight On...Camilla Fredriksson! Part Deux

We are so happy to have Camilla Fredriksson back with us for another superb post with an emphasis on backgrounds!  If you missed learning more about Camilla and seeing her first post full of delightful Dashing + Dapper CAS projects CLICK HERE!

Now, it's Camilla's time to sparkle and shine...

spotlight-camilla-fredriksson

Hi! I am back to do my last post for spot light on -Camilla Fredriksson! It was really difficult to choose from all the excellent Winnie & Walter dies and stamps, to choose which ones to bring me into the spotlight. I wanted to keep a theme, and I decided to stick to the background theme from last post, however off course somewhat different. I really enjoy to create backgrounds for my CAS cards, it gives me comfort that the card has been worked though even if the layout is clean and simple, I also certainly enjoy the process!


The first card is a repeated stamp card, white embossed and filled with glowing pearlescent water colors from Kuretake in shades of pink and apricot. I named my card Peace, joy & Love!! I used the small leafy branch from the lovely In Bloom: Addie's Garden set. I stamped and embossed it repeatedly on water color paper and then filled in the small leafs with random colors of a few variant shades of rich pigment water colors. To not cover the background, I have kept the embellishments simple, the lovely word dies are so versatile and clean, for this card I used word dies from following cutaway collections; [peace & joy]-The Big, the Bold and the Merry Cutaways and [love]-The big, The Bold and the Happy Cutaways. I cut the word dies 4 times and glues them up for more dimension. I also added a few color coordinated hearts, cut from the Essentials: Audrey Cutaways.


The glow is always difficult to catch on camera, but this one gives you and idea.

For the second card I used the same Addie's Garden set, this time only using 3 of the long leafs. I colored in green/blue shades, however colored in black & white I would imagine it is a perfect zebra pattern!


Also this time I white embossed the stamping, I colored with Distress Inks and also inked up it all by Ink blending tool. I wanted to create more interest to the background by stamping some small words repeatedly in the left corner in white. I used the lovely Hydrangea stamp, lightly colored as a platter for the focal point of the card - the word die In a Word: Hugs Cutaway. The Hugs cut was also glazed with glossy accent for some shiny effect. I used Essentials: Audrey Cutaways to make a small border as well as a few butterflies to complete the card.

For my last card I used my favorite stencil; Scenery: Persuasion Script Creative Screenings
I colored with Distress inks and once dry I added a layer of transparent gloss paste before removing the stencil from the paper.


The stencils is really enabling a fun way of creating a colorful background! My background is indeed really colorful so the rest is kept clean and crispy. I loved the die In Bloom:Maggie's Roses Cutaways from I first saw them, so I was happy to see the possibility to make use of it for this card. The rose is cut in 4 layers to create dimension, the leafs in 2 layers. I added a birthday die from the The Big, the Bold and the Party Cutaways to finalize the card.

This turned out to be a really long post, I hope you were able to follow it all the way down to these final lines. I want to sincerely thank Shay & Julie for the opportunity to play with your stuff and the honor to post under the spotlight theme, I have enjoyed every second since I got the question. Thanks a lot!!

Wednesday, June 24, 2015

Wanting to Win w&w Goodies?

Perhaps your w&w wishlist is a bit long or just your crafting wishlist in general is too long (ours surely are!).

We have several opportunities to win some credit to the w&w shop:

  1. Rerun No. 1 (open until June 30, 2015 at 11:59 p.m. CST)
  2. The Gossip Column with Taheerah Atchia No. 3 | Interview with an A-Lister (open until next Monday, June 29, 2015 at 11:59 p.m. CST)
  3. Sparkle and Shine Challenge (open for only a few more hours)
  4. Comment on a post by June Leading Lady, Charlene Cundy on her Leading Lady blog posts this month on her blog!

Don't miss a chance to join in on these fun and inspiring challenges right now for a chance to win some w&w shop credit!!

Don't forget if you like to learn something and join in with what you learned, please try In Focus with Gayatri!

Tuesday, June 23, 2015

Spotlight On...Carol Mayne! Part Deux

We are so lucky to have Carol Mayne back with us for another dramatic and dynamic post full of warmth and heart!  If you missed learning more about Carol and seeing her first fabulous Dapper + Dashing projects CLICK HERE!

Now, it's Carol's time to sparkle and shine...

Hello,

The only thing more exciting than having a Spotlight On feature at Winnie & Walter is the opportunity for a second! Once again, I'm honoured and thrilled to be showcasing W&W products in Part Deux of the Dashing and Dapper theme.  Before I do, however, a warm from-the-bottom-of-my-heart thank you to everyone who left such sweet, encouraging comments on my previous spotlight. Talk about feeling ever-so loved!  Okay...let's get the players on the stage....


spotlight-carol-mayne


The geometric and multi-faceted shapes, paired with soft grey, a whisper of a second colour and bold black die cut sentiments of my previous Spotlight post have  switched gears to include an assortment of backgrounds and images that are colour-linked in what I consider to be a dashing, dapper combination: red, gold and black.  I hope you enjoy the trio on stage today...


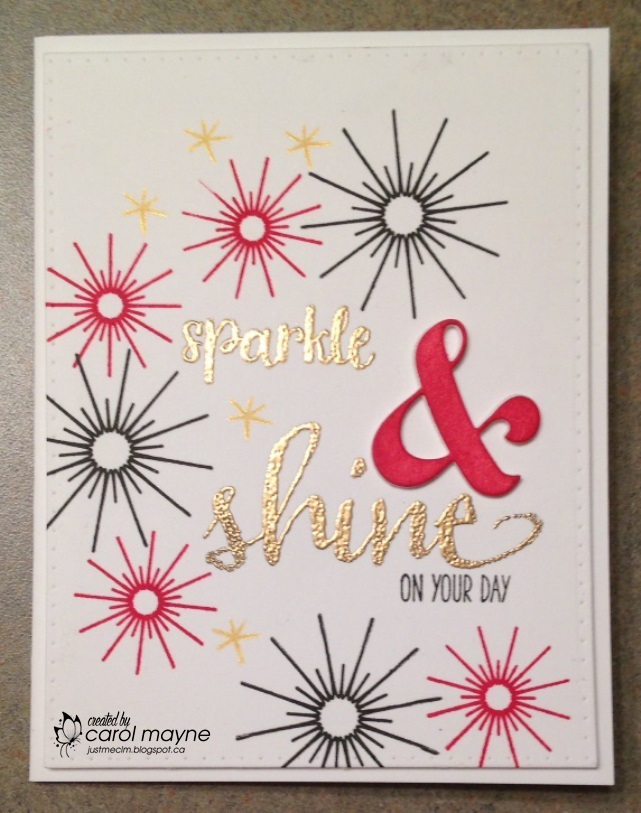
First on the runway, and sporting plenty of sparkle and shine is this celebratory number. The gold embossed *sparkle*, "on  your day" and  'fireworks' come from Sparkle, while *shine*, making a lovely shimmery appearance, comes from The Big, the Bold and Fun set.  My panel is, once again, cut from my 'use nearly always' set that I'm completely smitten with: Essentials: Katharine Cutaways, The largest rectangle is featured here...

carol_mayne_Sportlight two - sparkle and shine


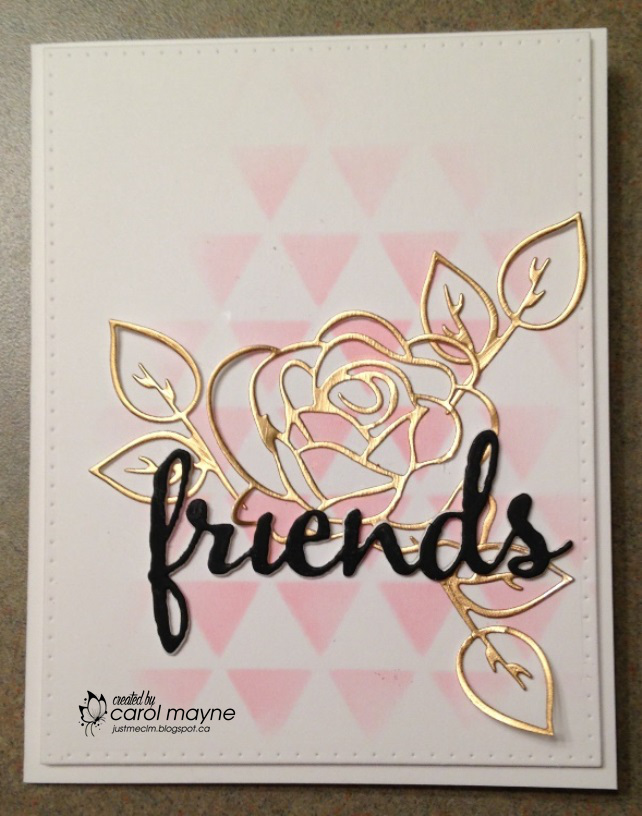
Second on stage is a more soft-spoken design, using the same colour pairings, but with a gentle touch.  I lightly stenciled the  Scenery: Triangled Creative Screenings background with SU Real Red ink ( also used in the previous card...talk about  a juicy colour!), then added a gold foil rose and leaves from In Bloom: Maggie's Roses Cutaways.  This is the debut of these cutaways and oh my!  They cut like butter and the possibilities...endless! In the foreground, you'll see the The Big, the Bold and Friends Cutaways, cut from one black and white card stock, and stacked for dimension. Essentials: Katharine Cutaways large rectangle panel rounds out Dashing and Dapper card two.

carol_mayne_Sportlight two - friends

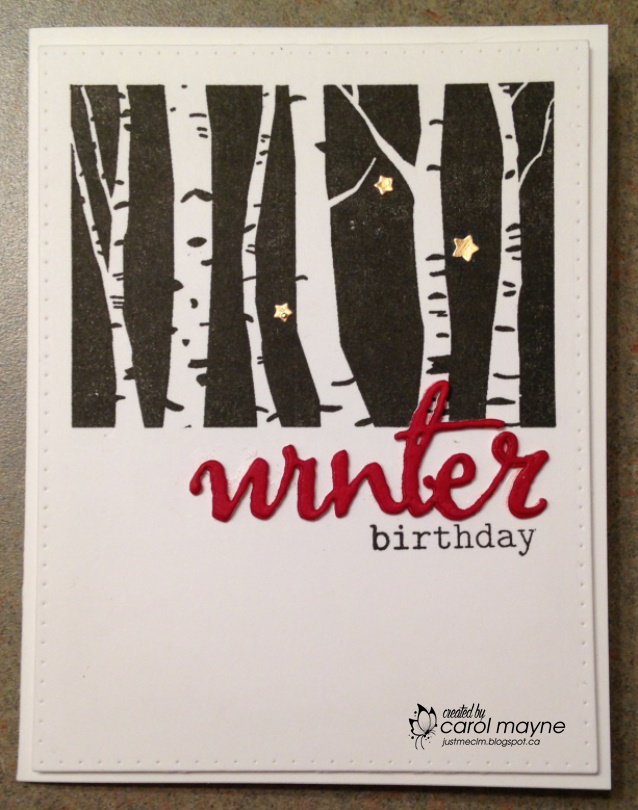
Of course, a 'dashing' set of cards wouldn't be complete without a play in the snow, so...my final card is a nod to just that: dashing though the snow.  I stamped Mini Scenery: Into the Woods with black Versafine ink, added a couple of tine gold stars, and a stacked cutaway from The Big, the Bold and the Seasons Cutaways.  "Birthday', from the The Big, the Bold and the Happy and another run through with the Essentials: Katharine Cutaways and voila...

carol_mayne_Sportlight two - winter

I hope that my cards have piqued your interest in checking out the amazing, ever-so-versatile, filled -with-infinite possibilities products over at Winnie & Walter;  If you already are the lucky owners of W&W stamps, dies and stencils, then I hope my card inspired some ideas.  I still have a few (okay, plenty!) of products yet to use, and rest assured: you'll be seeing many more W&W cards on my blog in the very near future.

To all who visit and leave comments: thank you so much! Your encouragement touches me deeply. 

To Shay and Julie: a mega-sized THANK YOU for this dream of a lifetime opportunity! It's been such an honour and privilege to be part of your Spotlight On project!

Monday, June 22, 2015

In Focus with Gayatri Murali No. 2 | Style #2
in-focus-banner-title_640px

I am back today with my In Focus feature. Hope you are enjoying my In Focus series and getting inspired.

in-focus-banner-title_640px

This month’s technique is Getting creative with Stencils technique. In the earlier post, I had used the Diagonal Striped Creative Screening to sponge inks and also off set the stencil to draw lines for added interest. Simple yet effective way to use stencil. You can find the post HERE

Gayatri Style banner copy

Today I am using the Scenery: Grand Diagonal Creative Screening, sponging inks, drawing lines and also stamping in them. This stencil allows you to stamp as well. How cool is that?

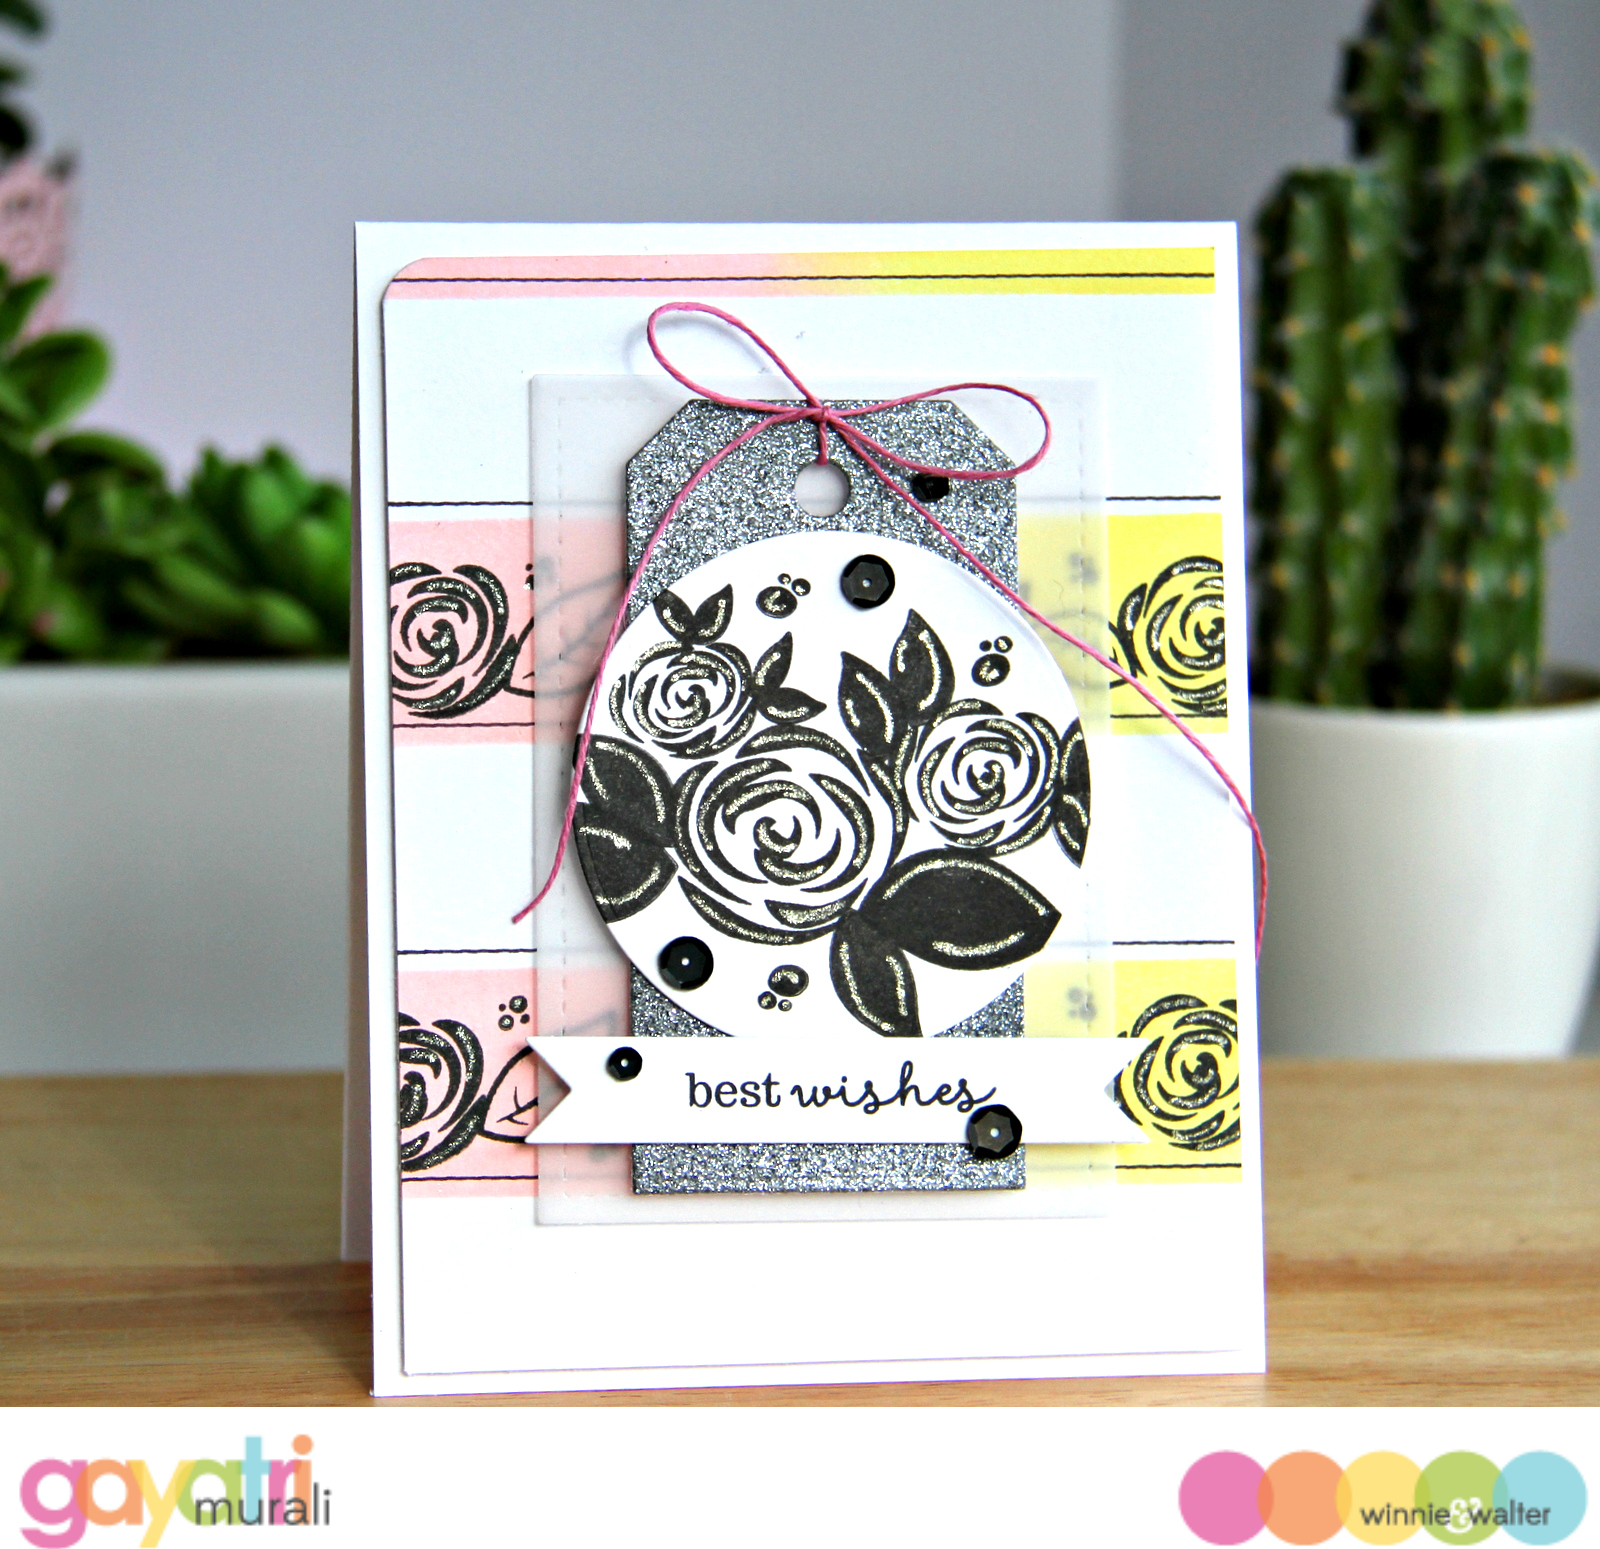
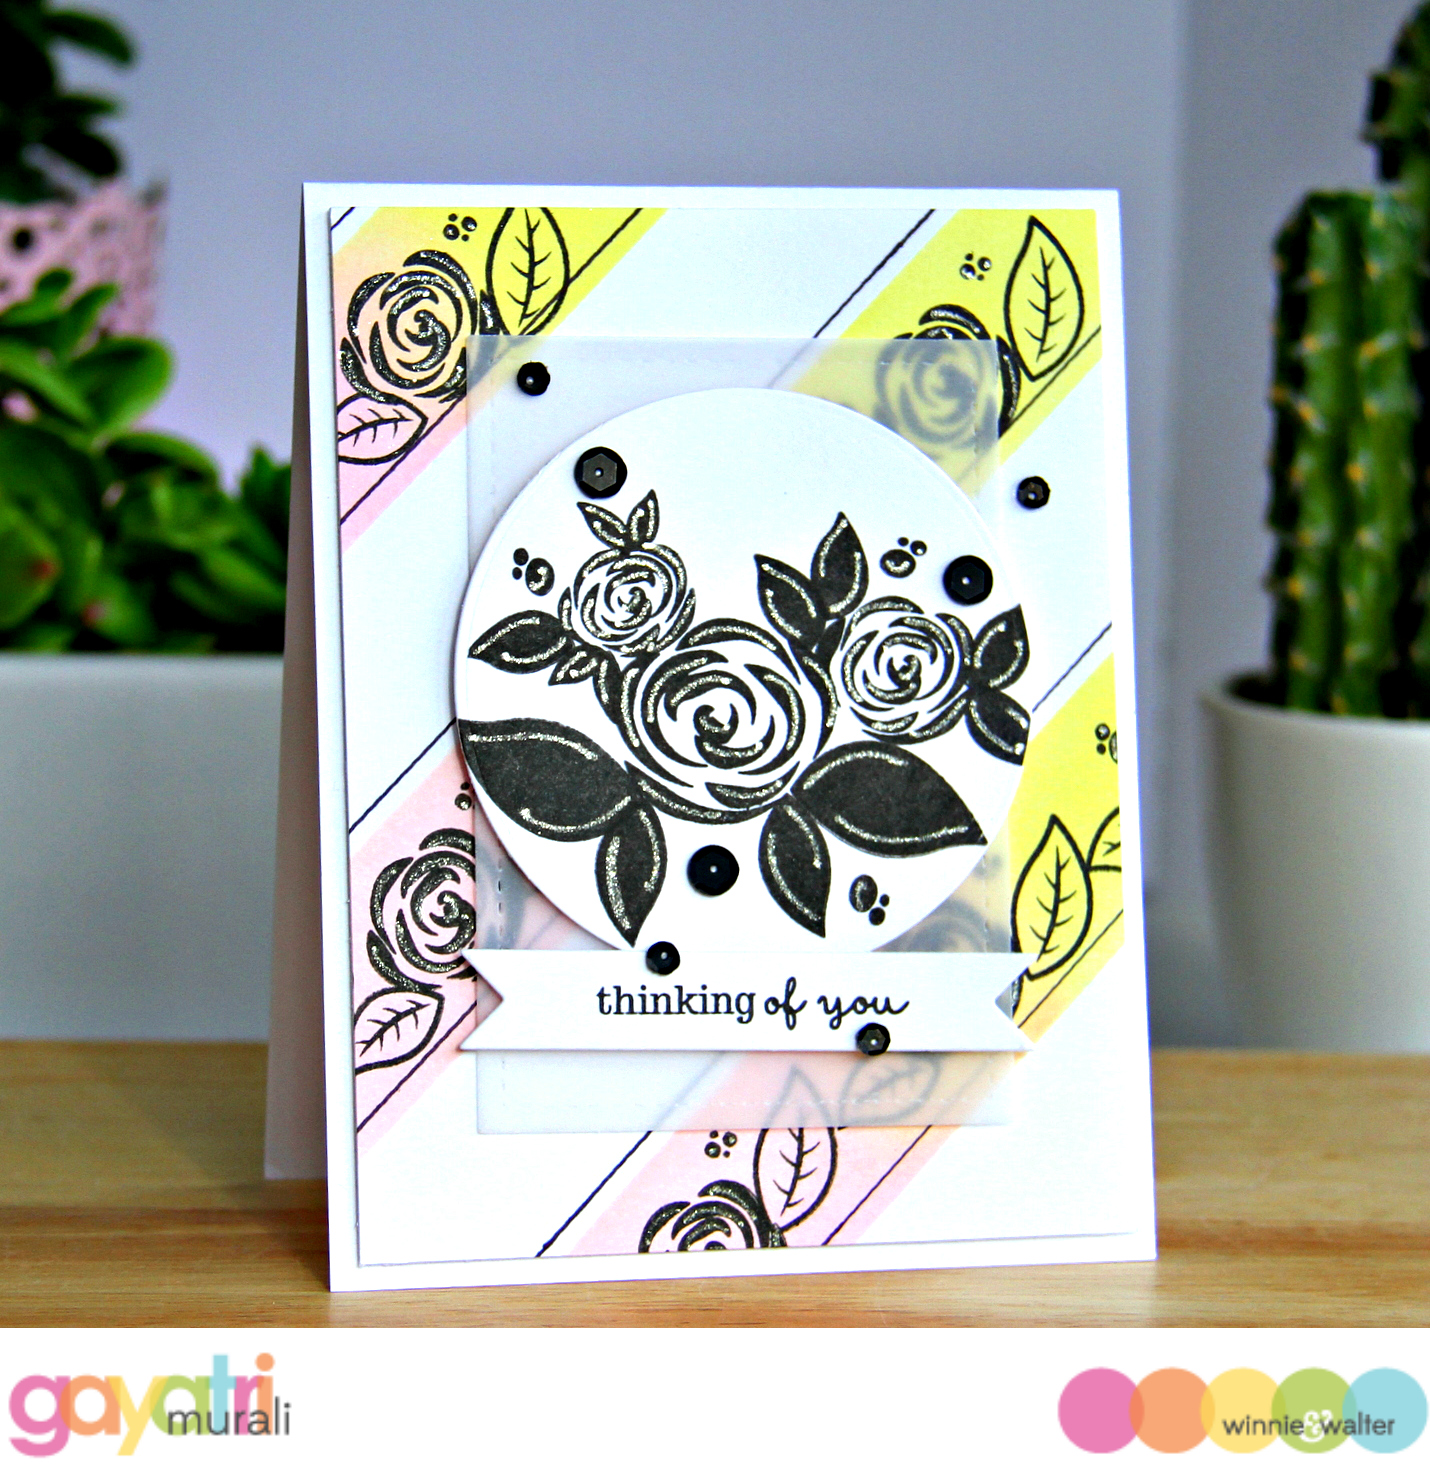
I have made not one but two cards to share today. In the first card, I used the stencil horizontally and diagonally as it is intended on my second card.

Best Wishes card
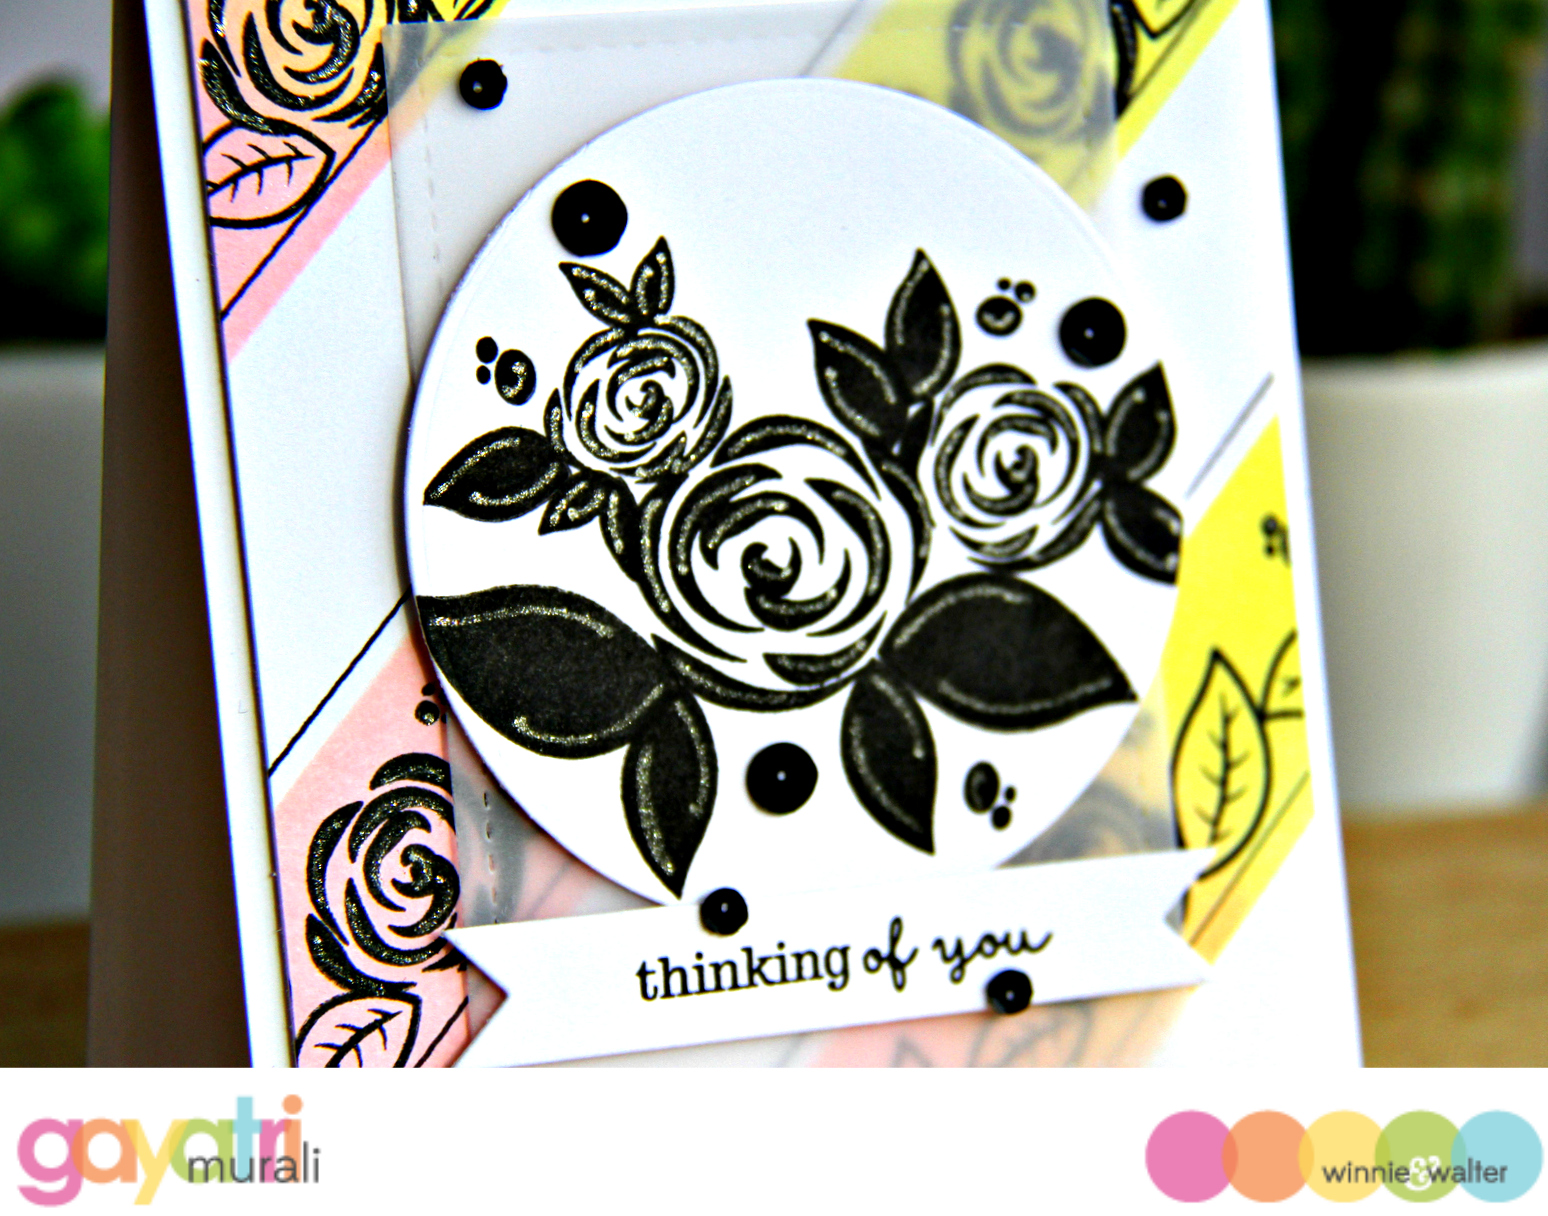
Thinking of you card

photo-tutorial_banner


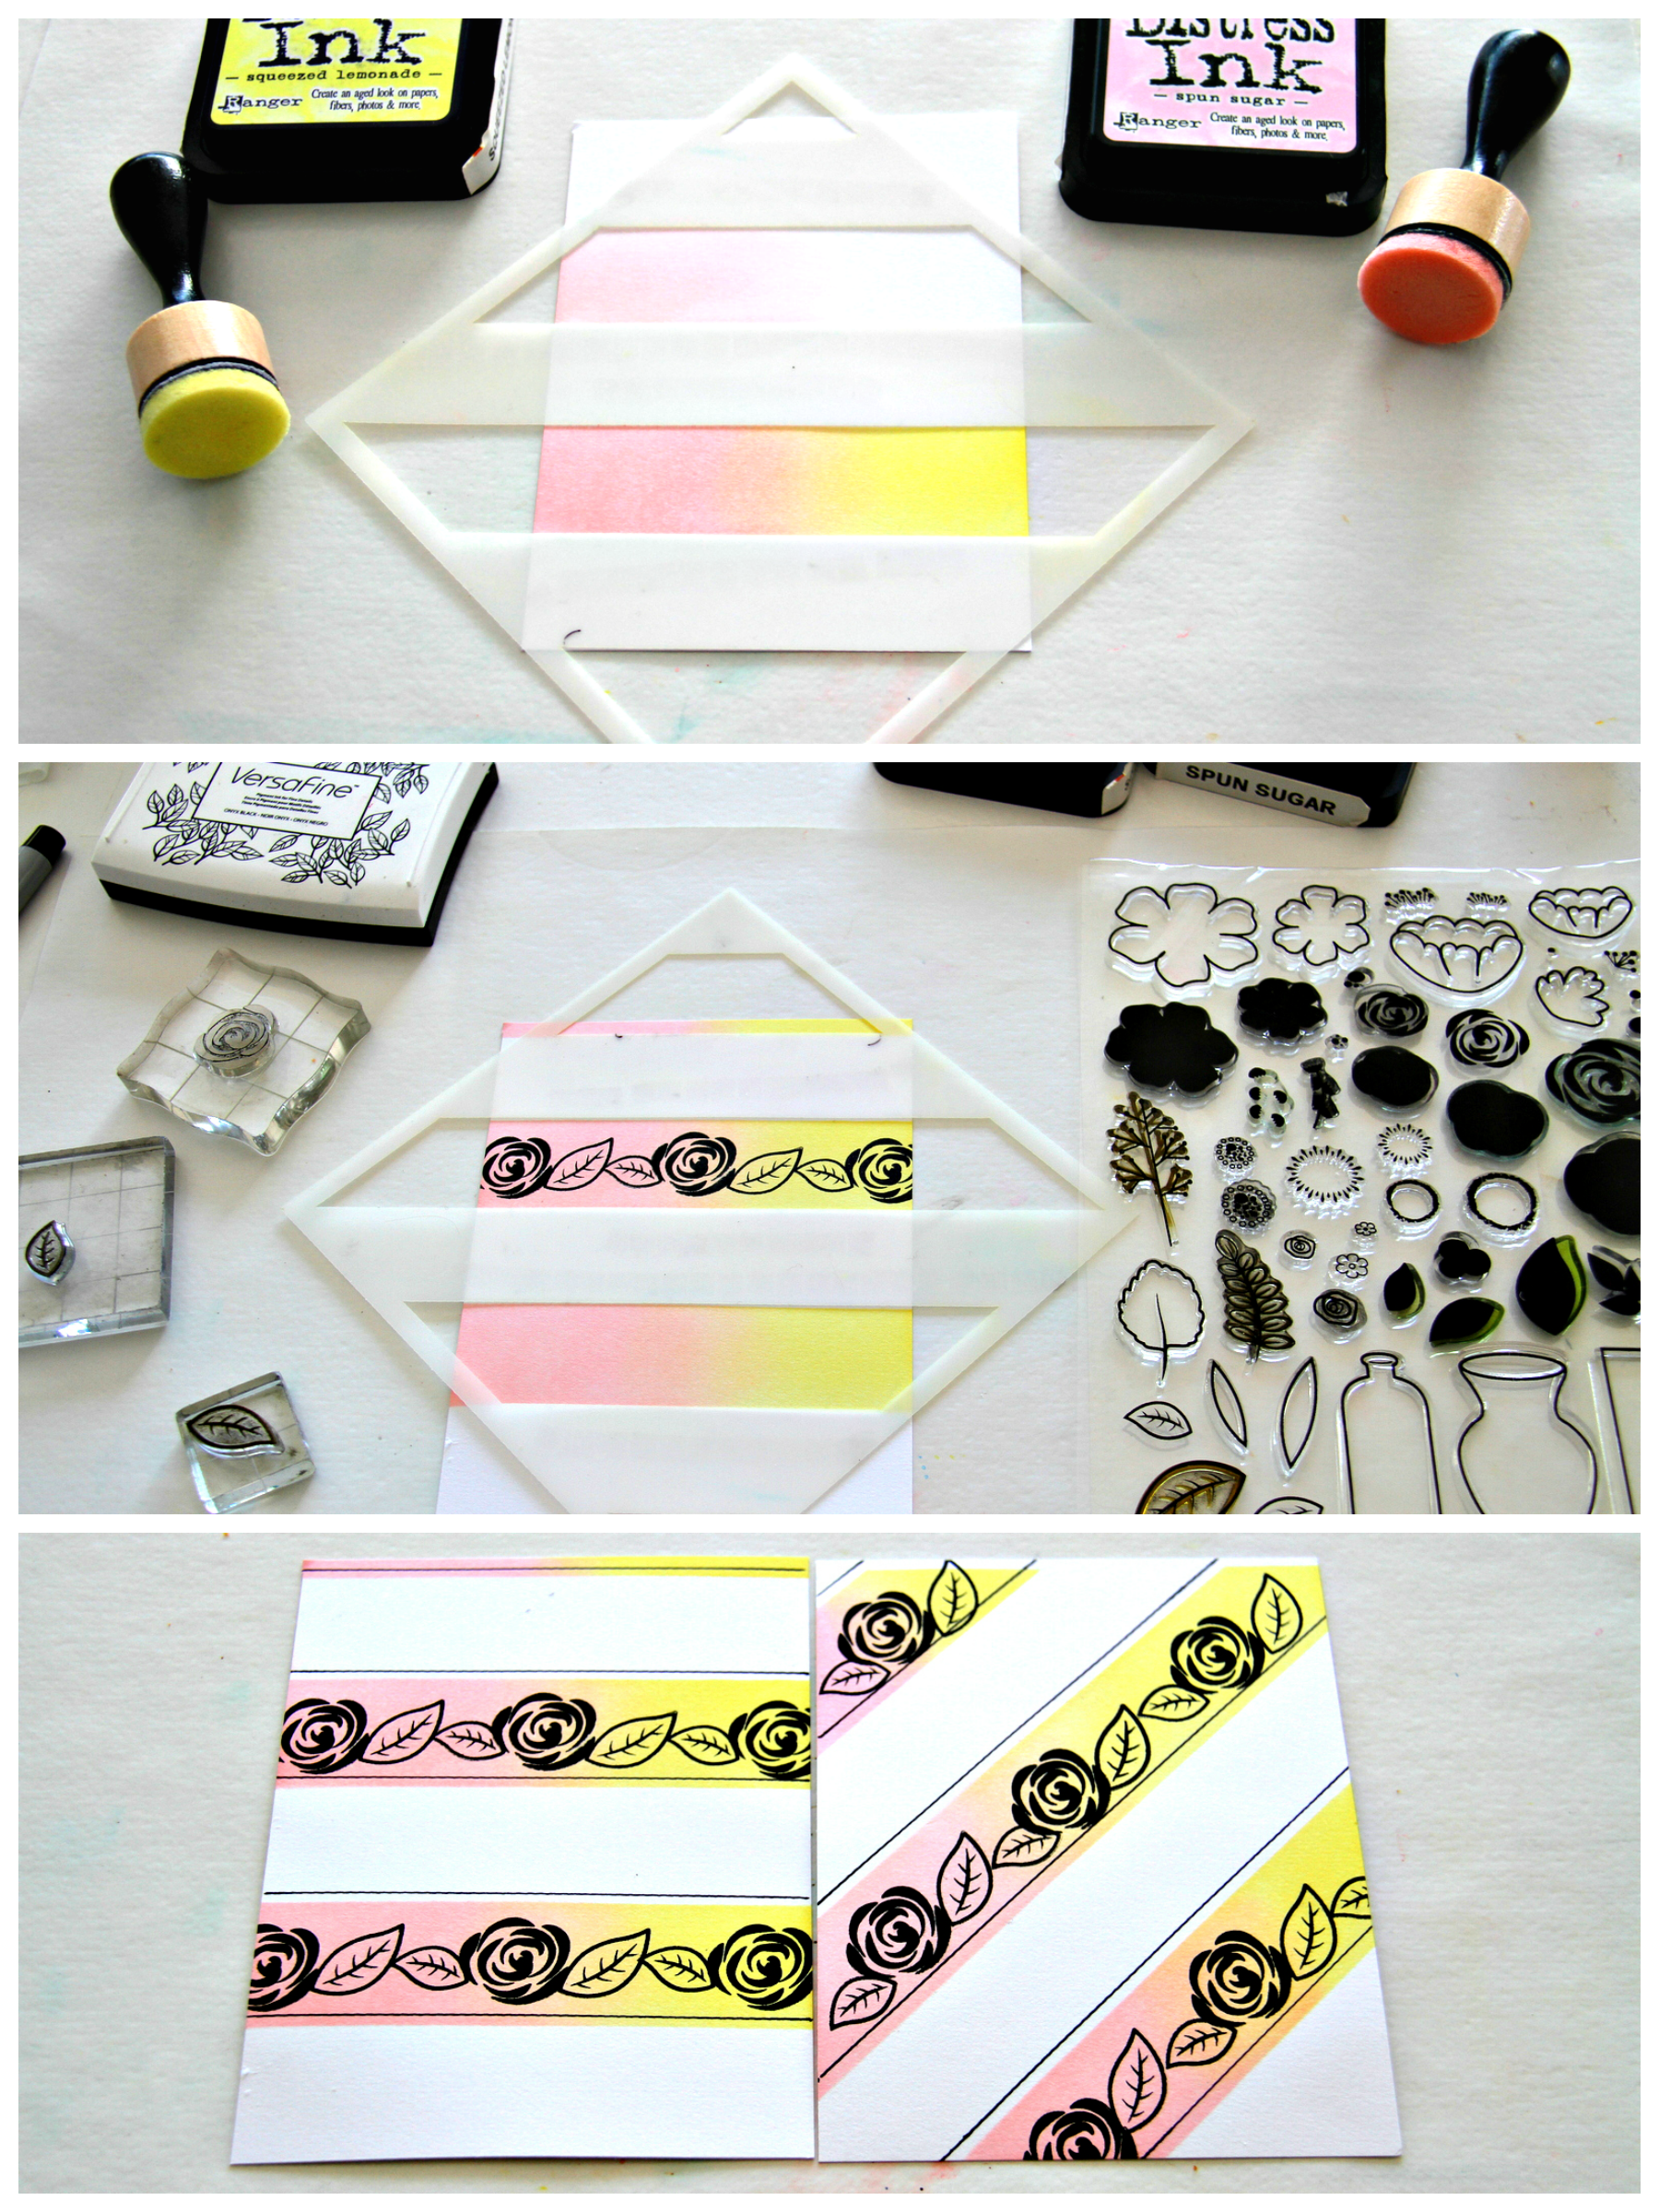
Here is a collage of photos showing how the card is made using the technique.

Stencil Style #2

brief_banner

This style just takes that one step more compared to style #1. I placed the Scenery: Grand Diagonal Creative Screening on the white panel, sponged two distress inks. Spun Sugar and Squeezed Lemonade from either side and blended in the middle. Then I off set the stencil and drew lines using black fine liner pen. The stencil is placed back into its original place, to stamp the flowers and leaves from In Bloom: Lola’s Bouquet with Joni Andaya stamp set in black ink. I wanted the flowers and leaves to stand out, hence I stamped them in black ink. Then I highlighted the flowers and leaves using Sakura clear gel shimmer pen. The panel looked gorgeous that I made a diagonal one as well.

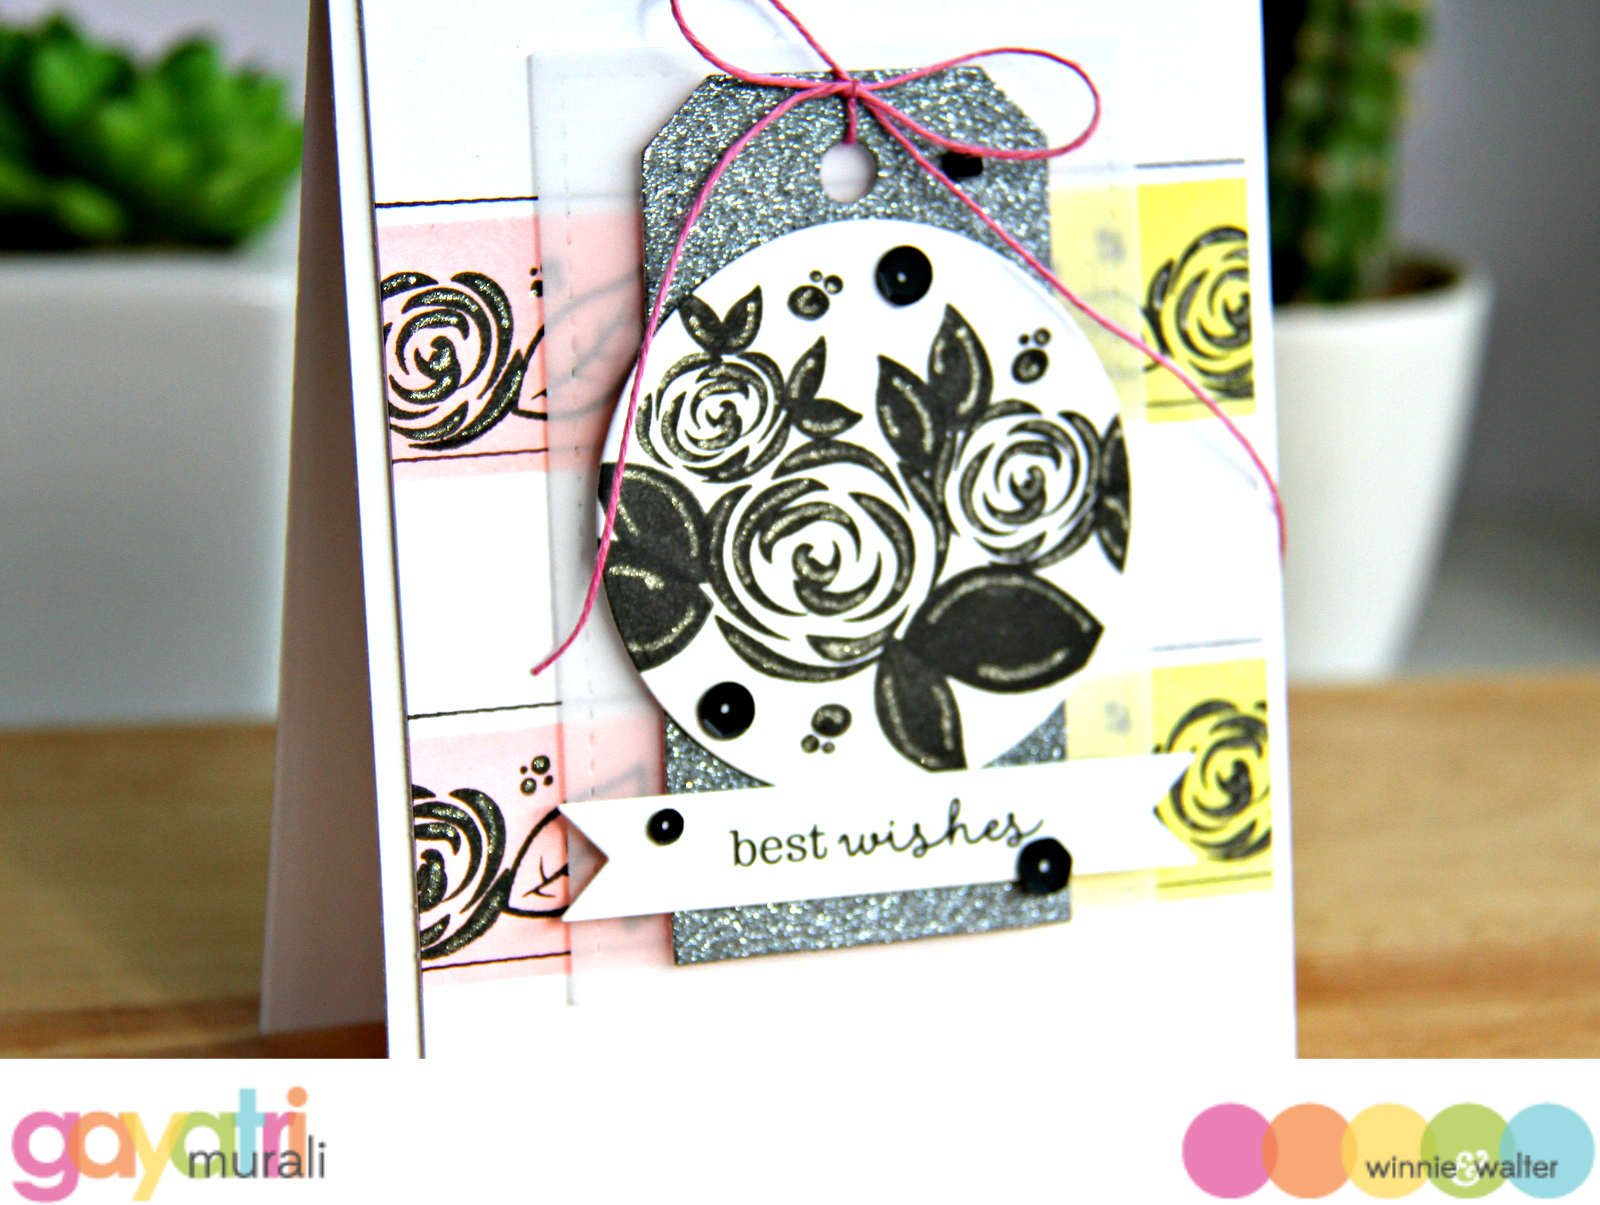
To make my card, I trimmed the panels slightly smaller than the card front, adhered to the card front using fun foam. For the focal point, I simply used the same flowers and leaves from In Bloom: Lola’s Bouquet with Joni Andaya stamp set to stamp a cluster of them on a die cut circle, highlighted with the shimmer pen. This focal point circle is layered with a rectangle vellum die cut from Pretty Pink Posh on both the cards. I also added a shimmer tag die cut from Essential: Katherine Cutaways on one of the cards. The sentiment is from This Awesome House stamp set stamped on a die cut from Essentials: Katherine Cutaways. I have added Onyx sequins from Pretty Pink Posh to tie all the black elements together.


Here are couple of close up pictures of the two cards.

Best wishes closeup
Thinking of you closeup

If you like to play along, we have a linky attached with this post. Love to see what you do with this technique.

I will see you next month with another technique and two styles of executing it.

Thanks for stopping by!

w&wDT_gayatrimurali_blog-sig


>>>LINK UP<<<<

An InLinkz Link-up


w&w-supplies