Showing posts with label watercolor. Show all posts

Saturday, October 3, 2015

WCMD 2015 | Watercolor with Vanessa

To get all the information about w&w WCMD 2015 CLICK HERE. 

WCMDblogbanner2014

Hello everybody! Vanessa here with a fun challenge for World Card Making Day. 

For my challenge, I chose one of my favorite techniques: WATERCOLORS. It's a popular trend right now and I am sure there are many watercolor fans out there! I love that I can create a watercolor card using so many different mediums, like Distress Inks, Gelatos, Watercolor Pencils or real watercolors. It's fun to experiment and most of the time you can not be sure how it turns out :)
Sometimes you think it'll turn out ugly, but once it's dry, you might love it! Ha, or vice versa. 

I created two samples for today. Look closely, you might get a peek of the upcoming release!


Here I used Derwent Inktense Pencils to color the gorgeous chrysanthemum (new release!!). I started with a panel of watercolor paper and stamped/heat-embossed the images. Then I applied water to the panel and, using a water tank brush, picked up color from the pencils to color the flower, the leaves and the background. For more fun, I flicked a bit of the color onto the background. After it was dried, I stamped and heat-embossed the sentiment using silver embossing powder. I adhered the panel to the card and finished it off with sequins.


The second card is a sample of playing with watercolors without knowing how it'll turn out. And I have to admit, I love how it turned out. For this background, I used Distress Inks. I pressed my ink pad onto a large acrylic block, spritzed the ink with water and dipped one corner of the watercolor paper panel into it. Then I cleaned the acrylic block and applied a new color. After spritzing it, I dipped the next part of the panel into it and so on. I repeated this with the whole panel until I was satisfied. Then I adhered the dried piece to my card base. I die-cut the rose and leaves from vellum and white card stock, layered them and adhered them to the card. Then I die-cut the "hugs" from card stock and fun foam and adhered it, too. Finally I added sequins.

Now it is your turn! Can't wait to see your take on my watercolor challenge, the possibilities are endless!

Vanessa


Prize: One randomly chosen project that is linked up will win $50.00 gift credit to the w&w shop.

>>>LINK UP<<


w&wDT_vanessamenhorn_blog-sig

Thursday, June 4, 2015

Pretty Pink Posh's Watercolor Blog Hop

watercolor.bloghop

Welcome lovely ones!  It is me, Shay, joining in for w&w on this wondrous Watercolor Blog Hop hosted by Pretty Pink Posh!

The blog hop officially opens on Friday, June 5 at 6:00 a.m. PST and ends June 8th at 11:55pm PST.

You will not want to miss joining in because look at the sponsors!  What?!?  Are you kidding?  We love them all.

watercolor.sponsors

Honestly being included among these incredible group of companies is dizzying and humbling.

For more information please go to the Pretty Pink Posh blog!

Okay, with a pinch (or a handful) of trepidation I am sharing my watercolor project with you (being among creative giants can make you feel a bit like an ant! lol).  Maybe my project will make you feel that if I can create a watercolor project you can too! :-)

shay_w&w_ppp_watercolor_bloghop1a

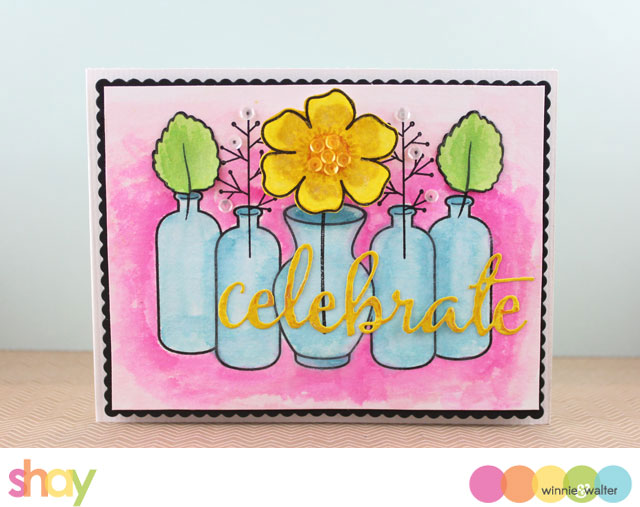
All the stamping is courtesy of the In Bloom: Lola's Bouquet with Joni Andaya stamp set...this set has so many options and possibilities!  I was really inspired by this breathtaking card by Heather Hoffman.  Heather used Copics for her card, but I decided to take watercoloring with the bottles and vase.

I began by stamping with some masking the bottles and vase in Versafine in black on a panel of watercolor paper. All of the watercolor is Tim Holtz Distress Ink + a waterbrush.  For the bottles I used tumbled glass (obvious choice!) and broken china, the background is picked raspberry and spun sugar, the leaves are shabby shutters and mowed grass and the flower is mustard seed, scattered straw and spiced marmalade.  I stamped the leaves first on the main panel and then stamped the leaves on another piece of watercolor paper that I then colored in, cut out, used a black marker around the edges and adhered over the leaves on the main panel.  The flower was stamped first in mustard seed with the large solid flower and then stamped around with the larger outline flower in black.  I then drew out the color from the solid flower to the outer edges.  I stamped the ray circle and then more solid ring and painted in the center.  I painted over the petals with Studio Calico Mister Huey's in shine for some shimmer (can be seen in person).  I attached some little 4mm marigold sequins from Pretty Pink Posh in to the flower's center.  I attached the flower to the main panel with foam dimensional adhesive.  I also added some sweet 4mm marshmallow sequins by Pretty Pink Posh to the budding branches.

I colored a piece of scrap paper with mustard seed ink and then die cut the "celebrate" from The Big, the Bold and Party Cutaways from the scrap paper.  I glued the word over the vases.  Last, I added the main panel to a piece of black cardstock with the the larger scalloped layer of Essentials: Audrey Cutaways and then added it all to a white card base with foam dimensional adhesive.

That's it from me.  Now get your favorite watercoloring supplies ready so you can play along too! :-)

Remember to check out the Pretty Pink Posh blog tomorrow Friday, June 5 at 6:00 a.m. PST when the blog hop officially begins!


w&w-supplies

Monday, August 18, 2014

Welcome Home with Heather


Hi, everyone! Heather P. here today with a fun card I created using the amazing Scenery: V for cheVron set from Winnie & Walter's latest release.  

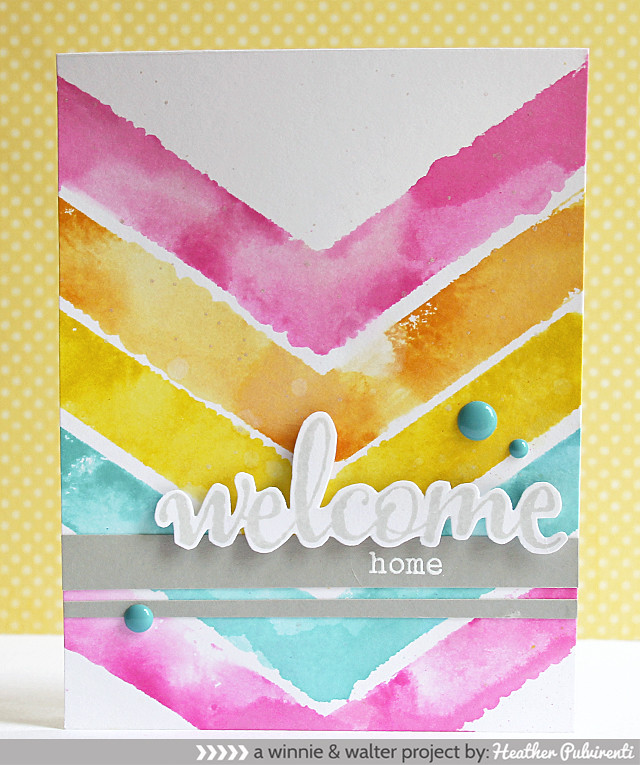
Watercolor is such a huge trend at the moment, and when I first saw the solid V in the cheVron set, I knew it would be perfect for a faux watercolor technique. 

To create my card, I started by stamping the large, solid V lightly with hot pink distress ink (making sure to leave plenty of blank space on the stamp image), then spritzing it with water before stamping it onto the paper.  I then continued with orange, yellow, and turquoise ink.  (By stamping the stamp lightly, making sure to not cover the entire image, it really allows the spritzed water to work its magic when you stamp it onto paper.) 

I then stamped the welcome from The Big, the Bold and Blessings set in light gray ink, then fussy cut it out. Next, I trimmed two strips of gray card stock, and stamped the larger of the two with the word home before heat embossing with white powder.  The two card stock strips were adhered to the card front before attaching the cut out sentiment with pop dots.  To finish up, I embellished with teal enamel dots.

Well, that's it for me today, but be sure to come back on Wednesday for more Winnie & Walter inspiration!


w&w supplies:


Monday, June 30, 2014

Share the Love Week Featuring Distress Inks | Day 1

share-the-love-graphic-distress-inks-ranger

Hello, hello, hello!  Welcome to the first day of our Share the Love Week featuring Tim Holtz Distress Ink by Ranger!  This is a week-long love fest where we focus on a company or product we adore and show how smitten we are by using our featured love with w&w products!

Tim Holtz Distress Ink are a fabulous product line brought to you by Ranger and the incomparable Tim Holtz.  They have unique properties which make them a terrific tool for creating fantastic projects.  We will be showing you a few ways to play with your Distress Inks this week, but by no means are they all of the wonders possible.  We recommend, if you haven't already, stalking following Tim Holtz's site and Ranger's site for more information and inspiration.

This time around we want you...yes, you...to participate with us for a chance to win some awesome prizes.

Our first day kicks off with what will surely be a very popular challenge: Watercolor/Watercolour!

Before we get to how you can participate to win, let's see what Julie, Shay and The Talent have made.

Julie

It's Share the LOVE week {insert huge smiley face here}!  Are you ready to get inky???  I love to get inky, especially with Distress Inks!  Today I am sharing a really fun way to get a water-colored background using Distress Inks and lots and lots of water! If you haven't tried this, you are in for a treat!

jmog_sharelove_distressWC-OLW2

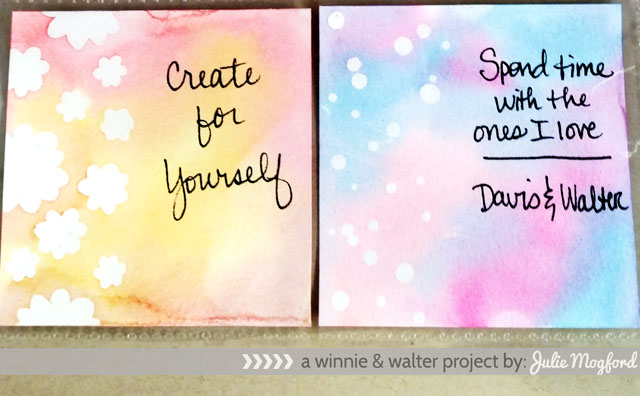
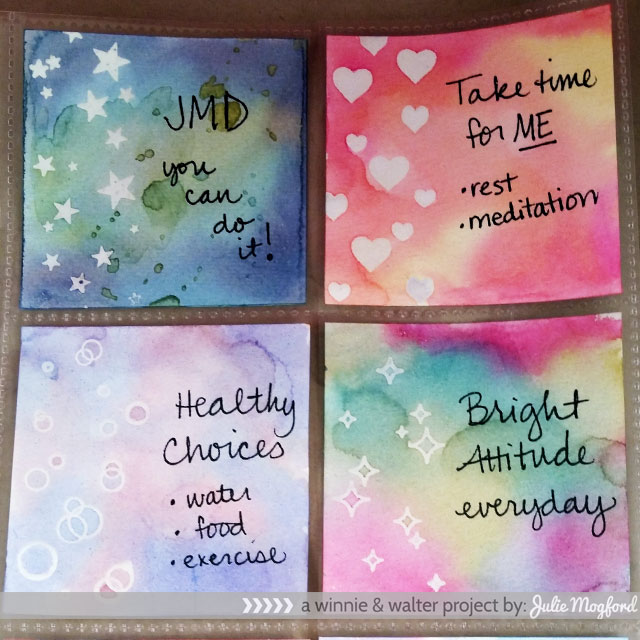
These are cards for my One Little Word project (a la Ali Edwards) and I wanted to hand write short statements on a cute and subtle background.  Distress Inks to the rescue!  I took several of my favorite w&w stamps and inked them with Versamark Ink and embossed them with clear EP on watercolor paper. (This technique does not require watercolor paper, but I knew I would be adding a lot of water, and I wanted my project to hold up to all of the spritzing that was about to happen.)

Cards 1 & 2 - flowers from The Write Stuff:  Leave it to Mom and confetti dots from Scenery: Big Bang Confetti

jmog_sharelove_distressWC-OLW

Cards 3 through 6 -  more Scenery: Big Bang Confetti (stars, circles and sci fi stars) and hearts from The Write Stuff: Love Story and You've Got Love Mail.

Once the embossed areas were cool, I inked up my my craft sheet with distress inks, just tapping the colors on the sheet randomly in an area just slightly larger than my paper.  I sprayed water over the ink until the water look like medium sized beads.  I then put my paper down on the watery ink and pressed and "smooshed" (you know it is a technical term) until I felt the card was sufficiently covered.  I turned it over and dried it with my heat tool.  If one area looked muddy, I used a paper towel to dab the excess. If an area needed more color, I either put the dried paper back into the ink again, or used a brush to add ink from the mat to the areas of the card that needed more color, and then dried again with the heat tool.  I love the look of the pooled ink inside the shapes.  It there wasn't enough color there, I definitely added more.

The soft blended backgrounds and the cute border accents on these cards are perfect for my personal journaling.  I think I will make more of these for my other albums too, and maybe try it on some Bristol paper as well.  It can definitely handle the excess water.  This technique is quick and easy, and yields some fantastic results.  I hope you liked this one and decide to get inky with us!!!

Shay
shay_watercolor1

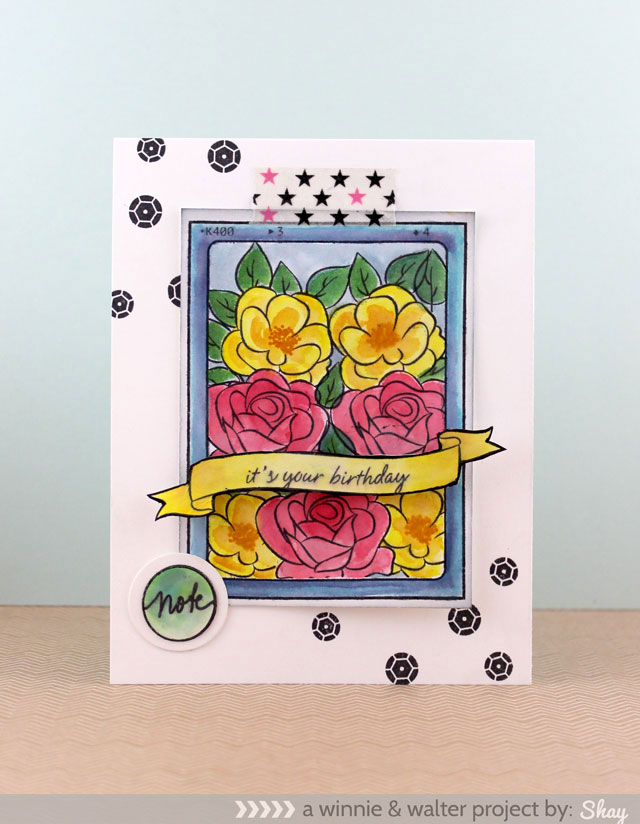
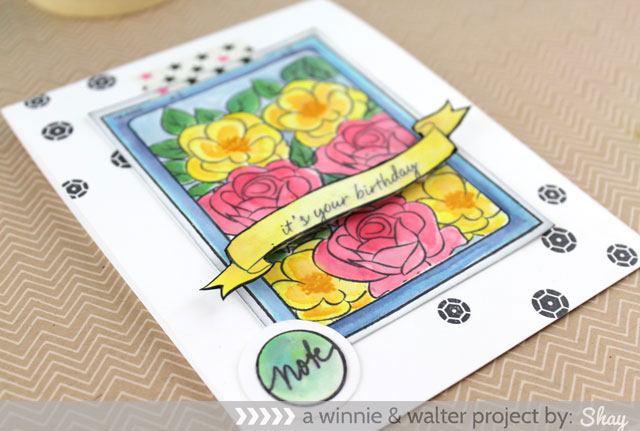
I began by stamping the frame from The Write Stuff: Leave it to Dad in black ink on a journaling card by Studio Calico.  I made a mask of the frame and then filled the inside in with the flowers and leaves from The Big, the Bold and Extras.  I made a mask of each the flower so I could have some depth in how the flowers stamped.  I then painted in the flowers with a water brush and Distress Ink that I smeared upon my non-stick craft sheet by Ranger.  Distress Inks are wonderful for watercoloring and blend wonderfully.  In the yellow family I used squeezed lemonade, mustard seed and wild honey.  In the pink family I used spun sugar, worn lipstick and festive berries.  In the green family I used iced spruce, evergreen bough and mowed lawn.  The blue inside the frame is stormy sky.  The frame is painted in with tumbled glass, broken china and chipped sapphire.

The outline banner from The Big, the Bold and Extras is painted in with the yellows listed above.  The sentiment is from Bubble Talk.  After cutting out the banner I edged it with a black Sharpie.  I attached the banner using dimensional foam adhesive.

The note is from The Write Stuff: Love Story and is colored in with evergreen bough and mowed lawn.

On the white card base I stamped the large and medium solid faceted sequins from Scenery: Big Bang Bling.  I attached the journaling card with washi.  And there you have the card.
shay_watercolor3

Now that you have seen what Julie and I have created, wait until you see the glory that The Talent has made today!  We hope you take the challenge and play along.  Keep on reading to see how you can join in and win!

The Talent
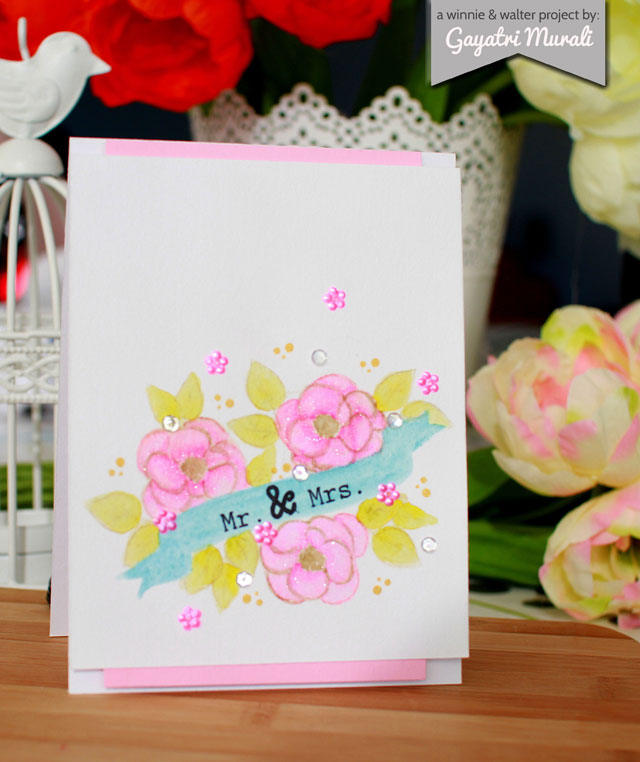
Gayatri_Mr.-&-Mrs.-card CLICK HERE to see more about Gayatri's project.
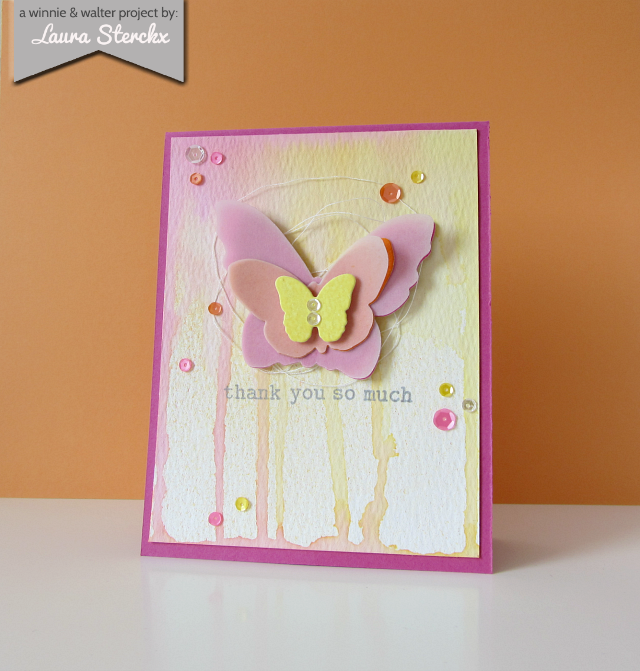
Laura_IMG_3924 CLICK HERE to see more about Laura's project.
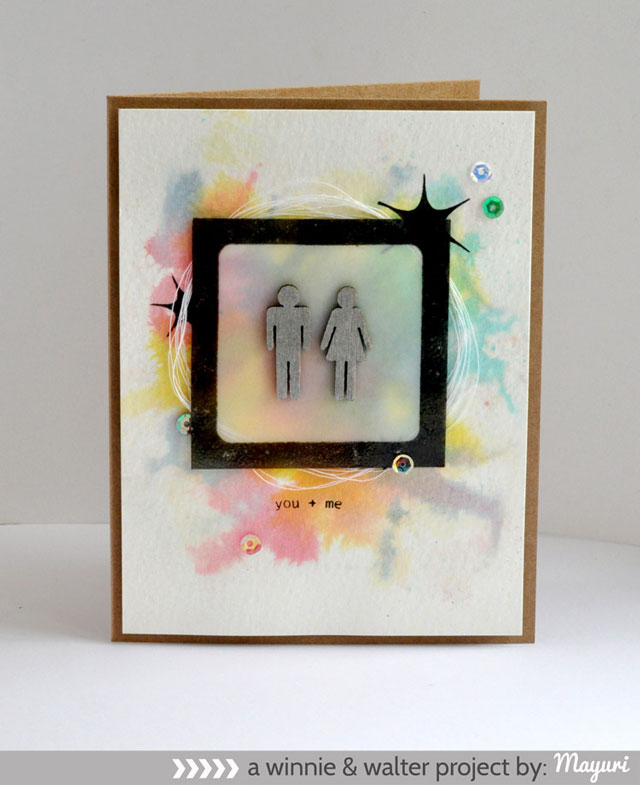
Mayuri_WWSTL_DIST_WATER CLICK HERE to see more about Mayuri's project.
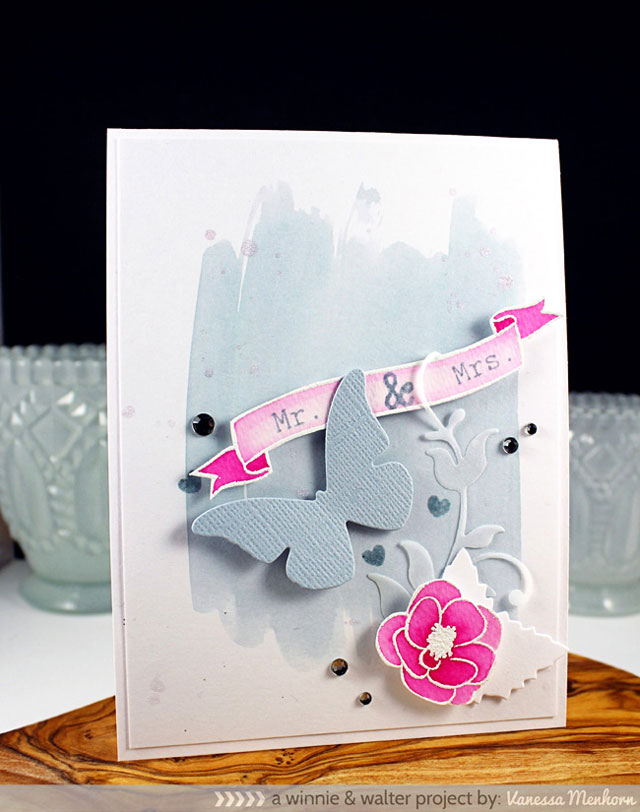
Vanessa_watercolorwedding CLICK HERE to see more about Vanessa's project.

>>>THE CHALLENGE<<<

Want to win a care package by Ranger?  Ranger has generously donated a prize of a mini ink blending tool, replacement foam and two (2) sets of Distress Ink minis.  Wow, that is awesome!

You have two (2) ways you can win:
  1. You can comment once on this post; and/or
  2. You can create a new watercolor/watercolour project using Distress Inks + at least one (1) w&w product (this can include stamps, cut files, digital products and/or one of our freebies found on our website or for our Facebook fans) and add it to the Link-up tool found below. You may enter as many times as you wish while the challenge remains open.
We will randomly pick a winner from the comments and challenge entries that are entered by Sunday, July 13, 2014 at 11:55 p.m. CST.


w&w supplies:

Wednesday, May 14, 2014

Hello Gorgeous

Hello gorgeous!  Yes, you!  It's me, Shay, with a bright and happy card to share with you today.

I love using embossing powder and Distress Inks with my stamps.  A whole lot of creative play can be done by using those key ingredients, don't you think?

shayhellogorgeous1

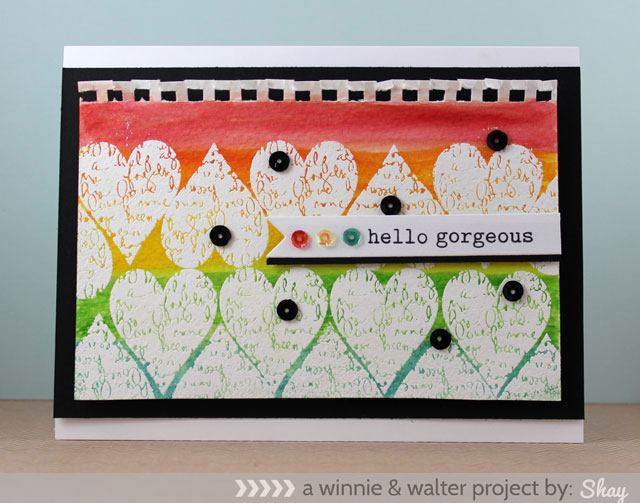
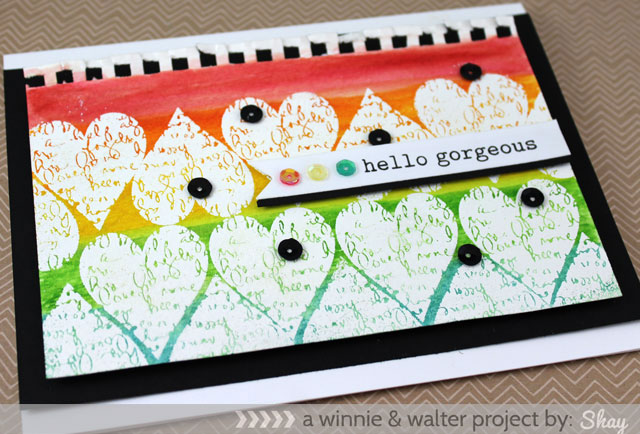
I pulled out the script heart from You've Got Love Mail and inked it up with Versamark and got to stamping on a piece of watercolor paper.  I heat embossed the hearts in stages with white embossing powder.  After I finished the heart pattern I pulled out Distress Ink in fired brick, spice marmalade, mustard seed, mowed lawn and broken china.  I smeared some of the ink onto an acrylic block and used a water brush to pick up the ink and add horizontal stripes of the color in a rainbow pattern.  With a damp rag I wiped off the embossed section to remove the ink.  

On a banner I die cut using a Papertrey Ink die, I stamped "hello" from The Big, the Bold, and the Happy and "gorgeous" from The Big, the Bold and You in onyx black Versafine ink.  I adhered that onto a piece of black cardstock and to the heart panel with foam dimensional adhesive.  Then I adhered the hearts panel with foam dimensional adhesive to a strip of black cardstock attached to a white card base.

shayhellogorgeous2

I finished up the card with some sequins, of course (I may need to enter a sequins support group soon!).

Hope you've enjoyed today's card and your Wednesday is as fabulous as you are!

Shay + Winnie (who is dozing loudly and contentedly in her studio chair)

Monday, May 12, 2014

Clean & Simple Mom

Happy Monday friends! Shay here today.  I hope you had a truly wonderful Mother's Day!

Today one last Mother's Day card for you.  As you could change the sentiment inside, this could also work for a mom's birthday, to say hello or to congratulate mom.  

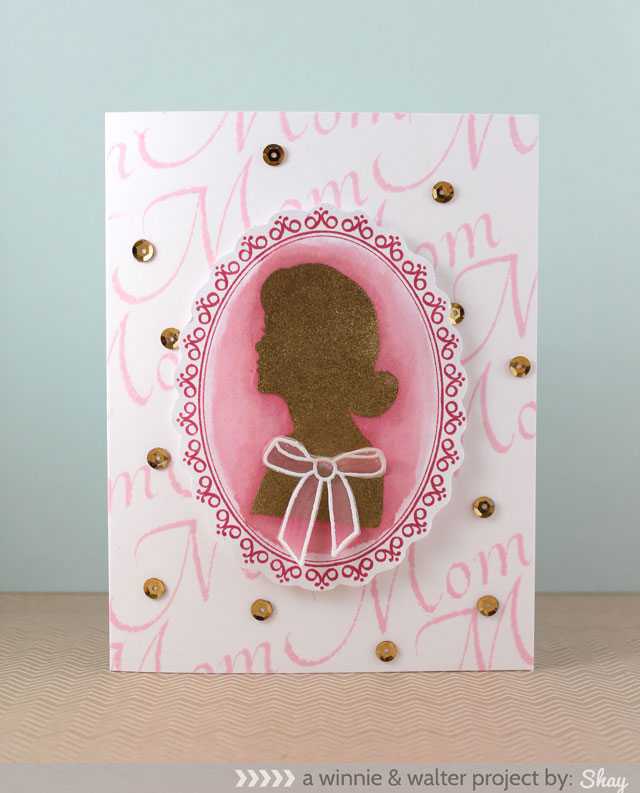
My mom happens to love pink so I went with a simple color scheme of pinks, white and gold for this card.

shaymother1b

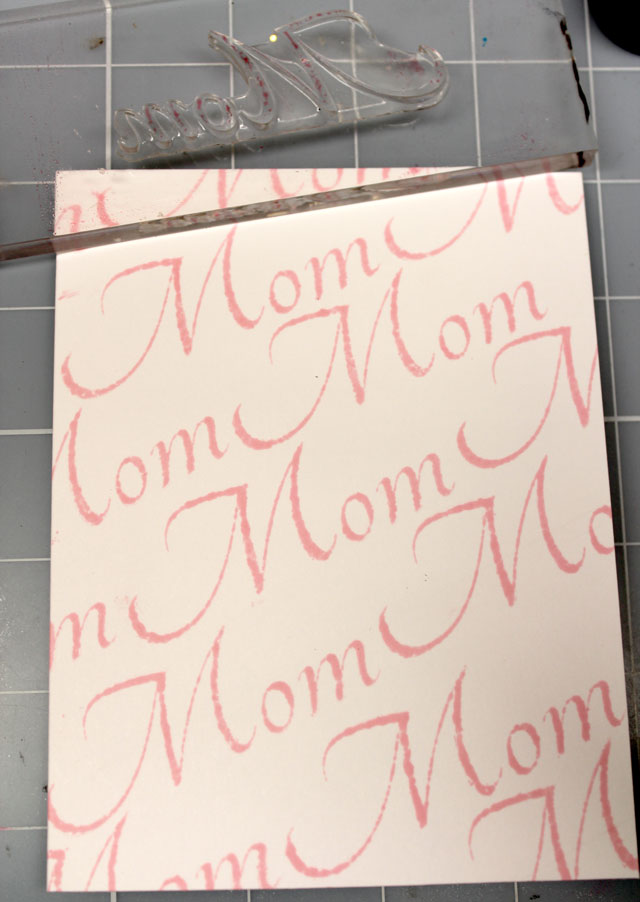
I began with a simple stamped background using the large "mom" from Parentville in spun sugar Distress Ink at a diagonal as pictured below.  It need not be perfect and I love the worn look the Distress Ink lends the "mom" when I stamp it for this particular card.

shaymother1a

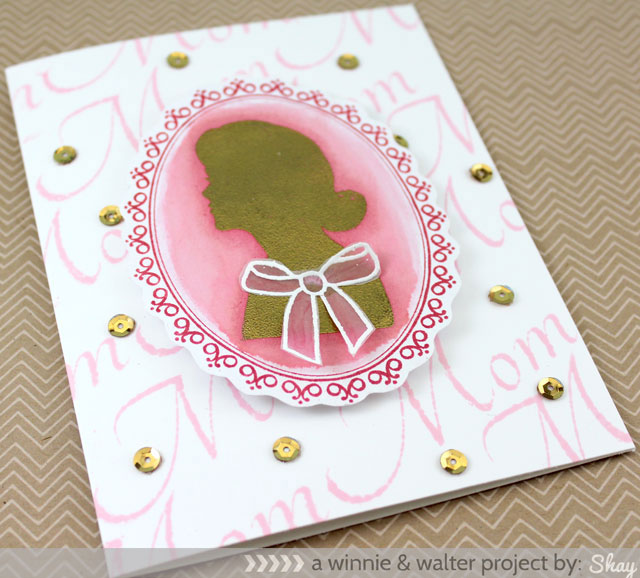
I stamped the oval frame from The Write Stuff: Leave it to Mom in red and cut it out. In the center of the frame I stamped the silhouette in Versamark and then heat embossed it in gold.  With spun sugar, worn lipstick and fired brick Distress Inks and water I painted around the silhouette with the darkest colors surrounding the silhouette.  I adhered the frame to the card using foam dimensional adhesive.  And because I can't enough sequins I added a healthy sprinkling of gold sequins.  Last, I stamped the bow from The Write Stuff: Leave it to Mom in white on vellum and cut it out.  On the opposite side of the embossing I colored it in with tender pink (RV13) Copic.

shaymother1c

Well, that's it for today.  Hope you enjoyed this clean and simple card.  You could easily change out the "mom" for "you" from The Big, the Bold and You for a fun card for a friend, daughter, sister or anyone else in your life.

Have a fabulous and creative day,

Shay and Winnie (who is asleep on her chair but certainly wishing you a particularly fine Monday)

Friday, May 9, 2014

Celebrating Mother's Day

Happy Friday Everyone!

It's Julie here, and I have a couple of Mother's Day cards today.  You may remember back in March when I created a card for Mother's Day for my Mom.  This time I have two more important "moms" in my life that I would also like to celebrate.  

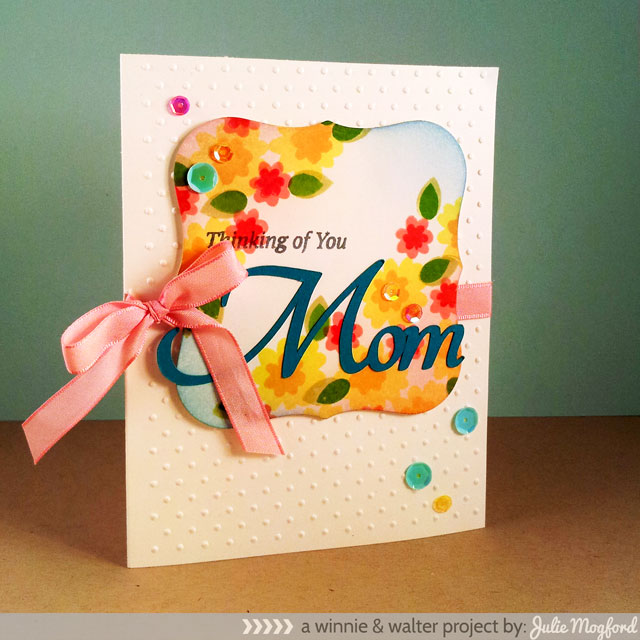
This first card is for my Mother-in-law, Sharon.  She loves flowers, but gets upset with Davis and me if we send her flowers.  So, I wanted to make sure her flower had flowers on it.  I really like using the flower trio in the The Write Stuff: Leave it to Mom, especially layering the flowers for more interest. 


jmog_w&w_mom2


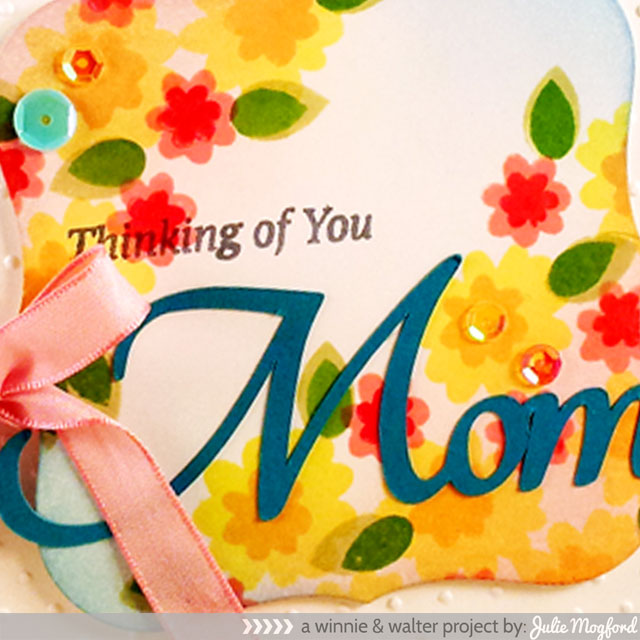
I was inspired by the amazing Joni Nina Andaya, one of the fabulous ladies of The Talent, and the third card from this post led the way.  I started with white cardstock and marked off the general area where I would cut the Spellbinders die, and stamped the large flowers first to get the idea of the layout and then filled in with the smaller flowers and leaves. (Squeezed Lemonade, Dried Marigold, Festive Berries, Worn Lipstick, Shabby Shutters and Mowed Lawn)  After I finished stamping the flowers, I die cut the shape and then added distress ink in Tumbled Glass and Spun Sugar.  The "Thinking of You" sentiment is from Parentville is stamped in Memento Flannel Grey ink so it would stand out on the background, but still be a little softer than a black.  The Mom was cut using our Parentville cut file.  To simplify gluing the letters straight, I did some magic in Silhouette Studio software and it cut the word as one whole piece.  NICE!  The die cut panel is popped up on foam tape on my polka dot embossed card base (I can't remember the last time I did an embossed card base - I think I need to dig these out and play!)  and I threaded ribbon under neath and through the scored edge of the card.  I don't do many ribbons anymore, and I wasn't sure I needed it, but I do like the added pink. The final touch was to add the sequins.  I am really enjoying adding sequins to my projects.  I don't think I've mastered the art like Joni has, but I'm still learning.  LOL


jmog_w&w_mom2CU

Here is one more close up look at this card.  Perfect for mom Sharon!


The second card is for my sister Mandy.  I think she is doing an amazing job as a mommy!  Kamilla is her first child and it is so fun watching them together!  Happy Mother's Day Mandy!

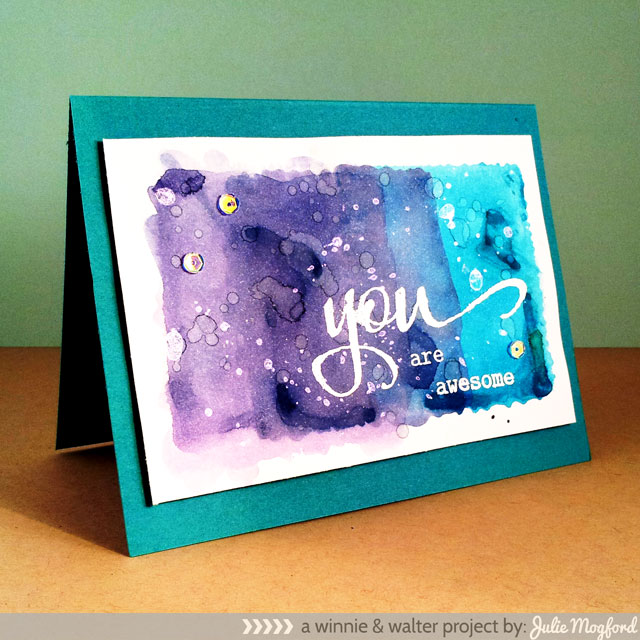
jmog_w&w_you-are-awesome

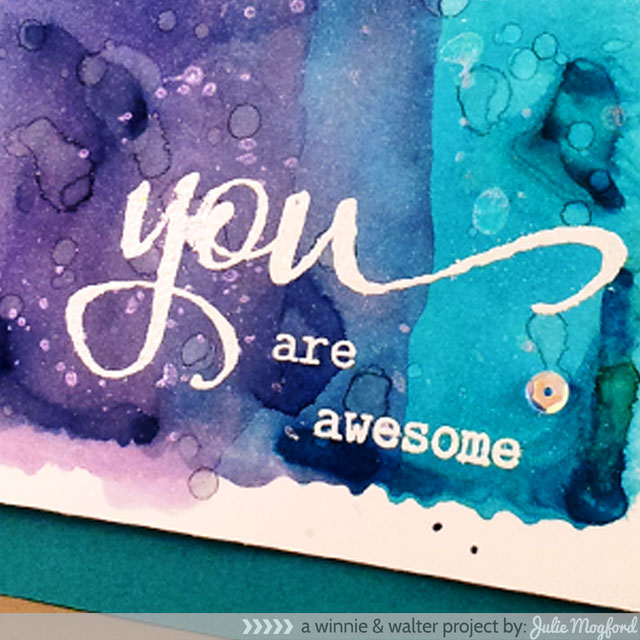
I am in love with the fabulous techniques I am seeing in the Online Card Classes: Watercolor for Cardmakers.  This class is already 4 days in and the lessons are awesome!  Very talented ladies over there!!!  I liked this particular technique so much that I had to give it a try.  Mine turned out a little messy, but hey - it's watercolor and I kinda like that look.  I added some sprinkles of water after the paper was dry and also added a sprinkle  of  Memories Mist Iridescent.  The colors were Peacock Feathers, Chipped Sapphire and Dusty Concord.  Love these together and they are so vibrant.  I stamped the sentiment from The Big, the Bold, and You with Versamark ink and embossed with Whisper White EP from Stampin' Up!  Last but not least, 3 more pretty sequins.  I like letting the texture of the watercolor technique take center stage and how the white sentiment stands out on this background.  I think I will be using this technique over and over!

jmog_w&w_you-are-awesomeCU


These two cards are so very different but both are easy to achieve.  Have you made any Mother's Day projects using Winnie & Walter products?  We would love to see your creations - join us on the Join in to Win page and link up.  Thank you for sharing your talents with us!

We hope you all have a wonderful Mother's Day weekend.  Enjoy spending time with your family, cherishing memories and making new ones!

Julie