Showing posts with label in a word happy cutaway. Show all posts

Saturday, October 7, 2017

WCMD 2017 | Variations Challenge with Shay

To get all the information about w&w WCMD 2017 CLICK HERE.

Hello there lovelies!  Whew you've made it to the last challenge for this year's WCMD.  The Big Hop! was amazing, right?  How about all those challenges by The Talent to get you inspired?  Well, I am going to further challenge you because I know you can handle it. :-)  I call this challenge the Variations Challenge.

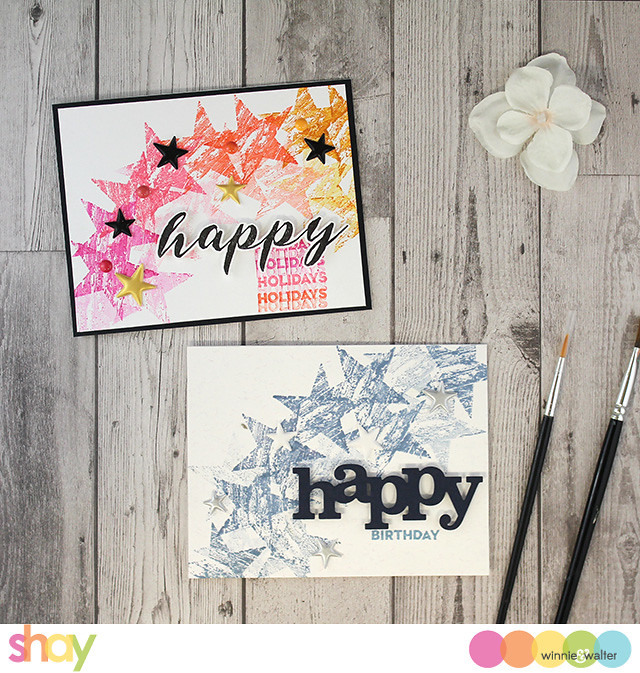
I made you two cards today:
shay_IMG_4204

I actually began with the blue card and then decided I wanted another with brighter colors.  Which got me thinking about how you can use the same basic design and come up with variations on it.   I actually love doing this and have done it many times which I will share with you later in this post for more examples.

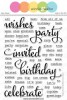
For each card I stamped the woodgrain star from Comfort + Joy (woodgrain star...be still my heart!) in a pattern that conveys some movement.  The holiday card is using bright, sunny colors while the other is a cool blue-grey.  I also did some second generation stamping for a little more interest.  Then I stamped the sentiment from In a Word: Happy (the stamp set) in black on white cardstock and cut it out using the In a Word: Happy Coordinating Cutaways.  For the birthday card I cut out In a Word: Happy Cutaway from navy cardstock.  I attached the die cuts to the cards using foam dimensional adhesive.  I stamped the supporting sentiment from In a Word: Happy (the stamp set).  Then I embellished with puffy stars and in the case of the holiday card some enamel dots too that coordinated with each of the main 4 colors used.  For the holiday card I attached the panel to a larger black cardstock panel and then to an A2 card base.  For the birthday card I attached the panel to an A2 card base.

I decided to keep with the stars for both cards, but I could have easily changed out the star for a heart or circle for the second card, but still created an interesting variation on the first card.

I wanted to share some other versions of this challenge I have done in the past to help inspire you:

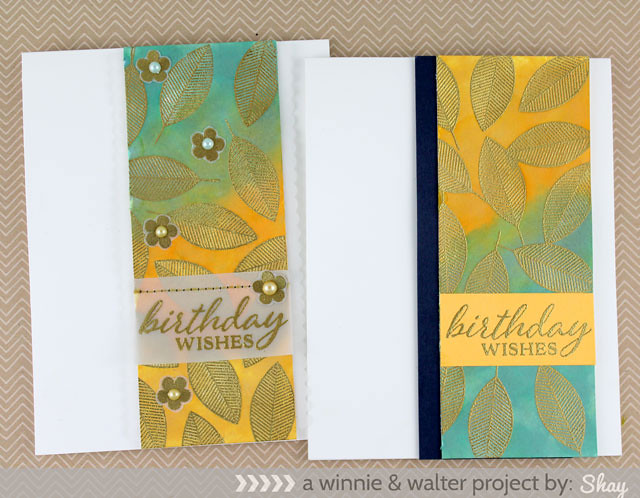
Feminine vs. Masculine using the exact same background with additions of the flowers to the feminine version and touches of vellum while the masculine has a more streamlined aesthetic using just a little navy cardstock as an accent:
w&w_shay_sss_both_wm

For twins boys using the same colors, but variations in images and main focal colors to highlight the boy's individuality.  This is a great way to use a embellishment from the same collection to create several cards:
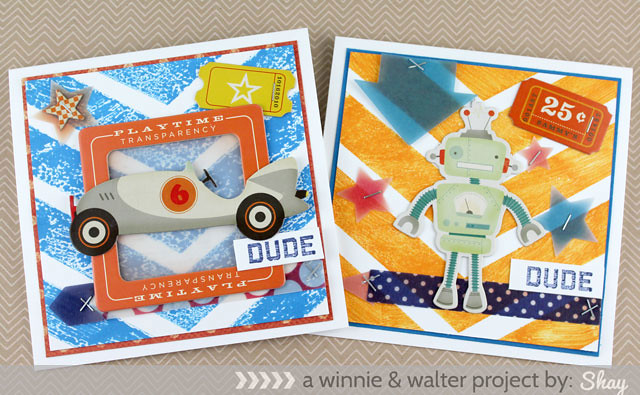
shay_8202014_1

Same background design with different colors and sentiments and changes in the focal images:
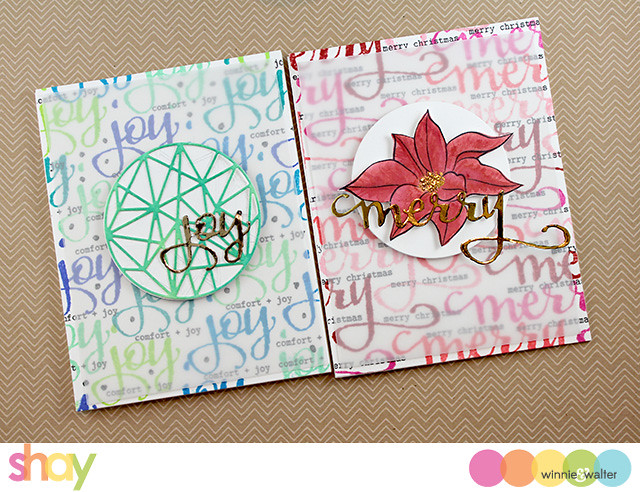
shay_IMG_4034

Same supplies with changes in images (from same stamp set) and different sentiment cutaways (dies):
shay_IMG_4032 

>>CHALLENGE<<

Now your challenge should you choose to accept it is to create one card and then make at least 1 more with variations to the original card.  You can change up the sentiments, the shape, the colors, the embellishments, etc. or all of them.

I am so excited to see your take on this challenge.  Thank you so very much for joining us for this WCMD and making it all the more wonderful for your presence and participation.

Prize: One randomly chosen project that is linked up will win $50.00 gift credit to the w&w shop.

>>>LINK UP<<


Saturday, September 9, 2017

September Leading Lady Hussena Calcuttawala | Take One

What an exciting day as we get to introduce our September Leading Lady, Hussena Calcuttawala!
Hussena creates these stunningly beautiful, well balanced and layered cards that are real showstoppers and we have certainly noticed her work when she's entered our challenges!  In a fact we invited her to be on the w&w blog a while back and you can see here work HERE and  HERE.  I am really excited to see what Hussena will be creating this month as she takes us on an adventure of her own design on Saturdays in September on the w&w blog.

Please give Hussena a big round of applause to welcome her as she steps onto the stage for her first performance as our September Leading Lady! 

hussena_calcuttawala_sep2017 

Hello everyone, this is Hussena and I'm super duper thrilled and excited to be the leading Lady at w & w this month. Winnie and Walter is a company which is very close to my heart as they were the first company internationally to give recognition to my work and invite me over as a Spotlight Designer. It was a big deal for me back then and still is. Needless to say, I really love their products. Their stamps, dies and stencils are amazing to work with and I love playing along their Birthday Bash challenges every year. Thank you so very much Shay, for this wonderful opportunity :)

I am sharing two cards today I made using some previously released stamp and die sets from w & w.

For my first card, I HAD to go with florals :) w & w has some of the most beautiful flower stamps, perfect for colouring and since watercolouring is so much in trend these days, these stamps worked perfectly for my design idea.


I stamped the flowers, leaves and the the little berries from the In Bloom: Anna's Flora, In Bloom: Elsa's Flora and In Bloom: Renee's Leaves stamp sets on some watercolour cardstock using Versafine Onyx Black ink and coloured them using my Zigs. I fussy-cut the images and kept them aside. My stenciling on the background was done with a very light hand using the w & w Creative Screening : Do You See What I See? with Peacock Feathers Distress ink. I added some black acrylic paint splatters as I knew I was going to arrange my florals against them.


I popped up some flowers and leaves on foam dots and for few of the images, I directly adhered them to my card front. Finally I heat-embossed the sentiment from the The Big, Bold & Party using White embossing powder.


My second card which is very fun and perfect for a birthday party!

I have gone with the VIBGYOR colours on this one. To create this card, I first die-cut my card panel using the scalloped frame die from the w & w : Essentials: Audrey Cutaway die set. Then, I stamped the yummy cupcakes from the Sugar Rush stamp set using various shades of dye inks. I did some masking to give a clean and crisp look to the scalloped frame.

I then started working on the focal of my card. I used the In a Word: Happy Cutaway and die-cut it using white cardstock and added some black cardstock behind the die-cut to give it a shadow effect. I coloured the white die-cut piece using various shades of Zig markers.

You can see the dimension on the die-cut as well as the glitter on the outlines in the picture below.


I then stamped the cupcake frosting and also filled in the remaining space in the background by stamping stars all over. The banner is also from the same set.


To add more interest and detail to my card, I stamped the entire background behind my card front by masking it with Washi Tape. I used the bottom of the small cupcake stamp to create the wavy chevron pattern you see. I think it really adds a lot more to my card :)


I hope you liked my cards and are inspired to create your own. I would love to hear what you think of them. I will be back next week with another set of cards using the new August release sets from w & w. Don't forget to comment on my blog post for a chance to win the $30 gift certificate to the Winnie & Walter store. Winner will be announced on my blog, at the end of the month.

Have a great day ahead!


w&w-supplies

Wednesday, January 18, 2017

Winter Happy Birthday with Kelly

Hello! I have a winter birthday card to share with you today. It's good to have these on hand for any birthdays that come right after the holidays, as I'm always in "veg-on-the-couch" mode for a week or two after the craziness of the holidays.

 
This card features the cardinal from Winter Woodland (glittered in red embossing powder) perched on a cozy evergreen branch. The evergreen branches were inked up in a light green first, and then I tapped a darker green ink pad on the edges to get a more natural, variegated look.

  
The "happy" is from In a Word: Happy Cutaway. I threaded a red strip of paper with "birthday" from The Big, the Bold and Party through the letters. I think that's a nice way to tie the two words together, and create a tiny border on the bottom of the card. The inside of the card is lined with a graphic patterned paper.

Thanks so much for stopping by!

-Kelly


w&wDT_kellygriglione_blog-sig

w&w-supplies

Monday, January 9, 2017

January Color Combo with Heather H.

Good morning! Heather; here stopping by this morning to share another card using a color combo from Pinterest and also inspired by Taheerah's recent Winnie and Walter Gossip Column - all about Marble. (There is a challenge to play along too in case you want to play along and be entered for one of the fabulous prizes!)


My color inspiration this time isn't a direct color combo - but just sort of a mood board with lots of bright happy colors that I was drawn too - and so many ways to interpret it:


I started off by using the fabulous little background stamp set Mini Scenery: Marbelize and stamping it two times in embossing ink on watercolor paper and heat embossing in clear. Now, it doesn't match up perfectly in the center, but since I clustered my embellishments there over the transition - it still worked perfectly as a background for my entire A2 card front.


Next, I applied lots of fun colors in random splashes on my background with watercolors, then misted it with water to help it blend even more, then blotted once with a clean baby wipe to pick up some of the color and soften it a bit - totally just playing, but as soon as I did that, I knew I had exactly what I was wanting so I stopped there!


I die cut In a Word: Happy Cutaway four times from white cardstock and adhered them together so it was a nice thick 3-dimensional embellishment, then heat embossed a couple tiny phrases from Happiest of Holidays with Evelin T Designs (always love stretching those holiday sets!) heat embossed on a bit of black cardstock.


Added some silver thread to the front, adhered the large "happy" over that, and added the small phrases with foam adhesive, then coated the word "happy" with a good thick coat of Glossy Accents to make it pop a little extra. Yep - I was a little giddy at how this one came out!


What do you think? Do you enjoy using color combos? Does this one inspire you? If you decide to use it to create something - I'd love to see what you make! Leave a link in the comments - I'd love to come visit and see what you created!

Thanks for stopping by - have a wonderful day!


w&wDT_heatherhoffman_blog-sig 2

w&w-supplies

Monday, February 1, 2016

w&w Belated 2nd Birthday Bash | Anything But a Card Challenge with Kate

w&w_bb2ndb_challengefinal

My challenge is "anything but a card".
I know everyone will rock this.
I have started with a tag .....I had much grander plans but I'm in the middle of moving house.
Some other examples you could make tags, pocket pages, art journals, gift wrapping and 3D items anything so long as its not a card. 


On my tag you also get a little sneak peak at a new item from the next release ;)
I have used the Essentials: Katharine Cutaways with black card and the new dies with white card. 
I wanted some bling so used my favourite turquoise glitter card with the In a Word: Happy Cutaway


I added the stamped birthday and finished with some glitter enamel dots and the black and white ribbon.

Thanks for looking.

>>>GIVEAWAY<<<
Link up your take on this challenge for a chance to win a $75.00 gift card (gift code) to the w&w shop.  One random winner will be chosen.

For more information on how to enter to become our Guest Star for the next release CLICK HERE.


>>>BONUS GIVEAWAY<<<

One randomly chosen comment on this post will receive the limited edition Scenery: BIGGER Bang Confetti stamp set.

Tuesday, January 19, 2016

Party/Celebration | Happy Birthday with Kate


Hello.
It's Kate here today and I wanted to revisit this months Rerun challenge.
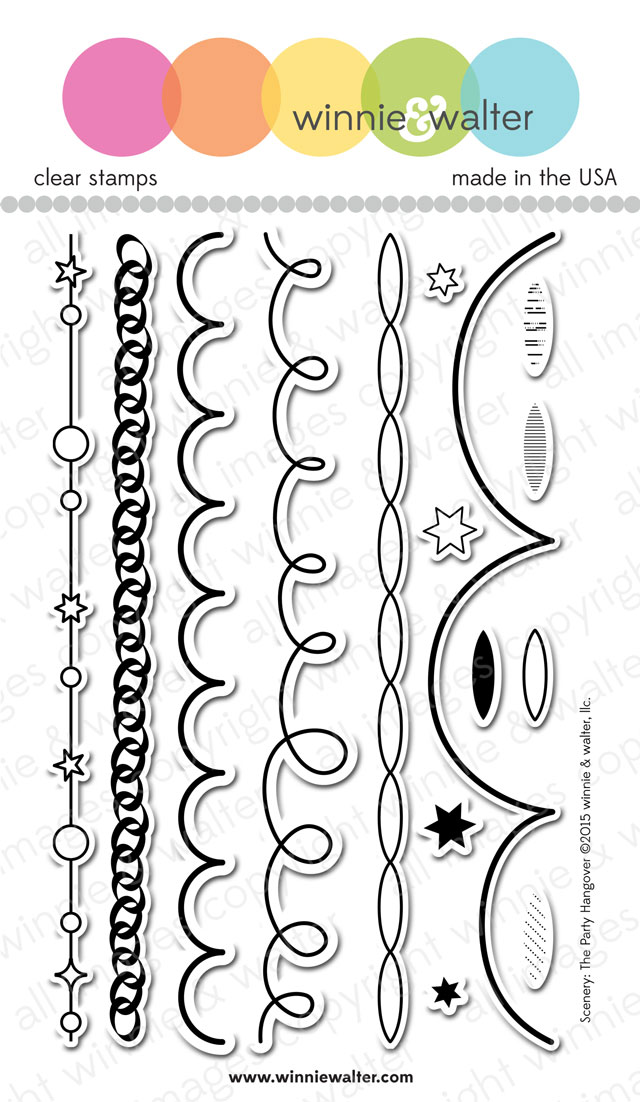
So this month the featured  stamp set is Scenery: The Party Hangover.

w&w_SCNThePartyHangover_4x6stamp_webprv


As the title suggests I went with a pink colour theme :) 


I kept this card very simple and repeat stamped the image in pink at an angle on my card base.
I wanted that stamped image to be my main stamping so I have used In a Word: Happy Cutaway and The Big, the Bold and Party Cutaways for my sentiment.
I finished with some sequins. 


Next up I used the scalloped stamp.


I stamped the scallop four times on my panel in black ink. 
I then used the Goldie Trim Cutaways with some scrap paper to mask the parts I wanted white.
I then  used an ink blender and distress inks to add colour. 
Again i have used cutaways for my sentiment and then added some enamel dots and rhinestones to finish.
You still have two weeks to join in the fun :) 
Thanks for looking.


w&w_kateTIR_blog-sig


w&w-supplies