Showing posts with label wishing you with evelin t designs. Show all posts

Monday, May 13, 2019

May Color Combo with Heather (Challenge)

Good morning! Heather here stopping by this morning to share a new Color Combo Challenge with you!


Here is my color inspiration for this month - coming from a beautiful photo I found on Pinterest! To me it looked like an ink blended background - so that is the direction I went on my sample card. Can't wait to see how you all interpret it!


I masked off the bottom of a panel of white cardstock, then blended 3 colors of distress inks over the top portion: Fossilized Amber, Ripe Persimmon, and Seedless Preserves!


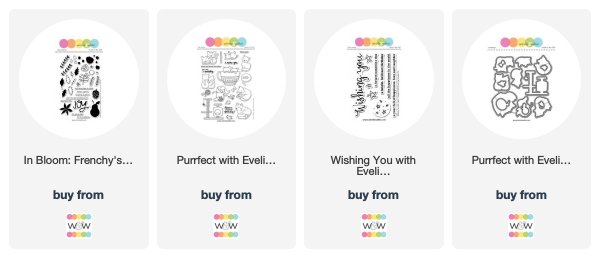
I also added some white splatters, then peeled off the masking tape at the bottom. Since it looked like a night sky, I colored up the adorable kitties from Purrfect with Evelin T Designs in simple Warm Gray Copic shades, and die cut them with the coordinating dies. The sentiment is a combination of Wishing You with Evelin T Designs and In Bloom: Frenchy's Festive Florals, with part of the sentiment heat embossed on a strip of black cardstock and popped up with foam adhesive. I also popped the kitties up with foam adhesive.


Finished off with a simple white frame cut with Essentials: Audrey Cutaways - one of my favorite scallop frame dies! I trimmed my inked panel small enough to layer over the top of it, then popped the entire thing on a dark gray cardbase.


Now - I have a few favorites from the last Color Challenge to feature! I loved seeing everyone's take on the neutral colors - such a fun and different style of cards!

First up - this STUNNING card by Rosali! Perfect use of neutrals - and could that little bird be any cuter?!?!?


Next up, an amazing use of super bright and soft neutrals - mostly white by Rahmat! It is hard to make a card with this much white, but she nailed it with all those lovely layers and textures - bravo!!!


Then we have this amazing card from Shona Chambers - THUD! Am I right? Elegant perfection right here folks! Beautiful work!


<<<RANDOM WINNER>>>


No. 13 | Helen F.
Helen's card is classy and sophisticated and makes great use of texture and layers to add dimension, interest and shimmer.

Helen, please email us at info {at} winniewalter {dot} com with the subject "April Color Combo Challenge Winner" to claim your prize.

>>>CHALLENGE<<<

New challenge will post on the second Monday of each Month, and will end on the Friday before the next challenge begins to allow time to pick a winner and some favorite entries to feature.

Now it's your turn to play along!
  1. Create a new project using the May Color Combo. 
  2. Use at least one (1) winnie & walter product.  This can include Cutaways (dies), Creative Screenings (stencils/masks), printable/digital items, cut files and/or stamp sets.  Remember we offer freebies in our shop.  Our freebies can be used to create your project(s) for this challenge.
  3. Link up your project below using the InLinkz Link-up by 11:55 p.m. CST on Friday, June 7, 2019.  
  4. Enter as many times as you want before the deadline.
  5. This May Color Combo Challenge may be combined with other challenges found here on the w&w blog or elsewhere. 
One randomly selected entry will receive a $25 gift certificate to Winnie and Walter. YAY!!! I can't wait to see your entries! 


Thanks for stopping by - have a wonderful day!


You are invited to the Inlinkz link party!
Click here to enter


w&wDT_heatherhoffman_blog-sig 2


w&w-supplies

Saturday, October 6, 2018

WCMD 2018 | Coordinating Die Coloring Challenge with Kelly

To get all the information about w&w WCMD 2018 CLICK HERE.


Hi Folks! Kelly here with a challenge for you ... Coordinating Die Coloring

How does this work? Pick one of your favorite stamps that has a corresponding die, die cut a piece from copy paper (making a stencil), place the negative stencil portion of the die cut over your stamped image, and sponge ink through the stencil.

Why should you do this? It's about the fastest way to color an image that I can think of! This makes it perfect when you're stamping a lot of images and just don't have the time or desire to make mini-coloring masterpieces. This does, however, leave you with the option to go back in and add some details with a marker if you'd like, like I did with the focal point green elephant.

 
I think this technique works particularly well with baby cards when you want to have soft, simple shapes. The adorable elephant featured on this card is from one of my favorite Evelin T Designs sets, Happy Dance. The die cut is from In a Word: Baby, and the sentiment is from Wishing You with Evelin Designs.

I sure hope you'll give this challenge a try ... I can't wait to see what you come up with!

Thanks for stopping by!
-Kelly

Prize: One randomly chosen project that is linked up will win $50.00 gift credit to the w&w shop.  **Remember for rules about the challenges to read up HERE.**

>>>LINK UP<<


October Leading Lady Trina Pham | Take One

Happy World Card Making Day!  Hope you are enjoying your day so far.  You can find more details HERE.

We have another awesome post for you today introducing our October Leading Lady Trina Pham!  Trina caught my eye with the incredible cards she submitted to our challenges.  Her cards are impeccably designed and executed with a flair for the dramatic and full of humor and cleverness.

I am really excited to see what Trina will be creating this month as she takes us on an adventure of her own design on Saturdays in October on the w&w blog.


Please give Trina a big round of applause to welcome her as she steps onto the stage for her first performance as our October Leading Lady! 


Hello there!  Look who's the lucky Leading Lady this entire month at Winnie & Walter!?  I KNOW!... oops, didn't mean to yell.  Can you tell I am thrilled and excited?  When I first saw the e-mail from Shay inviting me to guest design this month, I was shocked, ecstatic, overwhelmed and nervous all at once!  I think I'm still in a little disbelief, but don't pinch me because I don't want to wake up from this amazing dream! 😜   I love their products and I am so honoured to have this opportunity.  I hope you will join me every Saturday this month.

So for my debut week, I am hash tagging it #favourites.  My cards are mostly clean and simple (CAS), and masking is my favourite technique I use quite often to help preserve that white space indicative of CAS cards.  I also love bright, cheery colours, so incorporating rainbow colours into my cards is another favourite.  These two favourites are the basis for my cards today.


FIREWORKS

First up is a rainbow birthday card.  Birthday cards are needed all year round, and I make these cards the most.


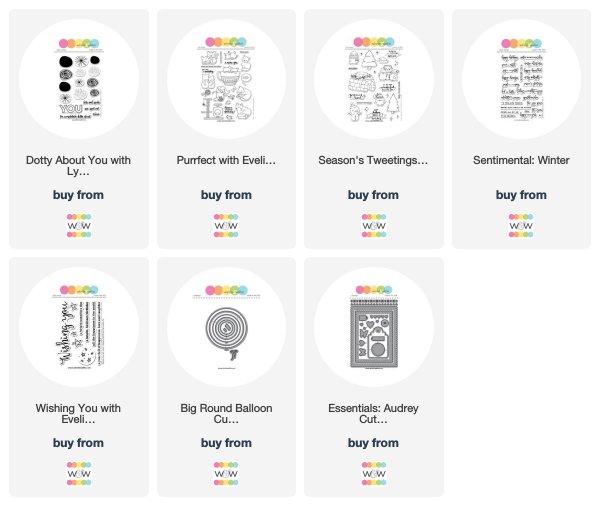
Started by trimming a piece of X-presss It cardstock down to A2 size.  Stamped the cats from Purrfect with Evelin T Designs with black Copic friendly ink.  Masked them, then die cut a reverse circle mask from masking paper using Big Round Balloon cutaways.  Adhered the reverse mask over the cats,  then white heat embossed the images from Dotty About You.  Sponged Picked Raspberry, Wilted Violet, Squeezed Lemonade, Peacock Feathers, Twisted Citron, Tumbled Glass, Faded Jeans and Chipped Sapphire distress inks to create the fireworks background.  Wiped off excess ink with a paper towel.


For some sparkle, spritz with a DIY shimmer spray.  Removed the masks, then coloured the cats with warm and cool grey Copic markers.  The sentiment from Wishing You with Evelin T Designs were heat embossed.  'Wishing you' was black heat embossed directly on the panel and the rest was white heat embossed on a black strip.  Adhered the panel to a white card base to finish.


CRITTERTREE

My second card is a Christmas card.  Christmas is a my favourite season.  I cherish the many fun festivities spent with family and friends.  And no surprise, Christmas cards are my favourite cards to make.  I am using my favourite critter penguin from Season's Tweetings with Evelin T Designs.  In fact, I posted a card a few days ago with him.  I didn't think he could get any cuter,  but how about a whole group of him in a crittertree?


This card is masking on steroids! *lol*😂  It is actually my second attempt because I smeared black ink on the first one.  On Neenah cardstock and starting at the bottom with the middle guy, stamped and masked, working my way up to the top.  Masked a slope next, then blended Broken China distress ink for the background.


Removed all masks and coloured them in with Copics.  Black heat embossed the sentiment from Sentimental Winter.  For some interest, die cut the panel using Essentials: Audrey's Cutaways.  Mounted with white fun foam onto a white card base for some dimension.  Clear shimmer on the hat brim and pom-pom finished off the card.  It was difficult to capture it in the photo.


And as I was cleaning up, I had an "ah-ha" moment.  The ink smear on the first one was in the background, leaving the crittertree untouched.  What a shame to see all that stamping and masking go to waste.  I fussy cut the crittertree out and create a bright and colourful non-CAS card.


The rainbow background was created with Distress Oxide inks (Squeezed Lemonade, Picked Raspberry, Salty Ocean and Twisted Citron) on mix media paper.  I used my favourite method and added a flurry of snow with a white gel pen.


And just like that, I have two rainbow crittertree cards two ways!


GIVEAWAY

Shay has kindly offered up a $30 Winnie & Walter gift card for me to give to one lucky commenter on my blog Phamtastic Design.  For your chance to win, leave a comment on this post and/or any of my leading lady posts and I will randomly pick a winner from all the comments left by October 31.


That does it for me this week.  As it is World Card Making Day (WCMD), I want to wish you happy WCMD!  If you haven't done so, check out the challenges Winnie & Walter is hosting in celebration of this event HERE.  Thank you for spending your time with me.  Have a wonderful week.


w&w-supplies

Saturday, February 3, 2018

February Leading Lady Jen Carter | Take One

It's another exciting day in February as it is the debut of our February Leading Lady, Jen Carter!

I had the pleasure of meeting the delightful Jen last year and got the chance to spend time with her as she made cards (I spent much of my time making backgrounds--not sure I finished a single card. lol).  I was impressed by her striking designs using bold colors and I wanted to see more.    

I am really excited to see what Jen will be creating this month as she takes us on an adventure of her own design on Saturdays in February on the w&w blog.

Please give Jen a big round of applause to welcome her as she steps onto the stage for her first performance as our February Leading Lady! 


Hello!  I'm Jen Carter and I am so excited to be Winnie & Walter's February Leading Lady!  I was so fortunate to meet Shay at a craft retreat almost a year ago and I can't say enough wonderful things about her kind & generous spirit!  I'm always amazed by the products that she puts out through the Winnie & Walter line!  It's an honor to be able to share with you each Saturday this month.

My first theme this month is using the overlooked stamps in our stamp sets.  Basically, take a look at the tiny stamps in your sets and make them the star of the show.  I challenged myself even further and used Christmas/Winter themed stamp sets to make non-holiday themed cards.


For this first card I wanted to make a bright, fun, party card.  I loved the little solid circles in the Winter Wishes with Evelin T Design stamp set. I also really liked that the circles had outline stamps to match as well!   So I pulled out a palette of bright inks and started to randomly stamp the little circles with the largest size at the top, working my way down to the tiniest of circles.  I used a gray ink and the coordinating outline circle stamps to outline a few here and there.

The sentiment is from the Wishing You with Evelin T Designs stamp set.  After stamping the second sentiment strip in bright colors I attached it to the panel with dimensional tape.


I wanted to add a little more dimension to my card so I die cut some of the circles in different sizes using the Winter Wishes with Evelin T Designs Cutaways, stamped them with the coordinating sized circle stamps and popped them up with dimensional tape.  


For my second card I wanted to focus on the adorable steam hearts in the Warm Wishes to You stamp set (this set will be released in 2018 and was the free gift with purchase stamp set during the last release).  To start I created the background paper using the smallest & largest heart and stamping with VersaMark ink.  For the rainbow panel, I chose my ink palette and then started stamping the hearts in a row. I embossed the sentiment from Sentimental: Gift with white ink onto black cardstock and then hand cut the ends of the banner to make a pointed end.  I placed the sentiment banner onto the heart stamped panel with dimensional tape.  The heart panel is also adhered with dimensional tape to the card base. I added some colorful sequins to finish the card off.

Thank you for stopping by today!  I hope you've been inspired to take another look at some of those tiny stamps in your collection and think of ways to use them as the star of your card or project!


I hope you'll visit my blog, Jen's Ink Spot & leave a comment on any or all of my Leading Lady posts in February for a chance to win a $30 gift card to Winnie & Walter! 


w&w-supplies

Saturday, December 2, 2017

December Leading Lady Kimberly Rendino | Take One

It's an exciting day as we get to introduce our December Leading Lady, Kimberly Rendino!
Kimberly's style is bold, dramatic and extremely well balanced and we have certainly noticed her work when she's entered our challenges!  In a fact we invited her to be on the w&w blog a while back and you can see here work HERE and  HERE.  

I am really excited to see what Kimberly will be creating this month as she takes us on an adventure of her own design on Saturdays in December on the w&w blog.

Please give Kimberly a big round of applause to welcome her as she steps onto the stage for her first performance as our December Leading Lady! 

Kimberly_Rendino_december2017

Hello there!   My name is Kimberly, and I am so very excited to be w&w's Leading Lady for the month of December!   It's such a thrill to be guesting for one of my very favorite companies - many thanks and big hugs to Shay for inviting me to share with you this month!

So....it's December and everyone is probably expecting me to share some holiday cards - right?  Well, we will definitely get to that later in the month, but today I wanted to focus on how the latest w&w release full of holiday goodness can be used year round!   

First up, a super colorful birthday card using the Cover Model: Do You See What I See? Cutaway.  Can I just tell you how much I love this die!?!   You'll be seeing lots more of it this month!  


 I began by blending a rainbow of Distress Oxide inks onto a piece of bristol cardstock.   Next, I added some Stick It to the back of a black piece of cardstock and die cut the cutaway.   Adding the Stick It before die cutting will help immensely when adhering the cut to the ink blended background!  


I cut a rectangular piece of black cardstock as well as the In A Word: Happy Cutaway.  I temporarily adhered the word die to the black cardstock to aid in placement of the stamping, which was heat embossed in white using In A Word: Happy (the stamp set).   Once the stamping was done, I added some ink blending to the sentiment along with some Glossy Accents, and once dry, I offset it with another die cut and adhered it to the black panel!   

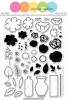
For my next card, I used the holiday set In Bloom: Victoria's Very Merry Flowers with Lydia Evans to create a card that could be used for just about any occasion!


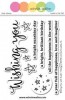
I used my MISTI stamping tool for stamp placement on this card - and the bonus is I only had to place each stamp once - I just rotated the panel and stamped again for a perfect mirror image on the top and bottom. The sentiment, from Wishing You with Evelin T Designs, was stamped and heat embossed in brown, and a few purple Nuvo drops made the perfect berries!


Thanks so much for joining me today on the Winnie & Walter blog!   I'll see you again next Saturday with a few cards that use (gasp!) no stamping at all!    


Before you go - Shay has generously donated a gift certificate for me to give away on my blog!   Head over there to leave a comment, and I'll choose a winner from one of the comments left on any of my Leading Lady posts through the end of December.   I'll announce the winner on my blog January 2!


w&w-supplies

Friday, April 21, 2017

Wishing You with Lydia

Hi there everyone and happy Friday! Today I have a bold, bright one-layer floral card with a little bit a simple masking. I am so looking forward to summer and this is kind of like summer flowers, right?!?!


I started by masking out a circle, to do this I simply cut out a circle from a sticky note- you could use a die or draw a circle and cut it out it's totally up to you! I then stamped my florals around the edge of the sticky note circle. I used In Bloom: Lola's Bouquet and a number of bold, bright dye inks. As you can see I didn't mask the flowers or leaves out and simply stamped over images, it gives a fun, carefree look.


I do love how fresh and summery this looks! For the sentiment I used Wishing You, I removed the stick note after I was finished with the floral stamping and stamped the sentiment in black inside the masked out circle.

Thank you so much for stopping by and I hope this card made you smile!

Hugs, Lydia x


w&wDT_lydiaevans_blog-sig 2

w&w-supplies