Showing posts with label thank you. Show all posts

Thursday, January 28, 2016

Thanks with Kate

Hello.
Its Kate here today and I have four super simple cards to share.
I wanted to show a couple of things firstly that you don't need lots of supplies to make cards and secondly that festive stamp sets can be used for more than the occasion they were intended for.
The stamp set I have used is In Bloom: Hollie's Festive Florals.
With the wreaths it seems like its more a Christmas stamp set but by something as simple as changing the colours you get a completely different feel.

In Bloom: Hollie's Festive Florals 


I kept the design of all the cards pretty much the same.
Staring by masking a circle in the centre of the card blank.
I then stamped in green pink and yellow so that its more like spring than winter.
The sentiment from The Big, the Bold and You is simply stamped in black ink directly over the stamping.


For this card I went to town with all the stamping. 
Choosing a pretty pastel colour way I love how it looks.
I think the random stamping and soft colours give it a folk art look.


This time i changed it up a bit and used my favourite stamp from the set, the circle of dots. 
I LOVE this stamp. Its perfect for creating a bokeh effect.
With my circle mask in place I stamped the first and second generation of each colour till I was happy with how much colour and pattern there was.


And finally I hardly stamped at all on this but wanted another rainbow card ...it makes me happy :)
I have used the Scenery: Multifaceted Creative Screenings with a whole load of distress inks.
The stencil wasn't quite big enough for my card so I did half then attempted to line it up. 
Its a little off but I think it works.

And as all four cards are one layer they are perfect for posting. 
Thanks so much for looking.


w&w_kateTIR_blog-sig

w&w-supplies


Tuesday, December 22, 2015

Special Guest Star May Flaum | Thanks

special-guest-star_mayflaum 

We have a special treat for you today!  Our lovely and talented friend, May Flaum, is back to share a gorgeous project with photo tutorial!  

If you missed her first appearance (and video) back in May of this year on the w&w blog CLICK HERE!

Without further ado, May Flaum....

mayf_detail

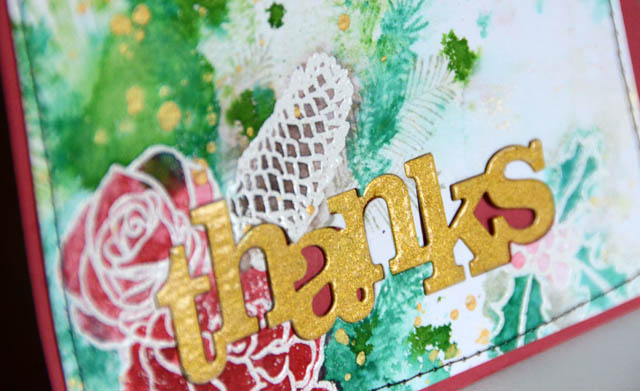
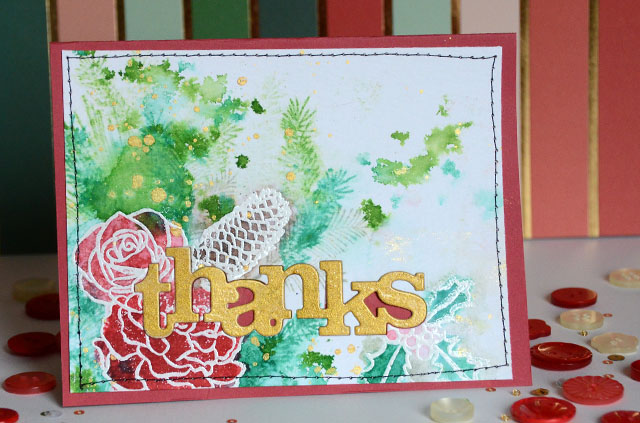
When it comes to holiday cards, thank you cards are my most important! May Flaum (www.craftwithmay.com) here, and I’m excited to share this with you today. Using a new favorite stamp set and die I’m creating a Christmas thanks card to send out and I’m just loving the results of the distress ink and white embossing powder with these stamps. I hope you enjoy this step-by-step tutuorial.

may_part 1

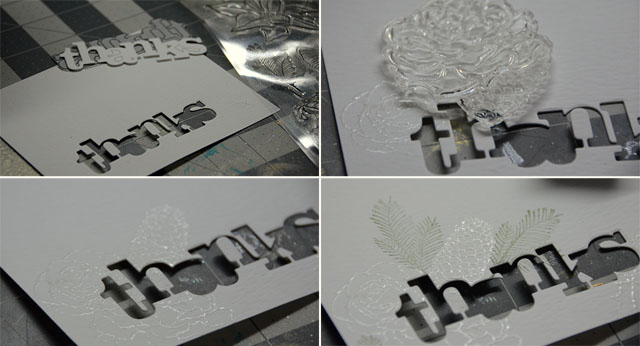
1.       Die cut “thanks” from watercolor paper card front and save word for later.
2.       Using clear embossing ink and white powder on watercolor paper, stamp and then heat set key images one at a time.

may_part2

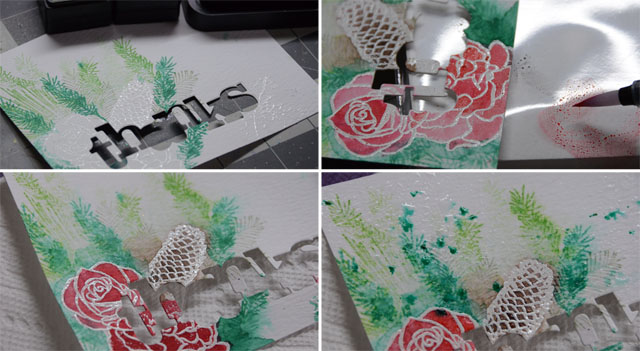
3.       Once you’re happy with the key images you have, begin stamping in your filler/background images with distress ink. Add a bit of water to blur and blend.
Tip: check where stamp will go and just wipe off ink of any area you feel will overlap onto a key image
4.       Using distress ink placed onto some plastic/nonstick surface or watercolor, color in the key focal point images.

may_part3

5.       Add in coloring around focal point images as need to help the white embossing really pop.
6.       Drop green ink or mist onto background and add water to create watercolor droplets of color. Add gold as desired. Dry totally.

may_DSC_1470

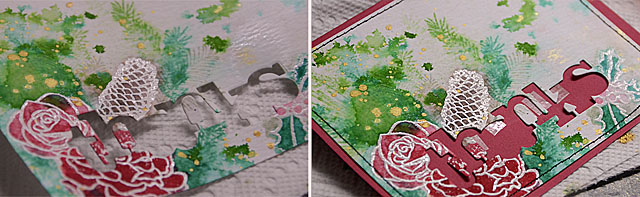
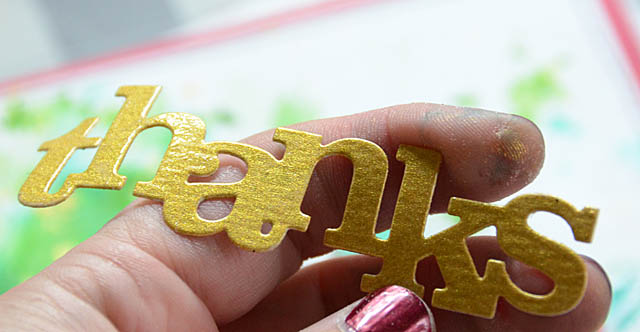
7.       While the card front dries, use a gold ink pad (or gold paint) and coat the word thanks that was previously die cut. Leave as-is, or coat in clear embossing powder for an extra shine as I did here.
8.       Once the card front is dry, adhere and stitch to a red card. Then finish the card by attaching the “thanks” die cut back in place.

mayf_1

This card was so much fun to make and combines so many favorite techniques and products. I hope you’ve enjoyed this tutorial and create some thank you cards of your own! To check out more of what I’m making feel free to visit me at www.craftwithmay.com or follow me on Instagram @craftwithmay


w&w-supplies


Saturday, December 19, 2015

December Leading Lady Piali Biswas | Take Three

Piali-Biswas_dec2015

Our December Leading Lady, Piali Biswas is back for her second sensational performance!  If you missed her smashing debut you must see it...CLICK HERE or her sensational second performance with fancy wrapping CLICK HERE.  Piali's proves her skill with a trio of sophisticated and elegant cards today!

Without further ado, Piali....

Hello Lovely Winnie& Walter Fans!!!

Happy Saturday!! Its my turn to be back on Winnie & Walter blog!
I'm so loving this fabulous Saturday feature as the Leading Lady...
Thank you Julie & Shay for making this possible!!!

Are you all ready for the holiday festivity yet???
I'm slowly getting there...I wish there were 48 hours in a day!
Holiday crafting is NO joke, its a serious process!

First we make holiday cards, then mail them, 
Next comes gift shopping and packaging,
I shared those ideas already...
now comes the preparation for after Christmas crafting.
Whats that?
As we all receive so many wonderful gifts and cards, after Christmas day its our turn to thank everybody for making the holiday special. 
Here are few Quick & Easy holiday Thank You card ideas...


I like my holiday thank you cards to be a little festive.
May be Christmasy colors or sparkly or few with few bells or stamped with holiday themed images.
 I used Scenery: Stripes stamp set to create my own plaid pattern, then diecut the word THANKS using In a Word: Thanks Cutaway

Its a fun pocket card...

The lovely bow is made with Take a Bow Cutaways.
For some fun texture I dry embossed the cardfront using Cover Model: The Leaf Effect Cutaway.
Love that we can use the die for dry embossing too!!

I also made a few postal friendly Thank You cards...


Love the small snowflake images in the Merry & Bright with Evelin T Designs.
Super easy card...just stamped the snowflakes randomly with various inks and heat embossed a few using WOW Gold embossing powder.


Next comes the New Year cards...


Its great to send some Happy New Year cards too!!
I used my favorite True Multifaceted Star Cutaways for this card.
I created the background using the different star images from Comfort + Joy set.


The sentiment is from The Big ,the Bold, and the Happy stamp set.
For 2016 I used Doodlebug Designs Alpha stickers.

Hope you like these cards!!

Julie & Shay generously gave me a $30 Gift Certificate to share with my readers.
Please visit my Blog for a chance to win.


Thanks for stopping by...
Happy Crafting!
Piali


w&w-supplies

Thursday, April 10, 2014

Thank You | Thank You a la Joni

Hello there everyone!  It's Shay again back with another thank you card.  I sort of channeled my inner Joni on this one. :-)  Joni makes the most beautiful backgrounds and did a stellar job with creating floral backgrounds this past release as seen HERE.

shaythankyou5

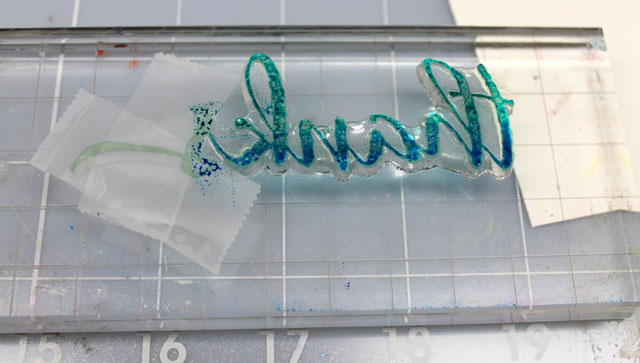
Ever want just "thank" rather than "thanks"?  Me too!  I played with the "thanks" from The Big, the Bold and You to create "thank" that I matched up with the "you" also from The Big, the Bold and You.  Below you can see how I used some handy tape to cover up the "s" so that it would not ink up.  Simply peel off the tape before stamping (you don't know how many times I have to remind myself to remove the tape before I stamp).  As you can see it stamped out perfectly!  So love that.

shaythankyou4

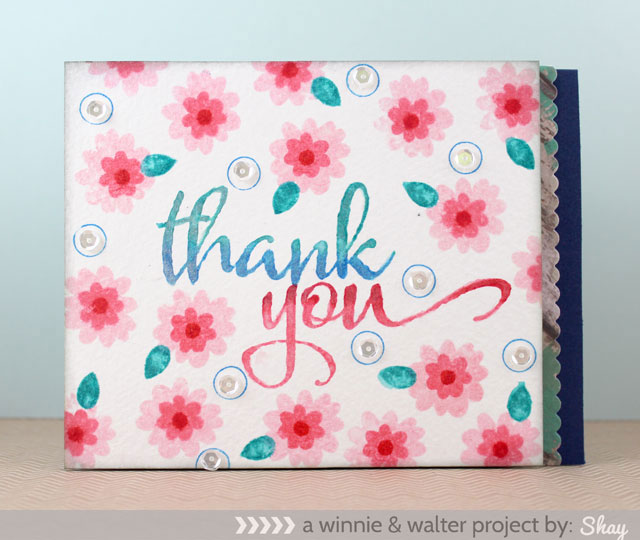
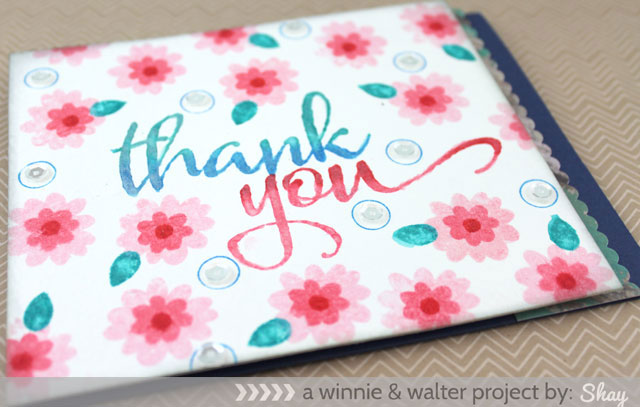
I wanted a fun variegated look so I stamped "thank" in peacock feathers and salty ocean Distress Inks (shown above) and "you" in festive berry and worn lipstick on a panel of watercolor paper.  Then I painted over the words with a waterbrush that I dipped in Studio Calico's Mister Huey's Calico Shine.  You are not be able to see it in the picture but in real life there is a pretty shimmer on the words.

With the flowers from The Write Stuff: Leave it to Mom I created flowers in spun sugar and worn lipstick.  The centers were stamped in festive berries using one of the solid circles from Scenery: Big Bang Confetti.  The leaves are stamped in peacock feathers and are also from The Write Stuff: Leave it to Mom.  To fill in some of the white spaces I stamped in the large outline circle from Scenery: Big Bang Confetti in salty ocean and sequins fit perfectly inside those open circles.  

The edges of the panel are lightly inked and adhered with dimensional adhesive to a navy cardstock base with a small scalloped patterned paper from the Maggie Holmes/Crate Paper Flea Market 6x6 paper pad die cut using the Femme Frames by Mama Elephant.

shaythankyou6
I hope you've enjoyed today's thank you card and we would love to see yours too!  Link up on our join in to win! page for a chance to win a stamp set of your choice.  

Shay.

P.S. Be checking on Facebook as there may be a little giveaway very soon. ;-)

Monday, April 7, 2014

Thank You | Thanks

We've restocked Scenery: Big Bang Confetti and The Big, the Bold and You!
========================================================================

Hello!  It's Shay (Winnie's human) here today.  As I am so behind on my thank yous {hanging head in shame}, I thought I would share some thank you cards this week with you.  I think having a healthy stash of thank you notes or cards is always smart.

Not only do I make thank you's to use for myself, but my family also put in orders.  My mom wanted some thank you notes for friends and family for various reasons and demanded asked me to make them using w&w stamps (so as my mom said, "I can brag").  What I do like about receiving my marching orders is that I use the person I am making the cards for as my inspiration.

shaythankyou1

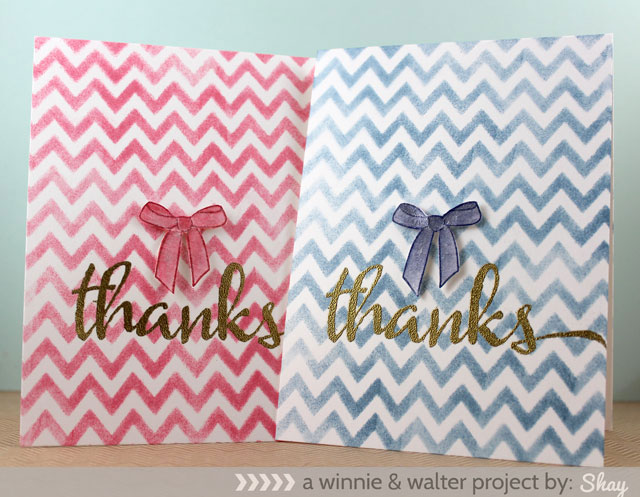
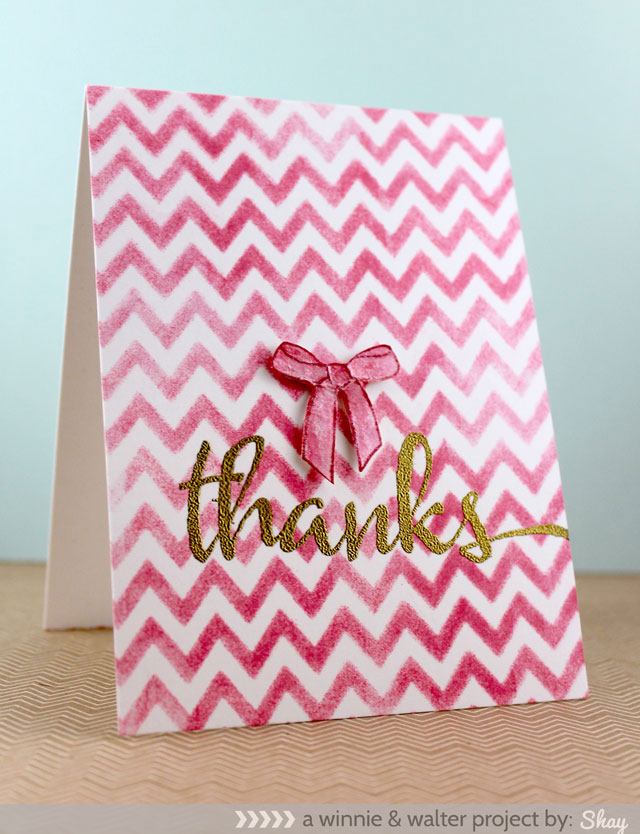
For the super simple cards I am sharing with you today I picked favorite colors of my mom.  I *love* stencils and have been collecting them for years so this was a perfect opportunity to use one of them.

We interrupt your program to share this fun (totally unsolicited) service announcement:

Virginia Lu has a brand new challenge blog, Virginia's View Challenge, and this month's challenge Virginia's View Challenge #2 is all about using stencils.  So pull out your stencils, have some fun craftventuring (craft + adventuring--it should be a word and so I am making it one!) and make sure to enter her challenge! 

And we're back.

shaythankyou2

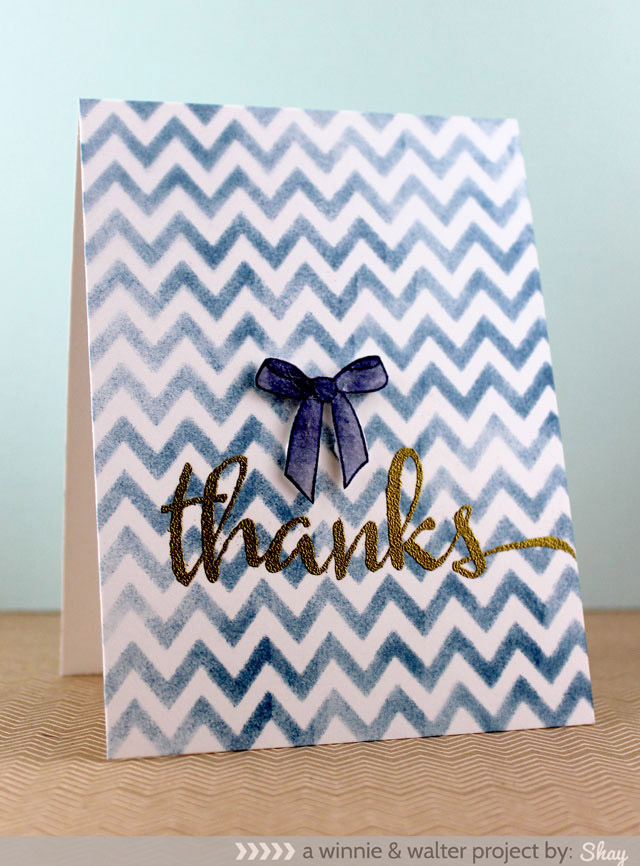
I also love chevrons so I pulled out an older chevron stencil from Studio Calico and my handy Distress Inks (they've been needing some love lately) along with an ink blending tool (got to get a mini or two!) and sponged on the color.  The blue is stormy sky and the pink is worn lipstick.  Last month we released The Big, the Bold and You (now restocked!) that includes "thanks".  This comes in so handy.  I stamped it in Versamark ink and then heat embossed it in gold.

shaythankyou3

I pulled out the sweet bow from The Write Stuff: Leave it to Mom (a motto of my mom's could be "stick a bow on it!" rather than a bird).  Using Hero Arts Mid-tone Shadow inks in navy and royal red I stamped the bow on a scrap piece of white cardstock.  With Distress Inks once again, I painted the bow in with a water-brush using stormy sky along with chipped sapphire and then worn lipstick along with festive berries.  After doing some easy and fun watercoloring, I let the bows dry a little (I was a bit too impatient and I would recommend setting it aside for twenty minutes or so to dry) and then cut them out.  To give them some more pizzazz I painted on some Mister Huey's Calico Shine by Studio Calico.  I adhered the bow onto the card with dimensional adhesive.  So easy!

When I showed my mom these cards, she liked them but said they needed bling so for those like my mom who want more add some bling, sequins, flowers or whatever else makes your heart happy.  These cards are so easy to customize by changing up the sentiment, colors, image(s) and stencil design.

Thank YOU for visiting today!  Should you like to play along with making thank yous with me this week, please link up your project on our join in to win! page so you get a chance to win a stamp set of your choice at the end of the month.

Shay.