Showing posts with label scenery: bigger bang confetti. Show all posts

Friday, July 27, 2018

Happy Birthday with Gayatri

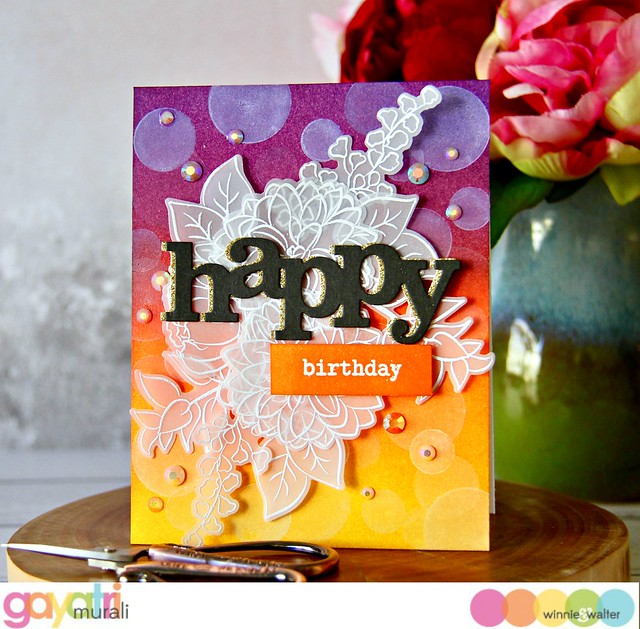
Hey everyone, Welcome! This is Gayatri with you. My last project for July here. I have a floral card to share with you today. I also created a bokeh background for the floral cluster. Here is the card for you.

gayatri_W&W July card #3a

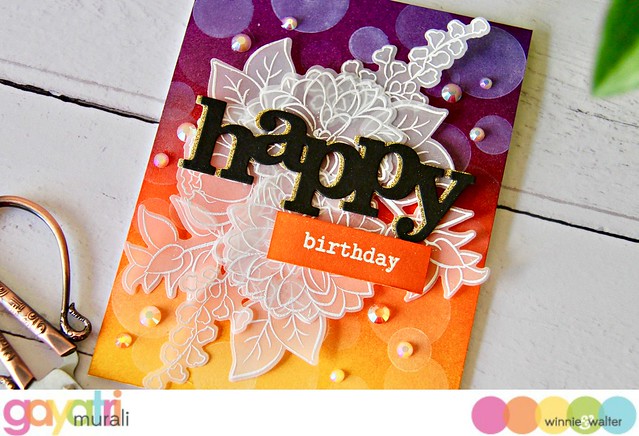
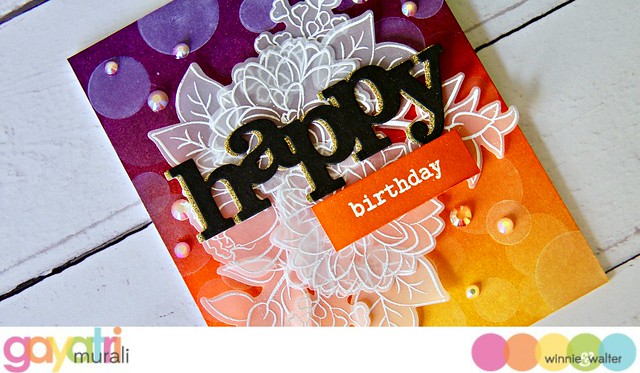
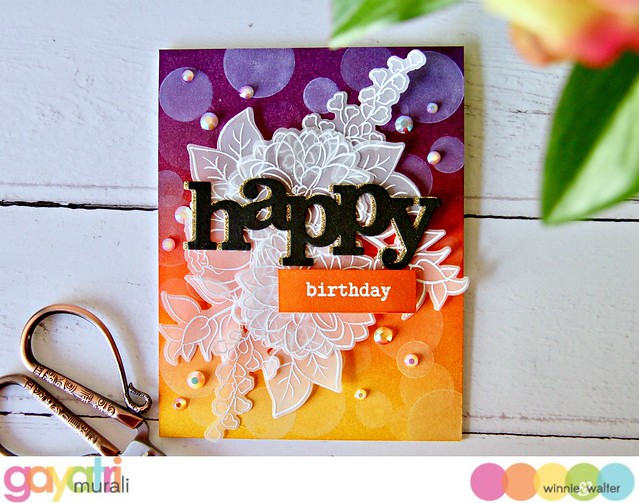
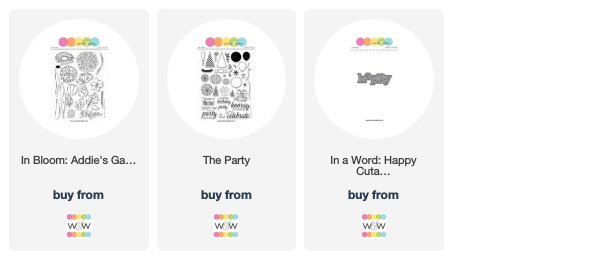
If you are following me on Instagram, you will know I am sharing distress ink blends each day. The background I used here is blend #4. The colours I have used on this background are Dusty Concord, Seedless Preserve, Ripe Persimmon, Carved Pumpkin and Mustard Seed Distress inks.  Then I used W&W’s Scenery: Bigger Bang Confetti stamp set (limited edition) to stamp solid circles on the background using white pigment ink to create bokeh background. Since the background is colourful and busy, I want to keep the focal point simple and clean. So I white heat embossed the images from In Bloom Addie’s Garden stamp set on heavy weight vellum. Then used the coordinating cutaway to die cut them and glue to form a floral cluster. I adhered this cluster on the middle of the background panel.

For the sentiment, I die cut In a Word: Happy cutaway in black and gold glitter. I glued them slightly off set to make the gold glitter as the drop shadow for the black die cut. I know its not traditional. Usually its black die cut that is the drop shadow. I adhered the Happy sentiment on the middle of the floral cluster. The secondary sentiment is white heat embossed on a strip fo white cardstock and sponged with Carved Pumpkin distress ink. I adhered this below the large die cut sentiment using foam adhesive. Finally to finish off some sparkle from jewels.

Here are couple of closeups of the card.

gayatri_W&W July card #3 closeup1 gayatri_W&W July card #3 closeup

Love the card. The colours are a bit unusual for a birthday card. But if you have a friend who has birthday that falls on Halloween, here it the birthday card inspiration. :) Hope you are inspired by my project. All supplies used to make this card below.

gayatri_W&W July card #3 flat

Thank you very much for stopping by. Have a lovely day!

My blog signature

w&w-supplies

Thursday, August 4, 2016

Essentials by Ellen August Mix It Up Challenge with w&w

banner-MIX-it 

Hello lovelies!

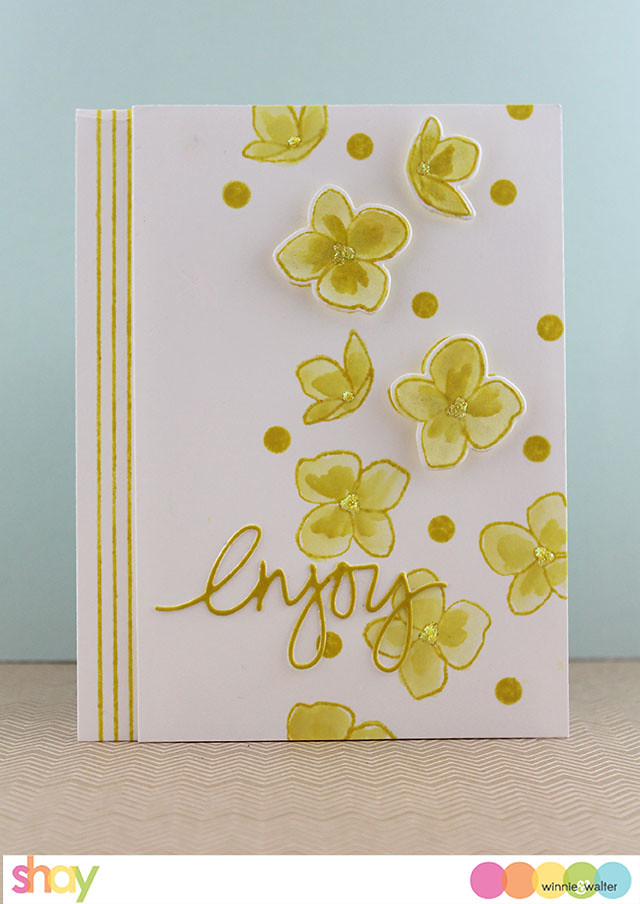
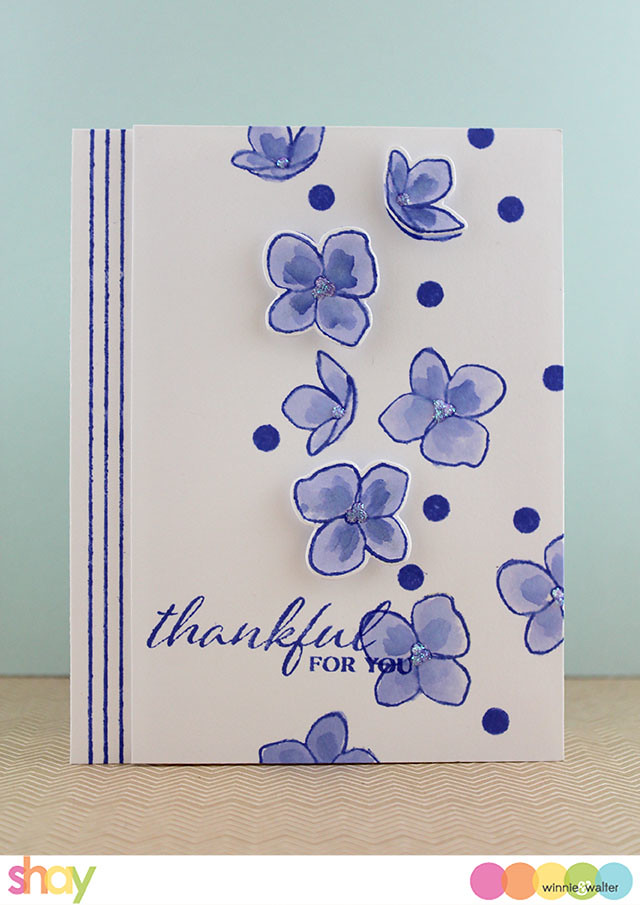
It's Shay here with a project (or seven) for Essentials by Ellen August Mix It Up Challenge using Essentials by Ellen products + Winnie & Walter products.
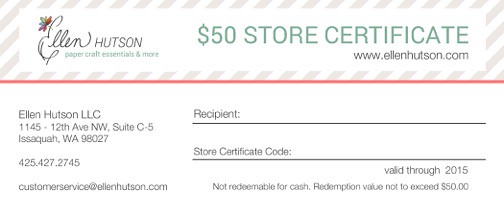
CLICK HERE to read how you can enter the challenge for a chance to win a $50 gift certificate to Ellen Hutson LLC!


50 Store Credit


If you want to learn more about the projects I created grab your favorite beverage and get comfy as there are several images and I am long-winded.

If you joined us for Share the Love Week featuring Essentials by Ellen by Ellen Hutson LLC you know I love Essentials by Ellen products so to be able to play along with the Mix it Up Challenge using Essentials by Ellen products with w&w products was a dream come true.  I know I am not alone for being head over heels for the Essentials by Ellen Clear Stamps, Mondo Hydrangea ...seriously hydrangeas are one of my very, very favorite flowers to begin with and Julie Ebersole's blown up version is a delight to craft with so I decided to use that stamp set.

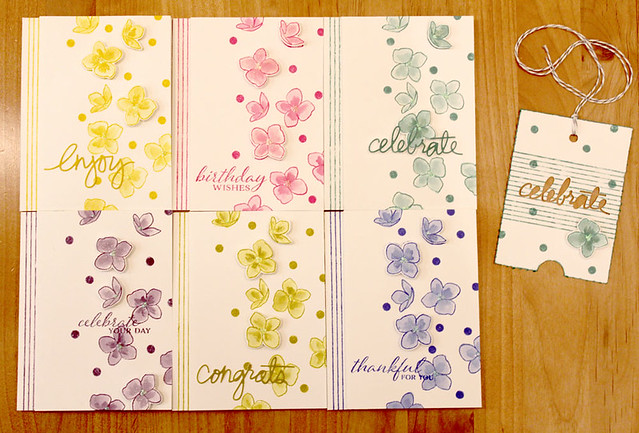
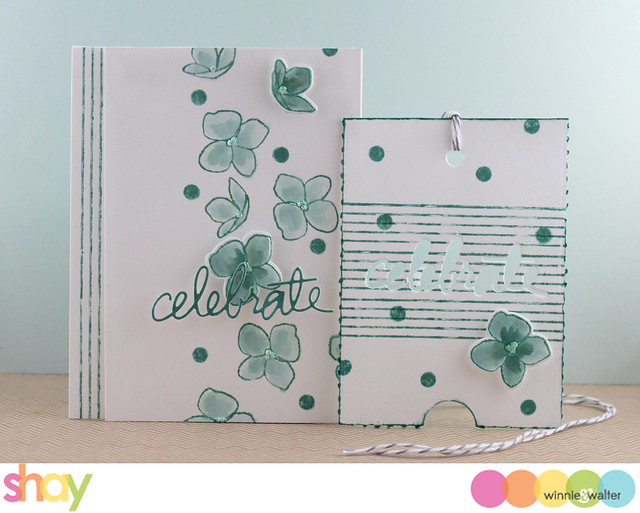
For my project I went with something I love to do: a collection of cards using the same design while changing up the color/sentiment per card.  As a bonus I also created a coordinating tag.  I had the tag match the evergreen bough card as I tied the tag onto a birthday gift to a friend and also gave her the matching card...the evergreen bough color actually blended in perfectly with the bag.

I love to see all of these cards together and also individually as although they are very similar by changing up the color and sentiment each has their own personality as well.  Plus now I have 6 cards + a tag in my stash without having to spend agonizing time on the design of each card.  Another idea is packaging up all the cards together to give as a gift.

Here they all are together (the individual photos will give you a better look at each of them):

ellen_mix_it_up_challenge_w

In evergreen bough with tag:
shay_IMG_4015

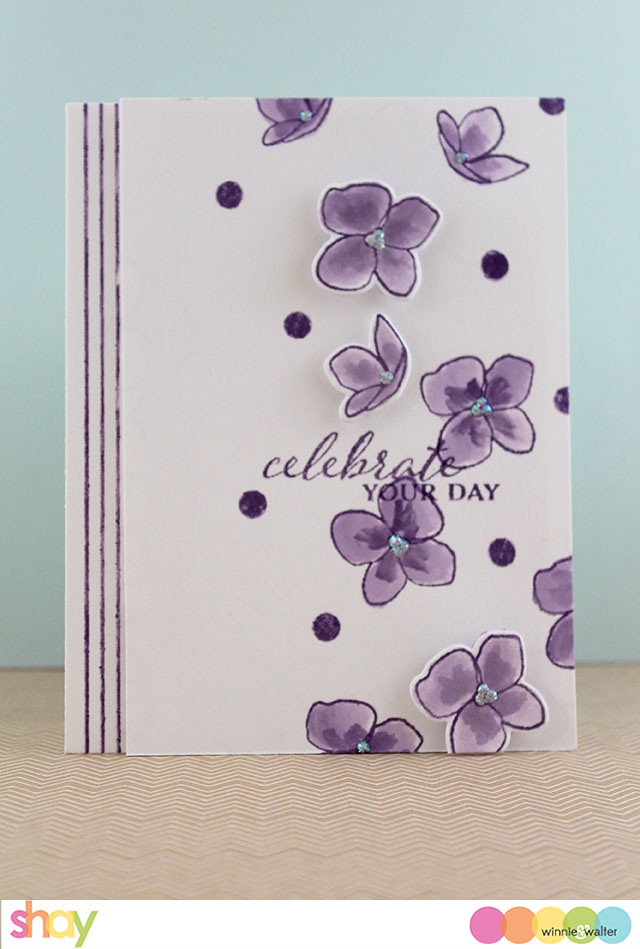
In dusty concord:
shay_IMG_4017

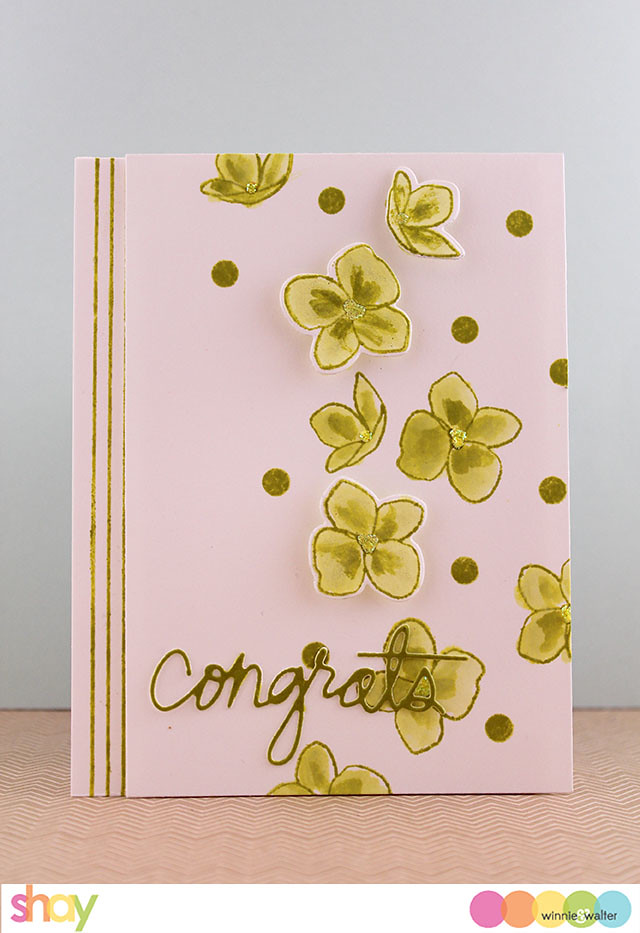
In crushed olive:
shay_IMG_4024

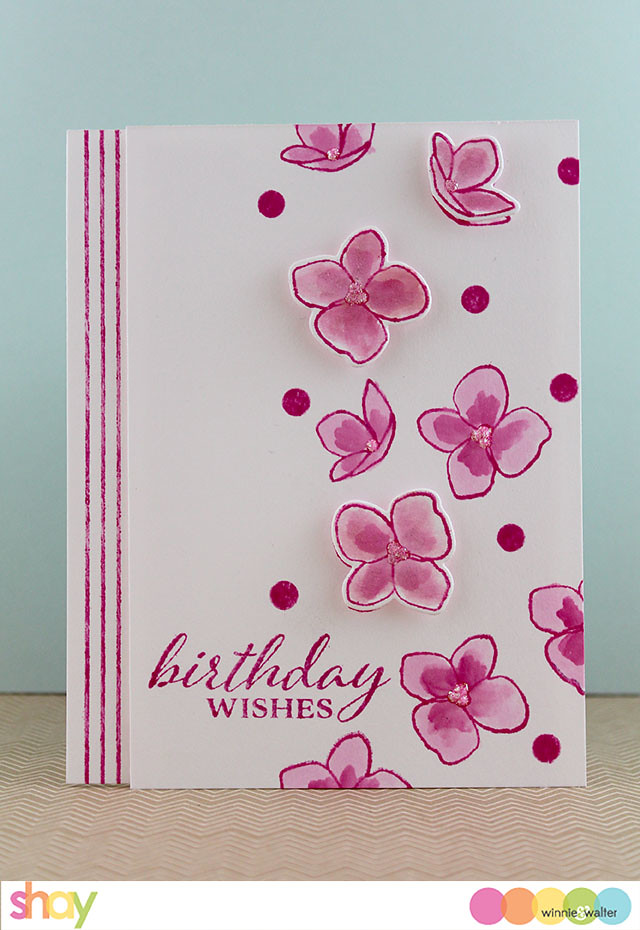
In picked raspberry:
shay_IMG_4022

In mustard seed:
shay_IMG_4018

In blueprint sketch:
shay_IMG_4020

Now for some simple steps of what I did per card:

1. On 6 separate panels of white cardstock I stamped the hydrangea petals from Essentials by Ellen Clear Stamps, Mondo Hydrangea in each of the Tim Holtz Distress Inks by Ranger (evergreen bough, dusty concord, crushed olive, picked raspberry, mustard seed and blueprint sketch) using a very similar pattern.  For Distress Ink I usually begin by inking up the stamp with Versamark for more even coverage of the Distress Ink.
2. I stamped 3 of each full petals and 1 of the folded petals in each color on a piece of separate white card stock.  After Step No. 3 below, I used Essentials by Ellen Designer Dies, Mondo Hydrangea by Julie Ebersole to die cut out the flowers.
3. Using a waterbrush and the Distress Ink I colored in each petal and then added Stickles (crystal) to the centers.  Set this aside to dry overnight or several hours.
4.  I added some dots randomly using the largest single solid dot stamp from Scenery: Big Bang Confetti.
5.  For some of the sentiments I used word dies from Essentials by Ellen Designer Dies, Zipper Panel by Julie Ebersole cut from white cardstock and for the stamped sentiments I used A Tree for All Seasons.  On the word die cuts I inked them up directly using the Distress Ink pad and let them dry before I adhered them to the floral panels.
6. I added the die cut petals on the panel using foam dimensional adhesive.  Over each petal I colored over it with Zig Wink of Stella Clear Brush Tip Marker.
7. On a white A2 card base on the left-hand side I stamped the stripes from Scenery: Stripes in each color.  I attached the floral panel to the card base with foam dimensional adhesive.

For the tag:

1. I cut out the Essentials by Ellen Designer Dies, Zipper Panel by Julie Ebersole and then carefully tore (at dashed lines) and cut out (at top score line) the center panel surrounded by the dashes and score line.  I cut out the "celebrate" from the center of the tag (I used the positive on the evergreen bough card).
2. Over the negative congrats I stamped the stripes from Scenery: Stripes 3 times in Tim Holtz Distress Ink by Ranger in evergreen bough.
3. I added one of the die cut hydrangea petal using dimensional foam adhesive.
4. I added evergreen bough ink to the edges.
5. I punched a hole at the top middle tag and tied the twine through the hole.

I would love to see what you create for the Essentials by Ellen August Mix It Up Challenge (you must use both Essentials by Ellen and Winnie & Walter products in your project)!

To get more information about how you can play along with the August Mix it Up Challenge and win a $50 gift certificate to Ellen Hutson LLC CLICK HERE!

Happy creating!

Monday, February 1, 2016

w&w Belated 2nd Birthday Bash | Rainbow Challenge with Vanessa

w&w_bb2ndb_challengefinal

Hello sweet Winnie & Walter friends! Vanessa here with a fun challenge! I don't know about you, but I love rainbows and they make me happy everytime I see one. So a bright, colorful card surely puts a smile onto my face, too! My challenge for you is as simple as that:

RAINBOW

Create any kind of rainbow on your projects. Use inks, cardstock, watercolors, stamping, embellishments - whatever makes you happy! I made two samples for you and would love to see your take on my rainbow challenge :)

For the first card, I played with Distress Inks. I had so much fun creating this:


I stamped the gems from the My Precious set with various Distress Inks onto a panel of watercolor paper. Then I used a water tank brush and painted over the gems to pull the color into these rays. After everything was dried, I stamped the sentiment. Now I adhered the panel to a Kraft card base and finished the card off with matching sequins.

For the second card, I used solid stamps to create a rainbow:


Using the large solid circle from Scenery: BIGGER Bang Confetti, I stamped a row onto a piece of white cardstock, using rainbow colored dye inks. Then I trimmed a strip from that row of circles to fit my card. I trimmed a panel of white cardstock, stamped "sending" from The Big, the Bold and Friends and adhered the panel to a black card base. Now I adhered my rainbow strip and added matching sequins. Finally, I die-cut my large word using The Big, the Bold and Friends Cutaways from black cardstock and adhered it to the card.

I hope you'll join me for the challenge! Can't wait to see you take!

Vanessa

>>>GIVEAWAY<<<

Link up your take on this challenge for a chance to win a $75.00 gift card (gift code) to the w&w shop.  One random winner will be chosen.

For more information on how to enter to become our Guest Star for the next release CLICK HERE.  Please remember you need to include GS in the Link Title to be considered for the Guest Star competition.


>>>BONUS GIVEAWAY<<<

One randomly chosen comment on this post will receive the limited edition Scenery: BIGGER Bang Confetti stamp set Vanessa used in her second card.

w&w Belated 2nd Birthday Bash | Two Challenge with Shay
w&w_bb2ndb_challengefinal

Hello fellow party goers!  It's Shay here.  I am so excited to bring you my challenge.  To commemorate our 2nd birthday I am following up on my One Challenge from last year.  This year it is the Two Challenge!
>>>CHALLENGE DETAILS<<<

Make a new project using the number 2 or two, two colors, two patterns, two layers, two embellishments, two photos, two words or two stamp sets (and so on)...really anyway to incorporate two into your project!  You can focus on a single option or combine the options (for instance a two layer card using two colors + two embellishments).

>>>MY PROJECTS<<<

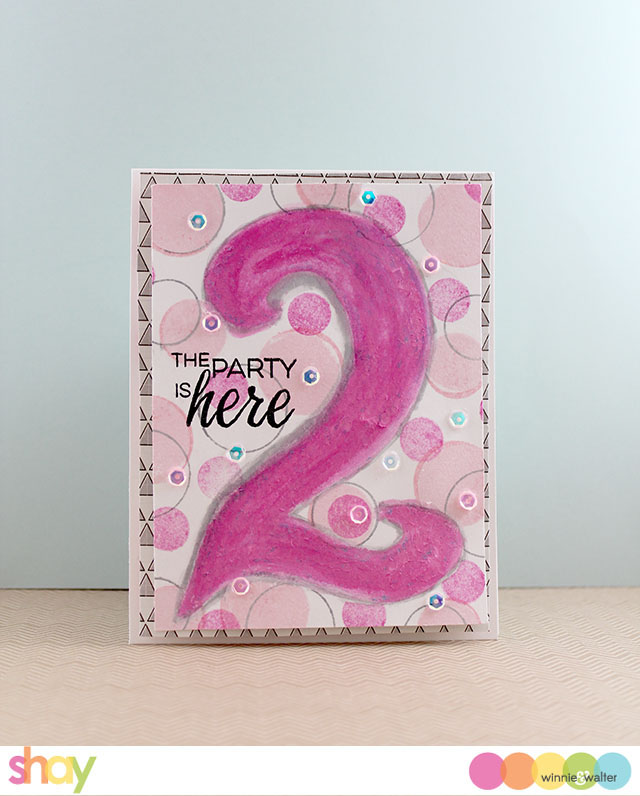
Card No. 1

shay_IMG_3924

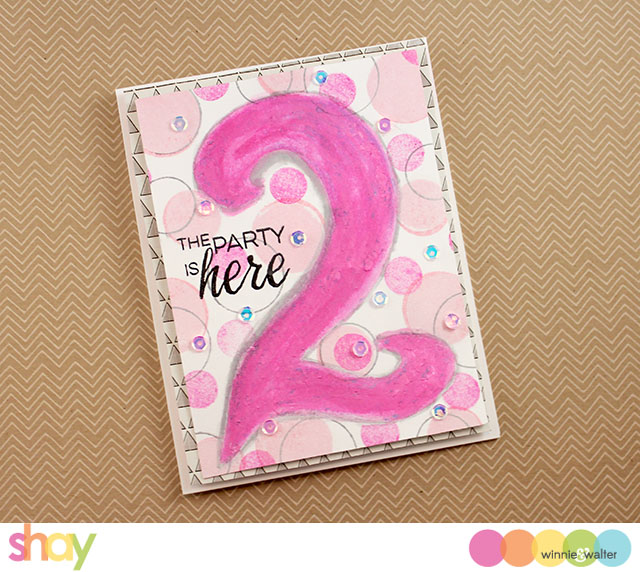
I drew in and then painted in the 2 using Tim Holtz Distress Ink in watered down picked raspberry and outlining it in hickory smoke.  From there I used the circles and the two largest outline circles from Scenery: BIGGER Bang Confetti to create a background using Simon Says Stamp white ink, a pale pink ink and second generation picked raspberry solid circles and the outline in Tim Holtz Distress Ink in hickory smoke.  I stamped the sentiment from The Party in black Versafine ink.  I added sequins in pink and iridescent.  With dimensional foam adhesive I attached the panel to a piece of patterned paper from the Shine collection by Maggie Holmes/Crate Paper. It was all attached to an A2 card base using foam adhesive.

shay_IMG_3927

How 2 is used: that is 2 colors: pink + grey/black (white is a freebie) + 2 colors of  sequins + 2 stamp sets + a huge "2".

Card No. 2 (and 3)

shay_IMG_3919

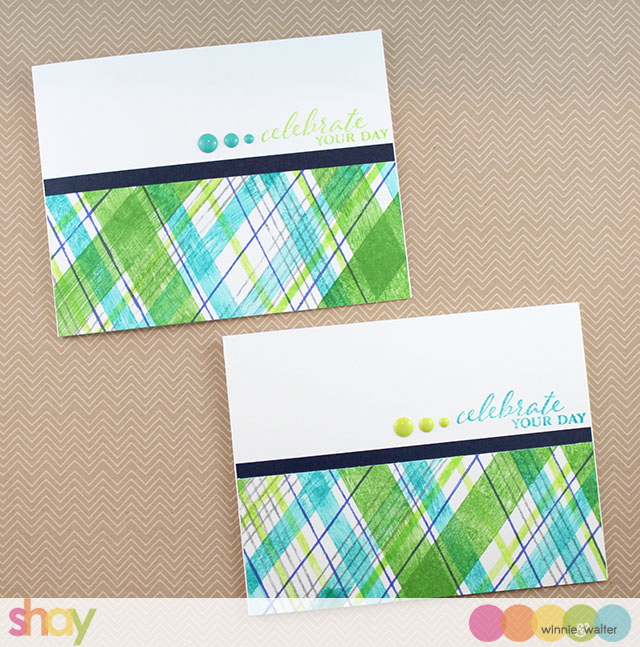
I went a different direction here: 2 cards.

shay_IMG_3929

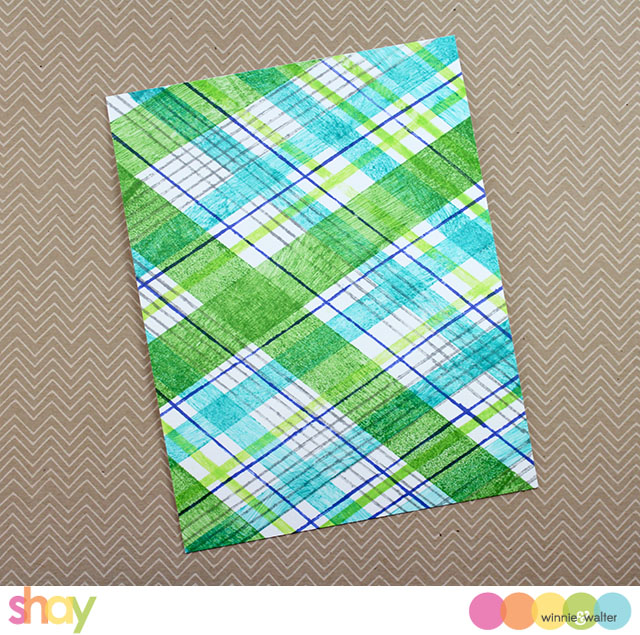
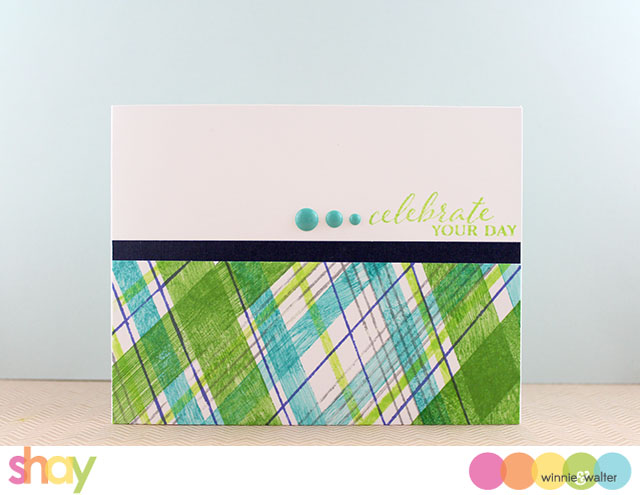
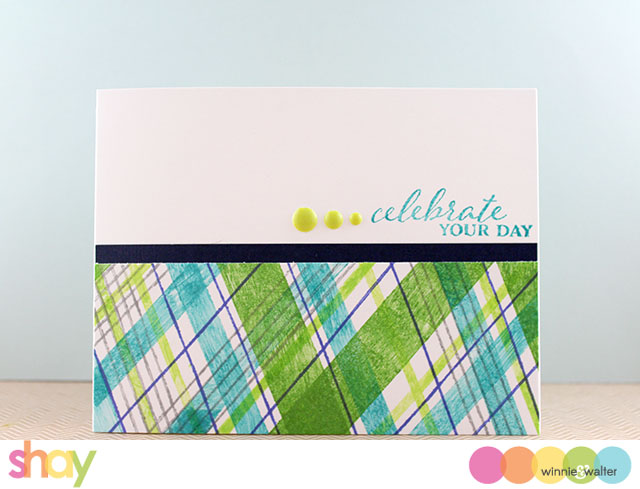
I began with a single panel of 4.25 x 5.5 white cardstock.  I stamped a plaid pattern using Scenery: Stripes and Tim Holtz Distress Ink in peacock feathers, twisted citron, mowed lawn, blueprint sketch and hickory smoke.  Remember to ink up with Versamark first so the Distress Ink sticks to it.

Then I cut the panel in half lengthwise.  From there I was able to create 2 cards.  I added a border of navy cardstock under the plaid before attaching the navy and plaid to the A2 card base and stamped the sentiment from A Tree for All Seasons on 2 white A2 card bases one in twisted citron and one in peacock feathers.  I accented each with enamel dots.

shay_IMG_3922 shay_IMG_3923

How 2 is used: that is 2 cards from a stamped pattern + 2 stamp sets.

>>>GIVEAWAY<<<

Link up your take on this challenge for a chance to win a $75.00 gift card (gift code) to the w&w shop.  One random winner will be chosen.

For more information on how to enter to become our Guest Star for the next release CLICK HERE.  Please remember you need to include GS in the Link Title to be considered for the Guest Star competition.


An InLinkz Link-up

>>>BONUS GIVEAWAY<<<

One randomly chosen comment on this post will receive the limited edition Scenery: BIGGER Bang Confetti stamp set I used in my first card.

Wednesday, November 25, 2015

Black Friday thru Cyber Monday Sale + First Look at the *limited edition* stamp set

First, we want to share how very thankful we are for you!  We are so blessed to be a part of your lives and that you use w&w products to make something handmade and beautiful--what a privilege and honor you bestow upon us each and every day!  Every comment, email, post, project and link shared warms our hearts.   Thank you.

Part of Thanksgiving is giving back.  Yes, Black Friday is a commercial event, but it also about us sharing with you.

Interested in more details about our Black Friday thru Cyber Monday Sale (CST)?  Here you go:

w&w_2015_blackfri_square

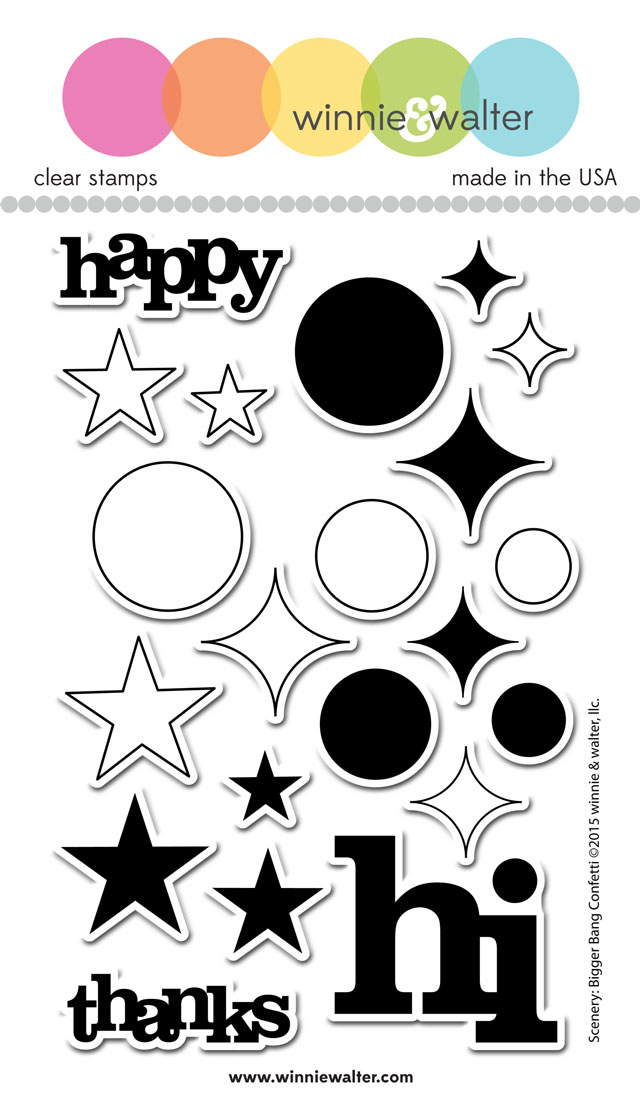
But there is more!  We have some projects to inspire you using the *limited edition* Scenery: BIGGER Bang Confetti stamp set that is free with purchase (while supplies last) when you spend $35 after discounts are applied and prior to any shipping & handing and taxes being applied.

w&w_SCN-BiggerBangConfetti_4x6_web

You need not do anything we will simply add it to your order if you qualify.

Time to get to...

>>>THE GOOD STUFF<<<

Julie

It is nearly Thanksgiving and I keep thinking, “where has the time gone?” This year is flying by. If you are like me, you are probably preparing for the big day and traveling to meet loved ones. I just want to take a moment and wish you all a very Happy Thanksgiving. There is so much to be thankful for and I know we are very thankful for you all. Your warm comments and messages bring us much happiness and we are grateful for your continued support.

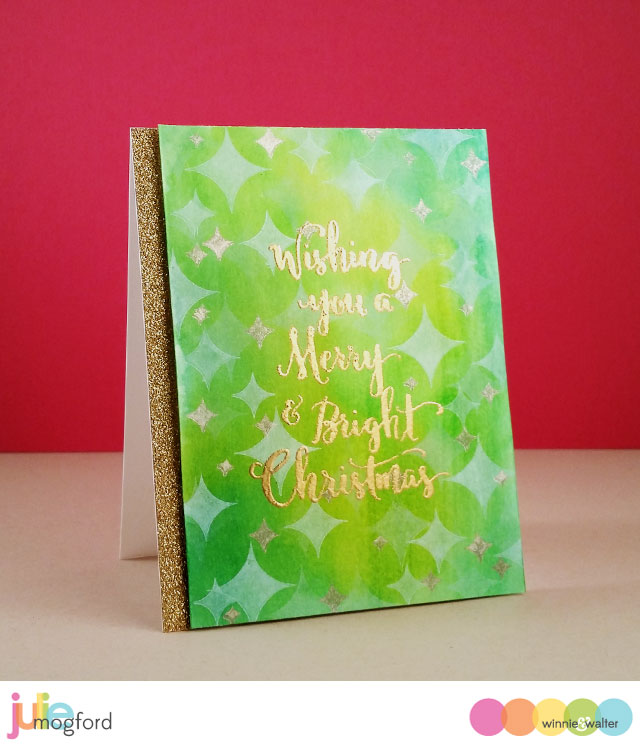
I have to admit that when I worked on this card, I finally was feeling in the mood to start my holiday cards. I think the recent cold snap helped with that too! LOL I’ve been really drawn to the bokeh trend we have seen over the last year or more, and I had not really tried making a card with that effect. When I saw the new Scenery: Bigger Bang Confetti set in my hands, I knew I wanted to try the effect, but not with the circles. I have been a huge fan of the diamond shaped star (I fondly call it “retro star”) since we released it with Scenery: Big Bang Confetti, so I knew it had the be the feature. It also reminded me of photos I’ve seen where the bokeh shapes have been manipulated into hearts or little Mickey Mouse ears. Here is my take - Retro Star Bokeh Christmas

jmog_RetroStarBokehChristmas

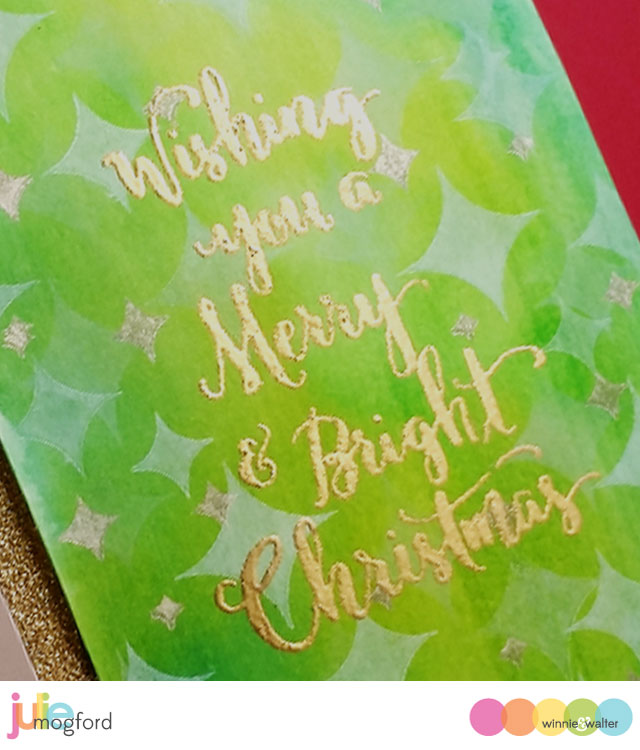
I started with some bristol that I painted shades of green inks onto the background and then another layer of an iridescent mist painted to give it a slight shimmer. It is very subtle. First, I started with the largest stars and randomly stamped them around the perimeter, trying to leave the center open for my sentiment. The faintest stars were stamped in Color Box Chalk Ink in Alabaster. For the brighter white stars, I used Palette Hybrid mini pad in Fresh Snow both in first and second generation stamping with all three sizes of stars from the BIGGER Bang set.

jmog_RetroStarBokehChristmas2

I wanted a bit more, so I also used the original Scenery: Big Bang Confetti solid retro stars stamped in Encore Ultimate Metallic Champagne Ink. These stars now pop to the front a bit more. The Merry & Bright with Evelin T Designs sentiment “Wishing you a Merry & Bright Christmas” fit perfectly as a gold embossed centerpiece to this card. I trimmed the card to 4” x 5.5” and added gold glitter tape to the left side of a top folding A2 card, and then mounted the finished panel with a sheet of foam for a little dimension.

I hope you are inspired by the projects today, and also enjoy the discounts for this weekend. You are going to love the ideas you see below. Take care, stay warm, and save me a piece of pie!!! :)

Shay

Hello friends!  Don't you love Julie's card?  So beautiful!

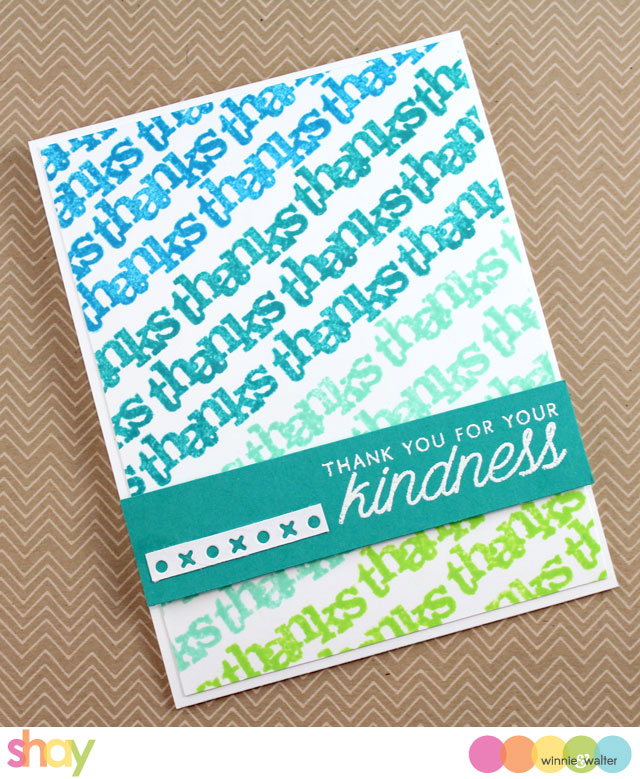
When I was thinking on making some projects with Scenery: BIGGER Bang Confetti what came to mind was the Share Handmade Kindness Challenge (#sharehandmadekindness) by Jennifer McGuire as I hadn't had a chance to make anything yet and why not use the "thanks" in the set to do something with the Acts of Kindness stamp set by Hero Arts?

One of the things I love about the Scenery: BIGGER Bang Confetti stamp set is Julie and I wanted this to be an incredibly versatile stamp set that would be something you could reach for time and again for any occasion and works with all the products you have in your crafting arsenal.

shay_IMG_3885

I stamped the thanks in Tim Holtz Distress Ink (before doing so I inked up the stamp with Versamark ink so the Distress Ink sticks to the stamp).  I cut the panel to slightly less than A2 size.  On a piece of teal cardstock I stamped the sentiment in Versamark and embossed it in white.  Out of a thin strip of white cardstock I die cut the xoxo border from Essentials: Audrey Cutaways and attached it to the teal cardstock.  I attached the thanks panel to an A2 white card base.  Last I attached the teal strip to the card using foam adhesive.

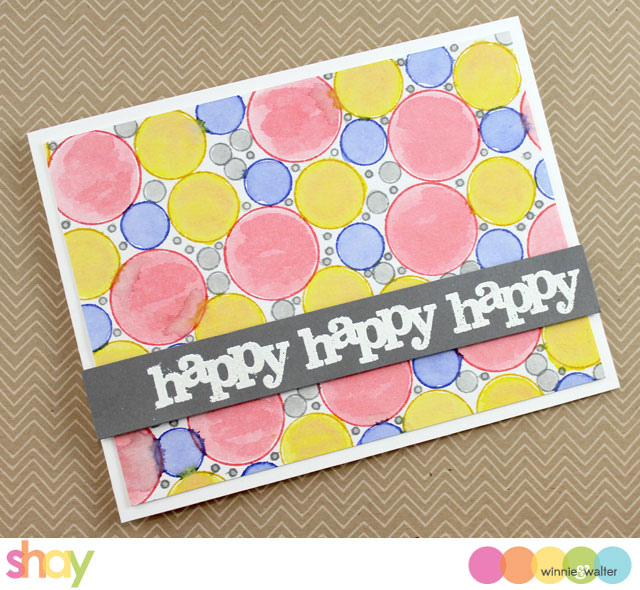
For my second card I took the same basic premise of the first card and used the outline circles from Scenery: BIGGER Bang Confetti stamp set to create the background.

shay_IMG_3887

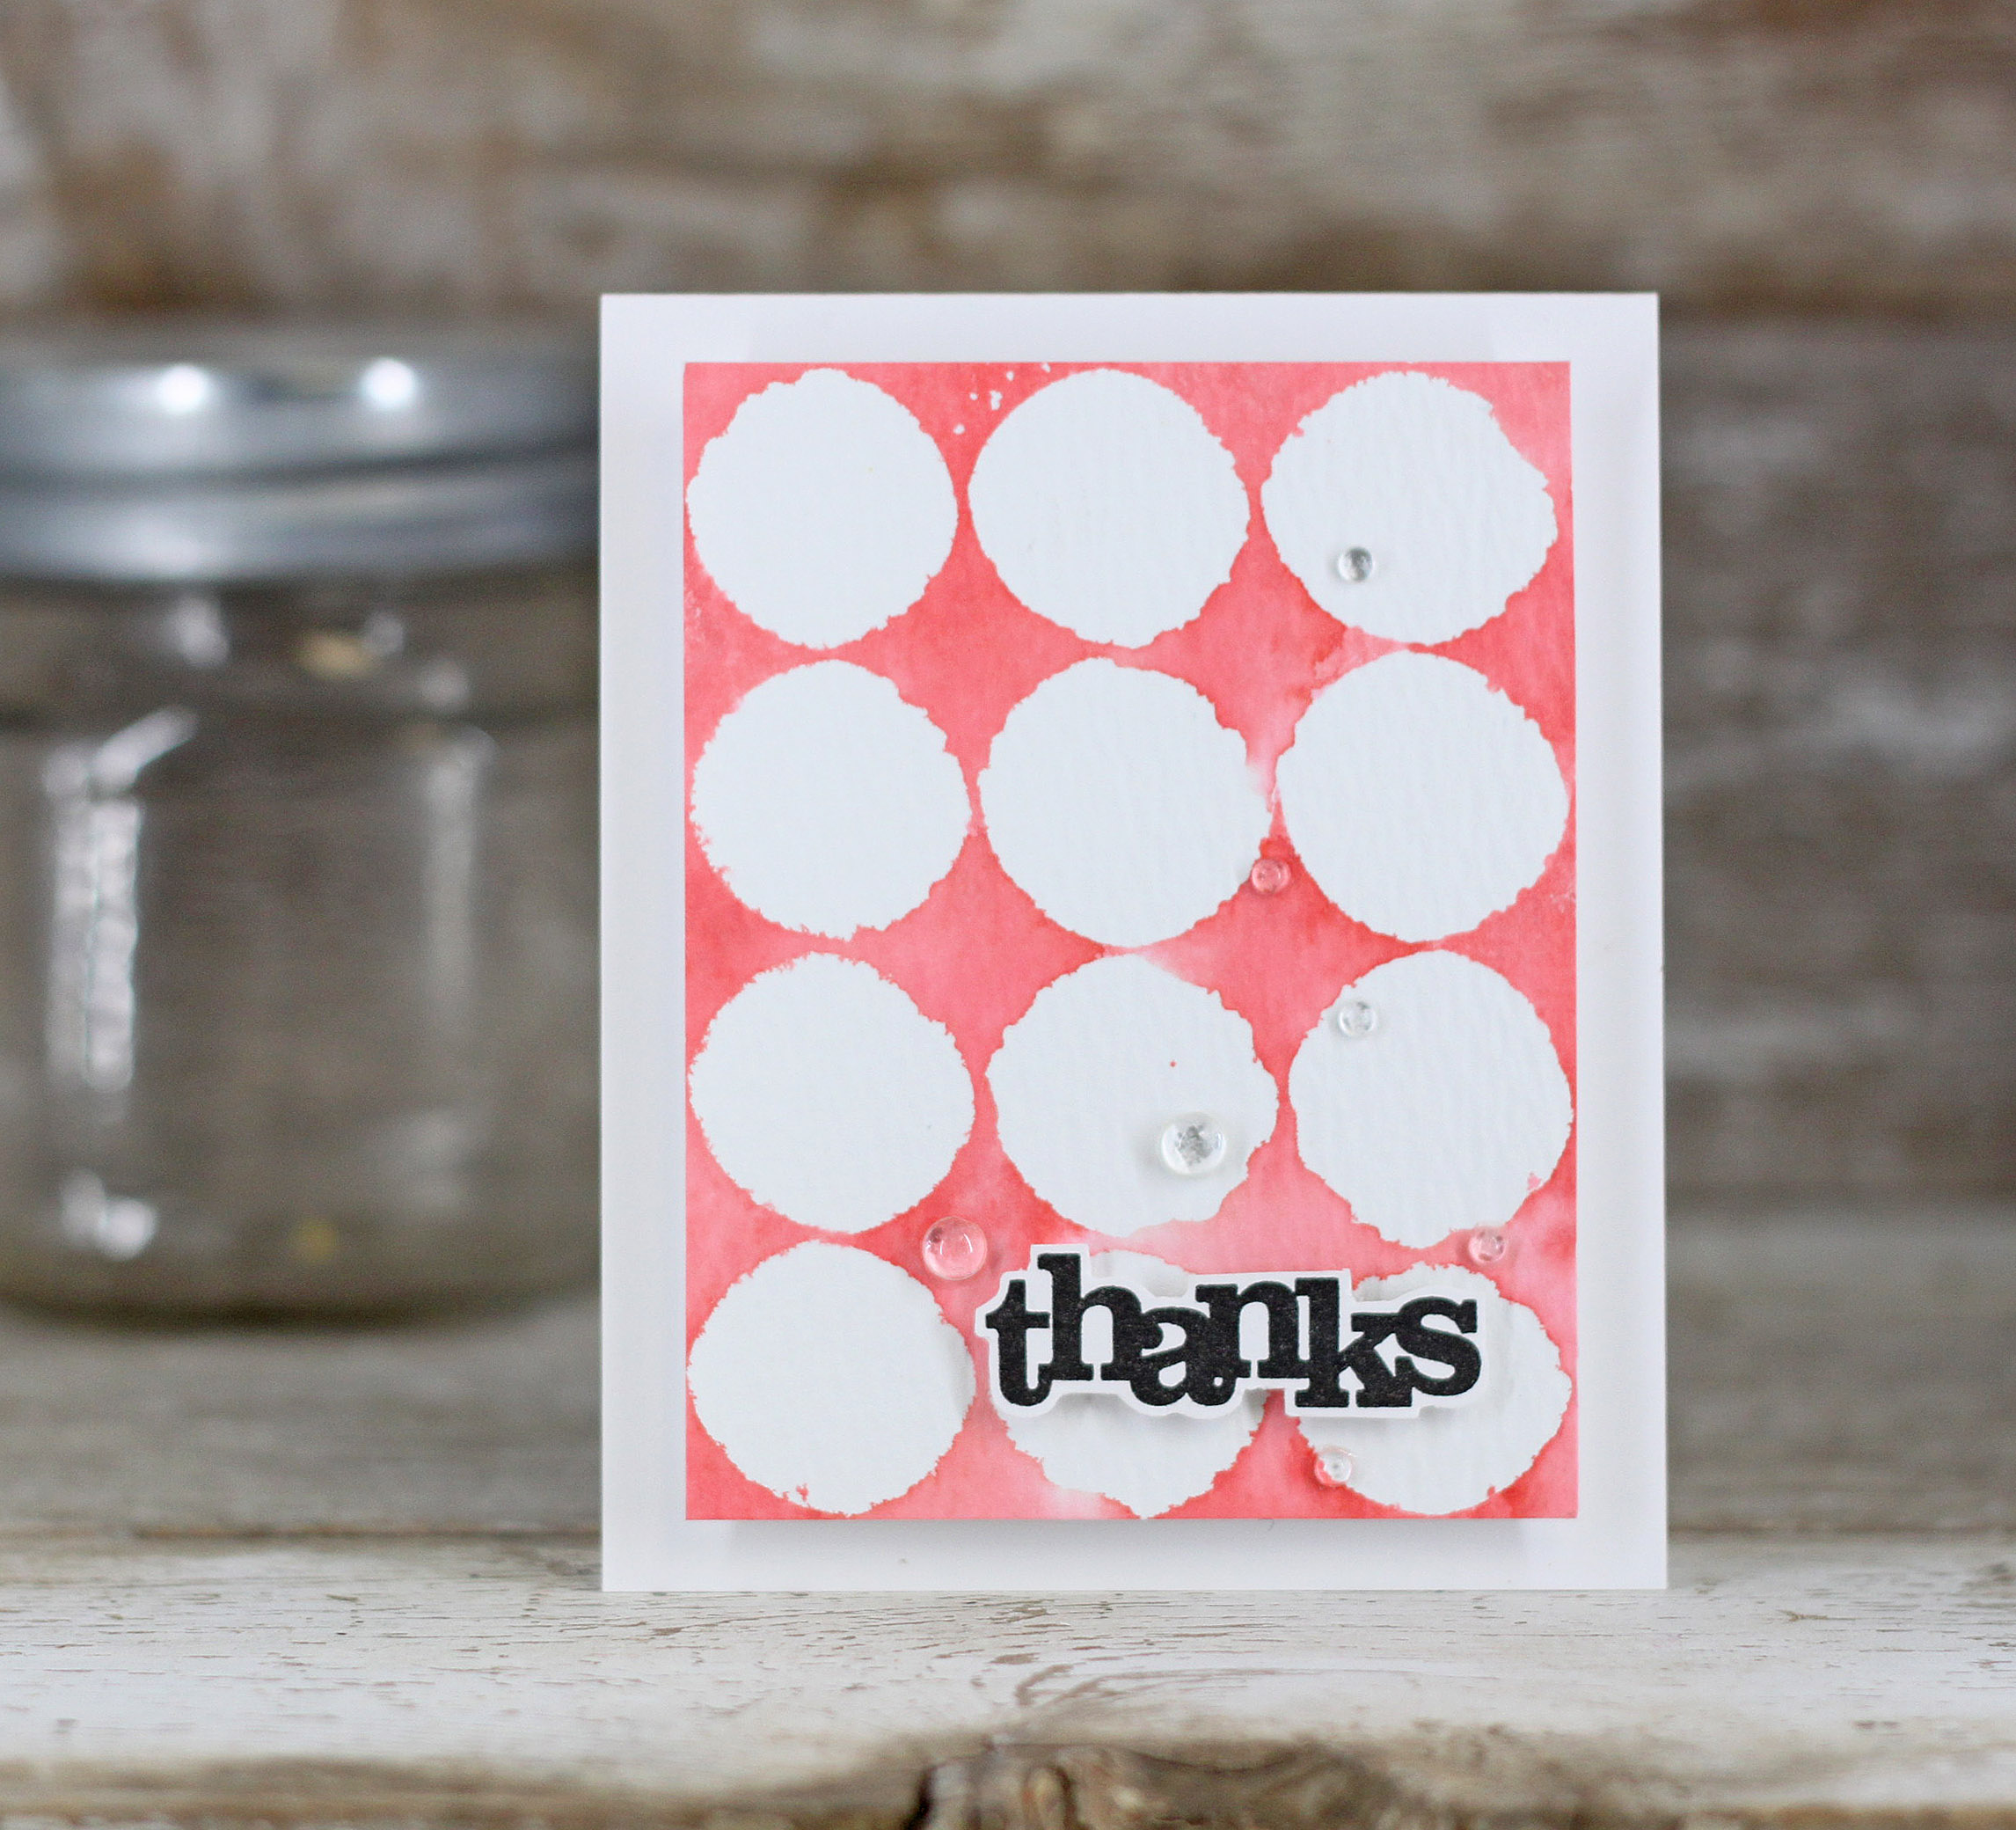
Using Tim Holtz Distress Ink again on a panel of watercolor cut to 4 inches x 5.25 inches I stamped the outline circles and then used a water brush to paint in each circle.  The smaller grey circles are from the Scenery: Big Bang Confetti stamp set.  I attached the panel to a A2 white card base.  On a strip of grey cardstock I stamped the "happy" 3 times in Versamark and embossed it in white.  I attached the strip to the card using foam adhesive.  I plan on sending this card to my uncle for his upcoming birthday...these shapes are great for making masculine cards too.

Now it's time for some dazzling inspiration from the Talent and our talented friends.

>>>THE TALENT<<<

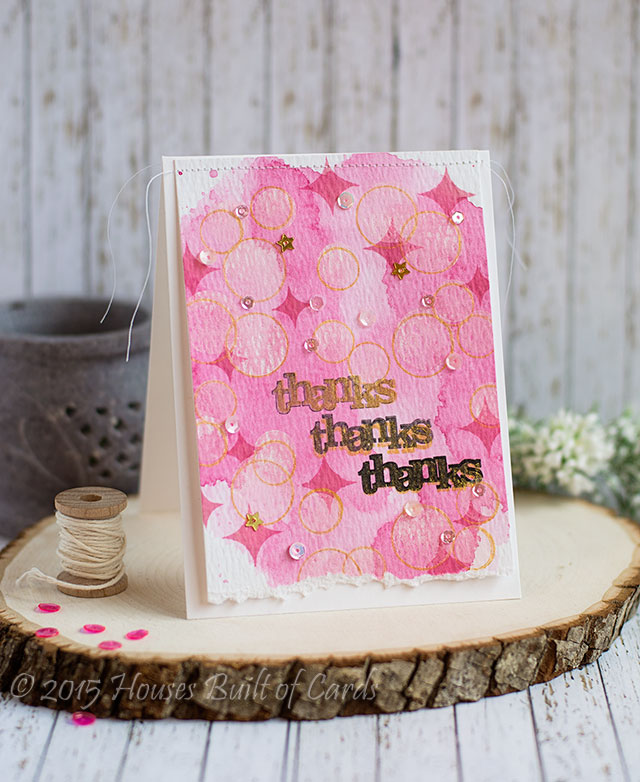
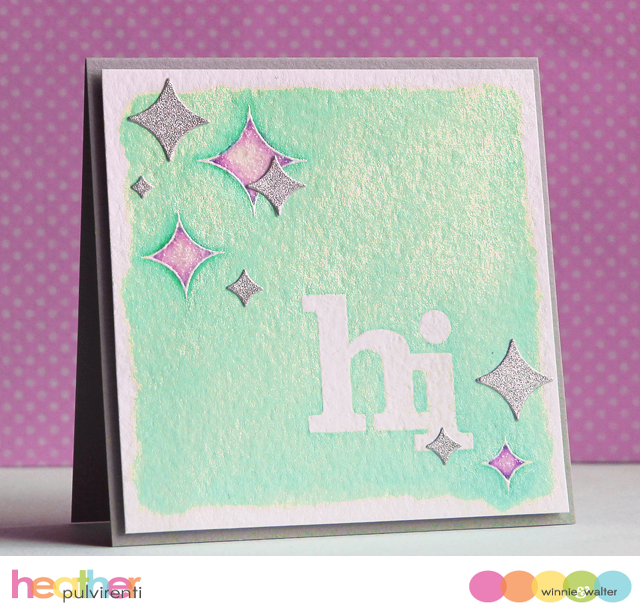
heather_112515 
CLICK HERE to see more from Heather P.

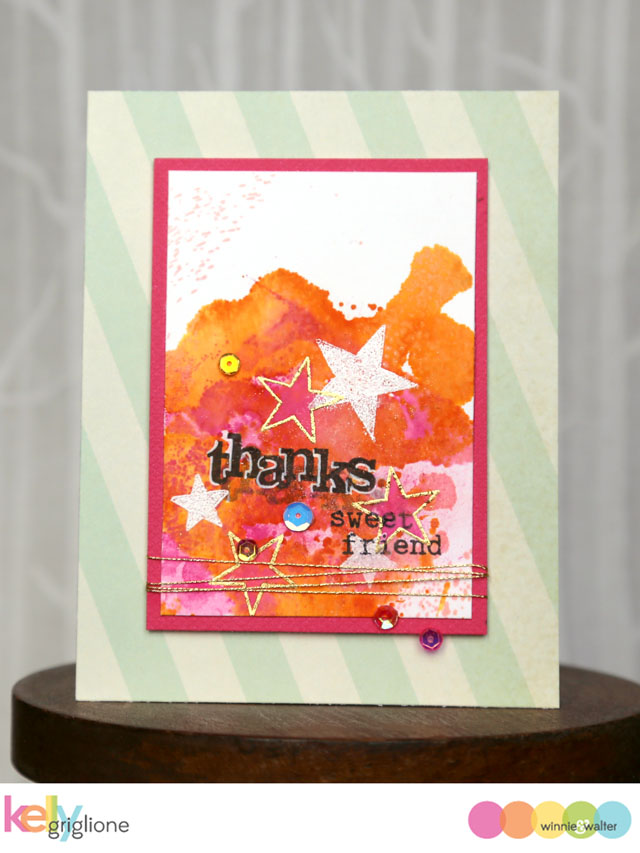
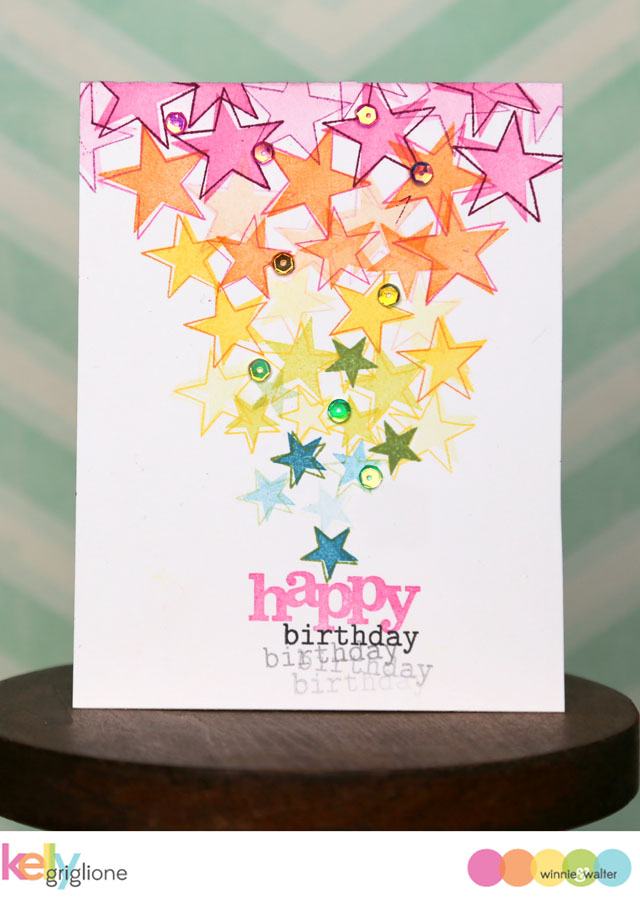
kelly_W&W Bigger Bang Confetti Handmade Thank You Card kelly_Winnie and Walter Bigger Bang Confetti Birthday Card 
CLICK HERE to see more from Kelly.

suzanne_DSC0109 
CLICK HERE to see more from Suzanne Dahlberg.

laurie_IMG_2413
CLICK HERE to see more from Laurie Willison.

heatherhoffman_Cards-11-14-15-124 
CLICK HERE to see more from Heather Hoffman.

If you haven't already, be sure to sign up for our newsletter which should be going out sometime this evening.  Here is where you can sign up for our newsletter:

On the w&w blog it is to the right under the links for our Talent. Just enter your email address right above the grey "subscribe" button. You can also sign up on our website (near the bottom of the front page under mailing list...look for the green "subscribe" button and on Facebook (look for the black envelope newsletter icon).

We wish you a delightful weekend full of all you most cherish.

Much love,
Walter, Julie, Winnie and Shay