Saturday, August 29, 2015

August Leading Lady Melania Deasy | Take Five

Sadly it is our last Saturday with our outstanding August Leading Lady, Melania Deasy.  We've felt so blessed to spend the last five weeks with the incomparable Ms. Deasy.  We wish to express our heartfelt gratitude to you, Melania, for the brilliance, beauty and mastery of each of your performances.  It has been a delight and honor to have you as our leading lady.  

If you missed her smashing debut you must see it...CLICK HERE or her second performance which showcases her golden touch CLICK HERE or her triumphant third performance where she shakes it up CLICK HERE or to be stunned by her coloring skills CLICK HERE.


Lucky for us all we have her final command performance today.  

Hi all!! Today I want to share with you my cards for Winnie & Walter August Leading Lady Take 5!
This is my last post as August Leading Lady. I'm so grateful that Winnie & Walter picked me and I have so much fun playing with their products. Thank you so much!!
And the theme today is all about DIY Background. You can make it with many different techique. This time I'm playing with stamps and dies.

So here is my first card :


Winnie & Walter Supply that I'm using:
The Big, the Bold and Extras for the images and "smile girl" sentiment
In a Word : Hugs Cutaway for the background and hugs die cut


To make the background, first I'm using Dye Ink and blending tool and then die cut the Hugs cutaway with Spellbinders Enlarged Embossing Pads.
 
I stamp the flowers and leaves with black ink and die cut it. I die cut hugs sentiment on black card stock and a white foam, then glue it together. The "smile girl" sentiment is from white embossing powder on pink card stock.

 And here is my second card :


Winnie & Walter Supply that I'm using:
My Precious for the background and sentiment

I stamp the diamond with grey ink and coloring with copic, then I add a vellum. The sentiment is from white embossing powder. I add twine and sequins for the finishing touch.

And here is my last card :


Winnie & Walter Supply that I'm using:
The Party for the sentiment

First I'm using masking technique and stamp the flowers and leaves using Dye Ink and add some gradation using Dye Ink and blending tool. The sentiment is from gold embossing powder and I tied the tag using green twine.

And here is the fun part!

Julie & Shay have generously given me a $30 gift card to the Winnie & Walter store for giveaway! For your chance to win please leave a comment on the Leading Lady posts on my personal blog. I will draw a random winner at the end of the month.   

I read all your comments on my previous post and your supports means a lot to me. Thank you so much all! I hope you inspire with my cards for August Leading Lady :)


Hugs,
Melania Deasy


w&w-supplies

Friday, August 28, 2015

Friendship | Dear Fabulous Friend with Gayatri

Hey there everyone, Gayatri here today with a card share for the friendship theme this month.

Here is my card.

gayatri_dear fabulous friend card1

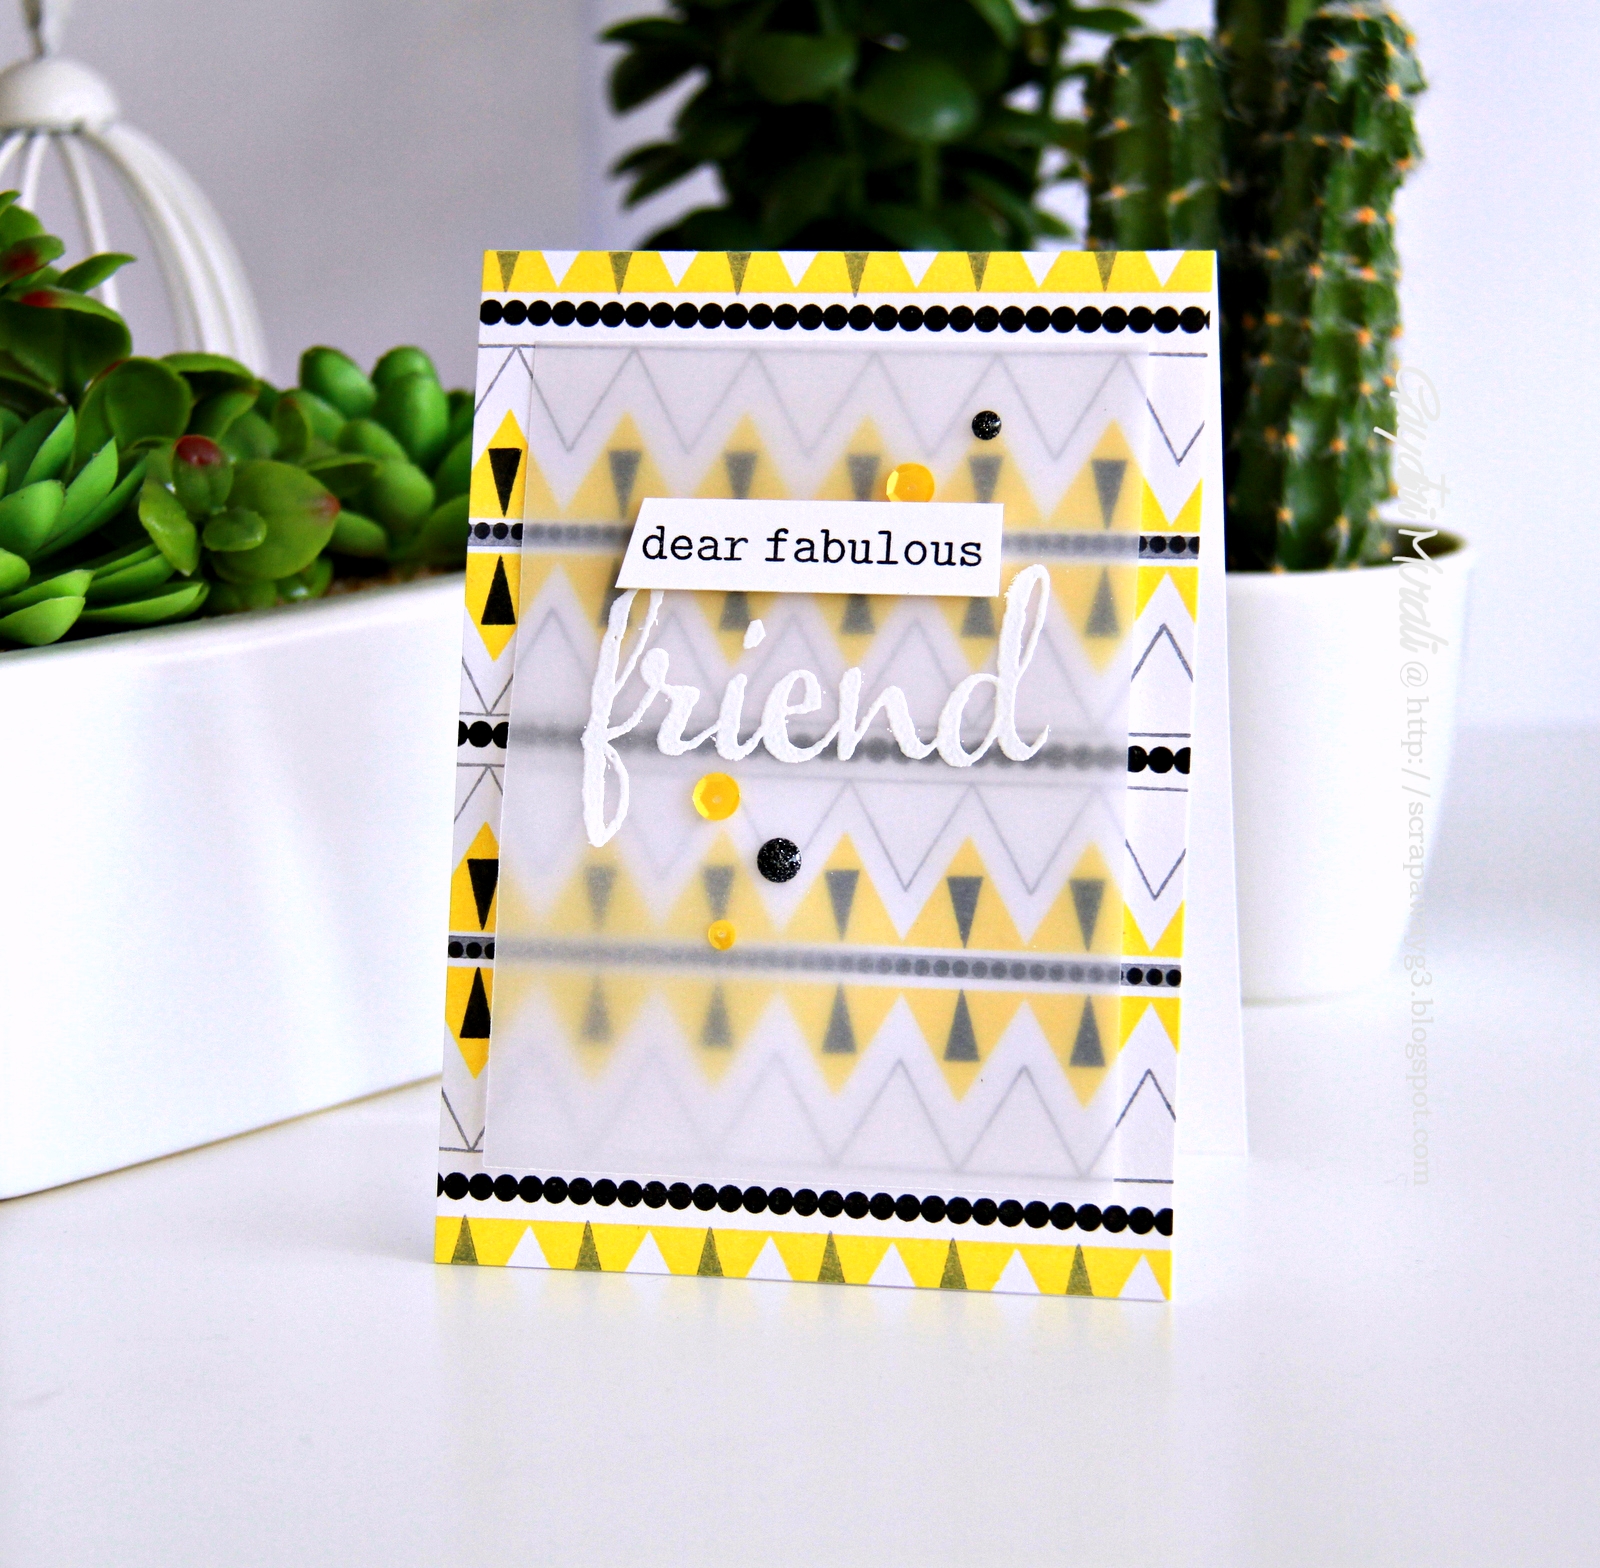
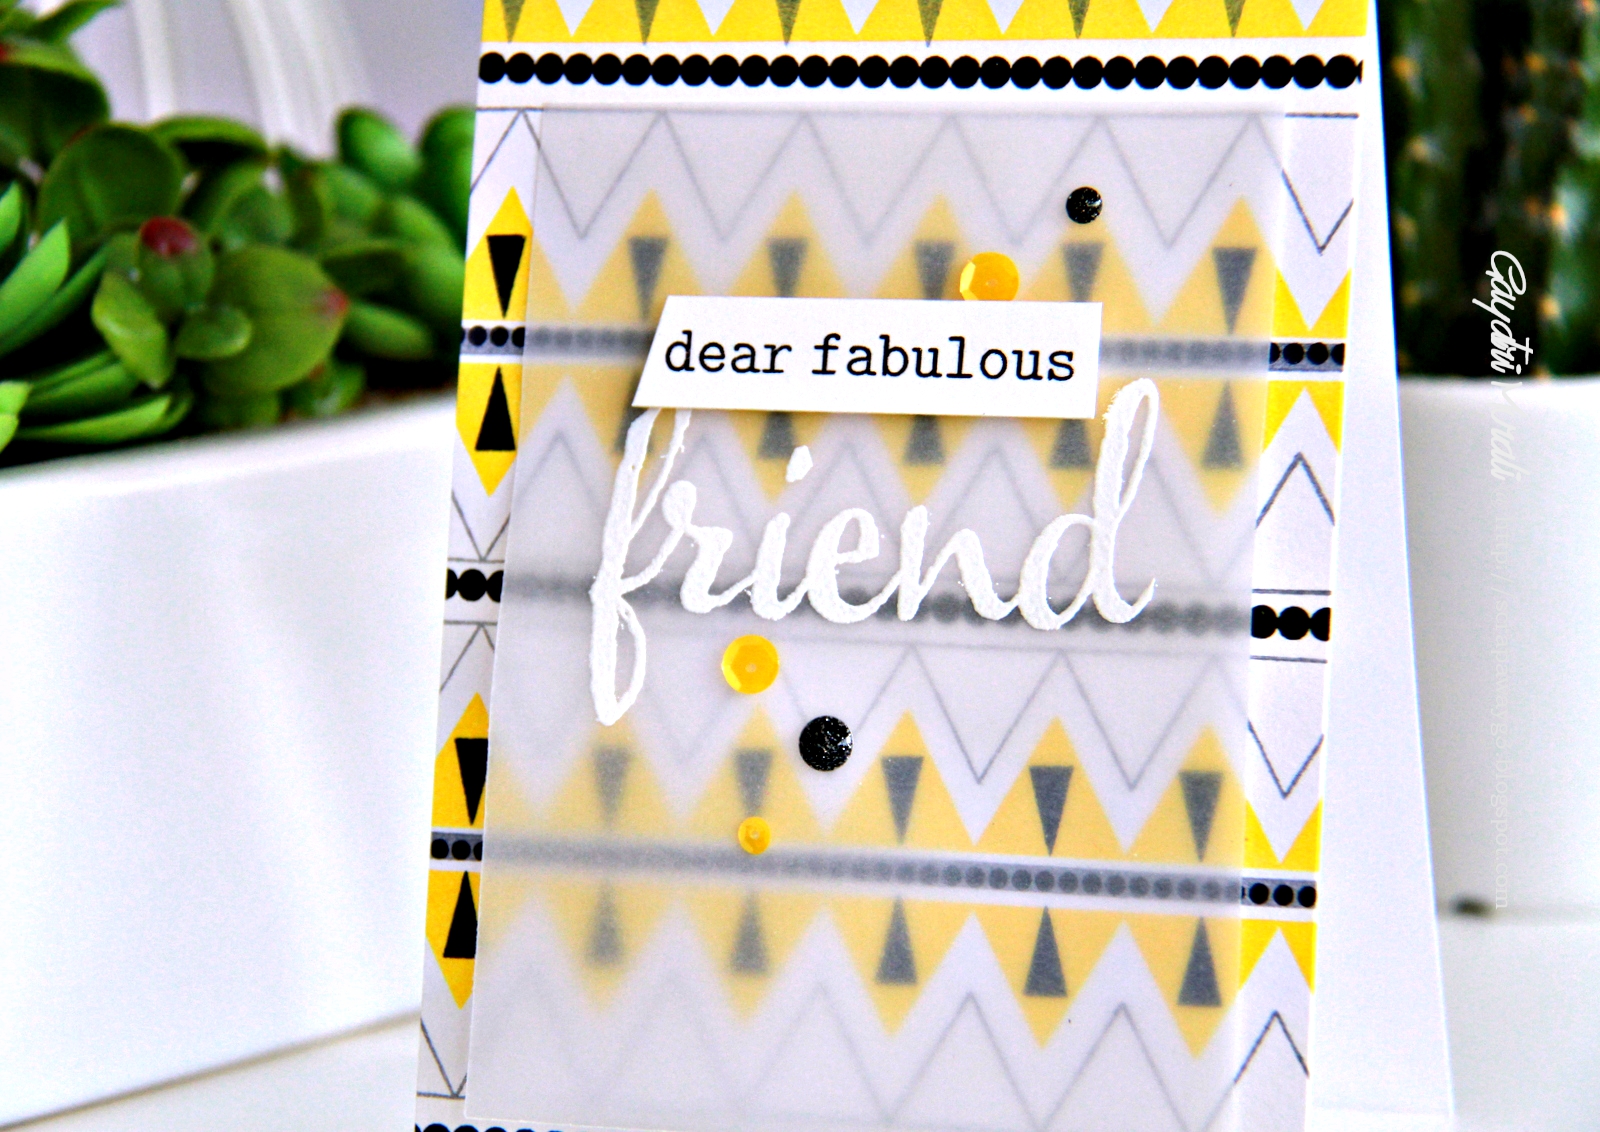
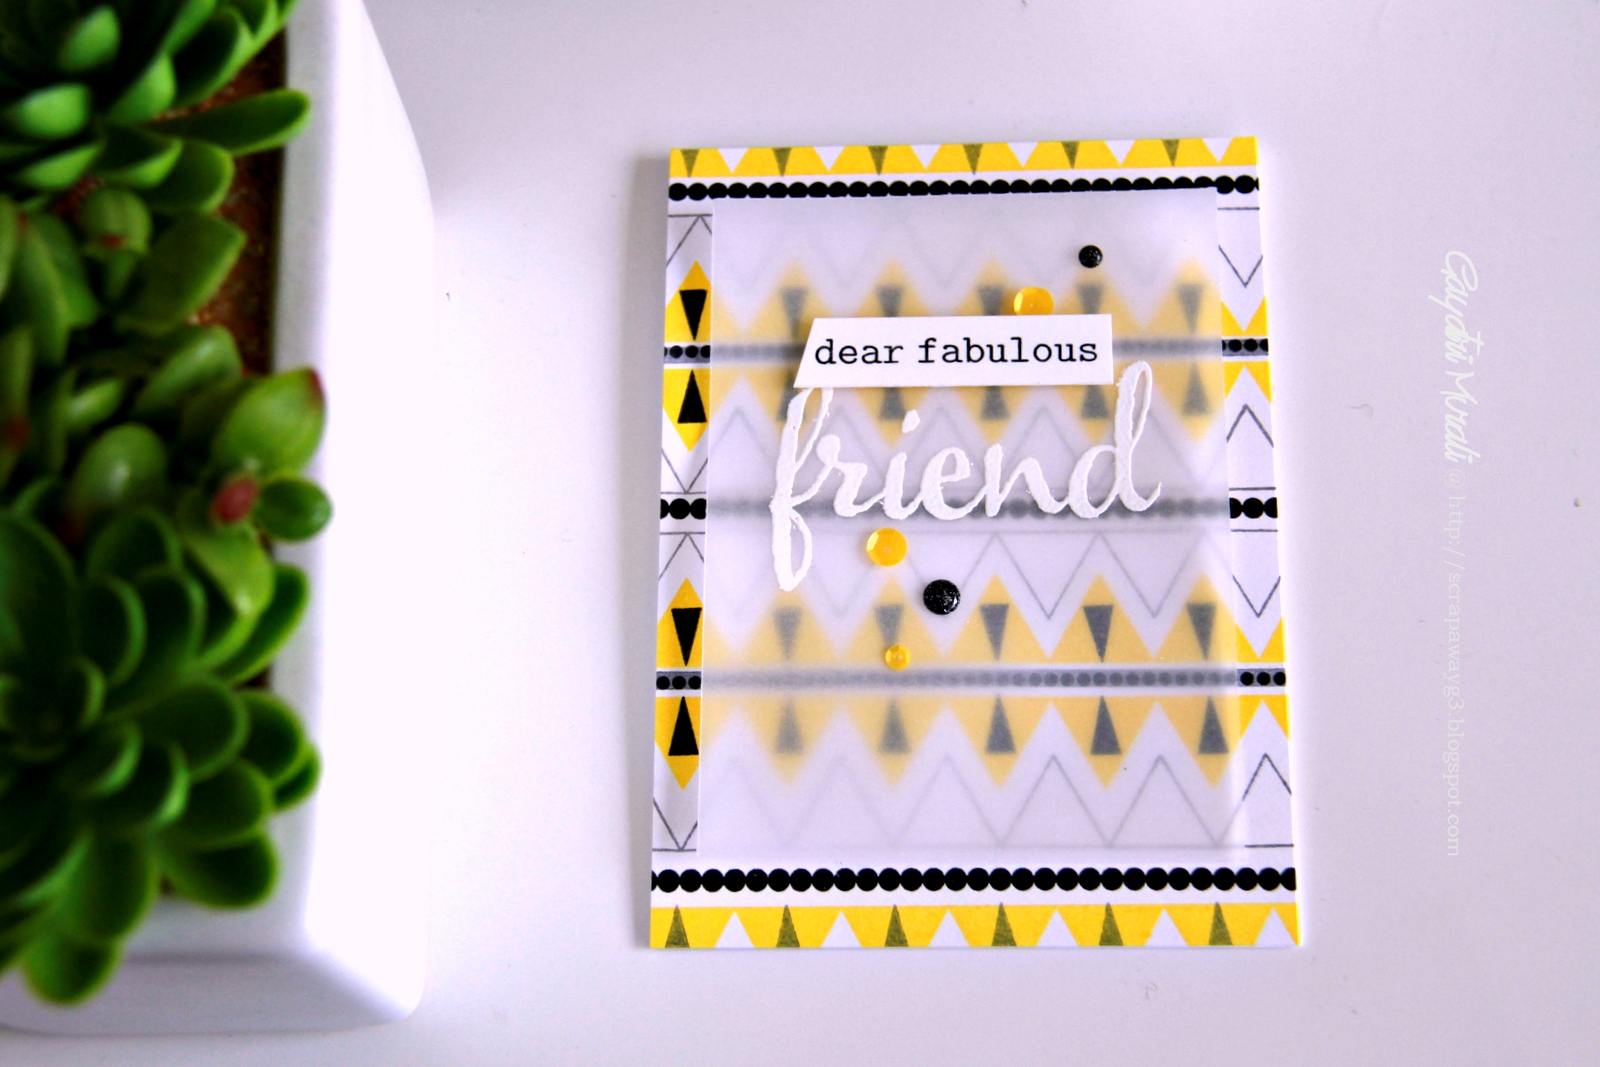
I love stamping and thereby making my own background. This makes your card unique and I find it so much fun. To make this card, I pulled out all the geometric stamps sets - Scenery: Rectangled and Triangled, Scenery: It’s a Wonderful Pennant and Scenery: Stripes. I stamped a geometric pattern on the background using both solid and outline triangle border stamp with the circles border stamp in between and finally adding tiny triangle inside the larger triangles. I used a combination of black, yellow and grey inks. I stamped the pattern to cover the entire card front. I loved the background. Looks more like a tribal pattern.

gayatri_Dear fabulous friend closeup

But I wanted the tone down the pattern as the black was too out there and the entire pattern was busy. I added a piece of vellum upon which I white heat embossed the sentiment Friend from The Big, the Bold and Friend stamp set. I stamped the smaller sentiment on a strip of white cardstock, trimmed an angled edge and adhered using foam adhesives. I used more foam adhesives below this strip on the vellum panel to adhere the vellum on the card front. Finally embellished using Lemon Drops sequins from Pretty Pink Posh and sparkle black enamel dots from Doodlebug.

gayatri_Dear fabulous friend flat

Hope you like my friendship themed card with custom background stamping.

Thanks for stopping by today!


w&wDT_gayatrimurali_blog-sig


w&w-supplies

Wednesday, August 26, 2015

Friendship | I Will Always Be There for You with Lydia Evans

Hi there this is Lydia and I'm here sharing with you my second post as Talent In Residence. Today I'm going to be focusing on how smaller dies can create a big impact on a card if they are used in multiples. I have chosen to use one of the small butterflies from Essentials: Audrey Cutaways.

DSC05974
 
So to start I took a piece of watercolour card, and moistened it with clear water. Once the piece was all wet I dropped in watercolour randomly until the piece was mostly covered. I left some spaces on the card as I like the effect when the butterflies are cut and they have lots of difference in shade and colour on them. Once the piece was dry I took the small butterfly die from Essentials: Audrey Cutaways and cut it as many times I could from the painted piece.

DSC05975

The card layer and tag shape are also from Essentials: Audrey Cutaways, I must say that this is a must have die set as there are so many things that you can do with it. I cut the largest of the scalloped card layers from a piece of woodgrain card and the tag from some smooth white cardstock. Once I cut the tag I added the sentiment from A Tree For All Seasons, I just love the sentiments and fonts on this set- although this is an autumn set the sentiments can be used all year round. I added the tag in place on the card layer with some foam tape.

DSC05976

Once the tag was in place I took the die-cut butterflies and played around with them flowing up the card before sticking them down. To finish I added some clear sequins and some liquid pearls. I really hope you liked my card today and have a go yourself of using small dies to create a big impact.

See you again soon, Lydia.

w&wDT_lydiaevans_blog-sig


w&w-supplies

Tuesday, August 25, 2015

Spotlight On...Michele Ferguson! Part Deux

spotlight-michele-ferguson

We are thrilled to have Michele Ferguson back with us for another incredible post that will inspire you to make beautiful projects for your friends!  If you missed learning more about Michele and seeing her first post that will stun you with their loveliness CLICK HERE.


Now, it's Michele's time to sparkle and shine...      

Hello again!  I'm back this week for a few more of my favorite ways to use Winnie & Walter products ... so many ways, one day just wouldn't do! 

I seem to design "in the round"!  Does that make sense to any of you?  In other words, when an idea strikes, I set about putting it to paper ... sometimes, while creating the first, another design will come about - like with the positive and negative idea from last week. 

This week [besides those carrots] I've latched onto a few favorite colors, or color combos, and just let my Winnie & Walter products shine - with a bit of my own favorite touches thrown in - like texture*, and humor ... does anyone appreciate my sense of humor?  =|

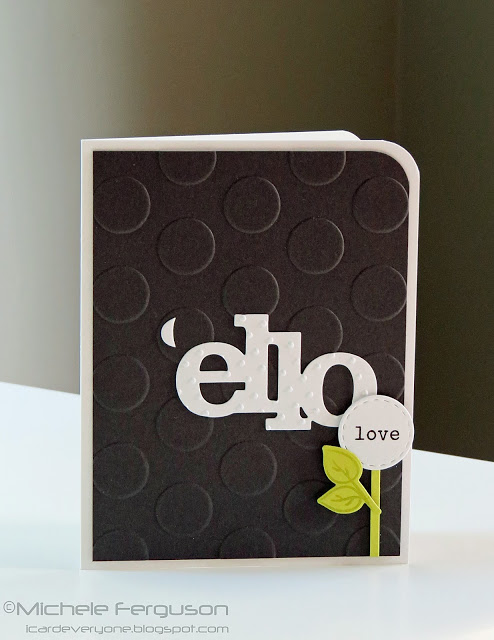
Enter exhibit #1: Yes, black IS one of my favorite colors!

michele_2image001
Hello Cutaway - adapted by simply turning

the die around, and partial die-cutting!

Pretty little leaves from Maggie's Roses... and a snippet for

the perfect placement of the perfect word - found
in the "Big, Bold and Happy" set.

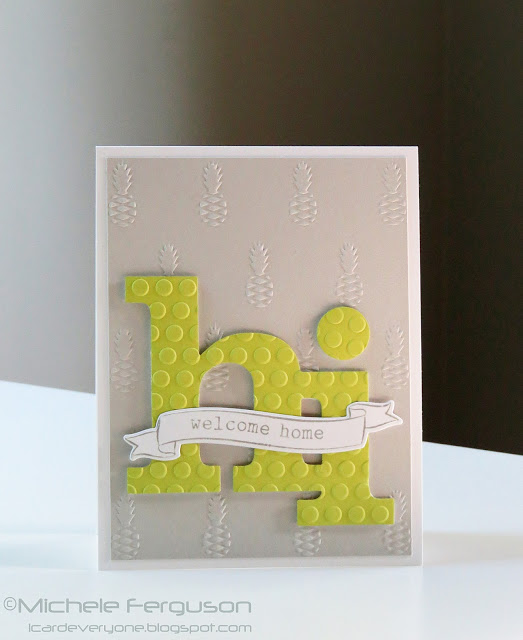
Card #2:  Putting the accent on the happy green with another way to say hello:

michele_2image002

Hi Cutaway - this time the positive cut, and perfect
words from The Big, the Bold and Seasons - welcome;
and The Big, the Bold and Extras - home, and the beautiful banner.

You had to know I planned ahead while cutting that hi - right?

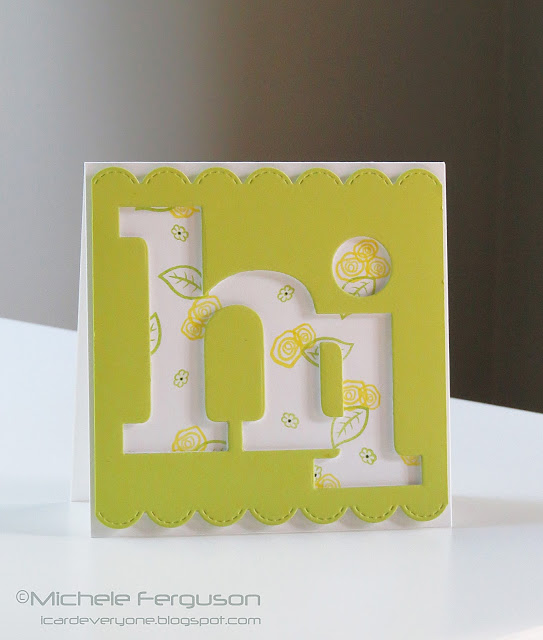
Enter card #3:

michele_2image003

In Bloom: Lola's Bouquet has a very, very special place in my heart.
Darling yellow roses - My Mom's favorite, and mine -
strategically placed, they do indeed 'dot the i.'

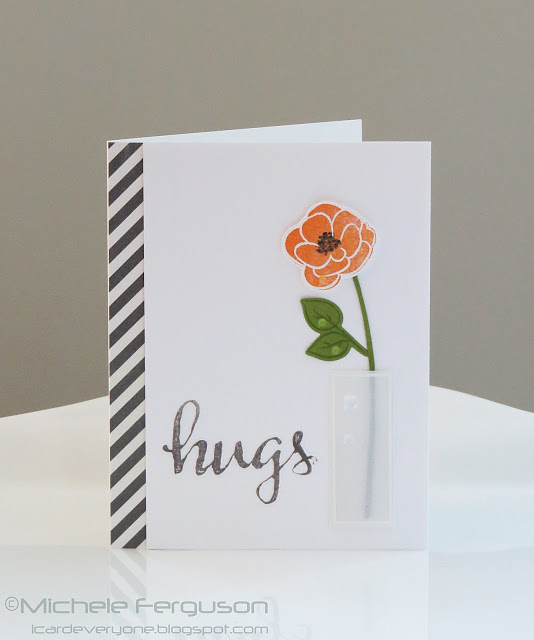
My final card is my way to say 'thank you' to Winnie & Walter for inviting me to share my creations using their fabulous products.   Also for their generous hearts, and continued support of all of us, and our love of paper-crafting.  I am pretty new to this blogging world, so I can't help but feel ever so special to be among those of you Winnie and Walter have shone their ever-lovin' spot-light on!

For you, Shay & Julie:

michele_2image004

Another one of Lola's Blooms - this time in orange - another favorite color, and a remake of this card - I couldn't wait to make that cool square vase!
Hugs provided by The Big, the Bold and Friends Cutaways and Stamps.
LOve that brilliant hand-written font!

Thanks for hanging out with me today, and thanks always for all the love and sweet comments from you, my card-loving, card-making, fabulous friends!

=]  Michele


*Embossing folders, patterned paper, and embellishments are from my stash and not W&W products.

Monday, August 24, 2015

Friendship | Hello Friend with Vanessa

Hello everyone! It's Vanessa here and I am happy to share with you a cute card for the August Monthly Theme: Friendship today. 

I wanted to combine a lot of different, yummy Winnie & Walter products on my card and used stamps, cutaways and creative screenings.


This penguin is so cute and I thought he would look great on a non-winter card as well. So, I started my card with a panel of white cardstock and temporarily adhered the Scenery: Classic Diagonal Creative Screenings over it. Then I inked the stripes softly with light blue Distress Ink. After I had removed the mask, I added drops of the same ink to the background. Now I stamped the penguin onto another piece of cardstock, colored it with Copics and cut it out. I lay it onto my panel to see where to stamp my string for the balloon and stamped it. Then I adhered the panel to the card and adhered the penguin. Now I colored a piece of white cardstock with Copics to create a gradient effect and die-cut the word from In a Word: Friend Cutaway. I adhered it to the card with foam tape. Next, I stamped the balloon from The Party and colored it with Copics. I cut it out and adhered it to the card with more foam tape. Finally, I stamped and heat-embossed the hello from The Big, the Bold and the Happy onto a strip of black cardstock and adhered it to the penguin. 

Here comes a closer look at the card:


I hope to have inspired you today! Thank you so much for stopping by!


w&w-supplies


Saturday, August 22, 2015

August Leading Lady Melania Deasy | Take Four

Our August Leading Lady, Melania Deasy is back for her fabulous fourth performance!  If you missed her smashing debut you must see it...CLICK HERE or her second performance which showcases her golden touch CLICK HERE or her triumphant third performance where she shakes it up CLICK HERE.  You are in for a distinct delight today as Ms. Deasy will stun you with her awe-inspiring coloring skills.

And now we present Melania Deasy!

Hi all!! Today I'm so excited to share with you my card for Winnie & Walter August Leading Lady Take 4!
I have so much fun playing with Winnie & Walter. Their products are so unique, versatile and modern.
And the theme today is all about no outline coloring. The results will look different and I want to try it with Winnie & Walter flowers from In Bloom : Addie's Garden

So here is my first card :


Winnie & Walter Supply that I'm using:
In Bloom : Addie's Garden for the flowers
In a Word : Friend Cutaway for the sentiment Friend
The Big, the Bold and Friends for the sentiment Beautiful
Essentials : Audrey Cutaways to die cut the vellum

First, I stamp the flowers with Memento Dessert Sand and color it with COPIC B000, B00, B02, BG01 for the blue and BG10, BG11, BG13 for the turquoise.
I die-cut the friend sentiment on gold glitter card stock and on a white foam then glue it together. I also die-cut vellum and add beautiful sentiment with gold embossing powder.
To make the background, I'm using Dye Ink and blending tool then I splash a bit of water and white watercolor with my brush. For the final touch, I add some sequins.

And here is my second card :

Winnie & Walter Supply that I'm using:
In Bloom : Addie's Garden for the flowers
In Bloom : Maggie's Roses Cutaways to die cut the vellum leaves
The Big, the Bold and Extras Cutaways to die cut the vellum leaves
The Big, the Bold and Comfort for the sentiment

I also stamp the flowers with Memento Dessert Sand and color it with Copic R000, R20 and R32. Then I die-cut the leaves on vellum. To make the background, I'm using Dye Ink and blending tool then splash orange watercolor with my brush. The sentiment is from gold embossing powder and I add sequins for final touch.


And here is the fun part!


Julie & Shay have generously given me a $30 gift card to the Winnie & Walter store for giveaway! For your chance to win please leave a comment on the Leading Lady posts on my personal blog. I will draw a random winner at the end of the month.   

Thank you so much for stopping by! I hope you like it and see you next week :)


Hugs,


Melania Deasy


w&w-supplies