
As October comes to an end we sadly must bid adieu to our outstanding October Leading Lady Trina Pham. The last few weeks with Trina has showcased incredible innovation, terrific techniques and acute skill. Trina has exhibited her tremendous talent and startling creativity week after week. I feel so blessed Trina shared her talents with us this month and made this month something special.
If you missed her smashing debut you must see it...CLICK HERE or her sensational second performance which colored me impressed CLICK HERE or her triumphant third performance with adorably brilliant cards and techniques CLICK HERE! Today's projects are full of beautify and skill!
If you missed her smashing debut you must see it...CLICK HERE or her sensational second performance which colored me impressed CLICK HERE or her triumphant third performance with adorably brilliant cards and techniques CLICK HERE! Today's projects are full of beautify and skill!
Lucky for us all we have her final command performance today.

Happy Saturday everyone! Time sure does fly when you're having fun, doesn't it? Today is my final post as the October Leading Lady for Winnie & Walter (W&W)! I want to thank Shay again for entrusting me to take over their blog every Saturday this month. It has been an honour and I've enjoyed every minute of it!
So last week I ended with an interactive spinner card. Interactive cards are very popular right now, even though they've been around for a very long time. Die versions may be available and make it easier, but essentially all of them can be created without one. I have two samples to share.
BIRTHDAY SURPRISE
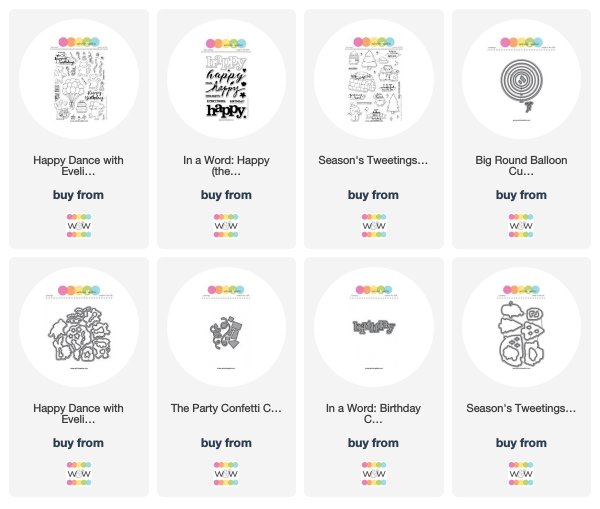
You knew one of my cards had to be a birthday. A scallop rectangle panel was die cut from Whisper White cardstock with Essentials: Audrey Cutaways. Happy from In a Word: Happy stamp set was stamped in black. In a Word: Birthday cutaway was die cut from X-press It cardstock and ombre coloured with a mini blending tool and Black Soot distress ink. A couple of streamers from The Party Confetti cutaways were die cut form silver foil paper and added as embellishment.

I wanted to keep the front super CAS and monochromatic because the par-tay starts on the inside!


Fold along the scored lines and assemble the box. Add strong adhesive to the triangles and adhere the box on a diagonal with the crease of the card base.

A couple of 1/2" x 1-3/4" strips scored at 1/4" on both ends were added inside the box. These were where acetate strips adhered to, which in turn how the balloons and hats were added to pop out of the box. The balloons from Big Round Balloons cutaways were die cut from white cardstock and coloured with distress inks and a mini blending tool. The hats from Happy Dance with Evelin T Designs were stamped with black Copic friendly ink on scrap of X-press It cardstock, coloured with Copics then die cut out with the coordinating dies. Silver foil streamers and confetti was added to finish.

CHRISTMAS WHEEL
I may be dating myself, but the popular reveal wheel is what I knew as a viewfinder card.


Started by stamping the images from Season's Tweetings by Evelin T Designs with black Copic friendly ink, coloured with Copics and die cut out with the matching dies. From a stitched white panel, partial die cut a circle opening. Instead of trimming a straight edge across, I used my scissors and cut a slope. Adhered the images around the window to create the scene.

For the wheel, I wanted a white border so a reverse circle mask was die cut from masking paper and adhered onto Bristol paper. Added various distress inks with a mini blending tool then die cut out with a scallop circle die. Die cut another scallop circle but this time from copy paper. Fold the copy paper in half then into quarters to find the centre. Align both scallop circles and pierce the centre with a piercing tool.

On the back of the scene panel, position the scallop circle then pierce through the scallop circle and the panel. Use the hole as a guide to cut a semi circle on the side edge. Secure the wheel to the panel with a brad. Pop the panel onto a white cards base by adding mounting tape around the edge of the wheel. White heat embossed the sentiment from Sweet Holiday with Evelin T Designs on black cardstock and popped it up with mounting tape over the brad to hide it. Added snow over all images with a white gel pen to finish. Here are more views of the different sky colours with turns of the wheel.


GIVEAWAY
Thanks to Shay's generosity, I have a $30 W&W gift card to give away to one lucky commenter over on my blog Phamtastic Design. For your chance to win, leave a comment on any of my Leading Lady posts by October 31 and I will randomly pick a winner from all comments left across my posts.

That concludes my time here at W&W. I want to thank all of you who stuck with me and left such kind comments. I was not feeling very well this week, and reading your comments brightened my day! Have a wonderful weekend!


You've been a great Leading Lady! These are both just amazing!
ReplyDeleteJust love that party in a box, Trina! So fun and unexpected from the simpler card front. I remember the viewfinders, as well, and am happy to say that I have seen them recently for sale in some stores. ;)
ReplyDeleteFestive and fun interactive cards.
ReplyDeleteGreat projects! I love the black, white and silver card!
ReplyDeleteLove the cards today. The balloons are awesome.
ReplyDeleteWow, these are fun and gorgeous!
ReplyDeleteYour cards are fabulous!
ReplyDelete