
Our February Leading Lady Rosali is back for her sensational second performance! If you missed her smashing debut you must see it...CLICK HERE. Today you will be wowed by Rosali's tremendous trio of cards!
In honor of our birthday month we're doing something a bit different this year and including a challenge to you on each of Rosali's posts this month. See the end of this post for more details and to link up!
In honor of our birthday month we're doing something a bit different this year and including a challenge to you on each of Rosali's posts this month. See the end of this post for more details and to link up!
Ladies and gentlemen, Rosali...
Hi there!
I am very happy to be back on the blog with my second post as Winnie & Walter’s Leading Lady!!

Last week I shared two card designs where I used masking with stencils to create backgrounds. This week I am instead:
MASKING BACKGROUNDS WITH DIES!
Using dies to die cut a mask for your background is an additional way to use stand-alone dies. I really like the seamless look you can get by doing this. And, another advantage is that it minimalizes layers on your cards and keeps them flat for easy and inexpensive mailing.
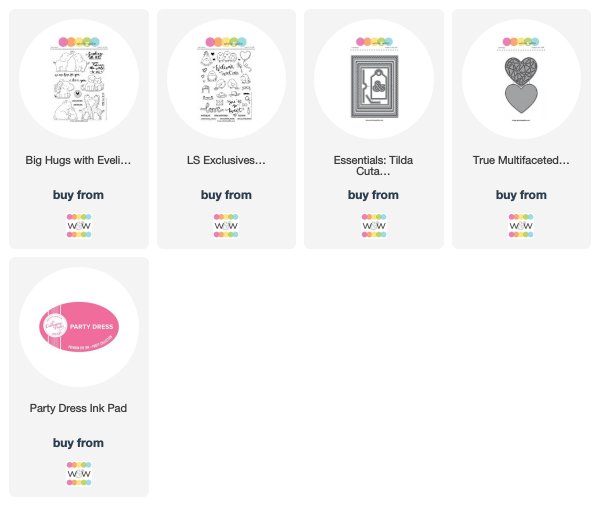
For today’s cards I chose one of Winnie & Walter’s True Multifaceted Heart Cutaways. With Valentine’s Day being only a few days away I thought I would share an idea for rather simple friendship cards – in case some of you want to make last-minute Valentine’s Day cards. :-)
I MADE THREE VARIATIONS OF MY DESIGN:

Here’s how I created my masked backgrounds:
- I took a piece of masking paper and die cut it using the triangled True Multifaceted Heart Cutaway. By the way, I always use repositionable labels as masking paper as it comes in a large pack and works perfectly fine for me.
- I took the largest die from the Tilda Cutaways set (with the cool jagged edges) and die cut three backgrounds panels from Neenah Solar White cardstock. Then I adhered the die cut heart onto one of the panels and picked a yellow, peachy and pink ink pad from my stash.
- For the first card (yellow birdies), I inkblended the three inks all over the background panel going. For the second card (dog & cat), I inkblended each color from left to right as well but just covered the heart and left the rest of the card white. For the third variation (pink birdie), I started inkblending pink ink in the center of the heart, and then added peach and yellow around it.
- After removing the mask from the last panel I added different splatters to all three backgrounds: tiny black watercolor splatters, pink ink splatters and Perfect Pearls splatters for some shimmer.
I picked three cute images from the So Tweet and Big Hugs stamp sets. Both sets are illustrated by Evelin T Designs and I just love all her critters! :-D I colored the images with Copic Markers, cut them out and adhered them over the hearts using foam tape.


COPIC GUIDE & COLORING TIPS:
Pink birdie: RV02, RV04, RV06, RV09 / YR 68 / Y13, Y08, Y35
Dog: W0, W1, E21, E33, E35, E57, R20
Cat: W1, W3, W5, W9, R20
Yellow birdies: Y11, Y13, Y08, Y35 / RV13, RV04
TIP 1: Use flicks from a white gel pen to get a feathery look - like I did on the pink bird. It's the same easy coloring technique that I used last week for the yeti's fur!
TIP 2: Add a little bit of grey shading to the dog where his fur is supposed to be white.
TIP 3: For the dog's light brown spots, first draw them in with the lightest E-marker. Then add shading from outer parts of the spots or where the shadows would be.
ADDING SENTIMENTS TO MY CARDS
For the sentiments I used “You’re so tweet” from So Tweet with Evelin T Designs stamp set and “Sending Big Hugs” and “just for you” from Big Hugs with Evelin T Designs stamp set.
On the pink birdie card, I heat embossed the sentiment in white on a wider strip of kraft cardstock. I die cut that strip with the Tilda rectangle die to give it the same jagged edges as the card front. For the cat & dog card, I used a banner sticker from my stash for the sentiment. And for the yellow birdies card, I heat embossed the sentiment with shiny platinum embossing powder that matches the color of the Perfect Pearls splatters.
TAKE A LOOK AT THE BEAUTIFUL SHIMMER:

I hope you like today's cards! For your chance to win a 30 $ gift certificate sponsored by Winnie & Walter, hop over to my blog post and leave me a comment over there, too.
Thank you for stopping by today! ♥
Rosali
USED SUPPLIES:
Winnie & Walter stamps, dies and stencils:
True Multifaceted Heart Cutaways
LS Exclusives: So Tweet with Evelin T Designs Stamp Set
Big Hugs with Evelin T Designs Stamp Set
Essentials: Tilda Cutaways
LS Exclusives: So Tweet with Evelin T Designs Stamp Set
Big Hugs with Evelin T Designs Stamp Set
Essentials: Tilda Cutaways
Ink Pads:
Catherine Pooler Designs - Party Dress Ink
Inlinkz Link Party
CHALLENGE:
Now that you've seen Rosali do it, "Masking Backgrounds with Dies" to create your own project and link up here by Friday, March 15, 2019, 11:55 p.m. CST to be entered to win $50.00 credit to the w&w shop! One (1) lucky randomly chosen winner will be picked from each of Rosali's Leading Lady posts this month.
Wow..ador ador set of cards ! Loved the masking and coloring too :)
ReplyDeleteThese are just darling! I'm going to have fun playing along in this challenge!
ReplyDeleteThese are simply adorable, Rosali. Beautiful colour combos. Love the splatters. x
ReplyDeleteThese are fabulous!
ReplyDeleteLove your darling cards. Your coloring is awesome.
ReplyDeleteCute set of cards and I like the masking technique.
ReplyDeleteRosali's cards are so beautiful and creative! I'll have to see if I can manage this technique and come up with a challenge entry myself!
ReplyDeleteCan't wait to see your take on the technique. :)
Deletelove your set of cards - they are so cute:)
ReplyDeleteThanks for entering the challenge, Dee!! Great idea to use a word die for masking! :)
DeleteWonderfully colourful, Jo x
ReplyDeleteWhat a great & awesome tutorial!!! With this technique, you could use any die, background die, or even group like dies together & just spotlight certain areas. FANTA-BULOUS way to stretch your dies & supplies!!! I have loved your tutorials so far!! Very informative!!!
ReplyDeleteWOW, I was impressed by the first weeks cards & these are even more amazing. Thank you for teaching me new techniques, your colouring is fabulous. I don't think I'm in league to enter the challenge yet though hehe.
ReplyDeleteI LOVE LOVE LOVE your colors and the backgrounds! Just the cutest images and coloring!
ReplyDeleteAwesome cards! Very nice ad I love them all!
ReplyDeleteSuper Adorable cards Rosali.. Love each one of them..Hugsxx
ReplyDeleteYour cards are so sweet!! I love the bright and happy colors!
ReplyDeleteWow! I'm in love for the bright colors!!! Beautiful cards!!!
ReplyDeleteThese die cuts are great backdrops for your focal point on each card. Thanks for sharing your creativity.
ReplyDeleteI LOVE these pink cards!!! The heart backgrounds are so perfect for the sweet critters. Fab technique to try out!!
ReplyDelete<3 J
jwoolbright at gmail dot com
HerPeacefulGarden.blogspot.com
BEAUTIFUL cards!
ReplyDeleteLOVE your crisp, white faceted hearts, pretty ink blending and cute designs!
I confess, I haven't tried this technique and feel inspired, I don't have any masking paper but I'm looking forward to trying mask-it with my dies to see if will work :)
Gorgeous cards!
ReplyDeletecookie clicker: Your Premier Gaming Asset Marketplace
ReplyDeleteDiscover the World of Monkey Mart Trading
Welcome to Monkey Mart, where gaming commerce meets innovation. Our platform is transforming the way gamers trade virtual assets, offering a secure, dynamic, and user-focused marketplace for the global gaming community.
Key Features of Monkey Mart
Experience a marketplace designed for gamers, with features including:
Secure and transparent transactions for complete peace of mind
Real-time market updates to keep you informed
Advanced trading tools for smarter deals
User-friendly interface for effortless navigation
24/7 customer support for all your needs
Monkey Design
Why Choose Monkey Mart?
Our platform offers unique advantages that set us apart:
Competitive and dynamic pricing system
Verified seller profiles for safer trades
Instant payment processing for faster transactions
A vibrant, community-driven marketplace
Regular updates to ensure top-tier performance and security
Trading Made Simple
We’ve made trading easier than ever with:
Intuitive navigation and smart search tools
Quick listing process for your items
Efficient filtering to find exactly what you need
Secure payment options for smooth transactions
Detailed transaction history tracking
Security Measures You Can Trust
Your safety is our top priority:
Advanced encryption protocols
Two-factor authentication for extra protection
Anti-fraud detection systems
Secure payment gateways
Regular security audits to keep you protected
Join Our Growing Community
Become part of the Monkey Mart family and enjoy:
Special community events
Exclusive trading opportunities
Reward programs and loyalty bonuses
Fun trading competitions
Regular platform enhancements
Getting Started is Easy
Create your account
Complete quick verification
Start trading immediately
Visit monkeymart.one today and experience the next level of gaming asset trading. Join thousands of satisfied gamers who trust Monkey Mart for secure, fast, and rewarding transactions.
You begin to recognize when a Drift Hunters is about to fail—and how to save it. Corners that once felt impossible start to feel familiar, even comforting. That progress doesn’t come from tutorials or pop-ups. It comes from time spent paying attention.
ReplyDeleteWonderful, fun, vibrant cards. Great to meet you & your work & congratulations on the debut at W&W. You've got a fabulous talent, thank you for sharing it. Looking forward to next part.
ReplyDeleteCalifornia Desert Date Palm Trees
Love the way this was presented. Simple, clear, and very useful. Customized Crystal mementos
ReplyDeleteAl Shaheen Graphics is a professional printing and graphic design company in Dubai offering high-quality printing, branding, and advertising solutions for businesses of all sizes. The company specializes in services such as digital printing, sign boards, business cards, brochures, banners, wall stickers, and customized promotional materials. With creative designs, modern printing technology, and reliable customer service, Al Shaheen Graphics helps businesses enhance their brand visibility and marketing presence in the UAE.
ReplyDeletePrinted Paper Bags Dubai
Wall Stickers Printing Dubai