Our March Leading Lady Lisa Lahiff is back for her triumphant third performance! If you missed her smashing debut you must see it...CLICK HERE or her sensational second performance with a bevy of amazing cards go beyond paper CLICK HERE! Today she's back with a trio of terrific cards showcasing a favorite of mine. :-)
Without further ado, Lisa...
Hello, hello! I hope you are having an amazing start to your weekend, we are up in Cleveland visiting family and celebrating my youngest's Birthday with family. But thanks to technology this post has been scheduled and set to go for a few days :). Today my post is titled "The Supporting Actress". So often we as cardmakers want to bring something to the front of a card that takes the spotlight, and really makes our projects shine. But, what about that background that sometimes we work hard on and it just seems to fade away? Or we spend so much time on our spotlight image, and we don't do anything with our background.
Now don't get me wrong, I LOVE cards like that and sometimes the background just isn't what we are wanting our recipients to pay much attention to, or we just want a clean and simple card that doesn't need a background. For today, however, I wanted to shine the spotlight on the backgrounds of my cards and give them the lead. (You might want to get your sunglasses on too, lol)
Now you see why I mentioned sunglasses? lol And I have to admit I might be a little obsessed with the script love die that comes in the
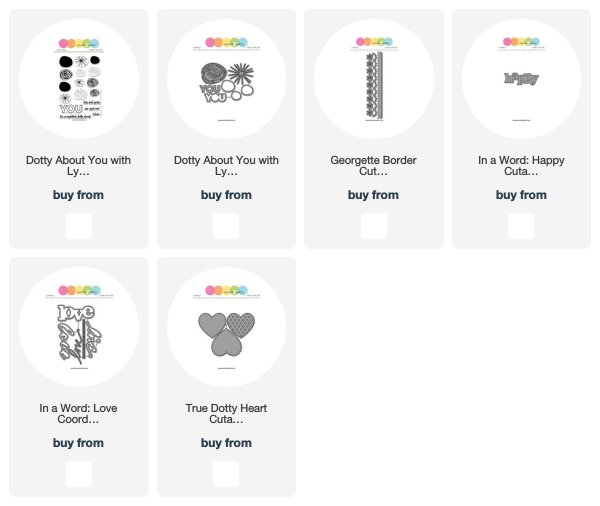
In A Word: Love Coordinating Cutaways, as I've already used it three times this month. For this fun rainbow card I started by cutting strips of DCWV Shimmer Cardstock and adhering them to a white panel. Next, I diecut the scalloped heart from the
True Dotty Heart Cutaways from the center of my rainbow. I then diecut the regular heart from this same set out of the center of the scalloped heart that I had cut out. This sounds more confusing than it actually is... really it's just diecutting the center of a diecut (does that sound any less confusing?). This left me with a negative scalloped cut in my rainbow strips, then I filled it in with the regular heart cut. Maybe this should be called inlaid diecutting within a negative cut... or something like that. Any who, I love the results! I finished it off my diecutting the xoxo strip along the bottom and keeping it intact, and adding the script love die across my hearts. The rainbow background though, is definitely the star of it all.
For my next card I used diecutting again to help my background shine. This time I created my own paper lace of sorts by diecutting the same floral strip from the
Georgette Border Cutaways repeatedly.
I wanted the design to really pop, so I chose contrasting colors to really draw the eyes in. Since I was going for a more natural look I didn't measure my cuts out, and rather just moved it around to from strip to strip. I then added the
In a Word: Happy Cutaway that was sprinkled with glitter, and I finished the card with a few rhinestones. By keeping the sentiment simple, and using clear rhinestones I was able to keep the focus on the lacy background.
For my final project I've used stamping to create a fun and eclectic background with the
Dotty About You with Lydia Evans Set...
By randomly stamping the various images in this set in different colors you could create an entire set of cards. Vellum also comes in handy with this card as it allows the background to be seen behind the sentiment. I also added a few hand drawn wavy lines to frame the stamped panel in and to keep the eyes moving inward.
I hope that today's post has inspired you to maybe take a second look at your backgrounds, and maybe make them the star of an upcoming project. After all the supporting actress/actor can really make a scene shine that much brighter. Thanks so much for stopping by, and I hope to see you over
on my blog as well!
Happy Crafting!
Lisa


so woderful card!
ReplyDeleteThank you so much! I'm so glad you like them!
DeleteWow..lovely backgrounds for the cards !
ReplyDeleteThanks! 😊
DeleteVery inspiring--love today's focus on backgrounds!
ReplyDeleteThank you! I'm so happy that my cards have inspired you!!!
DeletePretty cards! Love that rainbow heart card!
ReplyDeleteThank you Denise!
DeleteWow!!! Amazing layouts!!! My fav is the first one!
ReplyDelete<3
DeleteYour cards are beautiful, and certainly do focus on the backgrounds. You did a fine job of describing how you created the first rainbow card. I was able to follow along with your steps with no problem. Nice work.
ReplyDeleteThank you! I'm so glad my directions made sense. Sometimes what you're thinking in your head doesn't always come out right on paper. Thanks for your kind words!
DeleteOutstanding!
ReplyDeleteWonderful backgrounds. Love the rainbow one.
ReplyDeleteThanks so much!
DeleteYour rainbow is truly mesmerising!!...thanks for the inspiration
ReplyDeleteBoth are so wonderful, love the Rainbow heart!
ReplyDeleteWow, that die cut heart inlay is so creative and fun! Love these ideas
ReplyDeleteAnother beautiful collection of cards. The rainbow heart card is eye-catching.
ReplyDeleteThat’s a lovely set of cards !
ReplyDelete[margessw(at)icloud(dot)com]
I love your creative backgrounds and have already bookmarked your blog so I can refer back to it when I get stuck!
ReplyDeleteFab trio of cards. Love the festive background on your first card, and the simple elegance of the second card. Dotty about You is such a versatile set, and your colour palette is gorgeous.
ReplyDeleteReally lovely cards, I especially like the first one - very cool design, and I love all the colours!
ReplyDeleteI love all of them!!!
ReplyDeleteGorgeous cards. Love the dotty one. Hugz
ReplyDelete