Saturday, May 12, 2018

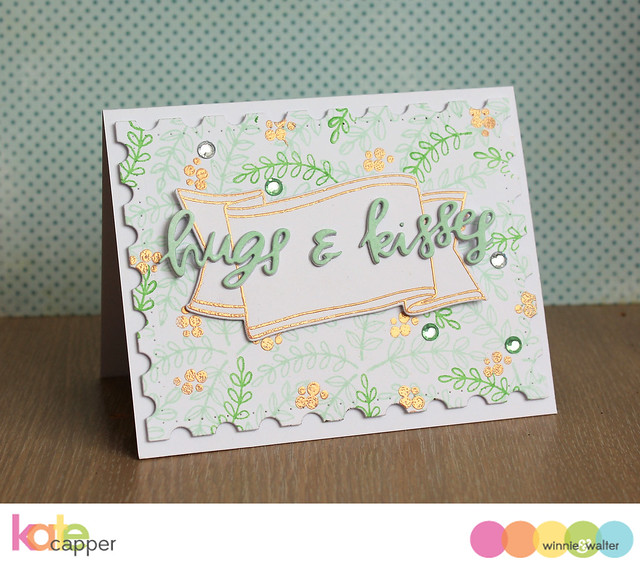
May Leading Lady Cynde Whitlow | Take Two (Video)

Our May Leading Lady Cynde Whitlow back for her sensational second performance!  If you missed her smashing debut you must see it...CLICK HERE.   Today's card is utterly charming and magnificently colored!

Ladies and gentlemen, Cynde...

Hey folks!

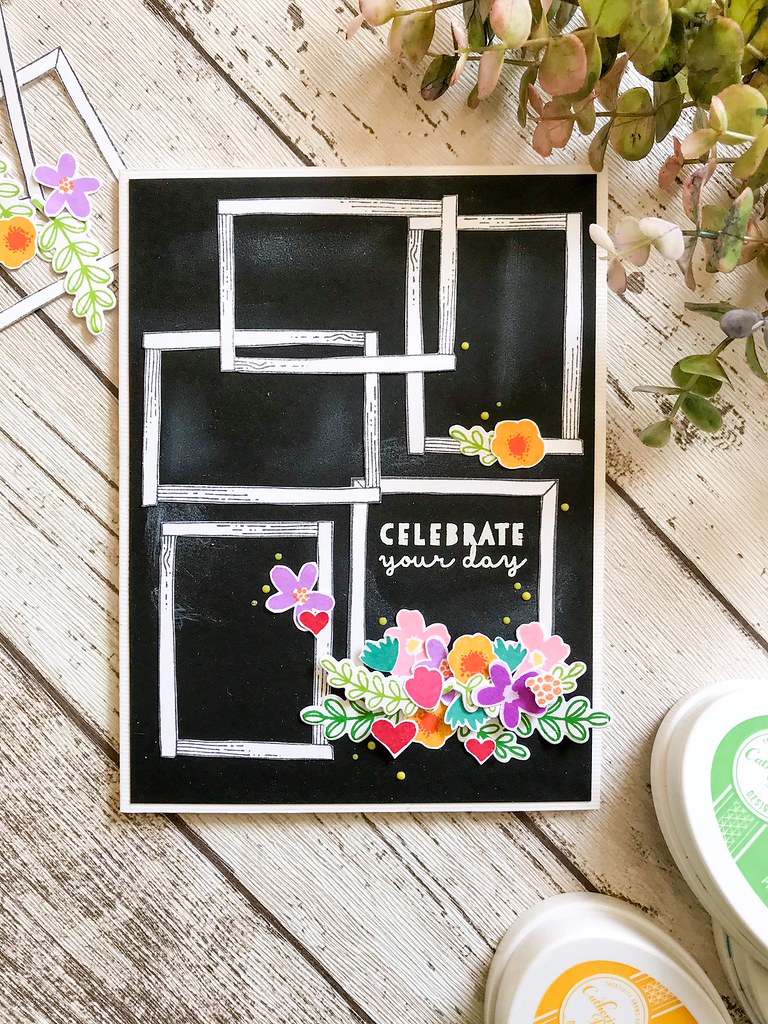
It's Cynde and I'm back today for Take 2 with Winnie & Walter as the May 2018 Leading Lady! Today we're going to take a look at using colored pencils on kraft cardstock. I say kraft, but honesty just about any color will do! More on that in a moment.

My last card was all about masking a scene and coloring in that scene with Copic's. The idea was to build up those images with layering and color. Today, I wanted to focus on colored pencils which is another medium folks can find frustrating and intimidating. Colored pencils can be just as fun as Copics! I promise! I kept today's card super clean and simple. I really just wanted to keep the focus on the coloring and the paper. Let's get started!


If you're interested in seeing how I made my card, I have a video to share! You can see that HERE.


I wanted to use those darling kitties in the cup from Purrfect with Evelin T Designs, but before I stamped them I needed to choose my cardstock. You can have the best colored pencils, but if your paper isn't as good, then you're still going to struggle folks. Prismacolor and Polychromos are super popular pencils (They should be. They rock!), but what about the cardstock?

The beauty of colored pencils is you can color on virtually any color of cardstock, but it needs two important features in order to work the best. The first thing is it needs some tooth. Ultra smooth cardstocks generally don't work the best. For the purposes of this tutorial, lets just say if you can feel even light texture on your cardstock, you probably good go.


The other thing I like in a cardstock (for color pencils) is I want it to feel little soft. Now this is mostly a personal preference, but I think it helps a bunch. This way I don't feel like I need to add as much pressure with my pencils right away. You should be able to feel a slight amount of "give" when you start coloring. I talk more about this in the VIDEO.

When I chose the colors for my card I purposely chose colors that would pop. I wanted colors that would stand out so you could see how they go down on to the cardstock and so you could see how those colors can really build up.


To finish off my card, I added a few hearts from the Scenery: Seeing Hearts Stamp Set and colored those in with he same colors as the hearts on the cup. They're pretty tiny and it's always important to keep your pencils sharpened when you color anyway, but that much more when your coloring in those tiny lil images.

I had left the stamp in my MISTI Stamping Tool so After I had everything colored in, I put the panel back in it and stamped it again with Versafine Onyx Black Ink to get those lines nice a crisp again.

That's it! I hope you enjoyed my card today


Be sure to follow along with me this month folks! I will have a super fab giveaway (Thanks Shay!) at the end of the month. All you will need to do is leave a comment on my blog telling me which one of my projects was your fave and why!

Thanks so much for stopping by! Until next time.

Cynde


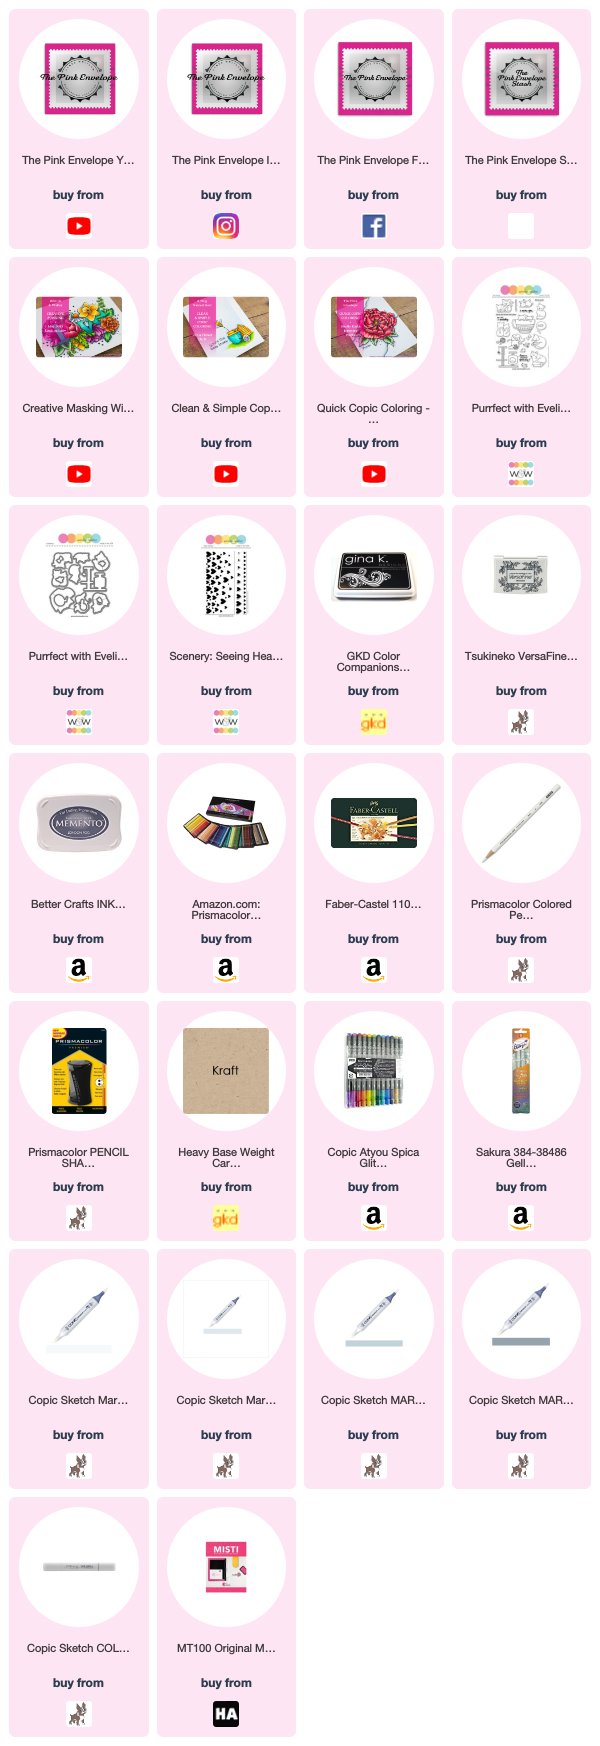
Supplies used:
Friday, May 11, 2018

2018 Mega Sponsor Spring Blog Hop Winners Announced!

Don't miss the Introduction to our May Documentarian, Lilith Eeckels HERE!


Hello there lovelies!


I am excited to announce the winner of the 2018 Mega Sponsor Spring Blog Hop from our stop along the hop. Thank you to all who participated and left such kind comments!


The winner of $30.00 credit to the w&w shop is:


No. 132 | Mel

Congratulations to Mel! Watch for future Mega Sponsor giveaways!


**Note: Claim your prize by Friday, May 18 midnight EST, If not claimed by then, we have the option to choose another winner or void the prize altogether.**

May Documentarian Lilith Eeckels | Introduction


Our third Documentarian is none other than Lilith Eeckels!  Lilith is someone I have been a fan of for years.  In fact she was a special guest star of ours way back in February of 2014 (CLICK HERE to see her gorgeous layouts) and I was so thrilled to be able to invite her back to be a Documentarian.  Lilith's projects are stunning in every way.

>>>ON SOCIAL MEDIA<<<

Blog: https://lilithandscrap.blogspot.com/
Instagram: https://www.instagram.com/lilitheeckels/
Facebook: https://www.facebook.com/lilithscrapbookingventure/
Pinterest: https://www.pinterest.com/lilith/
YouTube: https://www.youtube.com/user/Lilithsscrapbooking/videos

Now let's learn more about Lilith and peek into her Documentarian Dossier!


>>>DOCUMENTARIAN DOSSIER<<<

Name: Lilith Eeckels

Family: I have been married for nearly 18 years and have 4 boys (Damien & NoƩ 14 years old, Robin 11 and Elouan 8)

Something you love about where you live? I live in a small village in the Belgian Ardennes. I love the stunning scenery and enjoy going for long walks.

Favorite (favourite) food memory? I LOVE LOVE LOVE fruit and vegetables and have found memories of picking fruit and veg in my mom’s garden in South Africa. We even had banana trees but never saw a banana as the monkeys beat us to them.

Your favorite (favourite) color combination to create with? Teal, Aqua and pink. I always seem to pick these hues and have to force myself to go with other colours.

How did you begin documenting memories? I started just after I got married in 2000  as I wanted to create a unique wedding album.

Who and/or what do you most enjoy documenting? My family and myself. It might seem strange but I have always struggled with my self image and would always stay well away from photos and getting my picture taken. Since I started using photos of myself my self confidence has grown and I have learnt to love myself.

What is your favorite (favourite) way of keeping memories? By far scrapbooking. I have tried my forms and enjoy all of them but I always go back to scrapbooking.

What tips/advice would you give someone just starting out? Just HAVE FUN and THERE ARE NO RULES. Do what you love and enjoy the process.

What 5 items are essential to you for creating (photos are a given and exempt)? 
1.      patterned paper (I wish some would be wallpaper designs as I’d put them on every wall in my house)
2.      STAMPS. It is my new FAVOURITE product. So versatile.
3.      Dies. I love making my own embellishments and my star, butterfly and heart die are always nearby.
4.      Die cut machine.
5.      a pen (for journalling)

When do you need to feel inspired, who and/or what inspire you? I am constantly inspired as I am a very curious person always on the look out for new things to try. I feel inspired by so many crafters but I love looking at nature and drawing inspiration from ads.

Who are your favorite (favourite) documentarians?
My FAVOURITE is Stephanie Howell. I love her style and she is the sweetest person ever. She is inspiring in so many ways.

I also have a scrapbooking crush on Enza Gudor. Her work is OUT OF THIS WORLD. She in on the Altenew team with me and her projects blow me away each and every time.

Erum Tasneem. Boy can she colour. Her cards are mind blowing.

My list could go on and on but I narrowed it down to three.

Check back next Friday for Lilith's first project post!

Thursday, May 10, 2018

Hi Friend Hello with Gayatri

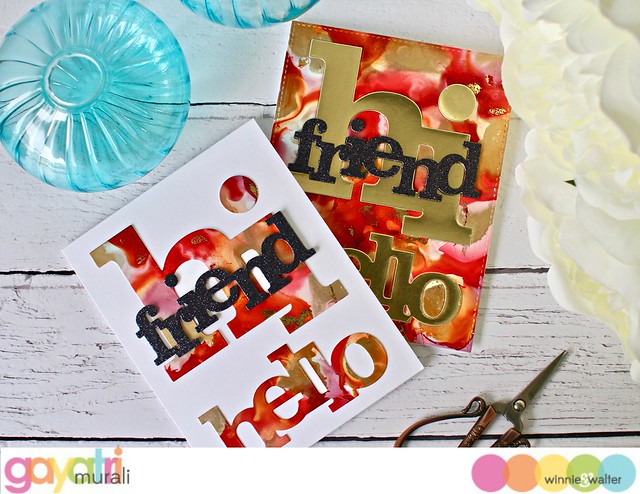
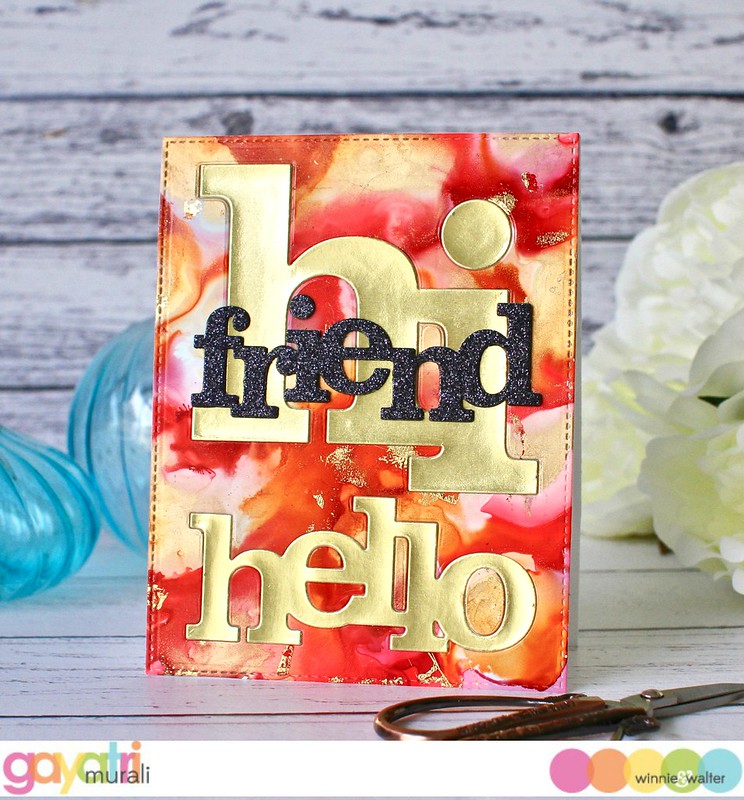
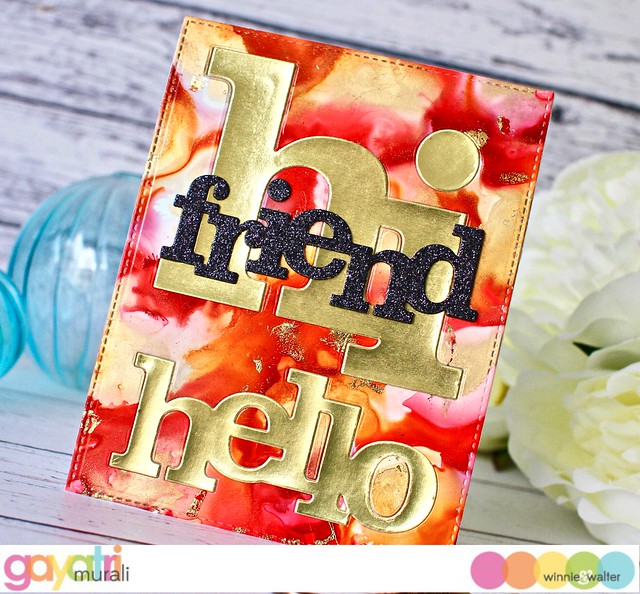
Today I have couple of cards using Winnie & Walter's cutaways(dies). I have stretched the cutaways to make two cards. Basically I used both the positives and negatives of the same cutaway to make two cards. The best way to stretch the cutaways is creating a background and die cutting the background using the cutaways. Use the negative of the die cut to make one card and the postive die cuts to make the other. For the background of my cards, I used alcohol inks and decor foil.

gayatri_W&W May cards#1

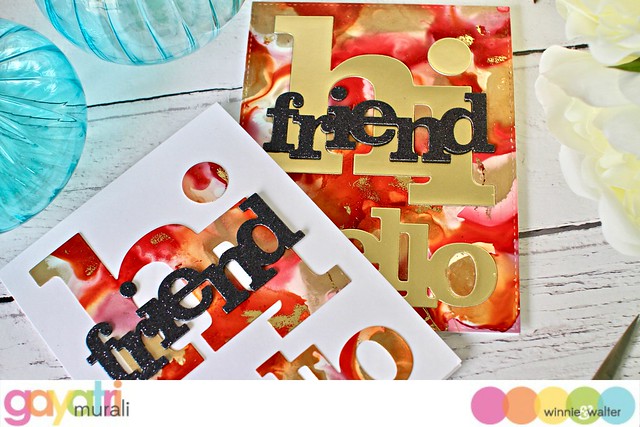
The alcohol ink colours I used are Watermelon, Pink Sherbet and Sunset Orange along with gold mixatives to make my background on Yupo paper. While still tacky, I used gold foil to rub on the panel. The foil will adhered to the tacky areas creating organic veins of gold foils on the panel. They are beautiful. Then I die cut the background using a stitched rectangle die to fit the card front.

gayatri_W&W May cards#1closeup

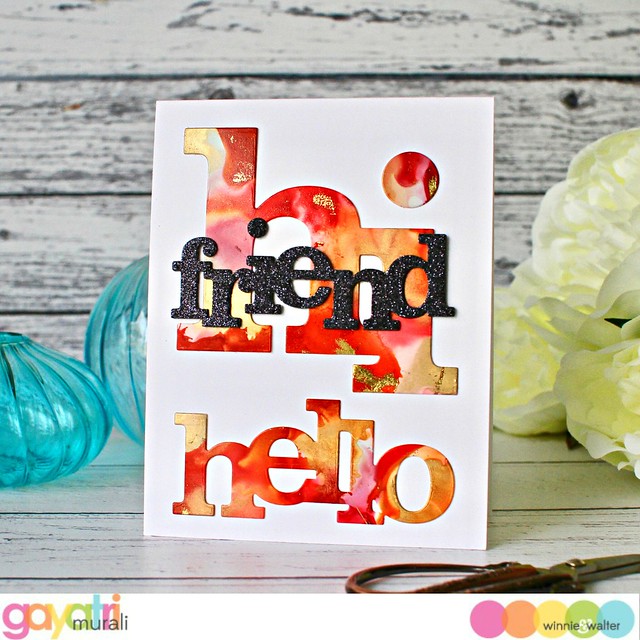
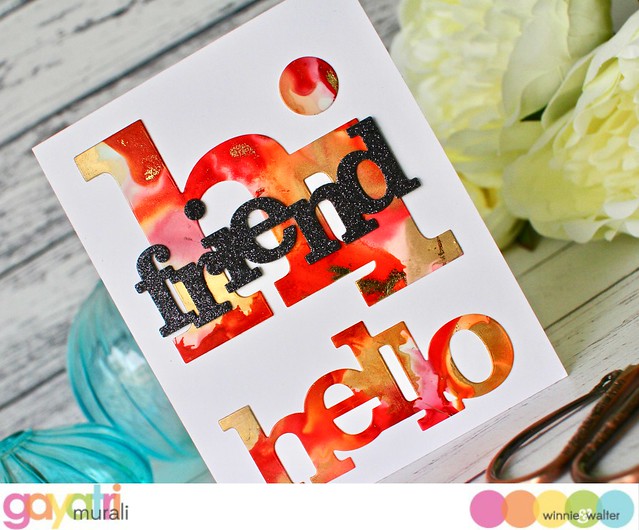
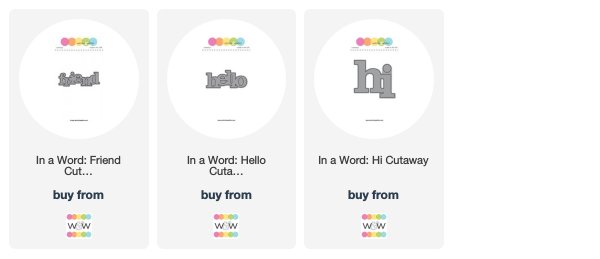
Then I used In a Word: Hi and Hello cutaway to die cut the background. I used the die cuts on a white card base adhering them one below the other to fill the card front. The contrast of white with the colourful die cuts are fantastic. To add to the contrast and add dimension, I die cut In a Word: Friend using black cardstock twice and black glitter paper once. I glued stacked the die cut with the black glitter on the top.  I adhered this on top of the Hi die cut on the card front. I am not adding any embellishments to the card because the contrasts and big bold colourful die cuts are the highlights of the card.

gayatri_W&W May cards#1d gayatri_W&W May cards#1ecloseup

For my second card, I used the negative panel. I adhered this panel on the card card front flush. Then I die cut the same In a word: Hi and Hello using gold foil cardstock and in laid the die cuts into its place on the negative panel on the card front. I also put back the little fill in pieces.  I repeated the same process for In a Word: Friend cutaway and adhered in the same spot as the first card. So the layout on both the cards are the same.

gayatri_W&W May cards#1c gayatri_W&W May cards#1bcloseup

So here is how I used the same dies to stretch and make two cards. The colourful mesmerising alcohol backgrounds makes a big impact. I hope you like my projects for today. All the w&w supplies used to make this card are listed below.

Thanks for stopping by today.

My blog signature

w&w-supplies

Tuesday, May 8, 2018

Layton's Legacy Card Drive & Fundraiser for NICU Parents Blog Hop


Hello lovelies! Hello lovelies! It is Shay here and I am really honored to be participating in this blog hop
in appreciation for the people who helped Lea, her husband and sweet baby boy.

Here is a bit more about this all in Lea's words:

"Today a dream of mine is coming true, as this Card Drive & Fundraiser goes live in honor of my
sweet little bear, Layton Caleb. Hi friends! In case you don't know me, my name is Lea Lawson
& I've been part of this wonderful papercrafting industry since 2002. Today is extremely special
to me, and let me introduce the baby behind the blog hop!

08- LaytonCaleb

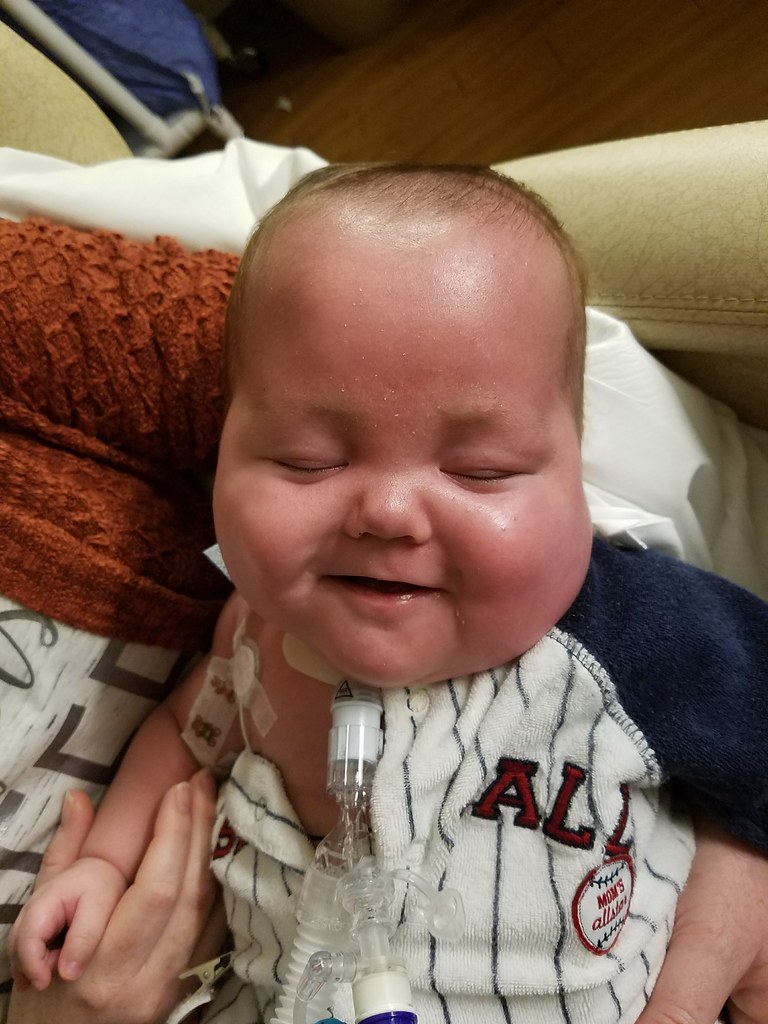
Meet Layton - our little fighter and hero for 5 months & 7 days. Layton came into this world 11 weeks
early on June 9th, 2016 with 2 serious health conditions. He endured more medically on a daily basis
than most adults face in an entire lifetime. And on November 17, 2016 he joined his big sister in
Heaven.


We were given those 5 months with Layton thanks to the level 4 NICU & amazing medical staff at The
University of Minnesota Masonic Children's Hospital. There are 50 beds in that NICU, and it is
ALWAYS full. In honor of Layton's birthday, I am raising money to purchase substantial Starbucks
gift cards that can be given to these parents as they find themselves thrust into NICU life.


Why Starbucks? There is one just across the street from the hospital, and I can attest that some days
you just need to step out of the hospital for a moment. Get a breath of fresh air, see some natural light
& regroup. I was given a $20 Starbucks card that had been donated to the NICU during the time
Layton was a patient, and I cried when I opened it. My son was getting million dollar care, and I was
there day in & day out doing everything I could for him. It was stressful, scary, and one of the hardest
things I've ever done in my life. Getting that gift card felt like someone was also thinking about us, and
trying to help take care of us too.


I can only do so much as just one person, but together we can accomplish SO much more! Plus - we
are making it fun! We have a huge Card Drive blog hop going on in Layton's honor, with tons of
amazing inspiration! We also have a fundraising effort, where every $5 donated gets you an entry into
the prize drawing. There are over $2000 in prizes, sponsored by some of the most amazing stamping
& papercrafting companies in the industry! {You can also see all the prizes HERE.}"
PRIZES
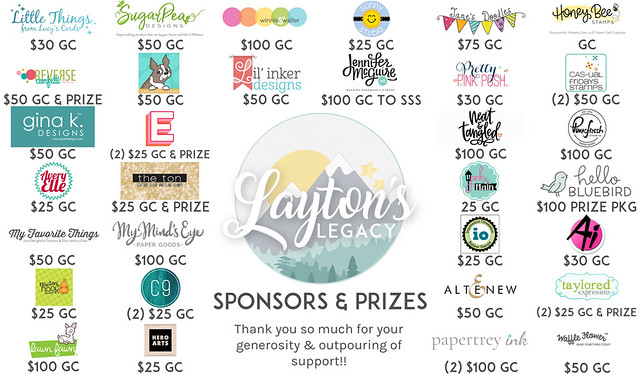
03-SponsorPrizeGraphic
WAYS YOU CAN HELP:
1. DONATE! - directly to Layton's Legacy YouCaring Fundraiser. For every $5 donated, you will be
entered into the drawing for one of the prizes above!! All winners will be drawn from donations made
thru the YouCaring Site. **Prizes will be drawn and announced here on my blog on Saturday, May 19th.**
2. SHOP!
-Pinkfresh Studio will be donating 10% of their sales for the week.
-CAS-ual Fridays Stamps will be donating 15% of their sales thru May 19th.
-My affiliate linking dollars will be donated thru May 19th.
3. CREATE! -  this is also a card drive, and if you'd like to create a card using the theme/moodboard
below, Lea would love that! Lea will be including these handmade treasures with the giftcards when Lea
hands them over to the NICU social worker, and her dream is that the NICU will be covered in beautiful
creations inspired by Layton!! Link them up HERE, and then please email Lea
(lea@lealawsoncreates.com) to get the address for sending - and note that Lea will need them to arrive
by May 31st.
HOW TO STAY UPDATED:
There are two ways to stay updated on the fundraising progress, and to see photos as Lea drops items off
at the NICU.
1. Subscribe to the Lea Lawson Creates blog via email using the prompt in the upper right corner -
then you will get email notifications when Lea adds a new post.
2. Follow Lea Lawson Creates on Instagram. Lea will add photos & videos to her IG Stories, and likely go
LIVE a few times throughout the fundraising effort and as she drops everything off at the NICU!
BLOG HOP
Not only is this a fundraiser, but also a super inspiring blog hop with MANY stops along the way! As
you hop along, you will see amazing cards created with a very special theme. Lea created this
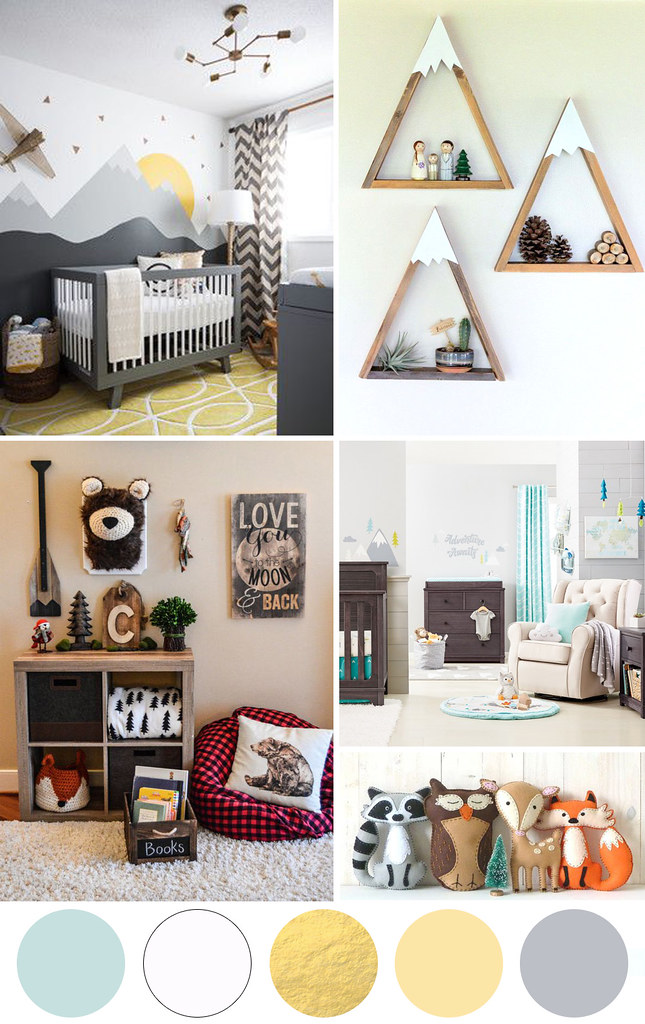
moodboard when she started planning Layton's nursery.


05-LaytonsLegacyMoodBoard
PROJECT

I loved the mood board and followed it pretty faithfully.

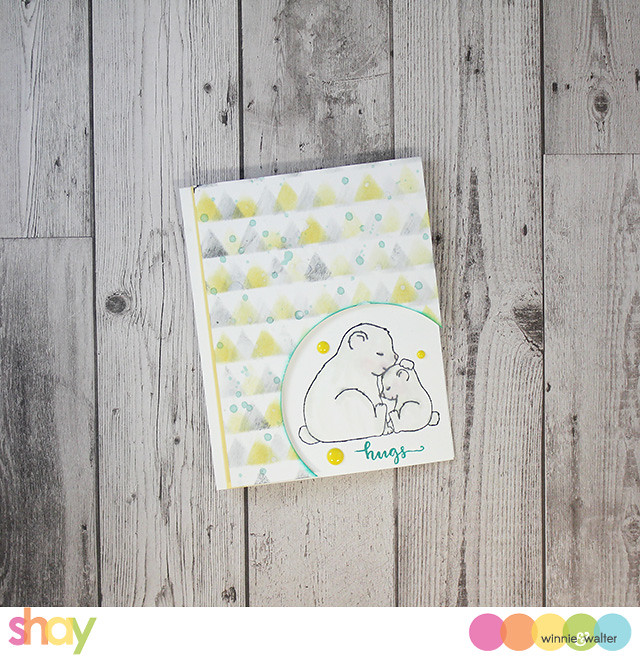
shay_IMG_4331

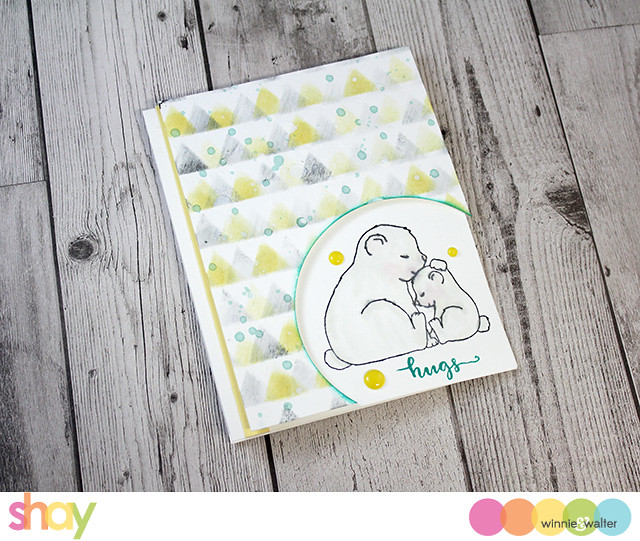
I began with stamping the mama and baby bear from Big Hugs with Evelin T Designs in Black Jack ink
on a white card base. I then colored it in with ink and a water brush. I stamped the sentiment from

On another piece of white cardstock I used Scenery: Triangled Creative Screenings and sponged on
Black Jack and Tiara inks as an ode to the mountains in the logo and mood board. Next I splattered
some aqua and white inks. I cut out the circle from Big Round Balloon Cutaways making sure to line
up the layer with the bears underneath. I edged the circle with Aquatini ink. I cut a strip of yellow
cardstock and attached it to card base and then added the triangle panel to the card using foam
dimensional adhesive. Last, I added some yellow enamel dots around the bears.


shay_IMG_4332 

That's it for me, but there are so many more incredible stops that will inspire you!

I hope you enjoy the hop!

Happy creating,
Shay.

Saturday, May 5, 2018

May Leading Lady Cynde Whitlow | Take One (Video)

Today is a very exciting day as it is the debut of our May Leading Lady, Cynde Whitlow!

I think I am not alone when I say I am dazzled by Cynde's coloring skills along with her stunning use of color and design.  If you have not seen Cynde's work I think you will be mightily impressed and inspired!  


I am really excited to see what Cynde will be creating this month as she takes us on an adventure of her own design on Saturdays in May on the w&w blog.

Please give Cynde a big round of applause to welcome her as she steps onto the stage for her first performance as our May Leading Lady! 


Hey folks!

My name is Cynde and I'm so excited to be here for Winnie & Walter as a Leading Lady. I've been a big fan of Winnie & Walter for a long time and it's a huge honor to design for them!

This month I'm going to bring you four different projects showcasing the fabulous February Release. For my first take I'm going to focus on creative masking. Masking is hands down my favorite techniques for making cards. The sky is the limit folks. I know for some folks it seems intimidating, but it's really not hard. It just takes a little bit more time, but totally worth it in the end.

If you're interested in seeing how I made my card, I have a video to share! You can see that HERE.


To start my card, I'm using the outline LOVE from the In A Word: Love Stamp Set. This Stamp set has a Coordinating Cutaway available as well.  I also use In Bloom: Addie's Garden and In Bloom: Anna's Flora.

Whenever you're going to stamp a more complicated scene like this, it's always helpful to stamp out a plan first. When I do this, I take a piece of plain ol' copy paper, cut it to the same dimensions as my card panel and just stamp away. No masking, nothing terribly strategic. I just want to stamp the images until I find something I like. Or close to it. I can always adjust things when I'm ready to stamp my panel.


The other thing and probably the most important thing to keep in mind when masking and stamping you stamp your images front to back. In other words, foreground to background. I think this is where folks gets nervous. Again, its helpful to stamp out a plan or do as I did in the video and pre build your scene by laying them out how you will want them stamped. So they're going to look piled on top of each other, but it gives you an excellent idea of what order they need stamped in. Just remember, whatever stamp is on top is the one that gets stamped first.

You could definitely do this technique in any medium you want. Watercolor, color pencils, whatever makes you happy. I love Copic Coloring so that's what I did with my card today. I really wanted those colors to pop and I thought a rainbow of flowers would be super fun. Plus the In Bloom: Addie's Garden and In Bloom: Anna's Flora images are large enough they can handle the bolder colors really well.


Coloring in the LOVE was super fun and I can think of lots of different ways you could do that. I wanted my to read more ombre, so I colored darker on the bottom and worked my way out to my lightest color at the top. I also really enjoy how those flowers hang over the word!

To finish off my card, I stamped the smallest heart from the Scenery: Seeing Hearts Stamp Set with black ink. I think they look like tiny embellishments and tie in to the theme of the card.

That's it. I hope you enjoyed my card today!


Be sure to follow along with me this month folks! I will have a super fab giveaway (Thanks Shay!) at the end of the month. All you will need to do is leave a comment on my blog telling me which one of my projects was your fave and why!

Thanks so much for stopping by! Until next time.

Cynde


Supplies used:

Friday, May 4, 2018

Rerun No. 30 | Framed with Evelin T Designs (Challenge + Giveaway + Sale!) + Winners of Rerun No. 29

w&w_rerun_logo
Hello lovelies!  Welcome to our monthly Rerun post!  First, we are going to announce winners from last month's Rerun No. 29 | The Big, the Bold and Baby.

We had such lovely entries and Mr. Random chose this challenge entry to win a $25.00 credit to the w&w shop:
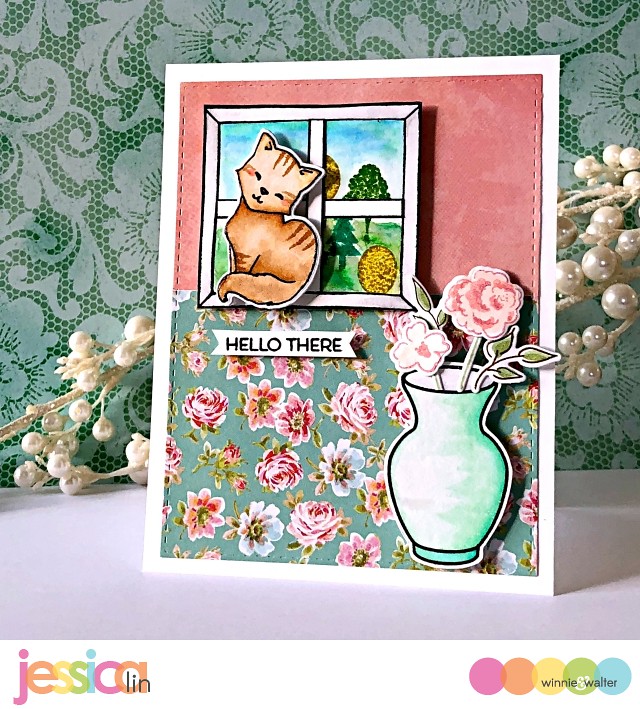
S'More
No. 6 | Karen Ladd

Thank you for all your kind comments as well!  The winner of the The Big, the Bold and Baby is:

No. 27 | Tina Z.


Congrats Karen and Tina!   Please email us at info {at} winniewalter {dot} com.  Tina, I will additionally need your mailing address.

Now on to this month's Rerun!

Each Rerun will provide plenty of inspiration focusing upon a featured product, a month-long sale on the featured product and a challenge (with a prize!) and giveaway.  You will not want to miss out!

w&w_FramedETD_6x8_web

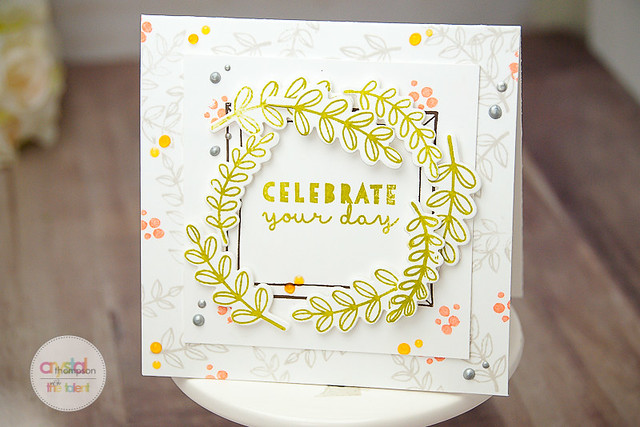
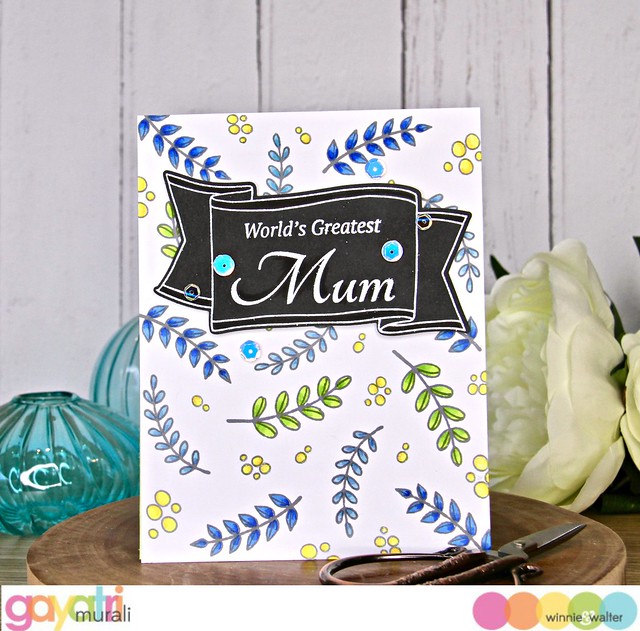
For our thirtieth Rerun we are concentrating on Framed with Evelin T Designs. This set is really a must-have in my humble opinion with wonderful frames, banners and organic accents that are a lovely addition to most any project.

Video alert: Crystal created a video for this month's Rerun.

Now on to the cards!

Shay 

Happy May (how is it May already?)!  This month we are focusing upon a stamp set that happens to have a special place in my heart because it is not only lovely, but so versatile and useful! Framed with Evelin T Designs is a set I often will pick up and use and in fact I used it for my cards for last month's Rerun featuring The Big, the Bold and Baby.

shay_IMG_4327

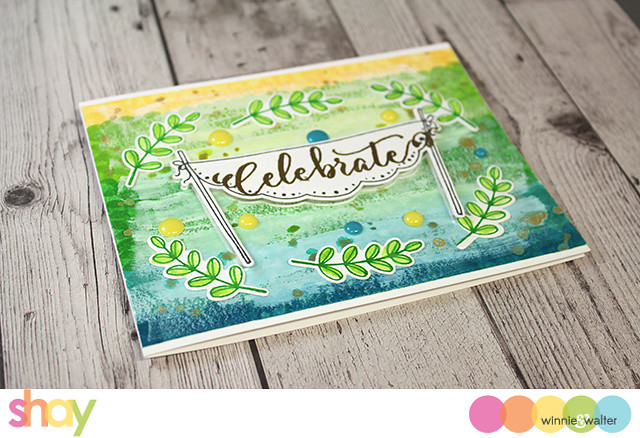
I really had no concept of what I was doing as I started other than I was going to use the scalloped banner from Framed with Evelin T Designs and I was going to avoid creating a background stamped with the sprigs of greenery because I have done those a lot (and I know I will do it a lot in the future too).

I began by stamping the banner onto a piece of white cardstock in Black Jack.  I then decided to mask it off by cutting the coordinating cutaway with thin paper and create a colorful background--this is when I sort of went off the deep end.  I stamped the different parts of the background with the largest solid dot in the set over and over again beginning with Something Borrowed, Aquatini, Grass Skirt, Lime Rickey and then Tiara.

Here was the result:

shay_IMG_4326

Interesting, but ultimately I felt it was way too dark and chunky.  I thought about adding a layer of vellum, but instead I got out my white acrylic paint and dry brushed a bit over much of the center of the panel.  I flicked some gold spray over the cards (I know I do this a lot, but I am still in the thick of my love phase with gold splatter!).

I stamped the banner in Black Jack again and cut out the banner with the coordinating die.  I stamped "celebrate" from Wish Big with Evelin T Designs making sure to adjust it so it fit on the banner.   I stamped the more rounded sprigs set of stamps 3 times each in Grass Skirt and quickly painted them in with Lime Rickey before I cut them out with the coordinating cutaways.

Once it was dry I added the sprigs with adhesive and the banner over the banner that had been masked previously with dimensional foam adhesive. 

Lastly I added some enamel dots before adhering the panel to a white cardstock base.

shay_IMG_4330

I had fun making this card and even like the result. lol

That's it from me...wait until you see what Crystal, Gayatri, Heather, Jessica, Kate and Keren did with Framed with Evelin T Designs ...so awesome!

>>>THE TALENT<<<

Video with Crystal:

crystal_WW Re-Run May (2 of 4)
CLICK HERE to see more from Crystal.

gayatri_May rerun card
CLICK HERE to see more from Gayatri.

heather_Cards-4-27-18-156
CLICK HERE to see more from Heather H.

jessica_IMG_0719 WM 640 CLICK HERE to see more from Jessica (our Talent in Residence).

kate_IMG_2607 CLICK HERE to see more from Kate.

keren_61449D21-5CD5-4878-8D81-2C22F87540E0 
CLICK HERE to see more from Keren.

>>>CHALLENGE<<<

Now it's your turn to play along with Rerun!
  1. Create a new project using Framed with Evelin T Designs (and/or the coordinating cutaways).  An alternative to using Framed with Evelin T Designs. (and/or the coordinating cutaways) is to create a new project using one of the projects featured in this post (or any Rerun post throughout May by The Talent) as your inspiration.  Make sure you use at least one (1) w&w product (this can include a freebie found in the w&w shop) in your project.  If you choose the alternative to using Framed with Evelin T Designs. (and/or the coordinating cutaways), please include in your post or project description which project inspired you and how.
  2. Link up your project here by 11:55 p.m. CST on May 31, 2018.  
  3. Enter as many times as you want before the deadline.
  4. This Rerun Challenge may be combined with other challenges found here on the w&w blog or elsewhere.
One project will be randomly chosen to win $25.00 credit to the w&w shop!  The winner will be announced on the w&w blog in June. 

>>>GIVEAWAY<<<

Please comment on this post (make sure to include your email address in your comment--if you have to add your email address to your comment please do so by replying to your original comment) by 11:59 p.m. CST on May 31, 2018 for a chance to win your very own Framed with Evelin T Designs stamp set!

Thursday, May 3, 2018

A Warm w&w Welcome!

We want to welcome our latest Talent in Residence, Jessica Lin!  Jessica does amazing work and she really made a lasting impression on us when she was our July 2017 Leading Lady (and ever since) so we invited her to join The Talent for the next few months.  You will see her on the w&w blog like the other Talent and during any release we have during her term.  

We are so very excited to have her joining us!!

>>>ABOUT JESSICA<<<


Her blog: Jessie Handmade

1. Favorite snack(s) while creating: I don’t snack in my craft room… The thought of accidentally spilling food is scary and I’m usually too concentrated to eat anyways. 

2. Color combo I can’t get enough of: Rainbows! I love bold, intense colors, so ROYGBIV always finds itself onto my color palette somehow.

3. On my desk/table right now is: My trusty Big Shot, mini MISTI, some most used black ink pads, and 3 different pairs of scissors - that’s how you identify a craftaholic.

4. I excel at:  I wouldn’t say I excel at crafting, but I do feel really passionate towards all kinds of crafts; paper crafting, sewing, needle felting… My hands have been kept busy for the past 12 years. 

5. When I craft I: watch tv/movies; listen to music; listen to the voices in my head; and/or prefer silence: When I’m planning card designs I prefer silence, but I love to listen to music when I’m actually crafting.  

6. My favorite crafting companion: My computer. Or Pinterest I should say. 

7. Don’t you dare take this away from me: This may sound weird but I treasure the portable hard drive where I store all of my step-by-step crafting tutorials and photos we took whenever we travel. 

8. My favorite crafting holiday/event: Christmas and birthdays! 

9. My pictures are mostly of: My cards. I don’t freak out like an average twenty-something when somebody snoops through my phone because there’s no drama or things to gossip about. Just cards I’d love to share. :-) 

10. When I grow up I want to be: A professional crafter!