Friday, September 11, 2015

Vanessa's Version: Rerun No. 4 | This Awesome House

Hi everyone! Vanessa here with my card using This Awesome House for the Rerun No. 4. 


I started with a panel of watercolor paper and created a watercolor wash using green and blue ink to paint a sky and lawn. Then I stamped the house, the cat and the sentiment and adhered the panel to the card. Using the dies from Essentials: Katharine Cutaways, I die-cut a frame and adhered it with foam tape. Finally, I added sequins.

I hope you like it! Can't wait to see your take on Rerun No. 4. Thanks for stopping by!


Vanessa

w&wDT_vanessamenhorn_blog-sig


Editor's Note: To see more about Rerun No. 4 and to link up your project for a chance to win a $20 gift card to the w&w shop please CLICK HERE.


w&w-supplies

Thursday, September 10, 2015

Spotlight On...Penny Ward! Part Deux

spotlight-penny-ward 

We are thrilled to have Penny Ward back with us for another incredible post that will inspire you with her inventiveness and creativity!  If you missed learning more about Penny and seeing her first post that will stun you with their loveliness CLICK HERE.

Now, it's Penny's time to sparkle and shine...      

I'm backkkkkkk...Penny here again today with more Metallic fun using Winnie & Walter goodness.

Fall is in the air....somewhere. Living in Florida, we only have one season and that is the Hot season. Isn't it wonderful though that we card makers can achieve Fall through our art?

This card is a fun way to maximize your stamps. 
You just thought those were leaves in that stamp set, but there are so many ways to use them.


Let's get started

  • Start with a piece of Authentique Durable pattern paper trimmed to 4.25 x 5.50 inches. Stamp and heat emboss the "hugs" sentiment from The Big, the Bold and Friends set as shown using WaterMark ink and Stampendous Bark embossing powder.
  • On White cardstock, draw a 3 inch circle (Ok, so I traced around a 3 inch circle die). Stamp leaves from the In Bloom: Lola's Bouquet with Joni Andaya stamp set around the circle using Memento inks Olive Grove, Rich Cocoa, Peanut Brittle and Rhubarb Stalk. Stamp over these same leaves again using Encore Metallic Green, Bronze, Copper inks as well as Delicata Golden Glitz.
  • Trim panel into a 4 inch square. Notch corners with a circle punch, stamp top portion of sentiment and adhere to pattern paper with foam adhesive.
  • Stamp "fern" using VersaFine Onyx Black, then ink with Encore Metallic Green, trim and adhere to side of wreath.
  • Ink up a few strips of light weight cardstock with the Encore inks. Trim very closely (about 1/8 inch) so the cardstock curls. Add a few sprigs of these curls over the "fern".
  • Tie a bow from jute, add to card front along with sequins as desired.
  • Cut White cardstock to 4.25 x 11 inches, fold in half for a base card. Adhere card front to base card.

I just couldn't let my time here as a Guest Designer end without doing something with watercolors.


Shaker cards are still very popular and so fun to make as well as receive.
Look closely at my shaker filler...yep, it is tiny die cuts from the Essentials: Audrey Cutaways.
Too stinkin' cute!


  • Cut watercolor paper 4.25 x 5.50 inches. Stamp and heat emboss Mini Scenery: Multifaceted with WaterMark ink and White embossing powder. Watercolor in the triangles with Blue and Aqua watercolors. Use the same colors for the rest of the panel.
  • Die cut the small scalloped rectangle from Essentials: Audrey Cutaways with Aqua cardstock. Trim inside this panel leaving approximately a half inch all the way around (or die cut with a rectangle die, if you have one). Adhere acrylic sheet to backside of opening. Die cut the same scalloped rectangle from white fun foam, trim center. Adhere to Aqua frame on the backside.
  • Fill "shaker" area with sequins and the adorable tiny die cuts from the Audrey Cutaways. Adhere Aqua panel over the shaker filler. Let dry.
  • Cut a piece of Vellum 1 x 4 inches. Using the Audrey Cutaways large scalloped rectangle die, run through your die cutting machine at an angle as shown. Adhere to card front at the bottom right.
  • Die cut "hugs" from The Big, the Bold and Friends Cutaways die set, paint with All Purpose Ink Frost White and adhere over Vellum.
  • Cut White cardstock 4.25 x 11 inches, fold in half to make base card. Adhere card front to base card and add sequins as desired.


Saving a new to me technique for last hoping you love it as much as I do.


Metallic shine?  Yes, please!
Super simple, easy peasy Mr. Sneezy!!!
Run into the kitchen and grab the aluminum foil....go on, I will wait.

  • Cut White cardstock 4.25 x 11 inches, fold in half for a base card.
  • Die cut Bright Pink cardstock with the large scalloped Essentials: Audrey Cutaways die. Adhere to base card.
  • Die cut a small scalloped rectangle from the Audrey Cutaways using Purple cardstock. 
  • Take a piece of aluminum foil about 8 x 6 inches. Crinkle it pretty good, then smooth it out with a brayer. Using 2 drops each of alcohol inks Wild Plum, Stream and Sunshine Yellow, swirl it around a bit with a paintbrush. Let dry.
  • Adhere foil to White cardstock measuring 5 x 4 inches. Die cut with small scalloped rectangle. Trim a small section of the center away. Adhere to Purple scalloped panel. Wrap sheer ribbon around panel, tie bow and adhere to card front.
  • Die cut "friends" from The Big, the Bold and Friends Cutaways set 3 times, stack and adhere together. Ink top half with Memento Rose Bud ink and bottom half with Memento Angel Pink ink. Adhere to card front along open section.
I am so hoping you found inspiration today for making your own Metallic cards. 

I want to thank Julie and Shay for inviting me to be a part of their family for this short time. It was such fun creating with their wonderful products.
 Hoping YOU have a wonderful crafty day.
Many hugs,  :)

Tuesday, September 8, 2015

Spotlight On...Lisa Lahiff!

spotlight-lisa-lahiff

We are proud to bring you our next Spotlight On...Lisa Lahiff!  Lisa caught our attention with her submissions to The Gossip Column Challenge and Rerun Challenge in which she creates delightful, cheerful, colorful and well balanced cards like this gorgeous CARD that she entered into our first The Gossip Column Challenge. 

Wait until you see what she's made today...you will see Lisa shine!       

>>>ABOUT LISA<<<

Hello beautiful people!!!!  I am so excited to be here with you today!  When I first saw an email to be in the spotlight I literally "eeekkked!", you can ask my husband as I scared the pants off of him, hehehe!  Now onto a little about me... I am a Mommy of two little monkeys, and I am married to my college sweetheart going on 9 years this November!  I have lived in Ohio my whole life, and while the weather may be a bit crazy I love it.  I was introduced to scrapbooking in 2005, right before I became engaged.  After my oldest was born in 2008, I discovered card making and blogging which got me hooked on all things papercrafting!  I have had the honor of seeing several of my works published online and in print, and I feel so blessed to be a part of this community.  I would love for you to stop by my blog, Lisa's Creative Niche, sometime and leave a little hello, I'll be sure to say hi back!

Now onto the projects...

>>>LISA's PROJECTS<<<

With the theme being metallics I decided to share various types of metallics as well as uses for metallics on the following cards...


For my first card I used metallic cardstock in various colors to heat emboss my floral images from the In Bloom: Lola's Bouquet with Joni Andaya Stamp Set.  I then fussy cut around the images and layered them on the left lower corner of my card.  On my background panel you will also see a strip of hearts I die cut with the Essentials: Audrey Cutaways.  The sentiment was stamped last in a coordinating blue from The Big the Bold, and the Happy stamp set.


Next I am sharing a fun way of using textured metallic paper and die cuts.  I started by die cutting the edge of my background panel with the long side of the larger frame cutaway found in the Essentials: Audrey Cutaways.  Once this was adhered to the front of my card, I die cut several butterflies from the same cutaway set and adhered them in a staggered pattern creating the appearance of motion on my card.  The sentiment was stamped from The Big, the Bold, and the Happy stamp set.


This last card was created as a happy accident, and I just love it!!!!  I was able to create my own metallic background by spritzing my cardstock with various gold and silver mists.  I left it to dry for a little, when I realized my original intent for my project was not working I grabbed a baby wipe and began wiping back and forth just to see what would happen.  The results is that lovely shiny and marbled metallic background.  For the second layer of this card I used the same results, but this time I crumbled the paper and opened it up to give it an "older" look.  I then ran it through my die cut machine with the smaller frame die from the Essentials: Audrey Cutaways.  Next I stamped my flowers and leaves from the In Blooms: Lola's Bouquet with Joni Andaya and the banner and sentiment from The Big, the Bold, and Extras Stamp Set onto watercolored paper.  I then used distress markers to watercolor in my images, and fussy cut each one out.  Finally I layered my flowers and leaves and popped my banner up with foam adhesive.

So to sum things up, metallics are great for stamping on, die cutting with, and creating beautiful backgrounds.  I hope I've inspired you to try something new with metallics today!  Thanks so much for stopping by and seeing my projects!  I have the honor to stop back later this month, and I can't wait to see you then!

Lisa

Monday, September 7, 2015

In Focus with Gayatri Murali No. 5 | Style #1

Hello and welcome to the new In Focus tutorial for the month of September.

in-focus-banner-title_640px

Keeping with this month’s theme of metallic, I am focusing on the GOLD trend.

The-Gold-Trend-technique

Gold has been trendy since last year. I love adding gold into my projects. So I will be sharing two different ways to add gold colour into your projects.

Gayatri Style banner


In this tutorial, I will focus on gold on larger scale by heat embossing as the background of my card.

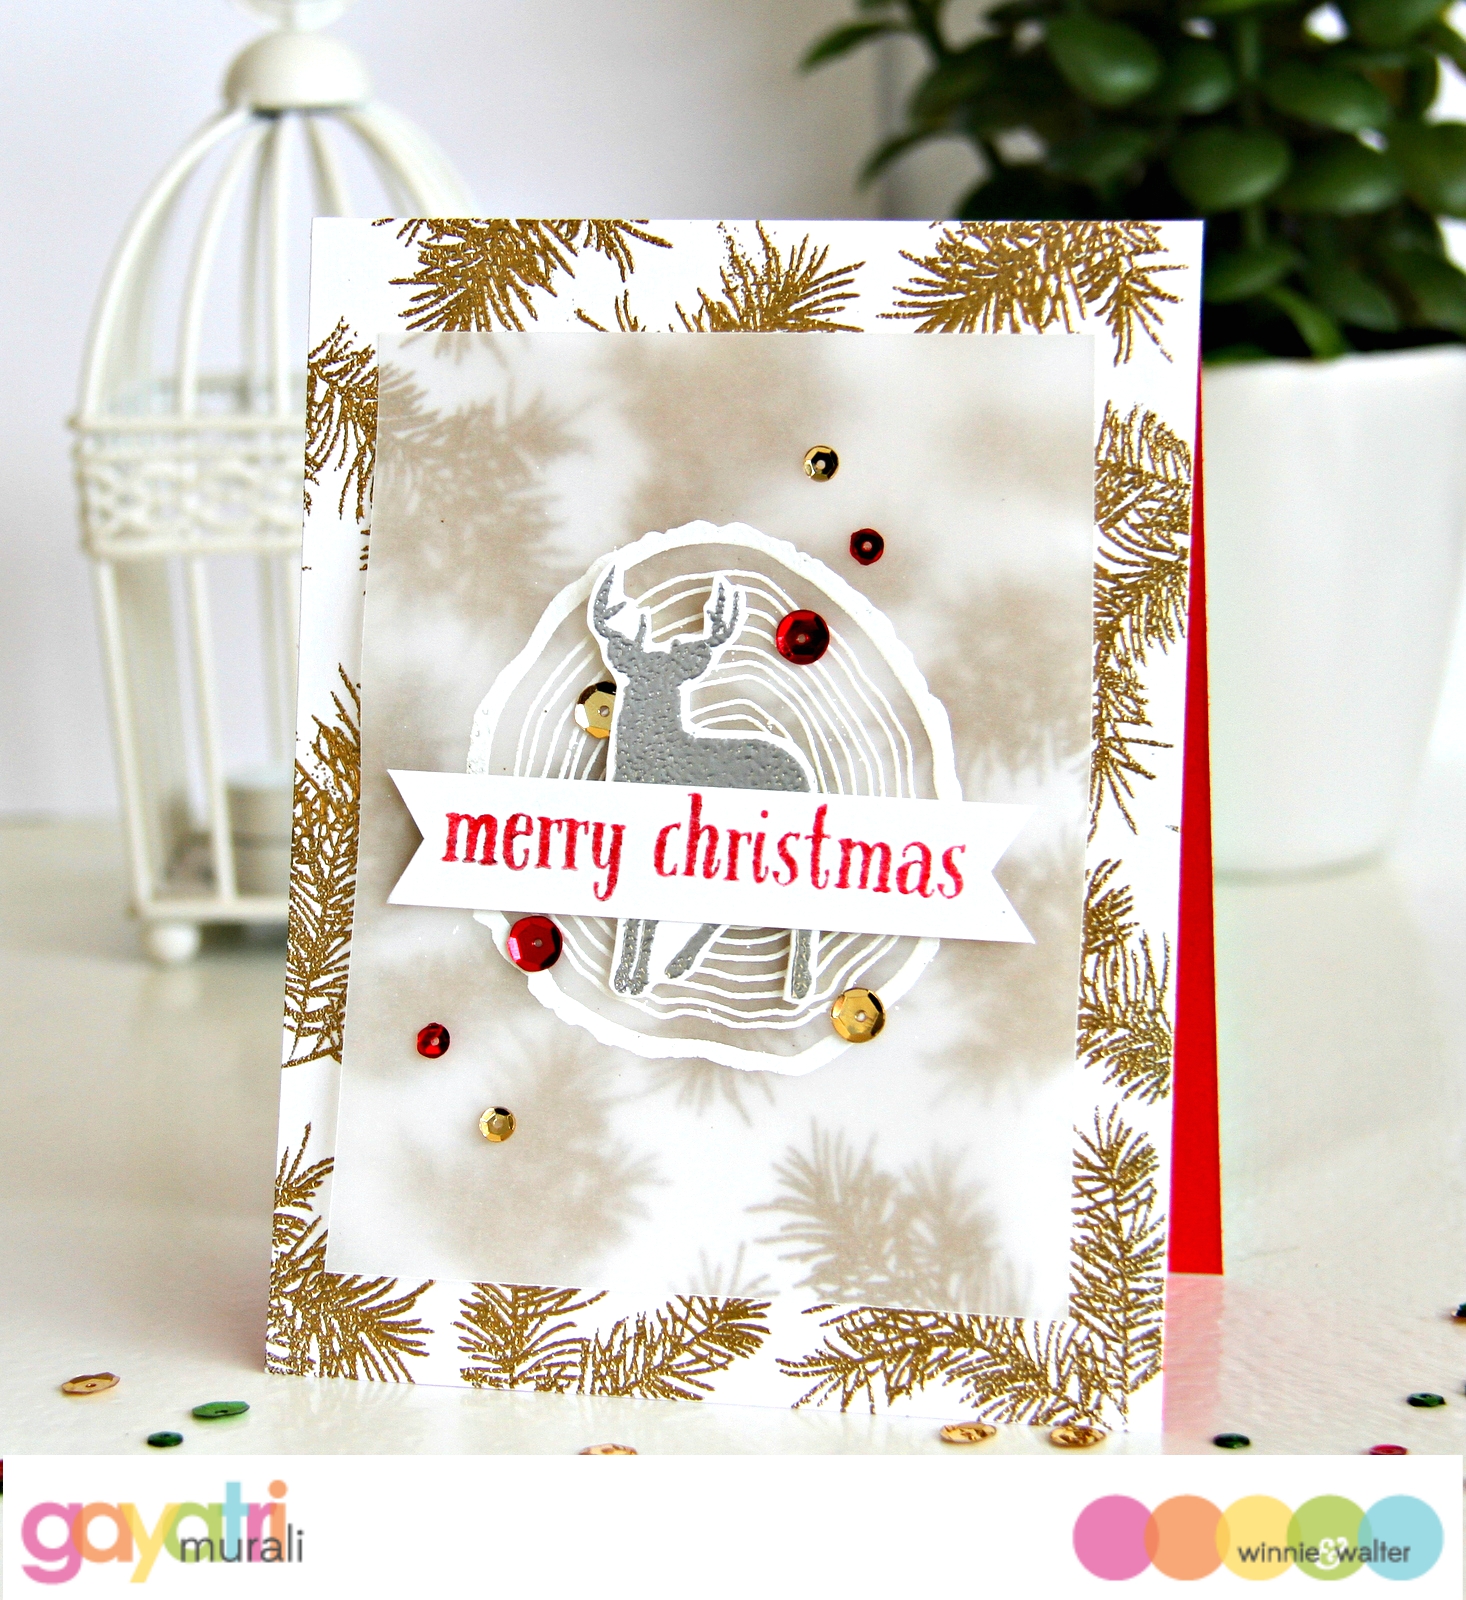
Here is my finished card.

Merry Christmas card1

Here is how I made it.

photo-tutorial_banner

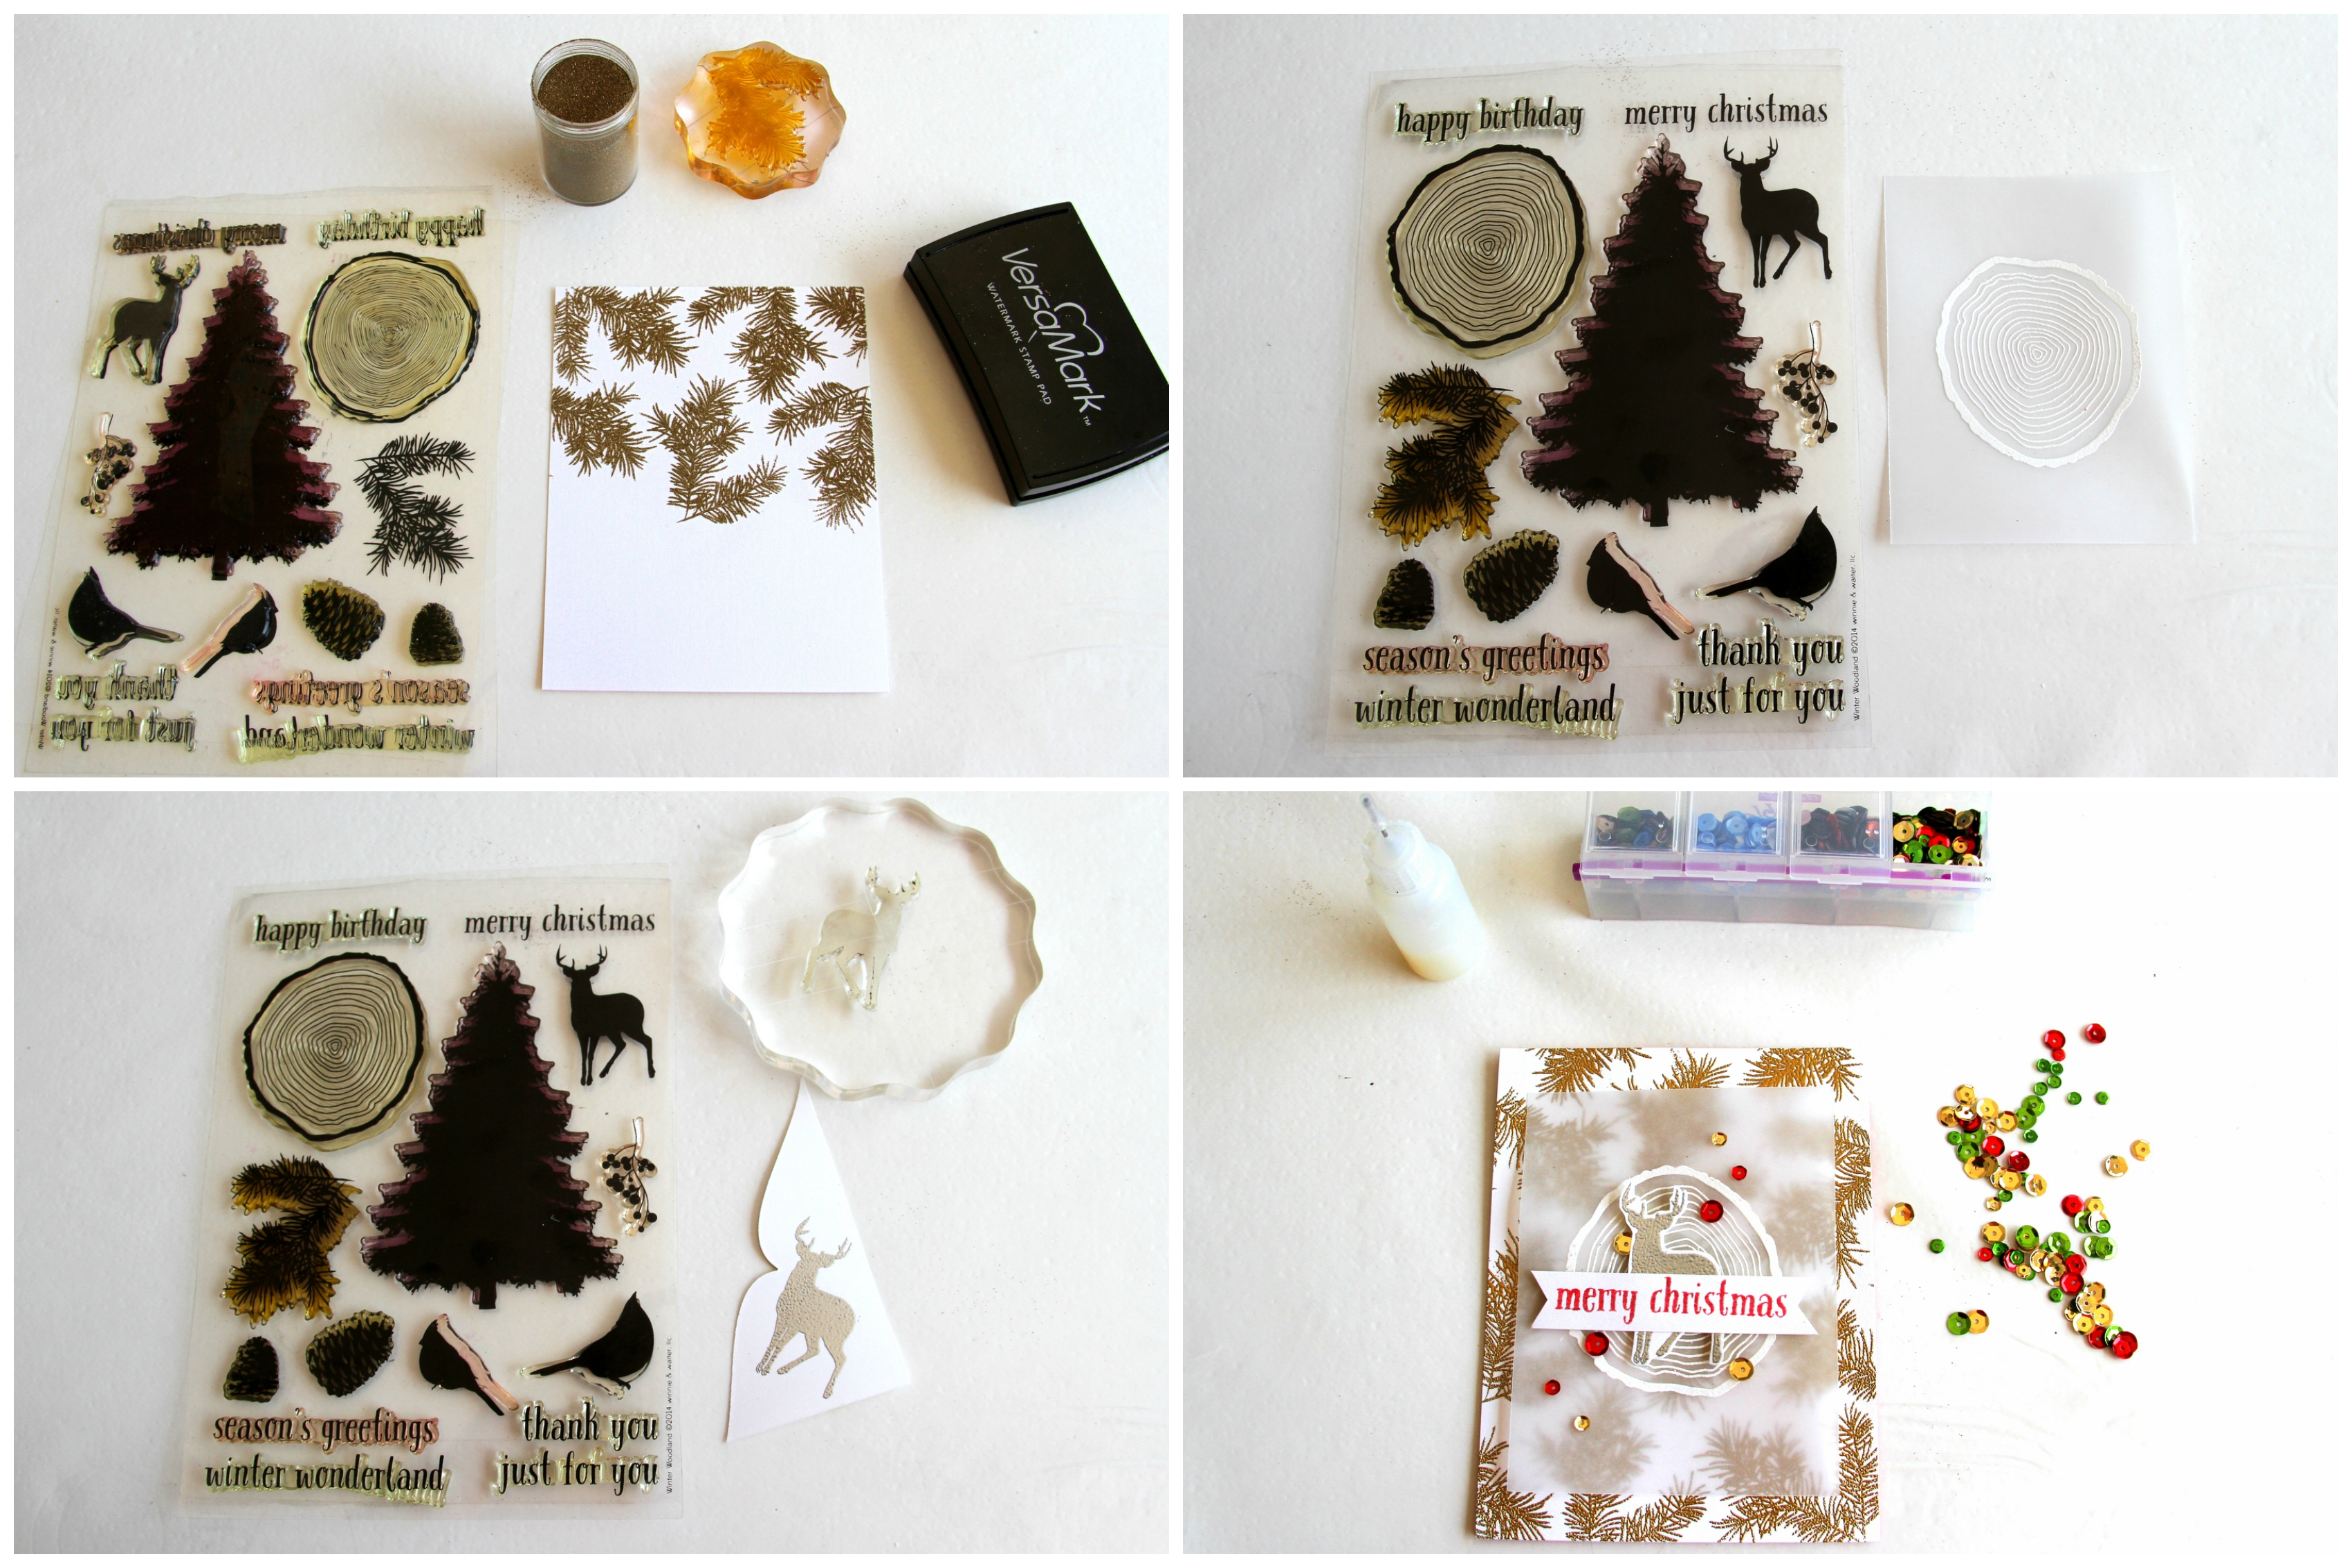
Gold trend photo tutorial


brief_banner

I started with a white card panel trimmed to size of the card front. Then I stamped the pine needles image from Winter Woodland stamp set all over the panel with versamark and heat embossed using gold embossing powder. Embossing added texture and the gold brought shine. Instantly the gold embossed images against the white background brought the rich festive look.

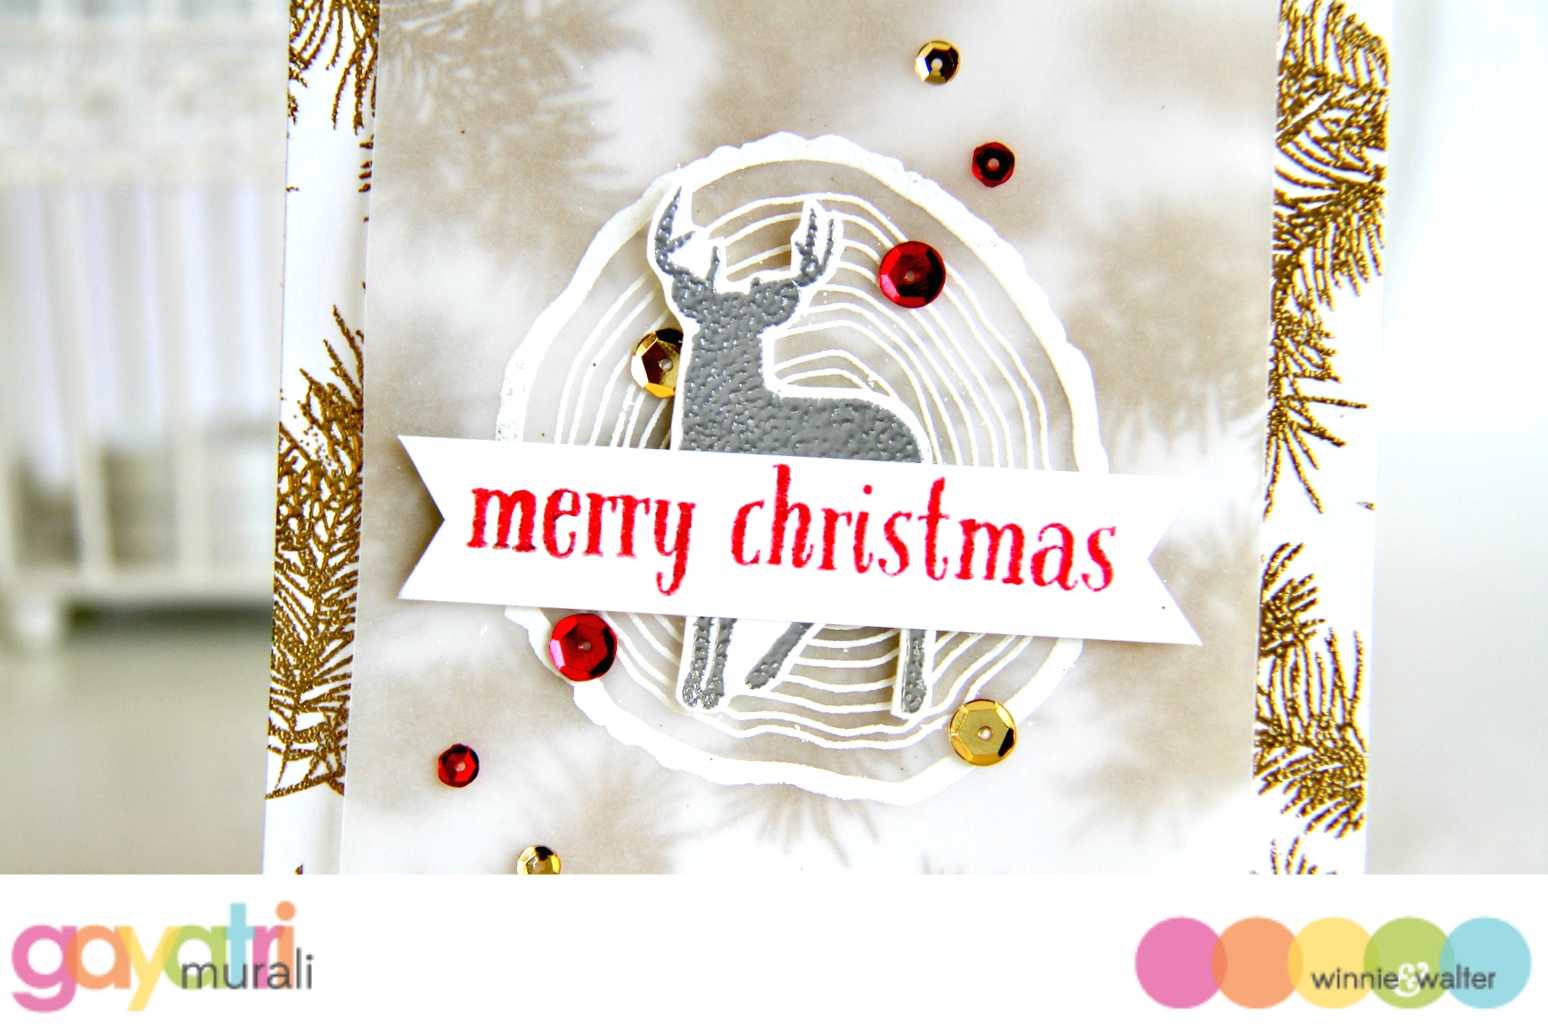
For the focal point, I white heat embossed the cross section of the wood from Winter Woodland stamp set on vellum. Silver heat embossed the reindeer also from Winter Woodland stamp set on a scrap piece of white cardstock. I them cut the reindeer out by hand. I adhered the reindeer on the vellum panel using foam adhesives. Now there is too much of white and metallic in the form of gold and silver. To bring in colour, I stamped the sentiment again from Winter Woodland in red and clear embossed on a strip of white cardstock. Trimmed the strip and cut fishtail ends. Adhered to the centre of the reindeer using foam adhesives. The reindeer and the sentiment strip are perfect to hide foam adhesives to adhere the vellum on the card panel.

Finally, adhered the card panel on a red card base and embellished with Pretty Pink Posh’s Traditional Christmas sequins. This entire card is made using images from just Winter Woodland stamp set. This set is awesome because it has so many Christmas images and sentiments. Here is a closeup shot of the focal point.

Merry Christmas closeup


How classy is the metallic gold embossing on the background? The tip is, if you are using gold on a larger scale such as for the background and heat embossing, pick a detailed image. Not a solid image. Big chunks of gold on the background does not give you the classy look.

Yes, I have started making Christmas cards. I needed to get organised early. Hope I have inspired you to start making Christmas card! Thanks for stopping by today. I will see you in couple of weeks with another tutorial using the GOLD trend.

w&wDT_gayatrimurali_blog-sig

>>>LINK UP<<<


w&w-supplies

Saturday, September 5, 2015

September Leading Lady Lindsay Amrhein | Take One

Lindsay-Amrhein_sept2015


Today we are thrilled to introduce our September Leading Lady, Lindsay Amrhein.   Lindsay's style is happy, bright, colorful, graphic and clean with a beautiful balance and flair.  Lindsay is a wife and mother from the Buckeye State and she's up for all sorts of papercrafting challenges as evidenced by being on the challenge design teams of Avery Elle, Taylored Expressions and Runway Inspired Challenge.   

Over the next few Saturdays in September will be leading us on a journey of her own design and imagining.  Make sure to visit her blog, Note To Self, to see more from her and for a chance to win a giveaway! 

Give Lindsay a big round of applause to welcome her as she steps onto the stage for her first performance as our September Leading Lady!    

Hello! I am so excited to be joining Winnie & Walter this month, as their Leading Lady! The current release of products is truly fabulous, and I had a blast creating with them! For my post today, I am focusing on the use of one product, the Cover Model: Multifaceted Cutaway die, and two fun ways to use it. Dies are an investment, and getting as many looks from them is a great way to stretch your dollar.

For my first card, I used the die to cut out a rainbow of cardstocks. When I had all of those pieces separated, I took the negative, and placed it onto my cardbase using a light application of adhesive. I then began placing the colorful pieces back into the slots using rainbow order. 


After adhering the pieces, I removed the negative portion, leaving just the colorful pieces behind. From there I moved on to the sentiment. Using The Big, The Bold, and Friends, I white heat embossed my sentiment onto black cardstock, and trimmed it out, mounting to the card front with foam tape.


I finished off this bright card with a few black pearls to accent the sentiment, and add a bit of contrast. My next card, featured the negative portion of the die. I began by die cutting, using white cardstock, multiple times, and gluing the layers together.


On the card base, I used Distress Inks to create a gradient blend to go underneath my die. Once the ink blending was complete, I added a bit of black thread, along with a white heat embossed sentiment from the mini set, Sparkle, on black cardstock. I trimmed it down, and adhered it over the thread.


To complete the card, I added a sprinkling of Clear Sequins from Pretty Pink Posh, which is available in the Winnie & Walter store! Thank you so much for stopping by today. I hope you were inspired to try something new with your dies today! See you next week!


w&w-supplies

Thursday, September 3, 2015

Spotlight On...Penny Ward!

spotlight-penny-ward 

We are proud to bring you our next Spotlight On...Penny Ward!  Penny really caught our attention by entering our The Gossip Column challenge and Rerun challenges with projects that showcase her clean, bold style and clever touch as seen in this amazing card HERE.

Wait until you see the awesome projects she's made today...you will see Penny shine!    

>>>ABOUT PENNY<<<


Hello crafty friends.... 
I am a daughter, sister, wife, mother, Nana and one year Breast Cancer Survivor.
I married my high school sweetheart back in the stone ages. We have two grown sons, a beautiful Daughter in Love and two adorable grandsons. My shadow is my small white dog Snowy.
I am retired from a Fortune 500 company after 20 years of helping others achieve their dreams. Before my grandson was born, some really great friends had a First-time Grandma shower for me (how cool is that?), and I wanted to make some personalized thank you cards. I walked into my local craft store, saw all the pretty papers and tools, and I was hooked.
Many watched videos later, I have been published in magazines more than 100 times. I am currently on the Imagine Crafts Design Team, and designed for Penny Black and others.
I was beyond thrilled to be contacted by Julie and Shay about being in the Spotlight for September. What an honor! I do believe a happy dance was involved.
I would love for you to visit my blog Penny Ward Ink, take a look around, maybe be inspired by something you see there. Questions and comments are encouraged!

>>>PENNY's PROJECTS<<<

Let's make some cards.....


This month we are featuring Metallics on our projects, though beautiful to look at, they are not very easy to photograph. Just imagine the sheen on each of these cards! :)

Let's start with Metallic cardstock.
Easy Peasy Mr. Sneezy

  •  Cut White Metallic cardstock 4.25 x 5.50 inches. Run the top half through embossing machine using a We R Memories Geometric folder.
  • Wrap Offray ribbon around card front.
  • Die cut Winnie & Walter In a Word: Hugs Cutaway two times from same cardstock. Stack and adhere together. Adhere to card front as shown, placing a small amount of Gold Metallic thread behind it.
  • Adhere this panel to a card base of white cardstock cut to 4.25 x 11 inches, folded in half.


Now let's try something a little more challenging:


This one is a little more complicated, yet still easy enough to accomplish in a short time...ok, don't count drying time...I hate that, don't you?

  • Cut Teal cardstock to 4.0 x 5.50 inches. Lay this panel on a craft mat and lay the Winnie & Walter V for CheVron stencil on top. Using a palette knife, spread Metallic Blue Creative Medium over stencil. (HINT: I spray the backside of stencil with Temporary adhesive to keep it in place). Let dry.
  • Stamp and heat emboss large Smiles sentiment from the Winnie & Walter Big, Bold & Friends stamp set using WaterMark ink and White embossing powder.
  • On a scrap of Black cardstock, heat and emboss the small sentiment from the same stamp set. Trim and adhere to card front with foam adhesive.
  • Attach the card front to a base card of Black cardstock cut to 4.25 x 11 inches and folded.
  • Make a couple of small banners from trimmed Washi tape, adhere to top of card. Die cut the small button from the Winnie & Walter Audrey Cutaway. Adhere to card front and coat with irRESISTible Pico Shimmer. Add Pretty Pink Posh Sparkling Clear sequins as shown.


 Foil is all the rage right now, and it is so perfect for Holiday cards:


This is fairly simple to make. You will need to download the Winnie & Walter The Big, Bold and the Merry cut file. 

I then took this file into my Silhouette software, deleted the "s" from the word Holidays, made a thick black border at 4.0 x 5.25 inches, positioned the word "holiday" where I wanted it and sent it to my laser printer. I then cut the panel to 4.25 x 5.5 inches, adhered the foil and ran it through the laminating machine.
  • Die cut In a Word: Hugs Cutaway from Blue cardstock, stamp it with Winnie & Walter Mini Scenery: Multifaceted using WaterMark ink and Silver embossing powder.
  • Paint some of the angles with All Purpose Platinum ink. Randomly add irRESISTible Pico Shimmer to some of the angles. Let dry. Adhere this embellishment just below the word "holiday".
  • Die cut a heart from the Winnie & Walter Audrey Cutaway, adhere thin Metallic Silver cord to back and adhere to card front as shown. Coat heart with Pico Shimmer and add bow.
  • Adhere card front to a base card cut from White cardstock measuring 4.25 x 11 inches folded in half. Run the edges along a Delicata Shimmery Silver ink pad.
Well, that is going to do it for today. I had so much fun playing with all my new Winnie & Walter stamps, dies and digitals. It's your turn. What Metallic creations are you going to come up with?
Until next time...hugs!!!!   :)

Wednesday, September 2, 2015

Winner of Rerun No. 3 Challenge | Bubble Talk

It is that time to announce the random winner of our Rerun No. 3 Challenge | Bubble Talk, but first let's celebrate *all* of the lovely entries!  

Thankfully it is chance rather w&w that has to pick a winner! :-)

Rerun3a

Many thanks to: Joyce M. Diane Jaquay, Berina Febin, Tenia Nelson and Penny Ward for taking on the Rerun Challenge and making such beautiful projects!  We feel very blessed that you joined in.

The random winner of the $20 gift credit to the w&w shop is No. 1: Joyce M.!

joycem_P1070096_edited

Joyce, please email us at info {at} winniewalter {dot} com to claim your prize.

Don't forget to enter our latest Rerun Challenge focusing upon This Awesome House!  Find out how HERE.

Tuesday, September 1, 2015

Rerun No. 4 | This Awesome House

w&w_rerun_logo

Welcome lovelies to our next monthly Rerun!

Each Rerun will provide plenty of inspiration focusing upon a featured product, a month-long sale on the featured product and a challenge.

w&w_ThisAwesomeHouse_web-wm

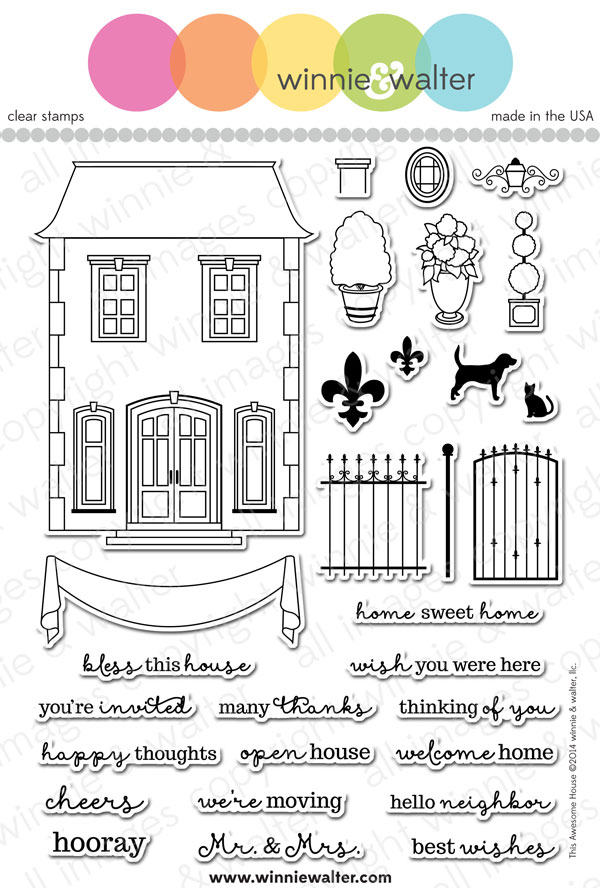
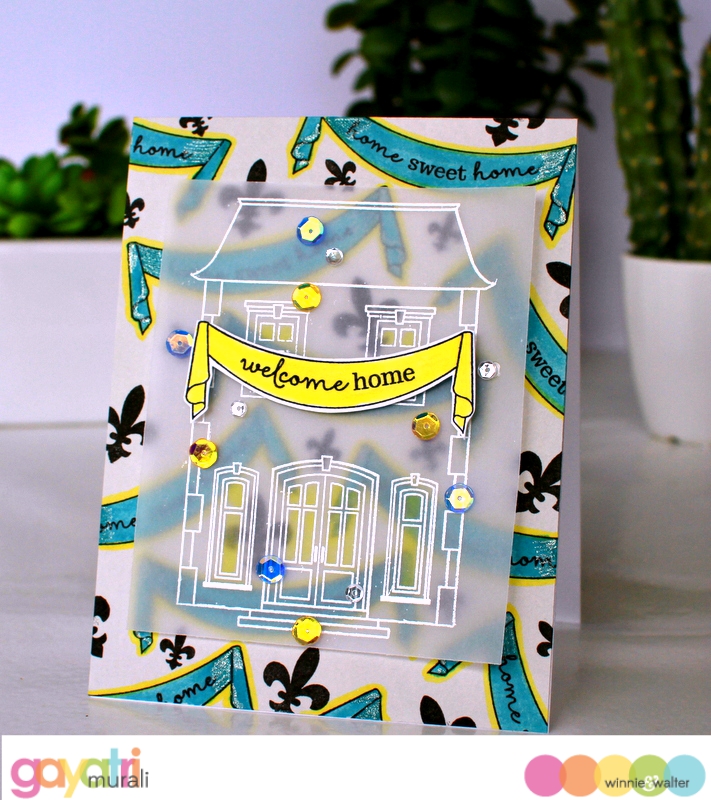
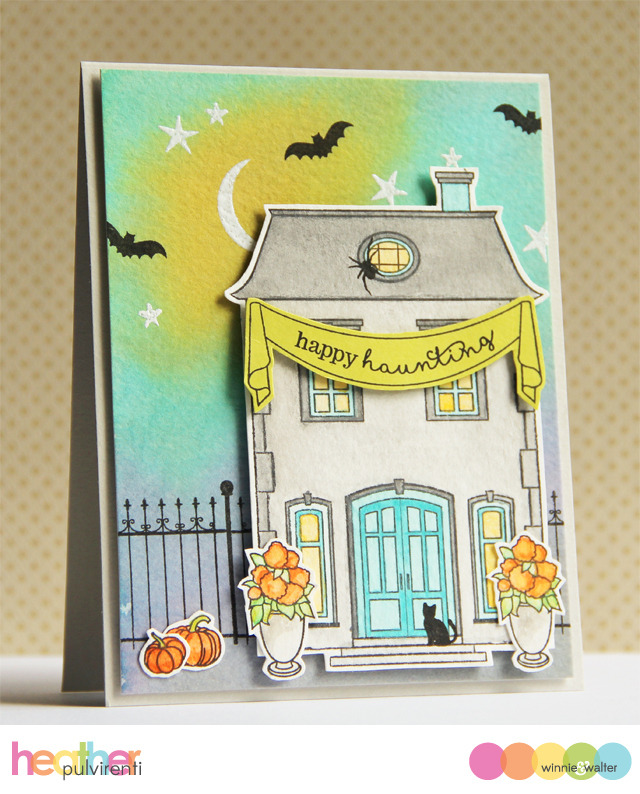
For our fourth Rerun we are concentrating on This Awesome House.  This Awesome House focuses upon a large stately house that can be customized for different occasions and includes a draping banner and sentiments!  Pair it with Moonlight for Halloween or Happy Christmas for Christmas.

Now on to the cards!

Shay

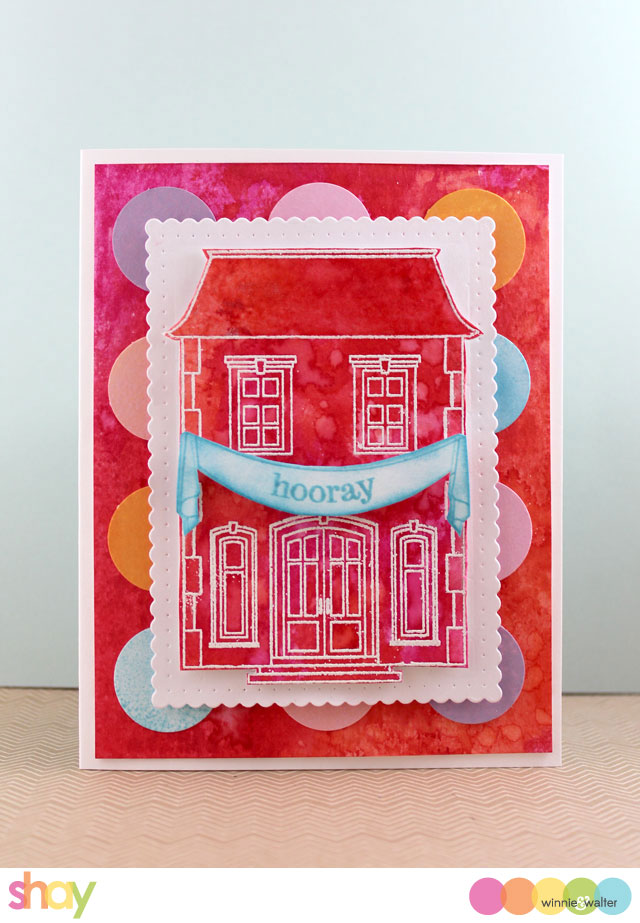
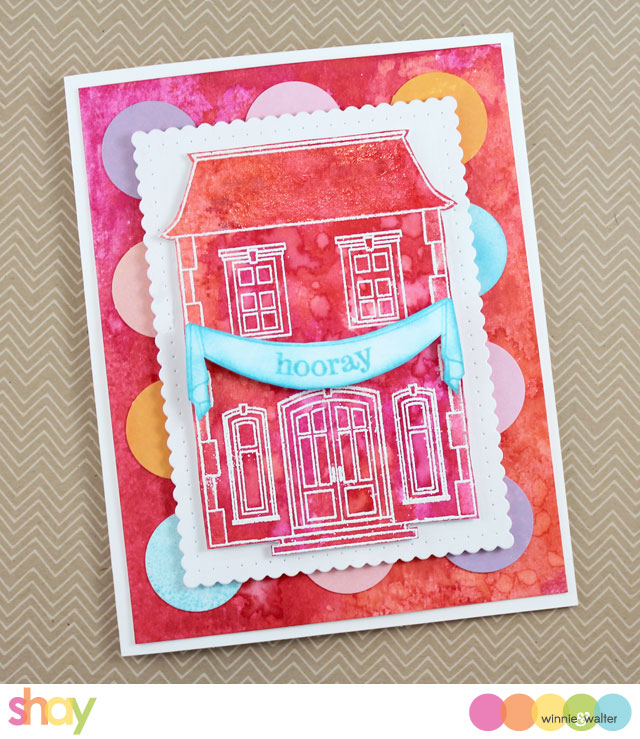
I went a little wild with color for my card this time around!  This house may be elegant, but it can also go funky and fun.

shay_1a

This card started out with an idea which did not go as planned.  I began by stamping the round solid balloons from The Party in different colors by Hero Arts.  I wasn't loving how I was cutting them out so I pulled out a 1" circle punch and punched them out.  Not sure what the heck I was doing with the circles I set them aside thinking they may go with another project entirely.

I stamped the house in Versamark on a piece of watercolor paper and then embossed it with white embossing powder.  I then swooshed the panel in picked raspberry Tim Holtz Distress Ink that I had smeared onto my craft sheet and sprayed with a little water.  Next was festive berries and then ripe persimmon.  With a water brush I filled in any white spaces with picked raspberry. I sprinkled water over the entire panel.  I used my craft knife and cut out the house from the panel being careful not to cut too much out of the panel.  I adhered the house with dimensional foam adhesive onto a piece of white cardstock cut using the smaller panel from Essentials: Audrey Cutaways.

I colored a piece of white cardstock with some turquoise ink and then stamped the banner over it along with the sentiment.  I cut it out and distressed the edges with the ink and then adhered it to the house using dimensional foam adhesive.

On the watercolored panel with the hole where the house was I added the colored circled and placed the white panel over the opening with dimensional foam adhesive.  Last I adhered everything to a white card base.

shay_1b

Wait until you see what Gayatri, Heather and Lydia did with This Awesome House!

>>>THE TALENT<<<

gayatri_Welcome home card
CLICK HERE to see more from Gayatri.

heather_090115
CLICK HERE to see more from Heather.

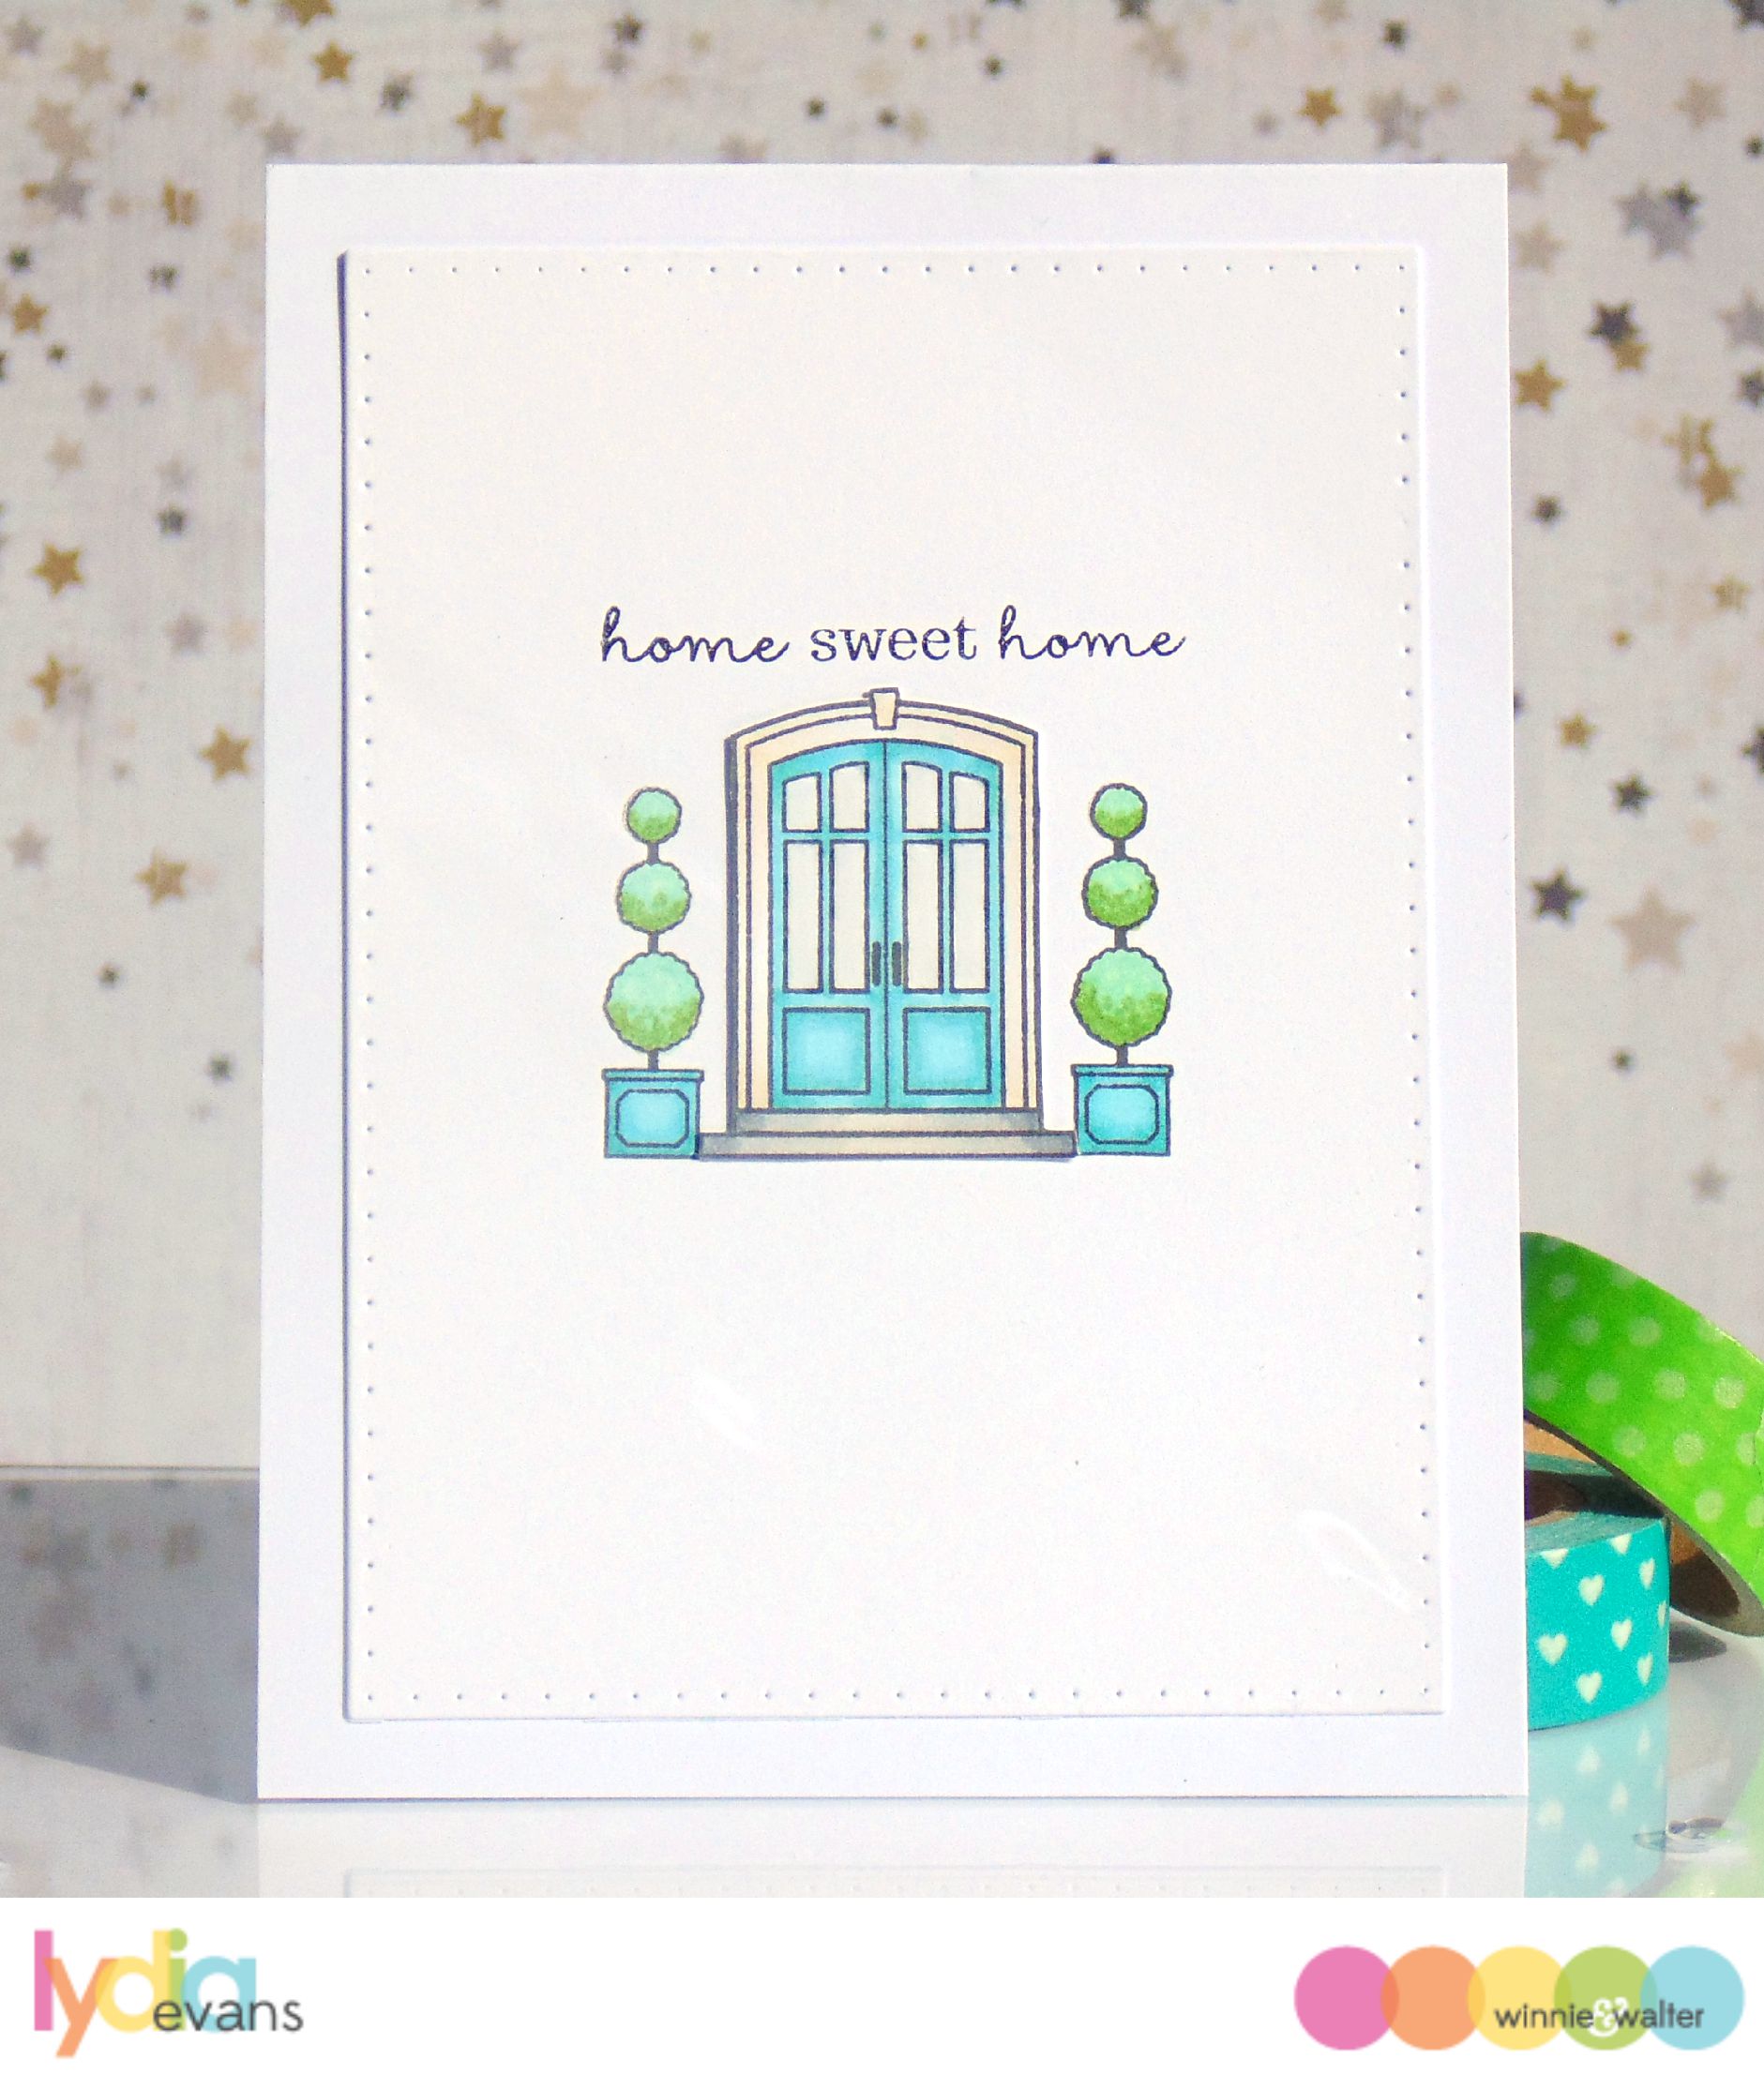
lydia_DSC06061


CLICK HERE to see more from Lydia.

>>>CHALLENGE<<<

Now it's your turn to play along with Rerun!
  1. Create a new project using This Awesome House (and/or the coordinating cut files).  An alternative to using This Awesome House (and/or the coordinating cut files) is to create a new project using one of the projects featured in this post (or any Rerun post throughout July) as your inspiration.  Make sure you use at least one (1) w&w product (this can include a freebie) in your project.  If you choose the alternative to using This Awesome House (and/or the coordinating cut files), please include in your post or project description which project inspired you and how.
  2. Link up your project here by 11:55 p.m. CST on September 30, 2015.  
  3. Enter as many times as you want before the deadline.
  4. This Rerun Challenge may be combined with other challenges found here on the w&w blog or elsewhere.
One project will be randomly chosen to win $20.00 credit to the w&w shop!  The winner will be announced on the Giveaway Winners page.