Friday, October 21, 2016

Merry Christmas with Lydia

Hi there everyone and happy Friday! It's Lydia here with you on the Winnie & Walter blog today, and I'm sharing a very CAS Christmas card..... I seem to be very into the festive spirit at the moment.

  dsc00115vc

I have used a couple of fabulous sets for this! First I started by drawing a light pencil circle where I wanted the partial wreath to be. I then took the small fir frond from In Bloom: Elsa's Flora and stamped this repeatedly using green ink to create a 'base' for the other images, I stamped a smaller base around the bottom left of the pencilled guideline and a smaller one on the top right. I find that doing a larger and smaller cluster works better for partial wreaths like this. I then took the twig with berries from Winter Wonderland and stamped this into place a couple of times using a light brown ink. I did this I as didn't want the berries and twig to be of the same colour and dark brown ink would have then shown through the red coloured pencil that I then coloured the berries in with. I used a brown coloured pencil to go over the twig and then used the same brown pencil to add in a few twigs to the foliage.

  dsc00114n

To finish the wreath clusters I then took the small fir cone from the same set, stamped it first in brown on the wrong side of the stamp to get a solid impression of the stamp, and then switched it over on my block so it was the right way and then stamped the detailed fir cone image in black on top of the brown impression. For the sentiment I stamped one of the beautiful ones from Merry & Bright with Evelin T Designs using embossing ink onto some vellum and heat set it using gold embossing powder. To finish I matted this piece on to some gold card before adding to a brown card base.

dsc00112y  
Thank you so much for stopping by and I do hope today's card has inspired you. 

Hugs, Lydia x

w&wDT_lydiaevans_blog-sig 2


w&w-supplies

Wednesday, October 19, 2016

Wishing You with Kelly

Hi Folks! For any Fall birthdays I love to take advantage of making cards with bright reds, oranges and yellows. They are such happy colors, perfect for putting a smile on someone's face.
  
   
This card uses one of my favorite trees ever, the large circle tree from Kindness with Evelin T Designs.  I'm not a fan of spending a long amount of time coloring leaves and branches, so this circle tree makes my coloring time so efficient!


Several Distress Inks are blended on the tree, and then I flicked some water drops to break it up. Gold and clear sequins add a nice sparkle.

   
I used the sentiment from Wishing You with Evelin T Designs (on sale in November) as a grounding element for the tree, and colored the area below each letter with marker. It makes the sentiment a little more interesting, and gives the tree somewhere to grow. The top of the "n" is cut with an exacto blade so I can slide the tree trunk behind it. I used a few washi tapes on the bottom of the card base.

Thanks so much for looking!

-Kelly

w&wDT_kellygriglione_blog-sig


w&w-supplies

Monday, October 17, 2016

Rerun No. 15 | Gorgeous with Keren


img_8061
Great to be with you again!
As this month's Re-run is all about Scenery: It's A Wonderful Pennant and I've focused on using just 2 of the stamps in the set
w_w_scn-it_sawonderfulpennant_lg-wm_large
First up- do lots of stamping. These photos were taken at night which is why there's a colour shift. I die cut a circle and then start to arrange the triangles symmetrically. It's useful even if you don't perfectly stamp the triangles, as the imperfections will be hidden under the next layer so add your dodgier ones to the first layer or two!
img_8063
Now just keep adding the 'petals' until you end up with a circle shape. It's up to you how tightly you stack them. I wanted a fuller flower and also wanted the darker shade at the back to help give more realistic dimension. I then added the lighter pink layer and then the orange one.
img_8064
For the final layer I added the smaller triangle shapes and then looked for a suitable sentiment from The Big, The Bold & You set. I curled the edges of some of the petals upwards using a bone folder and then I realised that my 'embellishment' had become the whole card!
img_8062
It's a fun statement card and will need a little flattening for an envelope but would work equally well as a present topper or home decor item.
Do check out the littler stamps and think beyond the season they're intended for. You might be surprised by the results you can get!
It'd be wonderful to see what you can come up with using this inventive set. Do add your link here.
Thanks for joining me today and I'll see you soon
Keren xx
w&wDT_kerenbaker_blog-sig2

w&w-supplies


Saturday, October 15, 2016

Ruby's Bridal Shower Blog Hop

To see our October Leading Lady, Maya Isaksson's Third Performance CLICK HERE.
Ruby's shower
Welcome!  Many of you came from the always excellent Emily Leiphart's blog and if you are just stumbling up on this blog hop please continue reading for tons of beautiful inspiration and prizes. :-)

There is nothing better than celebrating an incredible person and a wondrous event.  Ruby (now Rubeena Ianigro formerly known as Rubeena Naz) just got married and Amy Tsuruta (first stop on the blog hop too) organized a special blog hop to commemorate the occasion and Ruby herself.  Anyone who knows Ruby knows her as a generous person who gives of her time, effort and talents.  I feel very fortunate to be able to participate in honoring such a beautiful person inside and out.

Oh and make sure to comment throughout the hop for prizes from these companies:

Ruby's Shower Prizes

Now onto the card I created for Ruby.

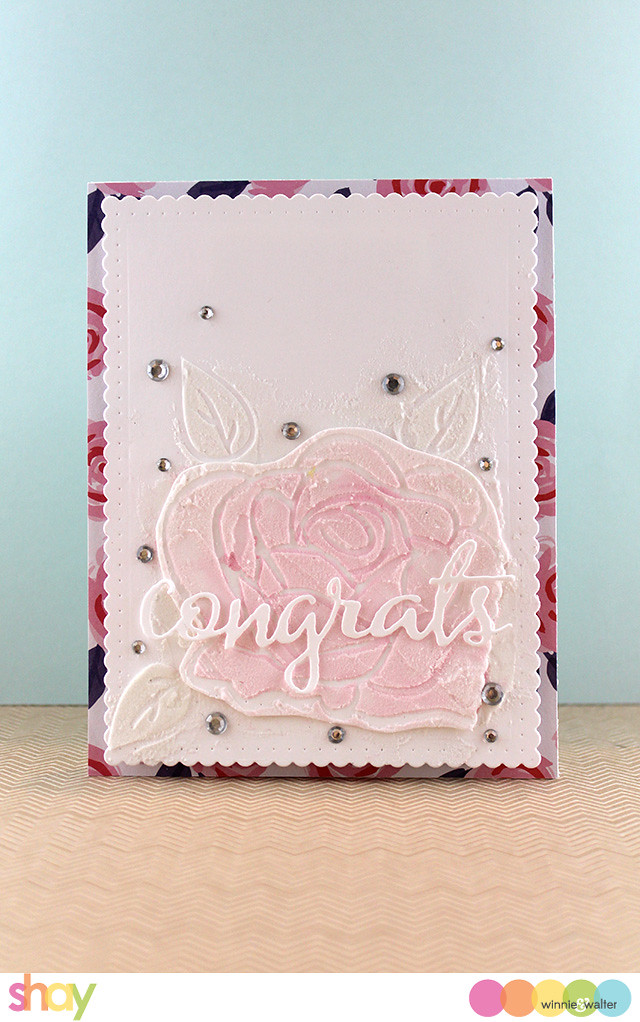
shay_IMG_4046

I was inspired by cake in creating this card.  I used embossing paste and one of the roses and the single leaf from Duo: The Big, the Bold and Extras Creative Screenings.  On the white cardstock panel cut with the largest scallop rectangle layer from Essentials: Audrey Cutaways I placed the leaf three times and spread the embossing paste over it like frosting.  On a separate sheet of cardstock I placed the rose and spread the embossing paste that I mixed with a little pink ink over the rose.  Once dry I cut it out and placed it on the scallop panel.  I added the die cut "congrats" from The Big, the Bold and You Cutaways over the rose.  I adhered the scalloped panel with foam dimensional adhesive to a card base covered with patterned paper from American Crafts Valentine collection 6x6 paper pad.  I love the little bit of bold color and pattern behind the soft white and pale pink.

Last I sprinkled a generous amount of sparkly gems because it's for a wedding and Ruby deserves some bling. :-)

Your last stop is with the magnificent Miriam Prantner!

Should you have gotten lost here is the entire linked up blog hop:
Shay (w&w blog) <===== YOU ARE HERE

Before I go I just want to wish Ruby and her husband, Steve, a lifetime of joy and laughter together!

Happy creating,
Shay.

October Leading Lady Maya Isaksson | Take Three

Maya_Isaksson_october2016


Our October Leading Lady, Maya Isaksson, is back for is back for her triumphant third performance!  If you missed her smashing debut you must see it..CLICK HERE or her sensational second performance adding an unexpected element CLICK HERE. For today's performance Maya uses a common stripe thread to create cards that are dynamic and dynamite!

Without further ado, Maya....

Today's theme is stripes! I fell in love with the set Scenery: Stripes and the stamps was the inspiration that made me want to do a whole post with stripes. 


Maya isaksson winnie walter striped shaker

The first card is made with just that set, Scenery: Stripes. I used my Misti to get the stripes straight and went ahead and stamped a pattern using 4 colors of Distress ink. As you might have noticed Distress ink doesn't stamp perfect on bold images like these, but I don't have any fun colors of another ink so since I used my Misti I was able to stamp multiple times until it looked even enough. I made it into a shaker card with vellum window to keep it a bit calmer but still interesting. You can see that something is behind the vellum but it won't distract from everything else that's going on. I used the True Multifaceted Heart Cutaways for the window, the geometric pattern complimented the background great and the size was just perfect! I also used sentiments from LS Exclusives: So Tweet with Evelin T Designs with the matching cutaways. It's a fun card and the colors look so good together, I will enjoy sending this to someone.


Maya isaksson winnie walter striped shaker
The second card is super simple. I just embossed the sentiments in white and stamped the lines from Scenery: Stripes over it. I also blended some ink really softly over it all to make the sentiment show up on the card. I cut the panel out with my favourite scalloped rectangle die from the very useful Essentials: Audrey Cutaways, I also cut out one of the hearts in the set and covered it with glitter and glossy accent. As I said, super easy!


Maya isaksson winnie walter striped shaker
The last card for today was pure color therapy. I stamped the geometrical patterned bars from True and spent a while coloring them with alkohol markers while listening to a good audiobook. I picked a color scheme off Pinterest to come up with a nice color combination. I also added clear shimmer using a sparkle pen to some of the areas. I cut out the panel with the smaller scalloped rectangle from Essentials: Audrey Cutaways and inlaid it in the large rectangle from Essentials: Katharine Cutaways to make it a bit more interesting. I added sequins as decoration and called it a day.


W&w_30giftcard

If you take a look over at my blog Little Outbursts of Creativity I have been given a gift card to giveaway for one of my commenters. So come on over, leave a comment on any of my Leading Lady posts there during the month and you have a chance to win it. You can use it in the Winnie & Walter shop and get something you love. 


See you again next Saturday, I have some great cards ready to show you so I hope you will come back for that!


w&w-supplies


Friday, October 14, 2016

Joy with Gayatri

Hello everyone, Welcome back. This is Gayatri here today. I have couple of Christmas card to share with you. The design is easy and can be easily mass produced.

Here is my first card.

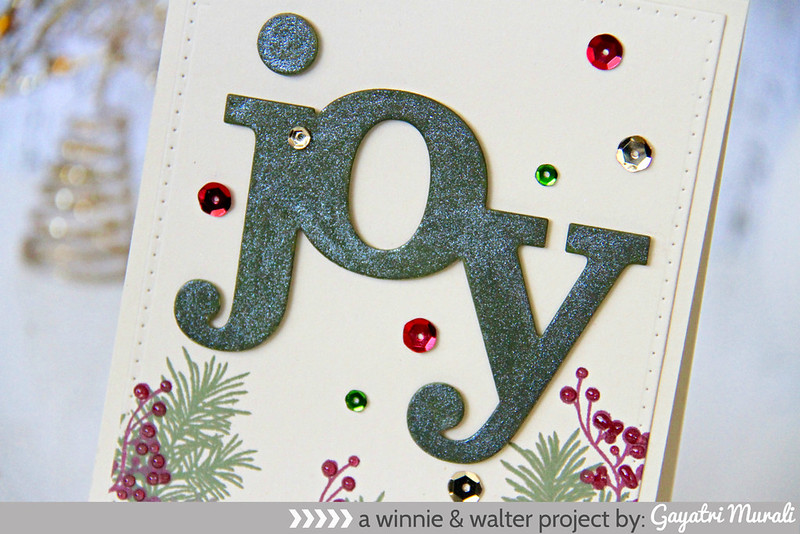
Green Joy 1

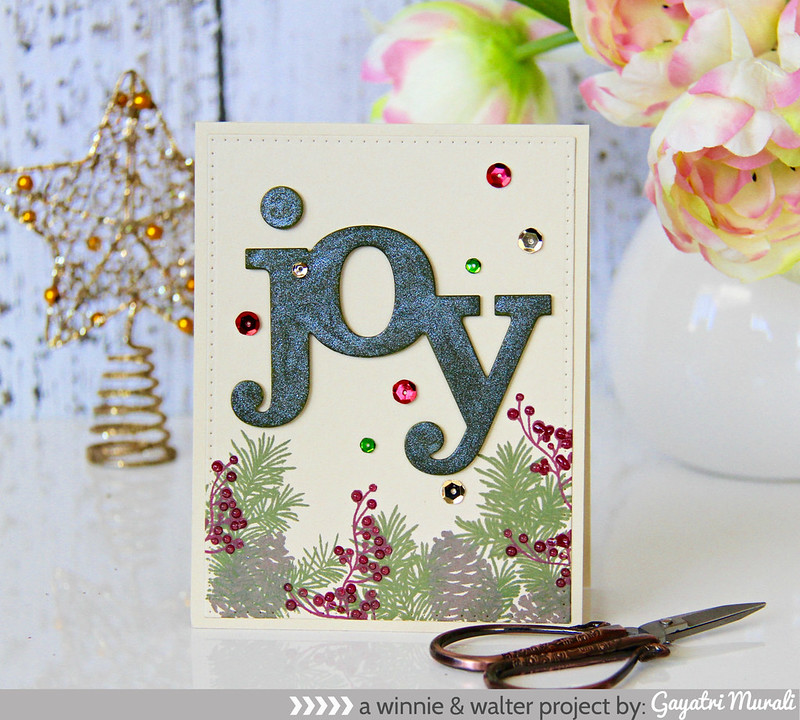
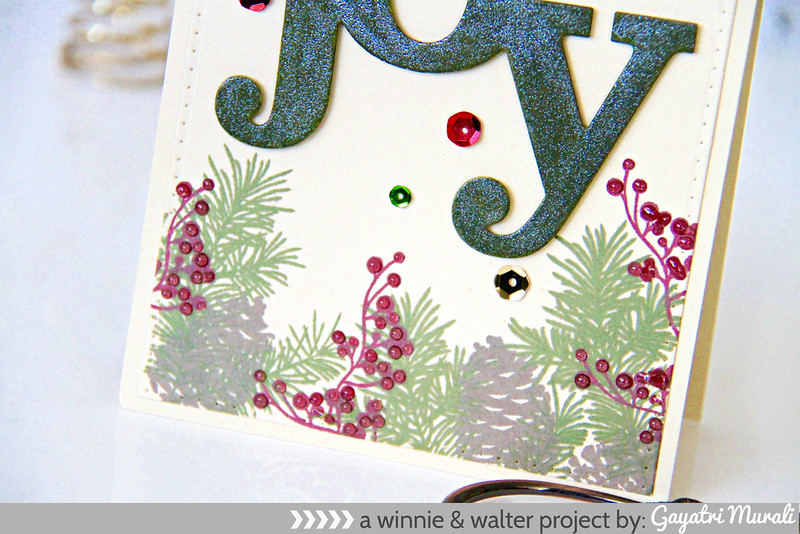
I have used Winter Woodland stamp set and In a Word: Joy cutaway on my card. I started with die cutting a rectangle panel using Essential: Katharine Cutaway. Then I stamped the images from wonter Woodland stamp set on the bottom of the panel using dark green, dark red and brown dye inks. I layered stamped the images.

Green Joy closeup

I then die cut the beautiful JOY using a dark green cardstock, sponged dark green dye ink on the bottom of the die cut, then brushed with green shimmer Spectrum Noir pen. The Ombre feature disappeared upon application of the green shimmer. But the shimmer is gorgeous. I adhered the JOY die cut on the top of the panel. I adhered this panel on the card base flush. I then added some metallic sequins from Pretty Pink Posh and glossy accents to the berries.

Green Joy closeup1

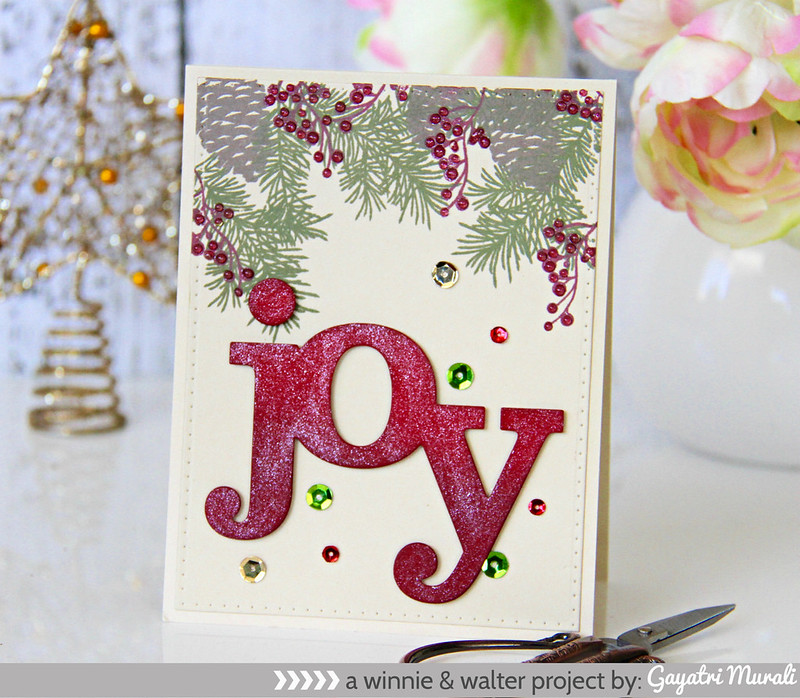
I really loved the colours on this card that I wanted to alter the layout and change the colour of the sentiment to make another card. So here is another card.

Red Joy card

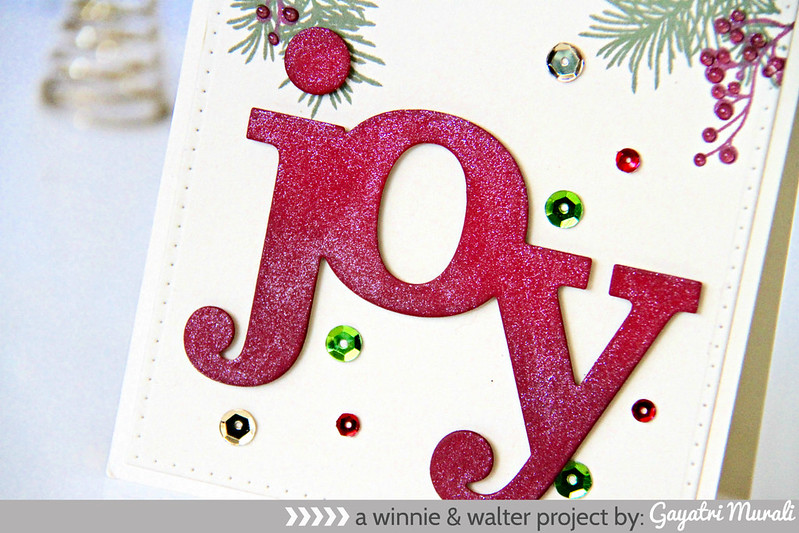
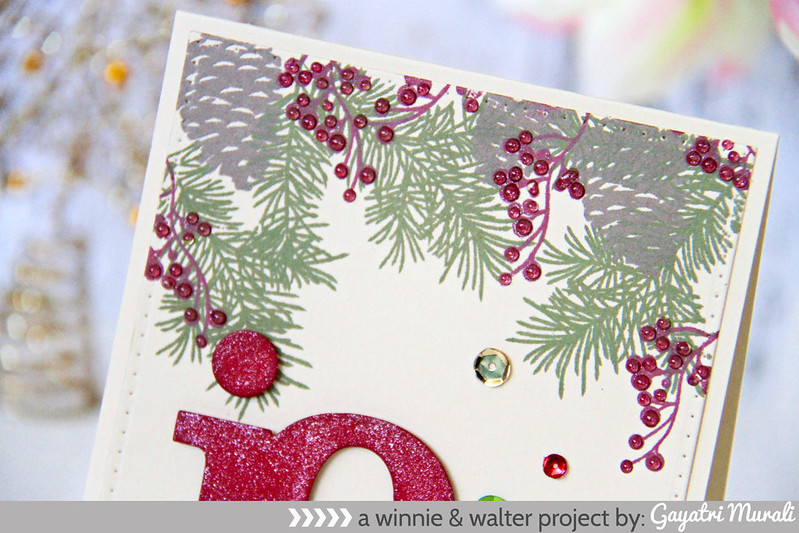
On this card, I stamped the same images from Winter Woodland on top of the panel. Then die cut JOY using red cardstock and sponged dark red dye ink on the bottom of the die cut. Instead of added red shimmer using Spectrum Noir pen, I added clear shimmer using Spectrum Noir pen. On this die cut the red ombre is visible and adds depth of the sentiment. I adhered this sentiment on the bottom of the panel using foam adhesives.

Red Joy closeup

I added the glossy accent to the berries and metallic sequins to bring the card together.

Red Joy closeup1

 Here are the Winnie & Walter Supplies I used to make these cards.
1. Essentials: Katharine Cutaway
2. In a Word: Joy Cutaway
3. Winter Woodland stamp set.


Hope you got inspired my Christmas cards today. Thanks for stopping by!

My blog signature

w&w-supplies