Friday, August 19, 2016

Hello Friend with Lydia

Hello there everyone and a very happy Friday to you!

Lydia here with you and I have a one layer watercolour card to share using the beautiful In Bloom: Anna's Flora.

Winnie & Walter Anna's Floral Watercolour_1  

To start I stamped a cluster of flowers and leaves using Anna's Flora- I masked the flowers after stamping them so I wouldn't stamp over them, this also gives the look that the flowers and leaves are behind each other. I used VersaFine ink as when it is dry you are able to use water over the images without them bleeding. Once the ink was dry I added some colour to the images using Distress Ink- I used a couple of different colours of Distress Ink on the flowers and leaves to give a fun look while still leaving some white on the images. I look the carefree look this gives.

  Winnie & Walter Anna's Floral Watercolour_2

After colouring the images I still wanted to add some more colour in places, so instead of stamping more images and colouring them I added some splashes of colour using the same ink colours I used for the flowers. I then let this dry before adding the sentiment. For the sentiment I used The Big, The Bold and Happy- I love this sentiment set! I love large sentiments and especially ones you can 'build', I always find that a bold sentiment like this finishes a card off perfectly.

  Winnie & Walter Anna's Floral Watercolour_4

Thank you so much for stopping by and I do hope you feel inspired! See you again soon and have a beautiful day. 

Hugs, Lydia x

w&wDT_lydiaevans_blog-sig 2


w&w-supplies


Wednesday, August 17, 2016

Rerun No. 13 | Hugs On Your Day with Kelly

Hi Folks! Just a reminder that there's still a lot of time left in the Rerun Challenge using In Bloom: Lola's Bouquet with Joni Andaya (until the end of this month).


This card was so easy to make. Before stamping I lined up my ink pads from darkest to lightest. Then starting from the bottom, I stamped a row of solid flowers in my second darkest ink, with the outline and center stamped in my darkest ink. For the next row on top, I stamped the solid flowers in my third darkest ink, with the outline and center stamped in my second darkest ink. As I stamped up the card I kept using my lighter inks. For the sentiment I chose a contrasting blue to make it a fun, happy card. Keeping with the happy theme, yellow polka dots are on the inside.

I sure hope you get a chance to play with Lola's Bouquet this month and join our challenge!

Thanks for looking!
-Kelly


w&wDT_kellygriglione_blog-sig


w&w-supplies


Monday, August 15, 2016

Stencils & SVGs with Keren


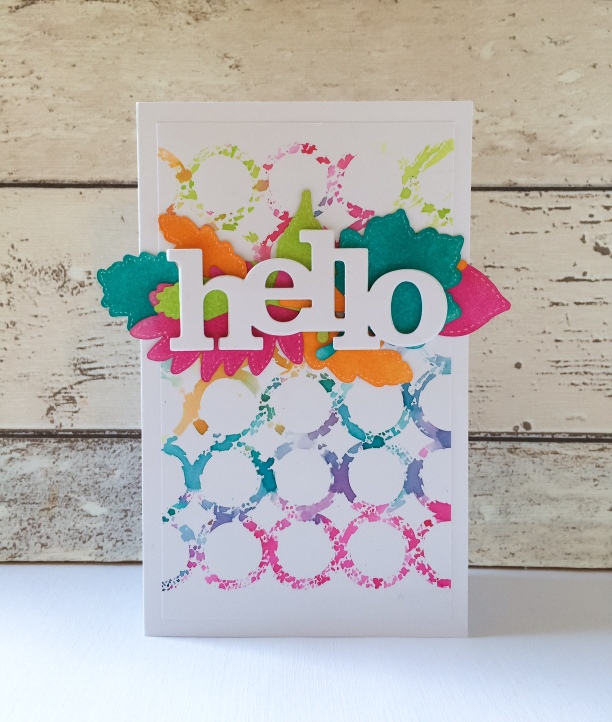
Hello! So glad to be with you today for a post combining stencils and SVGs!
IMG_6708
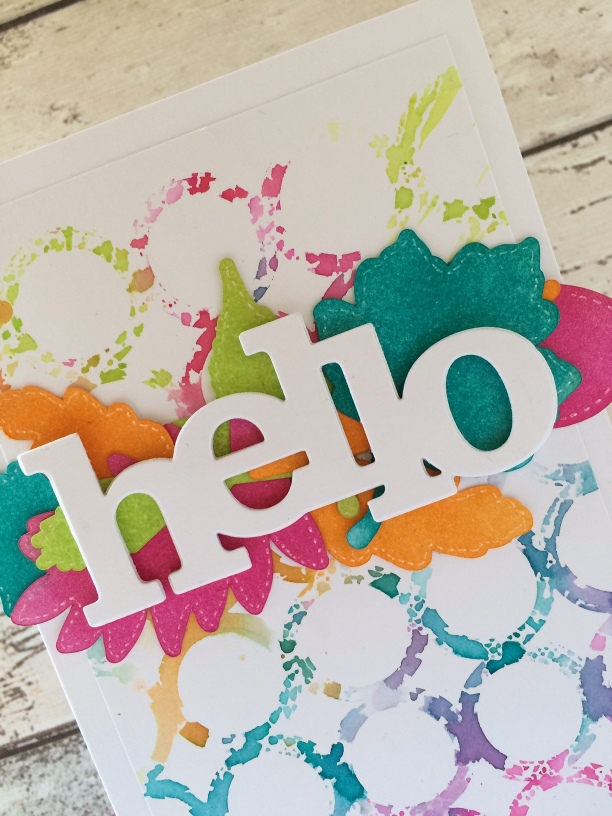
First off- the stencilled background. This is a popular technique and really simple to do. Grab a stencil; I used Pattern of The Ringsw_w_patternoftherings_cs_web_large
Choose some water soluble inks. Distress Inks work so well with this technique. I've used a really punchy combination, but you could go subtle if you'd rather.
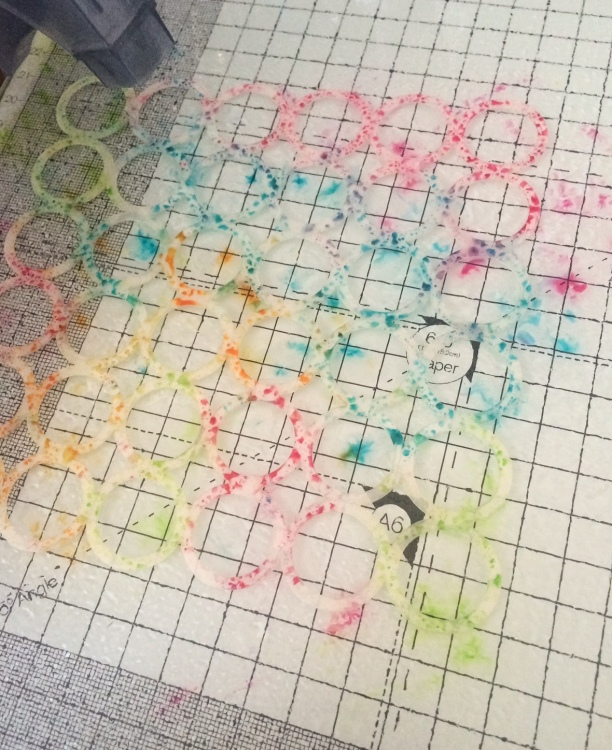
Pat the ink pads over the stencil. You might want something like a craft mat underneath as it gets a little messy!
IMG_6711
Don't worry about overlapping ink colours. It's worth starting with the lighter colours and moving to the darker colours after to avoid staining your ink pads. Once you've placed ink where you want it, give it a good spray with water.
IMG_6712
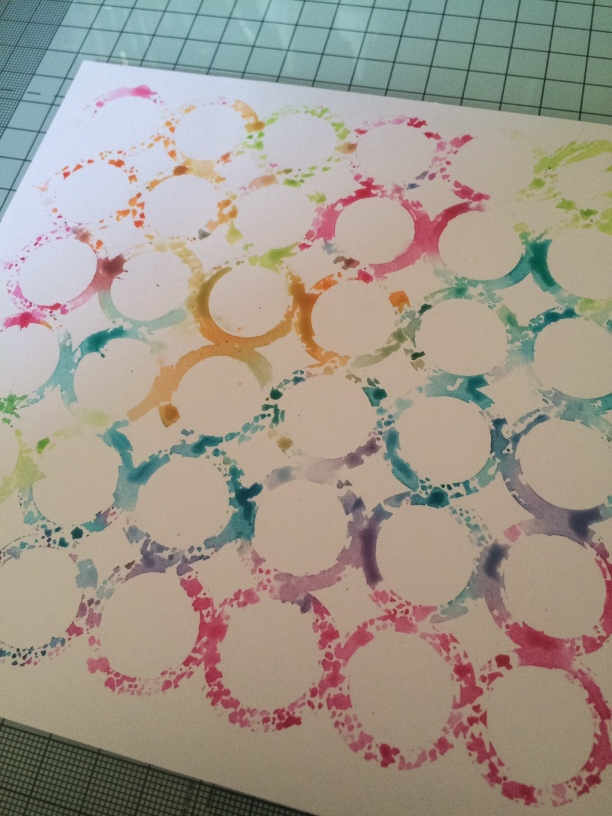
The more water you use, the more the colour will run. Once it's as wet as you want, lift the stencil up carefully and place ink down onto the card. You can simply add the cardstock on top of the stencil, but you can't then dab over it with a tissue to remove any excess ink, like I did here to keep the pattern as 'clean' as possible.
IMG_6713
You're left with a lovely pattern. If you work quickly, you can remove more ink before it dries or even spray more water to allow colours to develop. Then, just use as a background for your project.
IMG_6710
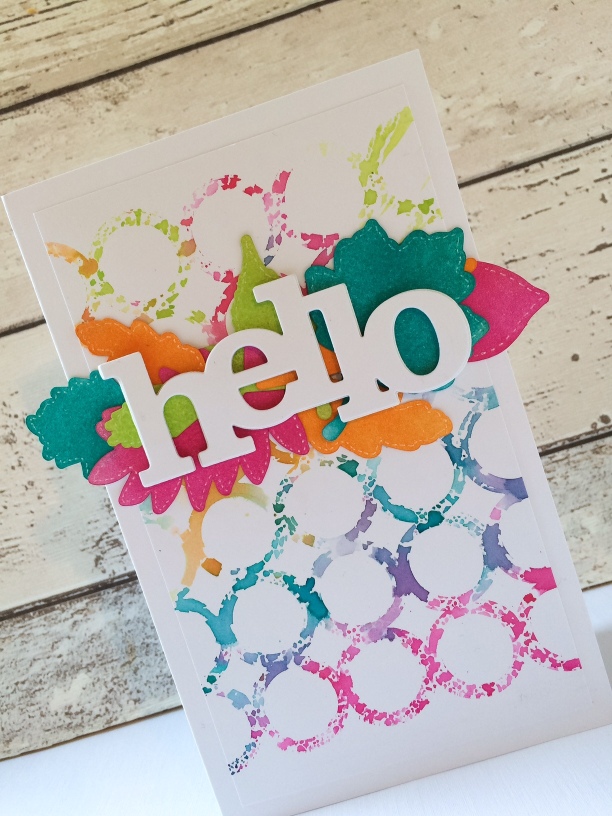
You can see from the picture, that there's actually no stamping!
I've used the cut files from Winnie & Walter to create the leaves.
Download the files and arrange them to be cut out from your computer.
IMG_6714
I created some fun patterns after this arrangement that I'll use for a future project. The files are easy to use and really cost effective. Check them out here
IMG_6709
Once they were all cut out with my Silhouette Cameo, I added more distress ink matching the colours I'd used for the stencilled part and finished off my card with a In A Word: Hello Cutaway
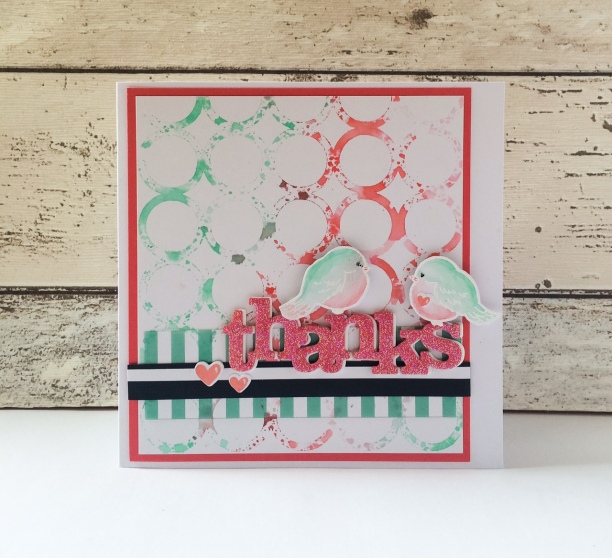
It doesn't need to be so 'in your face'. This is a perfect technique for using subtler gentler colours. See this card that I created using the same stencil but just 3 colours.
IMG_6687
I've used the In A word: Thanks Cutaway along with the LS Exclusives: So Tweet with Evelin T Designs stamp set. 
Truth be told, I didn't like the colour combo so much which is why I tried the brighter set which I ended up loving far more!
IMG_6686
Thanks for bearing with my lengthy post and I do hope you'll have a nosey at the Creative Screeenings (Stencils) & the Cut File collections.
See you soon
xx
w&wDT_kerenbaker_blog-sig2


w&w-supplies

Saturday, August 13, 2016

August Leading Lady Nina-Marie Trapani | Take Two

Our August Leading Lady, Nina-Marie Trapani, is back for her sensational second performance!  If you missed her smashing debut you must see it...CLICK HERE.  Today see how she adds a personal touch to create phenomenal projects!

Ladies and gentlemen, Nina-Marie....

Hi friends! Welcome back to my second Leading Lady post for Winnie and Walter! Today I will be sharing a card I created featuring hand drawn elements and loose watercoloring.

  Nina-Marie_Trapani_august2016 

I think adding some of our own personal touches to our cards, really makes them stand out and add that "something special" to a design. I do this often by doing something as simple as adding in patterns to outline images, or more detailed like drawing in elements to build/finish off a scene... And this is what I did in today's card! I used a group of super cute birds from the LS Exclusives: So Tweet with Evelin T Designs stamp set from Winnie and Walter and both hand drew/watercolored the tree scene they are set in.

  Winnie and Walter Leading Lady Part Two_2

This may seem a bit daunting, especially if you don't feel comfortable drawing. But trust me, this really is forgiving, easy and FUN! The style of these birds from LS Exclusives: So Tweet with Evelin T Designs really lends to a more "loose" feel and doesn't require you to be super detailed with your drawing; the more "sketchy" your hand drawn elements are, the better! I started off this card by stamping the birds onto Strathmore Bristol paper in Simon Says Stamp Intense Black ink (because this ink is waterproof and I will be watercoloring today). I then used a multiliner pen and sketched out some tree branches around the birds, making sure to keep an odd number to help balance out the design.

Winnie and Walter Leading Lady Part Two_3

I then used my Zig Clean Color markers to watercolor everything in; I've got the colors broken down for you below so that you can reference the color combinations if you are interested.
  • birds: Geranium Red, Wine Red, Blush, Sugared Almond Pink, Yellow, Ochre
  • trees: Beige, Dark Brown, Light Green, Deep Green, Green
  • sky: Shadow Mauve, Light Blue, Green Shadow
When coloring the tree leaves with my Zigs, I applied scribbles of color (one shade at a time) and then blended it out with my water and brush. I would repeat this with each color of green, drying between each layer of color, until the entire leaf cluster was finished. You'll also notice that the coloring on these images is a very artistic, free flowing style... or maybe you'd call it messy! :) I love the look of a looser watercoloring, where the color extends past the outlines of the stamped images. I've done this before with other cards and the finished result is always beautiful! This too is very easy to do and there are a couple ways you can achieve the results.

Winnie and Walter Leading Lady Part Two_1

The most important part of this technique is allowing the water to move your colors wherever it wants. I know this can be a bit nervy for those of us that like to have more control over their coloring. But truly, this is what is going to give you the most natural looking results; if you try to "control" where it goes outside the lines by painting outside the lines intentionally, I find it never feels quite right. So the two methods I love most for loose watercoloring techniques are:
  1. water then color: first spray areas of your image with water, before applying any color down. This will result in the color spreading as you drop it into the wet areas of your image. Depending on the type of watercolor medium you are using, this may be a bit tricker for some images. For the scene I was creating in this card, I skipped this method and used method two, but I wanted to mention this one because I use it and have had great results with it.
  2. color then water: for this method I color my images (inside the lines) first, then take a spray bottle and apply water over my colored images to get the color moving. I usually start off pretty light with the initial sprays of water as you want to stop before your coloring starts to move too much... because then you risk it becoming muddy.
Winnie and Walter Leading Lady Part Two_5
To finish off this card, I used The Big the Bold and the Comfort stamp and die sets from Winnie and Walter to create a sentiment that reads "Prayers, comfort and love". I think the bright, cheery colors paired with the heartfelt sentiment would be sure to lift up the spirits of the recipient. I painted the prayer die cut using the same red Zig markers that I used for the birds, which helped tie it all together in the design. I hope today's card has inspired you to try adding in some hand drawn elements of your own into your card designs... this really is a great way to stretch not only your stamp sets, but also your creative muscles!    

GIVEAWAY!

w&w_30giftcard

Before you go, I want to tell you that Shay was SUPER generous in allowing me to giveaway a $30 gift certificate to one of you, which can be used in the Winnie and Walter store! How cool is that?? BIG thank you to Shay for being so sweet!

To qualify for the giveaway, make sure you leave a comment on any of my Winnie and Walter blog posts (commenting on each Saturday post this month will count as extra chances to win the giveaway). After the last Leading Lady post at the end of the month, I'll draw a random winner from all the collective post comments.
   

PRODUCTS

If you are interested in any of the products used in this post, I have them all linked below. Affiliate links used when possible.