Friday, August 21, 2015

Mayuri's Version: Rerun No. 3 | Bubble Talk

Hello there - Mayuri here to share a card using Bubble Talk to create a fun, colourful background and card.
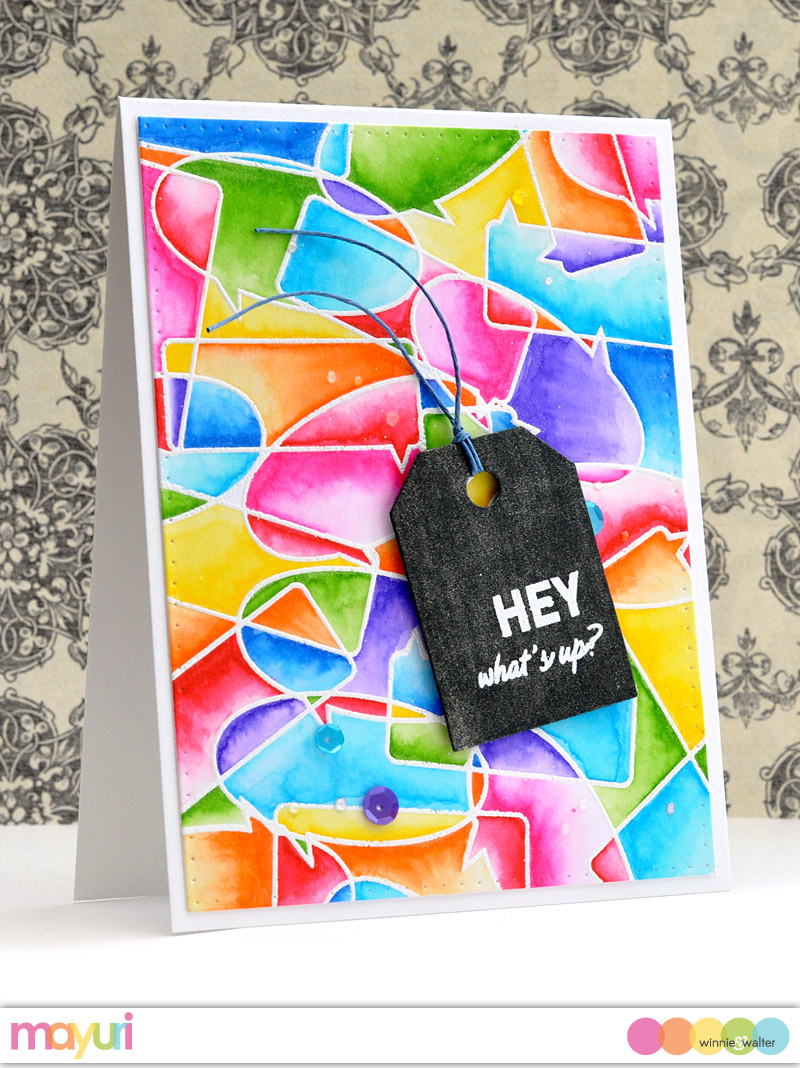
WW_MAYURI_AUG2015_IMAGE01


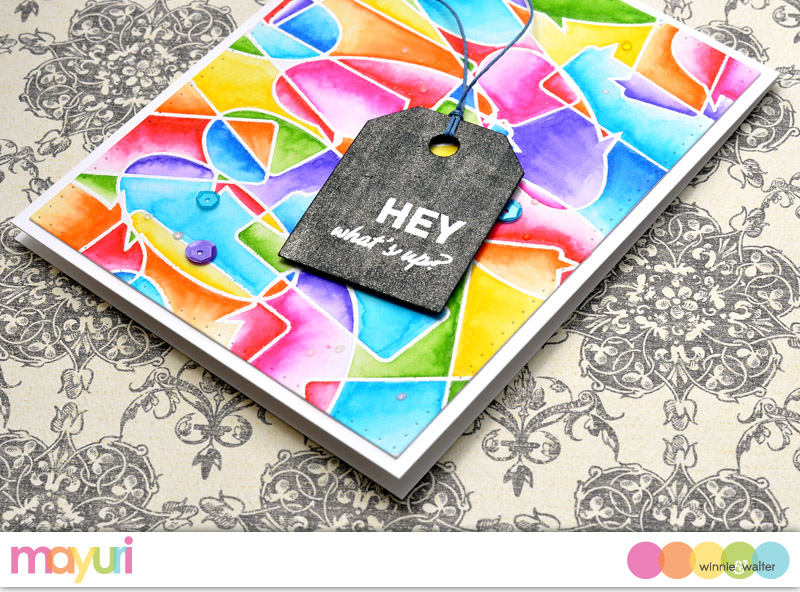
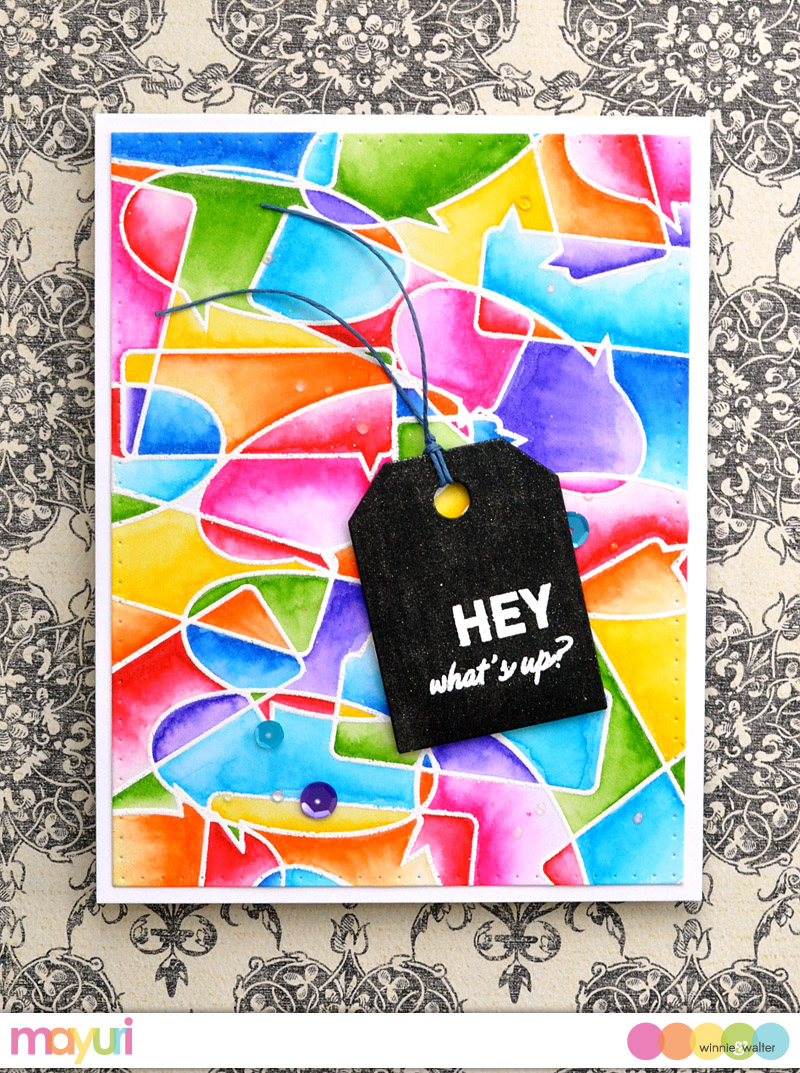
I began by repeatedly stamping both of the speech bubble outline images with Versamark ink onto a panel of white cardstock, sprinkling with white embossing powder and heat setting. You get a really fun background from all the overlapping speech bubbles, just asking to be coloured!
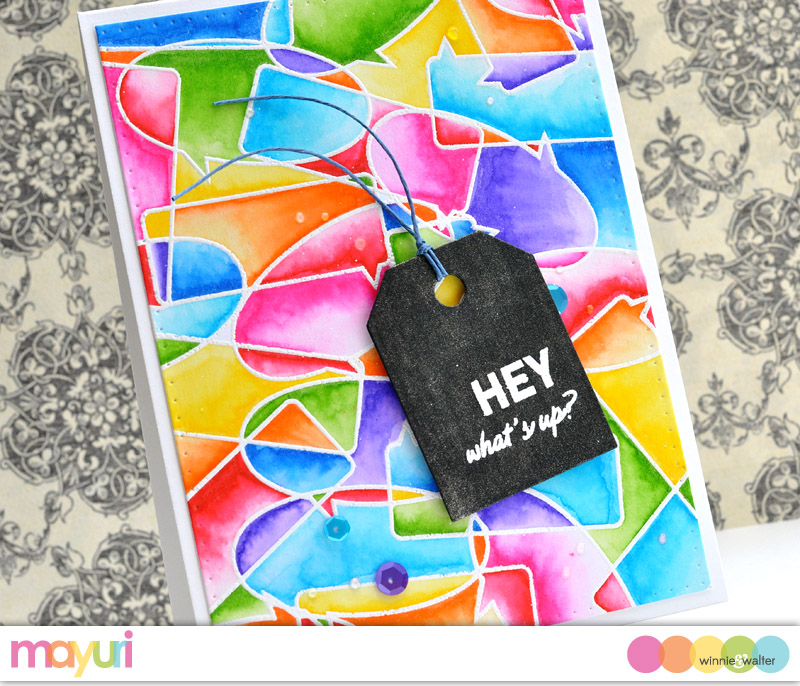
WW_MAYURI_AUG2015_IMAGE02


I used a rainbow assortment of ZIG Clean Color Real Brush Pens to colour each of the spaces created from the overlapping shapes - I laid down the colour first and went in with a wet paintbrush to drag the colour out for a sort of gradient effect. 
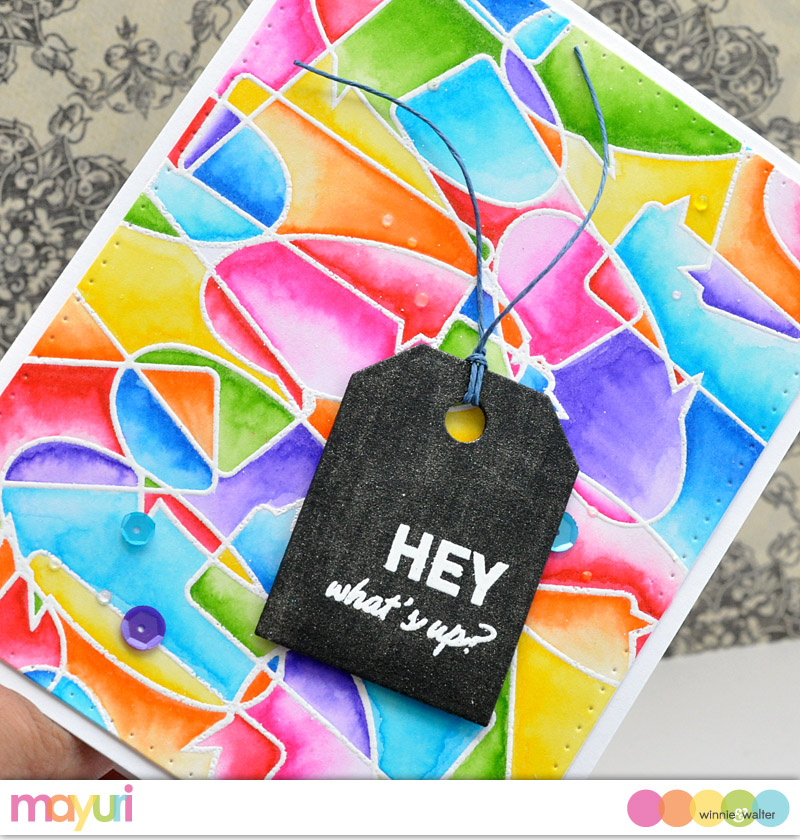
WW_MAYURI_AUG2015_IMAGE03


Once the whole panel was coloured, I trimmed it down using the largest frame die from Essentials: Katharine Cutaways. I then adhered it straight down onto a white card base.
WW_MAYURI_AUG2015_IMAGE04


The sentiment was stamped onto a piece of black cardstock, again with Versamark ink, and heat embossed in white. I trimmed it out using the small tag die from Essentials: Katharine Cutaways, threaded a piece of twine through the hole and foam mounted to the card front.
WW_MAYURI_AUG2015_IMAGE05


To finish, I added a few sequins and dots of Glossy Accents. I hope you'll have fun creating your own backgrounds and colouring them in!

Thanks for stopping by ;-)


w&wDT_mayuri_blog-sig

Editor's Note: If you are interested in seeing more Bubble Talk inspiration and for a chance to win $20 credit to the w&w shop please CLICK HERE.


w&w-supplies

Tuesday, August 18, 2015

Spotlight On...Michele Ferguson!

spotlight-michele-ferguson

We are proud to bring you our next Spotlight On...Michele Ferguson!  Michele leaves lovely, happy comments on the w&w blog and creates clever, clean and beautiful projects with lots of elegant embossing like with this gorgeous CARD that earned her our first Gossip Queen title. 

Wait until you see what she's made today...you will see Michele shine!       


>>>ABOUT MICHELE<<<

We all love Winnie & Walter products - well, what's not to love?  So to receive a note from Shay asking if they might Shine a Spotlight on ME?  EEEK!  I was convinced I had to shoulder through my fears!  After all, the theme is Friendship... no better way to say thank you for all the kindness sent my way here in Blogland in my first year.

I live in Michigan, very near the gorgeous Lake Michigan shore, with my bird-loving, bean-growing, photography-loving husband Tom.  [Those of you who visit me have seen proof of both of these!]
I've been card-making for just over three years now, but have loved being crafty all of my life... it comes from my talented, artistic, parents who encouraged all nine of us to be creative. 

>>>MICHELE'S PROJECTS<<<

There are many things that I love about Winnie & Walter's products, but to name two: everything Big and Bold with their companion words, and their Cutaways

For my Friendship theme, I've chosen to "accent the positive, and re-invent the negative space" of a few of my favorite cutaways!

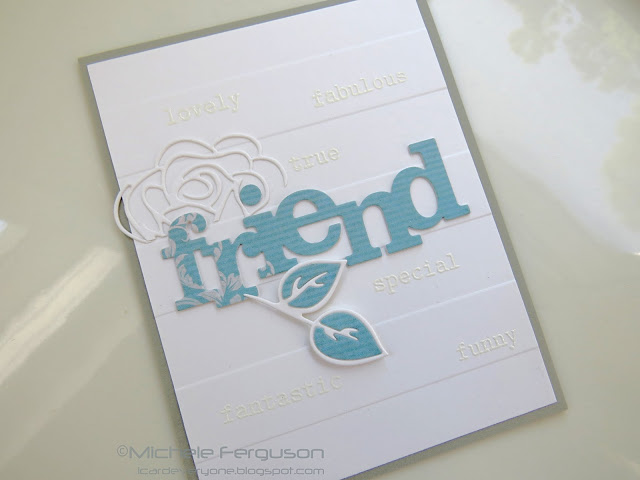
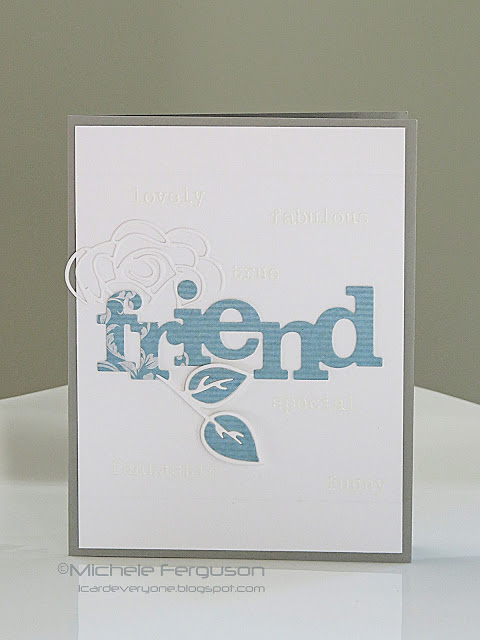
First up - the positive:  In a Word: Friend Cutaway...
michele_image001

With a few W&W wonderful words, here white-embossed,  I can add a little subtle message to an otherwise white background.   I've also used In Bloom: Maggie's Roses Cutaways to add a trimmed bloom, and those darling leaves.

michele_image002

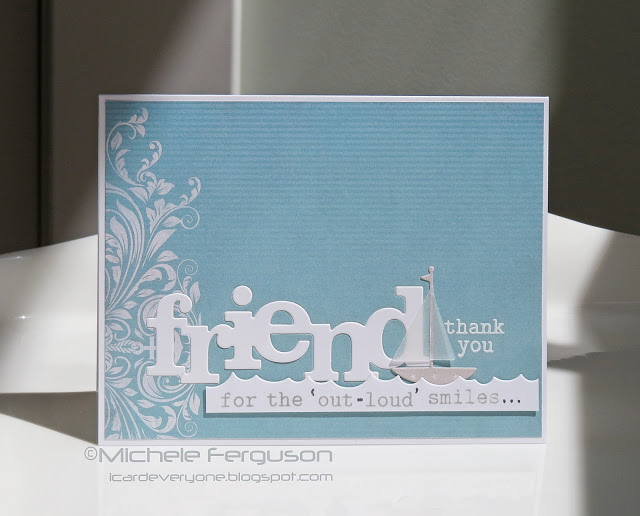
Next up - reinventing the negative:

michele_image003
Inside sentiment: 
"... sent across the miles!  You really know what floats my boat!"
The pretty paper and cute little boat die are from
the SSS July kit! 

With just a bit of pre-planning where the positive die cut comes from, you can anticipate what can become of the negative space left behind, as I've done here. The perfect words are added to say thank you in a personal way. 

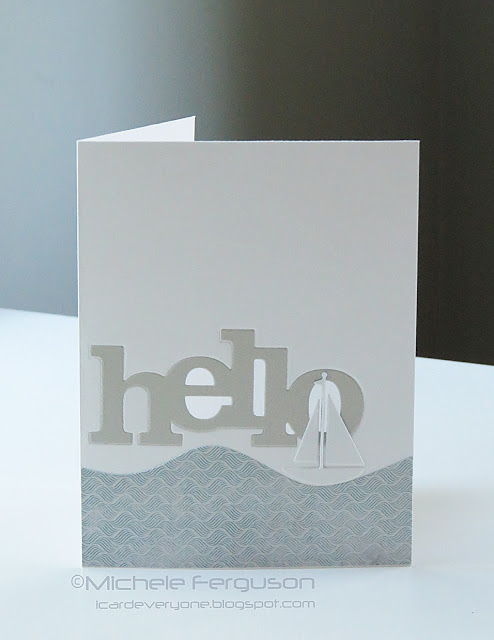
Here is another example of using the positive and negative cuts.  This time with the help of W&W's In a Word: Hello Cutaway!

The positive!
michele_image004


Can you see the addition of that vellum - a foggy little window?

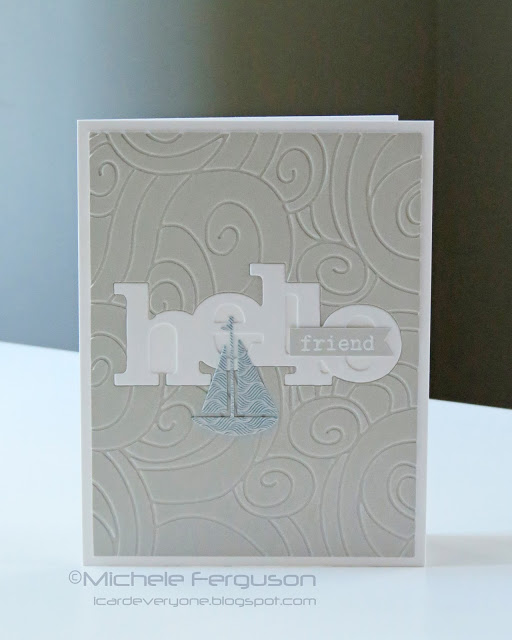
and the negative:
michele_image005
Set in an embossed stormy Sea,
which was done after cutting away the positive! 
Inside sentiment:
"When the seas are stormy, you're just the life-preserver I need."

Well there you have it ... thanks so much for spending a bit of your day with me.  I hope I've inspired you to turn those friendly little negative spaces into something very positive!

Thank you, Shay and Julie, for inviting me to share some of the ways I love to use your fantastic products!!

=] Michele

Monday, August 17, 2015

In Focus with Gayatri Murali No. 4 | Style #2

in-focus-banner-title_640px

Welcome back for the second tutorial this month. Here is the first tutorial using the tiny border cutaway.

Using border cutaways

This month I am focusing on using the tiny border cutaways that come in Essentials: Audrey Cutaways. On my first tutorial I die cut the tiny border cutaway from the set , trimmed it down and used as a layer over colour washed background. 

Gayatri Style banner copy

In this tutorial, I am using the xoxo border cutaway from Essentials: Audrey Cutaways set to make a cover model plate.


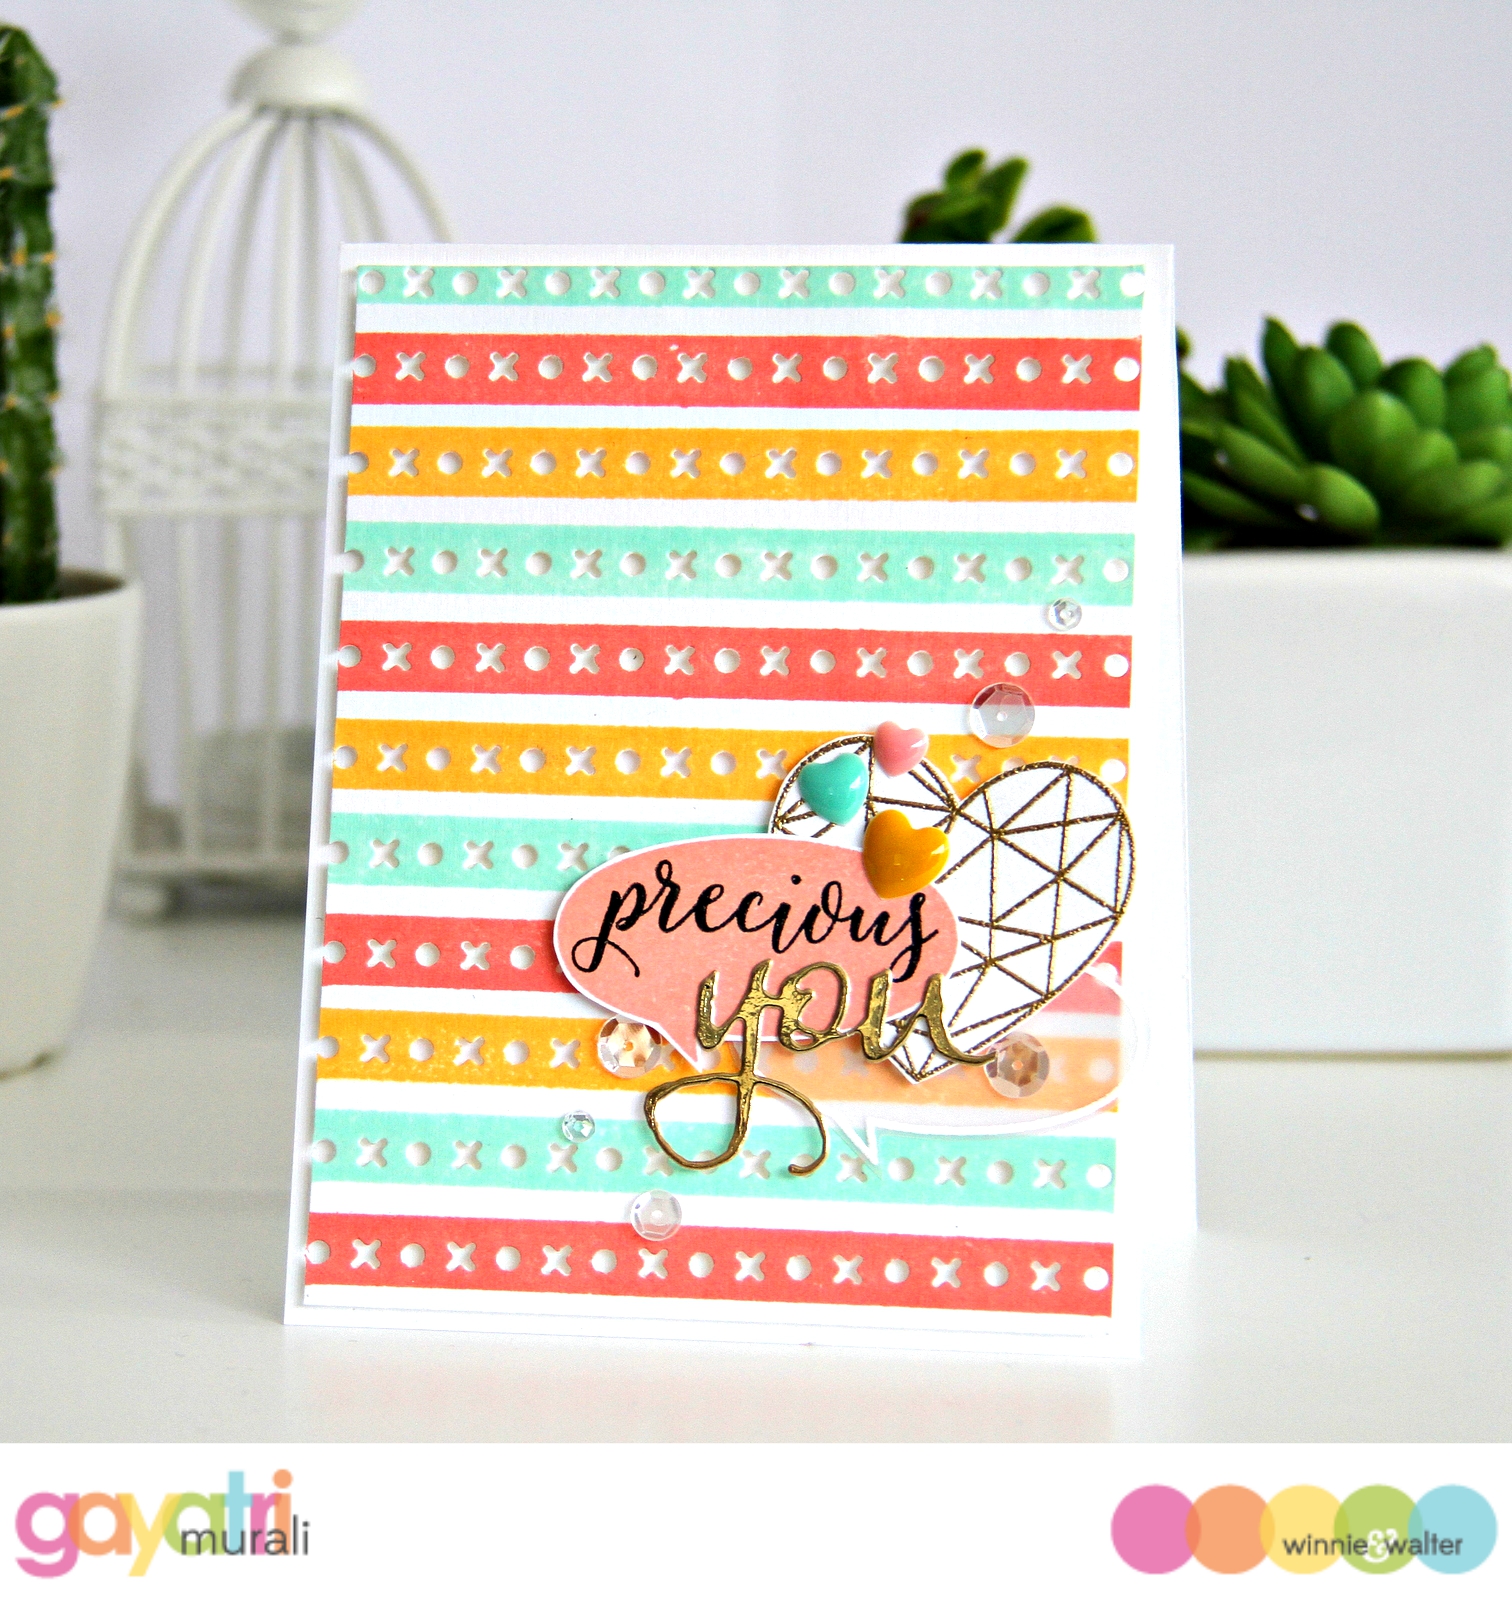
Here is the finished card.

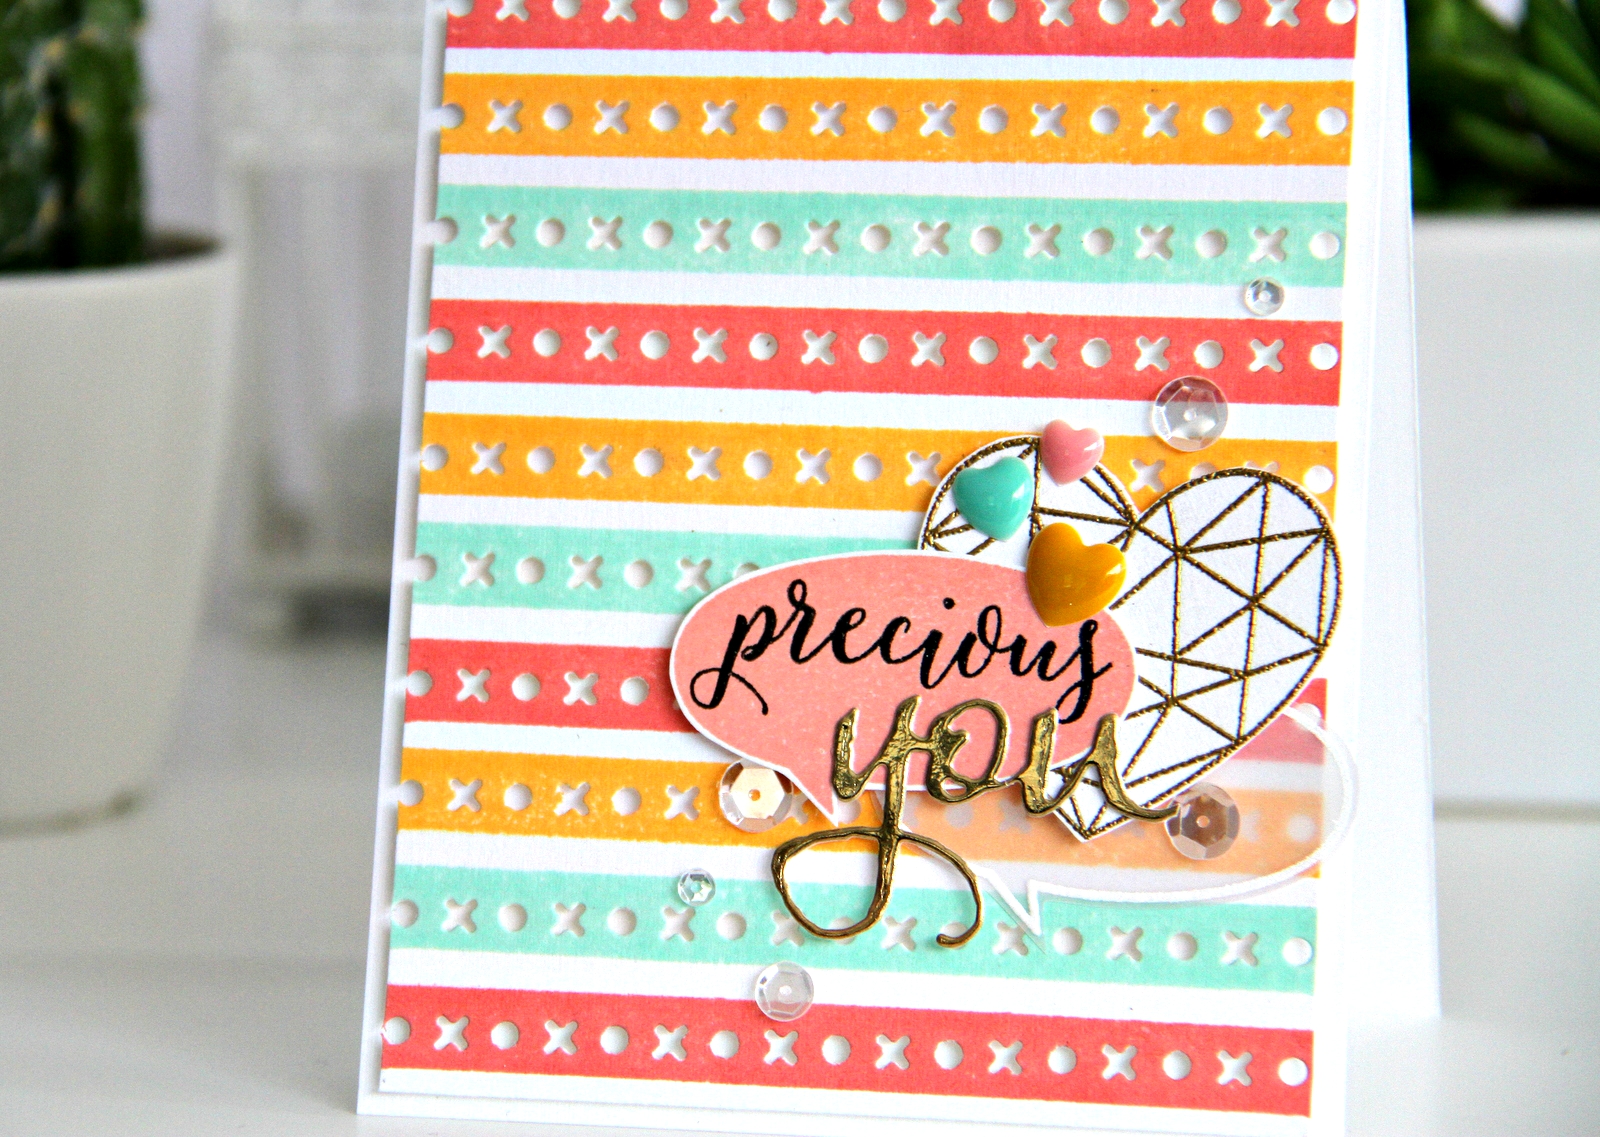
Precious You card


photo-tutorial_banner

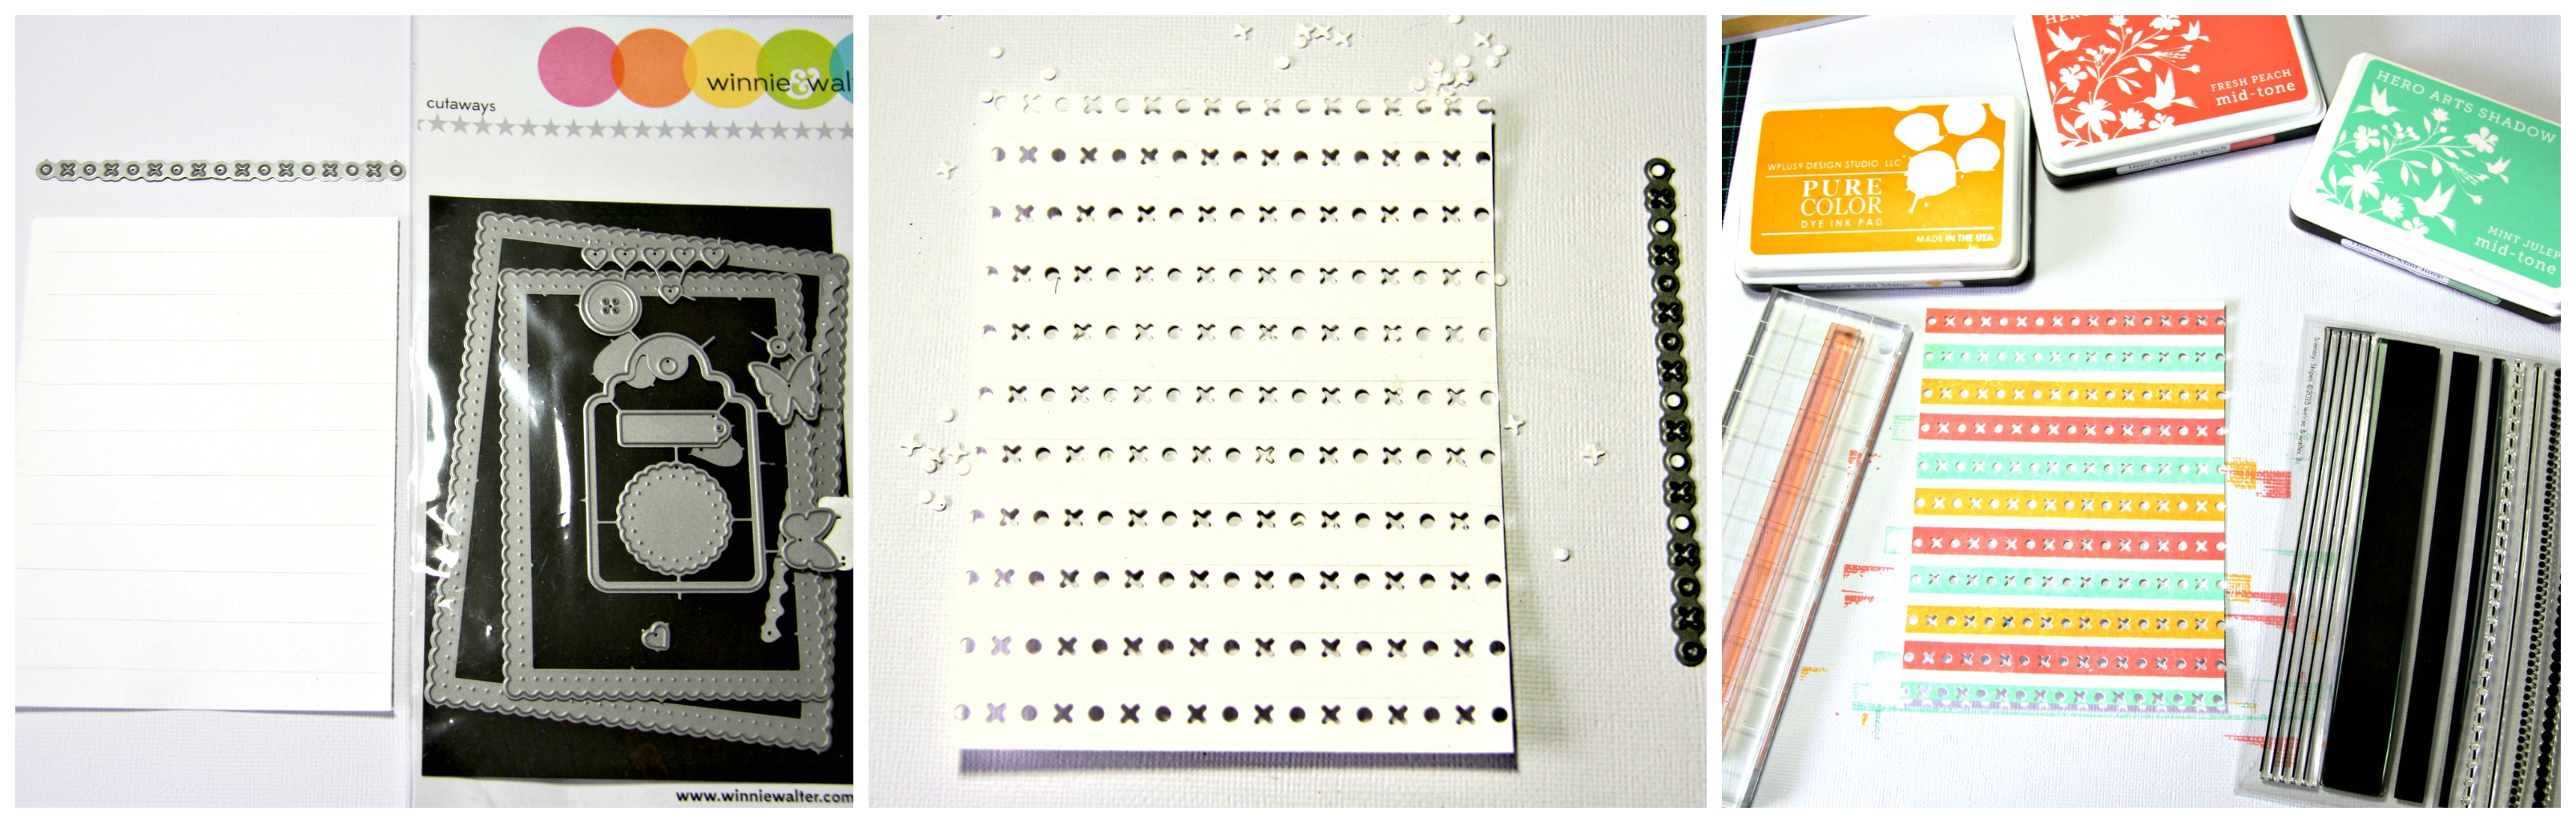
Here is a collage of photos showing how the card is made.

photo tutorial


brief_banner

The Essentials: Audrey Cutaways is a versatile die set. There are so many dies in this set that it is worth the investment. In today’s tutorial, I have used the “xoxo” border die in the set to make your own cover plate. A started with trimmed a cardstock to 4” x 5 ¼” in size and drew lines horizontally at equal intervals with a pencil. This pencil lines helped me line up the border die while die cutting.

After lining up and running through my cuttlebug, I ended with a cover plate with “xoxo” on it. To make this cover plate more interesting, I used the medium striped stamp from Scenery: Stripes stamp set and dye inks and stamped over the die cut on the panel. I chose three colours that matched well with each other. This time I chose to go with dye ink for only one reason - I was able to see through the inked stamp to line up and stamp. Pigment ink makes the inked stamp opaque making it difficult to see through the stamp to line up.  I really loved how my cover plate panel looked now with the colourful stripes.

I mounted this panel to a white card base using foam adhesives. For the focal point, I gold heat embossed and cut out the heart from True stamp set. I also had couple of speech bubbles from Bubble Talk stamp set already with me. One speech bubble is white heat embossed on vellum and the other stamped using Fresh Peach ink and cut out.  On the peach speech bubble, I stamp the sentiment “precious” from My Precious stamp set in black. I clustered the speech bubbles and golden heart and adhered using foam adhesive. I then die cut “you” from The Big, the Bold and You Cutaway in gold foil cardstock and adhered below the stamped sentiment.

Finally I added three heart shaped enamel dots and Sparkly Clear sequins from Pretty Pink Posh to bring the card together.


Here is a closeup shot of the card.

Precious you closeup 1

You can do anything over the cover plate to make it your own – sponge inks, watercolour, stamp images… It is up to your liking. Or you can also sponge ink on the card front and layer the cover plate panel. Hope you like my cover plate idea using the tiny border dies from Essentials: Audrey Cutaways.

Thanks for stopping by!


w&wDT_gayatrimurali_blog-sig

>>>LINK UP<<<


w&w-supplies


Saturday, August 15, 2015

August Leading Lady Melania Deasy | Take Three

Our August Leading Lady, Melania Deasy is back for her triumphant third performance!  If you missed her smashing debut you must see it...CLICK HERE or her second performance which showcases her golden touch CLICK HERE.  Today you are in for something full of joy and sparkle as Melania really shakes it up today!

Without further ado, Melania Deasy....

Hi everyone!! Today I'm so excited to share with you my card for Winnie & Walter August Leading Lady Take 3!

Winnie & Walter products are so unique and innovative! Love the fresh and versatile designs.
The theme today is all about Shaker Card! I LOVE making shaker card, the bling and festive feel just make me happy!

So here is my first blue card :


Winnie & Walter Supply that I'm using:
In a Word : Hi Cutaway to die cut the big word Hi 

First, I'm using Dye Ink with blending tool to make the blue gradation, then I die cut it with Spellbinders Enlarged Embossing Pads. The result will not cutting the paper, but emboss it. I die cut the emboss paper with Hi Cutaway. Then I use all the die cut paper to make a shaker card. The sentiment is from white embossing powder on black card stock.

I want to make it simple & elegant for my second card :


Winnie & Walter Supply that I'm using:
In a Word : Hello Cutaway to die cut the word Hello
The Big, Bold and Extras Cutaways to die cut the flowers and leaves

First, I'm using masking tape and Dye Ink with blending tool to make the green background. Then I die cut it using Hello Cutaway. The Flowers is from white embossing powder on card stock then I die cut it . I also die cut the leaves without stamping on them.

And here is my last card. It's soft and dreamy :


Winnie & Walter Supply that I'm using :
In Bloom : Lola's Bouquet with Joni Andaya for the flowers
The Big, the Bold and Friends Cutaways to die cut the word hugs
The Big, Bold and Extras Cutaways to die cut the vellum leaves

First, I stamp the flowers using Dye Ink and the middle using gold embossing powder. I cutting it manually. I die cut the leaves on vellum. For the shaker card, I die cut a circle, splash watercolor with my brush and then arrange the flowers and leaves. On inside shaker card, I die cut the word hugs with foam tape and white card stock, then I glue it. Adhere all and add twine for finishing touch.

And here is the fun part!


Julie & Shay have generously given me a $30 gift card to the Winnie & Walter store for give away! For your chance to win please leave a comment on the Leading Lady posts on my personal blog. I will draw a random winner at the end of the month.   

Thank you so much for stopping by! I hope you inspire and see you next week!


Hugs,


Melania Deasy


w&w-supplies


Friday, August 14, 2015

The Gossip Column?


Our dear, amazing Gossip Columnist, Taheerah Atchia, is on hiatus as she is dealing with the loss of her mother.  This tragedy has obviously been very difficult and Taheerah needs to set down her pen and her stamps for the time being.  Our hearts and thoughts are with Taheerah.

We know that leaving her love on her blog or here would be such a comfort and very much appreciated!

There is a great power in someone leaving an uplifting comment. :-)

AND we are going to add a link up tool here so you can add some new projects inspired by the previous 3 editions of The Gossip Column as they are all well worth revisiting!

An InLinkz Link-up