Friday, February 15, 2019

w&w 5th Birthday Bash | Five Challenge with Shay

Hello fellow party goers!  It's Shay here.  I am so excited to bring you my challenge.  To commemorate our 5th birthday I am following up on my One Challenge from our first year and Two Challenge from our second year and Three Challenge from our third year and Four Challenge from last year.  This year it is the Five Challenge!

>>>CHALLENGE DETAILS<<<

Make a new project using the number 5 or five, five colors, five patterns, five layers, five embellishments, five photos, five words or five stamp sets (and so on)...really anyway to incorporate four into your project!  You can focus on a single option or combine the options (for instance a five layer card using five colors + five embellishments).

>>>MY PROJECT<<<


The five for this card is pretty obvious with the repetition of the In a Word: Cheers Cutaway 5 times which I colored blending blue and orange Distress Inks.  I attached the cheers to a white A2 card base.  The banner was cut using Essentials: Katharine Cutaways and the sentiment stamped from Sparkle and adhered with dimensional foam adhesive.


Now it is your turn to link up your Five Challenge project!

>>>GIVEAWAY<<<

Link up your take on this challenge for a chance to win a $75.00 gift card (gift code) to the w&w shop.  One random winner will be chosen.

Inlinkz Link Party

w&w 5th Birthday Bash | Card Set Challenge with Heather


Good morning! I'm super excited today to be hosting one of the challenges to celebrate Winnie and Walter's Birthday! My challenge is to create a CARD SET - at least 3. This is one of my favorite ways to stretch my cardmaking time, by coming up with one idea or design, then switching out the colors or sentiments to create several cards at the same time! So since this is a birthday celebration - and you can NEVER have enough birthday cards on hand - I created this fresh and fun trio of birthday cards to share today!


I paired up a fun mix of older and newer releases to create these, and just by switching out the colors of ink, I was able to easily create 3 unique cards with minimal effort! 


I started off by stamping Mini Scenery: Bed of Roses 3 times on white cardstock and heat embossing with clear embossing powder. This allowed me to blend distress oxides over the top and the image "resists" the ink, making it pop out magically on the cardstock. I used 3 duos of ink colors: Fossilized Amber and Ripe Persimmon; Shaded Lilac and Wilted Violet; and finally, Cracked Pistachio and Evergreen Bough.


Next, I was delighted to discover that by trimming them down, they were the perfect size to mat with the smaller size die in the new Essentials: Tilda Cutaways. LOVE discoveries like that!


Another fun discovery - In a Word: Happy Coordinating Cutaways has a little surprise in it as well! I die cut the thinnest "happy" from black cardstock, and then discovered that if I also die cut the next thickness die, it made a PERFECT matte for the thinner one! YAY!


I layered those together, then added a tiny additional sentiment from In Bloom: Carolina's Florals with Angelica Suarez, trimming it down and tucking it over and under some of the "happy" word. I mounted the sentiment with foam adhesive carefully placed behind it, and then mounted the entire front panel on soft gray cardbases to help the white pop a little extra.


Now - I can't WAIT to see what you come up with! They can be as simple or difficult as you like! You can change the colors, the sentiments, or the images - just make sure you have a set of at least 3 cards! And have fun!

>>>GIVEAWAY<<<

Link up your take on this challenge for a chance to win a $75.00 gift card (gift code) to the w&w shop.  One random winner will be chosen.

Inlinkz Link Party

Saturday, February 9, 2019

February Leading Lady Rosali | Take Two

Our February Leading Lady Rosali is back for her sensational second performance!  If you missed her smashing debut you must see it...CLICK HERE.   Today you will be wowed by Rosali's tremendous trio of cards!

In honor of our birthday month we're doing something a bit different this year and including a challenge to you on each of Rosali's posts this month.  See the end of this post for more details and to link up!

Ladies and gentlemen, Rosali...

Hi there!
I am very happy to be back on the blog with my second post as Winnie & Walter’s Leading Lady!!
winnie_walter_leading_lady_rosali_february2019
Last week I shared two card designs where I used masking with stencils to create backgrounds. This week I am instead:

MASKING BACKGROUNDS WITH DIES!

Using dies to die cut a mask for your background is an additional way to use stand-alone dies. I really like the seamless look you can get by doing this. And, another advantage is that it minimalizes layers on your cards and keeps them flat for easy and inexpensive mailing.
For today’s cards I chose one of Winnie & Walter’s True Multifaceted Heart Cutaways. With Valentine’s Day being only a few days away I thought I would share an idea for rather simple friendship cards – in case some of you want to make last-minute Valentine’s Day cards. :-)

I MADE THREE VARIATIONS OF MY DESIGN:

winnie and walter masking backgrounds with dies

Here’s how I created my masked backgrounds:
  1. I took a piece of masking paper and die cut it using the triangled True Multifaceted Heart Cutaway. By the way, I always use repositionable labels as masking paper as it comes in a large pack and works perfectly fine for me.
  2. I took the largest die from the Tilda Cutaways set (with the cool jagged edges) and die cut three backgrounds panels from Neenah Solar White cardstock. Then I adhered the die cut heart onto one of the panels and picked a yellow, peachy and pink ink pad from my stash.
  3. For the first card (yellow birdies), I inkblended the three inks all over the background panel going. For the second card (dog & cat), I inkblended each color from left to right as well but just covered the heart and left the rest of the card white. For the third variation (pink birdie), I started inkblending pink ink in the center of the heart, and then added peach and yellow around it.
  4. After removing the mask from the last panel I added different splatters to all three backgrounds: tiny black watercolor splatters, pink ink splatters and Perfect Pearls splatters for some shimmer.
I picked three cute images from the So Tweet and Big Hugs stamp sets. Both sets are illustrated by Evelin T Designs and I just love all her critters! :-D I colored the images with Copic Markers, cut them out and adhered them over the hearts using foam tape.

winnie and walter masking backgrounds with dies 2
winnie and walter masking backgrounds with dies 3

COPIC GUIDE & COLORING TIPS:

Pink birdie: RV02, RV04, RV06, RV09 / YR 68 / Y13, Y08, Y35
Dog: W0, W1, E21, E33, E35, E57, R20
Cat: W1, W3, W5, W9, R20
Yellow birdies: Y11, Y13, Y08, Y35 / RV13, RV04
TIP 1: Use flicks from a white gel pen to get a feathery look - like I did on the pink bird. It's the same easy coloring technique that I used last week for the yeti's fur!
TIP 2: Add a little bit of grey shading to the dog where his fur is supposed to be white.
TIP 3: For the dog's light brown spots, first draw them in with the lightest E-marker. Then add shading from outer parts of the spots or where the shadows would be.

ADDING SENTIMENTS TO MY CARDS

For the sentiments I used “You’re so tweet” from So Tweet with Evelin T Designs stamp set and “Sending Big Hugs” and “just for you” from Big Hugs with Evelin T Designs stamp set.
On the pink birdie card, I heat embossed the sentiment in white on a wider strip of kraft cardstock. I die cut that strip with the Tilda rectangle die to give it the same jagged edges as the card front. For the cat & dog card, I used a banner sticker from my stash for the sentiment. And for the yellow birdies card, I heat embossed the sentiment with shiny platinum embossing powder that matches the color of the Perfect Pearls splatters.

TAKE A LOOK AT THE BEAUTIFUL SHIMMER:

winnie and walter masking backgrounds with dies 1

I hope you like today's cards! For your chance to win a 30 $ gift certificate sponsored by Winnie & Walter, hop over to my blog post and leave me a comment over there, too.
Thank you for stopping by today! ♥
Rosali


USED SUPPLIES:

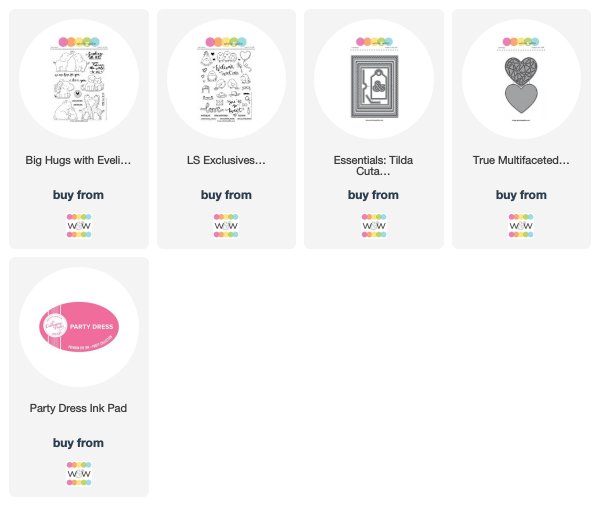
Winnie & Walter stamps, dies and stencils:
True Multifaceted Heart Cutaways
LS Exclusives: So Tweet with Evelin T Designs Stamp Set
Big Hugs with Evelin T Designs Stamp Set
Essentials: Tilda Cutaways
Ink Pads:
Catherine Pooler Designs - Party Dress Ink


CHALLENGE:

Now that you've seen Rosali do it, "Masking Backgrounds with Dies" to create your own project and link up here by Friday, March 15, 2019, 11:55 p.m. CST to be entered to win $50.00 credit to the w&w shop!  One (1) lucky randomly chosen winner will be picked from each of Rosali's Leading Lady posts this month.

Inlinkz Link Party

Saturday, February 2, 2019

February Leading Lady Rosali | Take One

Happy February!  I am so excited for this special month as it's our birthday month so we have lots of challenges.  Speaking of challenges and special we have an incredible February Leading Lady to introduce you to today: Rosali!  

I have been awed by Rosali's projects ever since she began entering our challenges.  I love how thoughtfully and beautifully designed each of her cards are and I can't wait to see what she has in store for us this month and in honor of our birthday month we're doing something a bit different this year and including a challenge to you on each of Rosali's posts this month.  See the end of this post for more details and to link up!

Please give Rosali a big round of applause to welcome her as she steps onto the stage for her first performance as our February Leading Lady! 

Hello everyone!

It's Rosali and I am super excited to be joining Winnie & Walter as their Leading Lady this month!! Eep!! Shay is one of the most generous and kind shop owners in the industry with lots of amazing products and I am honored that she asked me to guest design!!


For those of you who don’t know me yet - I’m a 30-something crafter, I live in Northern Germany with my hubby and you might know me under my social media nickname ilovestamping. Because I just loooove stamping, hah! 😃 My little addiction with cardmaking started about 4 years ago and shortly after I joined Instagram and met so, so many wonderful crafters there. I also started my own blog last year! I love to connect with people from all over the world through this amazing hobby.

I am gonna have a blog post for you guys each Saturday during February and I thought I would focus on a technique that I use super often on my cards: masking! It’s a very versatile technique that helps you get the most out of your supplies! I am gonna concentrate on a specific way to use it every week. I am also gonna share Copic guides and a few tips on coloring alongside the masking techniques. Today's post makes a start in which I will show you two examples on how to:

USE MASKING WITH STENCILS

So let’s ‘dive’ right in, shall we? This is my first card:

winnie and walter masking backgrounds with stencils 1

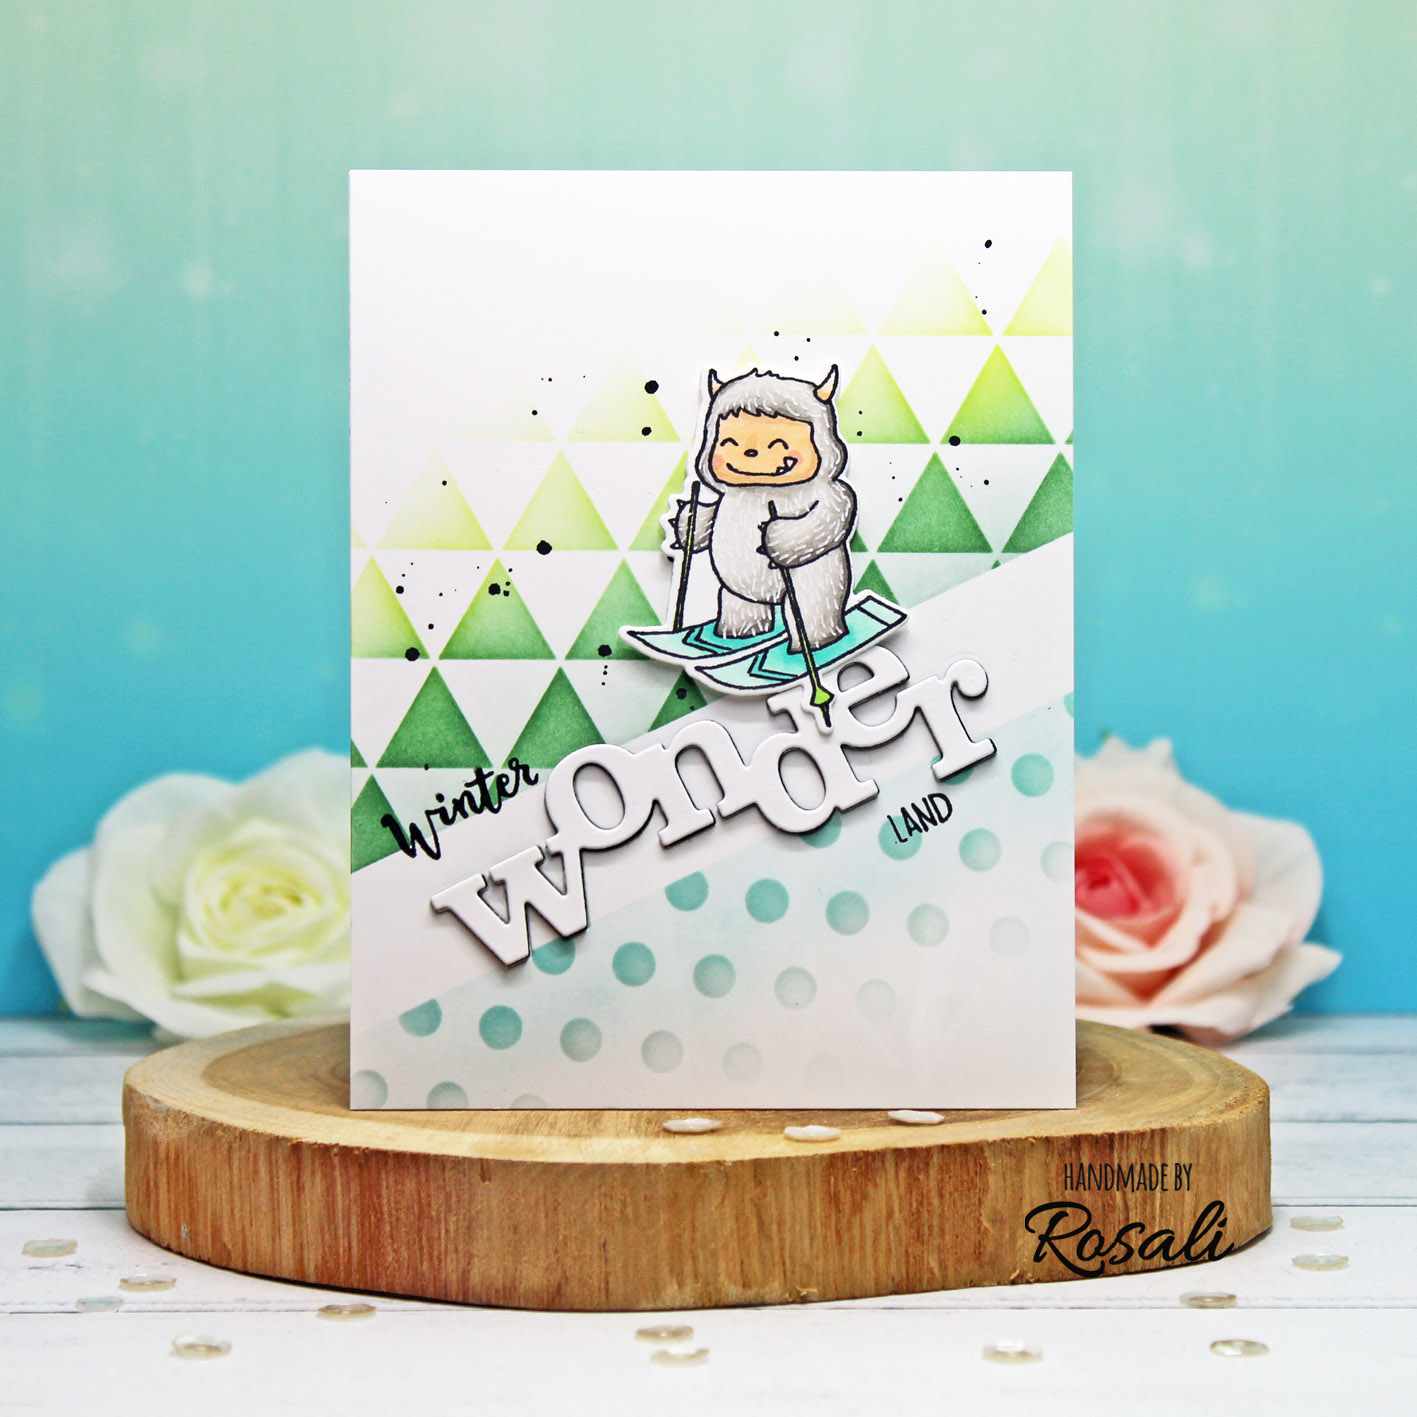
Here is how I used masking to create the background on this first card with the help of two graphic stencils - Polka Creative Screenings and Triangled Creative Screenings:
  1. I took a strip of Post-It Tape and put it across my cardstock panel at an angle to mask off the area for my sentiment. You can also use a strip of masking paper or a piece of painter's tape!
  2. First, I used light colored ink pads and a blending tool to add a minty base color above the tape and a light blue base color below the tape. This helped to define the borders of the masked area.
  3. After that I placed the Triangled stencil above my mask and inkblended three shades of green ink over it. I also added black watercolor splatters because I always love the artsy feel that it gives. 😊
  4. For the bottom part I took the Polka stencil and inkblended light grey ink over it.
Removing the tape after you're finished is always an exciting moment! I was happy with the outcome and went on to design the rest of my card. I die cut the Wonder Cutaway once from white cardstock and once from black fun foam and glued both together for dimension. I adhered them onto the background.

In addition, I stamped "winter" and "land" from one of the sentiment stamps from Yetitide Greetings to create my "winter wonderland" sentiment. To mask off the parts of the sentiment stamp that I didn't need I used a piece of washi tape when inking up the stamp! Just remember to remove the washi before stamping on your project (ask me how I know lol) ...

winnie and walter masking backgrounds with stencils 1 detail

The skiing yeti from Yetitide Greetings was the perfect critter for my card. I colored him with Copics (see coloring guide below) and adhered him using foam tape. If you use your imagination it kind of looks as if the white masked strip could be a snowy hill and the green triangle pattern could be trees!

For my second card, I followed a similar idea:

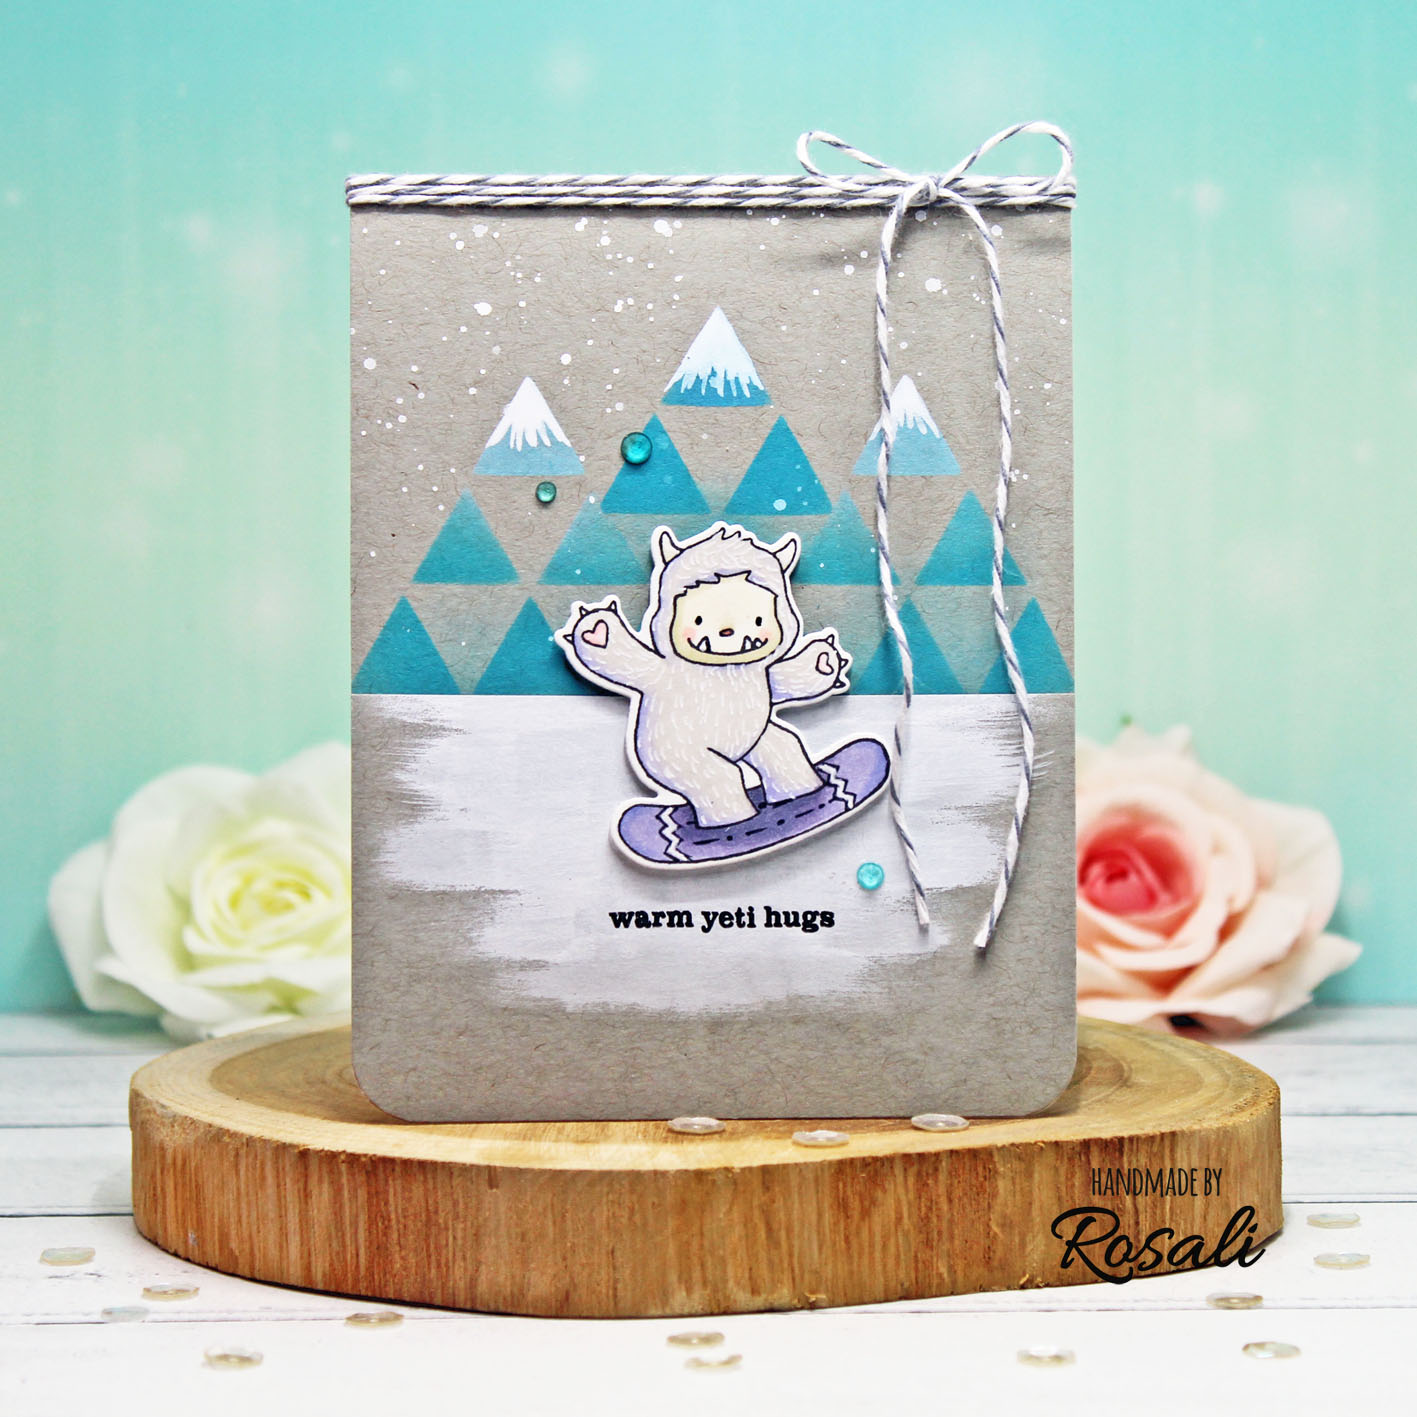
I wanted to use the Triangled stencil to represent mountains on my background. To get that look, I used Post-It Tape once more - this time putting it onto the stencil instead of the cardstock. I masked off a bigger triangle on the Triangled stencil to use as a mountain and took light blue and teal Distress Oxides for inkblending over the stencil.  Using this method, I added three mountains onto my grey background panel.

winnie and walter masking backgrounds with stencils 2
Then I took Copic Opaque White paint to
  1. give my mountains snowy tips,
  2. add small splatters as snowflakes and
  3. paint on a snowy ground (with a damp / rather thirsty flat brush - to get the painted look that I wanted)
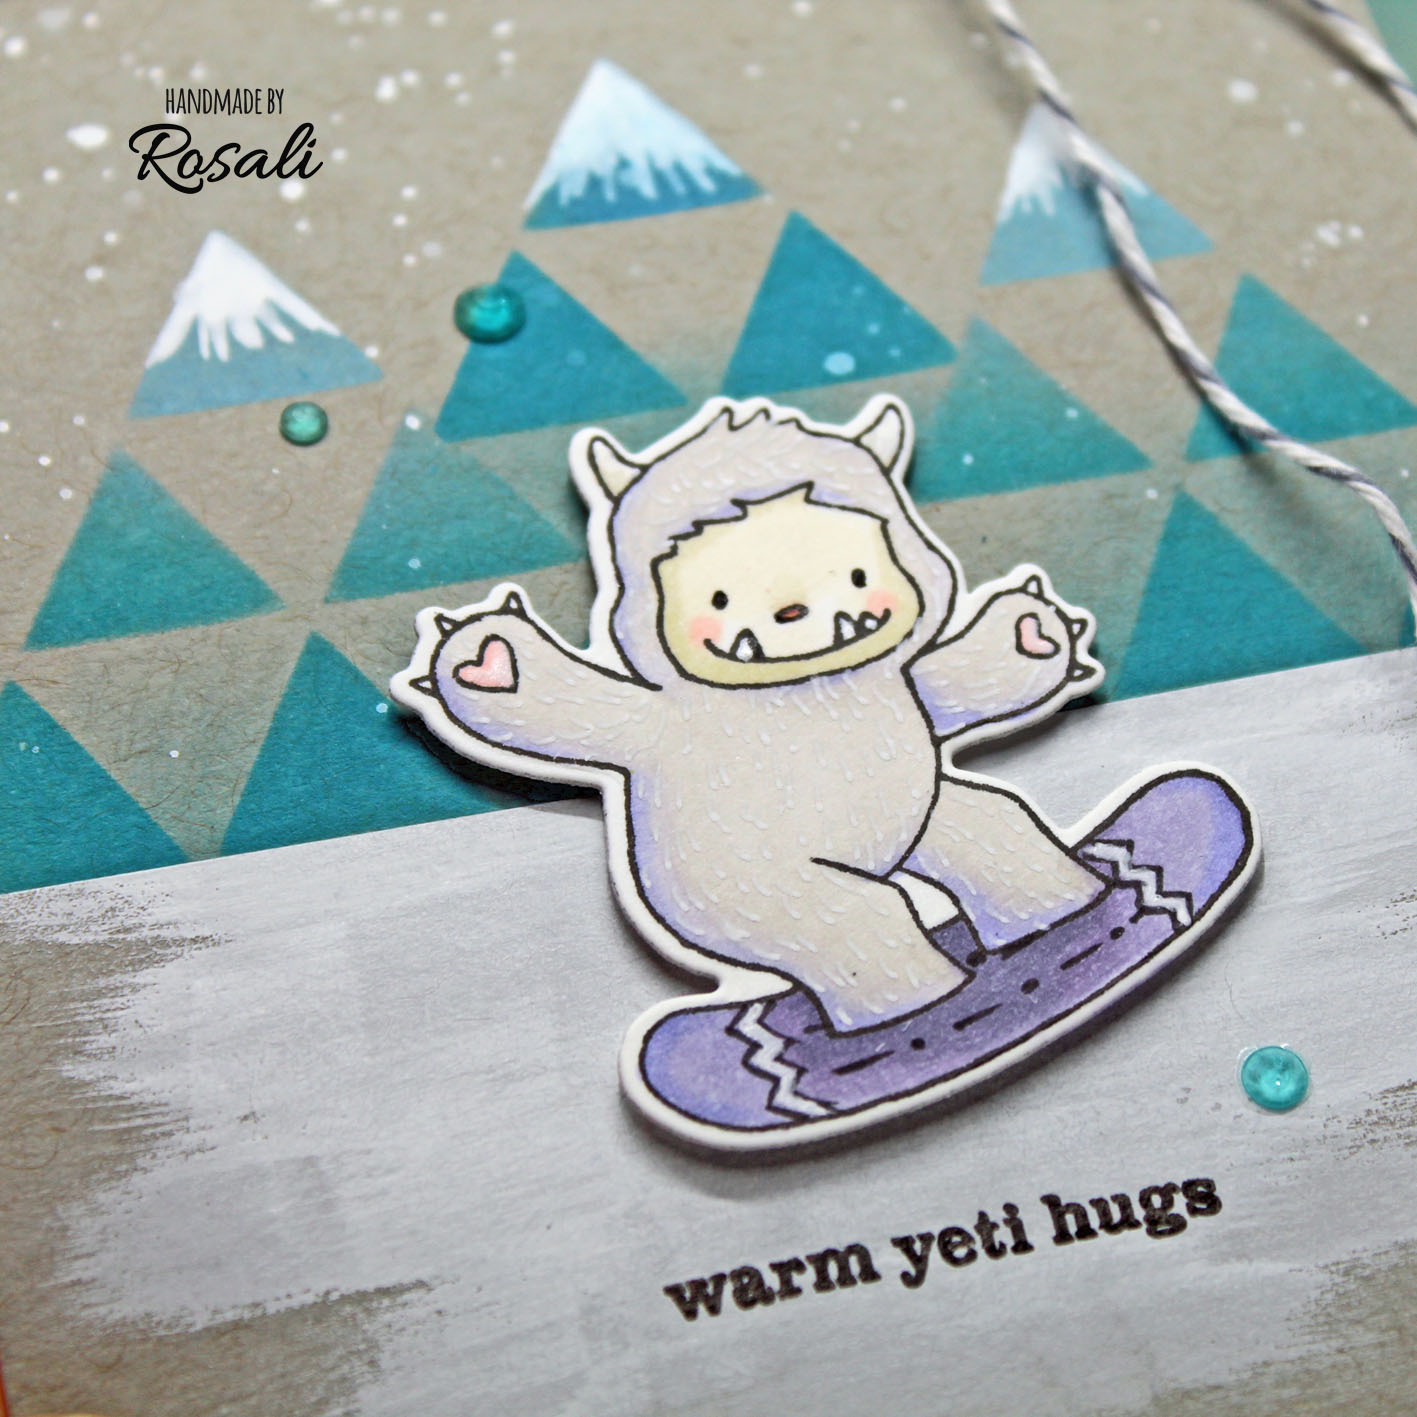
The snowboarding yeti and a small "warm yeti hugs" sentiment from Yetitide Greetings made my winter scene complete. Instead of plain grey I added a tint of lilac to my yeti this time. I really like the teal and lilac together in front of the grey card front!

CARD CLOSE-UP:

winnie and walter masking backgrounds with stencils 2 detail

COPIC GUIDE & COLORING TIPS:

Card 1
Yeti’s face: E51, E21, R20
Yeti’s fur: 0, W1, W3, W4, W5
Skis & ski poles: G000, G00, BG13 & YG03, YG13
Card 2
Yeti’s face: YR30, E81, R20
Yeti’s fur: W1, BV02, V20, V22
Snowboard: V22, V25, V28
TIP 1: For an easy fur look, add small flicks over your Copic coloring with a white gel pen!
TIP 2: Add patterns to the skis and snowboard with a Memento Marker for some extra interest.

I hope I have given you some inspiration today! Thanks for reading all the way down. :-) And don't forget to hop over to my blog and leave a comment over there as well. Winnie & Walter has generously sponsored a 30 $ gift certificate for one of you to win!

See you next week! ♥
Rosali


USED SUPPLIES:

Winnie & Walter stamps, dies and stencils:
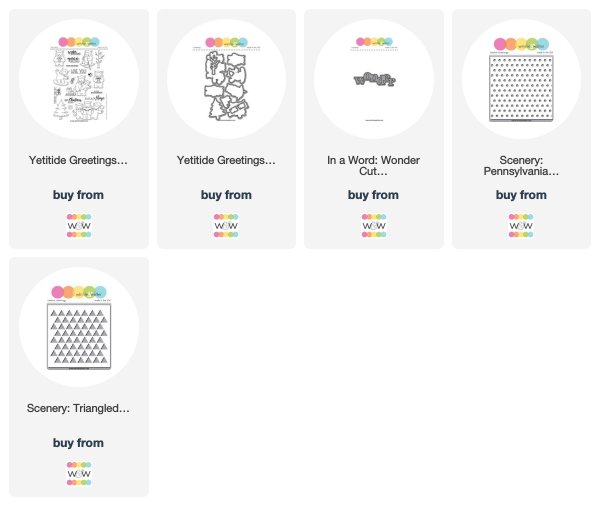
Yetitide Greetings with Evelin T Designs Stamp Set
Yetitide Greetings with Evelin T Designs Cutaways
In a Word: Wonder Cutaway
Scenery: Pennsylvania Polka Creative Screenings
Scenery: Triangled Creative Screenings


CHALLENGE:

Now that you've seen Rosali do it, "Use Masking with Stencils" to create your own project and link up here by Friday, March 15, 2019, 11:55 p.m. CST to be entered to win $50.00 credit to the w&w shop!  One (1) lucky randomly chosen winner will be picked from each of Rosali's Leading Lady posts this month.


Friday, February 1, 2019

"It's a Girl Thing" Turner Syndrome Awareness Blog Hop


Happy February loverlies!  Just checking in to let you know about an awesome blog hop happening now!  When you hop along, you will find tons of inspiration and awesome prizes from incredible sponsors like these all for a great cause:


Start hopping HERE!

Happy hopping,
Shay.

Saturday, January 26, 2019

January Leading Lady Greta Hess | Take Four

As January ends we sadly must bid adieu to our our January Leading Lady Greta Hess.  The last few weeks with Greta has been a spotlight for her excellent design, mastery of composition and terrific techniques.  Greta has exhibited her tremendous talent and astounding creativity week after week.  I feel so fortunate Greta shared her talents with us this month and made this month something special.

If you missed her smashing debut you must see it...CLICK HERE or her sensational second performance showcasing her oh-so-clever coloring methods CLICK HERE or her triumphant third performance highlighting a tremendous trio of cards showing off a wonderful design element that adds just the right amount of drama CLICK HERE! Today's projects add just that extra bit to make them shine!

Lucky for us all we have her final command performance today.  

I'm thrilled to be back with my Final Performance as the Winnie & Walter January Leading Lady.  It's been a huge honor & I can't thank Shay enough.

I love shimmer & shine including foil.  For my final 3 cards I thought it'd be fun to show you ways to add foil without using a laminator.  First up is a festive birthday card with a rainbow color scheme.


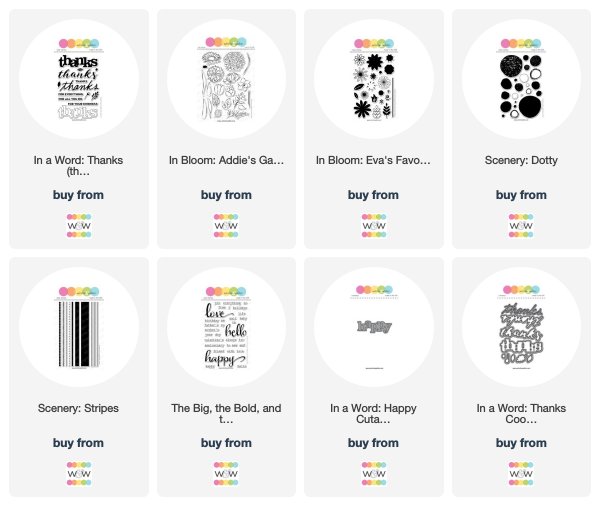
I stamped images from Scenery: Dotty on the card front using a variety of Distress Inks that match the rainbow foil.  The In a Word: Happy Cutaway was die cut from self-adhesive foam so that the adhesive was on the top.  Then the foil was pressed onto the word & carefully peeled back to reveal the gorgeous results!  This really is my favorite way to use foil--super easy & fun!  The little word from The Big, the Bold & the Happy was white embossed on a black scrap & trimmed into a label.  I added a scattering of shimmer dots for embellishment. For the next card I first made a plaid panel using 2 images from Scenery: Stripes stamped in Memento Lilac Posies & Teal Zeal.  Then I added strips of 1/8 inch score tape going both directions & pressed silver foil onto the adhesive.


 I love how it totally changes the look!  The bloom & leaves from In Bloom: Addie's Garden were die cut, stamped & brushed with the same inks.  I also used a shimmer pen on the bloom & attached it with foam tape.  For the sentiment I used In a Word: Thanks Coordinating Cutaways.  The shadow was cut from white cardstock & the word from a medium gray.  I like how it stands out, but doesn't compete with the silver foil. To finish up I made my most common type of card & that is one to keep in touch with a friend.  I  began by randomly stamping flowers from In Bloom: Eva's Favorite Flowers in 3 warm ink shades.  I added the dot from the same set using kraft ink. 


Then I used my Quickie Glue pen to make dots in the flower centers.  When they turned tacky, I pressed on gold foil.  Almost looks like designer paper with foil accents, don't you think?!  I stamped the words from The Big, the Bold & the Happy in dark brown ink.  Originally it was a one layer card, but I decided to add a gold foil frame.  I cut the panel down slightly & brushed the edges of the card front with Flitter Glu.  When it dried to a tacky finish I pressed on the same gold foil & attached the floral panel.  The frame could also have been done using 1/4 inch Score Tape. I hope you've been inspired in some way by my projects this month.  Winnie & Walter has given me a $30 gift certificate as a prize for the random drawing I'm doing on my blog.


Be sure to stop by each of my Leading Lady posts to be in the running.  Thanks again to Shay for having me & I look forward to seeing all your Winnie & Walter projects in blogland.


w&w-supplies

Wednesday, January 23, 2019

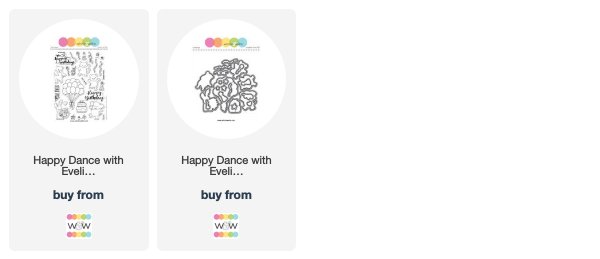
Rerun No. 38 | Happy Dance with Evelin T Designs by Crystal (Video)

Happy Wednesday loverlies!

There is still lots of time to participate in our latest Rerun challenge featuring Happy Dance with Evelin T  Designs!  

To help inspire you Crystal has an adorable card and video for you today!


What a darling card, right?

Remember you still have time to play along with the challenge and/or enter to win this stamp set.  All the details can be found HERE!

Have an incredible day!

Shay.

w&w-supplies

Saturday, January 19, 2019

January Leading Lady Greta Hess | Take Three

Our January Leading Lady Greta Hess is back for her triumphant performance!  If you missed her smashing debut you must see it...CLICK HERE or her sensational second performance showcasing her oh-so-clever coloring methods CLICK HERE.   Today, Greta has a tremendous trio of cards showing off a wonderful design element that adds just the right amount of drama!

Without further ado, Greta...

Thank you again to Shay for giving me this wonderful opportunity to share my love of Winnie & Walter products.  I hope you've found some inspiration for your own cardmaking.  The month is speeding by and it's time for Take 3. 
We all have times when it's hard to come up with an idea for a card.  One of my solutions to that problem is to use a favorite design element.  My choice is to mask off an area for inking.  There are many variations, so cards can all look different.  I generally use more solid images, but you will see today it really works with any stamps.

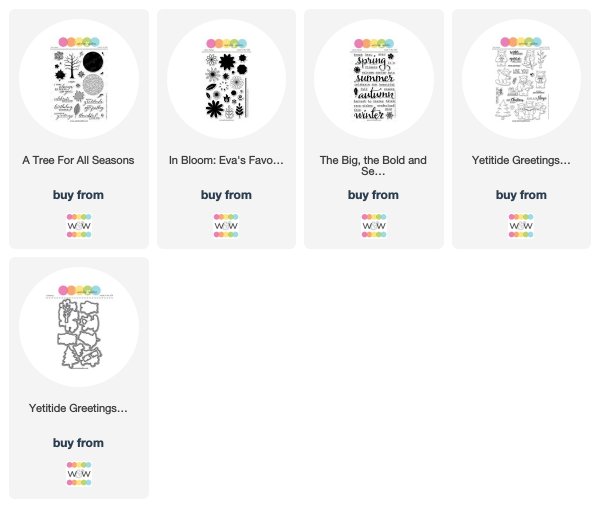
First is a sympathy card using A Tree for All Seasons.  I began by heat embossing the tree with a couple coats of embossing powder to obtain a thick, shiny image.  Then I masked off the area where I wanted color.  Distress Inks faded jeans and peeled paint were applied with stencil brushes for softer colors.  I heat embossed the sentiment and added brown splatters.  The panel was matted with light blue textured cardstock for a simple, flat card which, unfortunately, I need to get in the mail.


Next up is a fun winter notecard.  This is the first time I've used kraft cardstock for the technique, but it won't be the last!  I white embossed the front 2 trees from Yetitide Greetings with Evelin T Designs & masked them before adding the tree in the background.  The matching dies were used to make the masks--so quick & easy.  Then I masked off a horizontal strip & used an ink cube direct to the paper.  The trick when using kraft cardstock is to use an ink with pigment properties, like the Delicata Emerald Green I used.  The white embossing picked up a hint of the green which I actually think adds to the effect for this card.  I stamped the sentiment using words from The Big, the Bold & Seasons and added a few white sequins for embellishment.


For my final project the masked area is a rectangle in the center of the card.  Distress Inks bundled sage, milled lavender & spun sugar were sponged on beginning at the bottom right & moving to the top left, rather than straight across.  Instead of embossing, I stamped the bloom, stem and leaves from In Bloom: Eva's Favorite Flowers in Brilliance Starlite Black.  It's another ink with pigment properties giving me good coverage on top of the Distress Ink background.  I curved the straight stem onto my acrylic block and masked the card front to get the length I wanted.  The same ink was used for the beautiful word from Sentimental: Thanks (Black Friday 2018 free with purchase stamp set which will be released for sale later) and a single gray gem completes the card.


Be sure to check the Leading Lady posts on my blog to enter the random drawing for a $30 Winnie & Walter gift card.  I'll be back next Saturday for my final post.


w&w-supplies