Saturday, January 23, 2016

January Leading Lady Virginia Lu | Take Four

Virginia-Lu_jan2016


Sadly we have reached our last Saturday with our tremendous January Leading Lady, Virginia Lu.  These four weeks with Virginia have been brilliant.  We wish to express our heartfelt gratitude to you, Virginia, for the incandescence of your work, incredible inspiration, awe-inspiring scope and excellence delivered with each of your performances.  We have been blessed to have you as our leading lady.  

If you missed her smashing debut you must see it..CLICK HERE or to see her sensational second performance...CLICK HERE and her triumphant third performance...CLICK HERE.  

Lucky for us all we have her final command performance today.


Dear Winnie & Walter friends! I can’t believe that this is my last post as Leading Lady. As you can tell from all my posts, I have totally immersed myself in creating with these awesome Winnie & Walter products. So without further ado, let’s start with my first love—card making and stamping.

Happy Valentine's Day[2]

Since Valentine’s Day is around the corner, I thought it would be nice to share this card. I have found the Happiest of Holidays with Evelin T Designs and the Scenery: Into the Woods Creative Screenings  to be quite handy!

DSC_0792 (3)[2]

1. Secure “Into the Woods” over card stock with Washi Tape.
2. Stamp sentiment “love always” from The Big, The Bold and The Happy stamp set over “into the Woods”.
3. Carefully wipe off the stamping on stencil. Apply Distress Inks ( Fossilized Amber, Cracked Pistachio, Twisted Citron, Evergreen Bough).
4. Stamp the branch (happiest of Holidays) and add paper-pieced bird.
5. Stamp sentiment and add sequins.
My 2nd project is a colorful one!

from ours to yours[2]

The solid stamps from Our Town are perfect for color layering---this can be done with the help of a stamp positioner such as MISTI. The entire card was stamped and watercolored with Distress Inks. This card would be a great thank-you for a hostess. Speaking of thank-you cards, we can never have too many of them on hand, right?

DSC_0500[2]

I practiced my watercoloring with Mini Scenery:  Multifaceted , Madison and Do You See What I See?. I added the bows from Take a Bow Cutaways. The In a Word: Thanks Cutaway also came in handy!

As I continue with my art journaling, I came up with a few more pages.

2015-121[2]

Paper-piecing the birdies from Happiest of Holidays with Evelin T Designs was a lot of fun. I stamped the birdies on pattern paper and took them with me on a road trip to cut when I had time on my hands. After I returned home, I put them together on a page and used Gesso and Liquid Pearls to complete the design. The Big, The Bold and The Happy came to the rescue for stamping “so very thankful for friendship”.

so very thankful for friendship[2]

I absolutely love the sunflower image from In Bloom: Anna's Flora!

love life[2]

I completed the design by adding Gold Embossing Paste with the help of Scenery: The Leaf Effect Creative Screenings.

My last project was such a JOY to create. Mini Scenery: Multigrain is the unsung hero that pulls all the elements together. I colored the flowers and leaves from In Bloom: Anna's Flora with Peerless Watercolor.

you are my joy[2]

This page is 100% stamped.

you are my joy[2]

As a final note, I hope this post has brightened your day and that you feel inspired to create! My sincere thanks to Shay for inviting me to be the January Leading Lady. It has been my absolute pleasure to be here! Thank you for your kind and positive comments!


w&w-supplies


Friday, January 22, 2016

Party/Celebration | Cheers with Gayatri

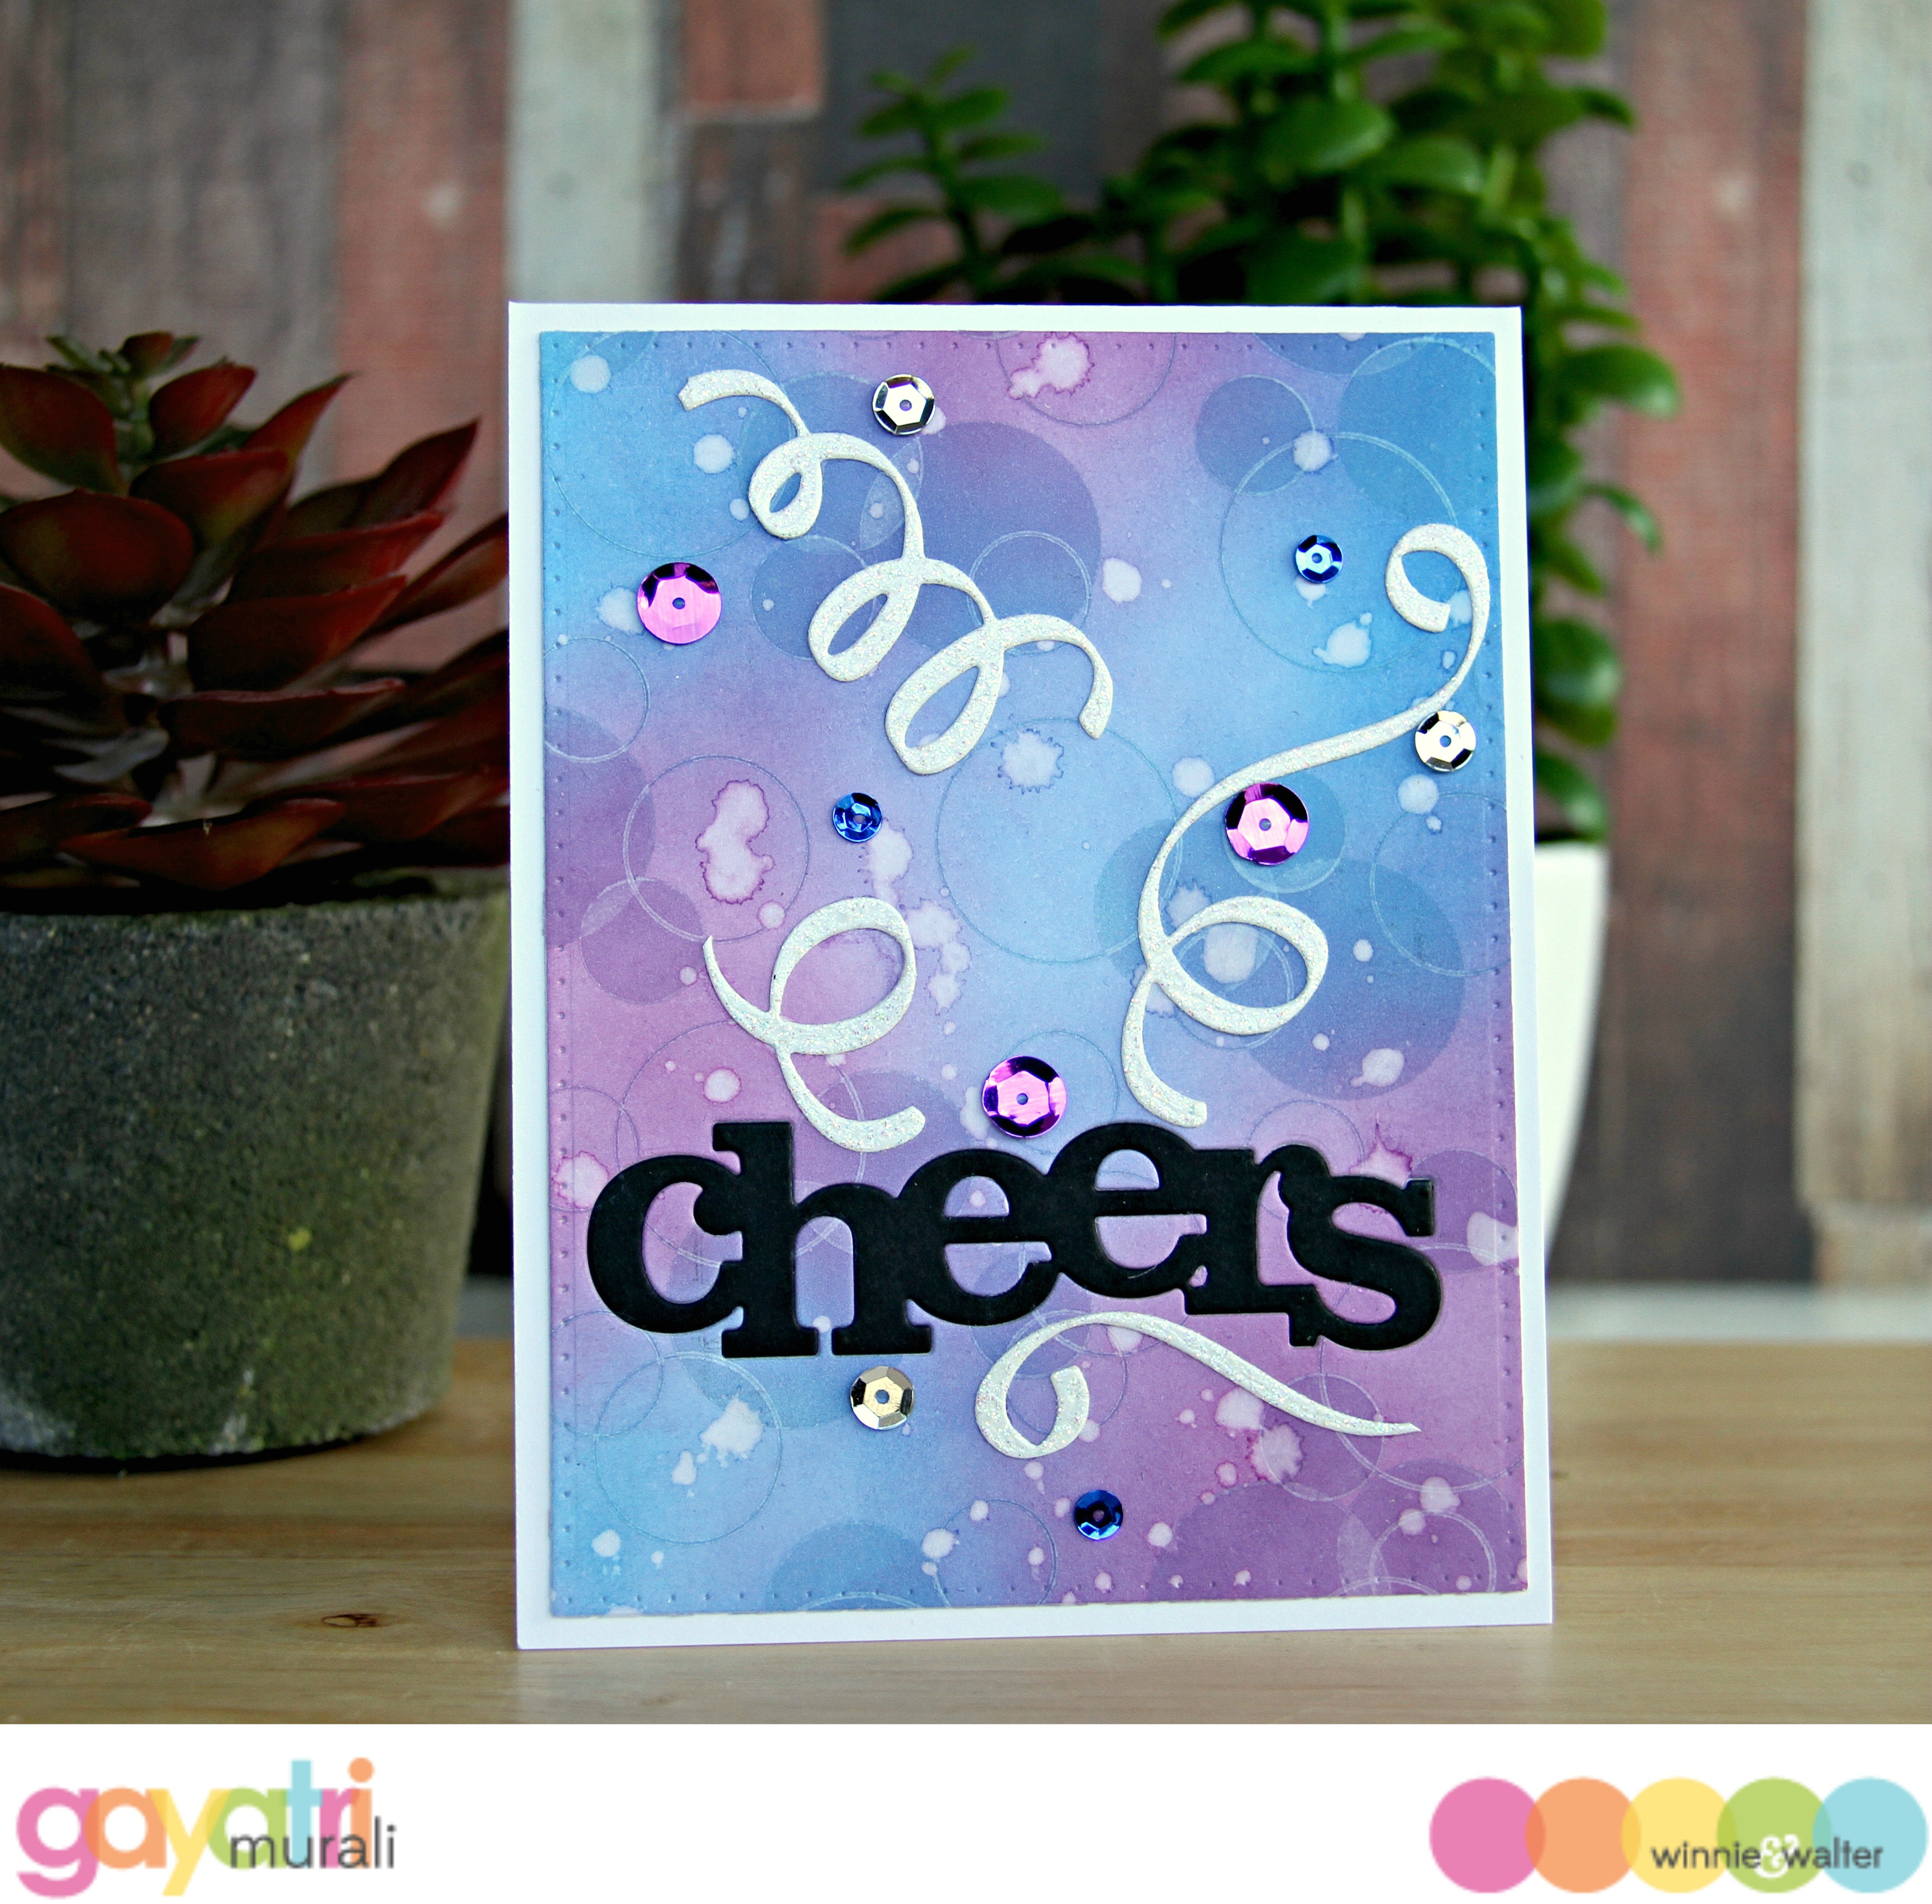
Hello everybody! Welcome! This is Gayatri here today with you party card using couple of techniques.

gayatri_Cheers card #1 

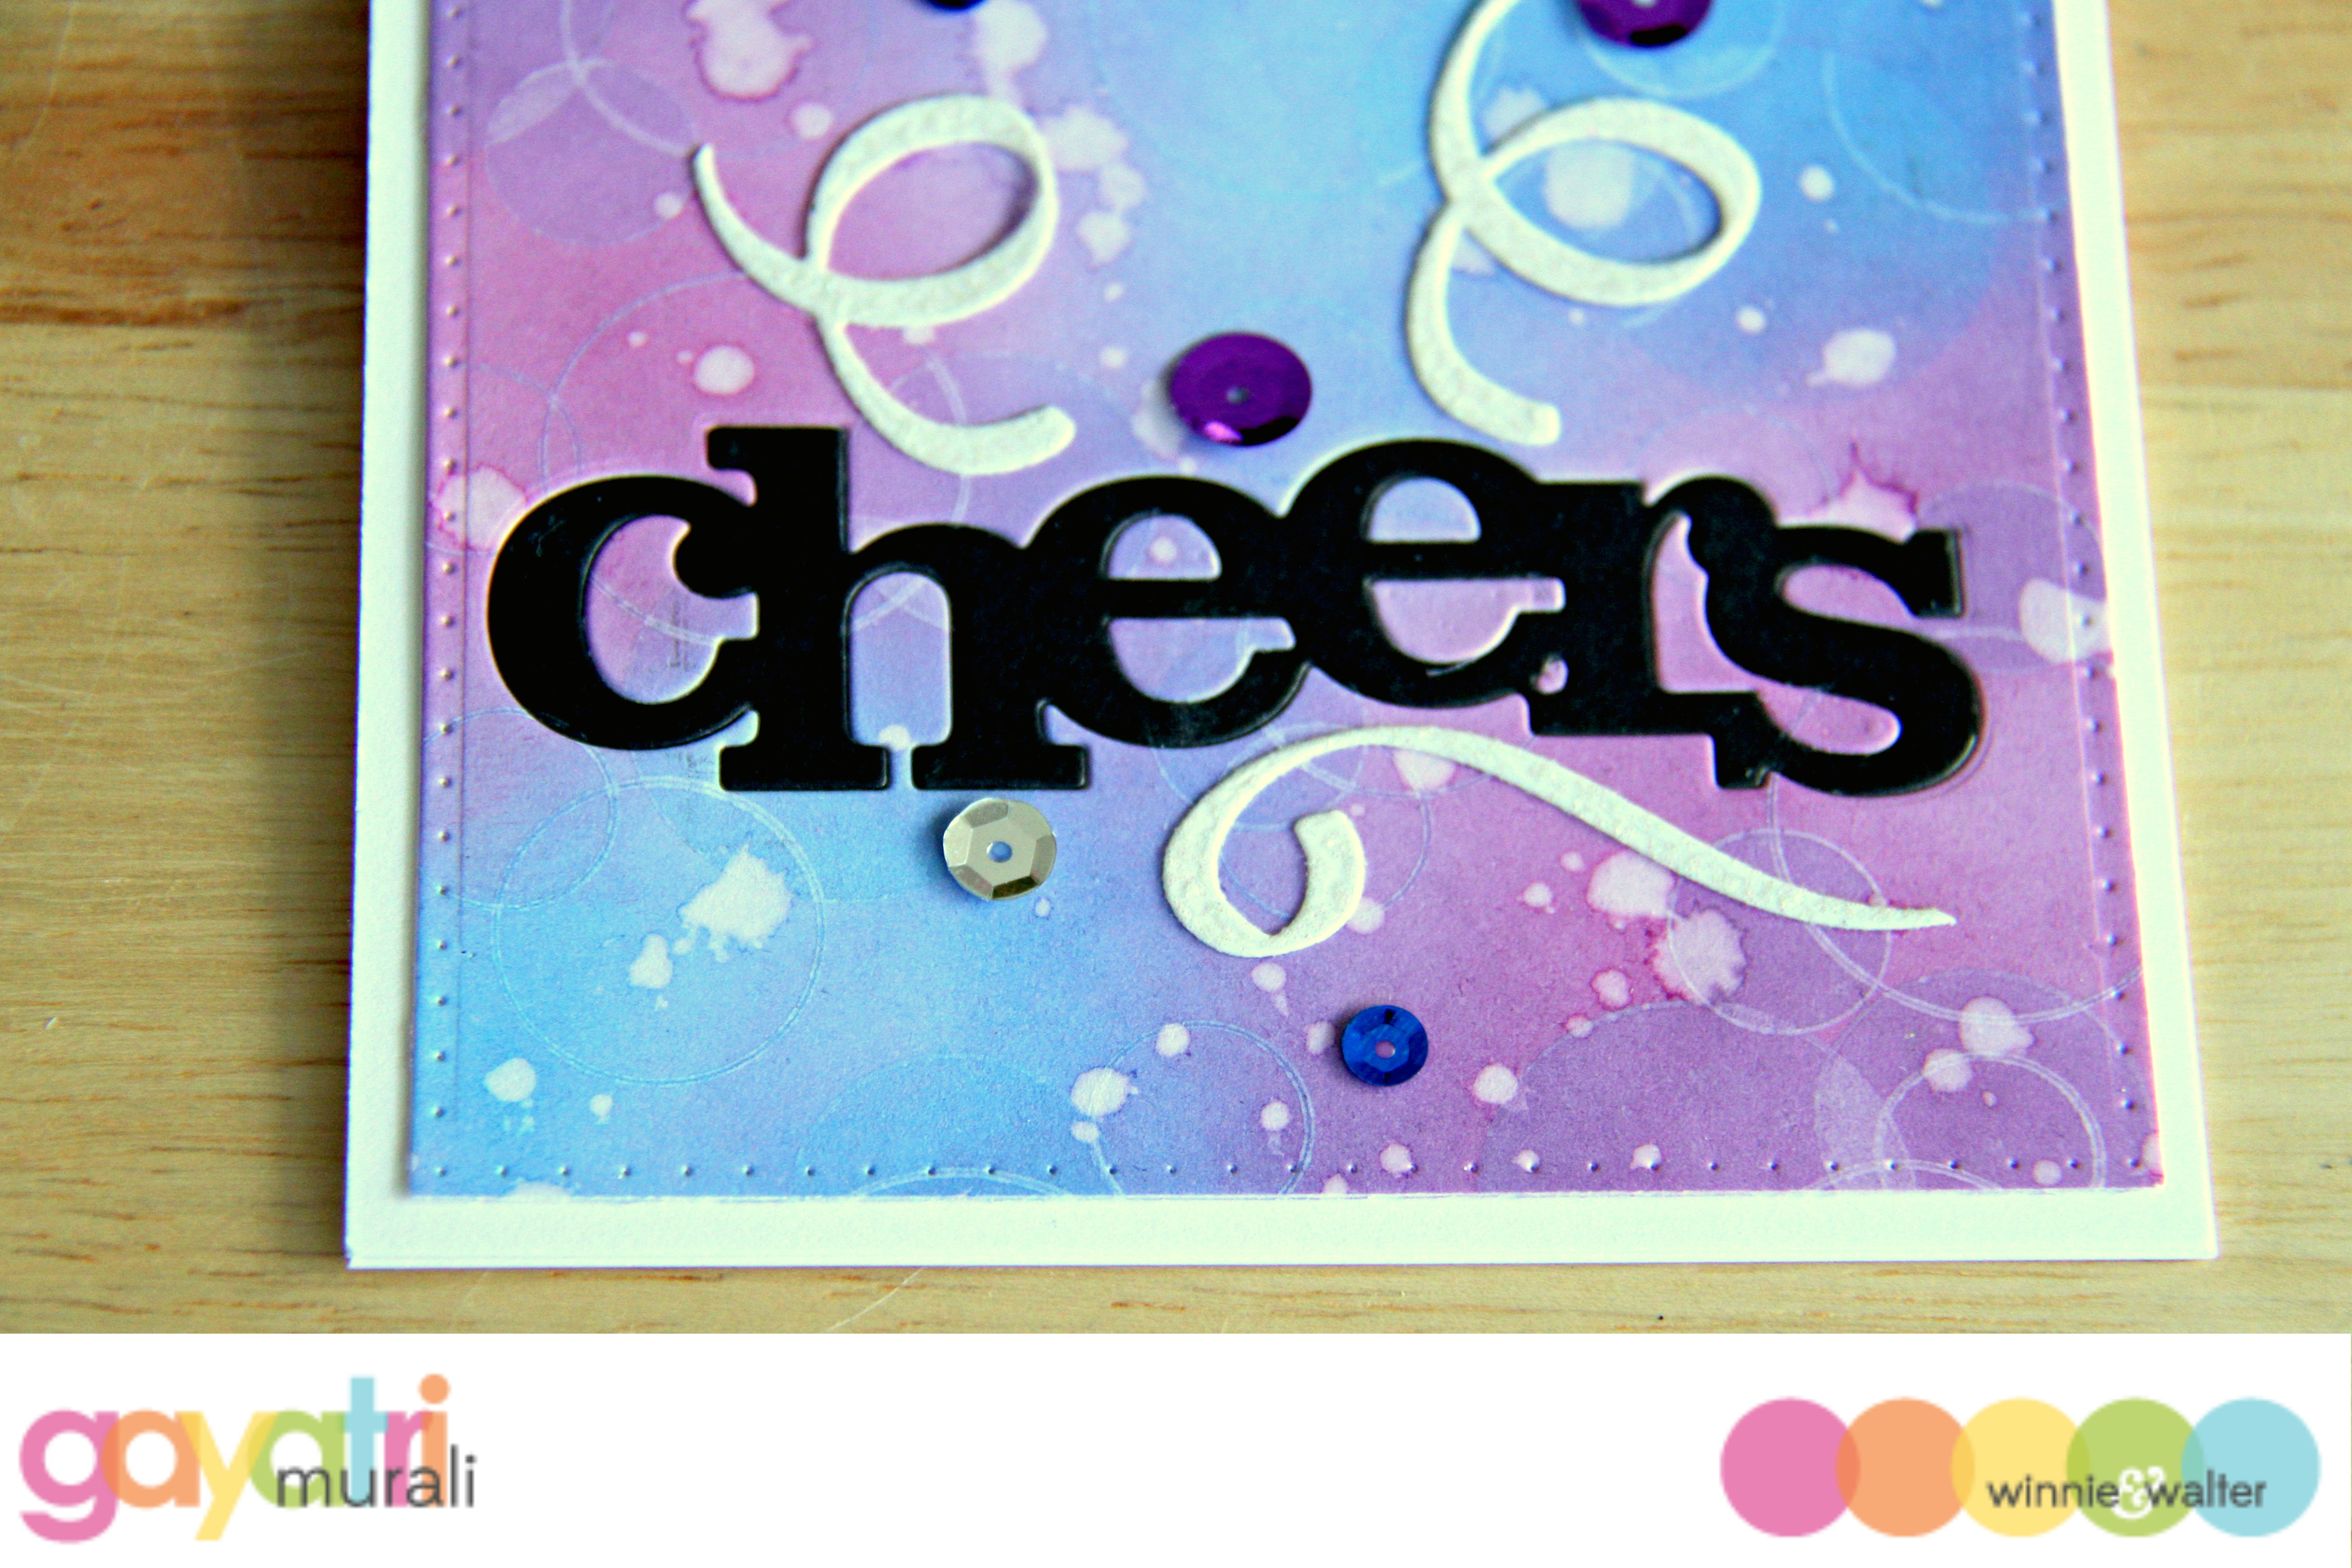
I created a bokeh background using inks and Scenery: Big Bang Confetti stamp set. I started with sponging Seedless Preserve and Mermaid Lagoon distress inks on white cardstock. I sponged layers and layers of colours until I was satisfied with the blend of colours. Then I used the solid and outline circles from Scenery: Big Bang Confetti stamp set to stamp layers of clusters of white bokeh using white pigment ink. The bokehs are subtle and beautiful. I also did spatter some clean water to add random texture. I then diecut a rectangle panel using the largest rectangle die from Essentials: Katharine Cutaways. Love the dot details on the edges of the panel.

gayatri_Cheers card closeup #1

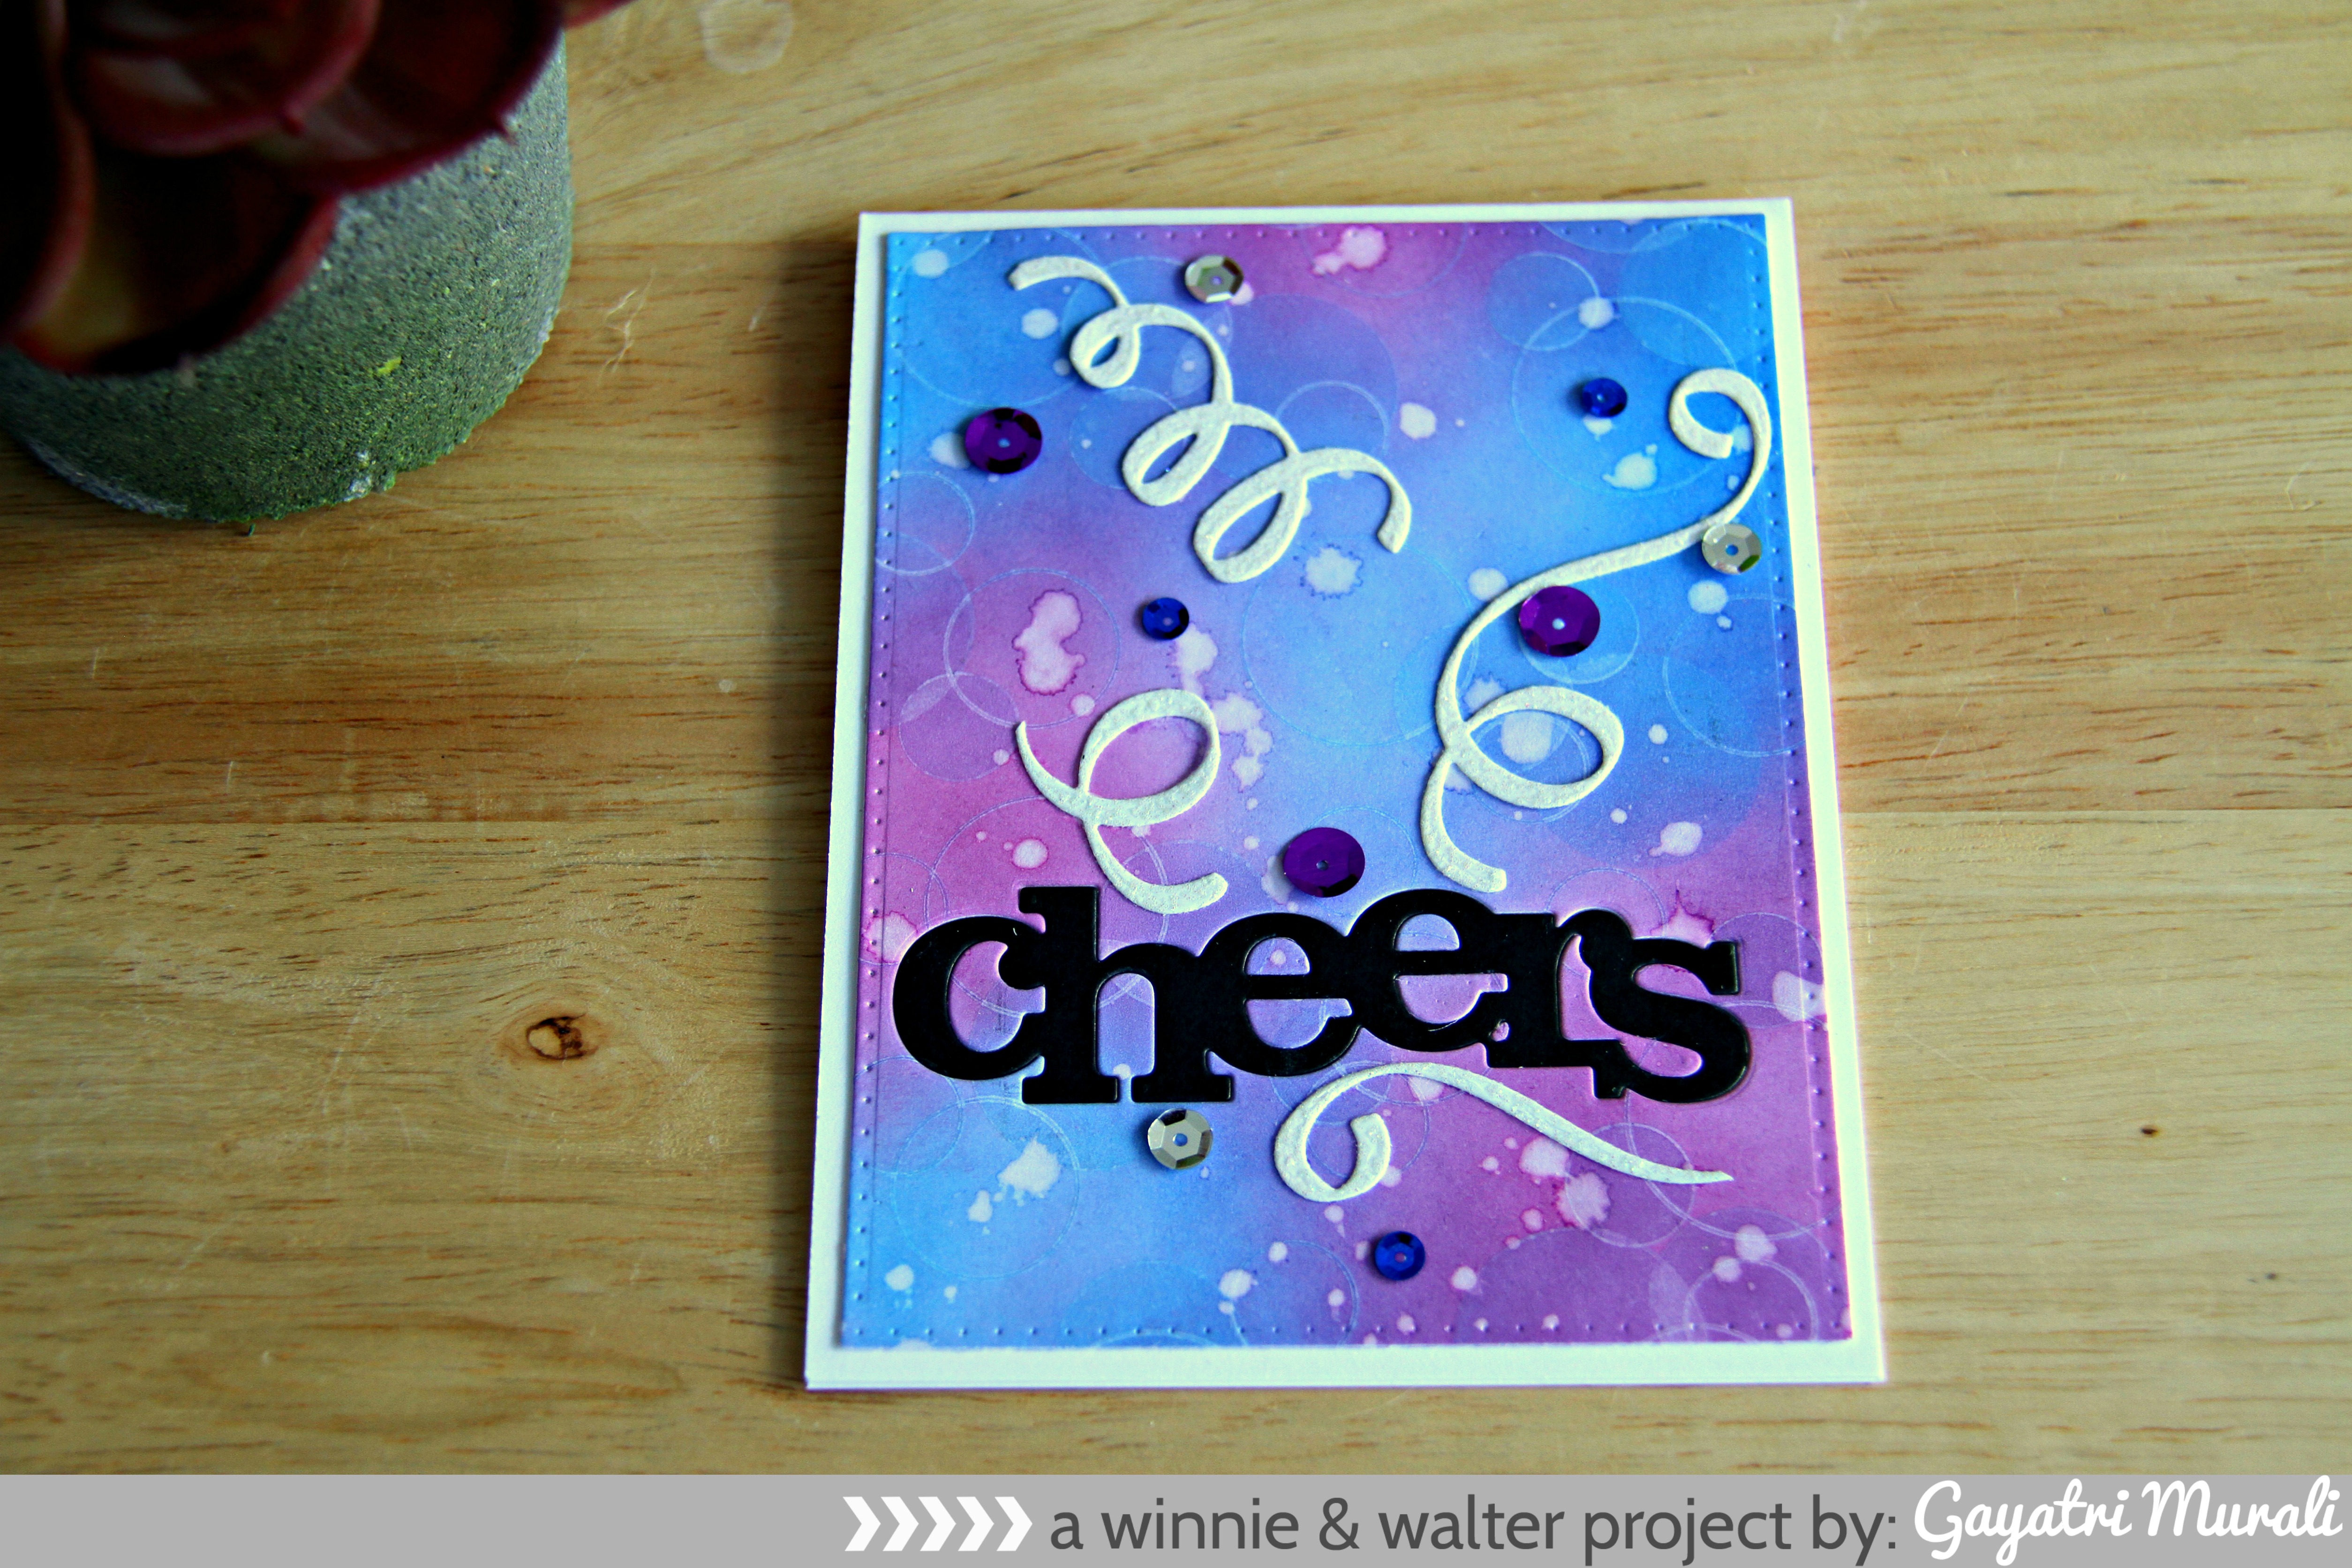
The focal sentiment is die cut from the main panel using In a Word: Cheers Cutaway. I also die cut the sentiment from black cardstock. I inlaid the black die cut into the main panel and all the bits and pieces in place by adding adhesive sheet at the back of the panel. This panel is adhered on a white card base using craft foam for dimension. To add to the cheer, I added some confetti from The Party Confetti Cutaways die cut using white glitter cardstock. Finally embellished with sequins from Little Things by Lucy Abrams - Kaleidoscope and Star Shine collection.

gayatri_Cheers card flate #1

I love creating backgrounds on my card to make them unique and also to get more out of your products. Hope you like my card.

Thanks for stopping by today. Have a lovely day!


w&wDT_gayatrimurali_blog-sig

w&w-supplies

Wednesday, January 20, 2016

With Sympathy with Lydia

Hi there Lydia here with you today, and I'll be sharing with you one of the most-heartfelt cards that you can sent. Even though sympathy cards are the least liked cards to make and give, they are needed and can be of great comfort to the receiver.

  w7w 

For my card I stamped a floral bouquet using In Bloom: Elsa's Florals in a light grey ink. Even though this floral set has lots of winter florals it is great for all year round, roses are great for all occasions right?!?! I wanted my images to have a pencil-sketch look about them so I used a grey coloured pencil to trace the stamped images and add in some simple shading.

  DSC07019

I added some sliver washi on the edge of my card blank just a little away from the edge to leave a thin strip of white too. For the sentiment I used one from A Tree For All Seasons, this is such a great set and has lots of different sentiments in a gorgeous font. 

Thank you so much for stopping by! I hope you liked my card and that you have a beautiful day. 

Hugs, Lydia xxx


w&wDT_lydiaevans_blog-sig 2


w&w-supplies


Tuesday, January 19, 2016

Party/Celebration | Happy Birthday with Kate


Hello.
It's Kate here today and I wanted to revisit this months Rerun challenge.
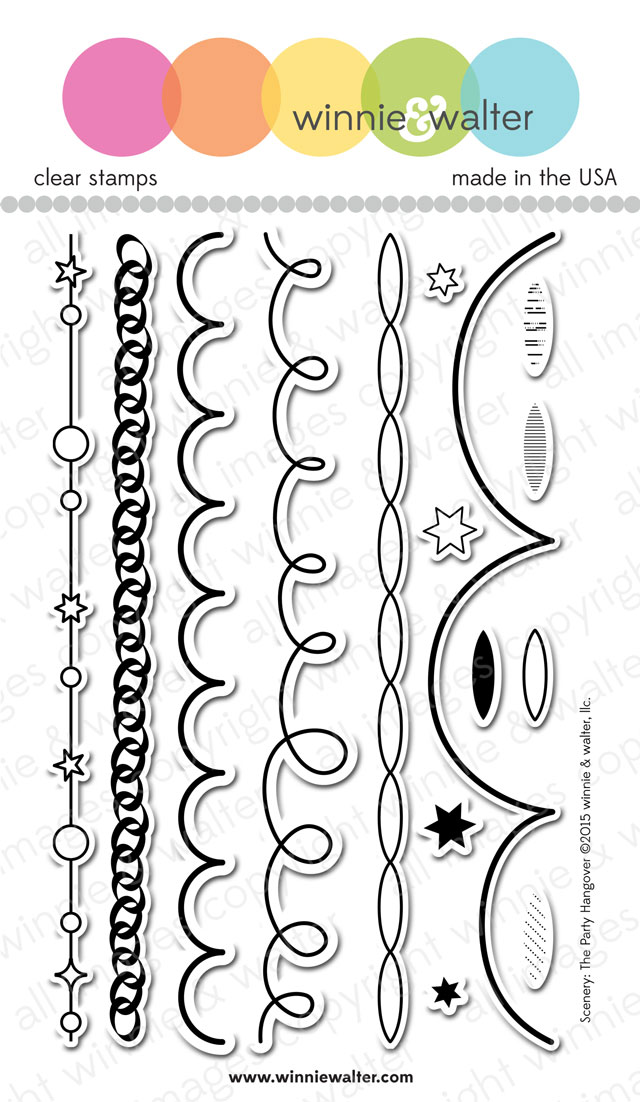
So this month the featured  stamp set is Scenery: The Party Hangover.

w&w_SCNThePartyHangover_4x6stamp_webprv


As the title suggests I went with a pink colour theme :) 


I kept this card very simple and repeat stamped the image in pink at an angle on my card base.
I wanted that stamped image to be my main stamping so I have used In a Word: Happy Cutaway and The Big, the Bold and Party Cutaways for my sentiment.
I finished with some sequins. 


Next up I used the scalloped stamp.


I stamped the scallop four times on my panel in black ink. 
I then used the Goldie Trim Cutaways with some scrap paper to mask the parts I wanted white.
I then  used an ink blender and distress inks to add colour. 
Again i have used cutaways for my sentiment and then added some enamel dots and rhinestones to finish.
You still have two weeks to join in the fun :) 
Thanks for looking.


w&w_kateTIR_blog-sig


w&w-supplies


Saturday, January 16, 2016

January Leading Lady Virginia Lu | Take Three

Virginia-Lu_jan2016

Our January Leading Lady, Virginia Lu is back for her triumphant third performance!  If you missed her smashing debut you must see it...CLICK HERE or her sensational second performance with so much fabulous artistry CLICK HERE.  Today, Virginia certainly showcases her incredible versatility and depth of skill and scope of talent!

Without further ado, Virginia....

Hello, dear Winnie & Walter friends! I am excited to share my 3rd post as The January Leading Lady.  I am having SO much fun and keep coming up with lots of ideas as I play. Does that ever happen to you? When you have the “right products,” your ideas simply FLOW. Now that Christmas is over, does that mean you put away your Christmas stamps and dies away? Well, not so fast! Look what I made with some of my Christmas-themed products!

First, I came up with a sophisticated masculine birthday card with the Christmas supplies! It all started with the stenciled background by using Scenery: The Peppermint Zone Creative Screenings.  The multi-colored stripes were stenciled with Distress inks. I purposely masked off the star (with True Multifaceted Star Cutaways ) in the center.

happy birthday (2)[2]

I then embossed the stars from Comfort and Joy. With the added vellum star from the Cutaways, this card came together rather easily.

DSC_0582[2]

It was embellished with silver DMC strings and tiny star confetti ( Martha Stewart). After making this card, I used similar supplies to create a set of birthday cards. You can never have too many masculine cards on hand, right?

happy birthday[2]

The stars from Comfort and Joy are so versatile! I also chose some pattern paper to make the star dies to create the focal point. To add some hidden bling, I added a gold strip from Goldie Trim Cutaways. It was easy to mass produce once you have all the design elements in place.

happy birthday (set of cards)[2]

The sentiment is from The Big, the Bold and The Happy. Even though the design is the same, each card is unique and different. And that is the beauty of hand made cards. Next, I have a few art journal pages to share. This flower page is the perfect antidote to make in the middle of winter.

happy day[2]

Making the stenciled background on the top page was just as fun as stamping flowers! I absolutely love the Scenery: Madison Creative Screenings. Those scalloped borders make the page all that much more “happy”! The In Bloom: Anna's Flora stamp set is the ticket to a happy garden scene. I stamped all the flowers and then clear-embossed them with the help of MISTI. You can see a shiny outlines from the clear-embossing - love that!

close-up-002[2]

I colored the images with my Zig Markers. Because it is an art journal page, I totally owned my creative licence and did not feel pressured to strive for perfection. I added doily and stencilled paste (Gesso mixed with Cracked Pistachio Distress Ink) at the bottom. The sentiment “discover beauty” is a Rub-On from Ranger.

After making a happy garden page, I was pulled back to the reality! I was inspired by the snow scene near my house and came up with a winter scene. The trees in the wood totally inspired me! And how cool is that Scenery: Into the Woods Creative Screenings!? I prepared the background with Gesso and Mister Huey Color Mist (see photo below).

#10[2]

After the foundation was covered with the Gesso and dried, I applied the white embossing paste (Wendy Vecchi) all over. Once it was dried, I put the Scenery: Into the Woods Creative Screenings back in place. Then I applied Vintage Photo Distress Ink mixed with Gesso OVER the bottom part of the trees.

2015-12[5]

For the final embellishments, I added sequins and glitter on the “snow.” The sentiment is from the same Rub-on as my previous page. Aren’t our 4 seasons amazing or what? I hope this prompts you to try out new techniques, supplies, and designs.

be still breathe[2]

My last post (whaaat!!!?) is coming up on the 23rd. I know, time flies when you are having fun! Here is a peek!

sneak peek[2]

Thank you so much for stopping by!

Friday, January 15, 2016

Party/Celebration | Every Day is a Party With You with Vanessa

Hello everyone! Vanessa here with a simple, but fun balloon card. I don't know about you, but I love balloons, they make me happy and make me think of good things. Although they also remind me of the fear my girl had when she was about two years old, because she slightly panicked that they might suddenly pop :) But by now she loves them, too! And the more colorful, the happier! So this is my card:


I simply stamped the balloons, strings and the sentiment from "The Party" onto a panel of watercolor paper (because I like the texture) and colored the balloons with Copics. Then I adhered the panel to a black card base and added matching sequins. Very simple, isn't it? But still fun!


I hope you liked today's inspiration! Thank you so much for stopping by!


Vanessa

w&wDT_vanessamenhorn_blog-sig


w&w-supplies


Wednesday, January 13, 2016

Party/Celebration | From All of Us with Heather H.

Good morning! Heather; here stopping by to share a birthday card that I made the other night - tried to make it a little more masculine - always seem to have a shortage of those in my stash!


I used 3 different Winnie and Walter birthday stamp sets - LOVE how versatile they are, and how well they all work together! The first on is The Party - which I used for the gift, as well as the streamer on the bottom under the sentiment. Most of the sentiment came from The Big, the Bold, and the Party - and the first two words came from Sugar Rush. I colored the gift with Copic markers - then added Glossy Accents to the bow portions - love the extra dimension it gives! Matted it with black cardstock, then mounted with foam adhesive on my pattern paper/cardbase.


Thanks for stopping by today! Have a wonderful day!!!


w&wDT_heatherhoffman_blog-sig 2


w&w-supplies