Saturday, July 18, 2015

July Leading Lady Anja Bytyqi | Take Three

Our July Leading Lady, Anja Bytyqi is back for her triumphant third performance!  If you missed her smashing debut you must see it...CLICK HERE or her masterful touch with masks and stencils showcased in her second performance CLICK HERE.  Anja's proves her skill with an array of inktastic projects today!

Without further ado, Anja....

Hello crafty peeps,

So glad to be back again for round three as Winnie & Walter's Leading Lady. Thank you so much for all your sweet comments – I really appreciate them!


I will have to tell you a little secret: not only do I hoard stamps and dies but I'm also addicted to inks ;-)
There are so many good products out there and I love to play with them! Stamping is really therapeutic, isn't it?!

So today's topic is Ink it Up!. I will show you some samples of my favorite ways to use the different inks.

Pigment Inks


On my first card I used one of my all-time-favorite birthday stamp sets: The Party. With these stamps it's so easy to create quick and simple cards. I stamped these fun balloons with Pigment Inks in the colors of the Winnie & Walter logo. I really like the vibrant colors and how well they stamp on top of each other. The grey strings and the sentiment were also stamped with Pigment Inks. At the bottom of my card I added a strip of washi tape.


Another great way to use Pigment Inks is by stamping them on colored cardstock (I used Kraft cardstock here) because they sit on top of the paper surface which makes them almost opaque so they keep their vibrancy. To support this effect you can stamp over white pigment ink like I did here. For a little twist I offset the chevrons a tiny bit. I often struggle creating masculine cards but the Scenery: V for cheVron stamp set makes it really easy to achieve a clean and graphic look. The sentiment was build with The Big, the Bold and Party stamp set and I heat embossed it with Clear powder. For this fun xoxo border I used a die from the Essentials: Audrey Cutaways set.


Dye Inks


For really crisp stamped images I prefer using Dye Inks because they soak into the paper. For this card I repeatedly stamped the chevrons from the Scenery: V for cheVron set. I heat embossed the outline balloons and the sentiment from The Party stamp set in Gold. I popped up the stamped panel with foam tape and added some Gold Cupped Sequins.


This card is really Clean & Simple. At first I masked off a circle (1 3/4") and then blended a light Aqua Dye Ink around it and let it fade out. After removing the mask I heat embossed the graphic ornament and the sentiment from the True stamp set with one of my favorite embossing powders: «Liquid Platinum» by Ranger. The word «friend» was cut from foil cardstock using The Big, the Bold and Friends Cutaways.


Distress Inks


To create artsy watercolor backgrounds I love to pull out my Tim Holtz/Ranger Distress Inks. At first I heat embossed the sentiment from The Big, the Bold and Happy stamp set with Clear embossing powder. I used Tim Holtz Watercolor Cardstock. Then I pressed down my Distress Ink pads on my Non-Stick Craft Sheet and added some generous spritzes of water. I dabbed my piece of Watercolor Cardstock onto the muddle of colors multiple times until I was satisfied with the result. To finish off my card I added a little die-cut heart.


On my last card for today I created a starry night sky with the Distress Inks. I blended the colors with a Mini Ink Blending Tool and added some water droplets which pulled off the color in these areas. The scripty sentiment and the gorgeous star are from the True stamp set and I heat embossed them in White. I also adhered some Silver Star Sequins. To mimic some additional stars I draw some white dots with a Sharpie pen.


These were my inky cards for today. I really hope you liked them and would be very happy to see you back again next Saturday for my last Leading Lady perfomance.

Until then feel free to comment on the Leading Lady posts on my personal blog for your chance to win a $30 gift card to the Winnie & Walter store.


A big hug to Julie & Shay for this opportunity to share my projects with you!

Thank you so much for stopping by! Have a wonderful weekend!


w&w-supplies


Friday, July 17, 2015

Connecting

Hello lovelies!  

It is Shay here.  I am going to do something a bit different today (warning: this is a very text heavy post).  I don't often take up a whole post (although I have done it more of late) because our Talent and lovely guests are incredible and do a fine job inspiring.  Plus it is hard to put yourself out there, right?

Still I love to connect with others that love to create too and I am the first to admit I am a papercrafts fan girl.  I swear it is not stalking, just a sincere admiration and love of crafting, style, creativity and the like.  I watch videos, read blogs, listen to podcasts, subscribe to various kits, take online classes, covet products and buy crafty necessities (aren't they all?) like I don't have a burgeoning studio stuffed full (and needing a hefty purging).

In fact Julie and I bonded over "talking shop".  We would meet at baby showers, parties and the like and end up spending hours talking about stamping, scrapbooking, companies, blogs, videos, crafters and magazines.  Most everyone else in our lives could not stand more than a few minutes of this sort of conversation without their eyes glazing over.

Our talk eventually morphed into spinning dreams of working on our own designs where we could expand on our ideas.  We did this for years.  Enough was enough and it was time to do something before we whiled away the years without doing anything.  Waiting for the right time means time slips away from you.  We made definitive plans and strategies.  We put them into motion and we started Winnie & Walter!  

We still can't believe we are doing rather than simply talking.  We have to remind ourselves that we run a growing crafting business...this dream has become a reality.  One of the most positive parts of running our own crafting business is that we have the chance to give back, to create relationships and to help others to strengthen their relationships too.

Running w&w as a second job is not easy along with balancing having a life outside of work, but having this chance to connect with you through w&w is so meaningful, so worthwhile and so very amazing!  We are unbelievably grateful that we have the opportunity to be a part of your lives through our shared joy in making.  

Crafting for me has not only been about creating and artistic expression, but a way to connect, share, care and help heal.  It is a way to reach out to others in the good times and bad.

I am not sure if you are aware that our dear Lea and her husband are grieving over the loss of their sweet little one, Arabella Grace.  These two are a lovely couple who have endured so much.  Julie and I are full of sorrow for their pain.  You can find out more on Lea's blog HERE.  If you feel so inclined, please leave a little love on her blog.  If you would like to send some love the old fashioned way, you can send cards to Lea & Josh Lawson, c/o Winnie & Walter, 14350 Northbrook Drive, Suite 220, San Antonio, Texas  78232 and we will happily forward them on. 

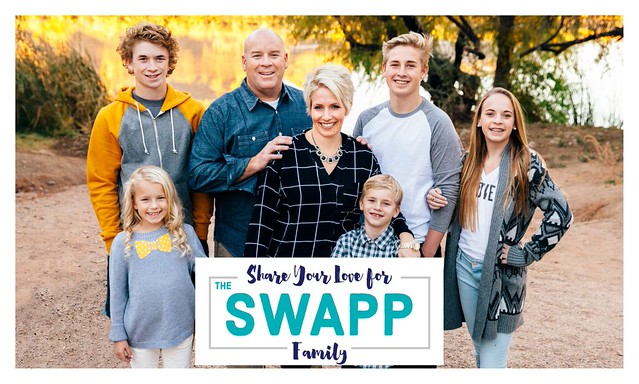
As many of you are probably aware, Heidi Swapp lost her 16 year old son recently.  I found out from Jennifer McGuire's call to cardmakers HERE.  I spent many hours with Heidi Swapp watching her live weekly classes online when she was part of House of 3.  She was warm, real, funny, talented and giving.  It is apparent that her family are her heart and center.  I don't personally know Heidi, but she and her family have brightened and enriched my life and I am certainly not alone.

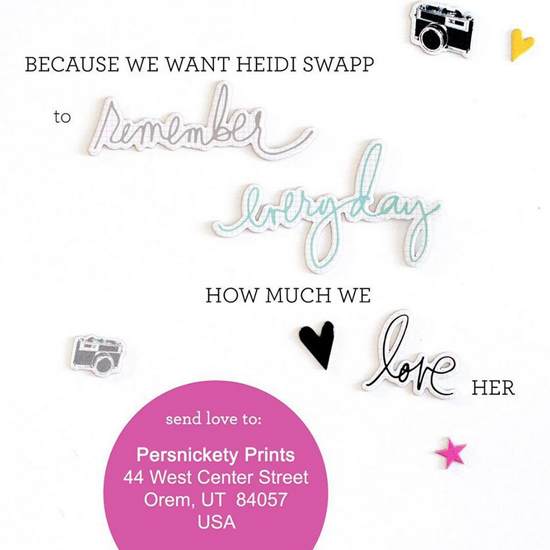
If you would like to send a card to the Swapp family, Persnickety Prints are collecting cards for them at Persnickety Prints, 44 West Center Street, Orem, UT  84057 USA.

Screen-Shot-2015-07-12-at-9.42.47-PM1
Via Persnickety Prints


Also Becky Higgins is collecting messages of love on 4x4 squares to be added to an album (or as many as necessary to house all those squares) for the Swapp family.  More information can be found HERE on how you can participate.  
swapp
Photo from beckyhiggins.com (click on the photo to reach Becky Higgins' post)


Any loss of a child is heartbreaking.  I am not a parent, but I am someone acutely familiar with a lot of helplessness, hopelessness, desolation and isolation not only personally but also experienced by friends and family.  Lain Ehmann wrote eloquently HERE about the power of reaching out to others.

Perhaps one of the reasons I am writing this long-winded post is that I feel motivated to reach out and let you know how important you are to Julie and me.  

This need to connect with you guys has me wanting to do a monthly post which I am calling {Mis}Adventures in Crafting.  I hope you will come along for the ride as I share various forays into crafting.  

As always, please do not hesitate to share your opinions, adventures, projects, thoughts and questions.    

Last thought for today: making and giving of a card is an act of grace.  You are sending your love along with your handmade card.  

Keep on crafting and spreading love,
Shay.


w&w_shay_blog-sig

Wednesday, July 15, 2015

Bright + Bold | Cheers with Laura

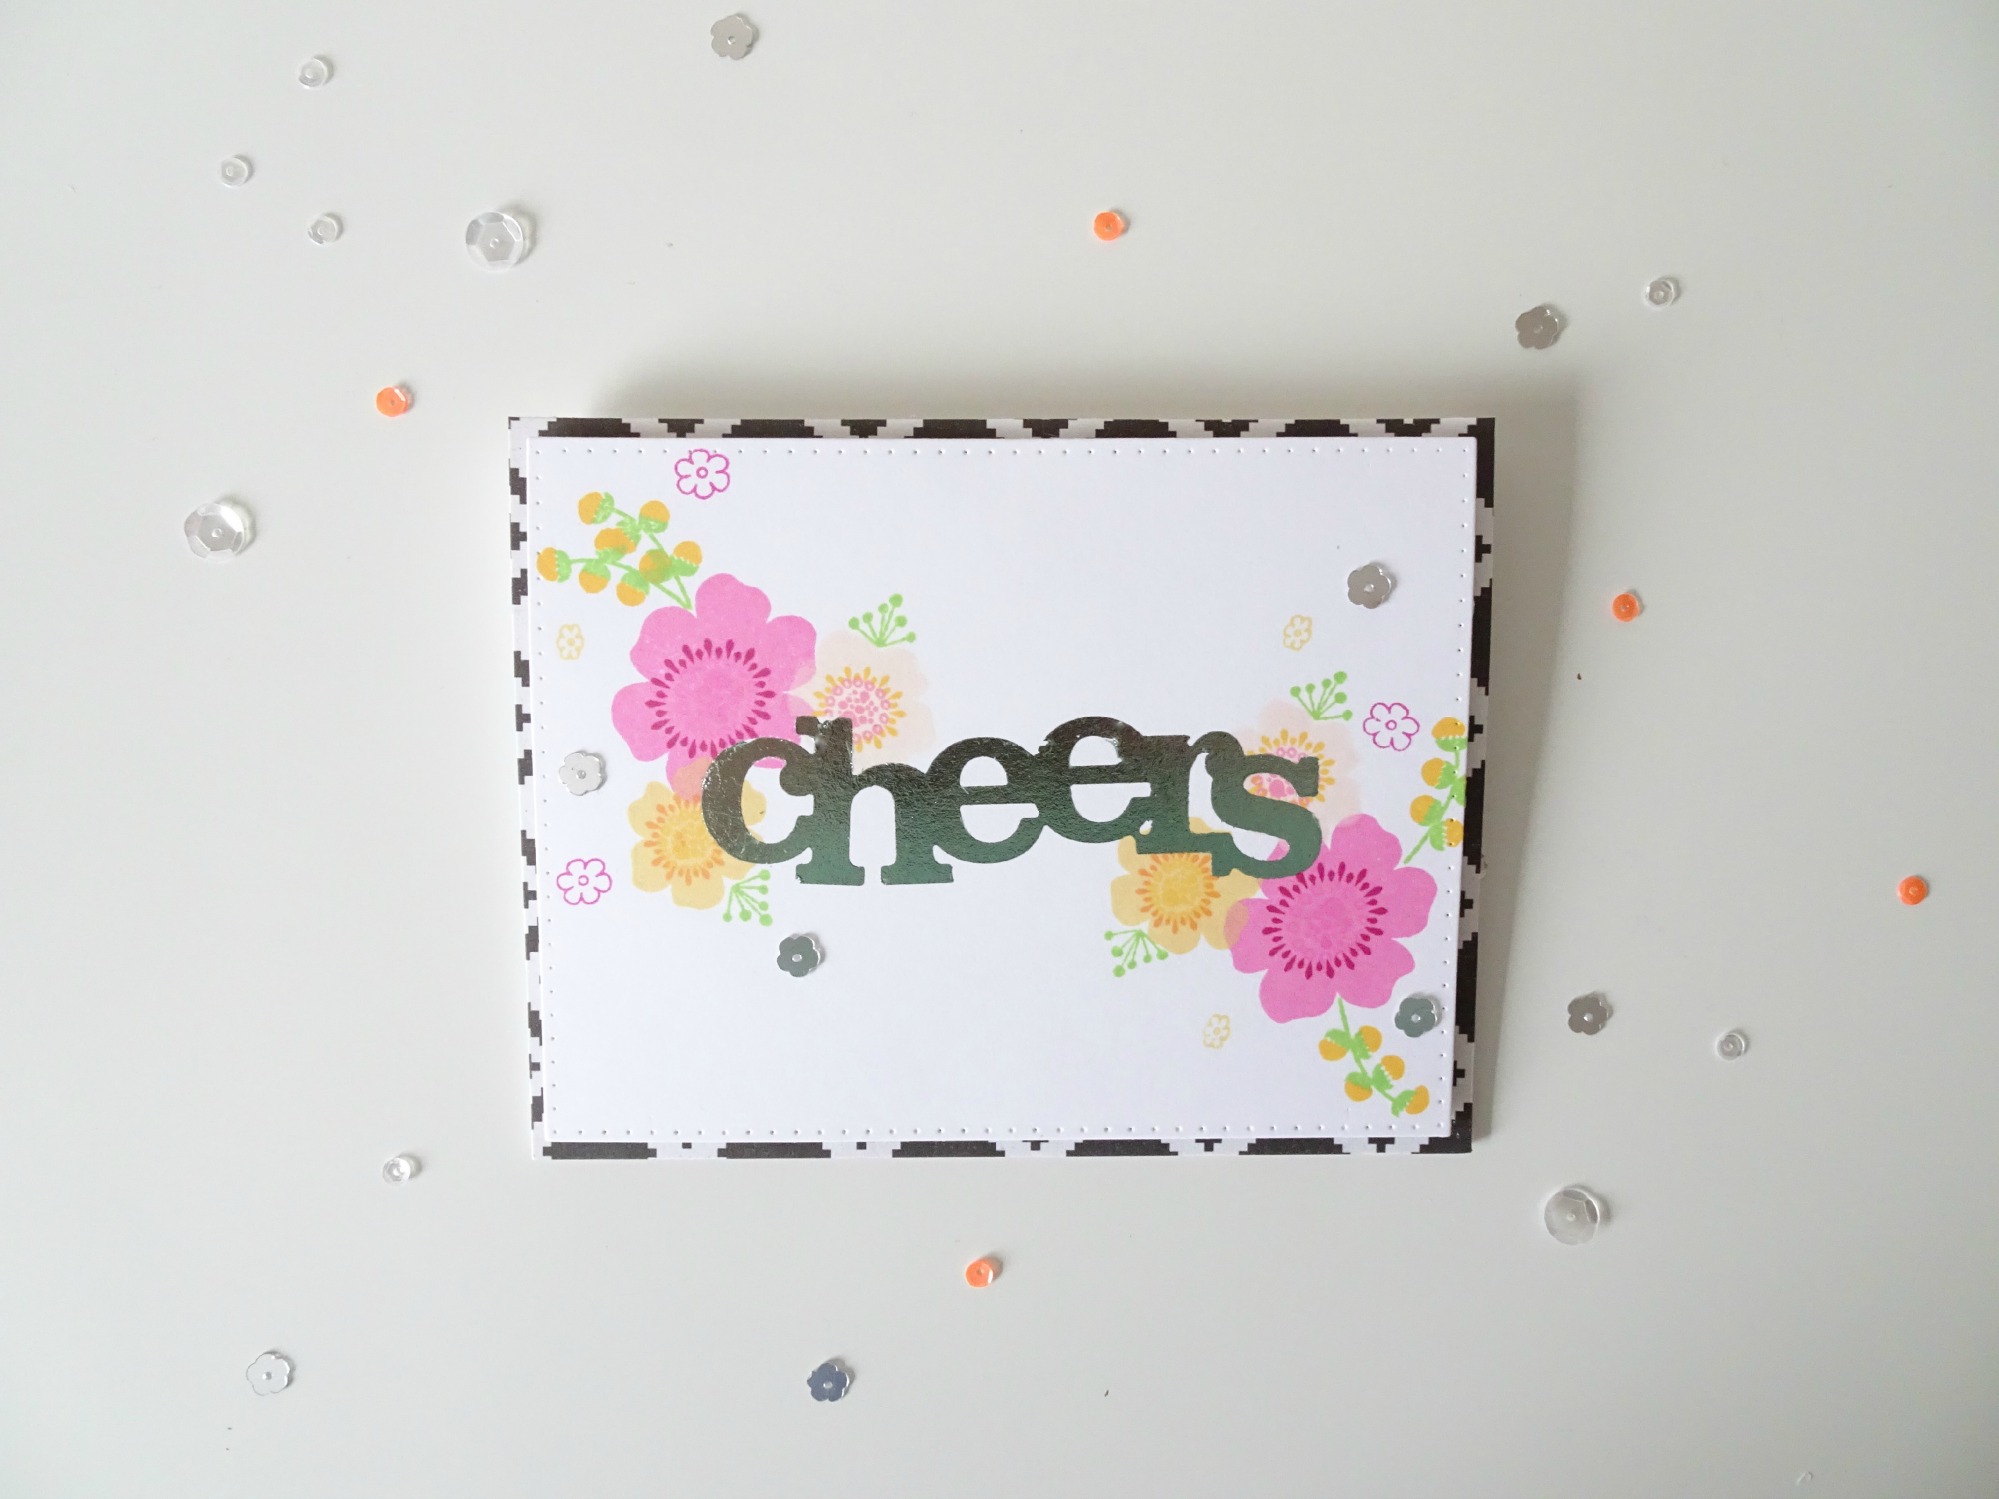
Hello, friends! It's Laura here today sharing a card using the In Bloom: Lola's Bouquet with Joni Andaya stamp set along with the In a Word: Cheers Cutaway. 

laurasterckx_w&w_blog

This card came together quickly! First, I stamped a bunch of flowers using the Lola's Bouquet stamp set. I layered a lot of the stamps together to get detailled flowers. Whenever I stamp lots of flowers or other images, I like to use dye inks because they dry super fast. 

On this card, I wanted to let the sentiment be the focal point. For that I die cut the In a Word: Cheers die cut out of Stick It adhesive sheets. Then, I peeled off the first layer and adhered it on top of the flowers. After transferring the sticky bit onto the card by rubbing my bone folder on the word, I peeled off the top layer of the die. Next, I took some mint colored foil and ran it trough my laminator. Quick and easy!

That's it for now! Thank you so much for visiting us! xo

:) Laura

w&wDT_laura_blog-sig


w&w-supplies


Tuesday, July 14, 2015

Spotlight On...Diane Jaquay!

spotlight-diane-jaquay

We are proud to bring you our next Spotlight On...Diane Jaquay!  Diane caught our attention immediately with her use of crisp color, dynamic pattern and clever use of stamps and dies.  In fact she was just named Gossip Queen with this stunning CARD

Wait until you see what she's made today...you will see Diane shine!       


>>>ABOUT DIANE<<<


Hello everyone!  My name is Diane Jaquay, and I live in a small farming town in beautiful Lancaster County, PA with my husband, David, and our two amazing kids, Connor and Ali.  Over the years I've tried my hand at many crafts, including quilting, cross stitch, needlepoint, embroidery, knitting, crocheting, painting, scrapbooking, mixed media, stamping, and card making (whew, that's quite a list and I'm sure I've forgotten a few things!)  For the past 18 years I've focused mostly on paper crafts, which all started when I was pregnant with my first child.  A group of my friends got together for my baby shower and presented me with a big bag stuffed with Creative Memory scrapbook supplies.  I still remember that being my absolute FAVORITE gift I received at my baby shower :)  Over the years I've completed about 20 albums chronicling my families memories, and my kids (now teens), love looking through them, which really warms my heart and makes all the hours I happily spent making them worthwhile!  About 8 years ago I started making cards, and that's been my main crafty focus ever since.  I've also dabbled a bit in mixed media canvases and art journaling, and hope to be able to do more of that.  In addition to all of my crafty pursuits I enjoy music, reading, hiking, biking, watching movies, and my guilty pleasure, reality TV (shhhh, don't tell anyone ;)

>>>DIANE's PROJECTS<<<

I'm SO thrilled to have the "spotlight" shone on me this month at Winnie & Walter!!  I've been a huge Winnie & Walter fan since Julie and Shay started their company, and it's always a pleasure to work with their wonderful products!  The theme this month is Bold + Bright.  For those who are familiar with my work you know that theme is right up my alley, I adore bold designs and bright colors and tend to use them a lot in my card making.  For today's post I'm focusing on getting the most out of your dies.  Winnie & Walter makes some fabulous dies and I wanted to give you some ideas for using them to their fullest potential.

Let's start with Cover Model: Multifaceted Cutaway.  Of course you can use the entire die cut piece in many ways, but I wanted to explore using just parts of it.  For my first card I used just the bottom 2/3 of the die cut to make a bold statement:


I cut the white die cut outline piece in the shape I wanted and adhered it to my card base.  I love citrus colors, so I decided to use some for this card (PTI Lemon Tart, Limeade Ice, and Orange Zest card stock).  I die cut the word "hugs" (In a Word: Hugs Cutaway), several times from white card stock, and once from polka dot vellum for the top, and adhered them all together to add more dimension to the card.  The various hearts were cut with Essentials: Audrey Cutaways.  The word "sending", which I stamped with Versa Mark ink on black card stock and embossed in white, is from The Big, the Bold and Comfort, and the words "to you" are from The Party.  I love mixing and matching sentiments from various stamp sets in this way! 

On to my next card, I wanted to use just the corners of Cover Model: Multifaceted Cutaway to "frame" one of Winnie & Walter's beautiful floral stamps:


I used wood grain patterned paper this time to die cut, and snipped off a couple of corners and adhered them to this 3 3/4" X 5 1/2" card base.  I stamped the flower and leaves from In Bloom: Addie's Garden with brown ink on patterned papers, then cut and paper pieced several layers for dimension.  I added some brown gems to the center of the flower.  The sentiment (from This Awesome House) is stamped on the banner die from The Big, the Bold and Extras Cutaway.  I curved the sentiment a bit when I stamped it to add some movement.  Another example of stretching your dies is using just part of the die the way I did here with the banner.  I added some ink splatters to add a little interest to the background, and rounded the top right corner with my corner rounder.  I like the mixture of sharp edges and soft curves on this card.

Next we're moving on to Essentials: Audrey Cutaways!  Oh how I love this VERSATILE die set!  Today I'm focusing on the scallop edge dies in the set.  I've made a couple of cards that you might traditionally use straight edge dies for, but I subbed the scalloped edge instead.


This card is 5 X 7, which it needed to be to make this design work.  First I cut 4 of the small scalloped die frames from watercolor paper.  I stamped various images from The Party and Scenery: Big Bang Confetti using Versa Mark ink and then I embossed them with white embossing powder.  Next I did the watercolor smooshing technique on the panels with Distress Inks (Picked Raspberry, Spun Sugar, Orange Marmalade, Squeezed Lemonade, Cracked Pistachio and Tumbled Glass).  For the sentiment panel I used The Big, the Bold, and the Happy.  To assemble this card, first I placed the 2 center pieces on an angle on a white piece of card stock and trimmed off the edges.  Next I placed the top 2 panels on (staggering the alignment) and trimmed.  I was able to use the leftover trimmed pieces to place the 2 bottom pieces on my card and trimmed those.  Then I placed the assembled piece on a 5 X 7 card base, and finished the card with some gems and sequins.  I hope that makes sense, it was really easy to do.  I originally saw this layout used with straight lines, but I think the scalloped edge adds such a FUN element to any card!

And now for my last card, again I used Essentials, Audrey Cutaways, this time using the large scalloped border die:


Angled panels on cards have been quite popular for awhile now, and I love the extra little something something that using the scalloped edge die adds.  I used the stamp set In Bloom: Lola's Bouquet with Joni Andaya here, and I cannot say enough wonderful things about this stamp set!  Seriously folks, if you don't own this one, what are you waiting for?  This card was my first time using the set, and I felt like a pro stamper right out of the gate!  When my husband saw the card he thought I'd used patterned paper, a high compliment indeed.  And I give 90% of the credit for that to Joni's fabulously designed stamp set.  I don't have a lot of experience stamping backgrounds like this one, but this set made it a breeze.  Of course I used some of my favorite "bold and bright" colors here (all PTI inks except for the little pink roses, for those I used Wplus9's Little Piggy).  I'm sure there are tutorials on the internet on how to stamp a background such as this one, but basically you start out with your largest image and stamp it in a triangular pattern (see the largest blue flower), then add in the 2nd largest image (see the dark pink, and orange/yellow flowers), and continue from there filling in blank areas around your card until you get down to the tiniest little dots.  SO fun, and I can't wait to make more backgrounds using this stamp set.  I also used In a Word: Hello Cutaway for this card, with the bonus being I now have the die cut word "hello" in the beautiful floral pattern to use on another card :)

That's all for now, although I have many more ideas for using dies, I didn't want to make this post too long and keep you here all day lol!  I want to offer my heartfelt thanks to Julie and Shay for letting me share my love of their wonderful products with all of you today!  I've had a blast!

Monday, July 13, 2015

The Gossip Column with Taheerah Atchia No. 3 | Hot Gossips + Gossip Queen Announced

Welcome back, fellow Gossipers! We've been so thrilled with the response to the latest issue of The Gossip Column! We continue to be ever thankful all for your kind words, comments, shares, and your enthusiasm for this exciting new feature on the w&w blog!

We were bowled over by the quality of each and every entry - you really seemed to channel your inner Jocelyn and we were so impressed!!

Just to recap, for this challenge we wanted to see you channel your inner Jocelyn Olson and create a card using elements of her signature style, or CASE one of her creations but put your own spin on it! We loved the results - some of the entries were off-the-scale amazing!!

We thought long and hard, and finally arrived at our decision for this column's Hot Gossips (runner-ups) and Gossip Queen (winner)!!

Drumroll please... 

hussena


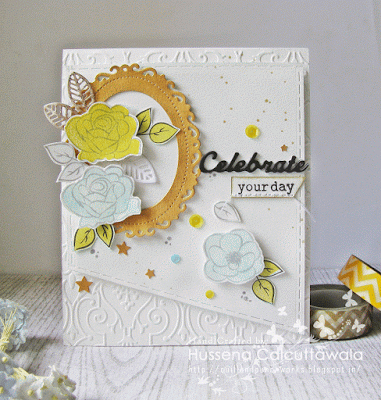
Hussena created a stunning CASE of one of Jocelyn's cards! Her layering, composition, colours and sprinkling of embellishments were all spot-on but introduced her own style in places too! I loved the wonderful embossing, white space and those gorgeous watercoloured blooms! Hussena this card is definitely Hot Gossip!!

penny_ward_hellofriend


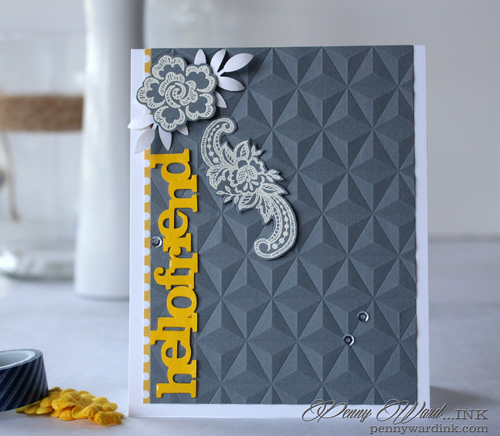
Penny Ward's amazing card kept us mesmerised with that amazing background embossing! I loved how she turned white space on its head, using grey as her main colour - but at the same time this card doesn't feel oppressive, it feels light and is such a great twist! The remaining elements are perfectly placed and very Jocelyn-inspired! Penny this stunner rightfully makes you Hot Gossip!!

And that brings us to our geometric-tastic Gossip Queen... 

diane_jaquay_IMG_0878


Diane Jaquay... her card channelled Jocelyn's style to a T! With fantastic pops of colour, clever negative die cutting, perfect positioning of elements and just all-round *wow*, this card packed a punch in all the right ways, was light, bright and fantastic! I couldn't help but name her Gossip Queen!!


Hussena and Penny you both win a $15 credit to the w&w store, and Diane you walk away with a $30 credit! Congratulations!! Please contact info {at} winniewalter {dot} com to claim your prizes!!

Please join us in congratulating these fantastic ladies and their amazing creations!! Everyone's entries were of such a high standard and you all deserve the plaudits too!! Please do take some time to browse the gallery to see everyone's work - you can find them at the bottom of the last The Gossip Column here.

For all you Gossipers who are keen to get the latest scoop, issue 4 of The Gossip Column will be hot off the press on Friday 7th August! We'll see you back here to get the exclusive on the latest gossip then!!

'Til then - keep on gossiping!


Taheerah

Saturday, July 11, 2015

Just for Julie!

Today is a special post in honor of Julie’s birthday today. 

As most of you know Julie is the co-owner of Winnie & Walter, proud mama of Walter the dog (and one of the namesakes of w&w) and the lady who works on making all of the w&w products possible by spending hours and hours on the computer.  Not only does Julie make magical things happen, she has a big heart and is also a full time teacher, wife, daughter, sister, aunt (you can see her darling niece in her memory keeping projects) and friend!  Talk about busy. 

Julie is a wonderful friend and business partner who patiently listens to my crazy ideas and makes the saner ones into reality.   I really want to celebrate Julie and her birthday….

>>>JUST FOR JULIE<<<

This year to change things up I thought I would ask *you* to get creative and make a happy card for Julie using some of the incredible w&w designs Julie has worked so hard on.  It can be a birthday, thank you, you are awesome, hello or any sort of happy card and write a little something to Julie. 

Please send your cards to: Julie Mogford, c/o Winnie & Walter, LLC, 14350 Northbrook Drive, Suite 220, San Antonio, TX  78232 thru August 15th.

Please make sure you include your name and email address in your card. J

>>>LINK UP YOUR CARD<<<

If you also want to share your cards online, please do!!  I’ve included a linkup tool you can use.  Thank you so much…you have no idea how much it will mean to Julie (she may get a little teary-eyed)!


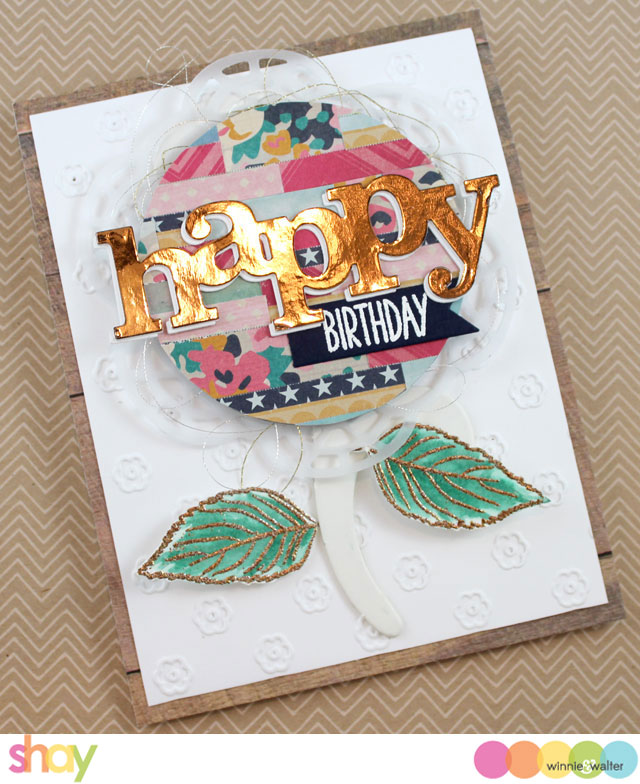
>>>JULIE’S BIRTHDAY CARD<<<

IMG_3694


I made Julie a birthday card as did some delightful ladies too (see linky)!

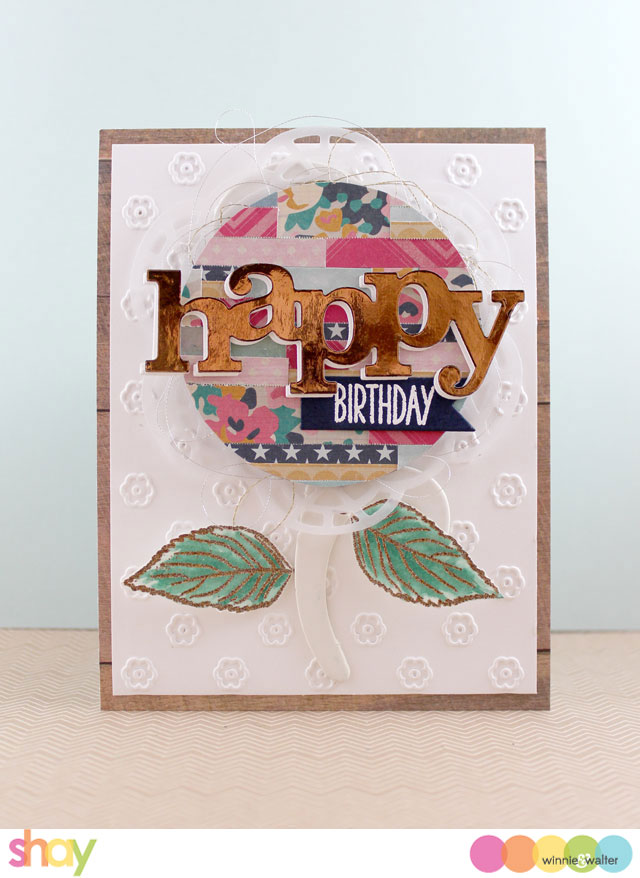
I had a vague design in mind based upon an anniversary card I made earlier this week which includes covering up a large simple die cut shape with stripes of patterned paper.  I adore using lots of patterned paper in a mosaic method.  I feel like I am getting back to my roots. lol 

I picked out some really pretty patterned papers from 6x6 paper pads: Maggie Holmes collection (original) for Crate Paper, Flea Market by Maggie Holmes/Crate Paper, Confetti by Maggie Holmes/Crate Paper, Craft Market by Crate Paper and Solstice by Pink Paislee.  I decided on a color scheme for Julie of cotton candy, raspberry, aqua, teal, goldenrod, navy and white with touches of metallics.   I am missing out on purple which Julie does love, but as I did purple last year I feel she will be okay with the different color palette.  So I covered a circle (cut using a Spellbinders Nestabilities die) with the stripes of paper from 6 different patterned papers I picked out.  I die cut a doily circle using a Lifestyle Crafts die (now We R Memory Keepers I believe) out of vellum.  When I placed the circle over the vellum along with a chipboard florish it all looked like a big beautiful flower to me so I went with it.  

I embossed a piece of white cardstock with the Simple Flowers embossing folder by Cricut as I adore the texture it imparts especially on clean beautiful white.  I attached the white chipboard florish to the embossed panel.  Did you know Julie loves flourishes?  One of these days we will be adding flourishes to the w&w lineup. lol

I wanted to add in some more stamping and something from In Bloom: Addie’s Garden as this is such a special set to Julie so I stamped on watercolor paper one of the large veined leaves twice in Versamark and heat embossed it with bronze embossing powder which looks a bit like a mix of gold and silver and works well with copper too.  Using a water brush and evergreen bough Tim Holtz Distress Ink I watercolored in the leaves and cut them out.

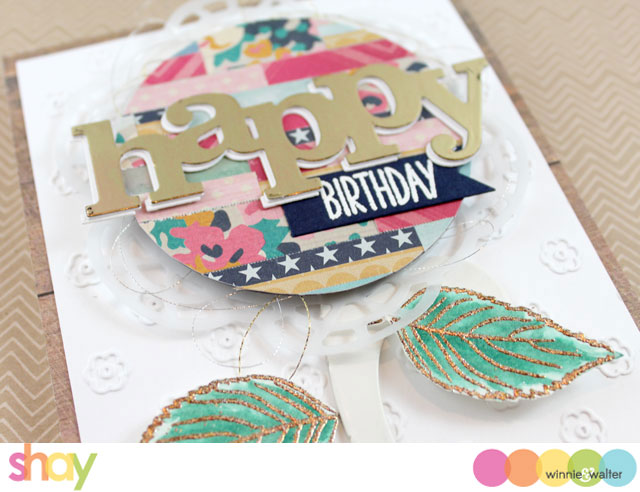
I die cut In a Word: Happy Cutaway twice from white cardstock which I adhered together and once from toner cardstock that came with my Minc.  I added some copper foil to the toner cardstock using my Minc and it came out all shiny and lovely.  I adhered the copper happy to the white happy slightly offsetting it.  I attached the happy to the patterned paper circle.  I die cut the larger banner from Essentials: Katharine Cutaways from a piece of navy cardstock.  I stamped “birthday” from Sugar Rush in Versamark and heat embossed it white.  I cut off the left end of the banner and tucked the banner under the happy.

IMG_3702


I attached a nest of silver and gold threads behind the circle for a sort of ethereal feel and more texture and then attached the circle to the vellum doily with dimensional foam adhesive which all got adhered onto the white embossed panel.  I added the leaves to the flourish with dimensional foam adhesive.  The white embossed panel got adhered to a white card base which I covered on the front with some woodgrain patterned paper which picked up the copper tones from the foiled happy.

IMG_3698


Julie, I hope you like your birthday card!  I wish you a delightful day bursting with all the people and things you love most.

Big birthday hugs,
Shay.


w&w-supplies

July Leading Lady Anja Bytyqi | Take Two

Our July Leading Lady, Anja Bytyqi is back for her second performance!  If you missed her smashing debut you must see it...CLICK HERE.  Anja proves her mettle with disguises with her marvelous projects today!

Ladies and gentlemen, Anja....

Hello everyone, first of all:

Happy Birthday dear Julie! May your day be awesome and filled with love!


Thanks so much for your warm welcome last week and all the lovely and encouraging comments on my Leading Lady debut! I'm delighted to be back on stage showcasing the enjoyable Winnie & Walter products.

This time I will focus on another product range called Creative Screenings aka Stencils/Masks.

Let's start with some Fun Stenciling!


Translucent Embossing Paste Triangles


For my first card I used the Scenery: Triangled Creative Screenings stencil together with Translucent Embossing Paste. Love the shiny look on dark cardstock! I cut my panel to an angle and decorated my card with a bright and rainbow colored In a Word: Happy Cutaway die-cut (which is a «left-over» from one of the cards from my debut), the white embossed word «birthday» from The Big, the Bold and the Happy stamp set, some thread and matching enamel dots.


Stenciled Triangles with Gold Spots


The second card shows another common way to use a stencil by sponging some ink onto it. I used the same Scenery: Triangled Creative Screenings stencil with a Mini Ink Blending Tool to apply the turquoise ink and let it fade out to the edges. After that, I put some VersaMark ink on three of the triangles and heat embossed them in gold. I also heat embossed the sentiment from The Party stamp set. To repeat the gold I cut a skinny strip from foil cardstock.


Masked Rainbow Stripes


Inspired by the colors of the Winnie & Walter logo, I decided to create a little rainbow for my next card. I masked off a circle and used the Scenery: Classic Diagonal Creative Screenings stencil for my colorful stripes. To create a sentiment with dimension I die-cut the In a Word: Hugs Cutaway from several layers of cardstock (three times white and one in black) and stacked them together. I embellished my card with sequins which were a special mix for Winnie & Walter's first birthday.


Summer Plaid Pattern


For my last card, I used the Scenery: Classic Diagonal Creative Screenings stencil to make my own plaid pattern by overlapping the colors. I heat embossed the «congrats» from The Big, the Bold and You in white on a piece of vellum.


I really enjoyed to play with these stencils and hope you got inspired! Don't forget to comment on the Leading Lady posts on my personal blog for your chance to win a $30 gift card to the Winnie & Walter store.


Can't wait to see you back again next week for round three!

Once again, huge thanks to Julie & Shay for letting me play with their great products!

Thank you so much for stopping by! Enjoy your weekend!


w&w-supplies