Friday, July 10, 2015

Bold + Bright | Congrats

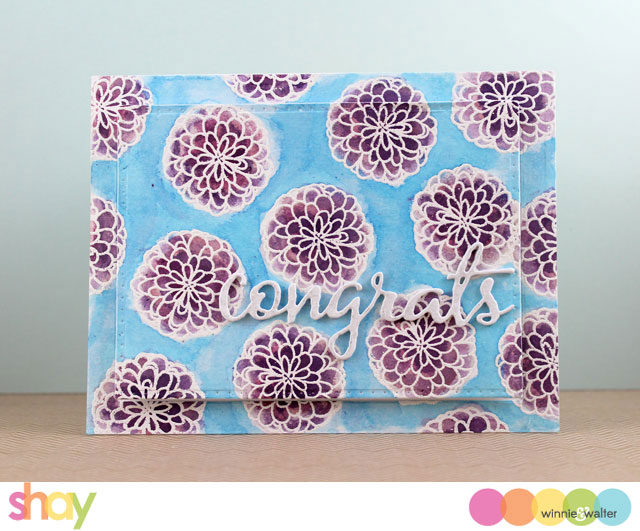
Happy Friday!  It's Shay popping in to share a card I made for a bridal shower a while back.  As the wedding featured purple I wanted to make sure I included purple in the card.

shay_congrats1

I heat embossed the large pom pom/flower from The Party in white.  I painted in a white cardstock card front using a water brush and Tim Holtz Distress Inks.  I cut out the center from the watercolored panel with the smaller panel from Essentials: Katharine Cutaways.  I adhered the outer portion of the panel to a card base and adhered the die-cut center using dimensional foam adhesive.  I adhered several layers of white cardstock together of "congrats" from The Big, the Bold and You Cutaways to finish off the card.

That's it!  Simply change up the colors and/or image as wanted and have fun watercoloring.

Have a fabulous Friday!
Shay


w&w-supplies

Wednesday, July 8, 2015

Bold + Bright | Many Thanks with Heather Hoffman

Good morning! Heather here stopping by with a clean and graphic floral card - I have been loving watercolor florals lately, but wanted to make something that popped a bit more with the In Bloom: Addie's Garden stamp set:


I colored the flower with Copic markers, then fussy cut it out and layered it together with some vellum and pattern paper attached with a paper clip. Added a sentiment from This Awesome House, a bit of washi tape, some enamel dots, and finished off with a white woodgrain card base.


Thanks so much for stopping by! Have a wonderful day!

w&wDT_heatherhoffman_blog-sig


w&w-supplies


Monday, July 6, 2015

In Focus with Gayatri Murali No. 3 | Style #1

in-focus-banner-title_640px

Hello every one, Cannot believe half a year has already gone by! Wow! Time certainly flies. New month means another technique tutorial. Are you ready for the new tutorial?

Gayatri Technique banner

This month’s technique is Masking technique. There are various ways to using masking technique. I am going to use the Cutaways and share couple of styles of masking.

Gayatri Style banner

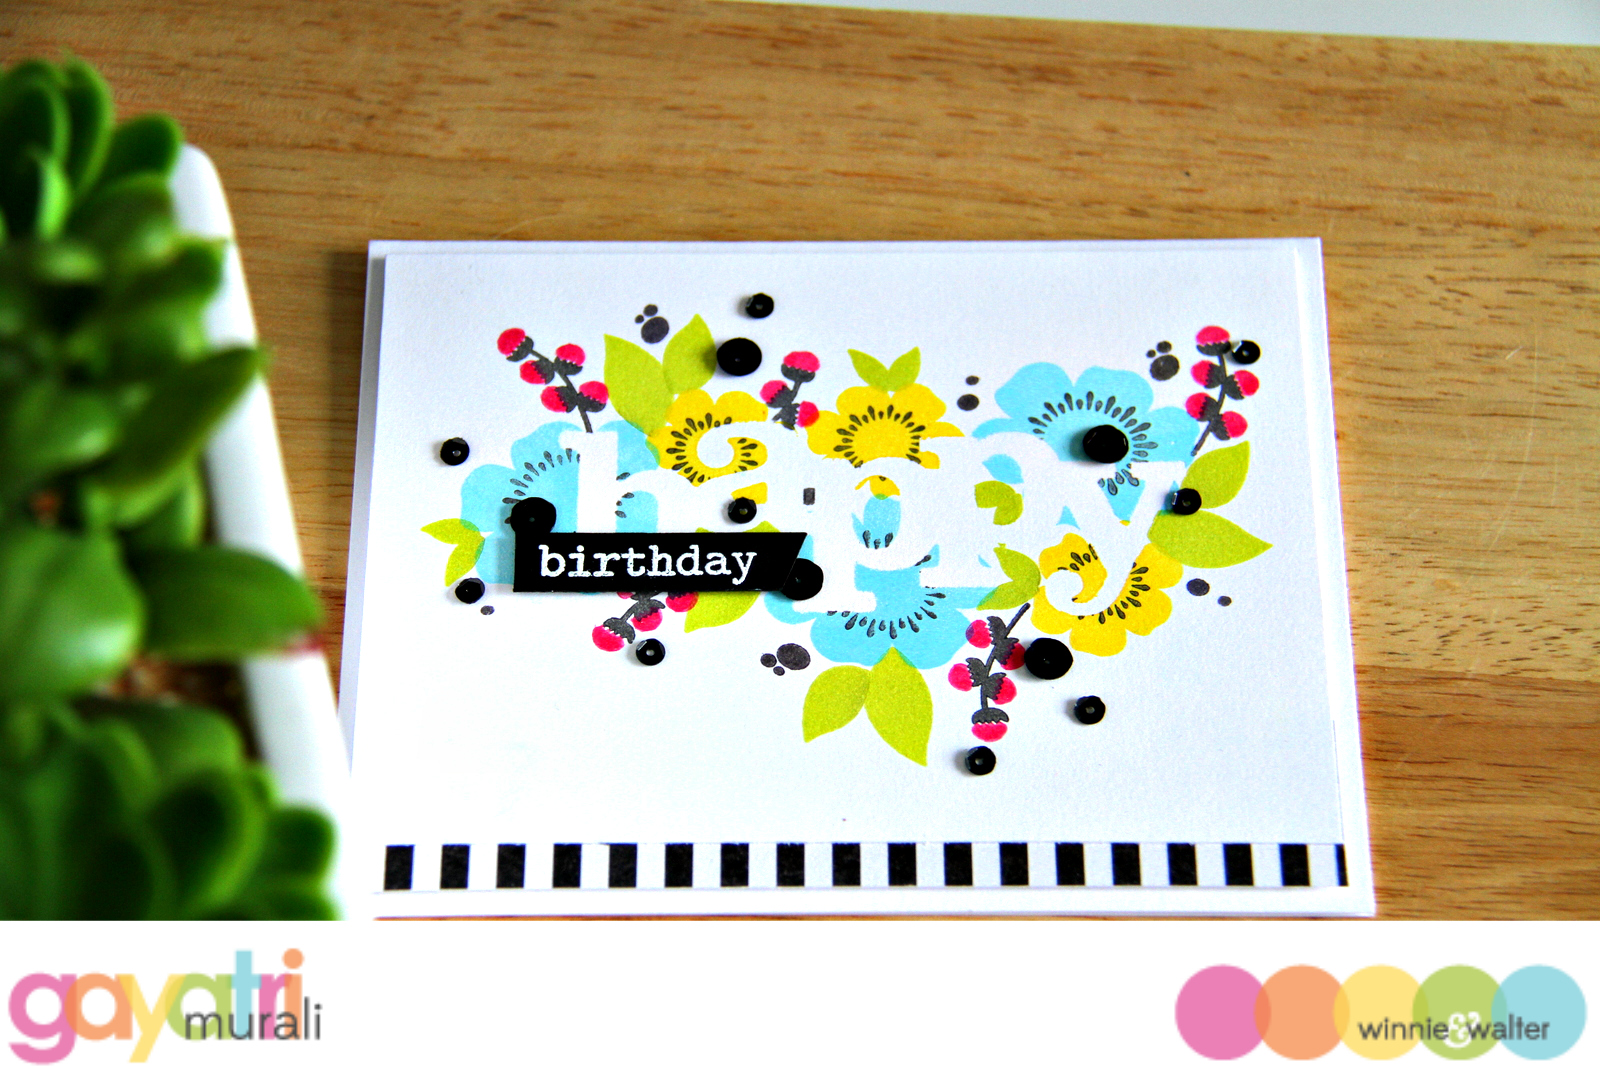
Today, I am using In a Word: Happy cutaway as my mask to stamp around it.

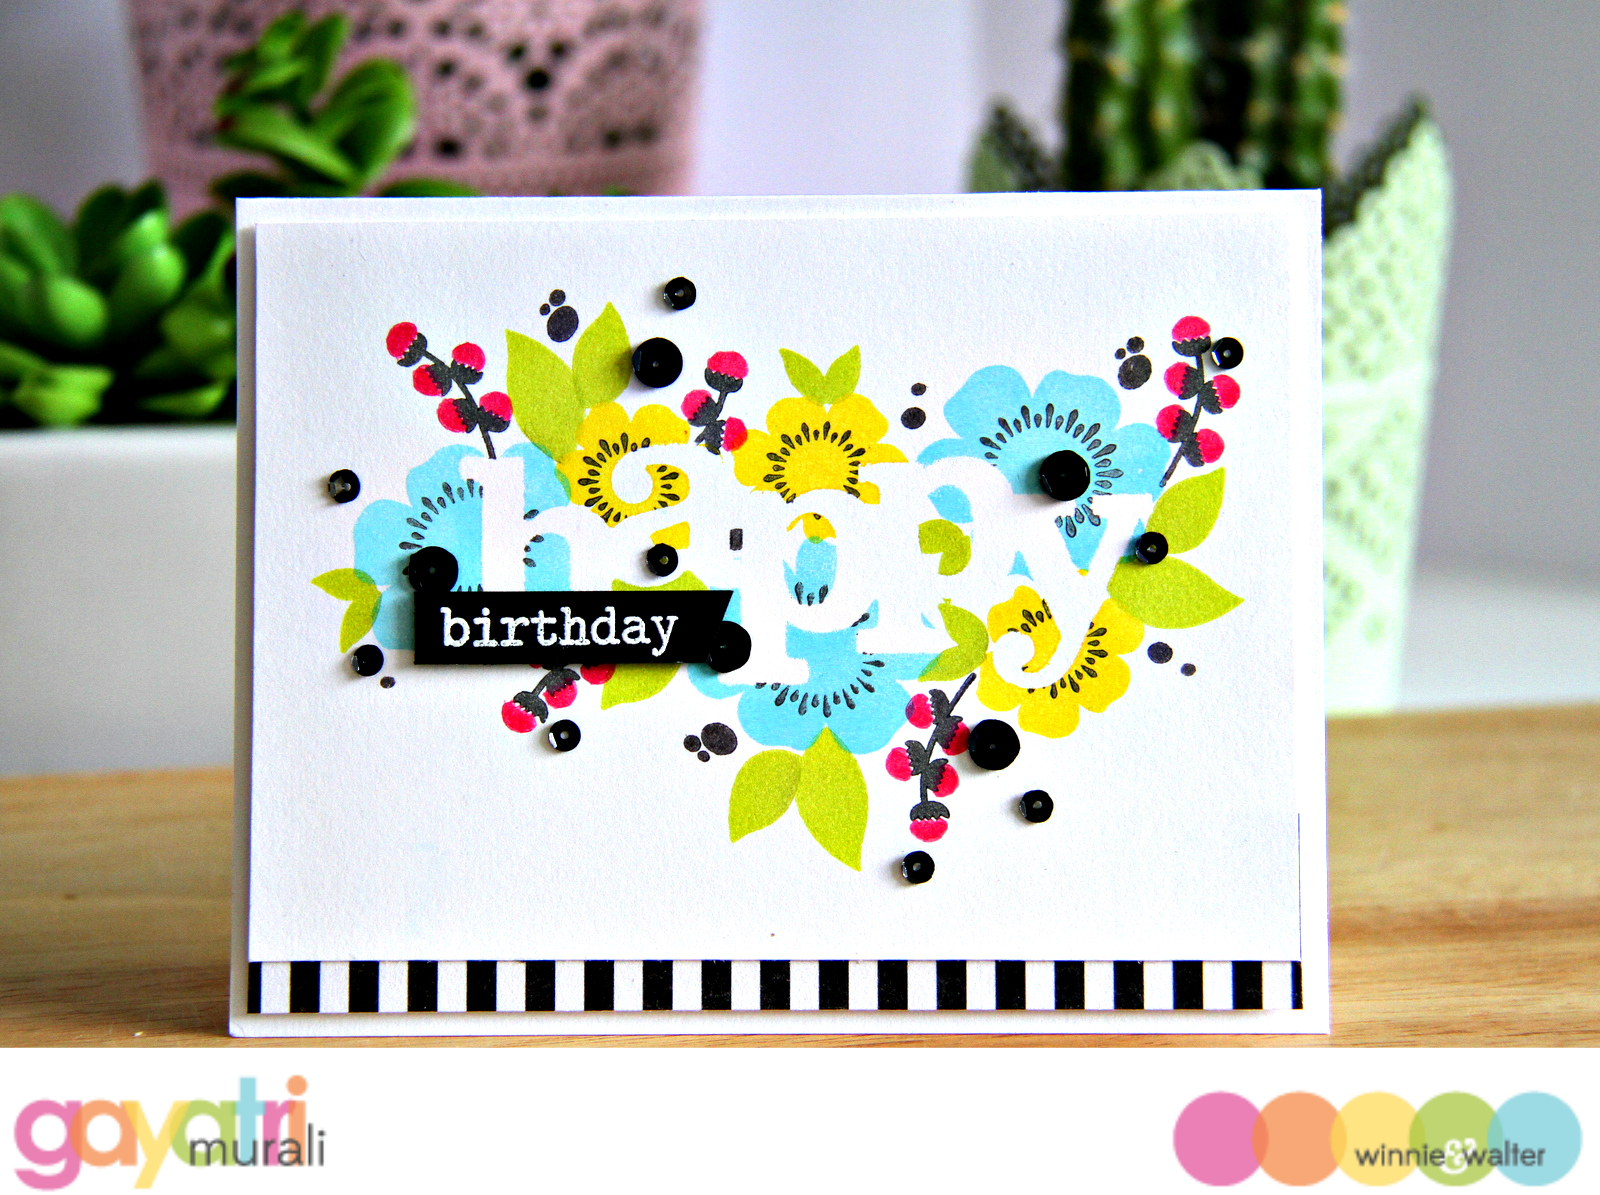
Here is the finished card

Style #1 masking technique 1


photo-tutorial_banner

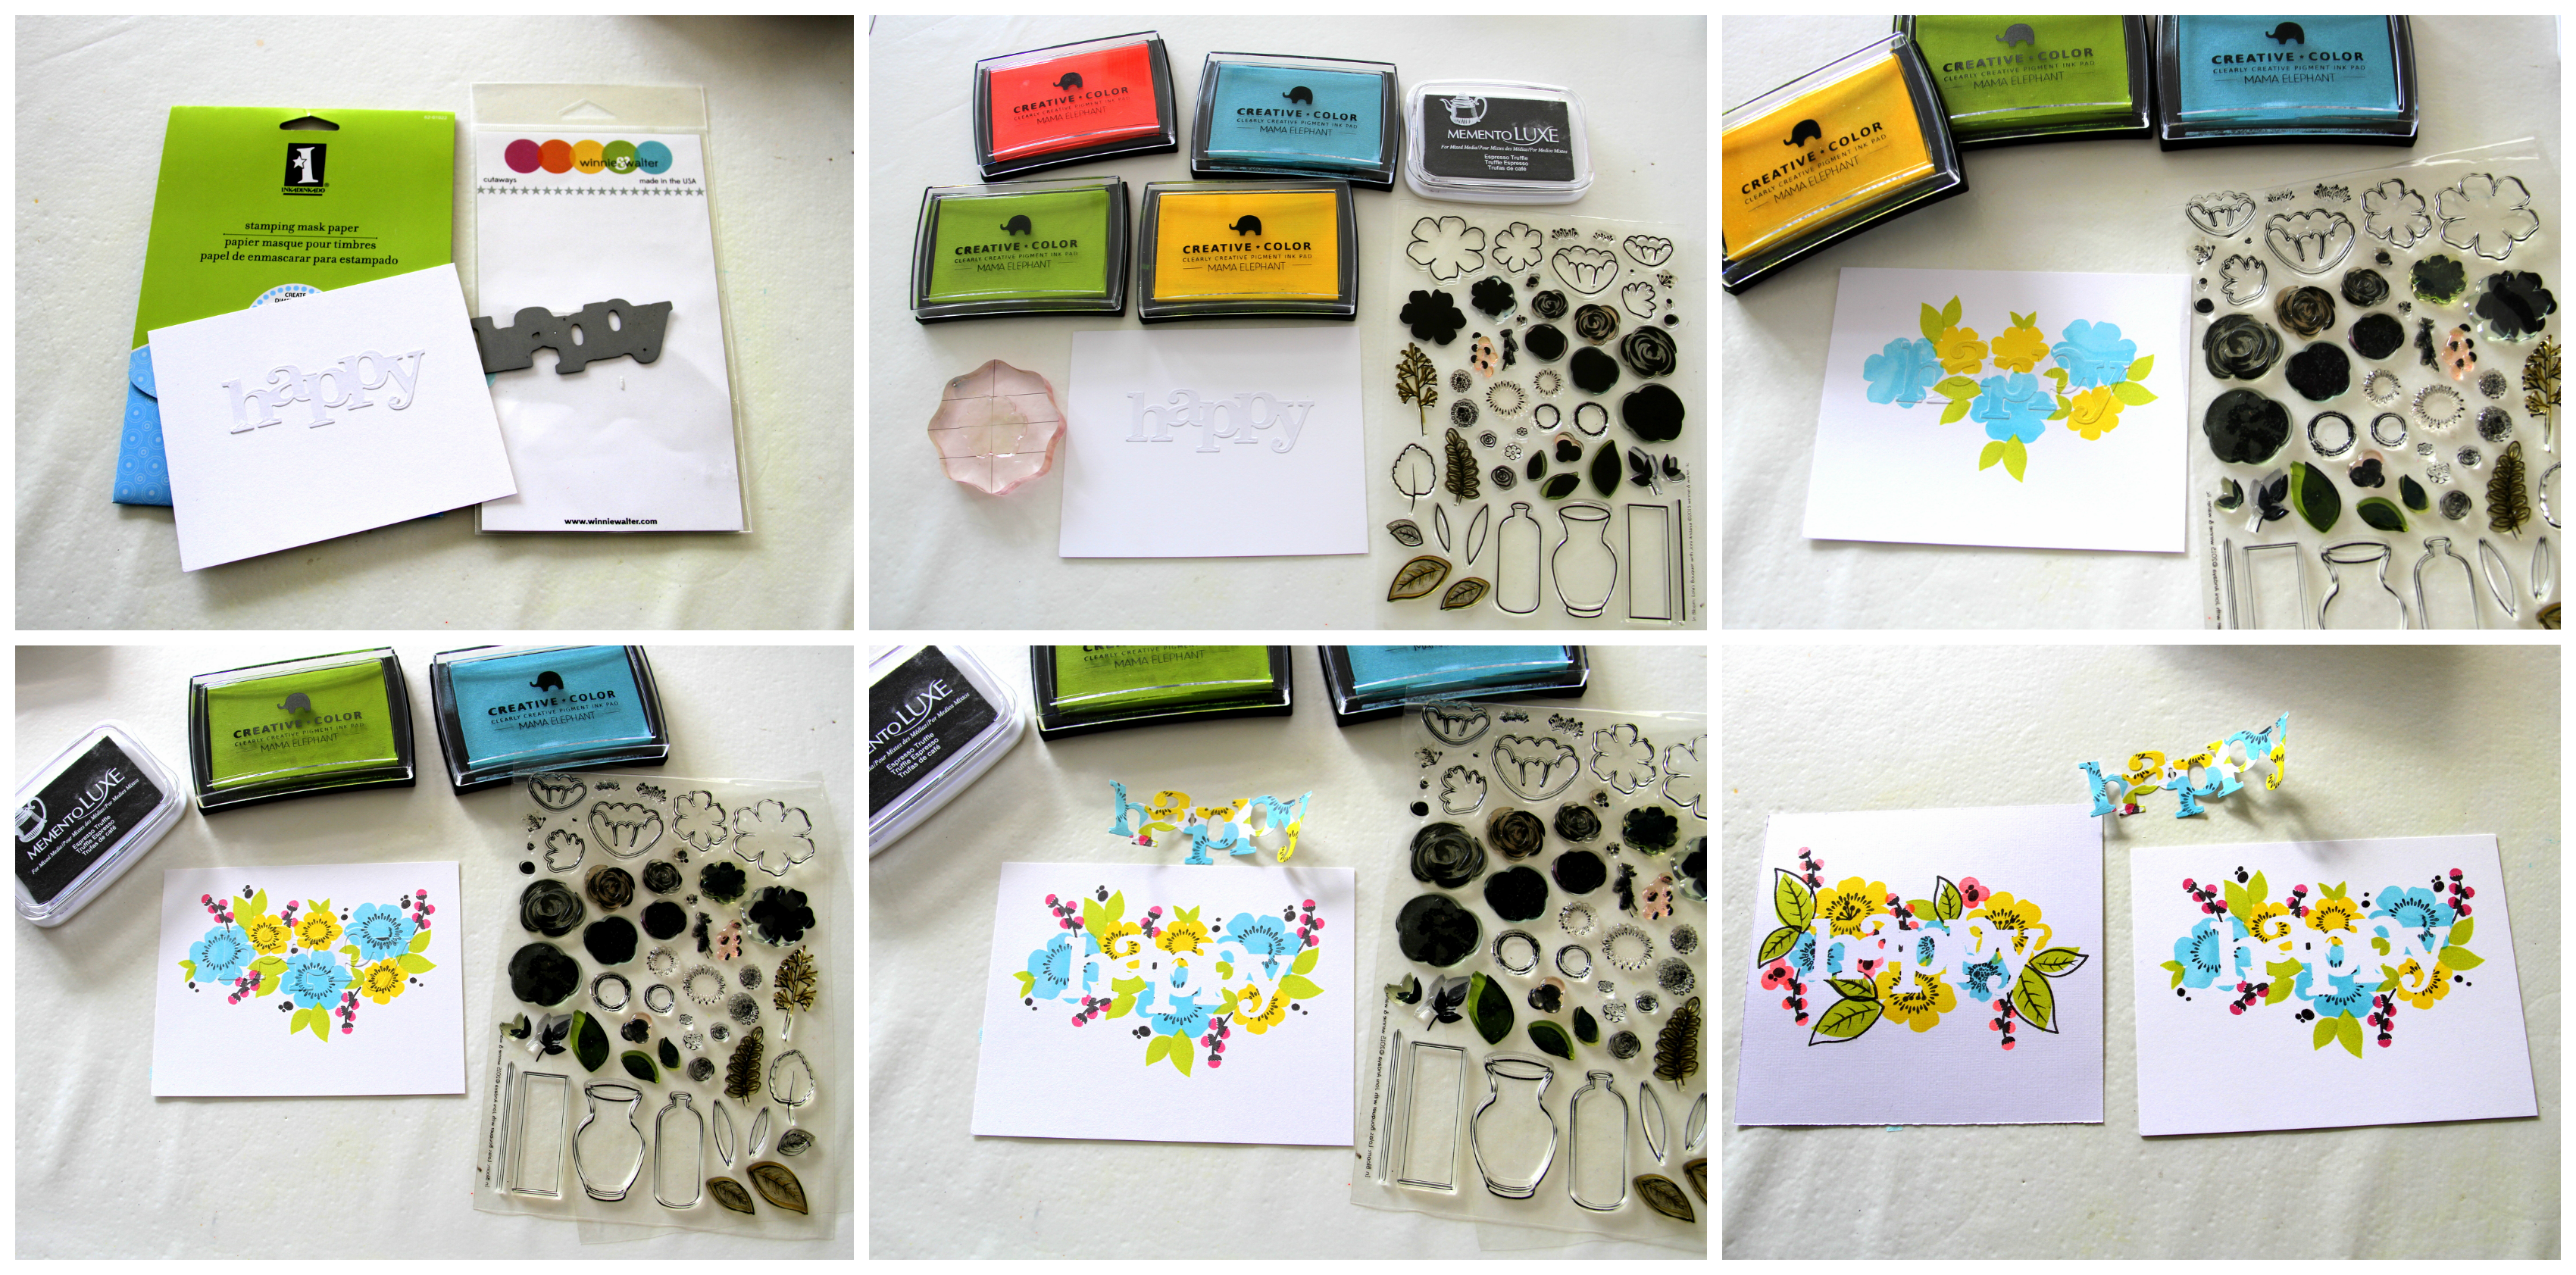
Here is a collage of photos showing how the card is made using the technique.

masking style #1 tutorial

brief_banner

Masking is a versatile technique, often used to create a cluster of images to get depth. I have however stamped a cluster of images using this technique in a different way.  I started with die cutting In a Word: Happy cutaway using the masking paper. I adhered the die cut on the white cardstock at the centre slightly towards the top. Before I started to stamp, I made sure the mask was adhered well by rubbing round the edges. I wanted a clean and crisp edge when I removed the mask later. The stamp set I have used to stamp around the mask is called Lola’s Bouquet. I love love this set. There are so many flowers, leaves and twigs to choose from to create your own cluster.

I started stamping with the largest flower in sets of three. Then with the smaller flower again in sets of three. I made sure the images overlapped the masked word. This showed the word clearly when I removed the mask later. I then added leaves, twigs, buds and accents to the cluster. The inks I have used here are pigment inks. They are the best inks to use for this technique as dye inks are absorbed by the masking paper and by repeated stamping will leak ink into the masked area.

Once I was happy with the stamping making sure I had covered most of the edges of the word, I left it to dry. Pigment inks take a few minutes to dry. Trying to remove the mask while the ink is wet risks smudging inside the masked area. This is the time I used to make my card base and heat emboss my smaller sentiment. Once the inks were dry, I removed the mask carefully. Love how the masked word “Happy” shows through among the cluster of stamped flowers and leaves. You can see in my last photo in the collage, that I had practised the technique first before I started on the card. This helps with making colour choices as well as identity the mistakes to correct them on the card.

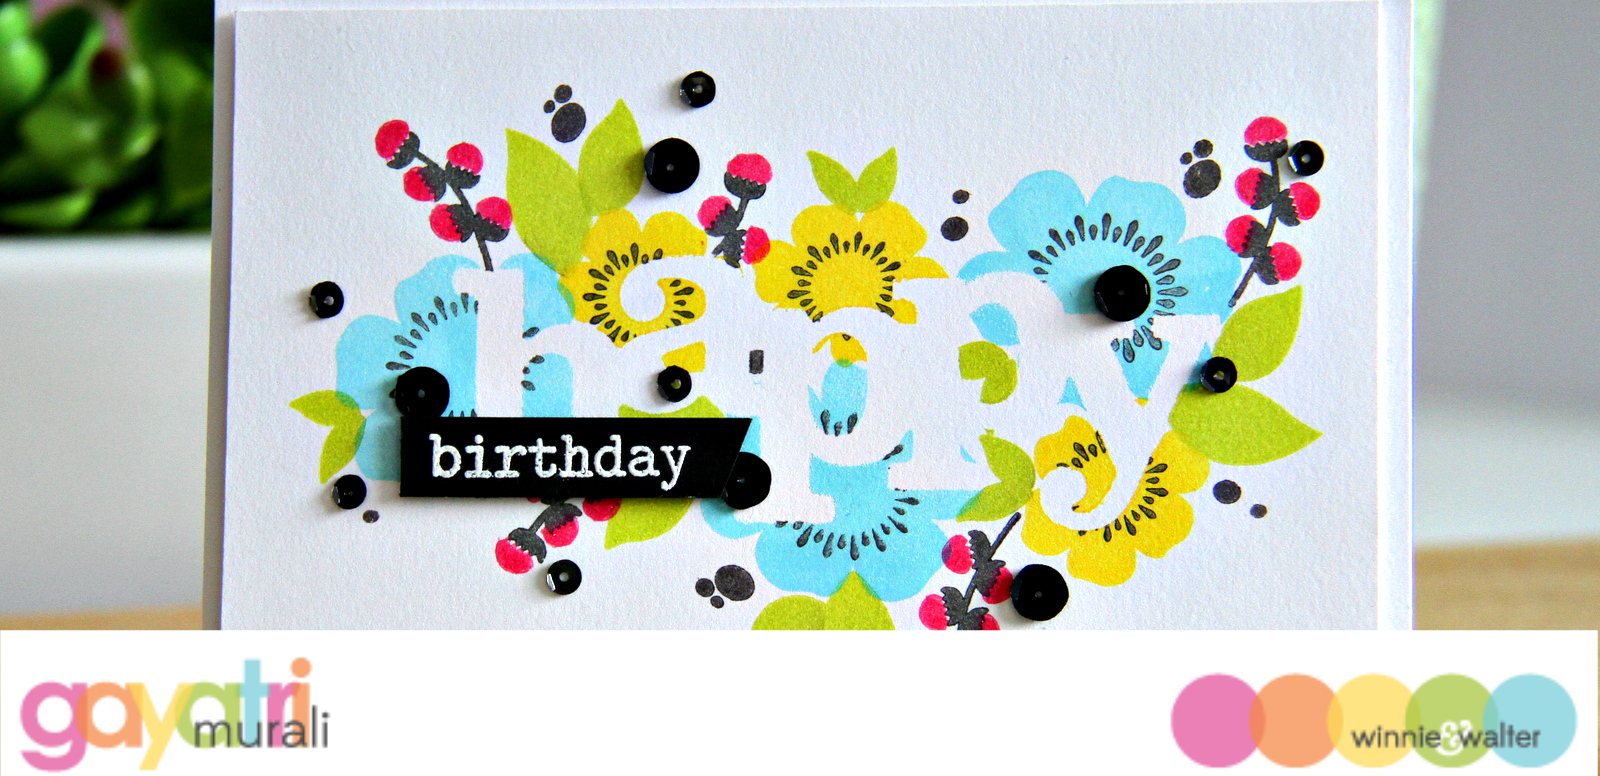
To assemble my card, I trimmed the panel, added a black striped pattern paper to the bottom, adhered the smaller sentiment using foam adhesives and accented with Onyx sequins from Pretty Pink Posh. This panel was then adhered to the white card base using foam adhesives.

Here are some more photos of the card.


Style #1 masking technique closeupStyle #1 masking technique closeup1

This technique could be used to make a one layer card, colour the masked area if you like it pop out more…. Possibilities are endless. Hope you are inspired by my technique card today.
If you like to play along, we have a linky attached with this post. Love to see what you do with this technique.

I will see you in a fortnight with another style of masking technique.

Thanks for stopping by!


w&wDT_gayatrimurali_blog-sig

>>>LINK UP<<<<


w&w-supplies


Saturday, July 4, 2015

July Leading Lady Anja Bytyqi | Take One

Today we are thrilled to introduce our July Leading Lady, Anja Bytyqi.   Anja's style is pretty, bright, colorful and clean all done with an impeccable dramatic flair and panache.     

Over the next few Saturdays in Anja will be leading us on a journey of her own design and imagining.  Make sure to visit her blog, Little Butterfly Creations, to see more from her and for a chance to win a giveaway! 

Give Anja a big round of applause to welcome her as she steps onto the stage for her first performance as our July Leading Lady!    

Woohoo!!! Today I can finally share these exciting news! I will be Winnie & Walter’s Leading Lady for this month! When I got the mail from Julie & Shay almost one year ago, I at first thought of a mistake ;-) I couldn’t believe they really wanted me *lol*. Since then, it felt like a wonderful dream from which I did not want to wake up

http://www.winniewalter.com/

Now, here I am! It still feels a bit unreal but I'm so thrilled and honored to share my projects with you on every Saturday in July showcasing Winnie & Walter’s amazing products!

But first let me tell you a bit about me.


My name is Anja and I’m originally from Germany but now live in Switzerland. I’m a proud mom to a handsome boy and a sweet little girl. I work part-time as a Media Designer for a printing company. 

In 2008, I discovered Card Making and Stamping. This is my creative outlet and I really enjoy it ever since. Since 2011, I've been blogging over here: Little Butterfly Creations.
 

When Winnie & Walter started their company more than one year ago, I immediately fell in love with their unique products. My very first crush were the versatile sentiment stamps from The Big, The Bold and … series and they are still one of my favorites ;-)

Winnie & Walter's latest big April/May release was packed with not only the most beautiful stamps but also really awesome dies. I'm so thankful that I had the chance to play with these fabulous products!

So today, it’s all about Creative Die-Cutting!

Double/Layered Die-Cutting


For this card I used the awesome Multifaceted Cutaway die. I love this geometric pattern and there are lot of fun things you can do with it. At first I cut it from white cardstock taking care that most of the pieces remained in place. Then I glued it onto my A2 card base and inserted the couple ones which fell off though. I also cut it a second time from gold foil cardstock. I put a piece of masking paper over it to secure all the pieces while running it again through my die cutting machine with a heart shaped die. All the gold pieces were glued down over the white cardstock. From the same gold foil cardstock I die-cut the word «love» from The Big, the Bold and the Happy Cutaways.

Negative Die-Cuts


My second card shows how you can also use the negative when die-cutting. I blended some summery Distress Inks together with water on a piece of watercolor cardstock. Then I let it completely dry before using the In a Word: Happy Cutaway die. I popped up my panel and the little letter pieces with foam tape and added the white embossed word «birthday» from The Big, the Bold and the Happy stamp set.

Inlaid Die-Cutting


I really love these In a Word Cutaway dies – they are just perfect for Clean and Simple cards. On this one I created my own striped pattern by arranging Navy and Coral strips of cardstock. Then I die-cut the In a Word: Hello Cutaway from my stripes and also from white cardstock. After that I inlaid the white «hello» in the negative space of the stripes.

Partial Die-Cutting


On my last card for today, I arranged the flowers and leaves from the In Bloom: Maggie's Roses Cutaways on a piece of purple cardstock. To create this border I did some Partial Die-Cutting – this means I didn't cut them completely by letting a part hang off my cutting plates while die-cutting. The butterflies are from the Essentials: Audrey Cutaways die set. For the white embossed sentiment I used one of my favorite stamp sets: The Big, the Bold and the Happy.


I hope I was able to inspire you to use your dies in a different way! Here's a little something for you that would help to invest in some fun Winnie & Walter supplies *hehe*:


Julie & Shay have generously given me a $30 gift card to the Winnie & Walter store to give away! For your chance to win please leave a comment on the Leading Lady posts on my personal blog. I will draw a random winner at the end of the month.

Glad you joined my Leading Lady debut and I really hope you liked it! I’m looking forward to see you again next week!

Huge thanks to Julie & Shay for giving me this incredible opportunity! 
It truly means the world to me!

Thank you so much for stopping by!


w&w-supplies


Wednesday, July 1, 2015

Rerun No. 2 | The Big, the Bold and Fun

w&w_rerun_logo

Welcome lovelies to our next monthly Rerun!

Each Rerun will provide plenty of inspiration focusing upon a featured product, a month-long sale on the featured product and a challenge.

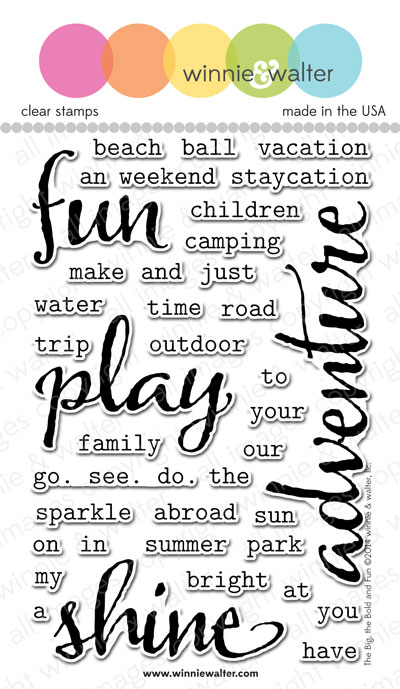
w&wBigBoldFun_WEB_wm

For our second Rerun we are concentrating on The Big, the Bold and Fun.  With summer upon many of us we wanted to focus upon The Big, the Bold and Fun with sentiments that are perfect for travel, bright sunshiny days, afternoons by the pool or ocean, camping and just having fun.

Some of the Talent including our Talent in Residence, Heather Hoffman, and Shay have taken on the challenge of working with The Big, the Bold and Fun again.

Shay

The Big, the Bold series really lends themselves to experimenting with techniques and tools.  Another thing I love is how well this series works with my stash.  I don't think I am alone in having amassed quite a lot of crafting supplies.  So I decided to play with The Big, the Bold and Fun and try some new things with some items that could use some love.

Card No. 1

shay1

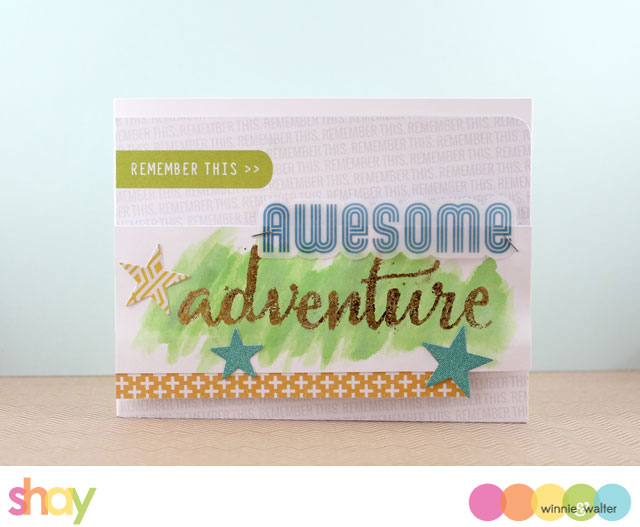
This was such a fun card to make.  I wanted to see if I could use my new Minc machine to foil a stamped image.  While the results are not perfect I really love the look for this particular card and it is perfect for an "adventurous" card. lol  

I used a glue pad from Martha Stewart Crafts to ink up the "adventure" stamp on a piece of white cardstock and then used gold foil and the Minc machine.  Some tips: make sure you use a very juicy glue pad and flatten the foil firmly onto the stamped image/sentiment.  Make sure the foil side (good side) is face up and the non-pretty side is sticking to the stamped image.  

After foiling the sentiment I used a waterbrush and mowed lawn Tim Holtz Distress Ink by Ranger to brush on some color over it.  It works wonderfully and resists the color.  I added the vellum sentiment  by Crate Paper with the Tim Holtz Tiny Attacher.  The star were leftovers I had cut out from patterned paper and glitter paper using Big Bang Confetti Cutaways for previous projects.  The orange paper was another leftover.  The background is actually a 4x6 journaling card from the Go Story Kit by Ali Edwards that I cut to fit an A2 card which is made from solar white Neenah cardstock and I also rounded one corner with my We R Memory Keepers Crop-A-Dile Corner Chomper.  I adhered the adventure panel to the card with foam dimensional adhesive.

I can see this as a card to send to someone to celebrate a milestone, event or accomplishment like a graduation, promotion, trip, retirement, anniversary or even a birthday and I love that it is gender neutral.

Card No. 2

shay2

Next I tried using letterpress paper with the "fun" stamp inked up with salty ocean Tim Holtz Distress Ink by Ranger.  I ran the inked stamp and paper through my Cuttlebug.  There was slight impression around sentiment and it gave an interesting, arty look to the ink.  Not a complete bust of an experiment, but it certainly did not give me the letterpress look so I deviated.  I further exaggerated the texture by using the end of a paint brush and traced the letters from the back.  I found a very fun black and white paper from a Studio Calico 4x6 paper pad from January 2014 which I cut down to fit the A2 card base made from solar white Neenah cardstock.

To the fun panel I drew the lines with a black Sharpie.  The "oh hello" is a sticker from the Amy Tangerine/American Crafts Sketchbook collection.  Fabulous collection that is a bit older, but is not at all outdated.  The Admit Two is a die cut from the same collection (attached with the Tim Holtz Tiny Attacher) as is the green patterened paper (from the 6x6 paper pad of the Sketchbook collection).  I added the fuchsia trim cut with Goldie Trim Cutaways to go across the entire card a bit beyond to enhance the whimsical feel.  All of those items were adhered to the fun panel and the entire panel was adhered to the card with foam dimensional adhesive.

I think this card would make a perfect invitation to a friend for a day filled with fun (including crafting of course!) or as a special way to let your little one (or big one) know you have an awesome day planned to spend just with them.

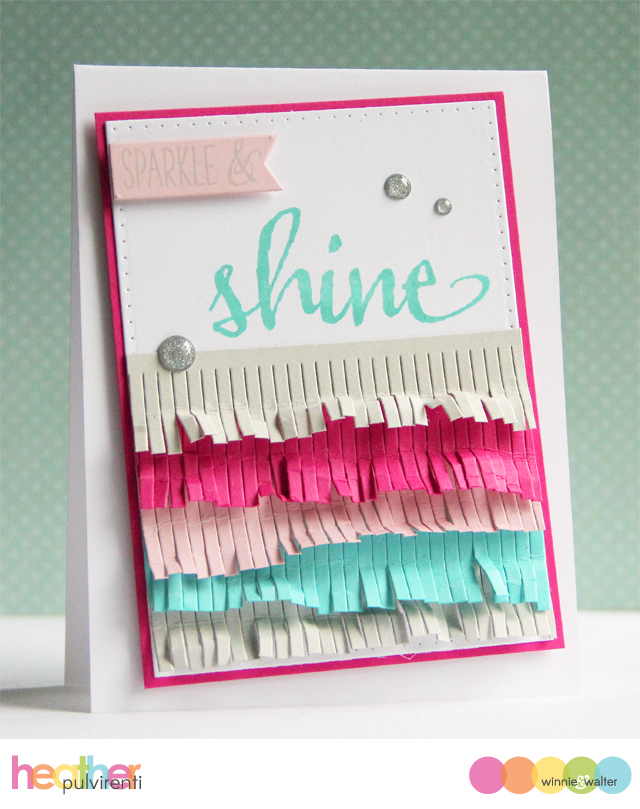
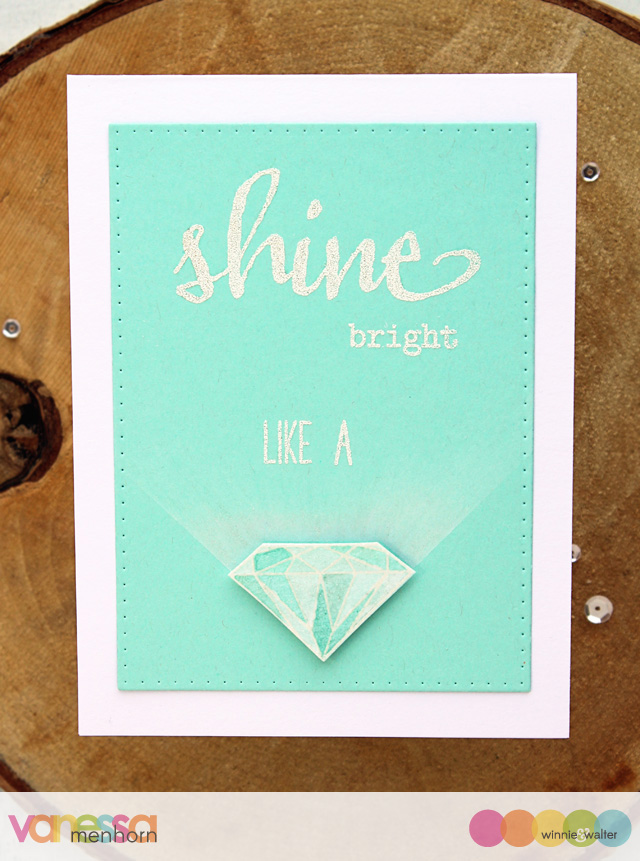
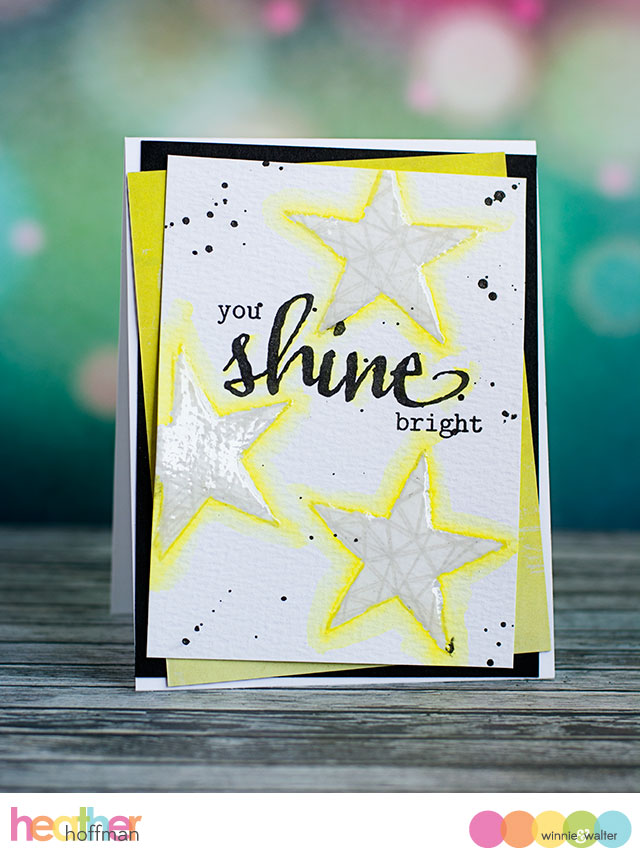
I hope you found a bit of inspiration and you feel like inking up your stamps and perhaps try something new and/or use some of your stash.  Speaking of inspiration, wait until you see what Gayatri, Heather P., Vanessa and Heather Hoffman have made!

The Talent

gayatri_Shine bright card
CLICK HERE to see more from Gayatri.

heather_p_070115

CLICK HERE to see more from Heather P.

vanessa_rerun2
CLICK HERE to see more from Vanessa

heather_hoffman_Cards-6-24-15-053
CLICK HERE to see more from Heather Hoffman.

>>>CHALLENGE<<<
  1. Create a new project using The Big, the Bold and Fun (and/or the coordinating cut files).  An alternative to using The Big, the Bold and Fun (and/or the coordinating cut files) is to create a new project using one of the projects featured in this post (or any Rerun post throughout July) as your inspiration.  Make sure you use at least one (1) w&w product (this can include a freebie) in your project.  If you choose the alternative to using The Big, the Bold and Fun (and/or the coordinating cut files), please include in your post or project description which project inspired you and how.
  2. Link up your project here by 11:59 p.m. CST on July 31, 2015.  
  3. Enter as many times as you want before the deadline.
  4. This Rerun Challenge may be combined with other challenges found here on the w&w blog or elsewhere.
One project will be randomly chosen to win $20.00 credit to the w&w shop!  The winner will be announced on the Giveaway Winners page.