Saturday, October 4, 2014

WCMD 2014 | Sketched with Julie

WCMDblogbanner2014

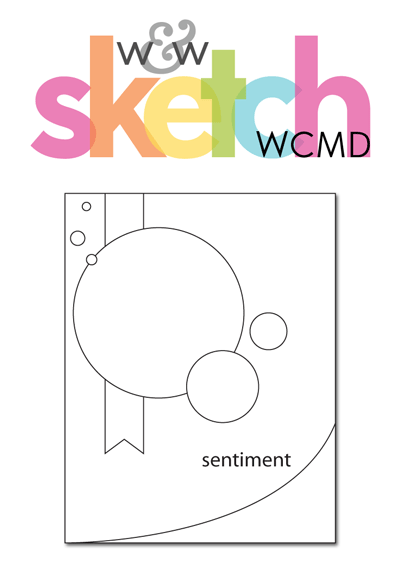
Hello w&w Family!  What an amazing day so far - the inspiration is out of this world :)  We hope you are having a great day today and having fun getting your craft on! I'm hosting one of my favorite types of challenges - SKETCH!  As a card maker / scrapbooker, I feel like I need a plan before I begin my projects, and a sketch is super helpful to me.  This sketch has a lot of elements, but can be deconstructed and include / exclude parts to fit your needs.  Let's take a look at the sketch for WCMD.

WCMDsketch2014

If you can't tell, I love circles and love to use them in my sketches.  I also added a curved line at the bottom left corner.  This is because I'm totally hooked on my new curved stitched border die from Pretty Pink Posh.  You can use any method of your choosing to create the curved corner of the card that you choose, but I really love the look the stitched border gives to both of these cards that I've created. 

Card No. 1
jmog_WCMDsketch2014_fall


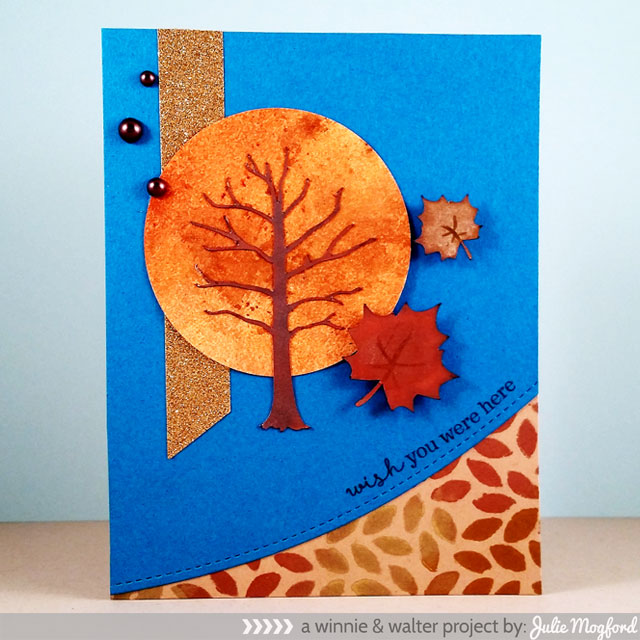
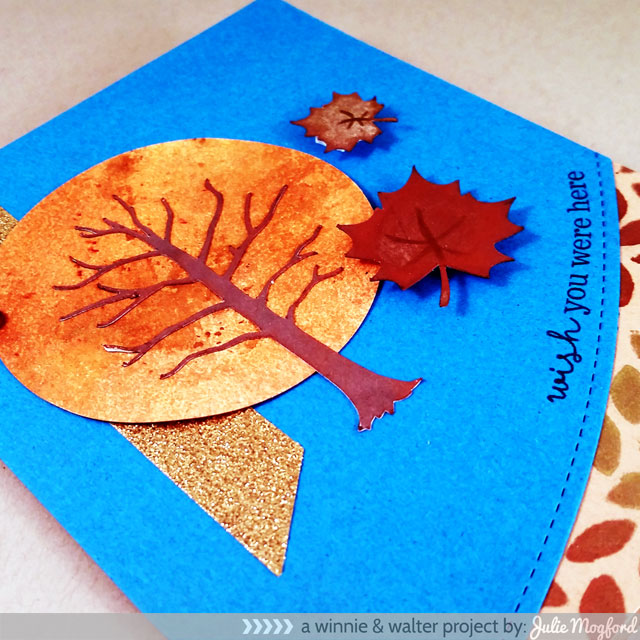
This card is really inspired by the recent season change - but I hope the temperatures catch up soon - still pretty warm here in San Antonio.  The card base leaf pattern was created from the A Tree for All Seasons Digital Elements using the leaf card cut on my Silhouette and used as a stencil.  I sponged metallic inks in gold, copper and bronze - super easy.  I love how they look with a soft metallic sheen, but the camera isn't picking that up entirely.  I chose a vibrant shade of blue to contrast the various shades of browns and golden tones which I think really sets everything off.
jmog_WCMDsketch2014_fall2

The tree and leaf cut outs are also from the A Tree for All Seasons Digital Elements and were inked up with more metallic ink and popped up with foam tape. I just drew a few leaf veins to give them a little interest. The circle is 3 spray inks with metallic powders on a manilla tag, and then die cut.   The gold glitter tape works great for the strip behind and gives it a little bit of fun sparkle.  I finished off the sketch using some brown pearls (shown in first picture) and the sentiment from This Awesome House stamp set, which I gave a gentle curve to follow the curved paper.

Card No. 2
jmog_WCMDsketch2014_winter

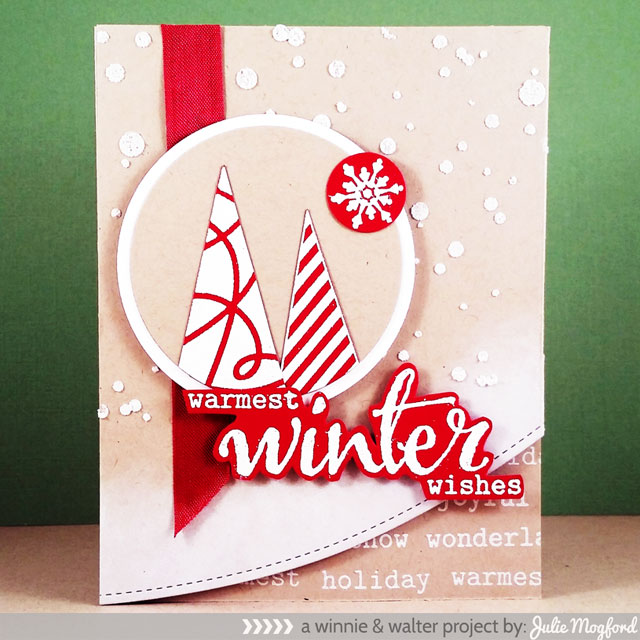
On this card, I deconstructed the sketch a little, leaving off several of the extra circles around the focal image.  The card set up started very much the same way as the first - creating a patterned card base.  This one is simply various holiday / winter words from The Big, the Bold and Seasons and  The Big, the Bold and Blessings, stamped in white craft ink (Stampin' Up!) on a kraft card base.  The top panel is also craft, but I used the same white craft ink and sponged it all along the curved edge to look frosty, and to stand out above the bottom kraft panel.
jmog_WCMDsketch2014_winter2

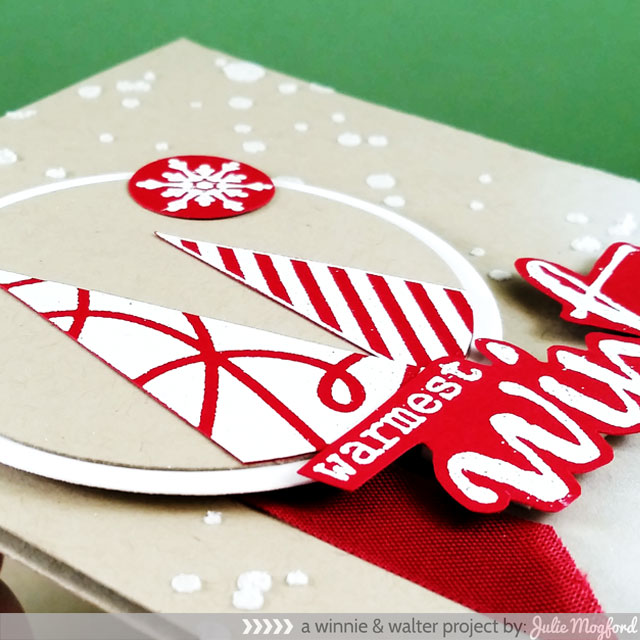
I wanted to create a snowfall look, but instead of grabbing my Big Bang Confetti stamp, I grabbed my new confetti stencil (yep - one of our new stencils! - don't you love a sneak peek?) and used it with some light molding paste to create a snowfall backdrop.  Check out the dimension!  Love that!!!!

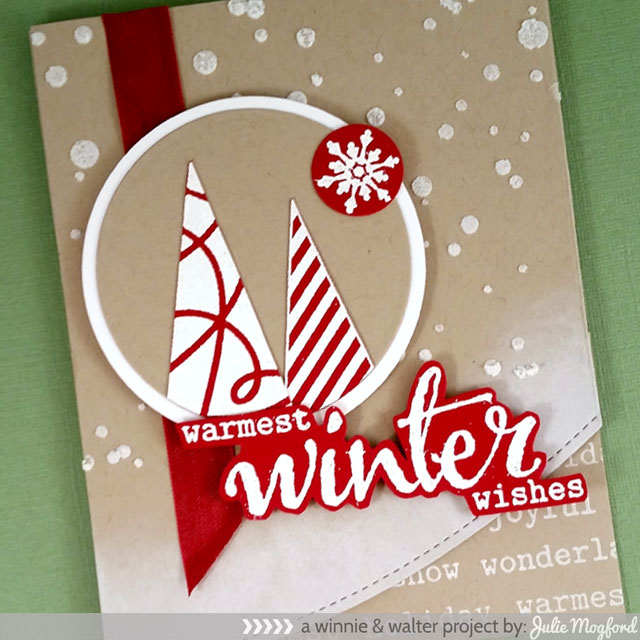
The circle focal section got the addition of a white layer to also set it off from the back ground and a couple of trees using a couple of the designs from Scenery: It's a Wonderful Pennant stamped and embossed in white on red cardstock, and trimmed very close.  This way, the trees look white as if with snow, and the red shows up as decorations on the trees. I used the same method to stamp the winter message and snowflake from The Big, the Bold and Seasons.  The red seam binding makes a perfect addition to the card to carry the red throughout the card.  Red or white/clear sequins or gems could also have been added, but I liked leaving out a few of the elements since the snow had some fun dimension.  Glitter could also be added to the snow for some added sparkle.
jmog_WCMDsketch2014_winter3


I hope you have a great time today crafting your little heart out jamming out to your favorite music (like I am right now  *wink*) or crafting with your friends and family.  If you can't join in on the fun today, you can still post your projects throughout the week until next Saturday, October 11, 2014 at 11:55 p.m. You may enter all of the challenges as many times as you like with new cards for each entry.  The sketch challenge prize - a gift card to Studio Calico!!  Totally great!  I can't wait to see your take on the sketch!

*hugs*
Julie


Prize: $25.00 Gift Card to Studio Calico.

Enter the Challenge:

An InLinkz Link-up


w&w supplies:


WCMD 2014 | Colour Combo with Gayatri

WCMDblogbanner2014

Hello dear craft friends!

Happy World Card Making Day!

Gayatri here with you and I am bringing you a colour scheme challenge. 

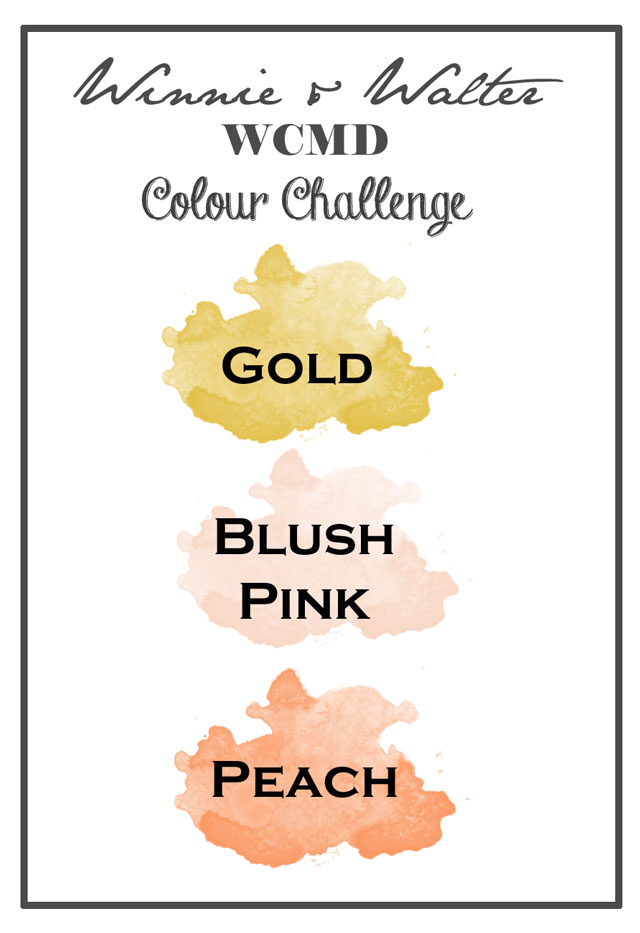
Here are the colours for the challenge.

gayatri_WCMD-Colour-challen

I wanted something trendy and something pretty. So I went for pretty colours peach and blush pink with trendy gold. Of course you can use neutral white/black with these colours.

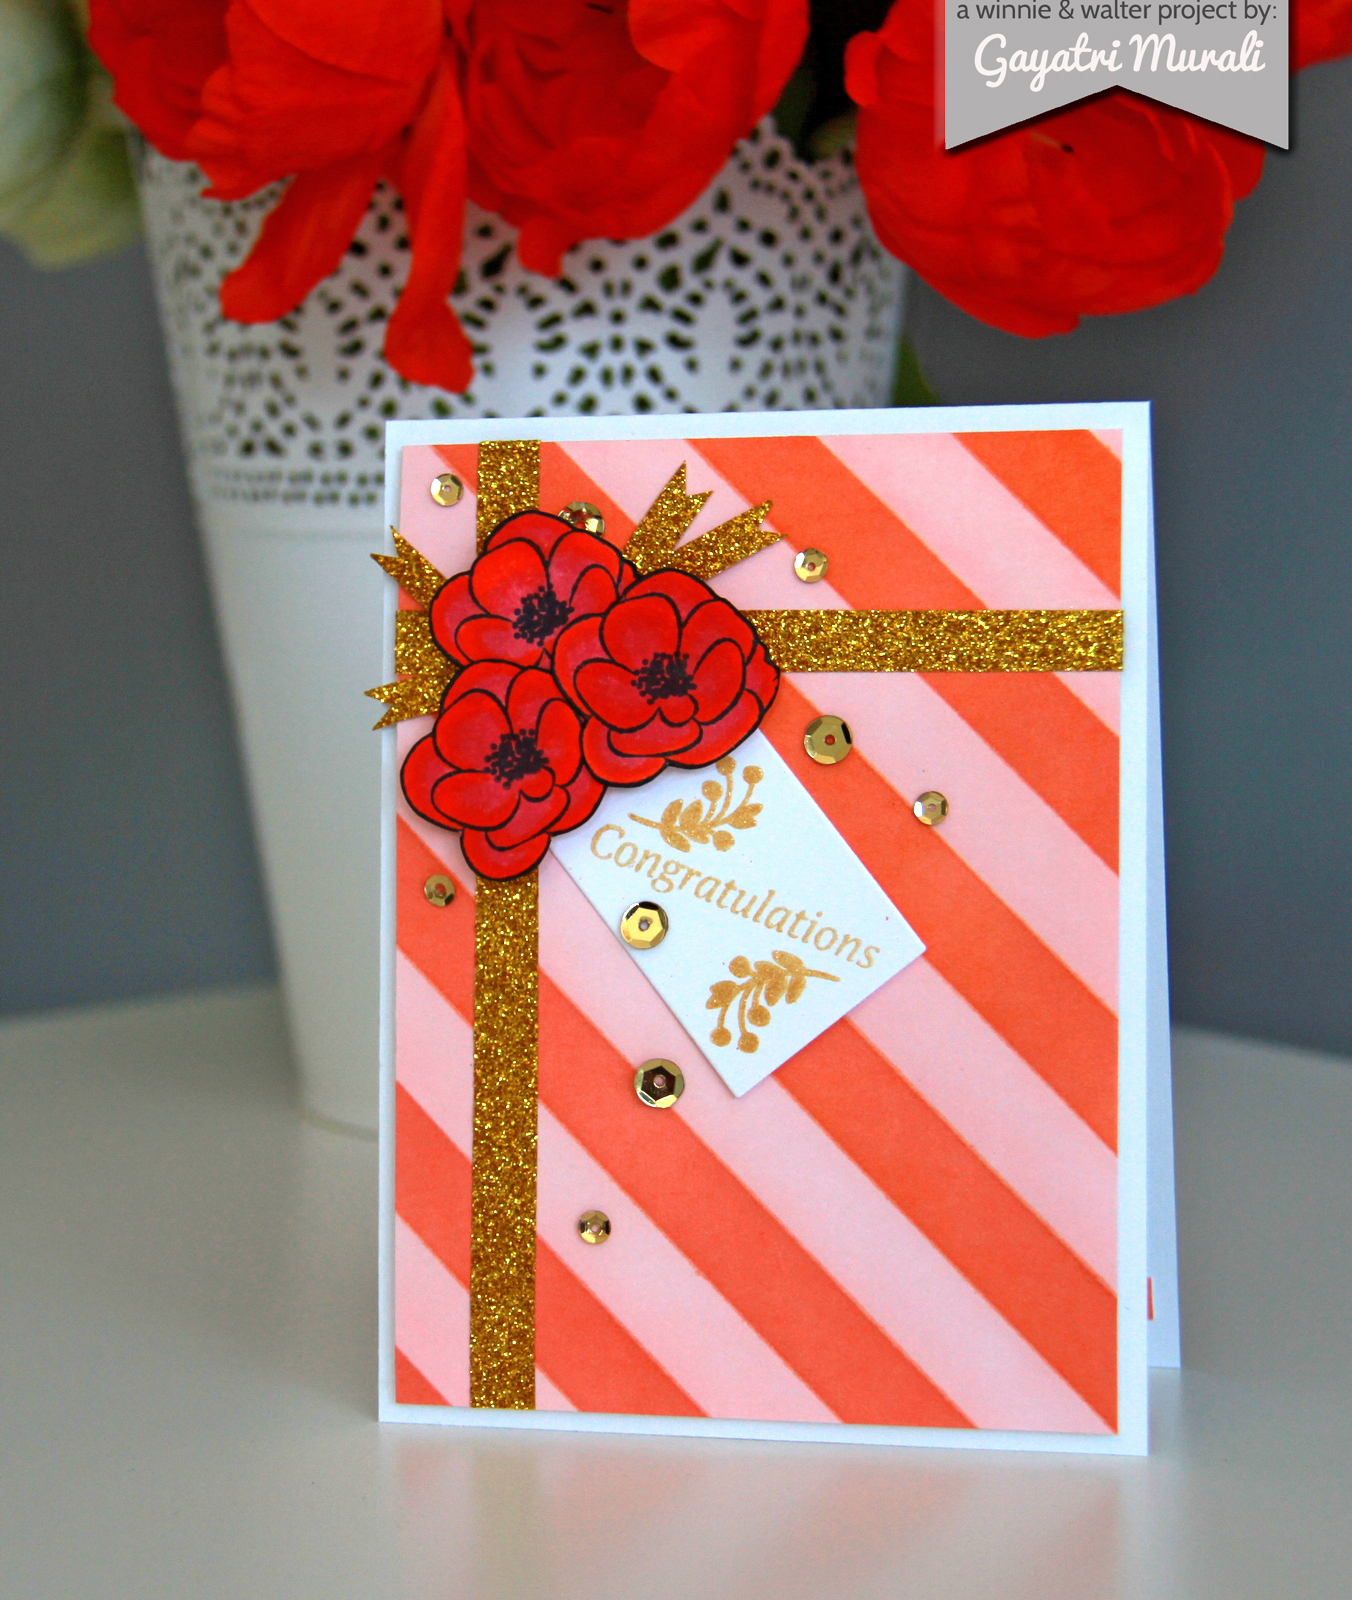
This is my take on the colours.

gayatri_Congratulations1

For the background, I have a new product coming soon to Winnie & Walter to achieve the peach and blush pink diagonal stripes. Then I have used gold glitter tape like a present wrap.

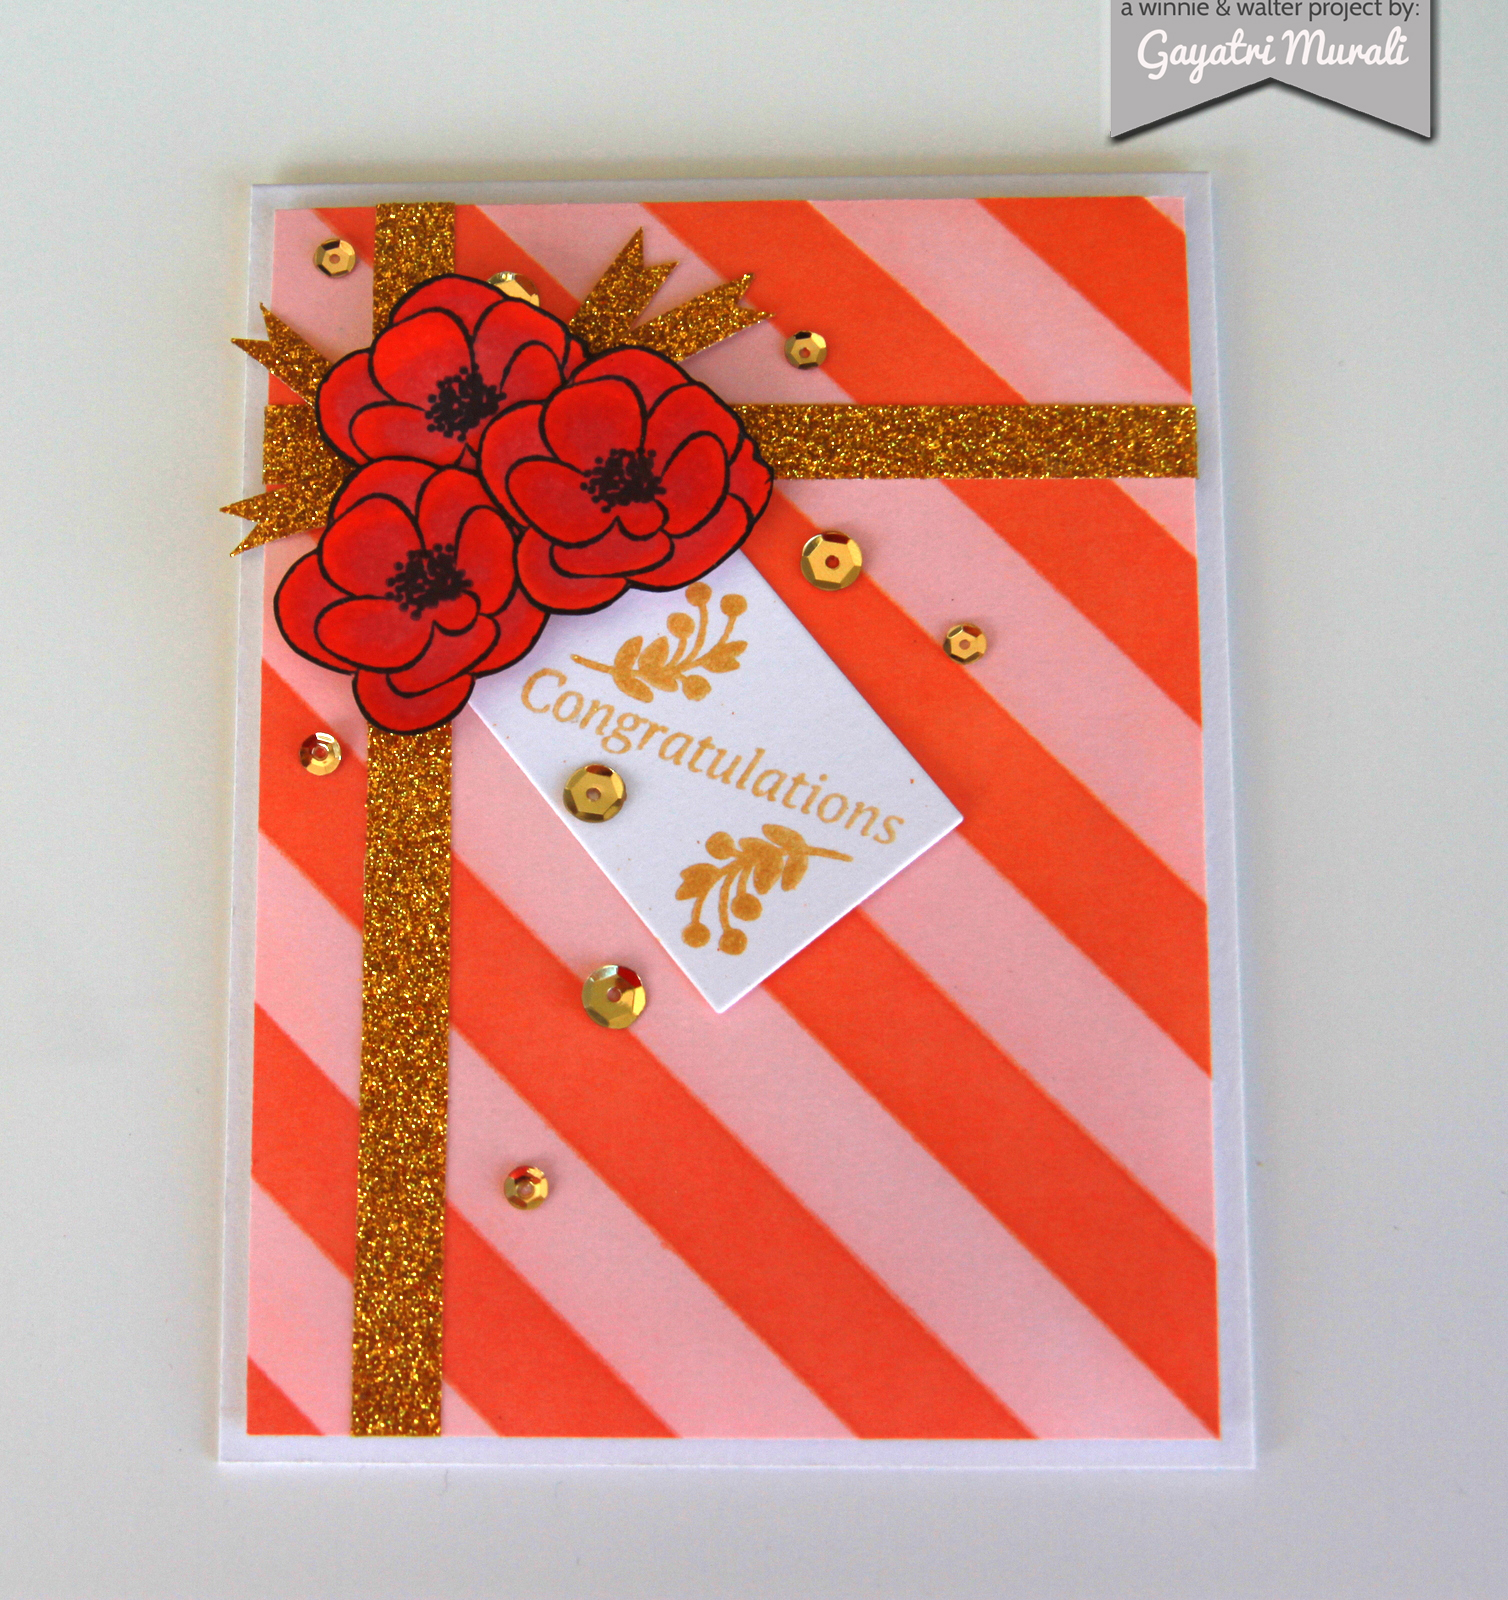
gayatri_Congratulations flat

I have used the flowers from The Big, the Bold and Extras stamp set to stamp and coloured darker shade of blush pink and peach using copics. I then hand cut the flowers and made a cluster. I adhered this cluster using foam. I then cut some strips of gold glitter tape with fish tail banner and adhered under the cluster of flowers.

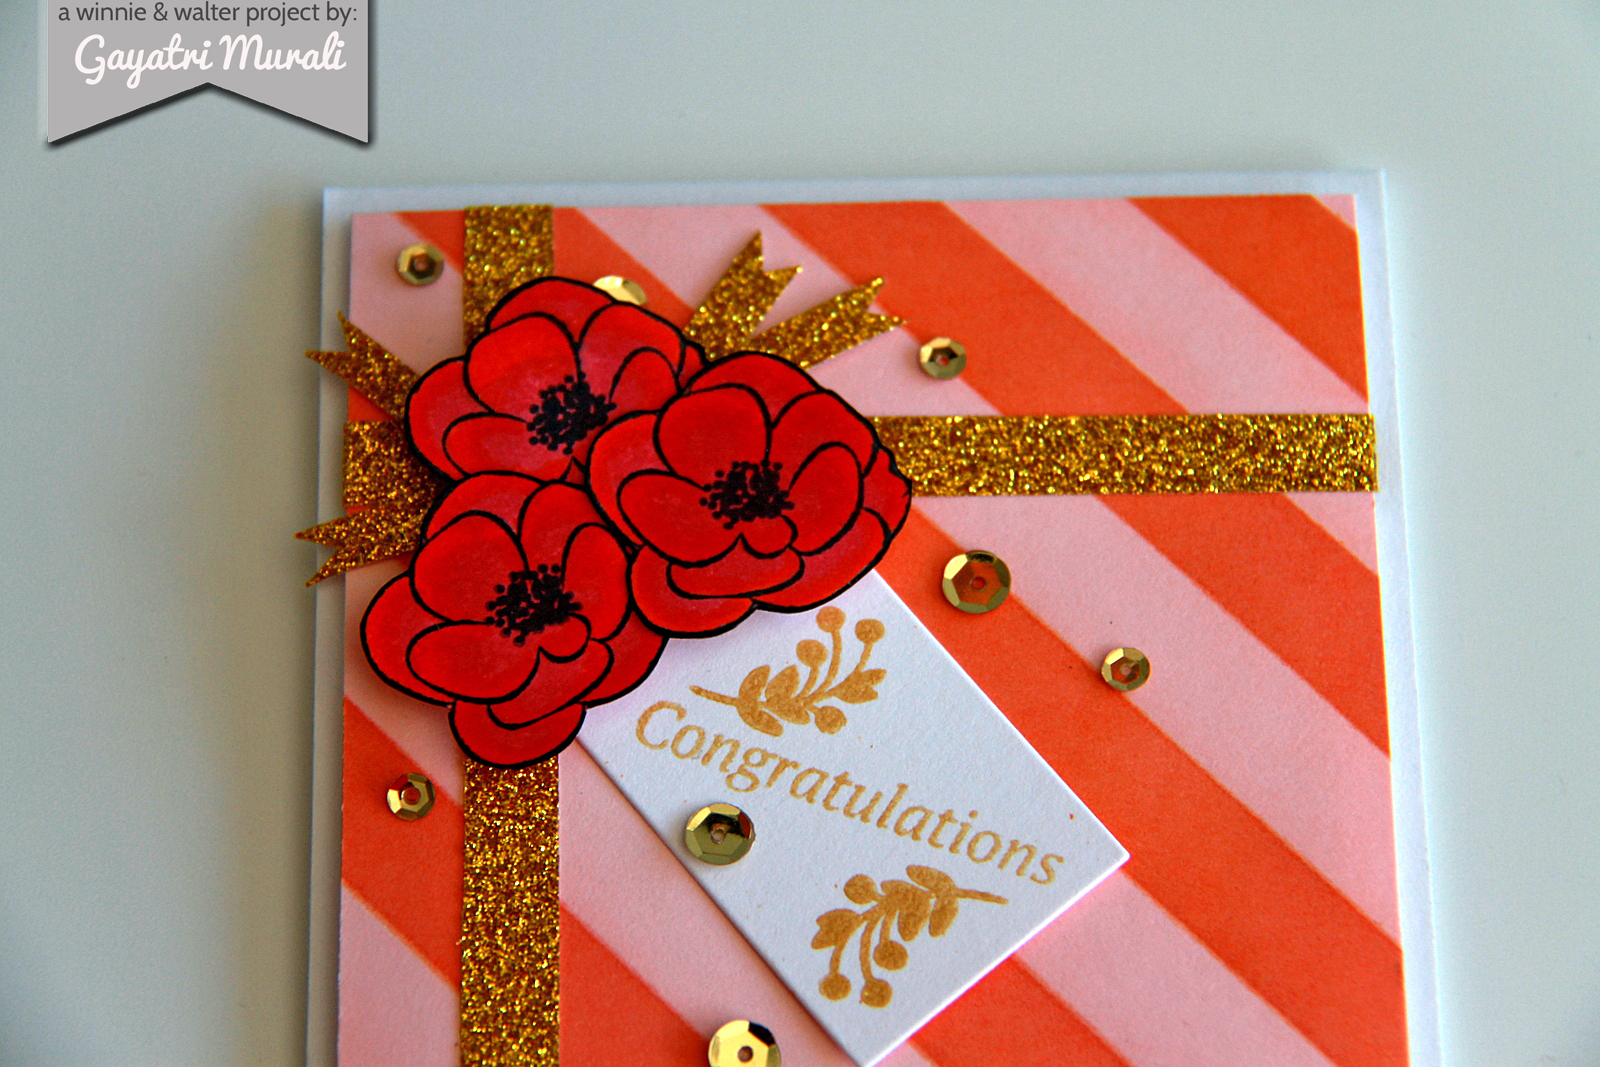
gayatri_Congratulations closeup 

For the sentiment I die cut a tag and stamped the sentiment from Parentville Extras using Deicata gold pigment ink and embossed using clear embossing powder. I also stamped the leaves image from The Write Stuff: Leave it to Mom stamp set using Delicata gold pigment ink and heat embossed it using clear embossing powder as well. 

Finally accented with gold 6mm and 4mm sequins from Pretty Pink Posh. I have mounted this completed panel on to the card base. 

So now it is your turn to use these pretty trendy colours and make a card. You can use as much or as little of the colours on your card. I am excited to see your take on the challenge. 

Tune in for the next challenge soon. 

Gayatri

Prize: $25.00 Gift Card to Pretty Pink Posh!

Enter the Challenge:

An InLinkz Link-up


w&w supplies:


WCMD 2014 | Pinspiration with Vanessa

WCMDblogbanner2014


Hi everybody and happy World Card Making Day! Vanessa here with a fun challenge for you. I am a bit addicted to Pinterest and love to use it as inspiration for my cards. So, my challenge for you is to create a project inspired by the image I found on Pinterest. Whether it's the colors, the design, the woodgrain, the shapes, the theme - use whatever inspires you looking at it! Have fun and I can't wait to see what you come up with!

Pinspiration:
vanessa_pinspirationphoto

My Pinspired card:
vanessa_pinspiredhello

Prize: $25.00 Gift Card to Ellen Hutson (just in time for the release of their brand new Essentials by Ellen stamps + dies!)

Enter the Challenge:
An InLinkz Link-up


w&w supplies:


WCMD 2014 | On Trend with Lea

WCMDblogbanner2014


W&W-WCMD-OnTrendChallenge-LeaLawson

On Trend: Cameras

I'm (Lea) challenging you to create a project using the ever trendy camera theme!  There are so many great camera themed products out there currently, and I want to see how you use them with your Winnie & Walter stamps (and/or any other products regardless of brand).  I can't wait to see what you create!
Stamps Used:
Prize: $25.00 Gift Card to Mama Elephant (just in time for their awesome 2nd anniversary celebration!) 

Enter the Challenge:

An InLinkz Link-up


w&w supplies:


Leading Lady Jennifer Ingle | Take One

jennifer_ingle_oct2014

For World Card Making Day we have the pleasure and honor of introducing our October Leading Lady, Jennifer Ingle!  She's a truly magnificent person and crafter and we are so delighted to have her dazzle us Saturdays in October!  Let's see what Jennifer has crafted up for her debut as Leading Lady...

Hello, Winnie & Walter friends! To say I was excited when Shay and Julie asked me to be the Leading Lady is surely an understatement. I am absolutely THRILLED to be here with you!
I love this dress!!! #justme #sometimesifeelcute #selfie #ootd #nofilter
My name is Jennifer Ingle, known around the interwebs as Jingle. My blog is Just Jingle and I love sharing my crafty creations over there. I have been paper crafting since my college years, but the truth of it is, I have crafted my entire life. When I was little I would make fascinating creations from construction paper and sell them at my 'craft fair table' ... in my living room... to my parents. I made a ridiculous amount of money on those fairs, considering the number of shoppers. HA! For my first week I wanted to have some fun with some of my FAVORITE Winnie & Walter stamps, so I decided on WORD UP! theme for this week. Yup. It's all about the words for this one, folks!
Happy Hello
For my first card, I used words as my absolute focal point. This one is ALL about the words. I stamped Happy from The Big, The Bold, and The Happy three times in different colors and then added the Hello, taking it off to the other edge to draw the eye to it. I love how words are the star of the show for this fun card!
Thankful for You
Another great thing about the word stamps from Winnie & Walter is that you can totally use them in the background, as well. For this fall card I stamped the word 'autumn' in the background repeatedly in a very pale ink to add visual interest and texture to the design. I then stamped my tree and the sentiment right on top! I love how the background adds so much to this card.
Black and White Thanks
For my final card, I actually didn't use any stamps at all?! WHAT?! I know, right? I cut the 'thanks' using the The Big, The Bold, and You cut files and used the negative as a stencil to trace my sentiment onto the card. I then used one of the BRAND NEW stencils from Winnie & Walter (available later this month) to add some bold, black embossing paste stripes across my card panel. I am LOVING these stencils!!! This card shows how words can be used in, perhaps the most traditional method, as a fabulous, standout sentiment! And there you go, my friends! I hope you have enjoyed our little Word Play today! Go grab some of your The Big, The Bold stamp sets and make some magic happen!!!
Shay and Julie have GENEROUSLY provided a $30 Gift Card to one of my readers over on Just Jingle! To enter, simply comment on my Leading Lady posts over on Just Jingle throughout this month. I will be choosing a winner at the end of the month from ALL of my Leading Lady posts, so you have a few chances to enter!


w&w supplies:


WCMD 2014 | Welcome + Details + Craftie Challenge For All!

WCMDblogbanner2014

It is midnight of October 4th here at w&w headquarters so we are kicking off the World Card Making Day (WCMD) celebrations!  Woohoo!

Beginning at 7:00 a.m. (CST) we will be posting challenges once an hour for 6 hours!  And at 6:00 a.m. you will get inspired by our October Leading Lady, the one and only Jennifer Ingle!!  Wait until you see her cards!  She is hosting a giveaway on her blog as well, so don't miss that!

For right now let's get some of the nitty gritty information out of the way so we can have fun, fun, fun all day (and night) long!
  1. We want everyone to be able to play so there is *no* requirement to use w&w products although we would be thrilled if you did (and we have freebies in the shop and for our Facebook Family). ;-)  Please make a new card though!
  2. We will have all challenges open until next Saturday, October 11, 2014 at 11:55 p.m. CST to let you create a little more than just on WCMD because celebrations should never be limited to a single day, right?   
  3. If you are unable to participate in the challenges, simply comment on the posts.  We will be giving one prize to a randomly drawn commentor compiled from all WCMD 2014 posts.
  4. Add your link to the appropriate Inlinkz Link-up tool for that post.  You may enter as many times as you wish while the challenges are open.  There will a prize posted on each challenge and one card will be randomly chosen as a winner of that prize from those that Link-up.
  5. Have tons of fun!
>>>CHALLENGE LINKS<<<


>>>GRAND PRIZE<<<

We really want to reward those who enter multiple challenges.  The crafters who enter a different card for at least 3 of the challenges (hopefully all of them!) will be entered into a special pool to receive the Grand Prize.  Entering the challenge below will qualify as 1 of those 3 challenges.  

What is the Grand Prize you ask?  How about a $50.00 gift card to the w&w store good for 1 whole year so you can decide what you want + entry into the upcoming card class with Online Card Classes (winner added to class once registration is opened)!  You know that if  it is an Online Card Classes class, it is the best!  

Big thanks to Jennifer McGuire and Online Card Classes for generously donating this prize!

>>>WCMD CRAFTIE CHALLENGE<<<

So to kick off our challenges we have a fun and easy one for you.  Simply take a craftie.  A craftie can include a picture or two of where you are making all of your cards for WCMD (this may include the table you are working on, the room, locale, etc.), you crafting, your crafting companions, etc.  We simply adore pictures of crafting in action, crafty spaces and works in progress! Post about your picture(s) on your blog, instagram (#wwWCMD2014, #craftie), Facebook, gallery or the like and link them up below using the Link-up tool.

Craftie Challenge Prize: $25.00 Gift Card to Simon Says Stamp.

Enter the Challenge:


Now that you have all the information get comfy, grab your favorite drinks and/or snacks, inks, stamps, papers and the like and get your craft on!

Lots of love and happy card making,
Winnie, Walter, Julie and Shay.

Friday, October 3, 2014

Congrats! with Kelly

Hi Winnie & Walter fans! I'm (Kelly) excited to share a card that was so much fun to make, and really shows how well all the different Winnie & Walter sets go together!


 Winnie & Walter, LLC

I stamped the large "congrats!" sentiment from TheBig, the Bold and You. Then I drew a curved line in pencil from the upper left corner to the lower right corner, which I carefully erased later. This is what I used as my guide to stamp and place all the tiny bits and pieces from the rest of the card.


Starting at the top left corner, I stamped the tiny and medium-sized sequins from Scenery: Big, Bang, Bling and the tiny stars from Scenery: Big Bang Confetti.

 
Then, starting from the sentiment to the bottom right corner, I stamped medium and large-sized sequins, large stars, and the "hooray" from This Awesome House. It was so fun to also add the real sequins next to the stamped sequins. For any areas that looked a little empty, I filled with the tiny star stamp. I absolutely LOVE that tiny star stamp. It's so adorable, and, well, tiny!

You could make a card like this with any of the script sentiments, and any mix of the scenery stamps (bubbles, dots, asterisks, squares, etc.)  What a great card set this would be to have a few different sentiments, and then the different smaller stamps. I think am putting that on my list of things to make!

Thanks so much for stopping by!
-Kelly


w&w supplies:


Wednesday, October 1, 2014

Happy Haunting! with Gayatri

gayatri_Happy Haunitng closeup3

Hi, Hello and Hiya everyone! This is Gayatri here. It is the 1st of October and time to make Halloween cards. So that is what I have for you today.

I have used the Moonlight stamp set recently released.

w&w_Moonlight_web-wm

I love this set because it has lots and lots of Halloween images. Plus some of the images come in different sizes perfect to create optical illusion. And some of the images can be used for non-Halloween projects as well. How versatile is this set? You got to love a versatile set.

Here is my card using Moonlight stamp set.

gayatri_happy haunting

I have gone for a freestyle kind of layout for my card. I started with watercolour paper trimmed to 4’ x 5 ½’. Then I did a colour wash at the centre slightly towards the top using wet on wet technique and Dusty Concord distress ink. I did the same on the top right and bottom left of the watercolour paper as well. I then stamped the spider web on the watercolour using grey ink. Then the web border using a darker grey as well. Then stamped the spiders and  sentiments in different angle using black ink.

For the tag, I did a colour wash using Spiced Marmalade distress ink, stamped the angled web and spider and used purple hemp to tie the tag.  I mounted this tag on the centre using foam adhesives. For the hat I stamped and watercoloured it on watercolour paper. I hand cut the hat out, mounted on the tag using foam adhesive. The sentiment is simply stamped on a strip of white cardstock, cut at an angle on one side and mounted again using foam adhesive. Finally embellished with some gorgeous Pretty Pink Posh sequins. The finished panel is glued to the purple card base.

gayatri_Happy Hauting closeup


gayatri_happy haunting 1

Hope I have inspired you to make some Halloween cards. Please share them with me if you use Moonlight stamp set. I would love to see your take.


Thanks for stopping by!

Gayatri


w&w supplies: