Thursday, May 22, 2014

Premiere of Parentville Extras + The Big, the Bold and Extras + giveaway

To enter our Third Release's The Big Giveaway CLICK HERE.
To enter to win Scenery: Rectangled & Triangled CLICK HERE
To enter to win Parentville Extras + The Big, the Bold and Extras continue reading!
To enter to win Bubble Talk +  The Write Stuff: Picture Perfect CLICK HERE (live May 23, 2014 at 7:00 a.m. CST)
To enter to win Scenery: Big Bang Bling + The Big, the Bold and Fun CLICK HERE (live May 24, 2014 at 7:00 a.m. CST)
========================================================================
Parentville Extras
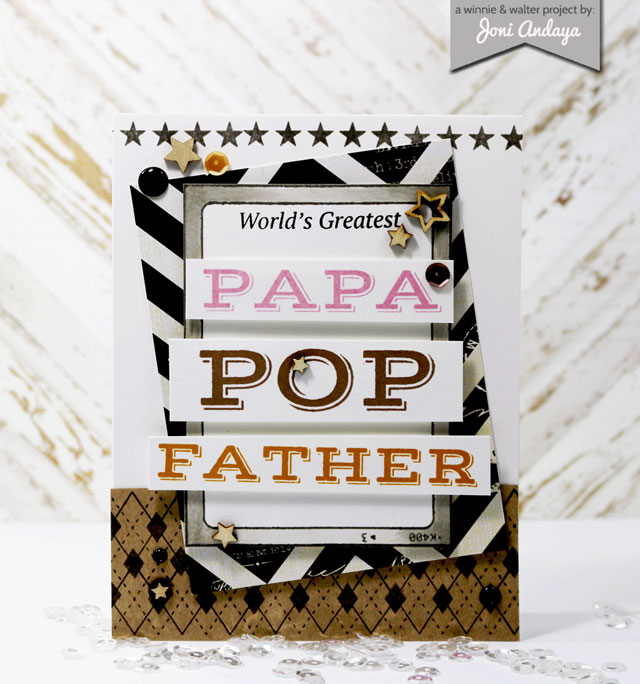
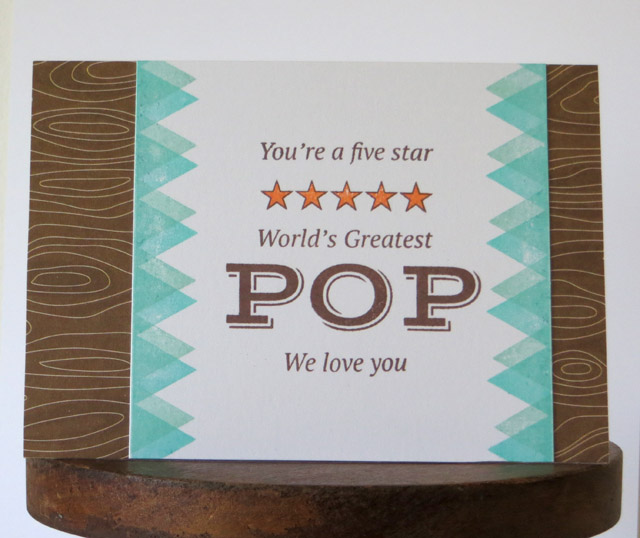
Why not go big for the Mothers and Fathers in your life?  With Parentville Extras you can do just that with a large Mum, Mama, Mother, Pop, Papa and Father and complementing sentiments for anytime you need to show your appreciation to a mother or father.  You can also celebrate soon-to-be or new parents.  And with some of the sentiments send congratulations, miss you and love you cards to parents near or far or tell your spouse, child, or friend you think they are a wonderful parent.

We finished off this set with some ever-useful hearts and stars which are perfect for parents or anyone!  Did we mention it also works perfectly with the already released Parentville?  Yep, that is what we call pretty fantastic.

The Big, the Bold and Extras
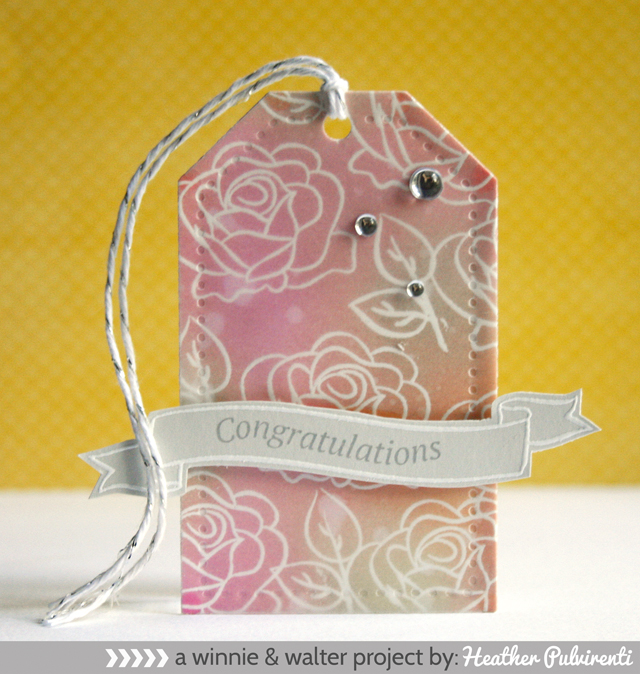
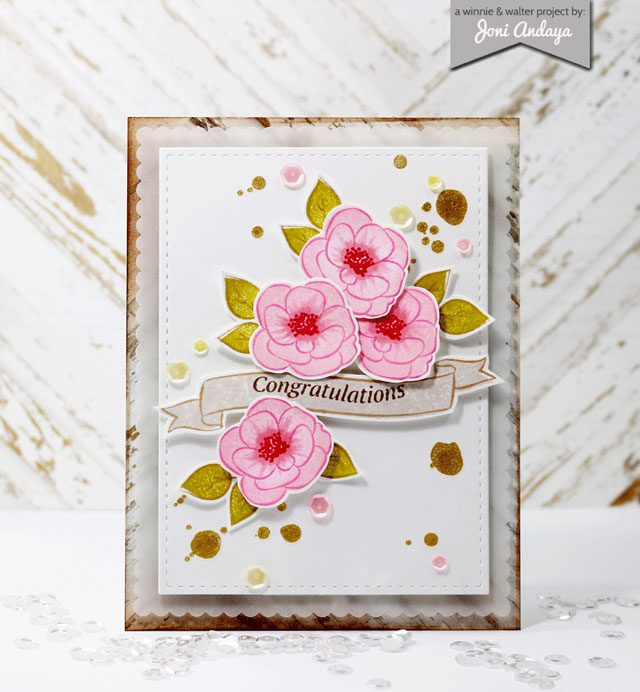
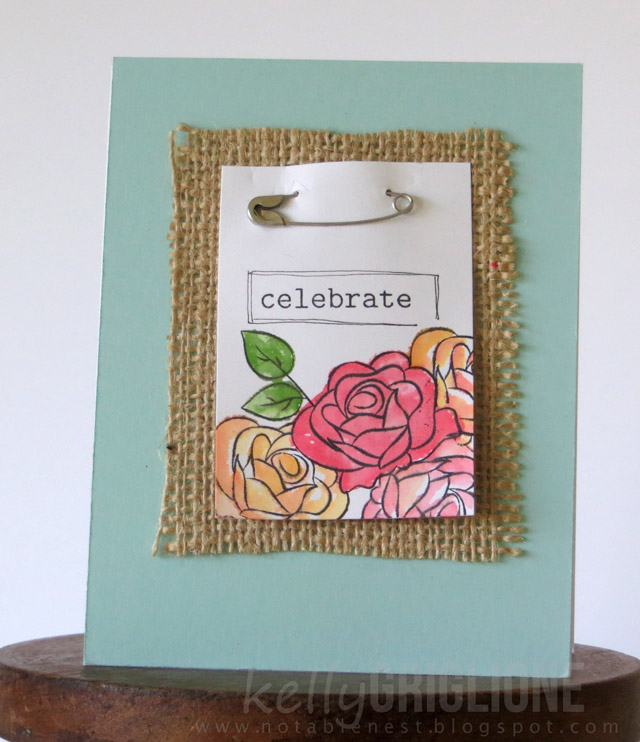
We adore our Talent because they are gifted, generous, kind and intelligent.  They are also a font of good ideas and information.  Joni gave us some really good suggestions on what she wanted to see from us and we listened!  We've got a set that is about giving your The Big, the Bold sets more.  More versatility, more beauty, more pizzazz, more options.  We've added some words that we wished we had included earlier and some great words for momentous occasions.  The two flowers, leaves and banner in the set are in outline and solid forms for two-step stamping or to be used separately.  Then there are two options for adding flower centers.  This is a crazy useful set!

>>>THE DETAILS<<<

Parentville Extras
Available for purchase on May 25, 2014.
Retails for $15.00
Includes Eighteen (18) sentiments including a large father, pop, papa, mother, mum and mama and six (6) images

The Big, the Bold and Extras
Available for purchase on May 25, 2014.
Retails for $15.00
Includes Twenty (20) sentiments including an ampersand and twelve (12) images

>>>THE GOOD STUFF<<<

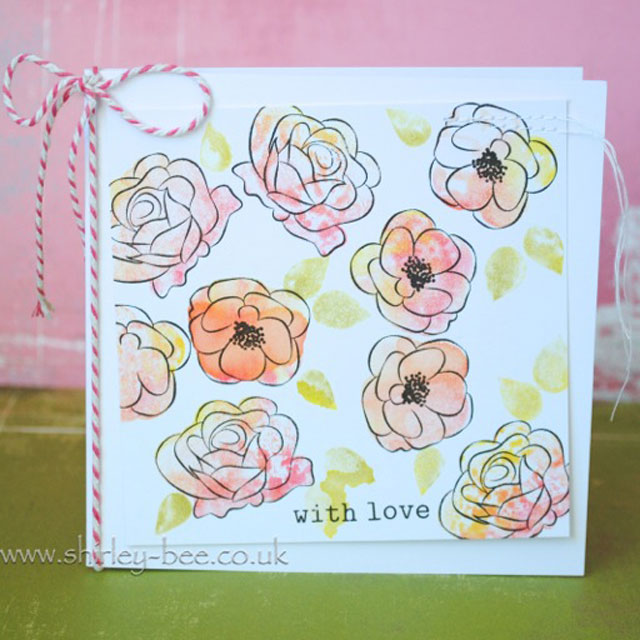
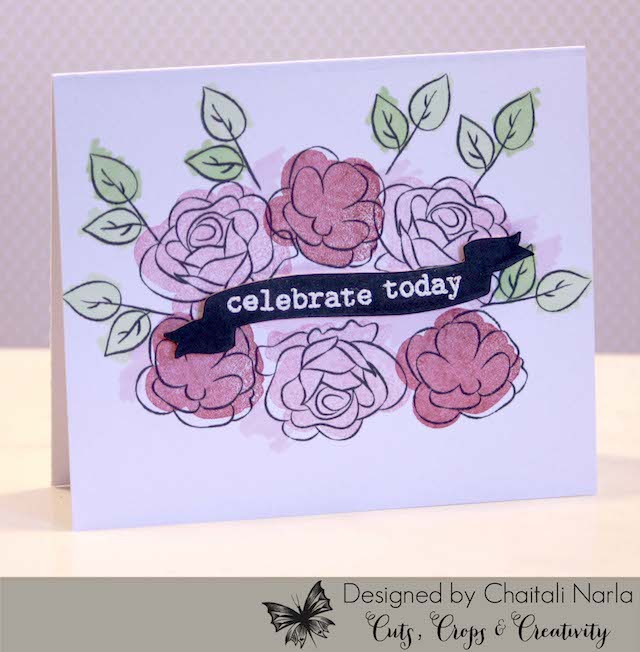
Let's get to the fun part and see what Julie, Shay, our guest stars, Shirley Bampton aka Shirley-bee (our winner of the Playdate No. 1 challenge) and Chaitali Narla of Cuts, Crops and Creativity, and The Talent (our supernova creative team) made with it. And make sure you visit Shirley's, Chaitali's and each of The Talent's blogs for more knock-it-out-of-the-park projects and details.  Don't forget to share some love with them too!

Julie


If you are new to winnie & walter, you may not be aware that we have digital cut files that are called “Cut That Out!”. OK – I laugh every time I read it.  Hee Hee!  Today, I have two cards using some of our cut files and I want to show you how they can easily be resized for a project.

Parentville Extras:

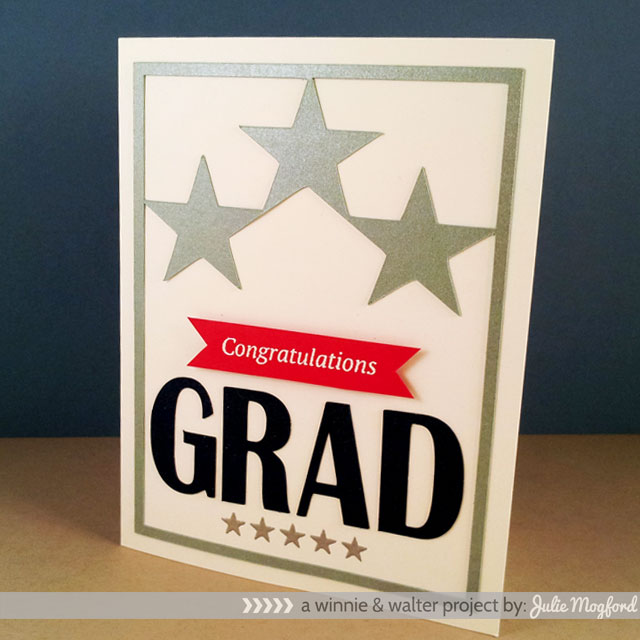
My first project is a graduation card, but would look great transformed into a card for dad, or even a patriotic card for Memorial Day, Fourth of July or for your favorite solider or veteran.
jmog_GRADstars-WEB

Using the 3-star journal card from the Parentville Extras digital cutting files, I changed the size of the cut file image (a PNG I moved over to my Silhouette software) to fit a 4.25 x 5.5 inch card.  The measurements here are 3.85 x 5.05 inches. By the way, these yummy papers are from my hoarded stash of Papertrey Ink papers (Silver and Night Sky).  I also used the Britannic Bold font to cut out the word GRAD while cutting all of my other images.  First I glued the frame using Tombow Mono Multi glue and once it was in place, I planned the spacing for GRAD.
jmog_GRADstars-2-WEB

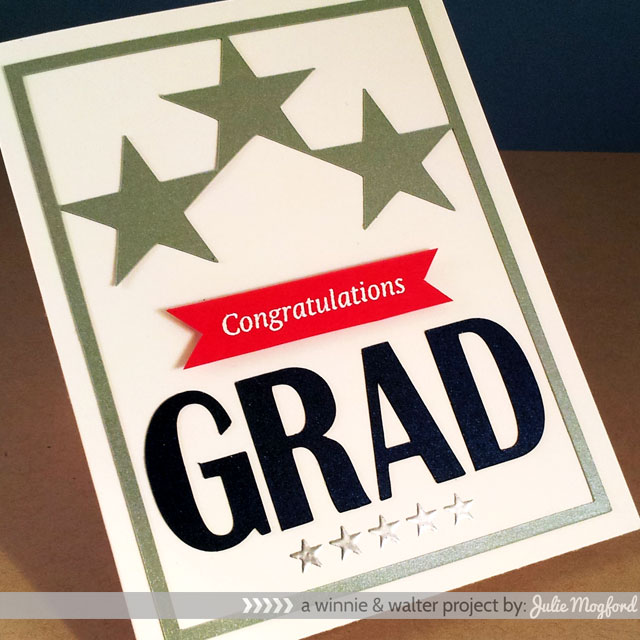
Before I glued the letters in place, I stamped and embossed the solid 5 star strip in silver to coordinate with the shimmery silver and navy papers. Finally,  I added the red hand cut banner strip that was stamped and embossed with the Congratulations sentiment that was also from the Parentville Extras stamp set.  Not much stamping here, but I love how the two stamps and journal card cut out came together for this card any graduate would love.

The Big, the Bold and Extras:

jmog_your-wedding-day-rose-WEB

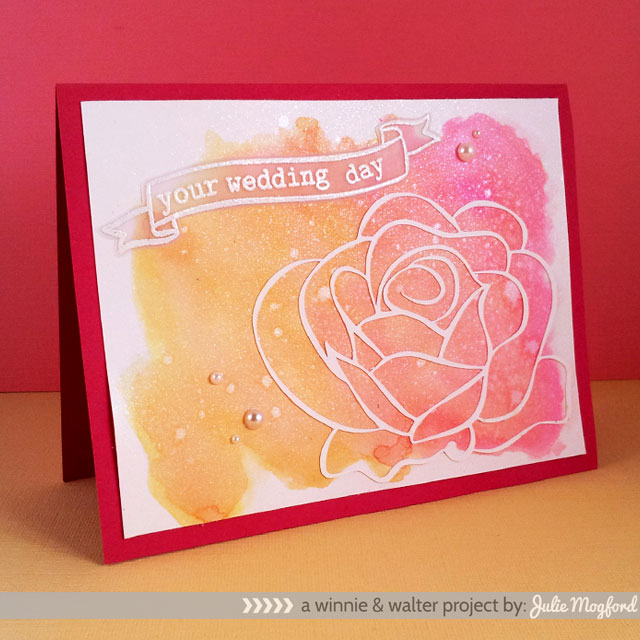
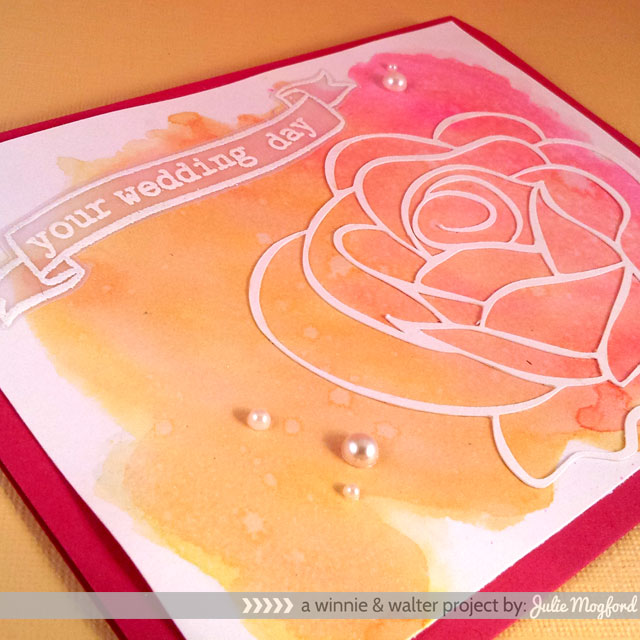
For my next card, I used Distress inks (Pickled Raspberry, Worn Lipstick, Spun Sugar, Dried Marigold, Wild Honey, and Squeezed Lemonade) to create the watercolor background for my die cut rose from The Big, the Bold and Extras digital cutting files.  I also added some shimmer with some Pearl Glimmer Mist.  *sigh*
jmog_your-wedding-day-rose2-WEB

For the rose, I enlarged it (2.85 x 3.6 inches) to fit my landscape card and cut it “as is”.  What I mean is that I didn’t use the offset to make the lines thicker and it cut just fine.  Just be careful when lifting it off the cutting mat.  It would still look great if you decided to give it slightly thicker lines as well.  I love how delicate it looks!  I added the banner and sentiments from The Big, the Bold and Extras set embossed in white on vellum and then cut it out by hand.  For the final touch, I added a few pearls. 
jmog_MR&MRS-WEB

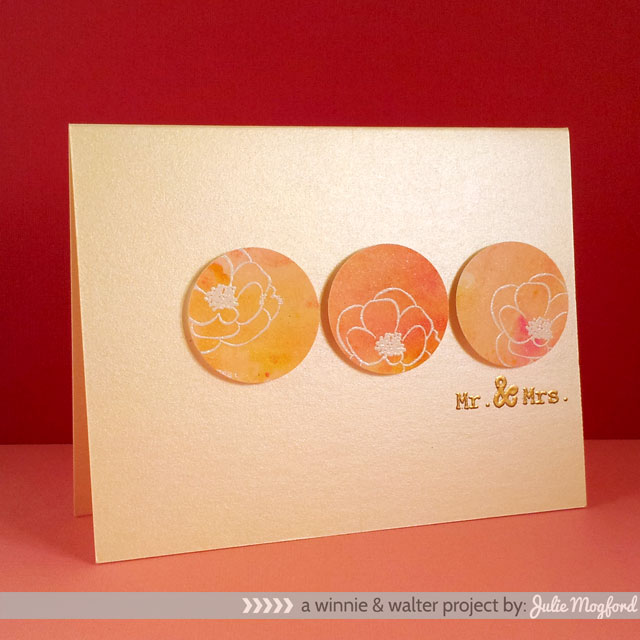
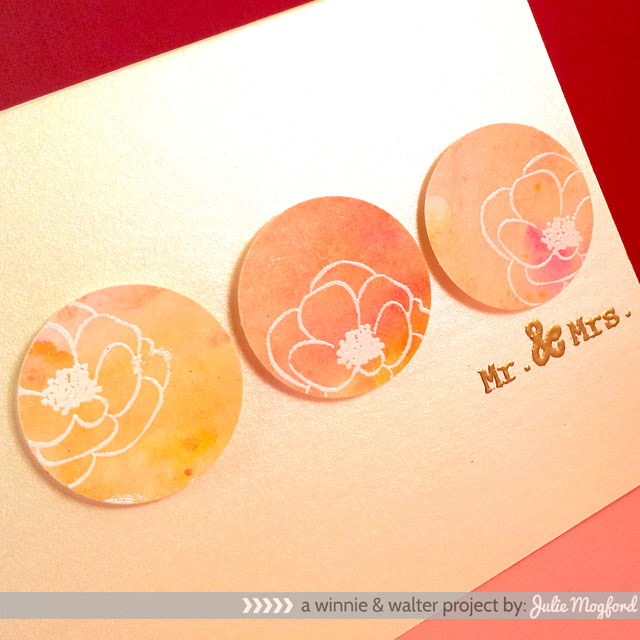
Before I cleaned off my craft sheet of the leftover distress colors,  I used a strip of Bristol paper to collect the remaining ink, blending it similar to a Tim Holtz technique and added more Pearl Glimmer Mist and now, I just HAD to use it for another card! BONUS!!  I punched 3 circles using a 1 3/8 inch circle punch, and stamped and embossed one of the flowers and added the dotted center in white, choosing to offset the stamping for a varied look.
jmog_MR&MRS-2-WEB

The circles are popped up with foam tape and a simple “Mr. & Mrs.” stamped and embossed in gold. The ivory pearl card base is another gem from my stash and I thought it was the perfect base for this card.  This one really made me happy!

Is everyone else loving the watercolor rage right now?  I know I am loving it.  I have really enjoyed the techniques from the Online Card Classes: Watercolor for Cardmakers, and the teachers over there are just so great – including our very own Joni Nina Andaya!

One more thing… if you like what you have seen with the cut files so far, you are in luck.  When you buy any of our new May Release stamp sets, you will get the coordinating cut files automatically added to your cart for FREE!  These files are in .svg and .png format.  The bonus here is that the .png files can be used in digital / printable projects too.  

Shay

I love what Julie made and designed!  The cut files are so fabulous and will make your crafting even more fun.

Parentville Extras
shayparentvilleextras1

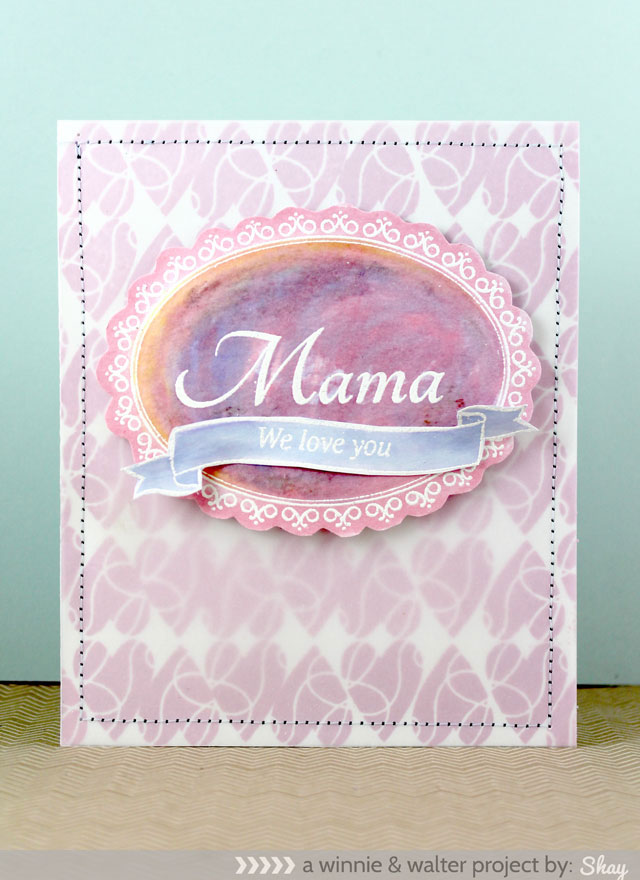
One of the words we added was "mama" which is something my sister sometimes calls my mom.  I decided to use mama with the frame from The Write Stuff: Leave it to Mom.  I stamped the "mama" and frame in Versamark and embossed them in white.  Then I pulled out Distress Inks in squeezed lemonade, worn lipstick and shaded lilac and water brush (my constant companions lately) and went to town.  I honestly didn't think too much about it.  I then dry embossed the center of the frame by carefully tracing the shape from behind with the end of a paint brush of course this is all invisible by looking at the picture, but in real life it has some dimension.  I cut the frame out.  I stamped the outline banner from The Big, the Bold and Extras along with "we love you" from Parentville Extras in Versamark and embossed them in white.  I colored it in with Distress Inks and the water brush.   For the background I stamped the swirly heart (Julie made it with initials!) in passion flower Hero Arts Shadow Ink alternating the direction of the heart until I filled the entire card front.  Then I sewed on a layer of vellum over it to soften the look.  I attached the frame to the card using dimensional foam adhesive.  
shayparentvilleextras2

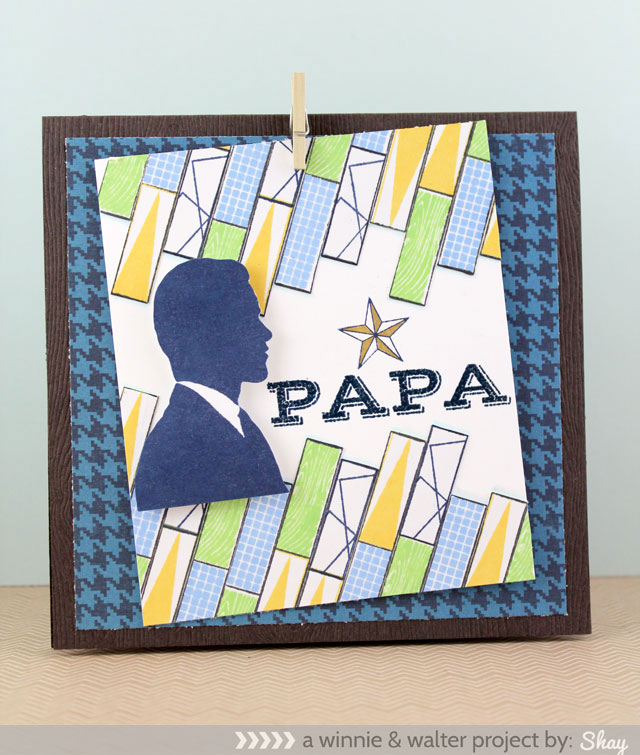
I happily picked up Scenery: Rectangled & Triangled again to make a background/border for a masculine card. This design has been living in my head for a while now.  I stamped the rectangle border in black several times and then using 4 different designs with a set color stamped each border (colors used were navy, butter bar, cornflower and green hills Hero Arts Shadow Ink).  I cut them all out and then placed them on a card front at an angle on the top and bottom and cut off the excess overhang.  In the center I stamped "papa" from Parentville Extras in Versamark and embossed with Zing! in denim.  I stamped the single star in navy and colored in every other section with Zig Wink of Stella in gold.  I also stamped the silhouette from The Write Stuff: Leave it to Dad in navy, cut it out and added that to the panel with dimensional foam adhesive.  I added the panel to a patterned paper by October Afternoon from their 9 to 5 collection (dictation) and wood embossed cardstock base with a tiny clothespin both bought from Studio Calico.

The Big, the Bold and Extras
shaybigboldextras1

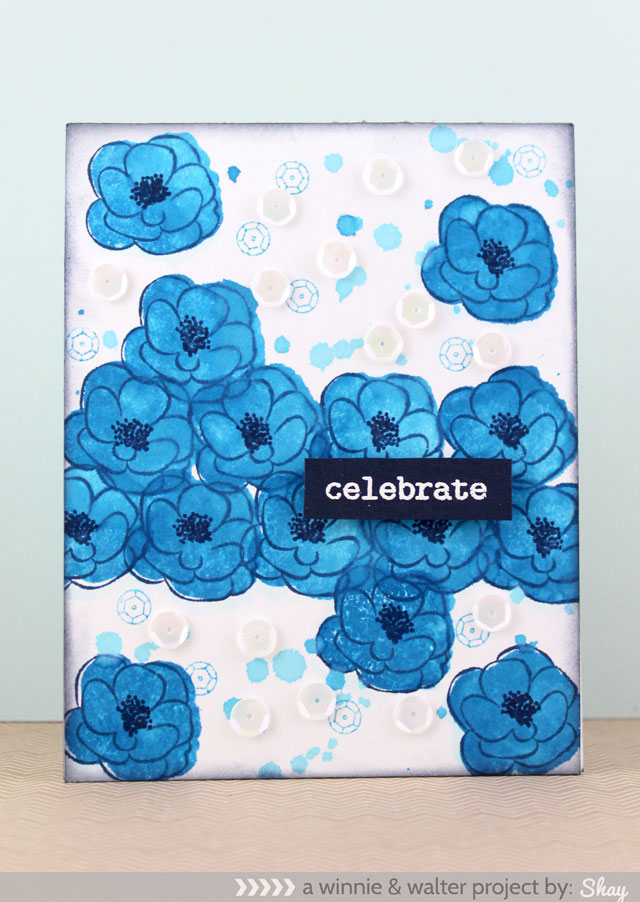
This first card was inspired by a dress that Catherine, Duchess of Cambridge (formerly Kate Middleton) wore that I saw in an issue of People recently.  It really struck me as being a gorgeous color and design.  And I thought using the new flowers from The Big, the Bold and Extras would be an ideal way to interpret that design.

I stamped the outline of the open center flower in deja blue (color theory by Studio Calico) and then used something blue (color theory by Studio Calico) to ink up the solid of the flower.  I spritzed it with water before stamping it.  Then I added the mini dots center to each flower in deja blue.  Because I was messy and needed to cover up that up I flicked ink on the card.  I added some sequin stamping using a stamp from the upcoming Scenery: Big Bang Bling.  Then I added some real sequins bought from Studio Calico some time ago.  I like to think the sequins both stamped and real are applied like Joni would do it. I am probably deluding myself!   Finally I added a sentiment by white embossing "celebrate" found on The Big, the Bold and Extras onto a rectangle of navy cardstock popped up on dimensional foam adhesive.
shaybigboldextras2

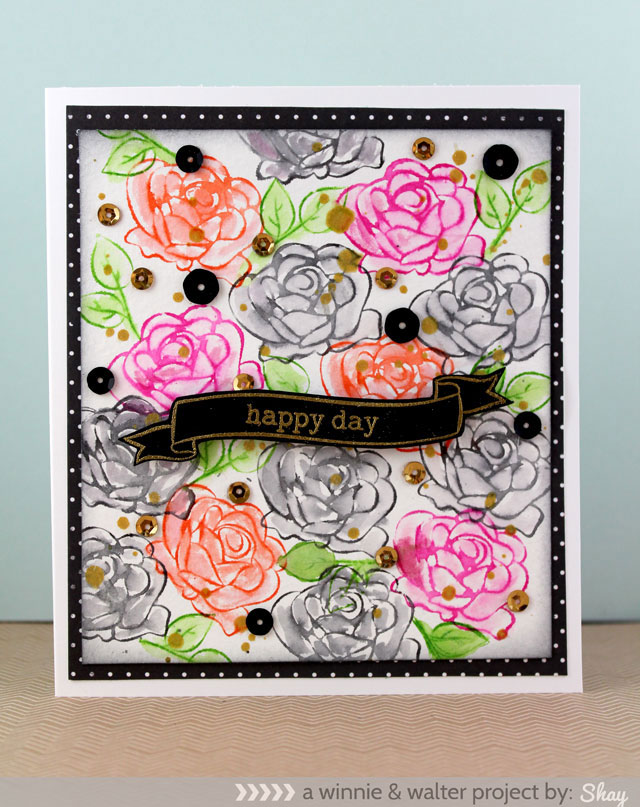
My last card for today uses the rose outline stamp and Distress Inks with my handy water brush.  I inked up the stamp, spritzed it with water before stamping on a piece of watercolor paper and then used the water brush to lightly color in the inside of the roses. I chose a strong color scheme of picked raspberry, ripe persimmon and black soot and then added mowed lawn double leaves. I added drops of gold Color Shine by Heidi Swapp.  For the sentiment I stamped and embossed the outline banner and "day" from The Big, the Bold and Extras and "happy" from The Big, the Bold, and the Happy.  And I added a healthy sprinkling of gold and black sequins.  I backed it all onto a piece of patterned paper from Glitz's 6x6 Finnley paper pad (still love it!) and a white card base.

Okay, now that you have endured my rambling you *must* see what Shirley, Chaitali and each of the Talent has made.  One of my favorite parts of this gig is seeing what they and you make with w&w products.  It is

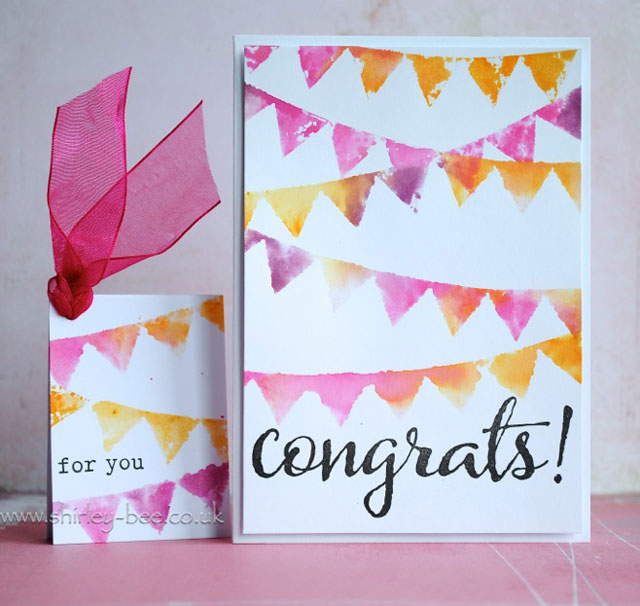
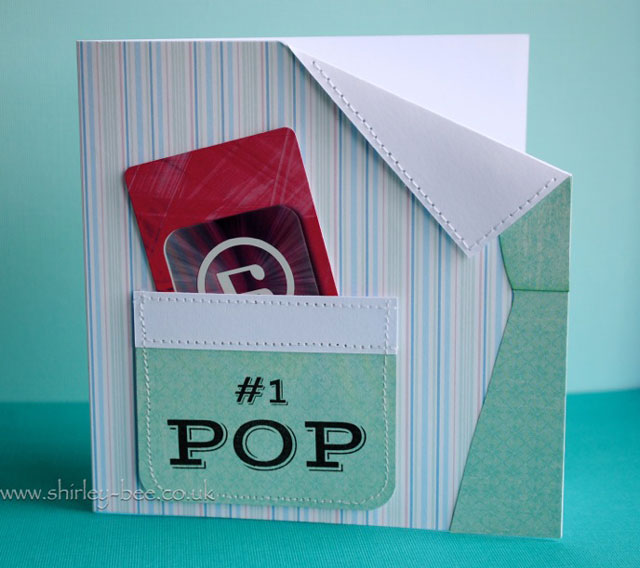
We are so pleased to feature our guest star, Shirley Bampton's amazing projects.  Don't miss out on all she has on her blog because she will delight you!
ShirleyWWMAY22_04
ShirleyWWMAY22_01
CLICK HERE to see more from Shirley.

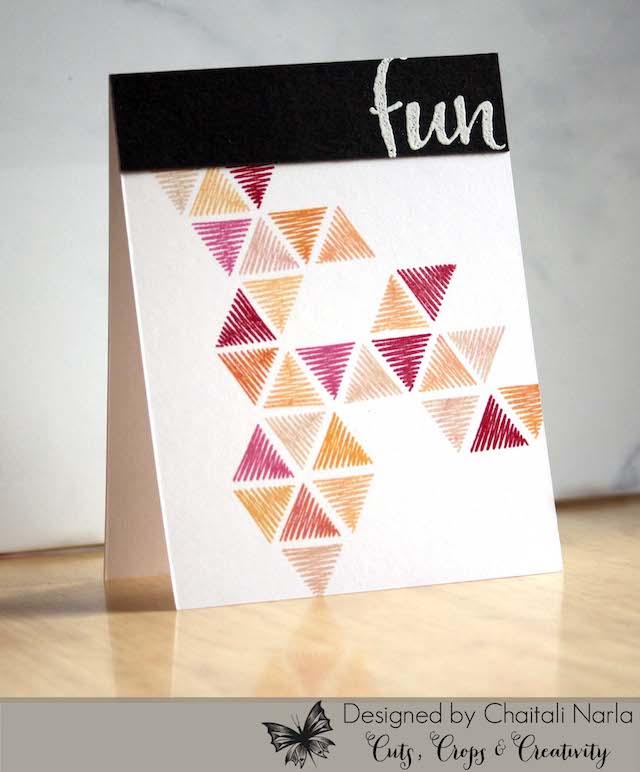
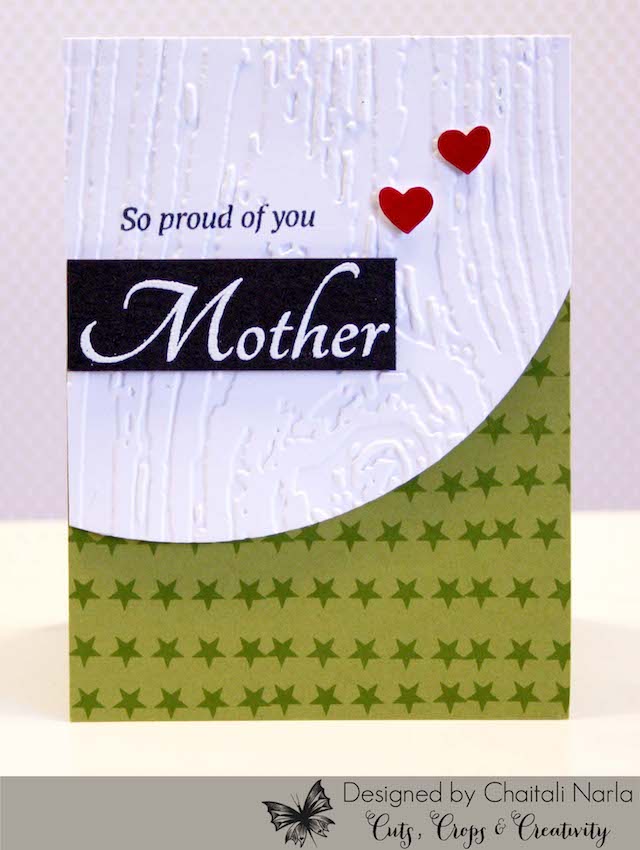
It is our honor to present our guest star, Chaitali Narla's fantastic projects.  We are so lucky to have the lady behind Iron Craft and Cuts, Crops and Creativity.

ChaitaliParentvilleExtras
ChaitaliTheBigTheBoldAndExtras
CLICK HERE to see more from Chaitali.

The Talent


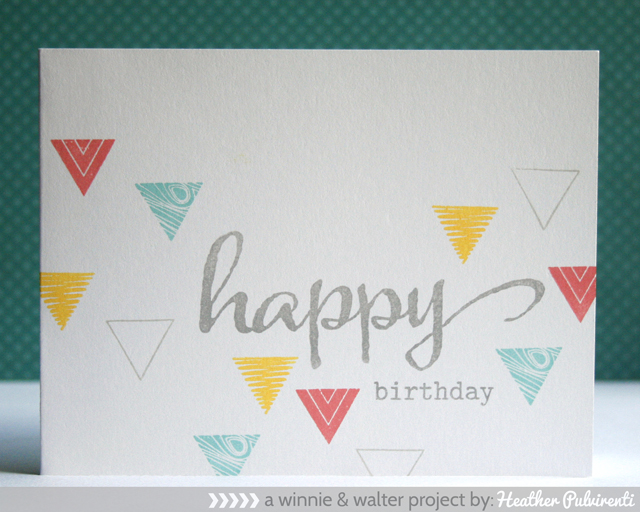
HP - Big Bold Extras & Parentville
CLICK HERE to see more from Heather.

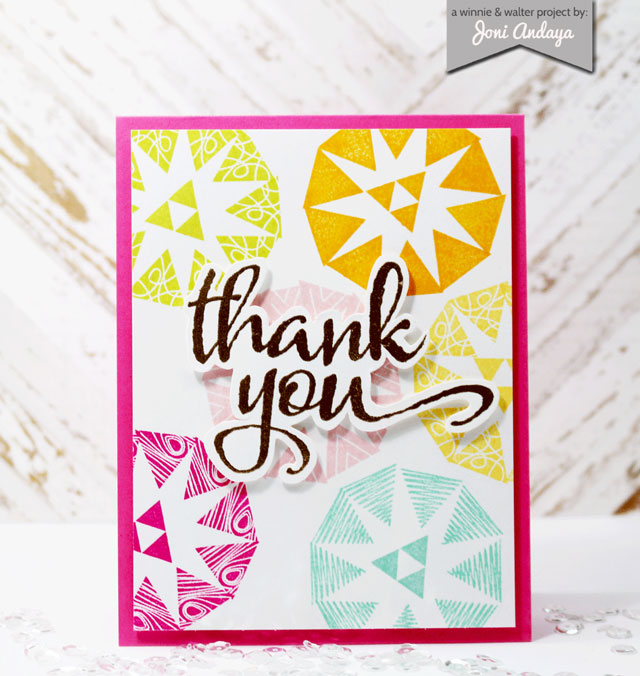
JoniParentvilleEXTRAS-ww
JoniTheBIGtheBOLD&theEXTRAS
CLICK HERE to see more from Joni.

KellyParentville Extras - Father's Day Card with Pop_web
KellyThe Big The Bold and Extras - celebrate burlap_web
CLICK HERE to see more from Kelly.

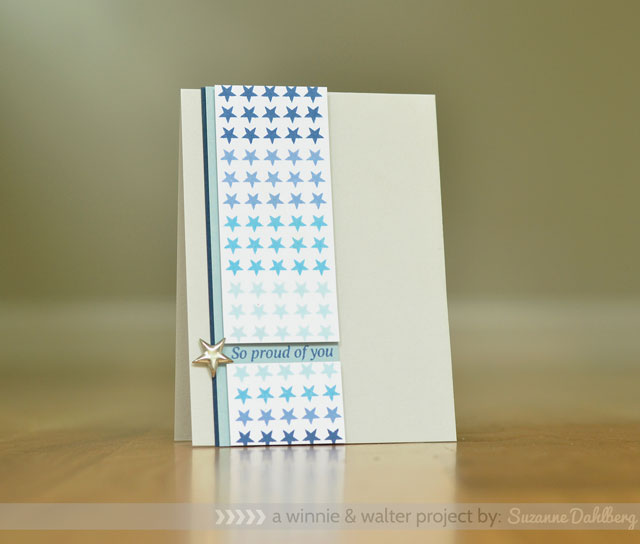
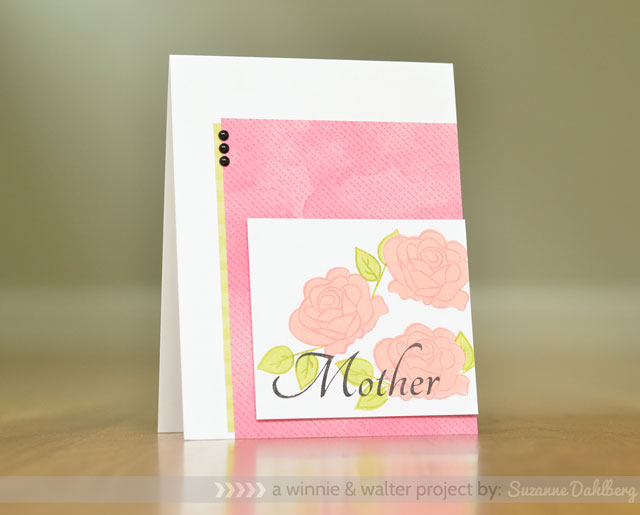
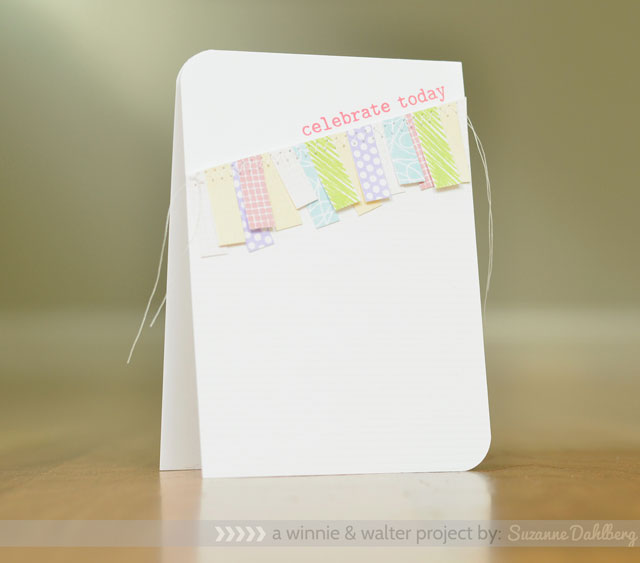
SuzanneD2b
SuzanneD2a
CLICK HERE to see more from Suzanne.

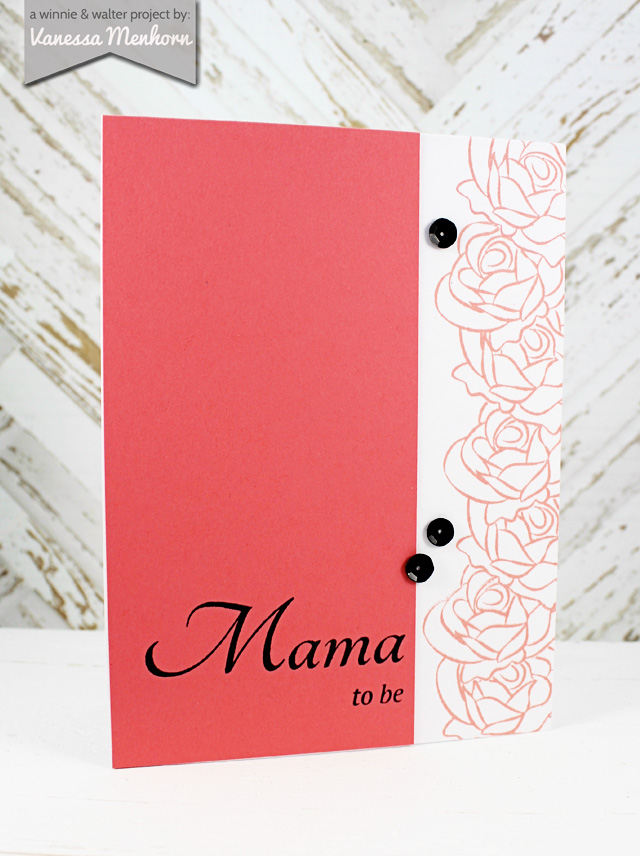
Vanessamamatobe
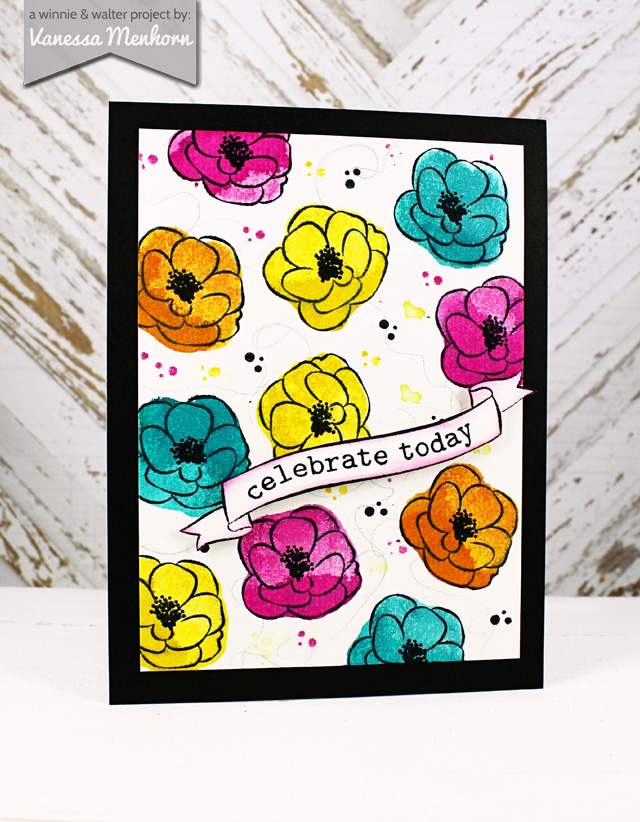
Vanessacelebrateflowerbg
CLICK HERE to see more from Vanessa.

>>>THE GIVEAWAY<<<

Comment here on this post for a chance to win Parentville Extras + The Big, the Bold and Extras stamp sets of your own by 12:01 a.m. (central standard time) May 25, 2014.  One comment will be chosen at random.

All winners during our Third Release will be announced on May 25, 2014.

To enter our Third Release's The Big Giveaway CLICK HERE.

Wednesday, May 21, 2014

Premiere of Scenery: Rectangled & Triangled + giveaway

To enter our Third Release's The Big Giveaway CLICK HERE.
To enter to win Scenery: Rectangled & Triangled continue reading!
To enter to win Parentville Extras + The Big, the Bold and Extras CLICK HERE (live May 22, 2014 at 7:00 a.m. CST)
To enter to win Bubble Talk +  The Write Stuff: Picture Perfect CLICK HERE (live May 23, 2014 at 7:00 a.m. CST)
To enter to win Scenery: Big Bang Bling + The Big, the Bold and Fun CLICK HERE (live May 24, 2014 at 7:00 a.m. CST)
========================================================================
We are so excited to show you Scenery: Rectangled & Triangled today!  This is a set with so many possibilities that we know you are going to dazzle us with ideas we never even thought of.  With three border images and so many different pattern of rectangles and triangles you can spend a day or two playing around with all the ways these stamps work together!

>>>THE DETAILS<<<

Available for purchase on May 25, 2014.
Retails for $15.00
Includes twenty-three (23) images including three (3) border images

>>>THE GOOD STUFF<<<

Let's get to the fun part and see what Julie, Shay, our guest stars, Shirley Bampton aka shirley-bee (our winner of the Playdate No. 1 challenge) and Chaitali Narla host of Iron Craft and a talented designer and illustrator, and The Talent (our supernova creative team) made with it. And make sure you visit Shirley's, Chaitali's and each of The Talent's blogs for more knock-it-out-of-the-park projects and details.  Don't forget to share some love with them too!

Julie


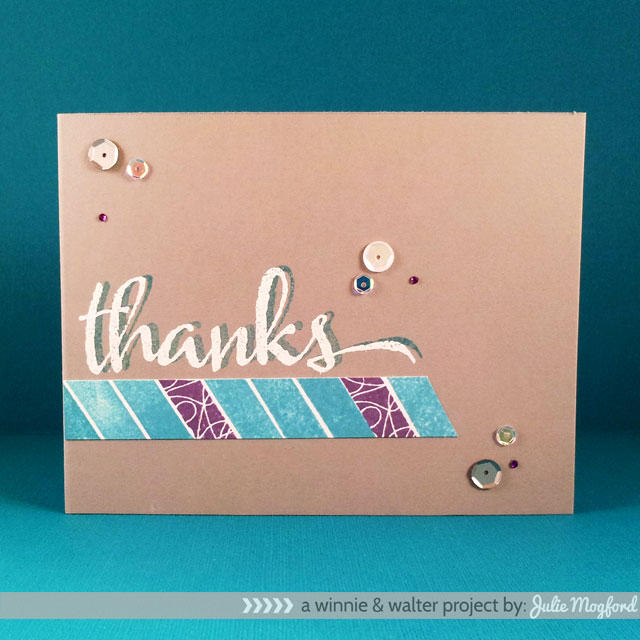
It’s time to share our creations and I really do enjoy this part.  For today’s project, I have a card where I have used the rectangles from Scenery: Rectangled & Triangled to create a colorful border strip. 

jmog_thanks-rectangle-WEB

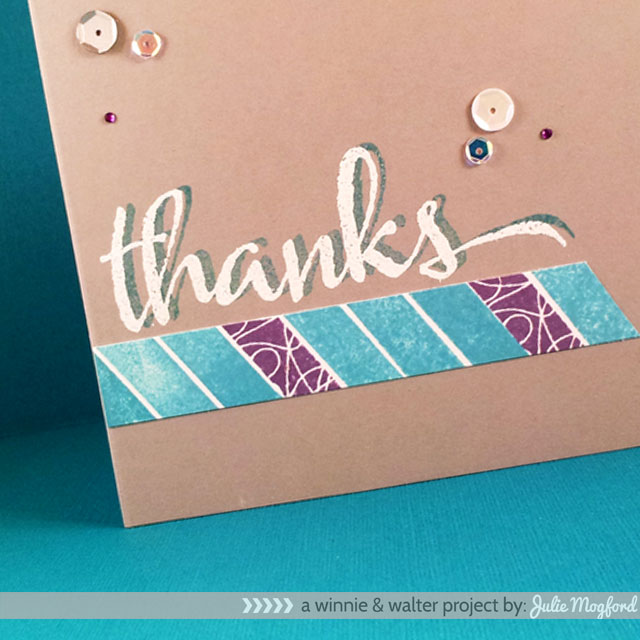
I began by stamping the solid rectangle with Broken China Distress Ink and the doodled rectangle in Dusty Concord to create a pattern.  I trimmed the paper and cut the strip at an angle to match the stamping at the perfect length to match the thanks stamp from The Big, the Bold and You stamp set.  First I stamped it in Broken China, not worrying if it was solid since it would be a shadow, and then again in Versamark and embossed in white and slightly offset to complete the effect.

jmog_thanks-rectangle-2-WEB

Finally, I added a few sequins in silver matte, white and a clear opalescent with a few tiny purple gems for some bling.  You are in for a real treat with Shay’s projects, plus the Talent’s and our guests’ projects.  Prepare to be inspired!!!

Shay


I am so thrilled to be premiering this stamp set.  I love other stamp sets just as much, but I know that we can't even scratch the surface on this.  Each person who uses it will create something unique and fresh from it!  For instance, I didn't think to use it like Julie did, but it is a completely awesome idea!

My trio of cards are pretty simple, but I think give a glimpse into the stamping adventures to be had with this one set.

shayrectangledtriangled1

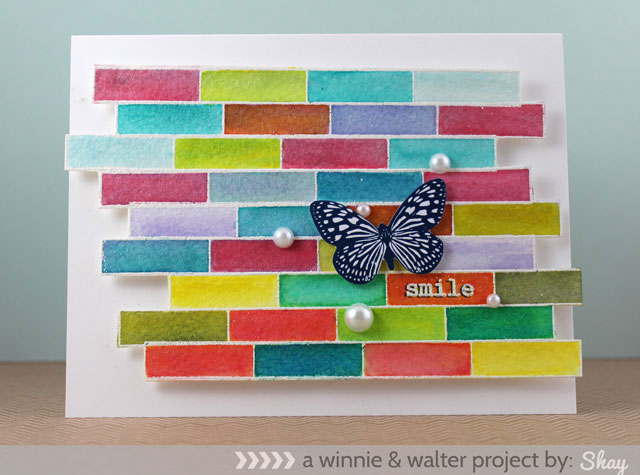
For my first card I used the rectangle border stamp and stamped it several times on watercolor paper going up vertically staggering them horizontally in Versamark and then heat embossed it in white.  I also stamped "smile" from The Big, the Bold and Extras which we will be premiering tomorrow in Versamark and embossed it.  Yes, several of the smaller words from The Big, the Bold series plus small sentiments from other sets like The Write Stuff: Leave it to Dad fit within the rectangles!  I cut out the panel.  I pulled out my Distress Inks and a water brush and got busy coloring in the rectangles. I later painted over the rectangles with calico shine Mister Huey's by Studio Calico.  To give the "smile" more presence I stamped it in grey slightly to the left for a shadow.  I adhered the watercolor panel to a white cardbase with foam dimensional adhesive (never leave home without it!).

To finish up the card I added a butterfly from an ephemera pack from the Lemon Lush Collection by Studio Calico and some pearls stickers from the February 2014 OhDeerMe Kit by Freckled Fawn.  I can't sing enough praises for these incredible jam-packed embellishment kits and they come in the most adorable patterned bags!

shayrectangledtriangled2

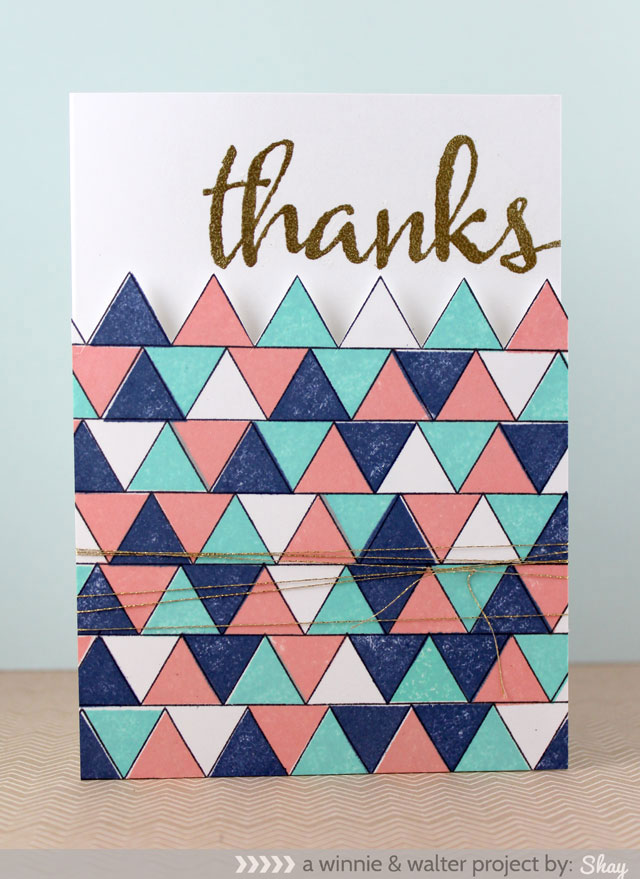
The next card uses the outline triangle border from Scenery: Rectangled & Triangled.  I simply stamped it in black over and over again with the flat edge nearly touching the peaks of the row beneath it.  I didn't worry about the placement of the triangles below and above it, but you can certainly be more particular.  I then used the solid triangle and filled in the triangles randomly with my chosen color palette of navy blue, soft cantaloupe, tide pool and white.  The inks are all Shadow Inks by Hero Arts.  I cut out my piece of handmade patterned paper.  I made sure to temporarily place it on top of the card base for placement of the sentiment.  I stamped "thanks" from The Big, the Bold and You in Versamark and gold embossed it.  I tied some gold tread around the triangle panel and adhered it to the card base with dimensional foam adhesive.

shayrectangledtriangled3

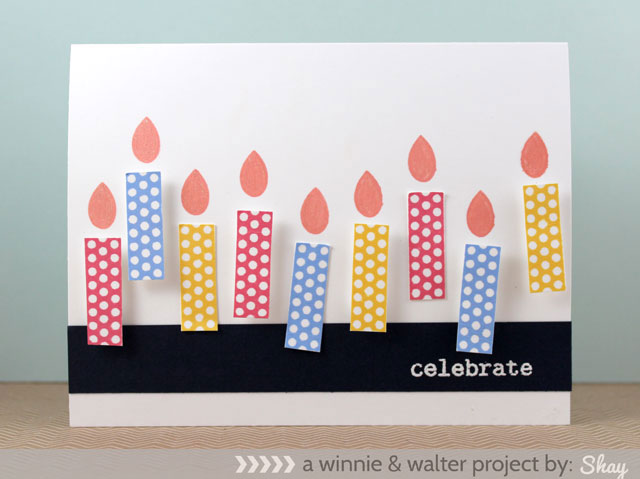
My last card tonight suddenly popped into my head.  The polka dot rectangle suddenly reminded me of candles!  So I stamped several in cornflower, pale tomato and butter bar all Shadow Inks by Hero Arts.  I cut them out, arranged them on my card base and then pulled out the big leaf from The Write Stuff: Leave it to Mother and inked it up with soft cantaloupe to look like a flame.  I cut a stripe of navy card stock and adhered it down.  I added the candles elevating most of them with dimensional foam adhesive, but not all for some interest.  I stamped "celebrate" from The Big, the Bold and Extras premiering tomorrow in Versamark and white embossed it.  For a finishing touch I added a little shimmer to the flames with a clear Zig Wink of Stella pen.  I realized as I was making this card that it would also make a sweet Hanukkah or perhaps even a Kwanzaa card too with some changes in color and/or pattern!

I am not at all done with this stamp set and you will see me use it throughout the release...I really can't stop myself!

Wait until you see what the Talent and our guest stars have done..they have blown my mind!

We are so pleased to feature our guest star, Shirley Bampton's amazing projects.


ShirleyWWMAY21_01
CLICK HERE to see more from Shirley.

It is our honor to present our guest star, Chaitali Narla's fantastic project.


ChaitaliScenery-Rectangled&Triangled
CLICK HERE to see more from Chaitali.

The Talent


HP - Rectangled & Triangled

CLICK HERE to see more from Heather.

Jonitriangles-&-rectangles-
CLICK HERE to see more from Joni.

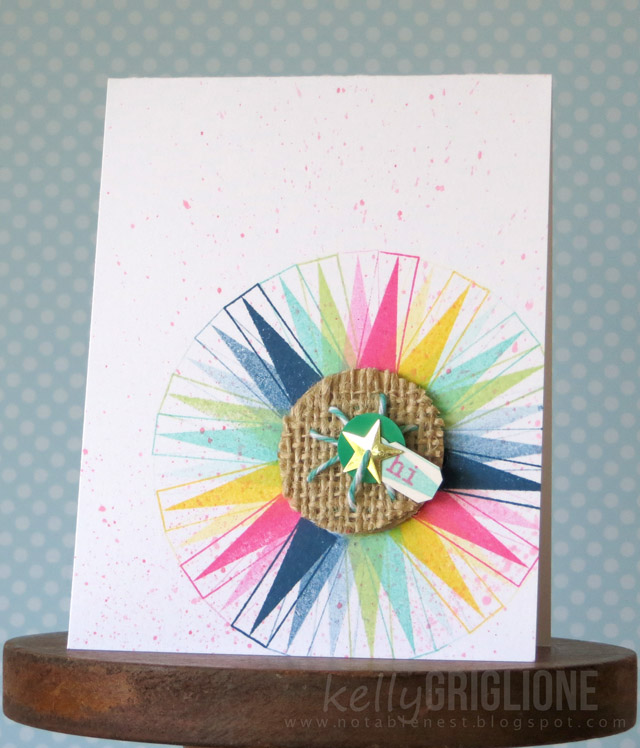
KellyRectangled and Tangled - Triangle Sunburst_web
CLICK HERE to see more from Kelly.

SuzanneD1
CLICK HERE to see more from Suzanne.

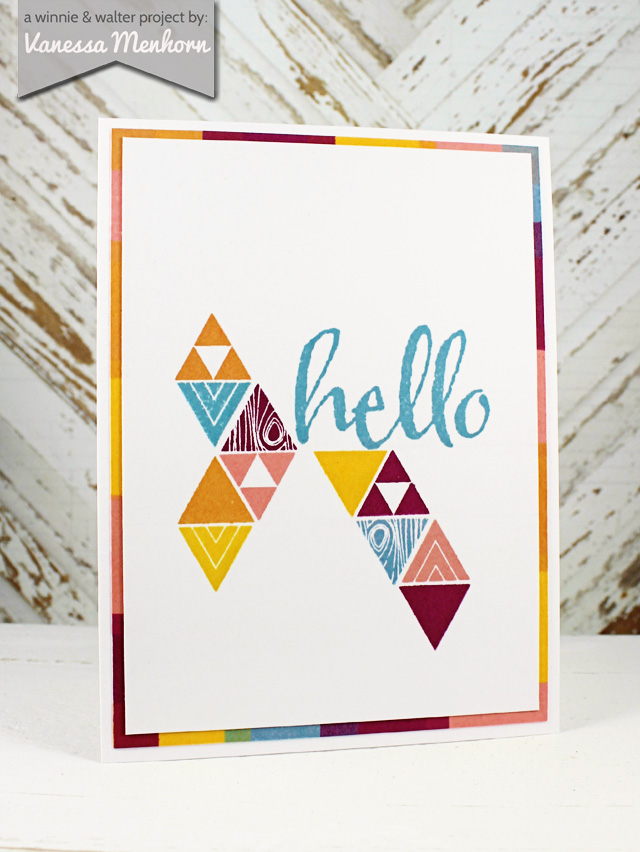
Vanessatrianglehello
CLICK HERE to see more from Vanessa.

>>>THE GIVEAWAY<<<

Comment here on this post for a chance to win a Scenery: Rectangled & Triangled stamp set and another stamp set from the Third Release of your choice by 12:01 a.m. (central standard time) May 25, 2014.  One comment will be chosen at random.

All winners during our Third Release will be announced on May 25, 2014.

To enter our Third Release's The Big Giveaway CLICK HERE.

Tuesday, May 20, 2014

Third Release | Coming Attractions

Note: 1 of 2 posts today.  Third Release | The Big Giveaway post is HERE.  

We are so excited to share with you previews of our Third Release.  We have seven stamp sets and their coordinating cut files releasing on May 25, 2014.

Are you ready for our largest release yet!  We brought follow ups of all your favorites and then some.
w&wScnRectTriPRV-WEB
Scenery: Rectangled & Triangled is a truly limitless possibilities sort of stamp set. Want borders and background builders?  This is just the set for you.  There are rectangles and triangles galore for on trend and exploratory stamping.  This stamp set will surprise you with what you can create!
w&wParentvilleExtrasPRV-WEB
We just could not let our dear friends across the pond go without a "mum" so we added mum and some other great names for mothers and fathers, some supporting sentiments for celebrating mothers and fathers throughout the year (including soon to be and new parents) and finished them off with universally usable hearts and stars to create Parentville Extras!  We love you mums!
w&wBigBoldExtrasPRV-WEB
Joni made some suggestions for images on her wish list and we've missed some little words in the past to go with The Big, the Bold stamp sets so The Big, the Bold and Extras set was born!  Use with your The Big, The Bold stamp sets, any set at all or on its own you will be happy with how much stamping millage this set will give you!
w&wBubbleTalkPRV-WEB
Hey girl, have a special dude you want to send a message to?  Bubble Talk includes great sentiment building with two step speech bubbles for a whole lot of stamping goodness!

w&wPicturePerfectPRV-WEB
The Write Stuff: Picture Perfect features so many great images (just wait until you see the camera!), icons and tiny sentiments for adding captions to pictures or images.  This is one delightful set for capturing all your summer adventures whether they are at home or on the go!

w&wScnBigBangBlingPRV-WEB
We've got our next Big Bang and it's all about bling!  With several sequin options Scenery: Big Bang Bling will never get old and will add just the right sparkle to any project.

w&wBigBoldFunPRV-WEB
You knew there had to be one...we've brought you The Big, the Bold and Fun with 4 (yes, 4!) big words and lots of smaller words with a nice summery feel that will also warm up your entire year!

We are so thrilled to share more with you over the next few days as we premiere the stamp sets beginning tomorrow, May 21, 2014.  The guest stars' and The Talent's projects are awe-inspiring!!

What do you think?  Anything you are particularly excited about?   We would love to hear your thoughts.

Third Release | The Big Giveaway

Note: 1 of 2 posts today.  Coming Attractions post is HERE

The Big Giveaway is where we randomly pick one (1) lucky winner to receive all of our Third Release (May/June 2014)!  That's all seven (7) stamp sets + coordinating cut files!!

>>>THE BIG GIVEAWAY<<<

You don't have just one chance to win, but a lucky 7!  You can do as many or as few entries as you want.  Remember that if you take advantage of all 7 chances to win, you will have commented on this blog post 7 times.  Each chance = a separate comment.

Ways to enter:
  1. Comment on this blog post.  
  2. Follow us on this blog to the right through Blogger, by email or through Feedly or Bloglovin.  Leave a comment that you follow us. (If you already follow our blog, let us know!  And thank you.)
  3. Like us on Facebook.  Leave a comment that you like us on Facebook...we like you right back!  (If you already like us on Facebook, let us know!  And thank you.)  As a little bonus for liking us on Facebook we have some fan freebies...just check under the "like our page" tab.
  4. Follow us on Instagram.  Leave a comment that you follow us.  (If you already follow us on Instagram, let us know!  And thank you.)
  5. Follow us on Pinterest. Leave a comment that you follow us.  (If you already follow us on Pinterest, let us know!  And thank you.)
  6. Follow us on Twitter.  Leave a comment that you follow us.  (If you already follow us on Twitter, let us know!  And thank you.)
  7. Share about Winnie & Walter's Third Release on TwitterFacebook, your blog or Instagram. (#winniewalter)  Leave a comment that you shared and thank you! 
You have until 12:01 a.m. (central standard time) on May 25, 2014 to enter.

All winners during our Third Release will be announced on May 25, 2014.

Big hugs to you all!

Friday, May 16, 2014

It's Almost Here!

w&w_may2014release


It all begins right here on the w&w blog next Tuesday, May 20th with Coming Attractions and The Big Giveaway!

You will not want to miss our biggest release yet!


Wednesday, May 14, 2014

Hello Gorgeous

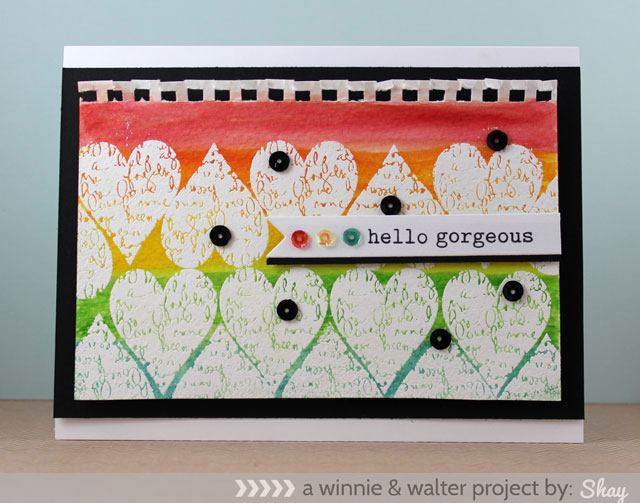
Hello gorgeous!  Yes, you!  It's me, Shay, with a bright and happy card to share with you today.

I love using embossing powder and Distress Inks with my stamps.  A whole lot of creative play can be done by using those key ingredients, don't you think?

shayhellogorgeous1

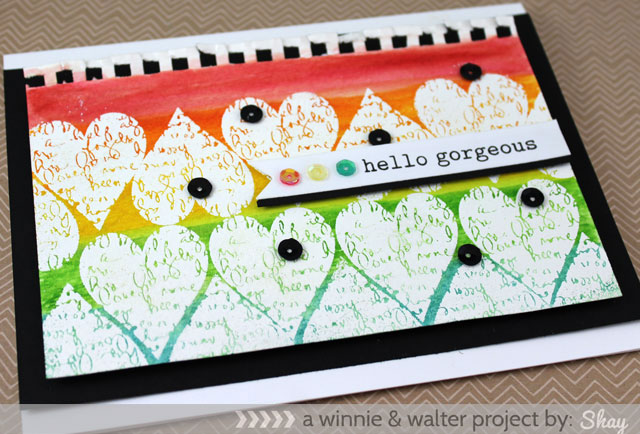
I pulled out the script heart from You've Got Love Mail and inked it up with Versamark and got to stamping on a piece of watercolor paper.  I heat embossed the hearts in stages with white embossing powder.  After I finished the heart pattern I pulled out Distress Ink in fired brick, spice marmalade, mustard seed, mowed lawn and broken china.  I smeared some of the ink onto an acrylic block and used a water brush to pick up the ink and add horizontal stripes of the color in a rainbow pattern.  With a damp rag I wiped off the embossed section to remove the ink.  

On a banner I die cut using a Papertrey Ink die, I stamped "hello" from The Big, the Bold, and the Happy and "gorgeous" from The Big, the Bold and You in onyx black Versafine ink.  I adhered that onto a piece of black cardstock and to the heart panel with foam dimensional adhesive.  Then I adhered the hearts panel with foam dimensional adhesive to a strip of black cardstock attached to a white card base.

shayhellogorgeous2

I finished up the card with some sequins, of course (I may need to enter a sequins support group soon!).

Hope you've enjoyed today's card and your Wednesday is as fabulous as you are!

Shay + Winnie (who is dozing loudly and contentedly in her studio chair)

Monday, May 12, 2014

Clean & Simple Mom

Happy Monday friends! Shay here today.  I hope you had a truly wonderful Mother's Day!

Today one last Mother's Day card for you.  As you could change the sentiment inside, this could also work for a mom's birthday, to say hello or to congratulate mom.  

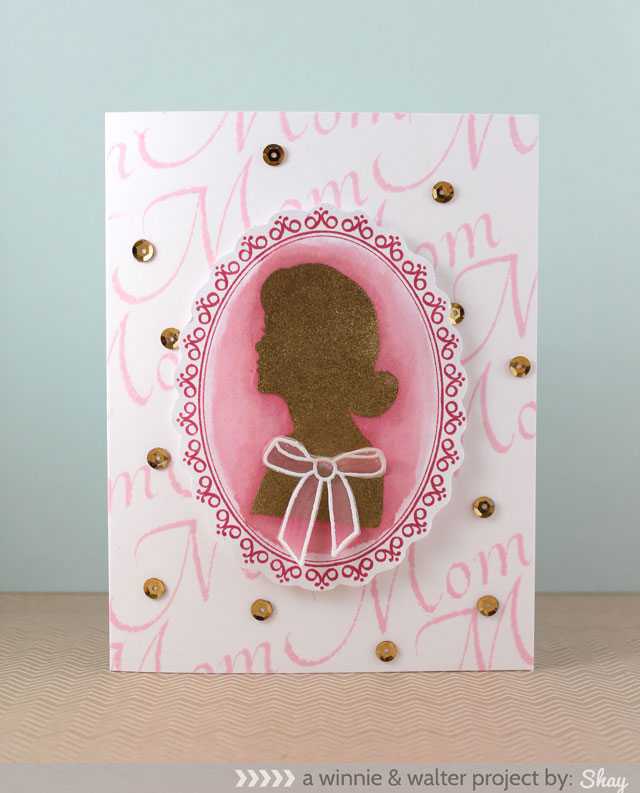
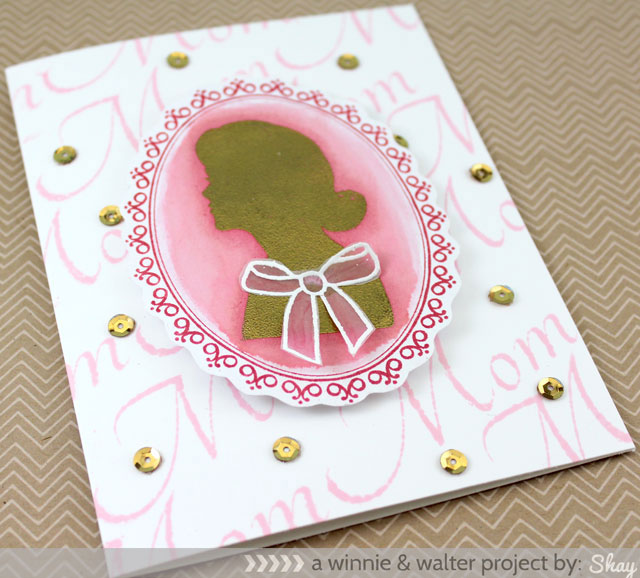
My mom happens to love pink so I went with a simple color scheme of pinks, white and gold for this card.

shaymother1b

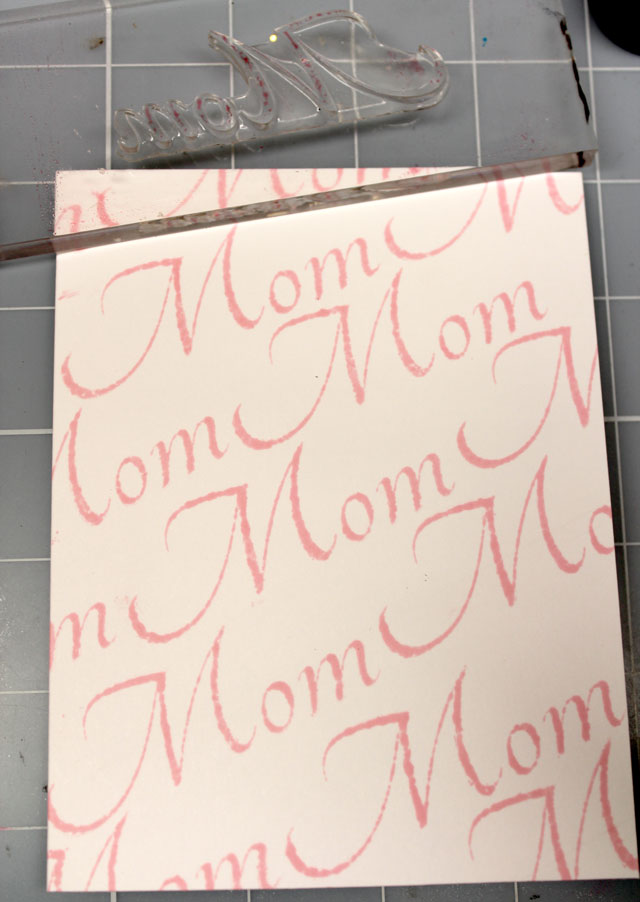
I began with a simple stamped background using the large "mom" from Parentville in spun sugar Distress Ink at a diagonal as pictured below.  It need not be perfect and I love the worn look the Distress Ink lends the "mom" when I stamp it for this particular card.

shaymother1a

I stamped the oval frame from The Write Stuff: Leave it to Mom in red and cut it out. In the center of the frame I stamped the silhouette in Versamark and then heat embossed it in gold.  With spun sugar, worn lipstick and fired brick Distress Inks and water I painted around the silhouette with the darkest colors surrounding the silhouette.  I adhered the frame to the card using foam dimensional adhesive.  And because I can't enough sequins I added a healthy sprinkling of gold sequins.  Last, I stamped the bow from The Write Stuff: Leave it to Mom in white on vellum and cut it out.  On the opposite side of the embossing I colored it in with tender pink (RV13) Copic.

shaymother1c

Well, that's it for today.  Hope you enjoyed this clean and simple card.  You could easily change out the "mom" for "you" from The Big, the Bold and You for a fun card for a friend, daughter, sister or anyone else in your life.

Have a fabulous and creative day,

Shay and Winnie (who is asleep on her chair but certainly wishing you a particularly fine Monday)

Friday, May 9, 2014

Celebrating Mother's Day

Happy Friday Everyone!

It's Julie here, and I have a couple of Mother's Day cards today.  You may remember back in March when I created a card for Mother's Day for my Mom.  This time I have two more important "moms" in my life that I would also like to celebrate.  

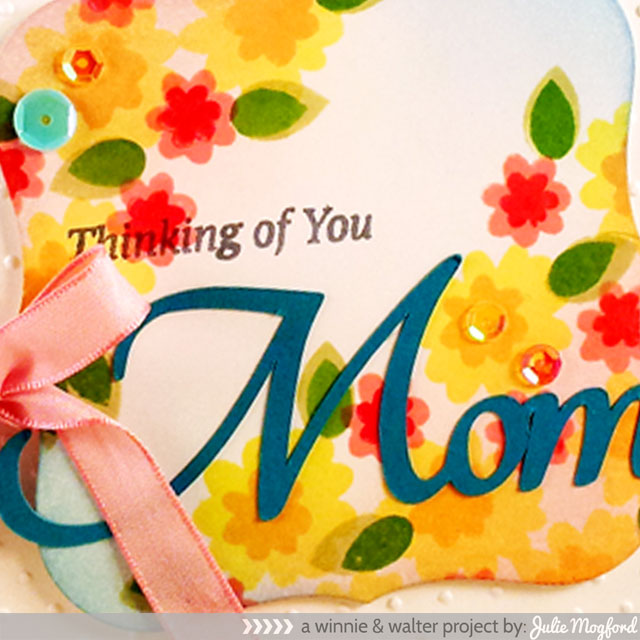
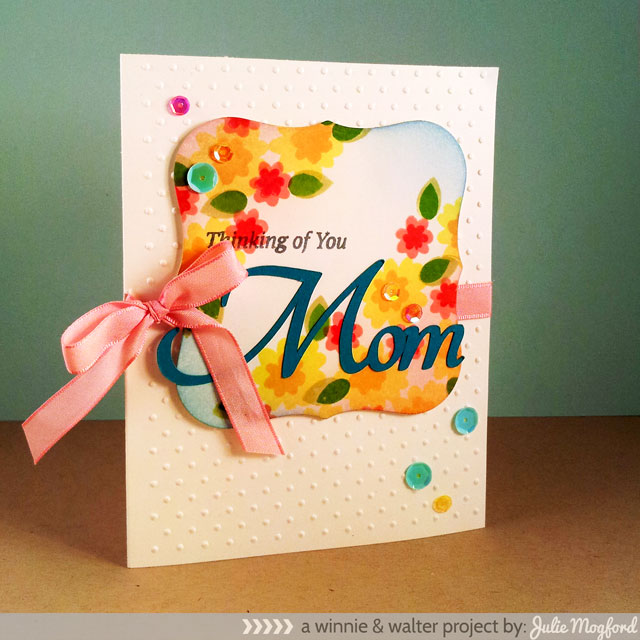
This first card is for my Mother-in-law, Sharon.  She loves flowers, but gets upset with Davis and me if we send her flowers.  So, I wanted to make sure her flower had flowers on it.  I really like using the flower trio in the The Write Stuff: Leave it to Mom, especially layering the flowers for more interest. 


jmog_w&w_mom2


I was inspired by the amazing Joni Nina Andaya, one of the fabulous ladies of The Talent, and the third card from this post led the way.  I started with white cardstock and marked off the general area where I would cut the Spellbinders die, and stamped the large flowers first to get the idea of the layout and then filled in with the smaller flowers and leaves. (Squeezed Lemonade, Dried Marigold, Festive Berries, Worn Lipstick, Shabby Shutters and Mowed Lawn)  After I finished stamping the flowers, I die cut the shape and then added distress ink in Tumbled Glass and Spun Sugar.  The "Thinking of You" sentiment is from Parentville is stamped in Memento Flannel Grey ink so it would stand out on the background, but still be a little softer than a black.  The Mom was cut using our Parentville cut file.  To simplify gluing the letters straight, I did some magic in Silhouette Studio software and it cut the word as one whole piece.  NICE!  The die cut panel is popped up on foam tape on my polka dot embossed card base (I can't remember the last time I did an embossed card base - I think I need to dig these out and play!)  and I threaded ribbon under neath and through the scored edge of the card.  I don't do many ribbons anymore, and I wasn't sure I needed it, but I do like the added pink. The final touch was to add the sequins.  I am really enjoying adding sequins to my projects.  I don't think I've mastered the art like Joni has, but I'm still learning.  LOL


jmog_w&w_mom2CU

Here is one more close up look at this card.  Perfect for mom Sharon!


The second card is for my sister Mandy.  I think she is doing an amazing job as a mommy!  Kamilla is her first child and it is so fun watching them together!  Happy Mother's Day Mandy!

jmog_w&w_you-are-awesome

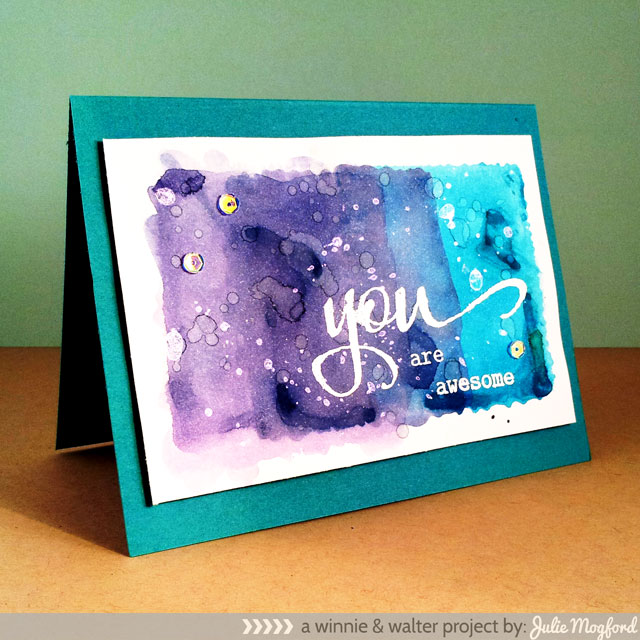
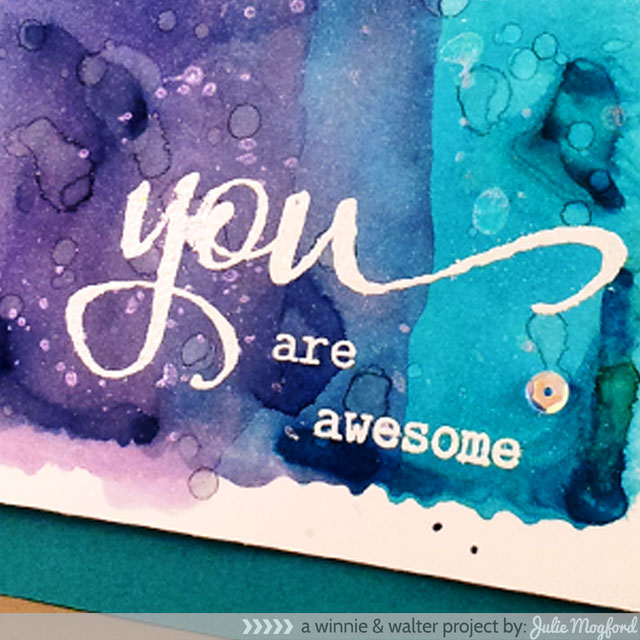
I am in love with the fabulous techniques I am seeing in the Online Card Classes: Watercolor for Cardmakers.  This class is already 4 days in and the lessons are awesome!  Very talented ladies over there!!!  I liked this particular technique so much that I had to give it a try.  Mine turned out a little messy, but hey - it's watercolor and I kinda like that look.  I added some sprinkles of water after the paper was dry and also added a sprinkle  of  Memories Mist Iridescent.  The colors were Peacock Feathers, Chipped Sapphire and Dusty Concord.  Love these together and they are so vibrant.  I stamped the sentiment from The Big, the Bold, and You with Versamark ink and embossed with Whisper White EP from Stampin' Up!  Last but not least, 3 more pretty sequins.  I like letting the texture of the watercolor technique take center stage and how the white sentiment stands out on this background.  I think I will be using this technique over and over!


jmog_w&w_you-are-awesomeCU


These two cards are so very different but both are easy to achieve.  Have you made any Mother's Day projects using Winnie & Walter products?  We would love to see your creations - join us on the Join in to Win page and link up.  Thank you for sharing your talents with us!

We hope you all have a wonderful Mother's Day weekend.  Enjoy spending time with your family, cherishing memories and making new ones!

Julie

Wednesday, May 7, 2014

Mother's Day in Purple

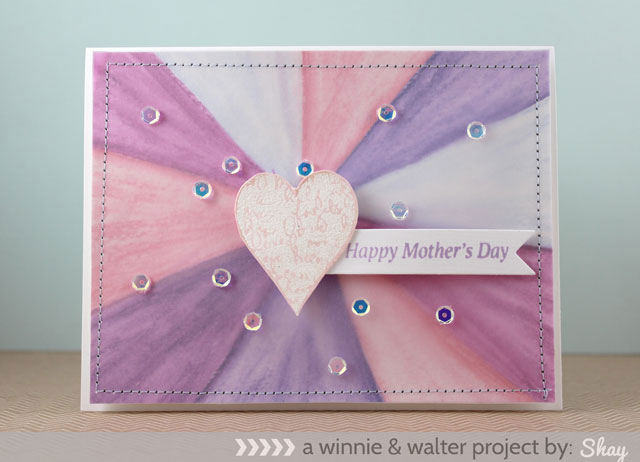
Hello there lovelies!  It is Shay here (Winnie is curled up in her chair in the studio helping out in her own special way) with a simple and easy Mother's Day card I made for my purple loving grandma.

shaymothersday1c

w&w stamps used: Parentville + You've Got Love Mail

If purple doesn't suit you or for the person you are sending a card it is very easy to change up the color palette.  Another way to customize this simple card is to create a different design other than a burst.

shaymothersday1a


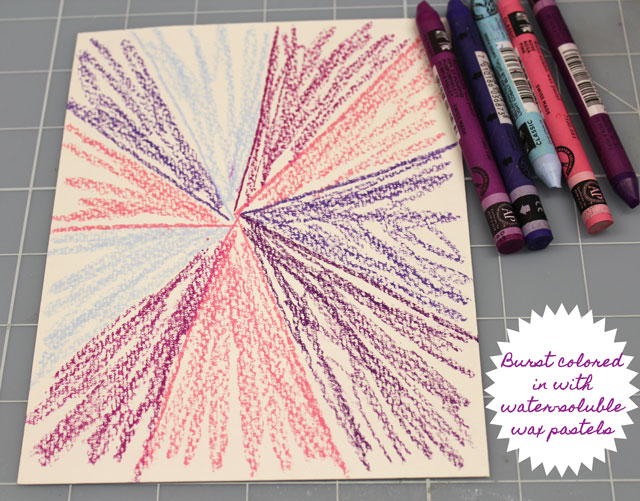
I began by watercoloring a background on watercolor paper using some Caran d'Ache Neocolor II water-soluble wax pastels in purples, a pale blue and pink.  I colored in the burst design--this is another way to alter how the image appears as you could color in a circular motion, horizontally, diagonally or some other direction.  Watercolor paints of your choice would work equally well here.

shaymothersday1b
 
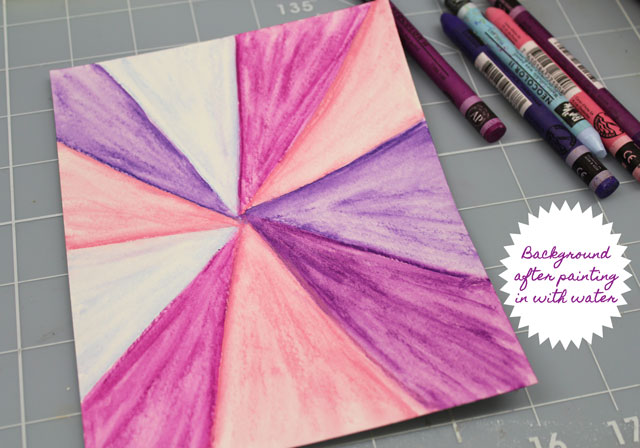
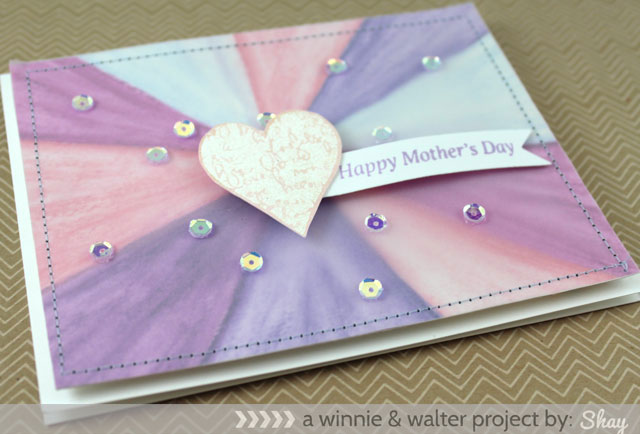
With a water brush I painted in the burst.  I then sewed on a layer of vellum over the watercolor panel.  This was all attached to a white card base with foam dimensional adhesive.  I white embossed a script heart from You've Got Love Mail and watercolored it in and sprayed it with shimmery sprays (this was actually sitting on my worktable waiting to be used).  I attached the heart to a banner cut with a Papertrey Ink die and stamped with the sentiment from Parentville in soft purple Hero Arts Shadow Ink.  Last I added some pretty sequins.

shaymothersday1d

This card was quite fast to make and it is full of pretty purples which I hope my grandma will appreciate.

We would love to see any Mother's Day projects you make using w&w products.  Simply link up on our join in to win! page and as a bonus you will be entered to win a coupon code good for a stamp set of your choice!

Have a wonderful Wednesday,
Shay and Winnie

Monday, May 5, 2014

Lots of Winners!

Happy Monday!  It's Shay here.  We hope you enjoyed Share the Love Week featuring Elle's Studio and our {inter}National Scrapbook Day celebration!  We had so much fun and were so thrilled with all the cards and layouts/spreads The Talent made (they can do anything!). 

A standing ovation for The Talent!!

Here's a rundown, if you didn't have a chance to check them out yet:

For Share the Love Week Featuring Elle's Studio  with Julie & Shay | Day 1 CLICK HERE.
For Share the Love Week Featuring Elle's Studio with Vanessa | Day 2 CLICK HERE
For Share the Love Week Featuring Elle's Studio with Heather & Julie|  Day 3 CLICK HERE
For Share the Love Week Featuring Elle's Studio with Kelly | Day 4 CLICK HERE
For Share the Love Week Featuring Elle's Studio with Joni | Day 5 CLICK HERE

And did you see the awesome sketch, layouts (layout using sketch + baby Kamilla layout) and cards Julie made?!?  Not only does she design awesome products, but she knows how to use them!

We still have the sale on our The Write Stuff stamp sets and coordinating cut files going on until midnight tonight if you want to pick up some fine memory keeping friendly stamp sets and cut files (they also are awesome for card making too).
Now let's announce the winners!!

>>>ELLE'S STUDIO $25.00 GIFT CERTIFICATE WINNER<<<

Tona (Comment No. 8)

>>>{INTER}NATIONAL SCRAPBOOK DAY THE WRITE STUFF WINNER<<<

Wendy (Comment No. 62)

>>>APRIL'S GIVEAWAY WINNERS<<<

And our random April giveaway winners.  Woohoo!

April's blog blinkie winner culled from those who linked up on the blog blinkie page:

KB Stamps by Katie Brooks

April's join in to win! comment winner culled from the w&w blog comments:

Margaret R.

April's join in to win! project winner culled from the project links on the join in to win! page:

My Love, My Heart, My Art by Scrapthat

Congratulations!

Winners please contact info {at} winniewalter {dot} com by Thursday, May 8 at 12:00 p.m. with which winner you are in the subject (for example April blog blinkie giveaway winner, April join in to win! comment giveaway winner, or April join in to win! project giveaway winner).  If we don't hear from a winner by Thursday, May 8 at 12:00 p.m. we will pick another winner in that category.

Giveaway winners:  we will provide you with a coupon code to use to purchase a free stamp set of your choice.  If the stamp set is not currently in stock, don't worry the coupon code will not expire immediately (and you can even use it to purchase new stamps being released later this month if you wait to redeem your coupon code).  Coupon codes can be used with purchase of other products.  Winner will be responsible to pay for shipping & handling.

Thank you to everyone who commented, added our blinkie to your blog and/or linked your fabulous projects.  Every single comment, linked project and blog blinkie placed on your blog is a gift to us.  

Remember these monthly giveaways are well, monthly...we are just saying. :-) 

Have an awesome day,
Shay (and Winnie)

Saturday, May 3, 2014

w&w sketch + iNSD + Elle's Studio = Julie's layout

Hello again friends,

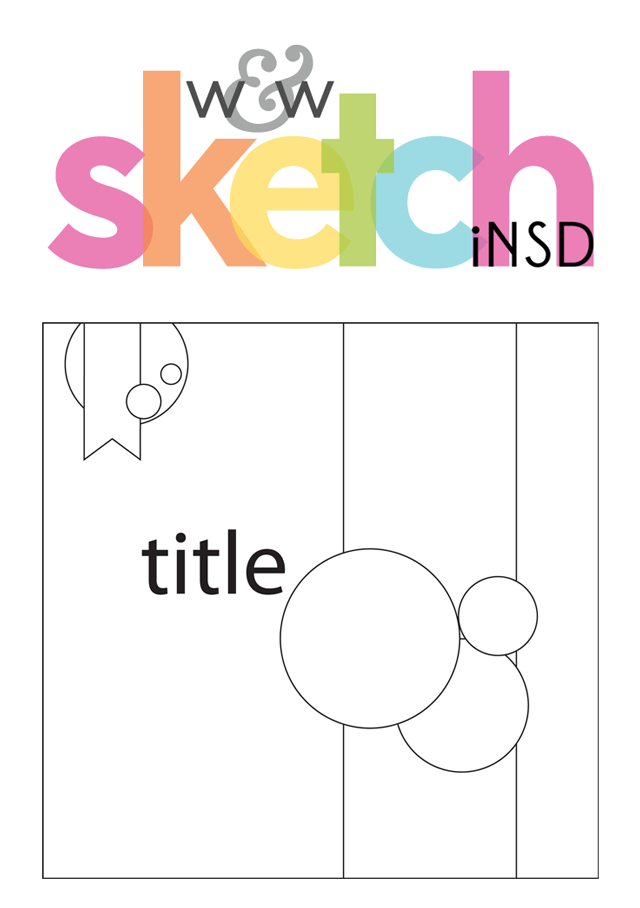
I'm back, and I have a project to share with you.  Earlier today, I posted this sketch ....

w&w_iNSD_sketch-2014promo

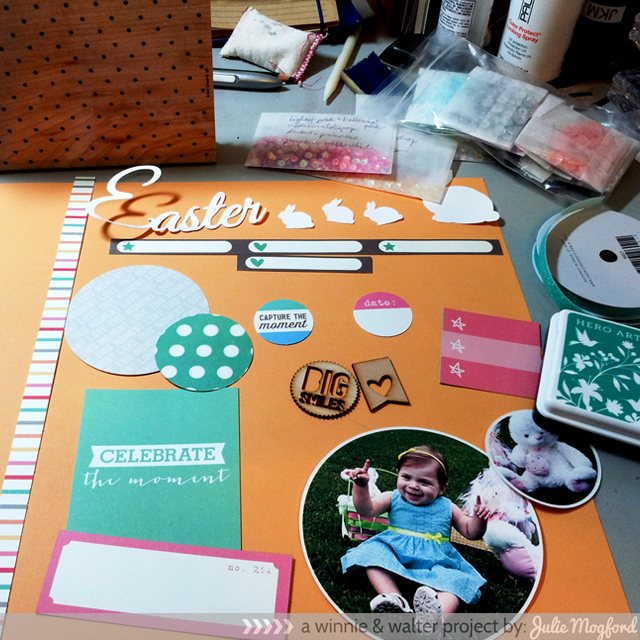
Ready for the results?  Ok - not so fast!  First, here is a pic of the supplies I gathered before making my project.

jmog_STL_iNSD_prj-supplies

I think the supplies take me the longest, so I knew from my sketch I needed some circles cut - some from the cameo, some from punches and one from my Cuttlebug.  I also pulled out my Elle's Studio supplies from the Everyday Moments Collection and looked through my stamps to see what supplies would work best.  This isn't all of them, and some are here that I didn't use. I also have a die cut "Easter" that I created with my Cameo, and I also cut some bunnies from this free template from Rebecca at her Simple As That blog.  I like how this project turned out.

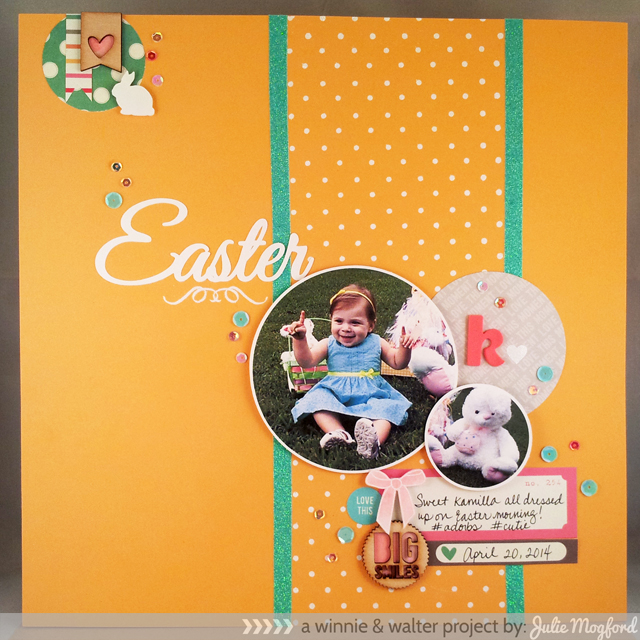
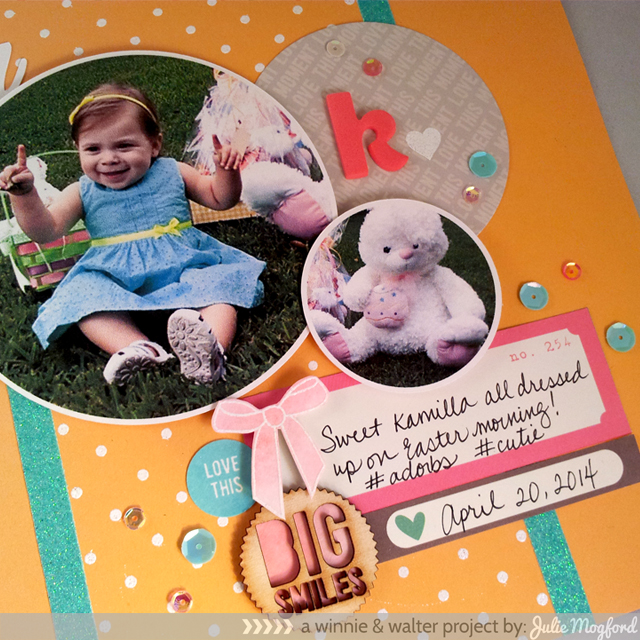
jmog_STL_iNSD_easter-layout
Parentville + The Write Stuff: Love Story + The Write Stuff: Leave it to Mom


If you didn't already guess, that is the same sweet little Kamilla that I used in my last project, except this is a current picture of her. I can't believe that is the same little girl - she is growing so fast.

I stayed pretty true to the layout, but I added several more elements at the bottom, and I got to use my stash of beautiful sequins (thanks Shay!).  The panel behind the circle photos is not a pattern paper, but a large background stamp called Polka Dot from Stampin' Up!  I have had this for years, and it is definitely a go to stamp.  I used Versamark ink and then embossed with SU! Whisper White EP. I wanted more of the aqua color on the page, so I used my American Crafts glitter tape to accent the panel.  Love the glitter, and love the not waiting for it to dry.  Yea!  The title has a little accent flourish from Parentville that was also stamped and embossed.


jmog_STL_iNSD_easter-closeup1

Elle's Studio products were very handy for this project.  The pink journaling ticket was just the right size and the cute little label with the heart - it is cut from the bottom strip of a 12x12 page - PERFECT! The poor bunny had no ears in the photo, but he was too cute not to include. And, he brought a little pink to the page. I needed more pink elements, but couldn't find any pink cardstock that I wanted to use, but then I happened upon a small piece of watercolor paper that was already pink!  LOVE MY SCRAP BIN!  I used the pink watercolor piece for three items - a backer to the BIG SMILES and Heart Tab (below) [Heather I'm crediting you with this idea!] and the little bow from The Write Stuff: Leave it to Mom, which was also stamped and embossed and then fussy cut (but it isn't too fussy, I must say - rather easy peasy).  I tucked in a LOVE THIS circle stamped in Hero Arts mid-tone Tide Pool ink from The Write Stuff: Love Story and punched it with a 3/4 inch punch - also easy peasy!  On the grey "love this moment" patterned paper circle, I added an American Crafts foam sticker K for Kamilla and a stamped and embossed heart, also from The Write Stuff: Love Story.  Then, I sprinkled sequins to my heart's content - I don't know if everyone else frets over the placement of these little "gems" but I do, and I don't think I'm great at it, but they do make me happy!


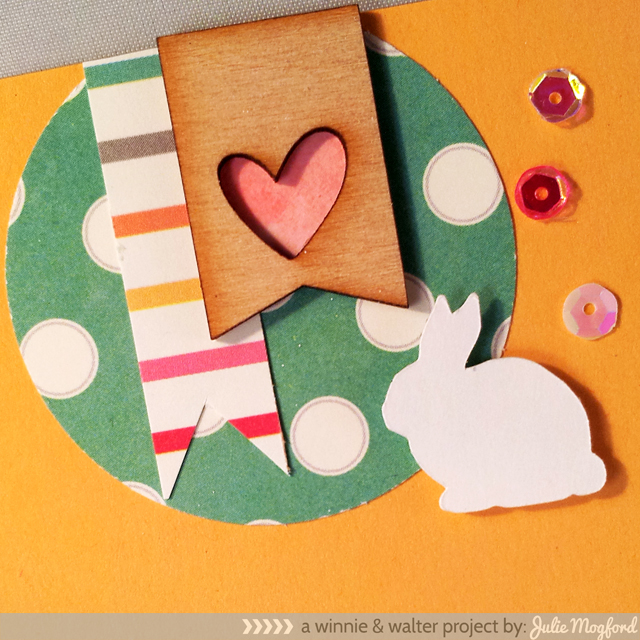
jmog_STL_iNSD_easter-closeup2

Here is a close up of the top cluster.  The aqua polka dot paper, the striped PP and wood veneer heart tab are all from Elle's Studio, with the addition of the pink watercolor paper, the oh so cute little rabbit die cut and the continuation of the sequins. The project took me longer than it should but I really enjoyed the process.

I really love using The Write Stuff stamp sets and digital cutting files because there are so many items to choose from and they work for many different kinds of projects - cards, scrapbooking, project life, One Little Word, and so much more.  And, in case you didn't know, all of our "The Write Stuff" product collection  is on sale 20% off  TODAY and TOMORROW (May 3-4, 2014).  If you haven't picked these stamps up yet, this is a great time to do that!

The Write Stuff: Love Story |  Stamps | Digital Cut Files
The Write Stuff: Leave it to Mom |  Stamps | Digital Cut Files
The Write Stuff: Leave it to Dad |  Stamps | Digital Cut Files


I hope this sketch and project inspires you to get crafty this weekend.

Julie

w&w iNSD Sketch

Hello!

Is everyone scrapping today?  I hope so!  I'm actually in the middle of a layout right now and wanted to post a sketch for a layout I am creating.  Maybe it will inspire you today.


w&w_iNSD_sketch-2014promo


If you make any projects today using our products,  we would love to see them over on the Join in to Win page! And, be sure to check out our Giveaway post!  You could be the lucky winner!!!  I will be back later today with my project.

Happy Scrapping and Crafting!

Julie