Wednesday, March 29, 2017

Special Guest Star Karolyn Loncon

special-guest-star-karolyn-loncon 

I am so thrilled today to introduce you to one incredibly warm, funny, vivacious, gifted and generous lady as our special guest star: Karolyn Loncon!  With her bright and ready smile, Karolyn immediately makes everyone feel at ease and like a friend.  Seriously, you could not meet a nicer or sweeter person and it is no wonder she leads such a full life as a wife, mother, grandmother and friend to many along with being on the design team of such superb companies as Avery Elle and My Favorite Things.

I know you will adore her and her projects as much as I do!

Please give Karolyn a big warm w&w welcome!

Well hello!!

I’m so thrilled and honored to be joining you all today to share a few projects that I created using some of my most favorite Winnie & Walter stamps and dies!  I’m so grateful to Shay for having me in today – she’s one of the sweetest human beings in our industry, and to have the chance to play with some of the newest Winnie & Walter products was such a blessing.  Thank you, Shay, for making me feel so special and appreciated!  Okay, let’s get to my projects, shall we?

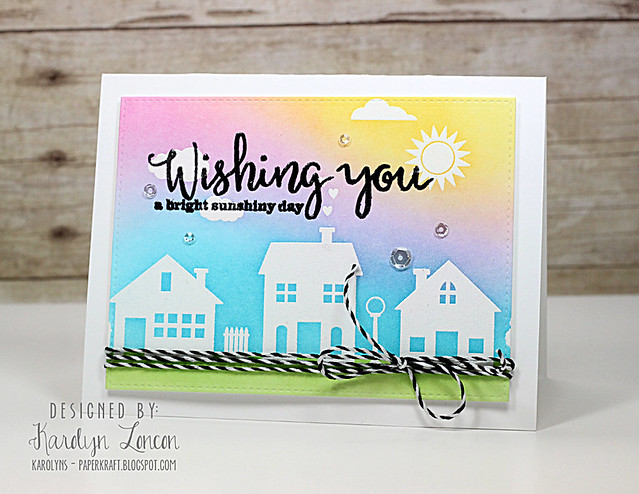
karolyn_loncon_Bright-Sunshiny-Day-W&W

My first project was so stinkin’ fun to create!  I was totally drawn to the solid images of the Our Town Stamp Set.  This stamp set is so versatile!  I saw the “holiday” possibilities, but I also saw the “everyday” aspect of this stamp set, too.  That’s what I decided to focus on with this project.  I stamped the houses, fence, lamp post, tree, hearts, clouds and sunshine onto an image panel using VersaMark Ink, and then I heat embossed the images using White Detail Embossing Powder.  I blended some Distress Inks to create a bright and sunshiny background, and die cut the image panel with a stitched rectangle die.  I stamped the sentiments from the Wishing You with Evelin T Designs Stamp Set using Onyx Black VersaFine Pigment Ink, and then heat embossed them with Clear Detail Embossing Powder.  I wrapped some black and white twine around the bottom of the image panel and tied it into a bow for my road!  I added my most fave Sparkling Clear Sequins with some Multi Medium Matte liquid adhesive, and then adhered the image panel to an A2 white card base with foam tape.  I’d like to think that this would brighten anyone’s day if it showed up in their mailbox.

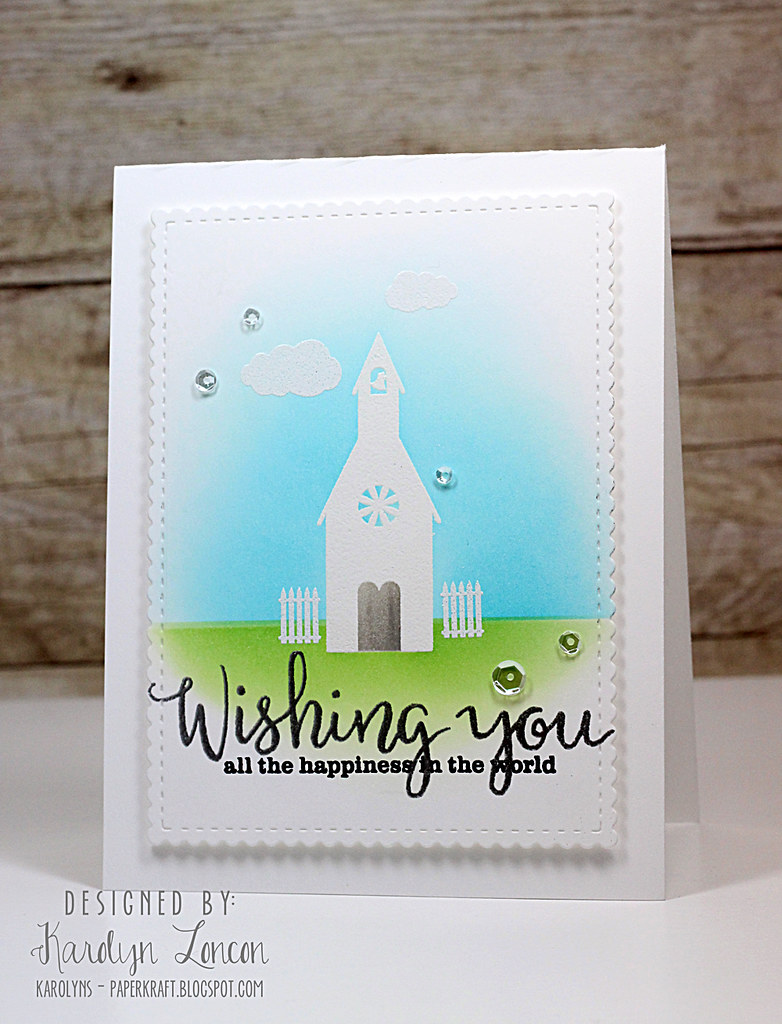
karolyn_loncon_All-the-Happiness-W-&-W

My next project again features the Our Town Stamp Set.  I thought that darling little church would make a perfect wedding card!  I stamped the church, fence, and clouds onto a white image panel with VersaMark Ink, and heat embossed them with White Detail Embossing Powder.  I masked off the horizon and lightly applied some Distress Inks for the grass and then the sky.  I also added a bit of gray distress ink in the space for the door – I thought it looked like an old church door after I did that.  Next, I stamped the sentiment, again from the Wishing You with Evelin T Designs Stamp Set, using VersaMark Ink, and heat embossed them with Silver Detail (“Wishing you”) and Black Detail (“all the happiness in the world”) Embossing Powders.  I die cut the image panel using a scalloped and stitched rectangle die, and adhered the image panel to a white A2 card base with foam tape.  Sparkling Clear Sequins added the perfect finishing touch.  The Our Town Stamp Set and the Wishing You with Evelin T Designs Stamp Set are both EXTREMELY versatile sets, and I will most definitely be using them often!

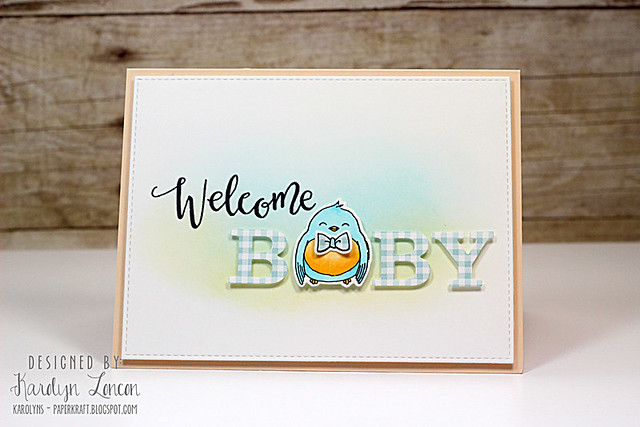
karolyn_loncon_Welcome-Baby-W-&-W

Oh my goodness, the LS Exclusives: So Tweet with Evelin T Designs Stamp Set just melted my heart when I saw it.  I had the great opportunity to meet the illustrator of this stamp set, Evelin Tee, at CHA a couple of years ago.  She would come by the Avery Elle booth and do our make and takes, and I instantly fell in love with her sweet nature and kind demeanor.  We looked forward to her and her friend, Anna, visiting the booth every day to do our latest make and takes.  So when I found out that she was illustrating for Winnie & Walter, it didn’t surprise me one little bit that her illustrations would steal my heart!  They are soooo stinkin’ cute!  I thought that chubby little birdie would be perfect for a baby card, and it paired perfectly with the Typecast: Cary Letters Cutaways! I die cut the letters from some blue gingham patterned paper and paper-pieced the bow tie using the same paper.  I stamped the birdie and colored him with Copic Markers and die cut him and the bow tie using the coordinating LS Exclusives: So Tweet with Evelin T Designs Cutaways.  I did a bit of light ink blending with some Distress Inks to create that soft background.  I stamped the “Welcome” (after doing a tiny bit of stamp surgery) sentiment from the LS Exclusives: So Tweet with Evelin T Designs Stamp Set onto the image panel using some black ink, and die cut the image panel using a stitched rectangle die.  I adhered the letter and bird (to replace the A) die cuts using some foam tape.  I adhered the image panel to a light peach card base.  Isn’t that birdie the cutest thing you’ve ever seen?!

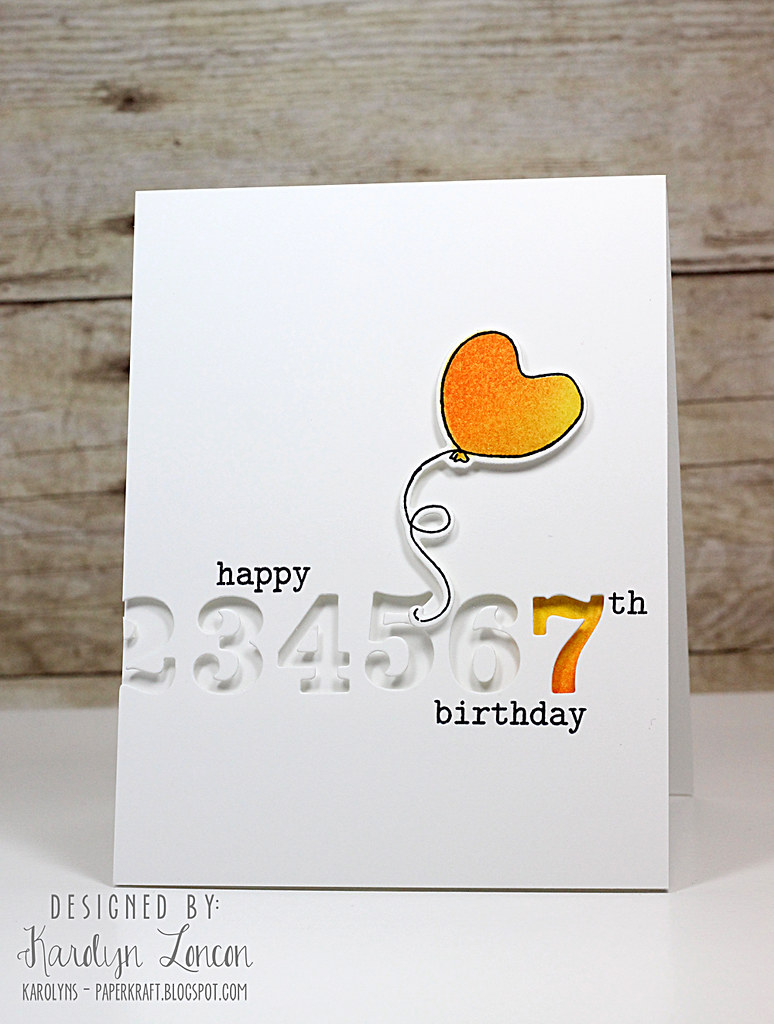
karolyn_loncon_Happy-7th-Birthday-W-&-W

My last project was created with my sweet grandson, Brecken, in mind.  He’s turning 7 in May, so I wanted to put a personalized card together for him.  The Typecast: Cary Numbers Cutaways made this task a breeze!!  I positioned the number dies a bit off center so that the “2” cut off at the left edge of an A2 white panel.  I cobbled together the “happy”, “th” and “birthday” from a couple of awesomely versatile stamp sets – “happy” and “birthday” came from The Big, The Bold & The Happy Stamp Set, and the “th” came from The Big, The Bold and You Stamp Set (again, after doing more stamp surgery to the word “the”)!  One of the things that I LOVE about Winnie & Walter’s stamps is that many of the sets use the same font for sentiments, so mixing and matching is awesomely easy!!!  Hello!! Versatility in stamps makes me so incredibly happy!!  I masked off and blended some Distress Inks onto the card base so that the “7” would stand out among all of those white letters.  Then I adhered the image panel to the card base with foam tape (I also adhered the number bits inside the number negatives).  As a last detail, I stamped the heart shaped balloon from the LS Exclusives: So Tweet with Evelin T Designs Stamp Set, created a mask for the balloon, and blended the same distress inks that I used for the “7” onto the balloon.  I die cut the balloon using the coordinating LS Exclusives: So Tweet with Evelin T Designs Cutaways.  I adhered it with more foam tape.  Easy, peasy!! I’m pretty sure Brecken is going to love this “just for him” birthday card made by Gramma!

So, there you have it!  I have had a blast creating for Shay and Winnie & Walter!  Their stamps and dies make designing a real pleasure!  I look forward to pulling out my Winnie & Walter stamps and dies on a regular basis!  Thank you, Shay, for inviting me to share with your readers – you are one in a million, my friend, and I’m ever so grateful for this wonderful opportunity.  I hope you all enjoyed my projects today.  Feel free to visit me at my blog, Paper Therapy, any time!  I love having visitors and making new friends!  So come on by whenever you have a chance!


w&w-supplies

Sunday, March 26, 2017

A Blog Named Hero's 5th Anniversary Bash {Giveaway}

ABNHbadge  
Hello Lovelies and Welcome!

It's Shay here and I am so happy w&w can participate in this 2 day hop in honor of A Blog Named Hero's 5th Anniversary.  We were a sponsor a while back and loved working with the talented ladies of A Blog Named Hero!

You should have come from the incredible Kathy Racoosin's blog.  If you are lost please go to A Blog Named Hero.

Each of the 2 days will have different prizes so be sure to visit A Blog Named Hero for more details on Saturday's post.

Now that you know where you are and hopefully are in the correct place, let me share a couple of simple cards I made for you.

shay_IMG_4117

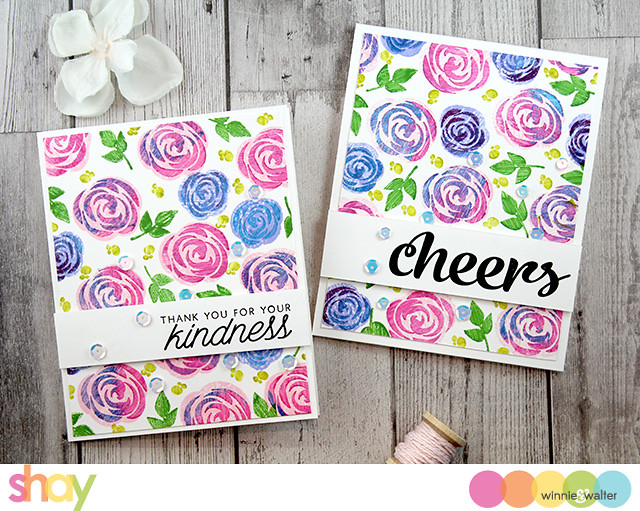
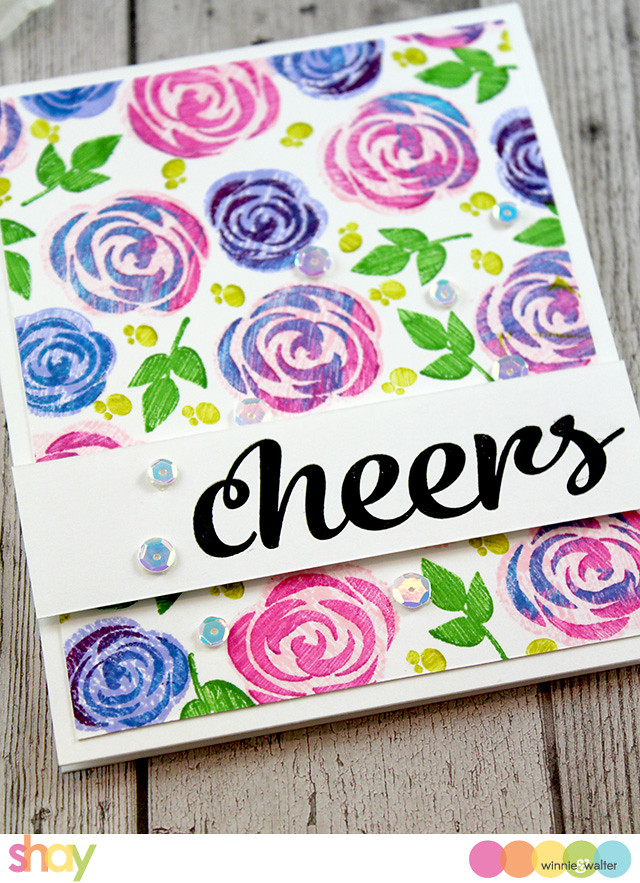
Big surprise I decided to concentrate on stamping a background for my cards and I used In Bloom: Lola's Bouquet with Joni Andaya on white cardstock.  I stamped the larger and middle sized solid roses in Tim Holtz Distress Inks (larger in spun sugar and the smaller in shaded lilac) and then stamped the coordinating modern rose detail for the larger rose in picked raspberry adding some other colors at times salty ocean, mermaid lagoon and seedless preserves and for the medium rose in seedless preserves, salty ocean and mermaid lagoon. The leaves were stamped in mowed lawn and the dots in crushed olive.

I then adhered the panels to white card bases and added the sentiments ("cheers" from My Monthly Hero December 2016 which just happens to still be in stock and "thank you for your kindness" from Acts of Kindness CL911--a must have) I stamped with Versafine in black on a strip of white cardstock and adhered with dimensional foam adhesive.  Lastly I added some sparkly sequins.

shay_IMG_4121

I hope you have enjoyed my cards and you are inspired to ink up your Hero Arts stamps! :-)  A big congrats to Jess + Lisa and everyone at A Blog Named Hero.  Wishing you many, many more happy years of creating and inspiring.

Your next stop will be the awesome Studio Katia!

>>>GIVEAWAY<<<

A Blog Named Hero is so thankful for our wonderful sponsors and collaborating companies!  Several companies decided to help us celebrate our fifth anniversary with giveaways and they were so generous that we decided to spread the love over both hop days with different prizes to be won each day!  Giveaway prizes total more than $500!  To win, leave a comment on each hop stop.  We will select winners randomly from different blogs so the more blogs you visit each day, the greater your chances of winning!  And be sure to visit the Saturday post from A Blog Named Hero for the list of Saturday hoppers and prizes!  Comments must be left before 11:59 PM EDT on Tuesday, March 28th and winners will be announced on March 30th.

Today's prizes include the following: 


  • $50 gift card to Simon Says Stamp
  • $50 gift card to Gina K Designs
  • $25 gift card to Winnie & Walter
  • $25 gift card to Lawn Fawn
  • $20 gift card to Avery Elle
  • prize pack from Mama Elephant
  • gift card from Studio Katia
  • one Online Card Class of your choice
  • one set of distress oxide inks from Jennifer McGuire Ink

  • Good luck and happy hopping!!**

    Saturday, March 25, 2017

    March Leading Lady Nicole Picadura | Take Four

    Nicole_Picadura_march2017 

    As March comes to an end we must sadly bid adieu to our marvelously talented March Leading Lady, Nicole Picadura.  The last four weeks with Nicole have been full of awesome projects and wonderful videos.  Each project and post has been a delight with exceptionally crafted cards so thoughtfully executed and designed.  I feel so incredibly fortunate Nicole shared her talents with us this month!  

    If you missed her smashing debut you must see it...CLICK HERE or sensational second performance CLICK HERE or her triumphant third performance CLICK HERE.   

    Lucky for us all we have her final command performance today. 

    Hello there! One of the all-time go-to technique I like to use on cards is ink blending. This creates not only a wonderful background to set the tone for your card, but also allows us to get more usage out of any dye inks we already have. Today marks the last day for me to share a project using Winnie & Walter's recent release! I wanted to create something warm but bold, colorful, and a lot of texture in the background. So, ink blending and detailed die cutting were the route I took in creating this card.


    One of the best ways to bring new life to your old and new products, in my opinion, is by mixing them up together. For this card, I am using the Cover Model: Multifaceted Cutaway (old product), Typecast: Cary Letters Cutaways (new product), and Sentimental: Love stamp set (new product). You can create a limitless number of cards by mixing up products together! To create this card, I first blended three ink colors on a bristol paper. Quick tip - if you ever had issues with getting a smooth, well-blended ink background on a regular cardstock, check out a bristol paper. You are going to LOVE working with inks on this paper. They blend effortlessly!!


    After ink blending, I adhered some double sided tape on the back of it (without peeling off the backing yet) and then ran it through my die cutting machine using the Cover Model: Multifaceted Cutaway. You get the above results so easily! Then you will want to peel off the adhesive backing and attach the whole die cut piece onto a white cardstock. (You can also attach to the card base directly) I dropped some water on the die cut piece and blotted with a clean tissue to create a bleached look. If you use any water-based dye inks or distress inks, you will be able to get this result right away.


    For sentiments/focal points of the card, I used the Typecast: Cary Letters Cutaways multiple times to create a dimensional "YOU" word and stamped one of the greetings from the Sentimental: Love stamp set and heat embossed it in white on a black paper. The strip of the embossed sentiment was attached using some foam dots to create more dimensions on the card. A few clear droplets were a perfect finishing touch to bring everything together. I hope you've been enjoying seeing projects from me every Saturday of this month! If you were inspired and creating something and had fun, that means I did my job correctly! Thank you very much for spending each Saturday with me! Hugs!


    w&w-supplies

    Friday, March 24, 2017

    Celebrate Your Day with Lydia

    Hello there Winnie & Walter fans and happy Friday to you!

    Today I have a card to share using Sketchy Thoughts. This is such a super fun stamp set and the funky fonts of the sentiments make this great for those tricky 'teenager' cards.


    I stamped the large speech bubbles over my card base, this was so quick to do as the images are quite large. I then stamped the sentiment into place and added the stars from the stamp set and some of the dots from Framed with Evelin T Designs around it. I then felt like this wasn't enough, so I stamped the sentiment again this time onto some black card and heat embossed with white embossing powder. I cut around this and added it on top of the sentiment I had stamped before, this gave much more contrast.


    I then added some swirly black gem embellishments that had been in my stash forever, I'm so glad then now have a home on a project.

    That's it from me today but I'll see you again soon!

    Hugs, Lydia x


    w&wDT_lydiaevans_blog-sig 2

    w&w-supplies


    Saturday, March 18, 2017

    March Leading Lady Nicole Picadura | Take Three {Video}

    Nicole_Picadura_march2017 

    Our March Leading Lady, Nicole Picadura is back for her triumphant third performance!  If you missed her smashing debut you must see it...CLICK HERE or her soft and textured beautiful second performance CLICK HERE.   Today she brings you another artfully crafted and impeccably made card with a video tutorial!

    Without further ado, Nicole....

    Hello! One of my good friends is expecting a baby boy in the summer so I wanted to create a card for an upcoming baby shower for her. (And, an excuse to use blue colors is always welcome!)

    Friday, March 17, 2017

    w&w 3rd Birthday Bash | Challenge Winners

    This is our second post today.  To see Lydia's post CLICK HERE.

    It is beyond time to announce the random challenge winners of our month-long 3rd Birthday Bash Challenges!

    We treasure each of your comments and for creating such magnificent art with our products.  It humbles us mightily.  We may need food, water, sleep and shelter to live, but it is you that is one of the things that makes the living rewarding! :-)

    >>>3rd BIRTHDAY BASH CHALLENGE WINNERS<<< (randomly chosen)


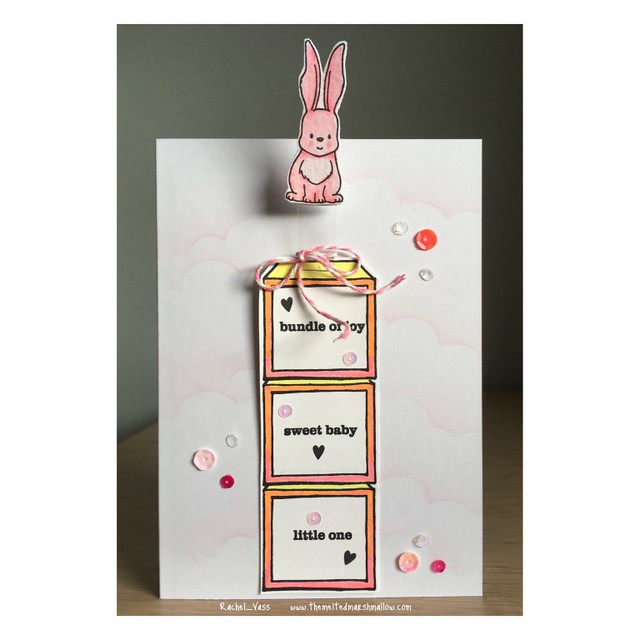
  • Three Challenge with Shayrachel_vass_shay_challenge_IMG_1516
  • No. 14 Rachel Vass

  • Cute Critters Challenge with Gayatri
  • preeti_d_gayatri_challenge 
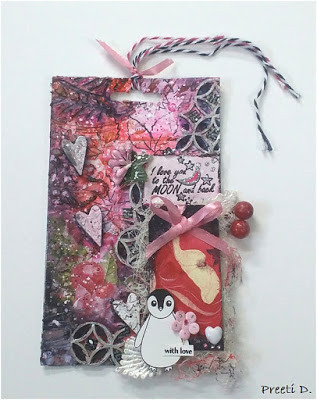
    No. 4 Preeti D.

  • Ink Smooshing with Heather H

  • ashwini_ink_smooshing_heather_h_challenge_32968267536_b501b5ac64_z 
    No. 16 Ashwini


  • Mood Board Challenge with Heather P 

  • jessica_lin_heather_p_challenge_IMG_3771 
    No. 89 Jessica Lin


  • Sequins Challenge with Kate
  • maraym_kate_challenge_img_9057 
    No. 22 Maryam
    No. 59 Sue LD
    No. 24 Andrea Shell 
    No. 9 Pooja
    No. 21 Dee Earnshaw

    Congratulations!

    Winners please contact info {at} winniewalter {dot} com with which winner you are in the subject (for example Three Challenge with Shay Winner).  


    Challenge giveaway winners:  we will provide you with a coupon code to use to purchase $75.00 worth of product at the w&w shop of your choice.  If the products you want are not currently in stock, don't worry the coupon code will not expire immediately.  Coupon codes can be used with purchase of other products.  Winner will be responsible to pay for shipping & handling.

    Thank you to everyone who entered our challenges.  Every single project entered is precious to us. 

    As for the winner of the Guest Star Competition that will be announced at a later time as there are so many incredible entries. :-) 

    You Complete Me with Lydia

    Hello and happy Friday everyone! I'm so happy to be back on the Winnie & Walter blog today as it feels like ages since I've been here.

    So today I have a rustic-spring time card using a couple of different Winnie & Walter stamp and die sets.


    I started by stamping some of the branches from Framed with Evelin T Designs onto some cream kraft card in an olive green ink. To fill in some of the bigger spaces in the background I stamped with the spot cluster from the same set. I just love how rustic yet fresh that background looks!


    As I didn't want to take much focus away from the background I decided to create a simple sentiment focal point. I stamped a sentiment from Sentimental: Love onto some wood effect paper and heat set it in white. I cut this using the small ticket shape from Essentials: Lana Cutaways, added some thread (the same colour as the background stamping)behind the ticket and layered this onto some vellum cut using the smaller card layer from the same die set.

    Thank you so much for stopping by and I'll see you again soon!

    Hugs, Lydia xxx

    Editor's Note: Coincidentally both Lydia and Kelly used the same sentiment from Sentimental: Love and Framed with Evelin T Designs this week on the w&w blog with completely different and yet incredible results!


    w&wDT_lydiaevans_blog-sig 2

    w&w-supplies

    Thursday, March 16, 2017

    w&w 3rd Birthday Bash | The GIGANTIC Giveaway Winner Revealed

    First, a very GIGANTIC thank you to one and all for joining in our 3rd Birthday Bash.  Each of you made our birthday so much more spectacular.  We would not be able to celebrate our third year without you!

    Second, you will want to know who won all the w&w stamps we release in 2017!

    Drum roll please...

    And the winner is... 
    birthdaybashgiganticwinner

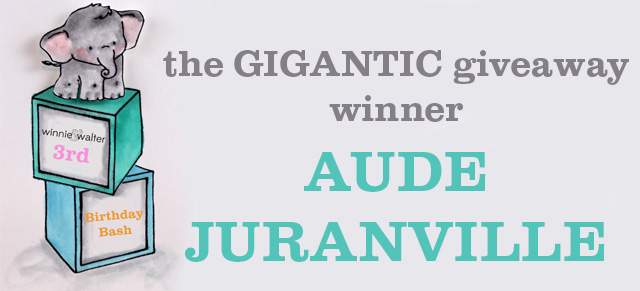
    Congratulations, Aude Juranville!  We will be emailing you. :-)

    Watch out this weekend when we announce our random 3rd Birthday Bash challenge winners!