Wednesday, November 30, 2016

Wishing You Joy with Gayatri

Hello everyone, This is Gayatri. I am here sharing my project using Winnie & Walter's newly released November products. The new products did not arrive on time, hence was not able to participate in the premieres and blog hop. So I will be sharing my projects I made using the new products over a few days this week and next.

The stamp set and coordinating cutaway I am showcasing today are Frenchy's Festive Florals.


This set is very pretty. Love the delicate images. And it is always great to have coordinating dies for every image. Here is my card.

Wishing You Joy!

I stamped the images from the stamp set using a mixture of pigment and dye ink and die cut them all out. I gold heat embossed the "JOY" sentiment and die cut. The two rectangles are die cut using Essentials: Katherine Cutaway. I sponged Peacock Feathers distress inks on top of the smaller white rectangle panel.

Wishing you Joy closeup

I clustered glued the die cut images on the top right corner of the smaller panel. Then below to the cluster to the left I adhered the "JOY" die cut sentiment using foam adhesives. Then I stamped the smaller sentiment on strips of white cardstock. I adhered these strips using foam adhesives.

I adhered the smaller panel over the larger panel using foam adhesives and the whole panels to the card base flush using scor tape. The larger panel is pattern paper from My Mind's Eye Charmed collection. I finally embellished with Pretty Pink Posh Sparkly Clear sequins.

Wishing You Joy flat

Hope you are inspired. Both the Frenchy's Festive Florals and coordinating Cutaway are available for purchase from Winnie & Walter Store.

I will share more projects using the new release in the coming days.
Thanks for stopping by today.

My blog signature


w&w-supplies

Saturday, November 26, 2016

November Leading Lady Jessica Frost-Ballas | Take Four

Jessica_Ballas-Frost_november2016

Sadly November is coming to a close so we must bid adieu to our positively radiant November Leading Lady, Jessica Frost-Ballas.  The last four weeks with Jess have been full of brilliant color, and design.  Each project and post has been a delight.  I feel so blessed Jessica shared her talents with us this month!  

If you missed her smashing debut you must see it...CLICK HERE or her sensational second performance where she made us swoon over her stunning cards in an elegant and dramatic color scheme...CLICK HERE!  For today's performance Jessica takes us through an gorgeous journey through the seasons. or her triumphant third performance featuring a gorgeous journey through the seasons CLICK HERE.

Lucky for us all we have her final command performance today. 

Good morning! Jessica here for my final Leading Lady post. :( I can't believe how fast November has flown by! I have greatly enjoyed my time on the Winnie & Walter blog and thanks so much to Shay (and Winnie!) for having me! :) For my last post I decided to focus on something else I love: interactive cards!


 I have always loved sequins and beads (pretty much anything sparkly) and you just can't help but smile when you shake around a card and watch all those pretty metallic bits shimmer and sparkle as they bounce around! As I mentioned last week I fell head over heels for the adorable critters in the last release and wanted to focus on them! I stamped the owl pair from Happy Owlidays with Evelin T Designs onto white cardstock with copic-friendly ink and then colored them with copic markers. I went with non-traditional holiday colors of teal and peach! I used the coordinating dies to cut them out and set them aside while I worked on the rest of the card.


 I stamped the scalloped banner from Framed with Evelin T Designs onto vellum with versafine and heat-embossed it with clear embossing powder. I also stamped and heat-embossed my sentiment from Happy Owlidays with Evelin T Designs. Next I fussy cut the banner and cut off the stakes to create a freestanding hanging banner. I used the Essentials: Carly Cutaways circle die to die-cut a white A2 panel for my shaker frame. Then I added a layer of acetate behind the frame and built up the back of the panel with foam mounting tape. I filled my shaker with a mix of peach, pink, gold, and clear sequins and tiny teal beads. At the last second I decided to make my shaker background colorful so I painted a piece of watercolor paper with scattered straw, wild honey, and worn lipstick distress ink and once it was dry I heat-embossed it with holographic embossing powder. I sealed my shaker with the watercolored background to create a frosty sunrise. Finally I adhered my banner and my owls to the front of the shaker with liquid adhesive.


 My last card appears to be a normal scene card but there's a little surprise that I'll share later! ;) I stamped the igloo and penguin from Season's Tweetings with Evelin T Designs onto white cardstock with copic-friendly ink and colored them with copic markers before die-cutting them with the coordinating cutaways. Next I worked on my wintery background. I smooshed evergreen bough, chipped sapphire, dusty concord, and black soot distress ink onto a craft mat and spritzed it with water before pressing a piece of watercolor paper into the ink. I repeated the process several times drying the ink with my heat gun between repetitions. When the ink covered the entire background panel I dried it for the last time. Then I flicked it with water droplets and let them sit on the panel for 30 or 60 seconds before blotting the excess water off to create the faded white splotches. I also used a toothbrush to flick white acrylic paint onto the background to create brighter "snow." While the acrylic paint was drying I die-cut the In a Word: Noel cutaway with silver glitter paper and white cardstock and adhered them together to create a rigid sentiment. I adhered that to my background with liquid adhesive. Next I tore strips of white cardstock to create a snowy ground for my scene. I adhered those to the background and then added my penguin and igloo. I punched a few holes through some of the Christmas lights on my igloo and made sure they went all the way through the background panel....


 ...so I could create a LED circuit underneath my card to light up a few of my Christmas lights! I also used a twinkle effects sticker so that my lights would blink on and off when you press the penguin's belly. In the above photo I used a paperclip to squeeze together the circuit so you could get the effect without my finger in the way! You can also see areas where I didn't have a layer of foam mounting tape on the back of the watercolor panel so it appears lighter in some spots...I think it kinda looks like the Northern Lights which was totally unintentional but I love it! I used white LED stickers but colored them with copic markers to create the colored lights. It's a fun surprise to see the lights light up!

 And that's curtains for me!! Don't forget to comment on any or all of my previous Leading Lady posts for a chance to win a $30 gift certificate to Winnie & Walter! Thanks so much for visiting each weekend and I hope I inspired you to break out those Winnie & Walter stamps and get crafty! Have a wonderful holiday weekend!


w&w-supplies

Friday, November 25, 2016

Black Friday - Cyber Monday Sale Free with Qualifying Order Stamp Set!

We have some projects to inspire you using the In Bloom: Julie's Roses stamp set that is free with purchase (while supplies last) when you spend $35 after discounts are applied and prior to any shipping & handing and taxes being applied from 12:00 a.m. on Friday, November 25, 2016 until 11:59 p.m. Monday, November 28, 2016.

w&w_IBJulie'sRoses_4x6_web

You need not do anything we will simply add it to your order if you qualify.

Time to get to...

>>>THE GOOD STUFF<<<

Shay

Hello lovelies!  A little about this stamp set...I have wanted bigger versions of the roses from The Big, the Bold and Extras for a while now so I when I was thinking of a good set for the Black Friday thru Cyber Monday Sale I went to this one.  I added in a few little sentiments that are classics, added a border and I think this set is a pretty good basic now.  I named it in honor of Julie, the co-founder of w&w, as these are the first flowers she designed that inspired the In Bloom series.  I felt it was about time she had a set named after her!

I have a couple cards for you today using In Bloom: Julie's Roses.

shay_IMG_4070

For my first card I stamped the outline roses three times using black ink and then colored in the roses using watered down black ink.  I stamped the centers in with black ink.  I cut the roses out.  On a white panel I stamped the solid leaves in black.  I flicked watered down black ink over the panel.
I adhered the roses over the leaves.  I cut out the In a Word: Shine Cutaway from charcoal glitter paper from American Crafts.  I adhered the shine panel onto an A2 card base.  I stamped the border from the stamp set in red and cut it out and added it to the bottom of the panel.  Last I scatterd gems about.

shay_IMG_4072 

For my second card I wanted to create a background using the roses.  I first stamped the large banner from Framed with Evelin T Designs.  I then made a mask of the banner.  I stamped the outline roses all over the panel in black ink.  I stamped over a few of the outline roses with the solid roses in red and yellow inks.  I removed the mask.  I added some shading with black ink and a waterbrush.  I stamped the sentiment from Sending You with Evelin T Designs (will be available for purchase in 2017).  I adhered the rose panel onto a layer of black cardstock.

shay_IMG_4073

Now it's time for some dazzling inspiration from the Talent.

>>>THE TALENT<<<

Sending Cheer card 
CLICK HERE to see more from Gayatri.

heather_Cards-11-19-16-148 
CLICK HERE to see more from Heather Hoffman.

heatherp_112516
CLICK HERE to see more from Heather P.

 keren_IMG_9263 
CLICK HERE to see more from Keren.

WW_BLACK_MAYURI_NOV2016_RGB_1898 
CLICK HERE to see more from Mayuri.

vanessa_blackfriday1
CLICK HERE to see more from Vanessa.

We wish you a delightful weekend full of all you most cherish.

Much love,
Winnie and Shay

Wednesday, November 23, 2016

Yes, the w&w Black Friday - Cyber Monday Sale is On!

We want to share how very thankful we are for you!  We are so blessed to be a part of your lives and that you use w&w products to make something handmade and beautiful--what a privilege and honor you bestow upon us each and every day!  Every comment, email, post, project and link shared warms our hearts.   Thank you.

Part of Thanksgiving is giving back.  Yes, Black Friday is a commercial event, but it also about us sharing with you.

Interested in more details about our Black Friday thru Cyber Monday Sale (CST)?  Here you go:

Black-Friday-Square-Ad-2016

Come back Friday at midnight CST here on the w&w blog for inspiration for our free with qualifying purchase stamp set.  This one is not limited edition, but it will not officially be released until 2017.

Tuesday, November 22, 2016

November 2016 Release | Giveaway Winners

Hello all!  We are ready to announce the winners of the November 2016 Release giveaways and to tell everyone how much we treasure each of your comments.  It humbles us mightily.  We may need food, water, sleep and shelter to live, but it is you that is one of the things that makes the living rewarding! :-)


>>>NOVEMBER 2016 RELEASE GIVEAWAY WINNERS<<<


Winner of Mini Scenery: Marbleize, Mini Scenery: Merry Berry, Sentimental: Winter, The Big, the Bold and Greetings, In a Word: Bright Cutaway, In a Word: Noel Cutaway, In a Word: Shine Script Cutaway, In a Word: Wishes Cutaway + The Big, the Bold and Greetings Cutaway (Premiere Day No. 1)

day1.winner

Winner of In Bloom: Frenchy's Festive Florals with Angelica Suarez, Scenery: Holiday Trimmings, Sending You with Evelin T Designs, Wishing You with Evelin T Designs, Essentials: Carly Cutaways, In Bloom: Frenchy's Festive Florals with Angelica Suarez Cutaway + Scenery: Harleen Creative Screenings (Premiere Day No. 2)
day2.winner

Winner of Framed with Evelin T Designs, Typecast: Cary + Framed with Evelin T Designs Cutaways (Premiere Day No. 3)
day3.winner

Winner of Happy Owlidays with Evelin T Designs, Season's Tweetings with Evelin T Designs, Happy Owlidays with Evelin T Designs Cutaways + Season's Tweetings with Evelin T Designs Cutaways (Premiere Day No. 4)
day4.winner The Big Giveaway (all 11 stamp sets + Sending You with Evelin T Designs, our free with qualifying purchase):

big.giveaway.winner

>>>TOUR OF THE STARS<<<

Each randomly chosen winner will receive $30.00 credit to the w&w shop.

w&w blog Comment No. 58
tourofstarswinner1


Virginia's blog Comment No. 18
tourofstarswinner2


Heather P's blog No. 25
tourofstarswinner3


Kelly's blog Comment No. 30tourofstarswinner4

Vanessa's blog Comment No. 57
tourofstarswinner5 


Winners please contact info {at} winniewalter {dot} com by Monday, November 28 at 12:00 p.m. with which winner you are in the subject (for example Premiere Day No. 2 Winner) along with your name and mailing address unless you are a Tour of the Stars Comment Winner--just email us your name.  If we don't hear from a winner by Monday, November 28 at 12:00 p.m. we will pick another winner for that challenge (and we really, really hate to do that!!).

Thank you for all your comments during our November 2016 Release!  

Saturday, November 19, 2016

November 2016 Release | Tour of the Stars

tour of stars blog banner Welcome to our Tour of the Stars (aka blog hop) to celebrate the November 2016 Release.  We are showing you inspiration for the just-released eleven (11) stamp sets + ten (10) cutaways + one (1) creative screenings to you this weekend and should you like to purchase them they are ready to buy right now in the shop.

As a bonus from now through November 24 when you make a qualifying order of $25.00 you will receive Sending You with Evelin T Designs***.

***About the limited time Free With Purchase Sending You with Evelin T Designs:
  • Order must be placed from November 18, 2016 at 10:00 p.m. CST through November 24, 2016 11:59 p.m. CST  (or while supplies last)
  • Your single order must total $25.00 or more before shipping and handling and taxes are applied.  Your single order must total $25.00 or more after any discounts are applied.
  • One Free With Purchase item per person.
  • We will be manually adding Sending You with Evelin T Designs to your order and it will not be reflected on your invoice.  
  • This offer is while supplies last.  
  • Sending You with Evelin T Designs is not a limited edition stamp set and will be released for sale in 2017.
Join me (Shay), Guest Star/Winner of Belated 2nd Birthday Bash Grand Prize Challenge Virginia Lu,  November Leading Lady Jessica Frost-Ballas and our out-of-this-world creative team The Talent and take a tour of the STARS!  You will find amazing inspiration and giveaways at every stop.

Here at the w&w blog I, Shay, am sharing a project!

Now get comfy-cozy, pour yourself a cuppa your favorite beverage and relax the day or weekend away as you take the Tour of the Stars.

>>>THE GOOD STUFF<<<

I think we've had enough talk already!  Let's get to my project. :-)

shay_IMG_4068

Using Essentials: Carly Cutaways, Happy Owlidays with Evelin T Designs, Season's Tweetings with Evelin T Designs and Scenery: Harleen Creative Screenings, I created this sweet ornament. I began by inking up the creative screenings on a solid tag base and stamped various stars from Season's Tweetings with Evelin T Designs over that in black ink.  I stamped and colored in the limb and owl trio from Happy Owlidays with Evelin T Designs before cutting them out with their coordinating cutaways.  I added the frame layer over the tag build my scene using dimensional foam adhesive on the owls.  I stamped the sentiment from the same stamp set and added twine to the tag.  Something simple, yet pretty cute thanks to some adorable stamps. :-)

shay_IMG_4069

Thank you so much for spending time with me!  I know you will fall in love with the projects you will see along the way. :-)  Make sure to show some love (and you will be entered to win prizes too).

>>>TOUR OF THE STARS<<<

Remember to comment at every stop for a chance to win!  Five (5) commenters will be chosen at random from the entire hop to receive $30.00 credit to the w&w shop!

You have until 11:59 a.m. (central standard time) on November 21, 2016 to comment and be entered to win.

Your NEXT STOP is with our Guest Star, Virginia Lu!

This is also the order of the Tour of the Stars should you get lost:

w&w blog <<===YOU ARE HERE
 Guest Star, Virginia Lu 

All winners from our November 2016 Release Tour of the Stars will be announced the week of November 21, 2016.

November Leading Lady Jessica Frost-Ballas | Take Three

Jessica_Ballas-Frost_november2016

Our November Leading Lady, Jessica Frost-Ballas, is back for her triumphant performance!  If you missed her smashing debut you must see it CLICK HERE or her sensational second performance where she made us swoon over her stunning cards in an elegant and dramatic color scheme...CLICK HERE!  For today's performance Jessica takes us through an gorgeous journey through the seasons.

And don't forget to return at noon CST today for our November 2016 Release Tour of the Stars including our incandescent leading lady.

Without further ado, Jessica....

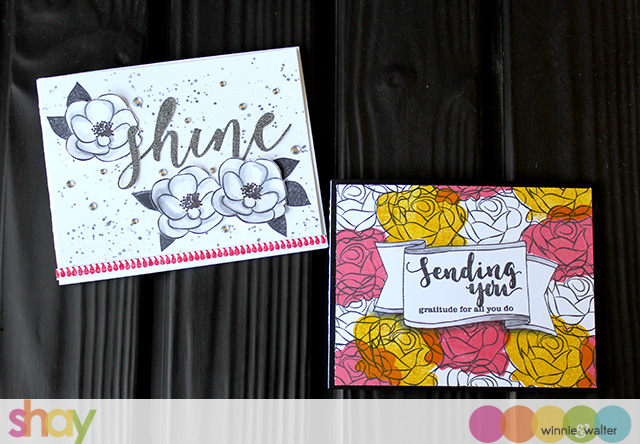
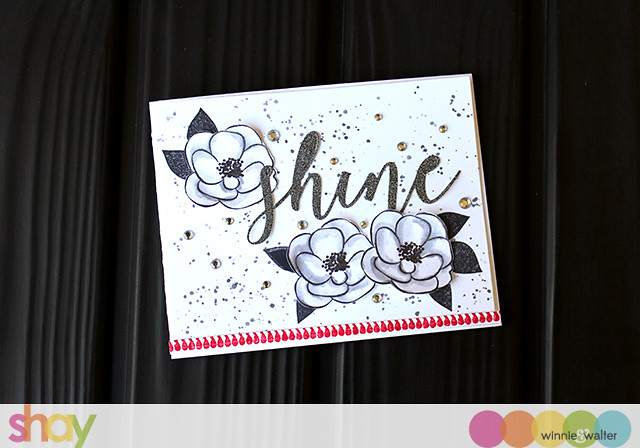
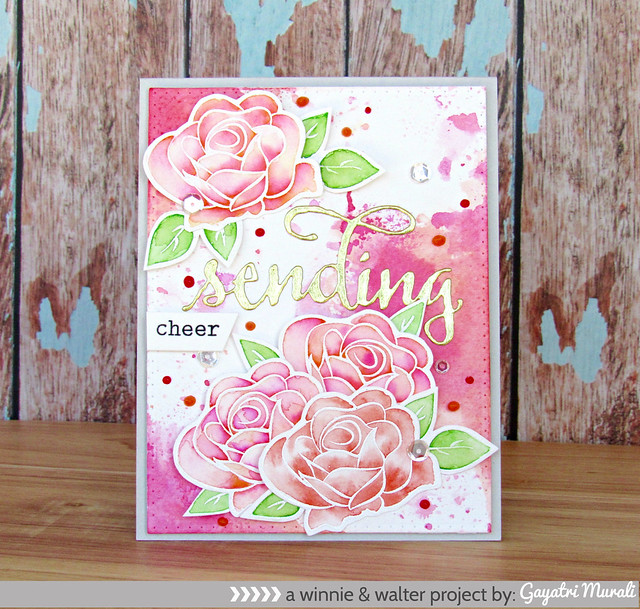
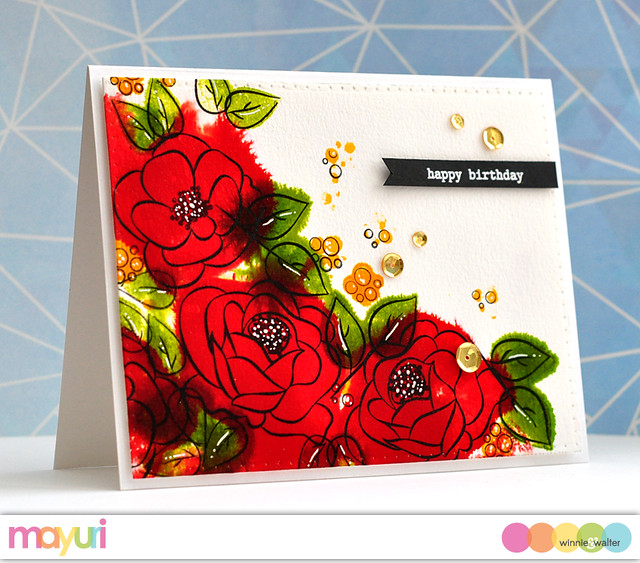
Good morning! Jess here with a study in seasonal florals using the beautiful floral sets from Winnie and Walter and sentiment sets from the new November release! Let's start with my favorite season, autumn!


For this card I stamped and masked florals from In Bloom: Anna's Florals and In Bloom: Renee's Leaves with versamark and then heat-embossed them with gold tinsel embossing powder. Next I colored them with zig clean color real brush markers and blended them out with a damp paintbrush. I added a soft brown wash around the florals and then stamped the sentiment from Sending You with Evelin T Designs (limited time free with qualifying purchase stamp set) and heat-embossed it with the same gold tinsel embossing powder.


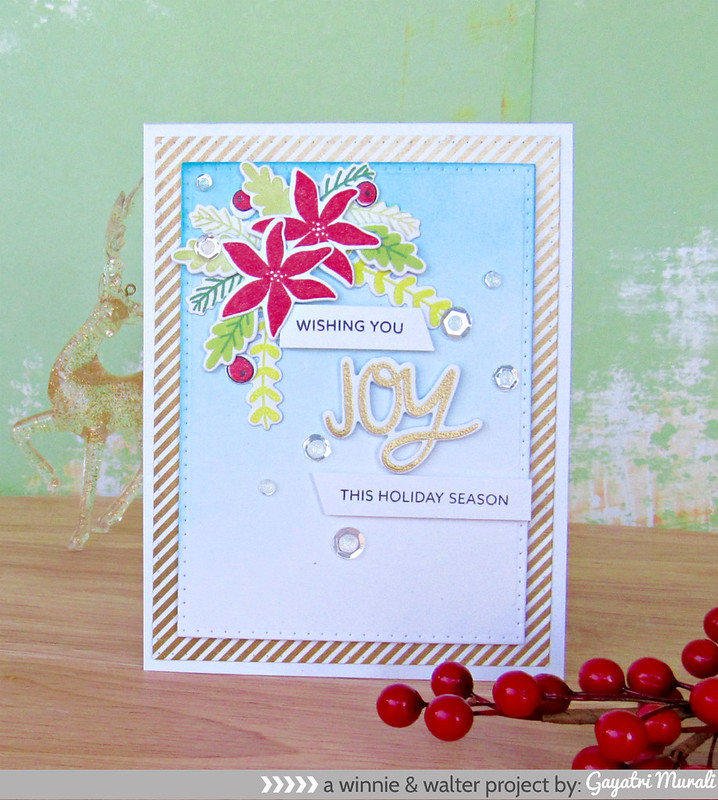
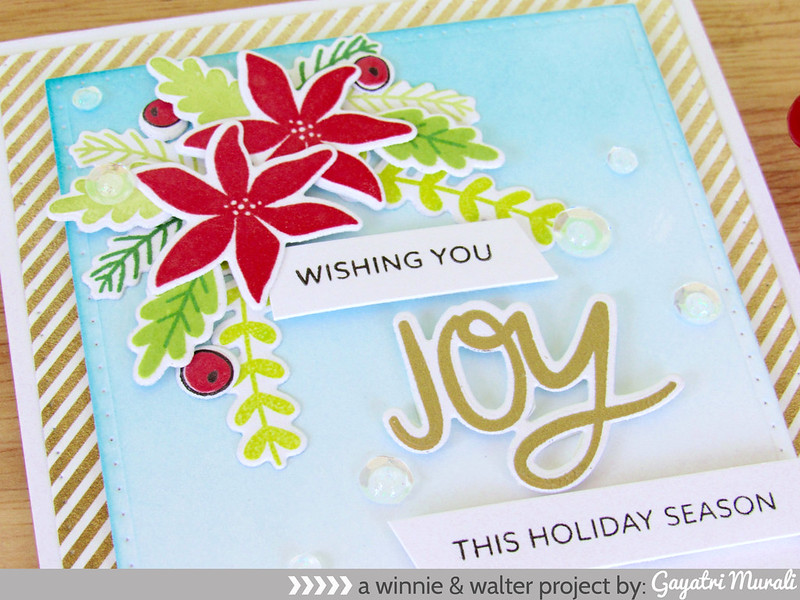
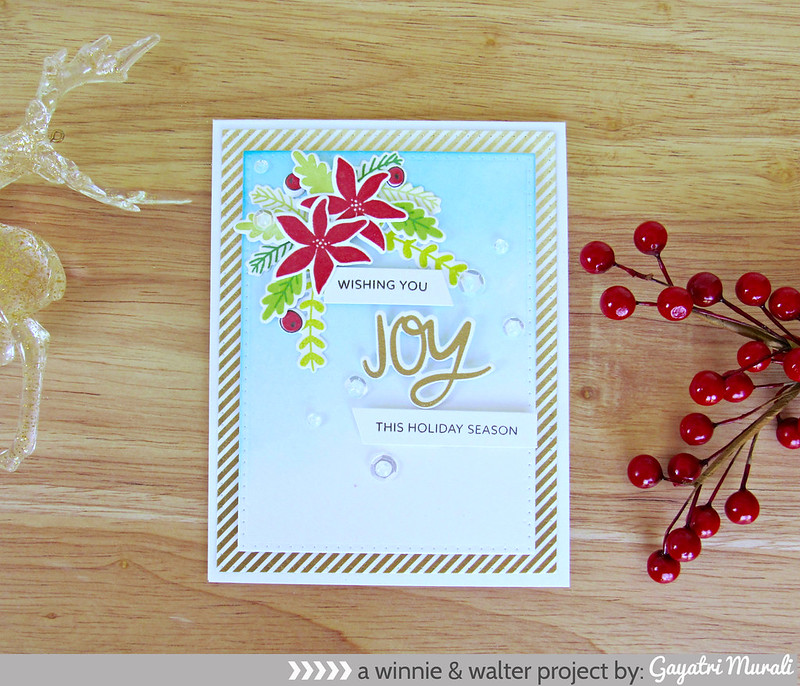
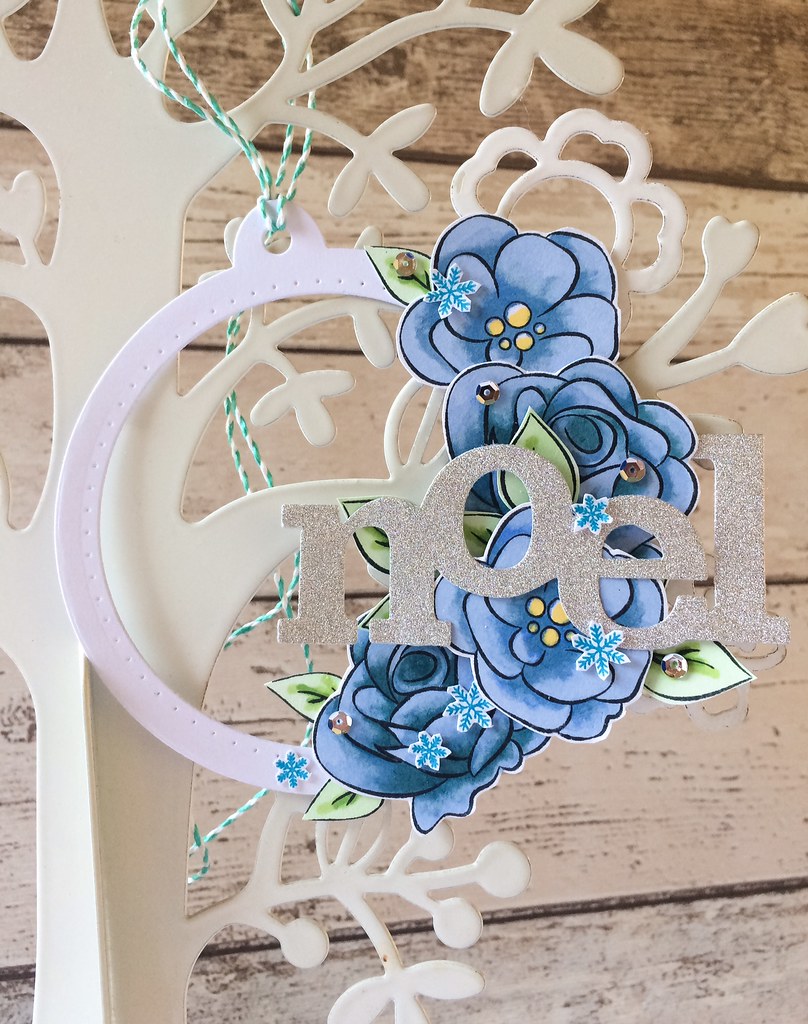
Then I went icy and cold for winter with distress inks and iridescent medium!


 I used masking to stamp poinsettias from In Bloom: Elsa's Florals around the border of my card with versamark before heat-embossing them with silver embossing powder. Then I filled in some of the open areas with foliage and berries. I smooshed stormy sky, chipped sapphire, tumbled glass, and blueprint sketch distress inks onto a craft mat and mixed them with iridescent medium to create a shimmery watercolor. After painting the flowers with distress inks I flicked them with water and let the paper dry naturally. I die-cut the large word from In a Word: Wishes Cutaway with silver glitter paper and then heat-embossed the rest of the sentiment from The Big, the Bold, and Greetings on white cardstock and trimmed it down to a label. I adhered the label with foam mounting tape and then added a sprinkling of sparkling clear sequins to finish the card.


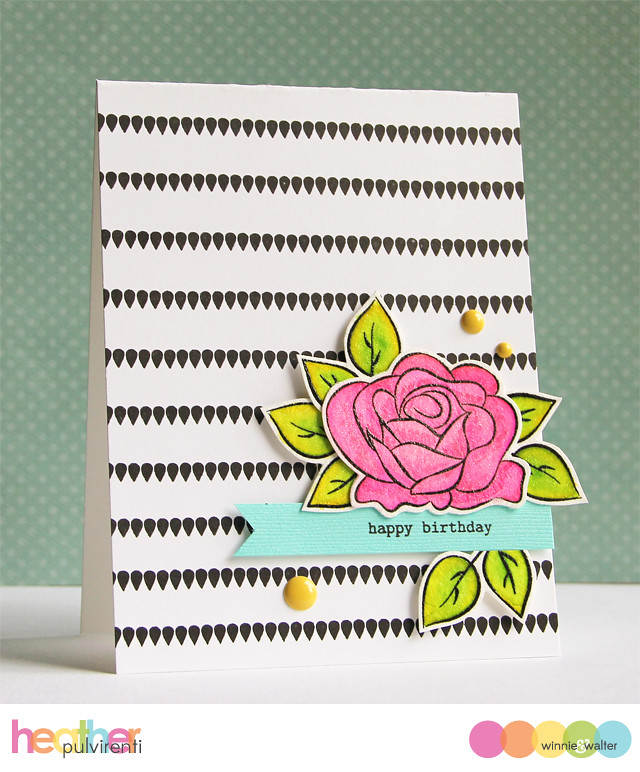
 Next I went a little CAS with copic markers for spring!


 I'm always working to improve my copic coloring and the flowers from Winnie and Walter are PERFECT for coloring! I stamped the flowers and leaves from In Bloom: Addie's Garden with versafine and heat-embossed them with clear embossing powder before coloring them with copic markers. I stamped the sentiment from Happiest of Holidays with Evelin T Designs with versafine and heat-embossed it with the same clear embossing powder. Finally I added a little spectrum noir clear sparkle to the tulips.


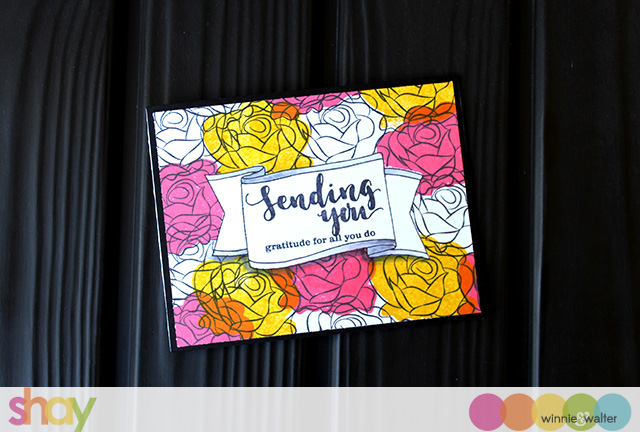
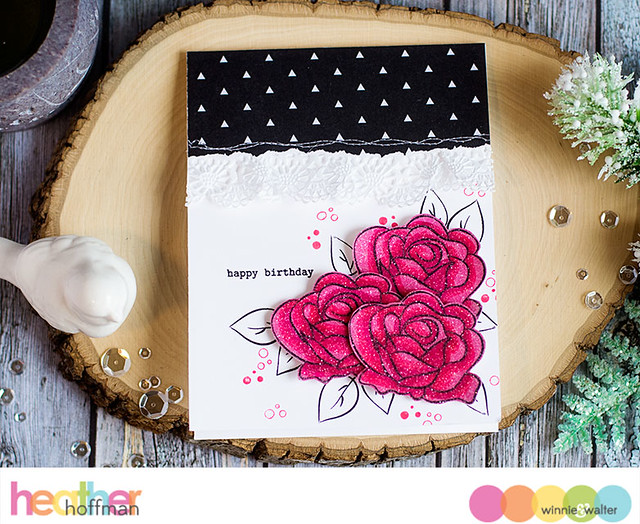
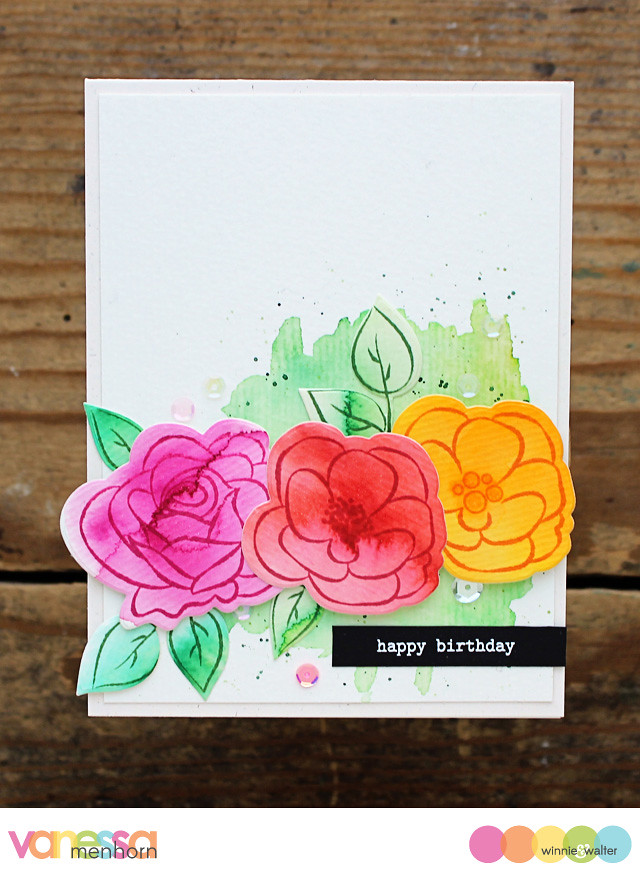
 Finally I went with loose watercoloring and bright colors for summer!


I stamped the flowers and greenery from In Bloom: Anna's Flora and In Bloom: Addie's Garden with versamark and heat-embossed them with white embossing powder before watercoloring them with Mission Gold watercolors. I used a lot of pigment inside the petals and leaves and then a much more watered down paint around the flowers. I let it dry overnight and then stamped half of the sentiment from Wishing You with Evelin T Designs with pink dye ink using my MISTI. Then I immediately stamped the sentiment again with versamark and heat-embossed it with clear embossing powder. I stamped the rest of the sentiment wishing the recipient 'a bright sunshiny day' inside the card and then added sparkling clear sequins.


I hope my cards inspire you to celebrate different seasons with your papercrafting!
And I'm thrilled that Shay has generously given me a $30 gift certificate to Winnie and Walter to gift to one lucky commenter! Leave a comment on any of my Leading Lady posts for a chance to win. Leaving a comment on multiple posts will give you additional chances to win so be sure to check back each Saturday!

Thanks so much for visiting and have a fantastic weekend! I'll see you back next week for my final post!