Showing posts with label WCMD 2014. Show all posts

Monday, October 13, 2014

Winners of our WCMD Challenges!

First, we were blown away by your enthusiastic comments and all of those that participated in our challenges.  We had a blast seeing you play along and make truly phenomenal projects for the challenges!

Now the random winners from our challenges:

WCMD | Craftie Challenge
$25 Gift Card (code) to Simon Says Stamp
No. 14 Berina Febin


WCMD Challenge | On Trend with Lea
$25 Gift Card (code) to Mama Elephant
Project No. 17 Lisa H.


WCMD Challenge | Pinspiration with Vanessa
$25 Gift Card (code) to Ellen Hutson
Project No. 27 Karen Ladd


WCMD Challenge | Colour Combo with Gayatri
$25 Gift Card (code) to Pretty Pink Posh
Project No. 6 Ingenious Inkling: SmilynStef


WCMD Challenge | Sketched with Julie
$25.00 Gift Card (code) to Studio Calico
Project No. 10 A Rare Ruby


WCMD Challenge | Unexpected Stamping with Kelly
Seat to the upcoming class at Online Card Classes (will be admitted once class registration opens)
Project No. 22 JayTeeZeHang


WCMD Challenge | Pattern Play with Shay
$25.00 Gift card (code) to WPlus9
Project No. 45 Stamp to Create


WCMD | Comment Winner
Seat to the upcoming class at Online Card Classes (will be admitted once class registration opens)
Comment No. 20 Janis from Pinspiration Challenge with Vanessa

Grand Prize
$50.00 Gift Card (code) to the w&w store + seat to the upcoming class at Online Card Classes (will be admitted once class registration opens)
Shona Chambers (entered in On Trend with Lea + Colour Combo with Gayatri + Pattern Play with Shay)


Congratulations!!!  All winners please contact us at info {at} winniewalter {dot} com with which challenge you won.

Again thank you, thank you, thank you to every one who made our first WCMD such a joy!

Wednesday, October 8, 2014

WCMD or WCMW?!?

We firmly believe that if one day of partying and making cards is great then 1 week of partying and making cards is INCREDIBLE.  Perhaps we should have called it World Card Making Week? :-)
What do you think?  

All of our WCMD (or WCMW if you prefer) challenges are still up until Saturday, October 11th 11:55 p.m. and here are the prizes from some of our favorite companies (we love supporting companies with products that makes our crafty hearts pitter patter):


How is that for some prizes?!?

For more details CLICK HERE and don't forget to check out all the inspiration from all of our challenge participants because it is awesome!!


And to make your WCMD/WCMW even more sweet we have an amazing Special Guest Star Friday and another performance by the dynamic October Leading Lady Jennifer Ingle on Saturday.

Saturday, October 4, 2014

WCMD 2014 | Pattern Play with Shay

WCMDblogbanner2014


Are you are having fun yet?  I sure hope you have after seeing Jennifer Ingle's first Leading Lady post, and challenges with stunning inspiration from Lea, Vanessa, Gayatri, Julie and Kelly.  And of course our Craftie Challenge.

I am hosting the last challenge for today, but remember you have until next Saturday, October 11, 2014 at 11:55 p.m. to enter all the challenges as many times with new cards as you want.

My challenge:  Pattern Play.  Use stamps, patterned paper, washi, stencils, embossing folders, journaling cards, die cuts, embellishments and/or any thing else you want to add some pattern to your card.  It can be geometric, intricate, romantic, graphic, stripes, damask, polka dots, script, busy, plain.  Mix up patterns, be adventurous, be bold, be subtle, be elegant, be clean, be simple, be you!

Here are a couple of takes on the challenge from me:

Card No. 1

shay_patternplay1a

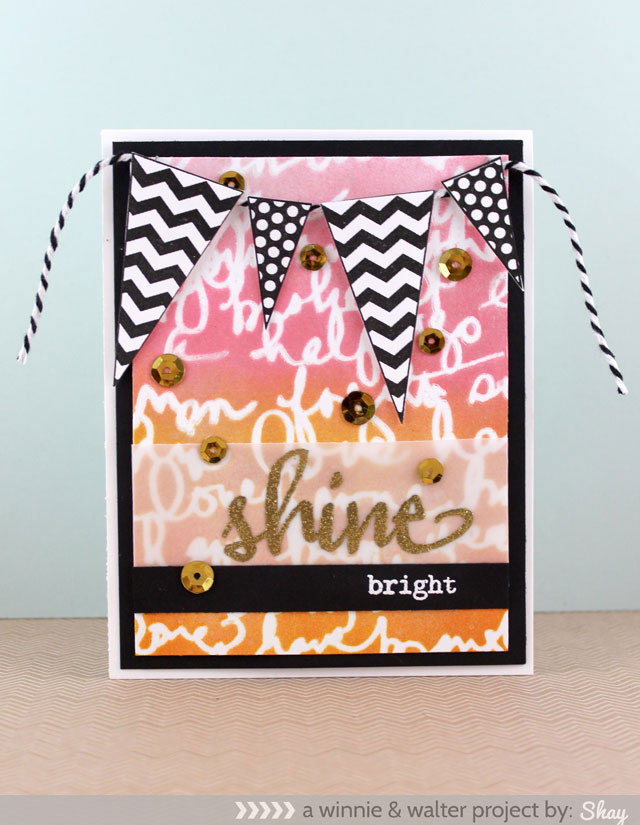
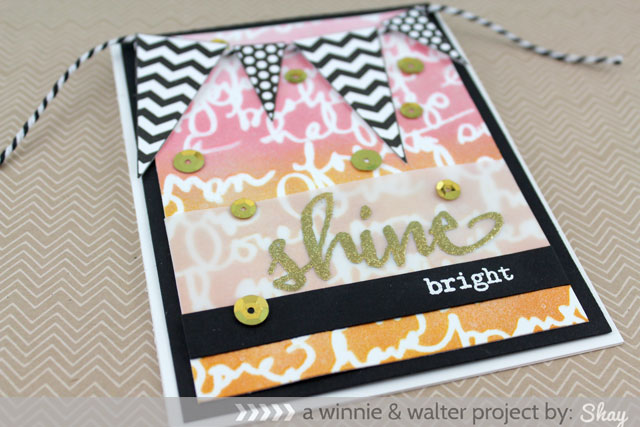
For this card I focused upon the script Creative Screenings (releasing later this month) and used Distress Inks in spun sugar, worn lipstick, wild honey and spiced marmalade with the mini ink blending tool. As this stencil is more delicate I used a pouncing motion to add the color rather than rubbing it in as I usually would and it worked great.  Next, I embossed using the same stencil using my Cuttlebug and a tan embossing mat. For all of this I used washi to keep the stencil in place.  I also sprayed calico shine Mister Huey's Color Mist over the panel.  

I stamped pennants from Scenery: It's a Wonderful Pennant several times with black ink and cut them out.  I draped a piece of twine on the script panel and adhered it with the Tiny Attacher.  Over the twine I added the pennants.

On a piece of vellum I stamped "shine" from The Big, the Bold and Fun with Versamark and embossed it with Zing! gold glitter finish embossing powder.  Wow, I love rich and sparkly gold!  To adhere the vellum to the script panel I actually wrapped it behind the panel and used adhesive on the back.  On a strip of black cardstock I embossed "bright" also from The Big, the Bold and Fun with white embossing powder and added that over the vellum strip.  Of course I had to add a sprinkling of gold sequins.  I adhered the script panel to a panel of black cardstock and then onto a white card base.

shay_patternplay1b

Card No. 2

shay_patternplay2a

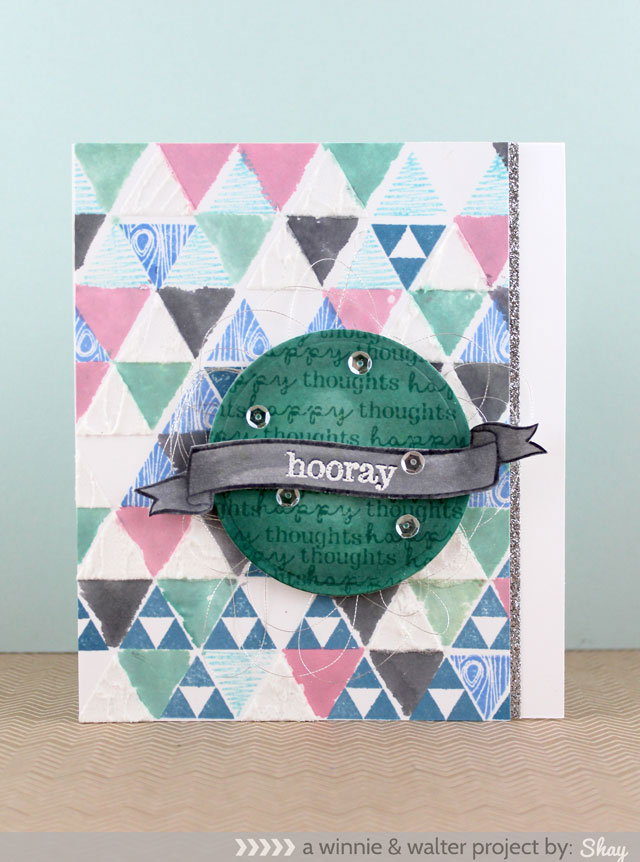
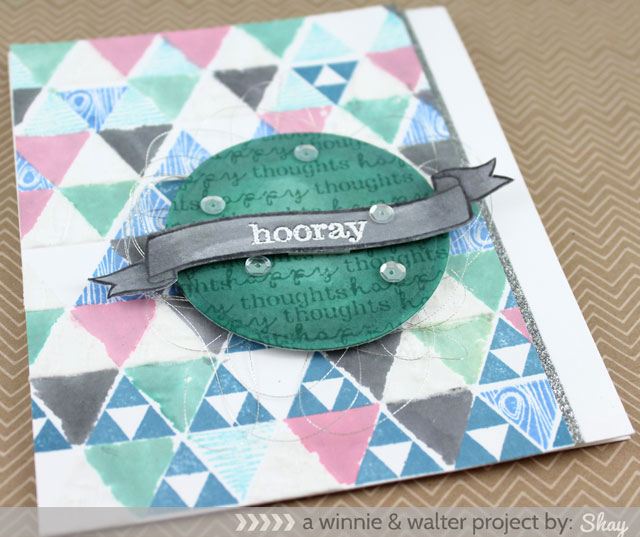
I decided to start with another Creative Screenings again.  This one just so happens to work with the triangles from Scenery: Rectangled & Triangled.  I stamped 3 different triangle designs with Hero Arts Mid-Tone Shadow Inks in cornflower and pool and Memories in turquoise (this is an ancient ink pad as in older than any of my dogs).  I really wanted to try Dreamweaver Stencils embossing paste I just bought so I used a palette knife to spread it into some of the open triangles.

I also used Distress Ink in worn lipstick, evergreen bough (a favorite right now) and black soot smeared on my craft sheet and sprayed with water to paint in some of triangles once the embossing paste dried (didn't take long at all).

Using the solid circle from A Tree for All Seasons I inked it up with evergreen bough and spritzed it with water.  I filled any open spaces with more watered down ink.  I cut it out with a Spellbinders circle die.  I stamped "happy thoughts" from This Awesome House numerous times in evergreen bough and the banner from The Big, the Bold and Extras in black soot and then painted it in with watered down black soot.  I stamped "hooray" from This Awesome House in Versamark and embossed it in white.  Behind the circle I added a nest of silver thread.  Last a little of my favorite shimmery sequins before adhering the the panel to a white card base with a little strip of American Craft silver glitter tape.
shay_patternplay2b

I hope you will be inspired to try new things, get inky, pull out that patterned paper that you've always wanted to use and play!  I really can't wait to see the wonders you create.

Prize: $25.00 Gift Card to WPlus9 (just in time for their gorgeous holiday release!)


Enter the Challenge:
An InLinkz Link-up


w&w supplies:


WCMD 2014 | Unexpected Stamping with Kelly

WCMDblogbanner2014


Happy World Card Making Day!

To celebrate, some of us on the Winnie & Walter team are heading up challenges throughout the day. Yes, there are prizes involved! No, you do not need to use W&W products. Are you ready?!?
My challenge for you:
Use one stamp on your card in an unexpected way. 
 Use a sentiment for a background, an image for a sentiment, parts of a stamp to cover your card base, the sky's the limit! 

 Here are two cards to get you thinking...


and they both use a NEW product line from Winnie & Walter that hasn't been released yet ... Creative Screenings!! So excited about these : )


Instead of using the solid circle "love you" stamp from The Write Stuff Love Story as an accent, I've used it to fill in the diagonal stripes on the right. I like that it serves to add a few different colors, and also sends a secondary message if you look hard enough to read the text. I shifted the striped screening down and added some blue and gold glimmer mist on the right. Then I flipped the screening over to use the residual glimmer mist, making diagonal, sketchy stripes on the left. "Hooray" is from This Awesome House.


 This card uses exactly the same idea ... use an image to fill in a masked area. The script bird stamp from You've Got Love Mail is stamped in hot pink and pink. The larger diagonal screening is shifted down, sprayed with ink, and flipped to the left to make more sketchy stripes. "Happy thoughts" is from This Awesome House.

If you'd like to try this challenge, and be entered in for some prizes, head over to the Winnie & Walter blog to link up your project. I'd LOVE to see your ideas! Also, we want to see what you're doing on World Card Making Day! Take a photo of you and/or others and link it up to the party at W&W for another round of prizes.

Thanks for looking!


Prize: A seat in the upcoming card class with Online Card Classes (winner will be added to class once registration is opened)!

Big thanks to Jennifer McGuire and Online Card Classes for generously donating this prize!

Enter the challenge:
An InLinkz Link-up


w&w supplies:

WCMD 2014 | Sketched with Julie

WCMDblogbanner2014

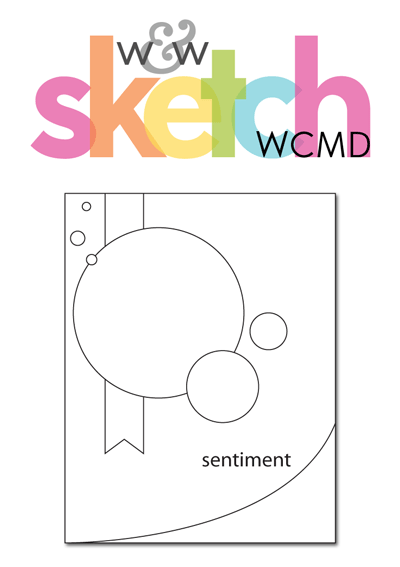
Hello w&w Family!  What an amazing day so far - the inspiration is out of this world :)  We hope you are having a great day today and having fun getting your craft on! I'm hosting one of my favorite types of challenges - SKETCH!  As a card maker / scrapbooker, I feel like I need a plan before I begin my projects, and a sketch is super helpful to me.  This sketch has a lot of elements, but can be deconstructed and include / exclude parts to fit your needs.  Let's take a look at the sketch for WCMD.


WCMDsketch2014

If you can't tell, I love circles and love to use them in my sketches.  I also added a curved line at the bottom left corner.  This is because I'm totally hooked on my new curved stitched border die from Pretty Pink Posh.  You can use any method of your choosing to create the curved corner of the card that you choose, but I really love the look the stitched border gives to both of these cards that I've created. 

Card No. 1

jmog_WCMDsketch2014_fall


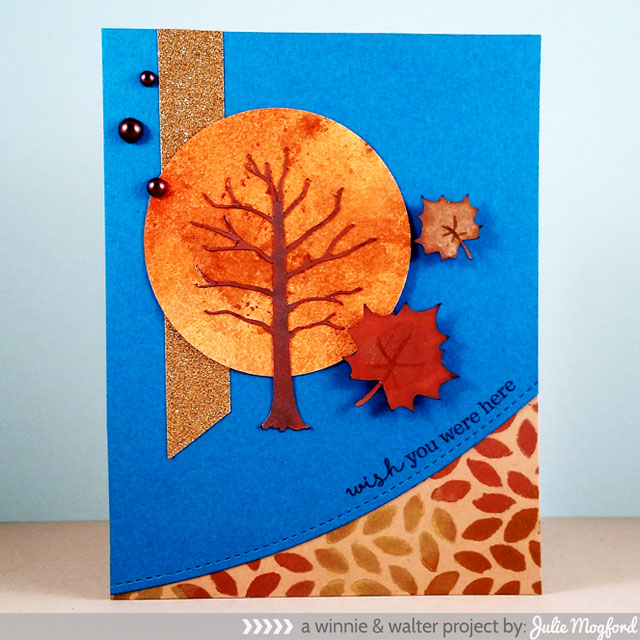
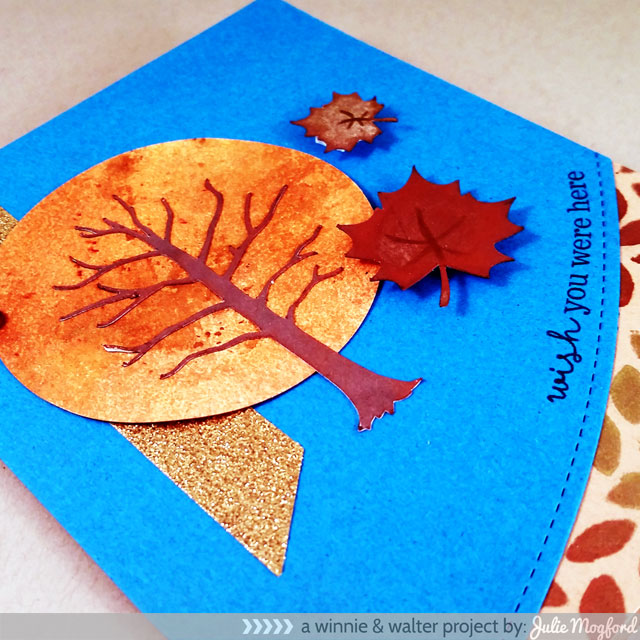
This card is really inspired by the recent season change - but I hope the temperatures catch up soon - still pretty warm here in San Antonio.  The card base leaf pattern was created from the A Tree for All Seasons Digital Elements using the leaf card cut on my Silhouette and used as a stencil.  I sponged metallic inks in gold, copper and bronze - super easy.  I love how they look with a soft metallic sheen, but the camera isn't picking that up entirely.  I chose a vibrant shade of blue to contrast the various shades of browns and golden tones which I think really sets everything off.

jmog_WCMDsketch2014_fall2

The tree and leaf cut outs are also from the A Tree for All Seasons Digital Elements and were inked up with more metallic ink and popped up with foam tape. I just drew a few leaf veins to give them a little interest. The circle is 3 spray inks with metallic powders on a manilla tag, and then die cut.   The gold glitter tape works great for the strip behind and gives it a little bit of fun sparkle.  I finished off the sketch using some brown pearls (shown in first picture) and the sentiment from This Awesome House stamp set, which I gave a gentle curve to follow the curved paper.

Card No. 2

jmog_WCMDsketch2014_winter

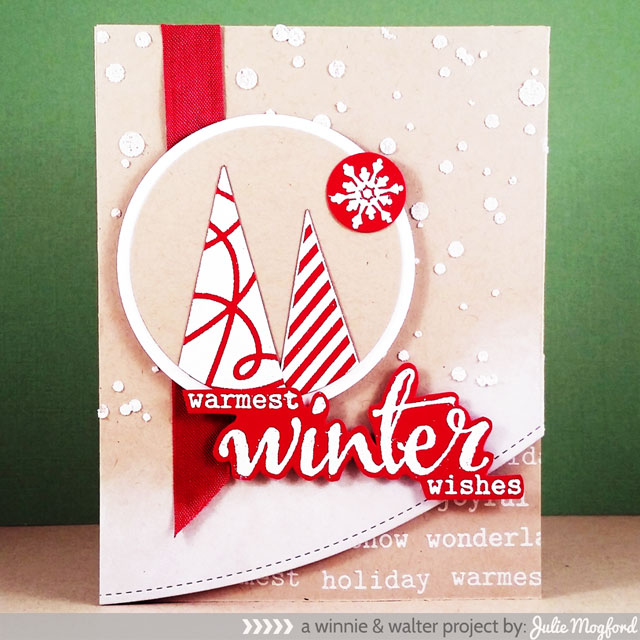
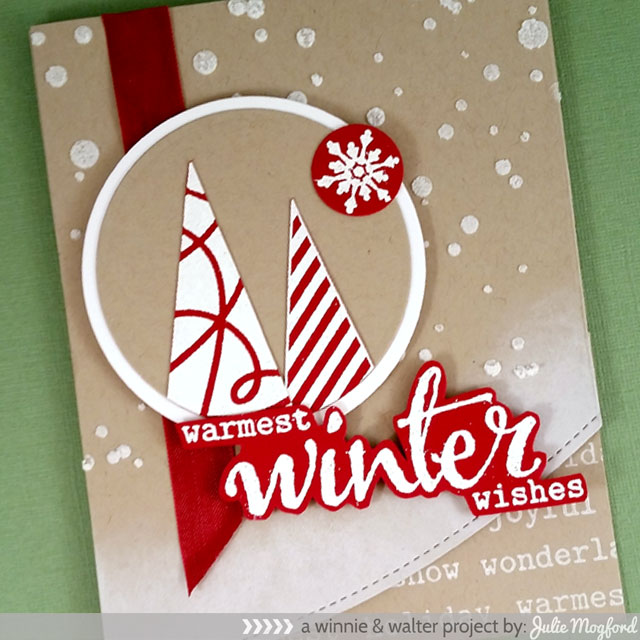
On this card, I deconstructed the sketch a little, leaving off several of the extra circles around the focal image.  The card set up started very much the same way as the first - creating a patterned card base.  This one is simply various holiday / winter words from The Big, the Bold and Seasons and  The Big, the Bold and Blessings, stamped in white craft ink (Stampin' Up!) on a kraft card base.  The top panel is also craft, but I used the same white craft ink and sponged it all along the curved edge to look frosty, and to stand out above the bottom kraft panel.

jmog_WCMDsketch2014_winter2

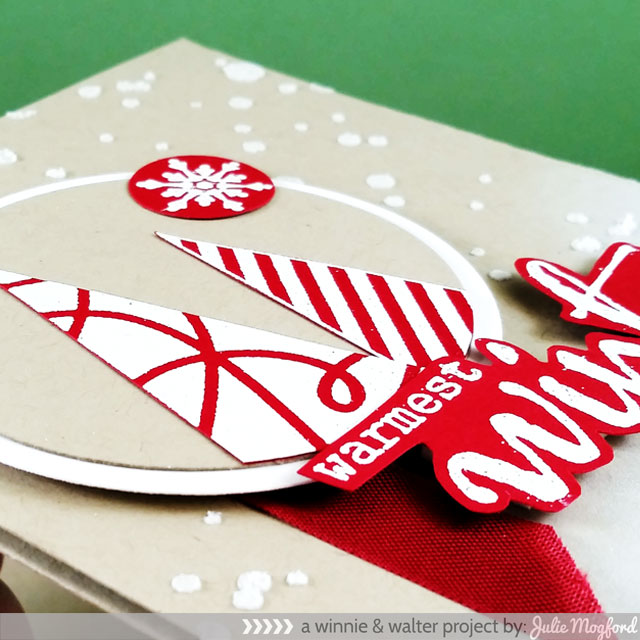
I wanted to create a snowfall look, but instead of grabbing my Big Bang Confetti stamp, I grabbed my new confetti stencil (yep - one of our new stencils! - don't you love a sneak peek?) and used it with some light molding paste to create a snowfall backdrop.  Check out the dimension!  Love that!!!!
The circle focal section got the addition of a white layer to also set it off from the back ground and a couple of trees using a couple of the designs from Scenery: It's a Wonderful Pennant stamped and embossed in white on red cardstock, and trimmed very close.  This way, the trees look white as if with snow, and the red shows up as decorations on the trees. I used the same method to stamp the winter message and snowflake from The Big, the Bold and Seasons.  The red seam binding makes a perfect addition to the card to carry the red throughout the card.  Red or white/clear sequins or gems could also have been added, but I liked leaving out a few of the elements since the snow had some fun dimension.  Glitter could also be added to the snow for some added sparkle.

jmog_WCMDsketch2014_winter3


I hope you have a great time today crafting your little heart out jamming out to your favorite music (like I am right now  *wink*) or crafting with your friends and family.  If you can't join in on the fun today, you can still post your projects throughout the week until next Saturday, October 11, 2014 at 11:55 p.m. You may enter all of the challenges as many times as you like with new cards for each entry.  The sketch challenge prize - a gift card to Studio Calico!!  Totally great!  I can't wait to see your take on the sketch!

*hugs*
Julie


Prize: $25.00 Gift Card to Studio Calico.

Enter the Challenge:

An InLinkz Link-up


w&w supplies:


WCMD 2014 | Colour Combo with Gayatri

WCMDblogbanner2014

Hello dear craft friends!

Happy World Card Making Day!

Gayatri here with you and I am bringing you a colour scheme challenge. 

Here are the colours for the challenge.

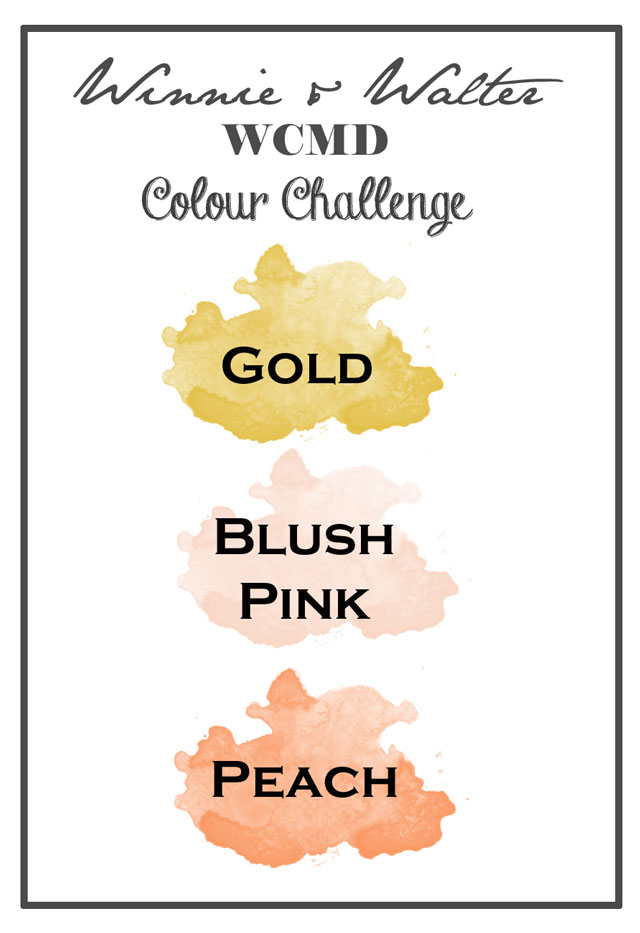
gayatri_WCMD-Colour-challen

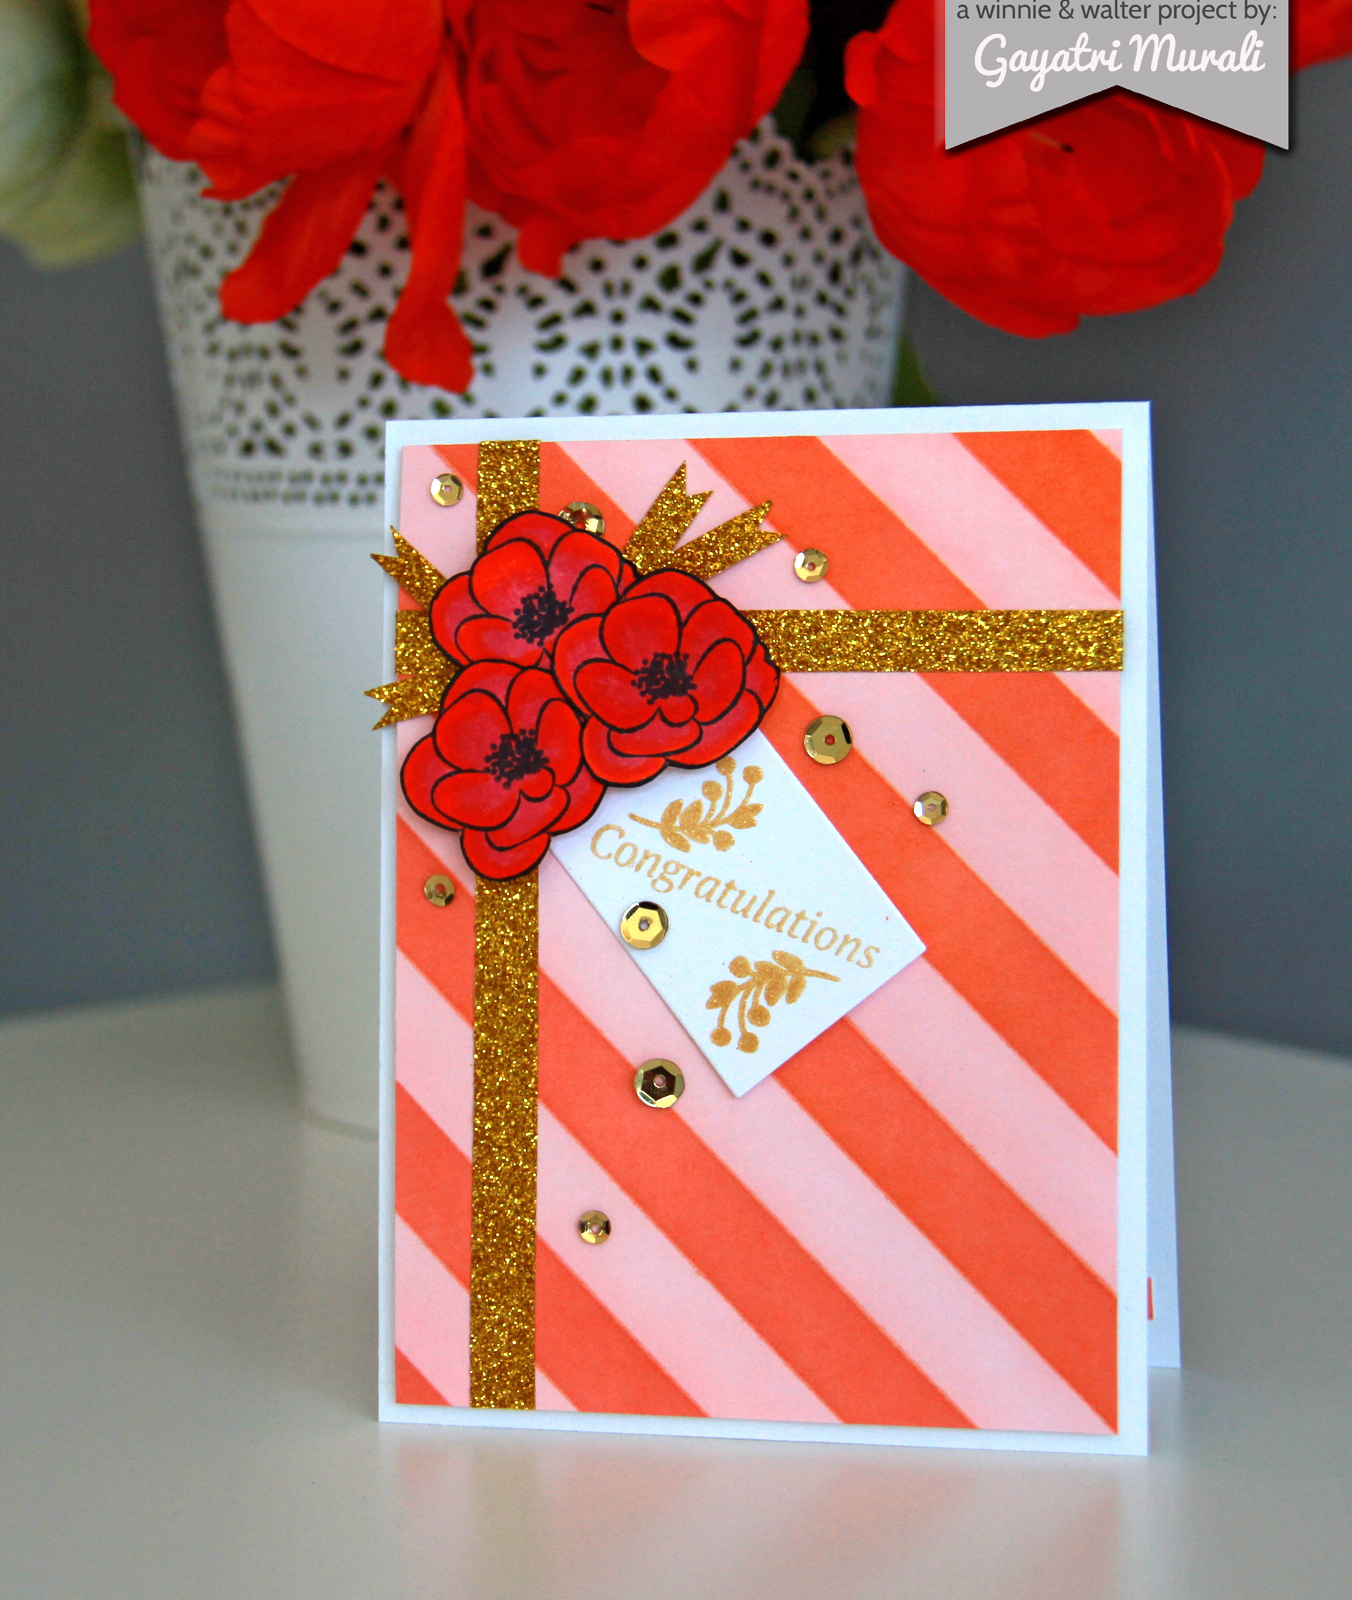
I wanted something trendy and something pretty. So I went for pretty colours peach and blush pink with trendy gold. Of course you can use neutral white/black with these colours.

This is my take on the colours.

gayatri_Congratulations1

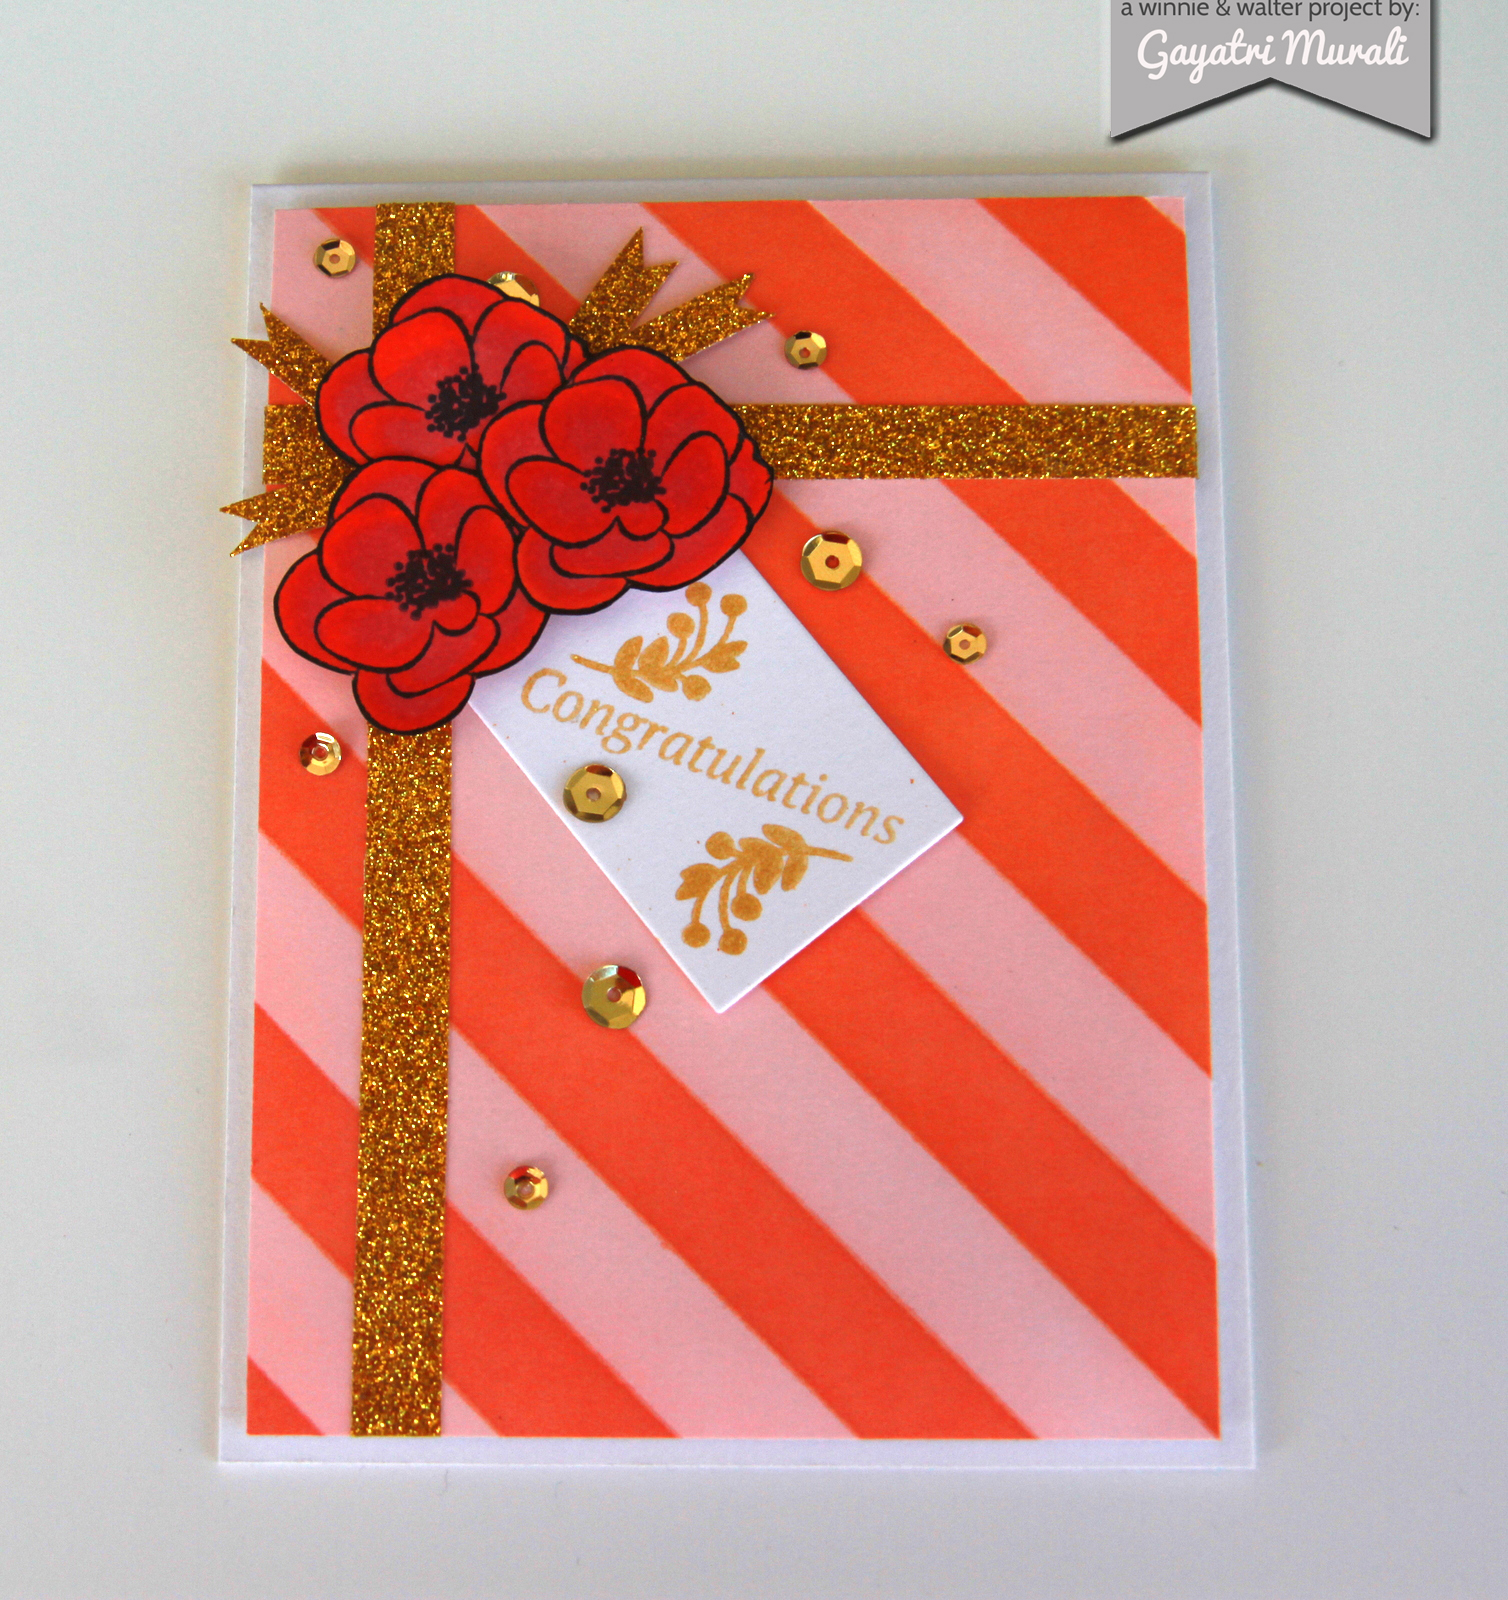
For the background, I have a new product coming soon to Winnie & Walter to achieve the peach and blush pink diagonal stripes. Then I have used gold glitter tape like a present wrap.

gayatri_Congratulations flat

I have used the flowers from The Big, the Bold and Extras stamp set to stamp and coloured darker shade of blush pink and peach using copics. I then hand cut the flowers and made a cluster. I adhered this cluster using foam. I then cut some strips of gold glitter tape with fish tail banner and adhered under the cluster of flowers.

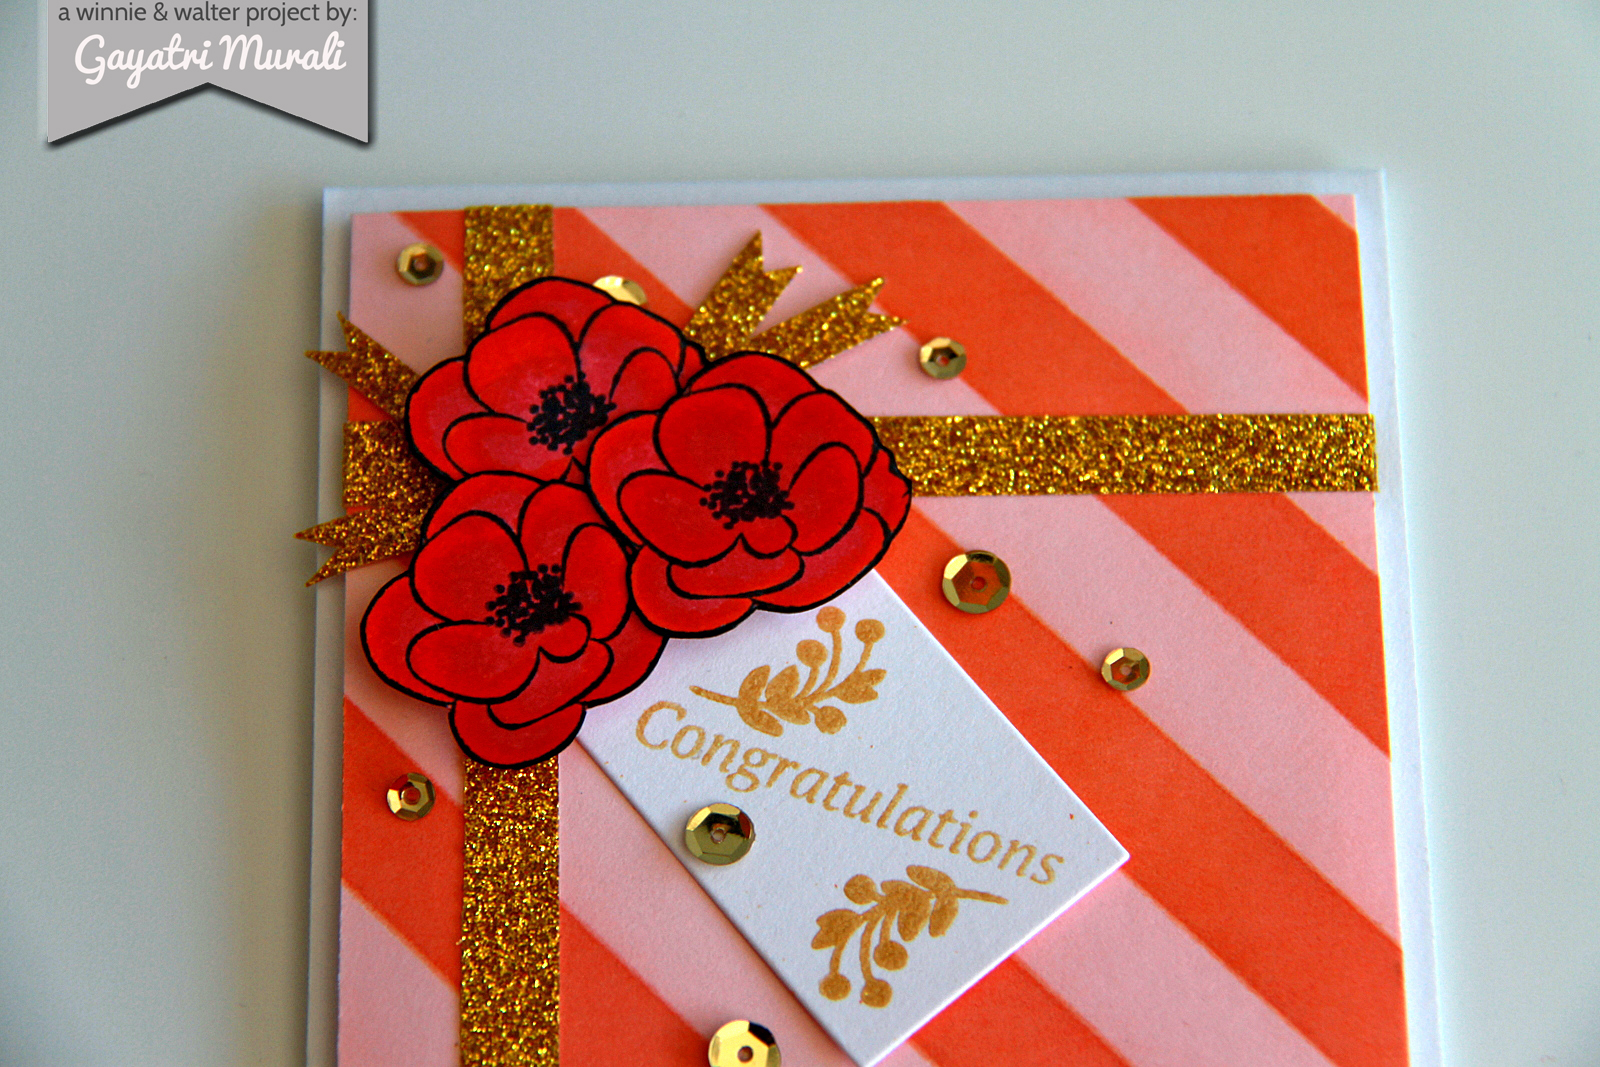
gayatri_Congratulations closeup 

For the sentiment I die cut a tag and stamped the sentiment from Parentville Extras using Deicata gold pigment ink and embossed using clear embossing powder. I also stamped the leaves image from The Write Stuff: Leave it to Mom stamp set using Delicata gold pigment ink and heat embossed it using clear embossing powder as well. 

Finally accented with gold 6mm and 4mm sequins from Pretty Pink Posh. I have mounted this completed panel on to the card base. 

So now it is your turn to use these pretty trendy colours and make a card. You can use as much or as little of the colours on your card. I am excited to see your take on the challenge. 

Tune in for the next challenge soon. 

Gayatri

Prize: $25.00 Gift Card to Pretty Pink Posh!

Enter the Challenge:

An InLinkz Link-up


w&w supplies: