Saturday, June 30, 2018

June Leading Lady Caly Person | Take Five

As June ebbs away we sadly must bid au revoir to our joyful June Leading Lady Caly Person.   The last five weeks with Caly have been full of beauty, incredible inspiration, amazing projects and a depth of style, grace and skill.  Caly has showcased her keen talent and adeptness with different coloring materials and creativity week after week.  I feel so very blessed Caly shared her talents with us this month and made this month something special.

If you missed her smashing debut you must see it...CLICK HERE or her sensationally lovely and expertly designed card from her second performance CLICK HERE or her triumphant third performance with that is too dog-gone cute CLICK HERE or her fantastic fourth performance which was an explosion of awesome CLICK HERE!  Today's cards are simply breathtaking!  

Lucky for us all we have her final command performance today.  

Hi Everyone! This is the final week of my Leading Lady series for Winnie & Walter! It has been so fun coloring with different color mediums using WW products!
  Caly_Person_june2018 

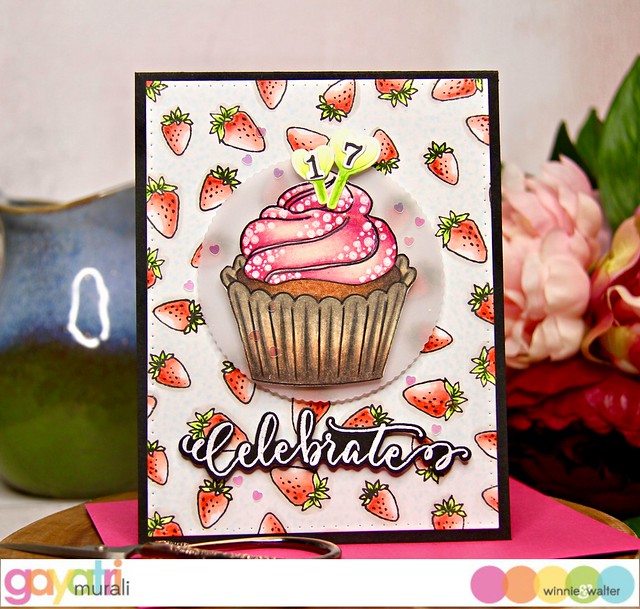
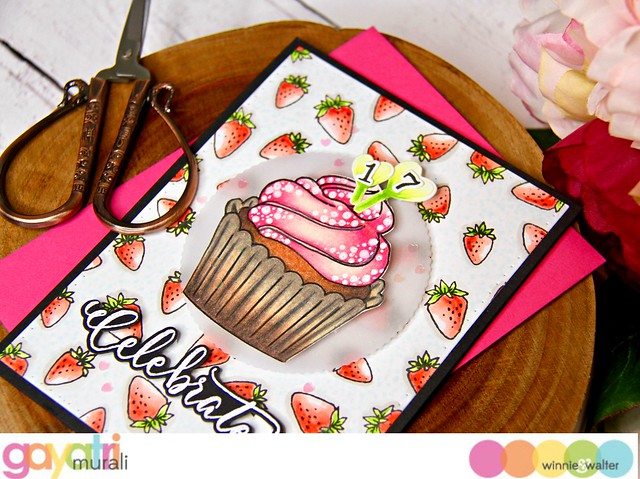
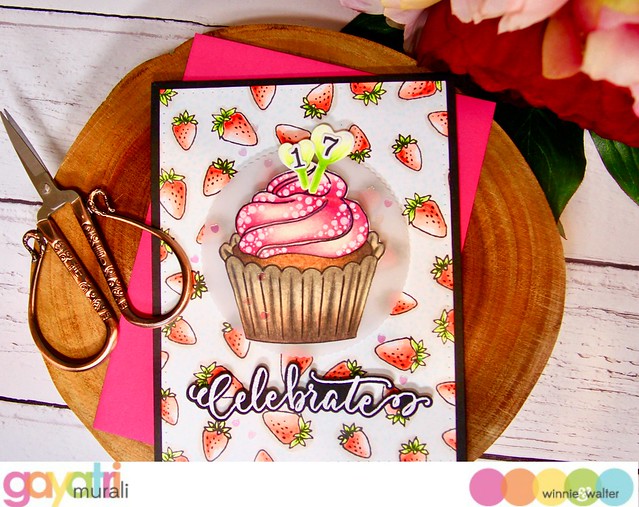
Today's cards are extra special because I played with Faber Castell Polychromos colored pencils for all the images - for the FIRST time! I've used colored pencils to add color/depth to already stamped images, but have never used them for full images - so have mercy on me! This was a lot of trial and error for me.

Julie's Roses  

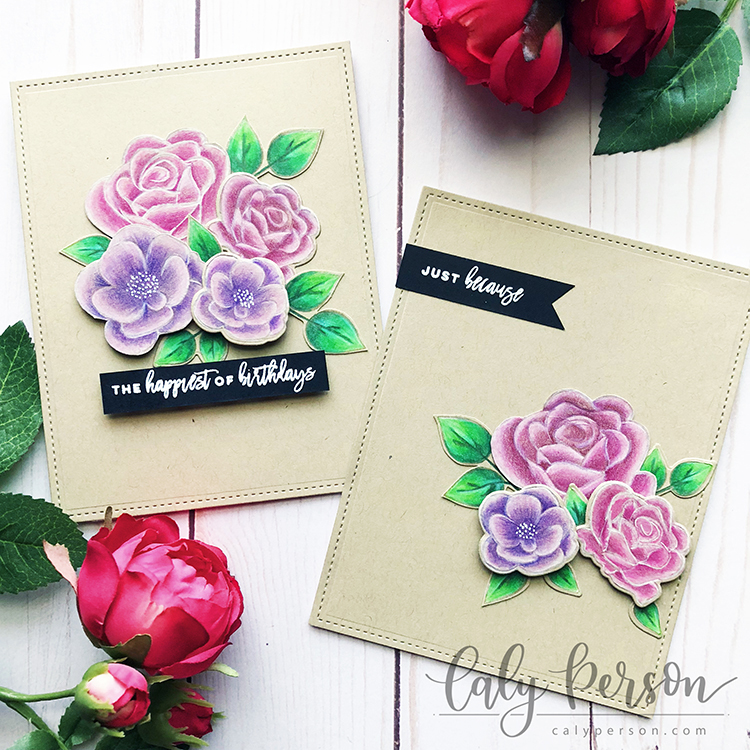
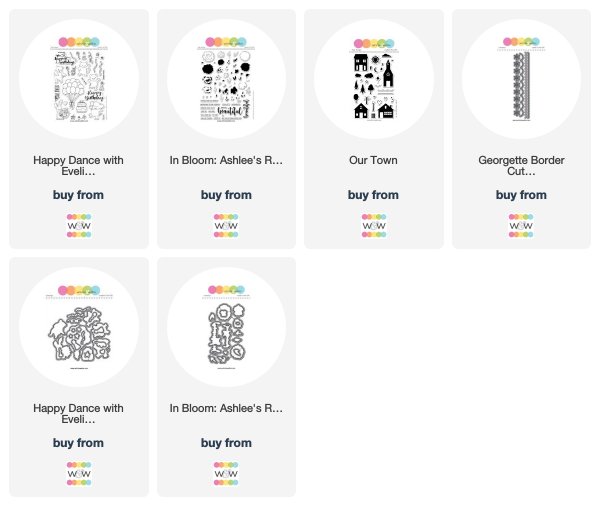
These flowers from the set The Big, the Bold and Extras are my favorite! Did you know that there was a special set called "In Bloom: Julie's Roses" that are the same flowers, but bigger? It's the bigger ones you see above. Don't worry, I believe Winnie & Walter will be releasing that set in the near future! I did some tone-on-tone stamping in hopes of doing no-line coloring with these images. I stamped a bunch on the same craft cardstock that you see and colored the images one at a time. I started with the leaves - applying the darkest color in the shaded areas first, blended out with the medium green, then the lightest green. When I was done, I went over the tips and the leaf veins to add some highlights with a white colored pencil.

  Julie's Roses 2

As mentioned above, this was a trial for me. I had mentioned using the darkest color first for the leaves also. You'll notice that the two pink roses are different. The lighter one is colored with a base of white down first. I don't think there's a wrong way to color - just personal preference in how you want your images to look. The colors are definitely more vibrant with a base of white, but I think there is more depth to the image when colored without a base of white first.

  Julie's Roses 1

I colored enough images to make two cards. It's easy to arrange floral arrangements anywhere on your card - but these are my go-go. I love bold sentiment strips embossed in white also. Polychromos colors used: 101, 129, 125, 133, 119, 139, 137, 159, 163, 166.

If you've been following along the past 5 weeks, you'll know that a $30 gift card is up for grabs! Comment on THIS post (on my personal blog) and let me know which of the cards I've is your favorite for you chance to win! I'll choose a winner next Saturday, July 7th and the gift card will be issued by Winnie & Walter.

  w&w_30giftcard

It's been my pleasure to be a Winnie & Walter Leading Lady! Thanks so much for being here with me! I've had fun using Winnie & Walter products for these projects! Today marks the end of June so a new fabulous Leading Lady will sharing new projects starting next week :).

 XOXO, Blog Signature

SUPPLIES: *NOTE: To view where these items can be purchased, click on the linked abbreviations below (SSS for Simon Says Stamp, EH for Ellen Hutson, AMZN for Amazon, etc.). Affiliate links may be used (at no additional cost to you) – thank you for your support!
WW The Big, the Bold and Extras WW The Big, the Bold and Extras WW The Big, the Bold and Extras Cutaways WW The Big, the Bold and Extras Cutaways WW In Bloom: Julie's Roses WW In Bloom: Julie's Roses WW Sentimental: Birthday WW Sentimental: Birthday
WW Sentimental: Gift WW Sentimental: Gift Crumb Cake Ink Crumb Cake Ink Crumb Cake Cardstock Crumb Cake Cardstock Versamark Ink Versamark Ink HMSB | EH | SSS
SU Heat Tool SU Heat Tool Basic Black Cardstock Basic Black Cardstock LF Large Stitched Rectangle Stackables LF Large Stitched Rectangle Stackables HMSB | EH | SSS | LF Recollections 110 lb Recollections 110 lb
Recollections 110 lb Recollections 110 lb 3D Foam Squares - Mixed 3D Foam Squares - Mixed HMSB | EH | SSS | AMZN ATG Gun ATG Gun EH | SSS | AMZN Mini Multi Medium Matte Glue Mini Multi Medium Matte Glue HMSB | EH | SSS
 

Friday, June 29, 2018

Stretch Your Supplies with Jessica

jessica_IMG_1279 W&W

Hi everyone! It's Jessica and I'm back to share more ways to stretch your crafting supplies. I decided to combine some older goodies with the latest February release to create this card.

jessica_IMG_1287 W&W
If you're a fan of Disney and Pixar's animated movies this scene might look a little familiar. I was heavily inspired by the iconic scene in Up and I've tried recreating it here. 

jessica_IMG_1283 W&W

The balloons image is from Happy Dance with Evelin T Designs. After stamping and die-cutting it with the coordinating cutaway, I colored it with ZIG Clean Color Real Brush markers and also added some details with a white Gelly Roll pen. The original image has a bow tied at the end of the strings, but I snipped that part off so it'll appear like the balloon strings are coming out from the chimney.

jessica_IMG_1285 W&W
This colorful little house is from the Our Town set and I stamped it with various Distress Inks. I then fussy cut it and doodled with black and white Gelly Roll pens.

jessica_IMG_1287 W&W
I wanted to add a sky background but I don't have any cloud border stencils so I challenged myself to create one. I die cut the big scallop die from Georgette Border Cutaways and used that to stencil the rows of clouds.

jessica_IMG_1295 W&W
I finished off the card by building the sentiment with In Bloom: Ashlee's Rosie Posies with Lydia Evans and its coordinating cutaways. The "LIFE IS A" part is puzzled together from two separate stamps, and the "ADVENTURE" sentiment is actually handwritten with a black Gelly Roll pen. I hope you enjoyed today's creation and learned some tips about stretching your supplies; I love to combine images from different stamp sets, alter the images sometimes, and look for other creative ways to use my dies. Thanks so much for stopping by and I'll see you soon. 


w&w-supplies

Wednesday, June 27, 2018

Celebrate with Gayatri

Hello everyone, Welcome! Gayatri here with you today. I have a birthday card to share with you. I have used Winnie & Walter’s Wish Big with Evelin T Designs stamp set. I have been meaning to use the strawberry images from the stamp set for a long time. So for today’s card, I used them to create my own background panel. Here is the card.

gayatri_Celebrate card 1

To create the background, I stamped the three strawberry images randomly to fill in the entire panel in black copic safe ink. Then I coloured them with copic markers. I used R20, R21, R22 and R24, YG21 and YG25 copic markers. I die cut this panel using the largest rectangle die from Essentials: Katherine Cutaway.

gayatri_celebrate card closeup1

For the focal point, I stamped the coloured the large cupcake from the stamp set using colour pencils.I added some details on the cupcake using white belly roll pen. Using the coordinating cutaway I die cut the cupcake. I also stamped the die cut the numeral 17 and the heart shaped cupcake toppers. I coloured the cupcake toppers in the same green copic markers are the strawberry leaves. I adhered the numerals on the cupcake toppers and adhered the toppers on the cupcake. 

gayatri_Celebrate card closeup2

To make the focal image pop from the busy background, I die cut a vellum paper using one of the Cutaways from Ring in the Celebration Cutaway. I adhered the cupcake on the vellum die cut using foam adhesive and again on the background panel.

gayatri_Celebrate card closeup4

The sentiment is also from the stamp set is white heat embossed on black cardstock and die cut using the coordinating cutaway. This sentiment is adhered below the focal image using foam adhesives.

This entire panel is adhered on black card base for contrast as well as to tie in the black from the outline of the cupcake, black numerals and the black die cut sentiment. Finally I added some heart confetti for some subtle bling.

gayatri_Celebrate card flat

All the w&w supplies used to make this card are listed below.

Hope you like my card today. Thanks so much for visiting. Have a lovely day.


My blog signature


w&w-supplies

Monday, June 25, 2018

Grad Background + Foam Sentiment with Crystal (Video)

Today we have another fabulous video tutorial with Crystal to create this awesome graduation card!


Hope you enjoy and have an incredible day!
Shay.


w&w-supplies

Note: Scenery: Bigger Bang Confetti is a limited edition stamp set which is only available as a giveaway.

Saturday, June 23, 2018

June Leading Lady Caly Person | Take Four

Our June Leading Lady Caly Person is back for her fantastic fourth performanceIf you missed her smashing debut you must see it...CLICK HERE or her sensationally lovely and expertly designed card from her second performance CLICK HERE or her triumphant third performance with that is too dog-gone cute CLICK HERE!  Today's card is an explosion of awesome!

We now present Caly...

I can't believe it's already week 4 of my Leading Lady feature for Winnie & Walter! Time Seems to be flying!
  Caly_Person_june2018 

We've been talking about different coloring mediums on previous posts. Today though, I decided not to do any coloring because the stamp set I chose didn't have any outlined images...ha! The Dotty About You stamp set jumped out at me for a tone-on-tone card. Then I used the coordinating die set to add some contrast.

  WW Dotty About You

Stamp sets like this are great for creating backgrounds! So I started with a light craft paper and used a matching ink to create the tone-on-tone look. I put all the stamps I wanted to use on a long acrylic block and flipped to alternate the sizes and patterns until the panel was covered. Then I took some gold glitter stickles and added dots to the center of the bursts.
  WW Dotty About You 1

The coordinating dies were cut out in gold and black cardstock and helped give this card some added dimension and interest. To give it more contrast, I added a sentiment strip on black cardstock embossed with white. This card is quick and easy and I hope you'll try it!


This month-long feature will be every Saturday in June. If you stick around until the end of the month, you could win a fabulous gift card from Winnie & Walter. I will be drawing a winner from comments on my blog (on the final post) at the end of the month!

  w&w_30giftcard
Thanks for joining me this week! There are 5 weeks in June so I'll be back one final week to share my last card next Saturday. See you then!

XOXO, Blog Signature

SUPPLIES: *NOTE: To view where these items can be purchased, click on the linked abbreviations below (SSS for Simon Says Stamp, EH for Ellen Hutson, AMZN for Amazon, etc.). Affiliate links may be used (at no additional cost to you) – thank you for your support!

WW Dotty About You WW Dotty About You WW Dotty About You Cutaways WW Dotty About You Cutaways SU Heat Tool SU Heat Tool HA White Embossing Powder HA White Embossing Powder HMSB | 
 SSS | EH
Sahara Sand Ink Sahara Sand Ink Sahara Sand Cardstock Sahara Sand Cardstock ATG Gun ATG Gun EH | SSS | AMZN Mini Multi Medium Matte Glue Mini Multi Medium Matte Glue HMSB | EH | SSS
Ranger Stickles - Gold Glitter Glue Ranger Stickles - Gold Glitter Glue EH | SSS