Saturday, January 26, 2019

January Leading Lady Greta Hess | Take Four

As January ends we sadly must bid adieu to our our January Leading Lady Greta Hess.  The last few weeks with Greta has been a spotlight for her excellent design, mastery of composition and terrific techniques.  Greta has exhibited her tremendous talent and astounding creativity week after week.  I feel so fortunate Greta shared her talents with us this month and made this month something special.

If you missed her smashing debut you must see it...CLICK HERE or her sensational second performance showcasing her oh-so-clever coloring methods CLICK HERE or her triumphant third performance highlighting a tremendous trio of cards showing off a wonderful design element that adds just the right amount of drama CLICK HERE! Today's projects add just that extra bit to make them shine!

Lucky for us all we have her final command performance today.  

I'm thrilled to be back with my Final Performance as the Winnie & Walter January Leading Lady.  It's been a huge honor & I can't thank Shay enough.

I love shimmer & shine including foil.  For my final 3 cards I thought it'd be fun to show you ways to add foil without using a laminator.  First up is a festive birthday card with a rainbow color scheme.


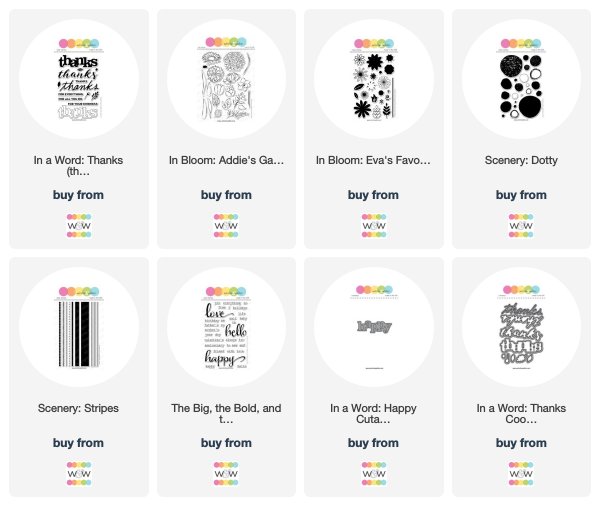
I stamped images from Scenery: Dotty on the card front using a variety of Distress Inks that match the rainbow foil.  The In a Word: Happy Cutaway was die cut from self-adhesive foam so that the adhesive was on the top.  Then the foil was pressed onto the word & carefully peeled back to reveal the gorgeous results!  This really is my favorite way to use foil--super easy & fun!  The little word from The Big, the Bold & the Happy was white embossed on a black scrap & trimmed into a label.  I added a scattering of shimmer dots for embellishment. For the next card I first made a plaid panel using 2 images from Scenery: Stripes stamped in Memento Lilac Posies & Teal Zeal.  Then I added strips of 1/8 inch score tape going both directions & pressed silver foil onto the adhesive.


 I love how it totally changes the look!  The bloom & leaves from In Bloom: Addie's Garden were die cut, stamped & brushed with the same inks.  I also used a shimmer pen on the bloom & attached it with foam tape.  For the sentiment I used In a Word: Thanks Coordinating Cutaways.  The shadow was cut from white cardstock & the word from a medium gray.  I like how it stands out, but doesn't compete with the silver foil. To finish up I made my most common type of card & that is one to keep in touch with a friend.  I  began by randomly stamping flowers from In Bloom: Eva's Favorite Flowers in 3 warm ink shades.  I added the dot from the same set using kraft ink. 


Then I used my Quickie Glue pen to make dots in the flower centers.  When they turned tacky, I pressed on gold foil.  Almost looks like designer paper with foil accents, don't you think?!  I stamped the words from The Big, the Bold & the Happy in dark brown ink.  Originally it was a one layer card, but I decided to add a gold foil frame.  I cut the panel down slightly & brushed the edges of the card front with Flitter Glu.  When it dried to a tacky finish I pressed on the same gold foil & attached the floral panel.  The frame could also have been done using 1/4 inch Score Tape. I hope you've been inspired in some way by my projects this month.  Winnie & Walter has given me a $30 gift certificate as a prize for the random drawing I'm doing on my blog.


Be sure to stop by each of my Leading Lady posts to be in the running.  Thanks again to Shay for having me & I look forward to seeing all your Winnie & Walter projects in blogland.


w&w-supplies

Wednesday, January 23, 2019

Rerun No. 38 | Happy Dance with Evelin T Designs by Crystal (Video)

Happy Wednesday loverlies!

There is still lots of time to participate in our latest Rerun challenge featuring Happy Dance with Evelin T  Designs!  

To help inspire you Crystal has an adorable card and video for you today!


What a darling card, right?

Remember you still have time to play along with the challenge and/or enter to win this stamp set.  All the details can be found HERE!

Have an incredible day!

Shay.

w&w-supplies

Saturday, January 19, 2019

January Leading Lady Greta Hess | Take Three

Our January Leading Lady Greta Hess is back for her triumphant performance!  If you missed her smashing debut you must see it...CLICK HERE or her sensational second performance showcasing her oh-so-clever coloring methods CLICK HERE.   Today, Greta has a tremendous trio of cards showing off a wonderful design element that adds just the right amount of drama!

Without further ado, Greta...

Thank you again to Shay for giving me this wonderful opportunity to share my love of Winnie & Walter products.  I hope you've found some inspiration for your own cardmaking.  The month is speeding by and it's time for Take 3. 
We all have times when it's hard to come up with an idea for a card.  One of my solutions to that problem is to use a favorite design element.  My choice is to mask off an area for inking.  There are many variations, so cards can all look different.  I generally use more solid images, but you will see today it really works with any stamps.

First is a sympathy card using A Tree for All Seasons.  I began by heat embossing the tree with a couple coats of embossing powder to obtain a thick, shiny image.  Then I masked off the area where I wanted color.  Distress Inks faded jeans and peeled paint were applied with stencil brushes for softer colors.  I heat embossed the sentiment and added brown splatters.  The panel was matted with light blue textured cardstock for a simple, flat card which, unfortunately, I need to get in the mail.


Next up is a fun winter notecard.  This is the first time I've used kraft cardstock for the technique, but it won't be the last!  I white embossed the front 2 trees from Yetitide Greetings with Evelin T Designs & masked them before adding the tree in the background.  The matching dies were used to make the masks--so quick & easy.  Then I masked off a horizontal strip & used an ink cube direct to the paper.  The trick when using kraft cardstock is to use an ink with pigment properties, like the Delicata Emerald Green I used.  The white embossing picked up a hint of the green which I actually think adds to the effect for this card.  I stamped the sentiment using words from The Big, the Bold & Seasons and added a few white sequins for embellishment.


For my final project the masked area is a rectangle in the center of the card.  Distress Inks bundled sage, milled lavender & spun sugar were sponged on beginning at the bottom right & moving to the top left, rather than straight across.  Instead of embossing, I stamped the bloom, stem and leaves from In Bloom: Eva's Favorite Flowers in Brilliance Starlite Black.  It's another ink with pigment properties giving me good coverage on top of the Distress Ink background.  I curved the straight stem onto my acrylic block and masked the card front to get the length I wanted.  The same ink was used for the beautiful word from Sentimental: Thanks (Black Friday 2018 free with purchase stamp set which will be released for sale later) and a single gray gem completes the card.


Be sure to check the Leading Lady posts on my blog to enter the random drawing for a $30 Winnie & Walter gift card.  I'll be back next Saturday for my final post.


w&w-supplies

Wednesday, January 16, 2019

Love Mail with Kelly


Hi Folks! As fun as the holidays were this year, now that everything is packed away it's time to start turning attention to all things pink and red for Valentine's Day! In this post I'm sharing a fun and inexpensive Valentine's Day craft. These are the mini valentine mailboxes we made for friends/neighbors/teachers/office-staff last year. They are inspired by the craft project I led for Jackson's fourth grade class at the school Valentine's Day party. (also inspired by the pile of left over mailboxes I was going to need to return to Target!!)


 The mini tin mailboxes come from the Target dollar spot; aren't they the cutest?! The glass candlesticks you can pick-up anywhere for pretty cheap (especially at garage sales!) These are just from the dollar store. I spray painted them with whatever paint I had left over in the garage, making sure to check the label that it was fine to spray on glass. After hot gluing the mailbox onto the spray-painted stand I was ready for the fun part ... decorating them!


 For mass-produced projects like this I like to stick with the same basic template. Each mailbox has the sentiment on the left side, a collage of a heart and other elements on the front lid, and a cluster of tiny hearts on the right side. This particular mailbox uses the happy die from In a Word: Happy Cutaway, and the embossed sentiment from Sentimental: Love. The heart is from the Flawless Heart Cutaways, and then the postmark, envelope and 14 are from an oldie but goodie, You've Got Love Mail.


A similar mailbox here, except we have a "hello" instead of a "happy" greeting (from In a Word: Hello). And a birdie decided to land on this one, direct from the dollar store ... a package of 3 for $1.


Knowing the general layout is the same makes assembling the one-of-a-kind mailboxes that much easier. You just need to plan ahead a little. For example, I die cut several different large words at a time (one red piece of cardstock is enough to cut Love, Hugs, and Hello in the same pass through the die cutter, along with several small hearts) and I stamp several key phrases with versamark on a piece of black cardstock, emboss them all at once, and then cut them into strips with my trimmer. Starting off with a nice pile of words and phrases to choose from makes it really fun to try new combinations along the way.


 You've really got to love those In a Word dies ... this mailbox is "sending hugs" with the help of, you guessed it, In a Word: Hugs.

Now it's confession time as someone with a stamping blog: I did not stamp super cute Valentine's Day greetings to go inside of each mailbox.  


But, while I was in the dollar spot at Target I found these ADORABLE Valentine's Day band-aids that came 20 to a pack for only $1. Score!!!


Just add a "stuck on you" pun, and you've got yourself a sweet little valentine that's easy to mass-produce. Bonus: you don't even have to add adhesive to the band aid!!! : ) Just peel off the strips. Extra bonus: they work just as well for boys as they do for girls, which is sometimes hard to find.


 I used an envelope punch board to make custom-sized envelopes out of patterned paper for each valentine, addressed them and stamped a heart on each one. Don't they look cute after cupid has made his little deliveries?!


Here the all are, waiting to be left on doorstops across town.

Being as detail-oriented as I am, I matched up each mailbox with how I thought the colors would go in their homes ; )


Packed up for delivery. I was a little sad to see them all go.


Since I made these a little ahead of time I was able to hand-deliver some to my out-of-town friends  when I met them for lunch dates and such.


Finally, here are the mailboxes the kids designed during their fourth grade school Valentine's Day party (stop by to see these adorable kids in action). I mostly gave them glitter-foam stickers and adhesive gems to work with since they only had a few minutes in their station to assemble the mailboxes. But, I started them off with several of the patterned paper hearts on the front. It was pretty incredible, and very fulfilling, to see them so proud of their masterpieces which they can display for years.

Thanks so much for stopping by!
-Kelly


w&w-supplies

Monday, January 14, 2019

January Color Combo with Heather H. (Challenge)

Good morning! Heather here stopping by this morning to share a new Color Combo Challenge with you!


Here is my color inspiration for this month - instead of just an ordinary color combo, I thought I would go with more of a mood board theme! And who doesn't love mint and gold together? I like the addition of silver, and we can consider the silver more of a sparkle element (such as my perfect pearls and clear sequins on my card) instead of an actual glittery silver:


Once again I decided to use some of the newest winter and Christmas theme release from Winnie and Walter, and stretch some of the dies this time beyond just Christmas and winter theme cards!


I started off by die cutting Cover Model: The Peppermint Zone Cutaway from mint cardstock, and layered it over a white cardbase. I also die cut In a Word: Wonder and In a Word: Believe Cutaways, and the "&" from Typecase: Cary Letters Cutaways - all from gold cardstock to build my sentiment.


Before adhering the words down, I mixed some perfect pearls with water, and added a heavy splatter over the front of my card - just a subtle bit of sparkle and shine! I also added a twist of gold thread behind the words, and carefully mounted them with foam adhesive. Finished off by a few sparkly clear sequins!


Now - I have a few favorites from the last Color Challenge to feature! ! So without further ado, here they are!

First up - I just love this sweet card from Jill V. - the stenciled heart is the perfect backdrop to her little birdie couple and fun sentiment design!


Next up, this lovely floral number by Anila DK is just swoon worthy, don't you think?!?!? The heart stenciling is so pretty, and the flowers and sentiment combo are just gorgeous!


Lucy E. created such a soft and pretty background on her card! LOVE the ink blending and the soft white tree in the center with just the right touch of sparkle!


And finally, this lovely watercolor creation from Deepti is just stunning and a perfect take on the color combo! Beautiful work!


<<<RANDOM WINNER>>>


No. 7 | treebug
Tina's is so previous and sweet!  She incorporated the colors with just the right patterned papers.

Tina, please email us at info {at} winniewalter {dot} com with the subject "December Color Combo Challenge Winner" to claim your prize.

>>>CHALLENGE<<<

New challenge will post on the second Monday of each Month, and will end on the Friday before the next challenge begins to allow time to pick a winner and some favorite entries to feature.

Now it's your turn to play along!
  1. Create a new project using the January Color Combo. 
  2. Use at least one (1) winnie & walter product.  This can include Cutaways (dies), Creative Screenings (stencils/masks), printable/digital items, cut files and/or stamp sets.  Remember we offer freebies in our shop.  Our freebies can be used to create your project(s) for this challenge.
  3. Link up your project below using the InLinkz Link-up by 11:55 p.m. CST on Friday, February 8, 2019.  
  4. Enter as many times as you want before the deadline.
  5. This December Color Combo Challenge may be combined with other challenges found here on the w&w blog or elsewhere. 
One randomly selected entry will receive a $25 gift certificate to Winnie and Walter. YAY!!! I can't wait to see your entries! 


Thanks for stopping by - have a wonderful day!