
Today marks our fourth day of Share the Love Week featuring Distress Inks by Ranger and we are going strong! This is a week-long love fest when we focus on a company or product we adore and show how smitten we are by using our featured love with w&w products!
This time around we want you...yes, you...to participate with us for a chance to win some awesome prizes.
Today our challenge revolves around something that is so much fun, versatile and works amazingly well with Distress Ink: Stencils/Masks!
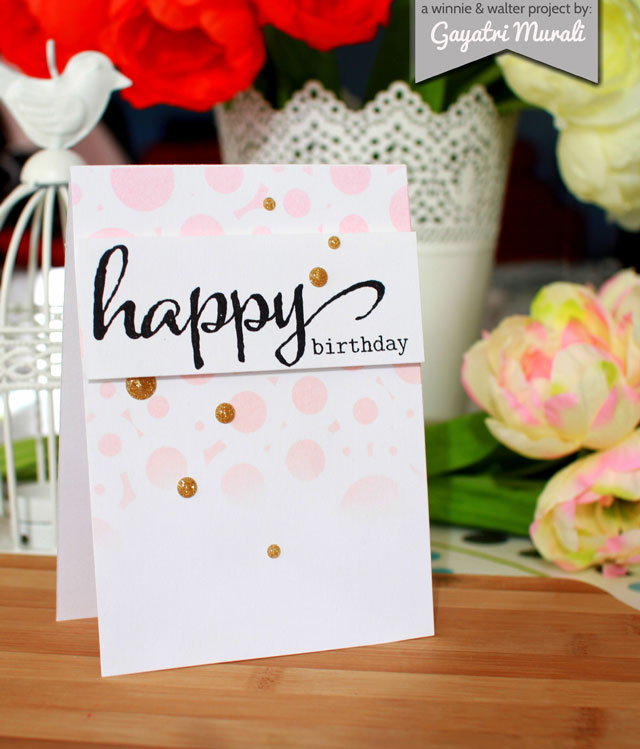
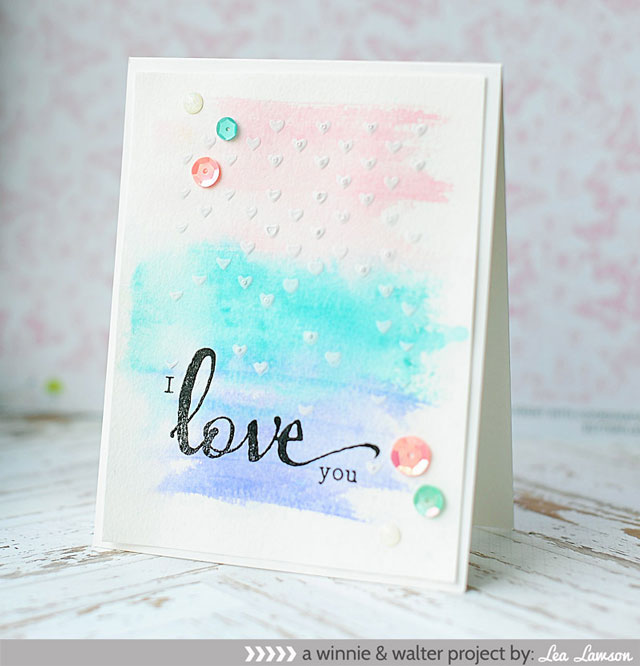
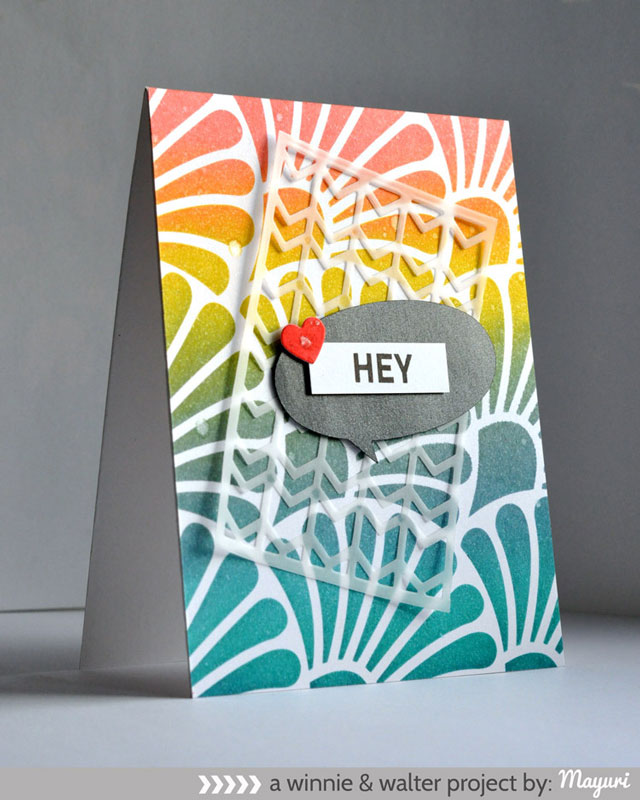
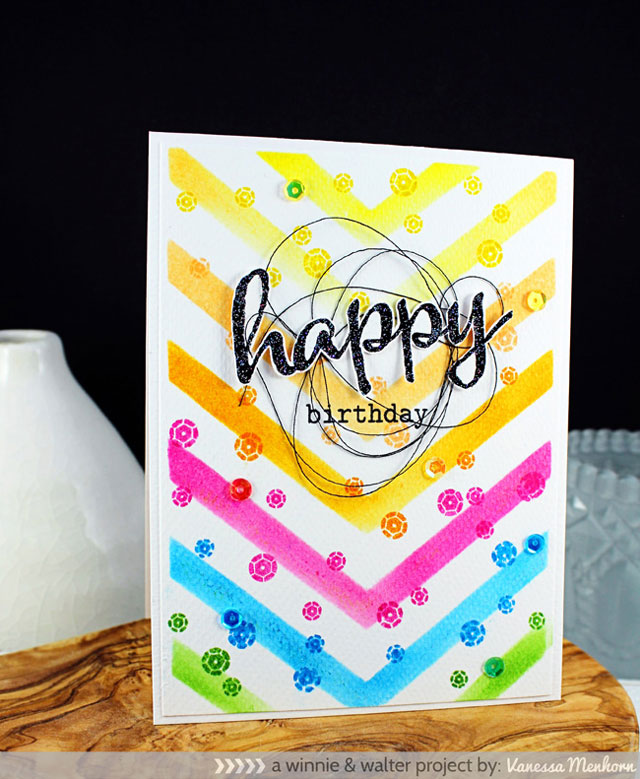
Before we get to how you can participate to win, let's see what Julie, Shay, Gayatri, Heather, Kelly, Lea, Mayuri and Vanessa of The Talent have made.
Julie
Hello there! I hope
everyone is enjoying getting inky! Just
wanted to say thanks so much to all of you who are commenting and participating
in our Share the Love week! You all are
making it even more exciting for us. I
know Walter enjoys looking over your creations too!
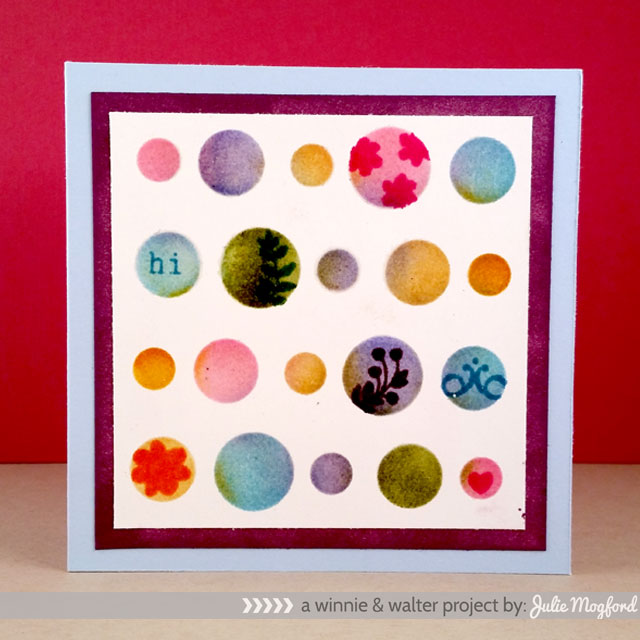
Today I have two cards – both using stencils and both are
VERY different. The first is a stencil I
had in my stash and I wanted to try using my new Distress Ink minis and new
round blending tool to color in the stencil.
I really love the results and how the ink blends on the surface. *sigh*
I chose 5 different colors and added them randomly and then
I went back with colors that were in the same color family but darker, and
added images that I stamped within the stencil openings. The stamps used here
are the floral stamps are from The Write Stuff: Leave it to Mom, tiny heart
from You’ve Got Love Mail, and hi from The Big, the Bold, and Extras. Sometimes the image was small and fit neatly
inside, and other places, I purposely added the image to overlap, such as the
pink flowers on the top row. I cut down the design to a square, mounted it on
purple cardstock and then onto my 4.25 inch square card base. Super Fun and Super
Easy!!!
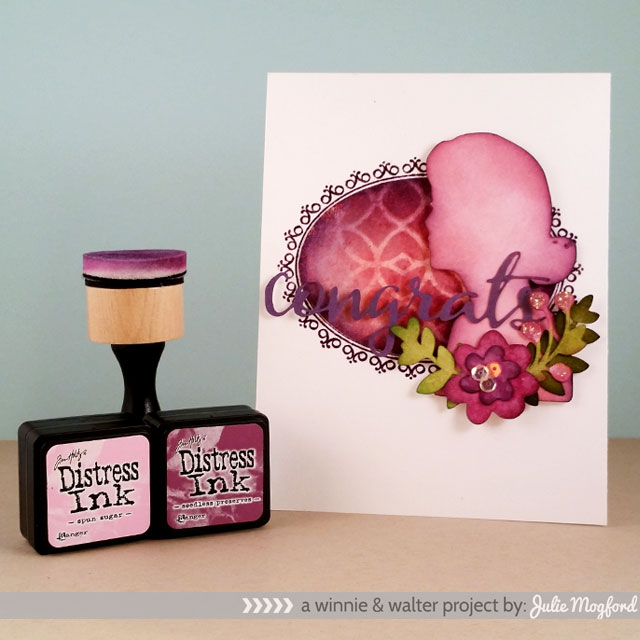
My next card totally evolved as I was creating it. I started off with a manila tag a la Tim
Holtz and created the lattice stencil background in varying shades of pinks and
purples. I stamped the ornate oval frame from The Write Stuff: Leave it to Mom stamp set on the tag and cut out the inner oval and inked the edges a bit more with the
darker shades of dusty concord and seedless grapes. I stamped the ornate oval
frame again, this time with the dusty concord and embossed with clear ep, and
then added the lattice oval. This added
inking really makes the lattice drop to the background, and almost give the
appearance that this is a window into another space. Lots of depth, but this part is flat. {insert
happy face again}.
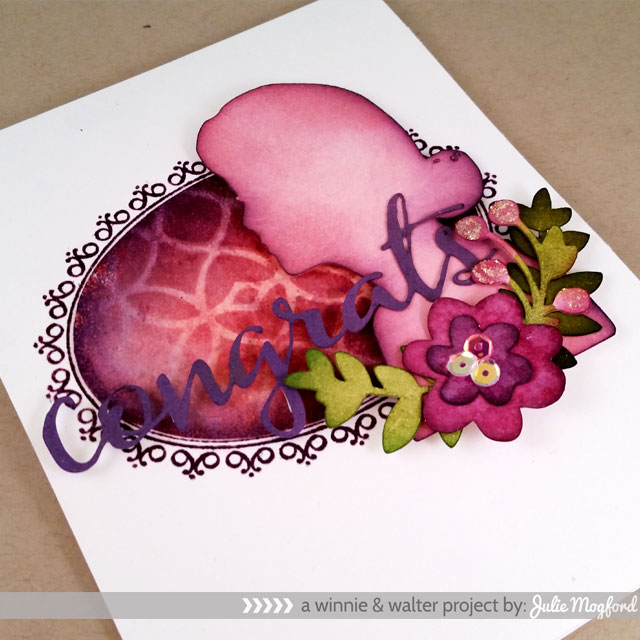
The rest of the items are ALL cut files, all cut from white
card stock! The congrats is from The Big, the Bold and You cut files set and yes, it is as delicate as it looks. It was a test cut from my original trials after creating the cut files, and it is super thin. Using the round ink applicators, I was very
careful to tap the ink on repeatedly instead of using a blending motion and I
still got amazing coverage. Now, my
sentiment matches the colors of my other elements perfectly!
All of the other cut outs are from The WriteStuff: Leave it to Mom cut files set and I just colored my little heart out with these new smaller ink blending tools. My final accents were a very subtle addition of Radiant Rain Shimmering Mist, which I applied with a paint brush for subtle shimmer, Stardust Stickles on the flower buds and iridescent sequins for the center of the flower. I am totally in my purple happy place!
All of the other cut outs are from The WriteStuff: Leave it to Mom cut files set and I just colored my little heart out with these new smaller ink blending tools. My final accents were a very subtle addition of Radiant Rain Shimmering Mist, which I applied with a paint brush for subtle shimmer, Stardust Stickles on the flower buds and iridescent sequins for the center of the flower. I am totally in my purple happy place!
Shay
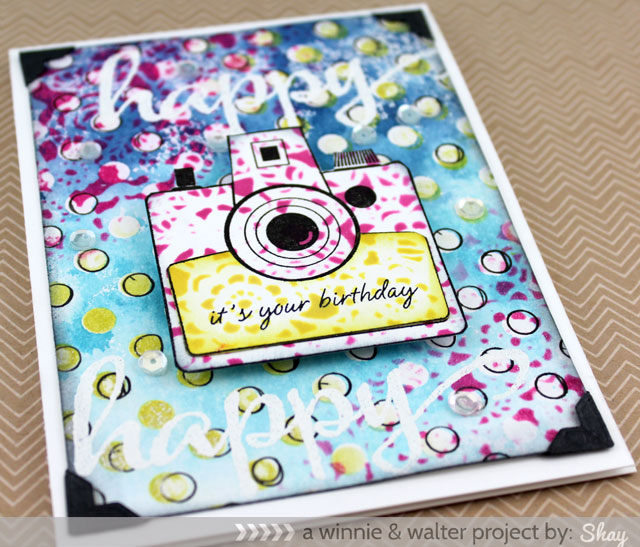
I went for it! I used the stencil within an inch of its life. Well not really as stencils are pretty hardy things, yet I still used it as a stamp, stencil, mask, a tracing tool and layering a stencil upon a stencil. These little thin pieces of plastic are amazing and then you add your Distress Inks to it and you have the endless possibilities we all wax poetic about.
I went for it! I used the stencil within an inch of its life. Well not really as stencils are pretty hardy things, yet I still used it as a stamp, stencil, mask, a tracing tool and layering a stencil upon a stencil. These little thin pieces of plastic are amazing and then you add your Distress Inks to it and you have the endless possibilities we all wax poetic about.
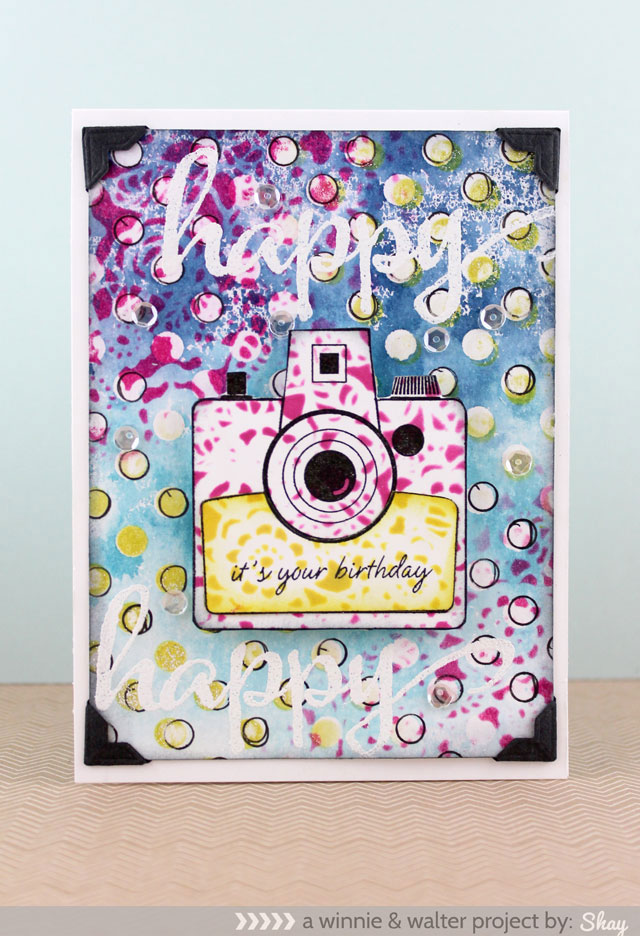
So on to what I did...I apologize in advance for how long this is! I inked up The Crafters Workshop Mini Swiss Dot 6x6 stencil with tumbled glass, broken china and faded jeans Distress Inks. Simply take your ink pads and swoosh or pounce it over the plastic. Then I spritzed the stencil with water before I placed a piece of Tim Holtz Distress Watercolor Cardstock over the wet ink. To keep from getting myself entirely covered in ink and to firmly press the paper into the inky stencil I placed a paper towel over the paper covered inky stencil.
After removing the stencil from the paper I colored in some of the holes with a white crayon. Over the panel I placed the doily layering stencil from the Tim Holtz Collection and with the mini ink blending tool and picked raspberry Distress Ink I colored in the upper left and lower right edges. Then using the Mini Swiss Dot stencil I traced some of the circles with a black pen. After that I put the stencil back (slightly off) and used squeezed lemonade Distress Ink to color in some of the dots on the upper right and lower left edges. I then stamped happy from The Big, the Bold, and the Happy in Versamark and embossed it in white. I edged the panel with black soot Distress Ink and an ink blending tool. I added black photo corners to the watercolor panel and adhered it all to a white card base.
On a little square of white cardstock I stamped the camera from The Write Stuff: Picture Perfect. On the camera I used the doily stencil and picked raspberry Distress Ink. I cut out the camera and edges it with black soot Distress Ink and an ink blending tool. I stamped the bottom part of the camera again on a scrap of white cardstock in which I stamped the sentiment from Bubble Talk and used the doily stencil with squeezed lemonade on it. I cut it out and glued it onto the pink camera. I adhered the camera to the watercolor panel with foam dimensional adhesive. Last, I added...you guessed it..sequins. What? It needed some sparkle! :-)
If you made this far you are deserve a treat and I can think of nothing better than the projects by Gayatri, Heather, Kelly, Lea, Mayuri and Vanessa! These ladies are sensational!!
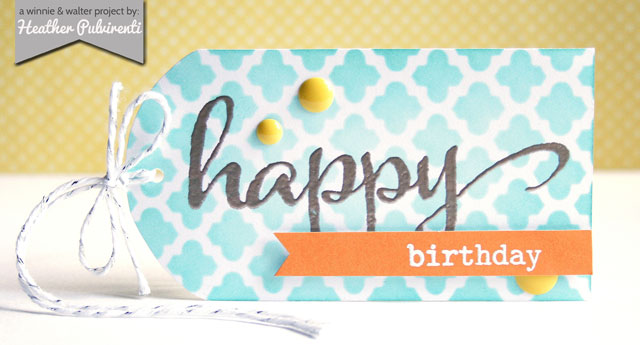
CLICK HERE to see more of Heather's project.
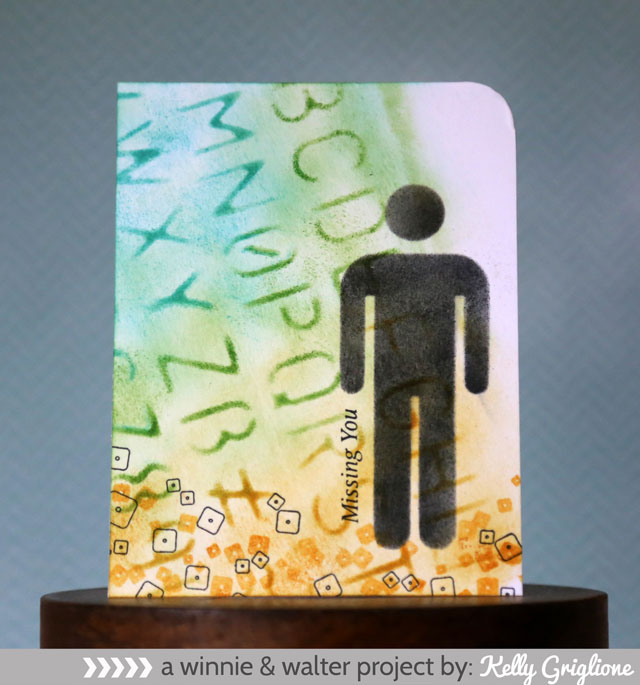
CLICK HERE to see more of Kelly's project.
CLICK HERE to see more of Lea's project.
CLICK HERE to see more of Mayuri's project.
CLICK HERE to see more of Vanessa's project.
Want to win a $30.00 "gift card" from us (shipping & handling will be the responsibility of the winner)?
You have two (2) ways you can win:
- You can comment once on this post.
- You can create a new stencil/mask project using Distress Inks + at least one (1) w&w product (this can include stamps, cut files, digital products and/or one of our freebies found on our website or for our Facebook fans) and add it to the Link-up tool found below. You may enter as many times as you wish while the challenge remains open.
We will randomly pick a winner from the comments and challenge entries that entered by Sunday, July 13, 2014 at 11:55 p.m. CST.



Great work Everyone!! nice stenciled examples!! :D
ReplyDeleteSuch unique works of art! Beautiful colours achieved and stencil patterns are gorgeous!
ReplyDeleteI am loving all the inspiration!
ReplyDeleteAwesome inspiration and creativity with these stencils and masks.
ReplyDeleteYour DT is rocking the Distress Inks this week! Awesome projects!
ReplyDeleteOK, that's it! I'm having a W&W Distress-Fest this weekend!
ReplyDeleteSweet! Heather's birthday tag really inspired me...my favorite colors are yellow and turquoise!! I gotta get out my supplies and play along!
ReplyDeleteOh my!!! Lots of inspiration here!
ReplyDeleteStunning work, love all the inspiration and such fabulous designs!!!!
ReplyDeleteW&W looks LOVELY in DESTRESS! Julie's silhouette card is STUNNING. LOVE the depth of the inks:)
ReplyDeleteStencils are so fun, these examples are amazing! <3
ReplyDeleteI love Distress Inks and Stencils, love it... Beautiful Cards, amazingly inspiring...
ReplyDeleteWow so much gorgeous stuff to look at ...i don't have many stencils but time to dig them out and see what i can do :)
ReplyDeleteKate xx
I'm really new to stencils, and honestly, distress inks, too! You may be wondering what rock I've been living under? Until I took the Water Coloring for Card Makers class, I had no idea the versatility of a water-based ink! Love them now... on to stencils =]
ReplyDeleteJust when I didn't think it could get any better with this week of Share the Love, it does!!! These projects are outstanding! Way to raise it to a whole new level ladies.:)
ReplyDeleteWow these are stunning! And I'm so inspired by all if your creations!
ReplyDeleteStencils are such fun! They work really well with Distress Inks. Awesome DT samples - thank you so much for the inspiration!
ReplyDeleteThese cards are fantastic! Thanks for so much inspiration. I just got some Distress Inks, so I am very excited to try these ideas.
ReplyDeleteOh wow, these are all fantastic! Thanks for the inspiration.
ReplyDeleteW&W and Distress Inks…what a great combo!
ReplyDeleteBeautiful projects!
ReplyDeleteThese cards are simply gorgeous and look like so much fun to make!! I am definitely getting out my stencils and distress inks to play!!!
ReplyDeleteLooks like it is fun to play with stencils.
ReplyDeleteLove the techniques today....such great results!
ReplyDeleteWow so much of inspiration :) love every single card :)
ReplyDeleteLots of colorful inspiration today!
ReplyDeleteStunning, amazing, gorgeous! Tim Holtz sure has a lot to answer for, lol! So glad to be learning so much with distress.
ReplyDeleteFantastic cards! Loving these wonderful techniques you shares too!
ReplyDeletelovely projects!
ReplyDeleteWonderful cards today!
ReplyDeleteStencils and distress inks are a marriage made in heaven - I'll be playing for sure in this one! Love the seedless preserves and spun sugar on Julie's card!
ReplyDeleteworking on mine now.... such great inspiration from the team today
ReplyDeleteMAGNIFICENT MASKING & STUNNING STENCILLING!!!
ReplyDeleteWOW wow WOW
I am TOTALLY INSPIRED ... ANOTHER set of techniques to ADD to my "techniques-to-try" list - THANK YOU for sharing the CREATIVE INSPIRATION today :)
WOW! Great inspiration in this post!
ReplyDeleteLadies, you showed us really, really nice projects and techniques!
ReplyDeleteThanks to W&W for the chance to win!
LOVE stencils, so versatile, and I'm loving all of these samples and the different looks the artists achieved!!
ReplyDeleteI only have a couple of stencils but I'll give it a go!
ReplyDeleteI just love stencils and the beautiful designs here!!
ReplyDeleteFABULOUS cards ladies - LOVE Winnie & Walter with Distress Inks!!
ReplyDeleteA newish technique for me ... what fabulous cards to inspire me! Anita :)
ReplyDeleteLove the creations with stencils. I am not experienced working with stencils but am inspired to give a try.
ReplyDeleteWow, everyone's creations are gorgeous! Need to get back to crafting!
ReplyDeleteYou have such a talented DT! Love all of these beauties!
ReplyDeleteI just love these stencil and mask ideas! Awesome cards! Lots of great ideas to try out!
ReplyDeleteI love the look of stencils and distressed inks! So pretty!
ReplyDeleteThose cards look amazing!
ReplyDeletelove the stencils, great inspiration
ReplyDeleteHi Winnie and Walter, I am new to your products and I am excited to use them! I found you through a youtube video by Jennifer McGuire. Love your blog and look forward to creating with your stamps! :)
ReplyDeletelove all the bright colorful designs showcasing the stamps. Looking forward to becoming a part of the community
ReplyDeleteFantastic!!
ReplyDeleteOh my goodness, Julie - your card is absolutely regal! Those colors, the depth. Wow.
ReplyDeleteWhat a wonderful group of cards! So much color and inspiration...
ReplyDeleteI love stencils - they are so versatile
ReplyDeleteWow wow wow !!!!!! Pure inspiration, thank you for sharing with us!!!
ReplyDeleteElisabeth
I only have one stencil....after looking at this post, I definitely need more!! Shay and Vanessa's cards are AMAZING!!! I love how the Big, Bold stamp sets really pop in a lot of these projects!! Such great font!!!
ReplyDelete