We have a special treat for you today! Our lovely and talented friend, May Flaum, is back to share a gorgeous project with photo tutorial!
If you missed her first appearance (and video) back in May of this year on the w&w blog CLICK HERE!
If you missed her first appearance (and video) back in May of this year on the w&w blog CLICK HERE!
Without further ado, May Flaum....
When it comes to holiday cards, thank you cards are my most
important! May Flaum (www.craftwithmay.com)
here, and I’m excited to share this with you today. Using a new favorite stamp
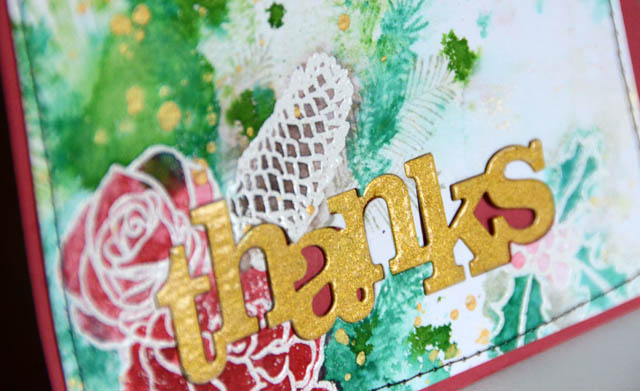
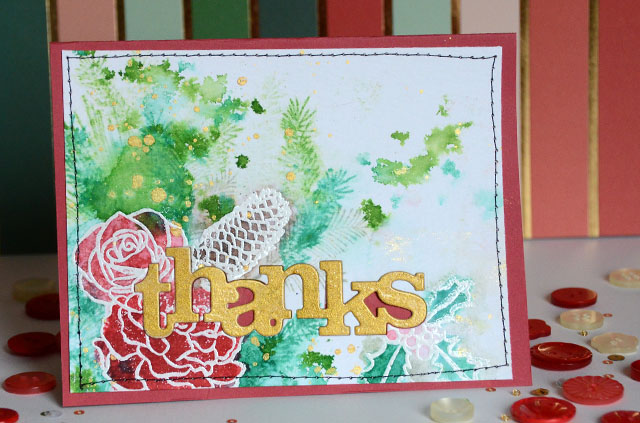
set and die I’m creating a Christmas thanks card to send out and I’m just
loving the results of the distress ink and white embossing powder with these
stamps. I hope you enjoy this step-by-step tutuorial.
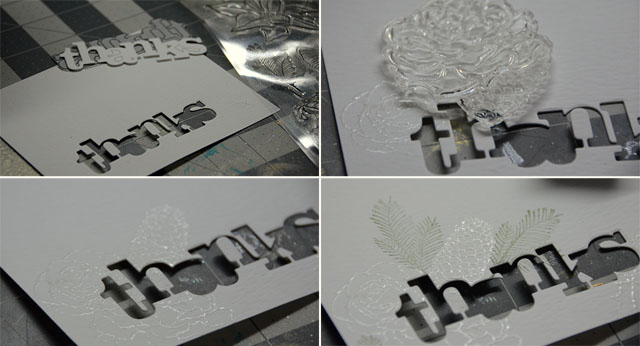
1. Die cut “thanks” from watercolor paper card front and save word for later.
2.
Using clear embossing ink and white powder on
watercolor paper, stamp and then heat set key images one at a time.
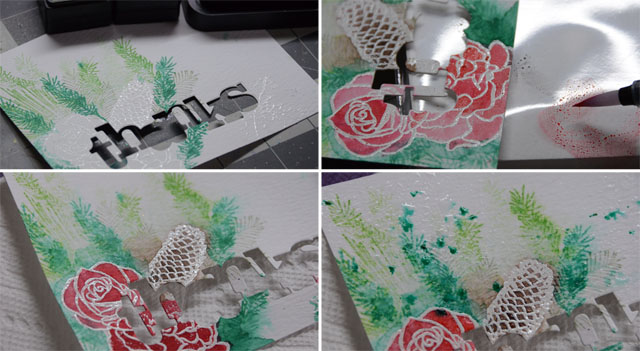
3. Once you’re happy with the key images you have, begin stamping in your filler/background images with distress ink. Add a bit of water to blur and blend.
Tip: check where stamp will go and
just wipe off ink of any area you feel will overlap onto a key image
4.
Using distress ink placed onto some
plastic/nonstick surface or watercolor, color in the key focal point images.
5.
Add in coloring around focal point images as
need to help the white embossing really pop.
6.
Drop green ink or mist onto background and add
water to create watercolor droplets of color. Add gold as desired. Dry totally.
7.
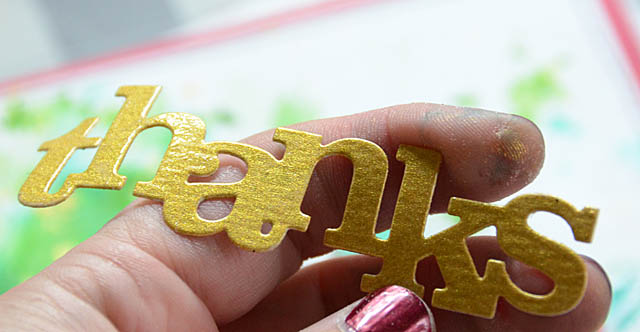
While the card front dries, use a gold ink pad
(or gold paint) and coat the word thanks that was previously die cut. Leave
as-is, or coat in clear embossing powder for an extra shine as I did here.
8.
Once the card front is dry, adhere and stitch to
a red card. Then finish the card by attaching the “thanks” die cut back in
place.




It looks lovely !
ReplyDeleteVery pretty!
ReplyDeleteThis is beyond lovely! Who knew mixed media could look so tailored - GORGEOUS!
ReplyDeleteMay, this is so beautiful. Great job.
ReplyDeleteOH I have that Elsa's set on my Christmas wishlist!!! Fabulous, May!
ReplyDelete=]
This is so beautiful, love the combination of colors, the white embossing and the gold inlaid word!!
ReplyDeleteGorgeous card, May! Love the bright colors and design.
ReplyDeletewow - I wish I had the tools to make this type of card. Beautiful
ReplyDeleteBeautiful card ... I love the water colour look - and that die cut is great!
ReplyDeleteThank you for sharing your beautiful card and teaching us how to recreate it on our own! Gorgeous!
ReplyDelete~carol