Thursday, April 19, 2018

May All Your Wishes Come True with Gayatri

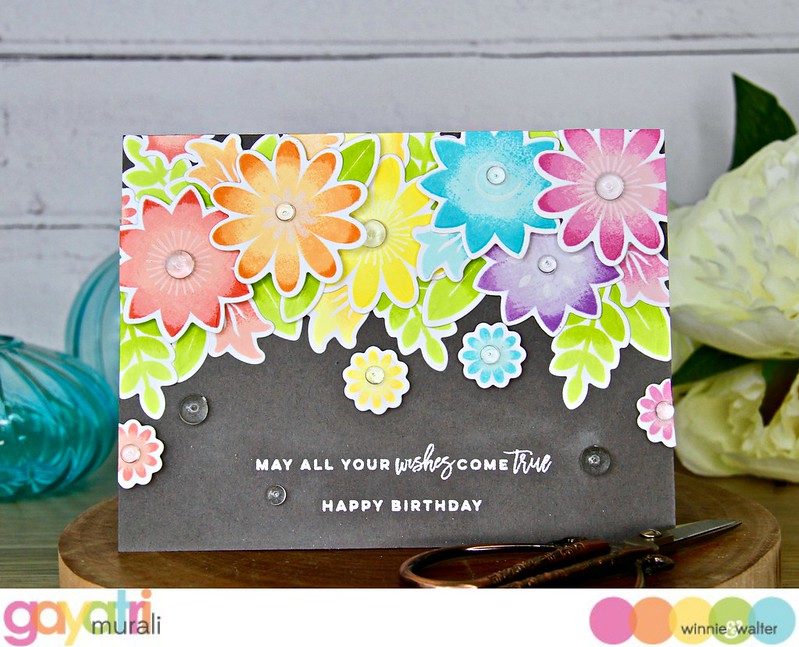
Hello and welcome back to W&W blog. This is Gayatri here today sharing a spring themed card. Lots of floral in rainbow colours. Bright colours and florals make me happy. Hope it does for you too.
gayatri_Happy Birthday card 1

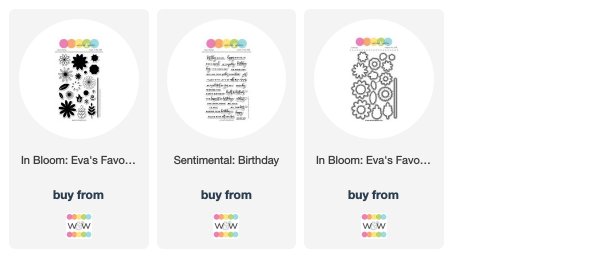
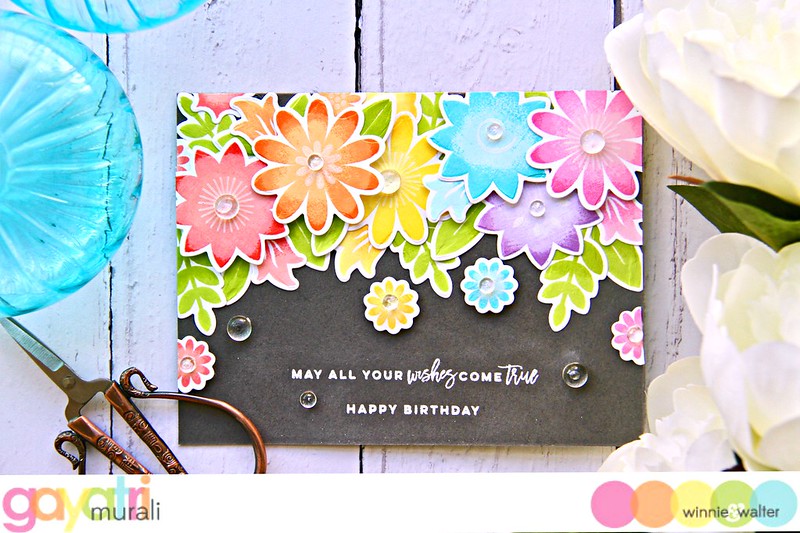
I have used rock and roll technique to stamp the flowers and leaves from W&W's In Bloom: Eva's Favorite Flowers stamp set. The inks I used are from Altenew and I stamped them using MISTI. I made sure I stamped enough flowers in all rainbow colours. I only used the solid stamps from the set. To add interest to the flowers, I used white pigment ink to stamp the centre details of the flowers. Used the coordinating cutaways to die cut them all out. 

Instead of using white or black card base, I chose a dark gray card base. Something different to what I normally pick. The flowers and leaves are clustered on top of the card base in rainbow order and adhered some using glue and others using foam adhesives. The sentiment is from Sentimental: Birthday stamp set from W&W which I white heat embossed on the bottom centre of the card. Some clear droplets to finish off the card.
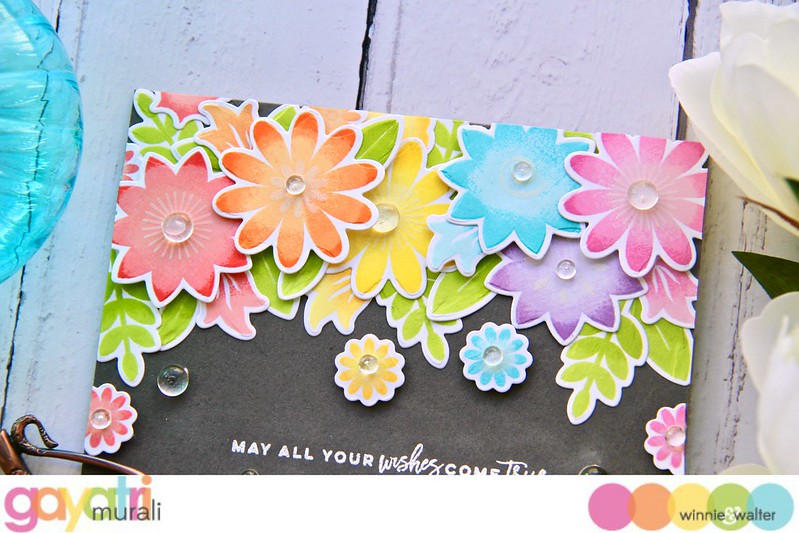
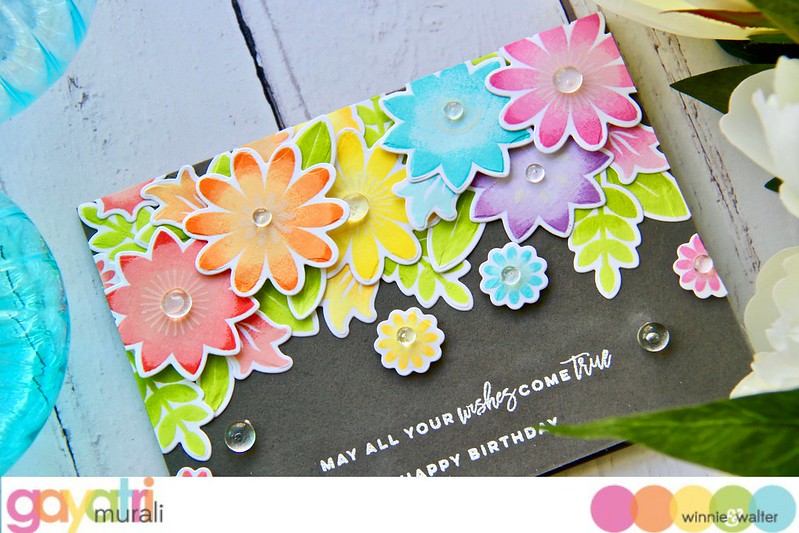
Here are some closeups of the card.
gayatri_Happy Birthday closeup1 gayatri_happy Birthday closeup

I love the rock and roll technique because the shading with darker shade of the same colour on the outside gives depth to the rather flat coloured flowers and leaves. And the white flower centres add subtle detail. The use of dark gray card base gives contrast at the same time not too stark a contrast from say a white or black card base. Hope you got inspired by this card and give it a try. All supplies used to make this card are listed below.
gayatri_Happy Birthday flat

Thanks very much for stopping by!


My blog signature


w&w-supplies

Wednesday, April 18, 2018

In a Word: Birthday Titles Cutaways with Kelly


Hi Folks! Kelly Griglione here to share a fun set of cards using In a Word: Birthday Tiles Cutaways. (Editor's Note: these will be back in stock very soon!)


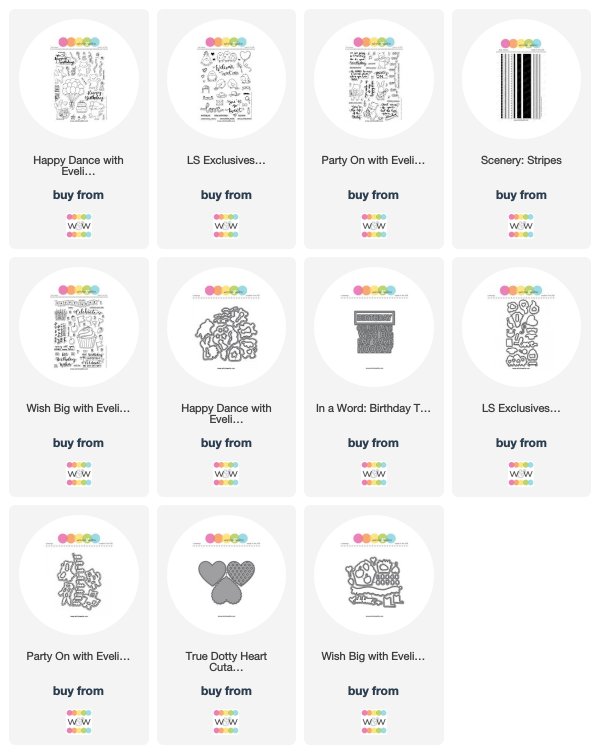
This project started while Spring cleaning my craft room ... I made an honest effort while evaluating all my scraps and random pieces of projects laying around to "use it or lose it." Awhile ago I made this packaging as part of the August 2017 product release (see blog post). I haven't had an occasion to use it right away, and I really didn't want to keep storing something that bulky, so I removed the metallic purple bands and cut them down to size.

I wanted to put each metallic purple band on the bottom of the card, so for the top of the card I taped together three different cutaway phrases. As a bonus, all but the white card base are leftovers from prior projects as well!

 Once the words are set on the card base, all that's left to do is add some adorable critters ... Evelin T Designs to the rescue! The elephant from Happy Dance with Evelin T Designs looks so celebratory, especially with a balloon in hand. 


On the charcoal card, I added a cupcake from Wish Big with Evelin T Designs and got some puffy texture with my Tsukinekeo Radiant Neon Amplify liquid that magically gets puffy when you heat it. It's so fun to watch! The bird guarding the cupcake is from LS Exclusives: So Tweet with Evelin T Designs. 

The foxy flutist from Party On with Evelin T Designs is another leftover I was able to enlist for a focal point. As with the previous cards, I like that the die cuts extend over on top of the text so that you know the words are there, but they're not 100% visible. Kind of like how magazine covers are laid out so the main images are often covering a portion of the magazine title. You know what it says, but you don't see all the letters. 

Sometimes I hesitate on getting the companion die set because I think I can just get away with stamping all the images onto the card. This is a case where the dies were necessary ... both for the main image, and for the tiny music notes drifting through the negatively cut letters. 
One more thing to mention, the tree stump the fox is standing on for his performance is actually the cupcake turned upside down!
 

The last card has the kitty playing an accordion on a leftover heart from True Dotty Heart Cutaways. For all the critters I tucked the far leg behind whatever they were standing on so it looked more like they were dimensional. Also, on several of the cards I added some arrows from Scenery: Stripes 2.

It's been awhile since I've used a side fold card, and honestly I only did this because the leftover card bases I wanted to use were all folded that way. But in the end I rather like them this way, and might consider doing this more. Plus anytime you can see through to the inside of the card, I think that's a fun element to have. It's a chance to show off any patterned paper you have inside. 
Three cheers for a more efficient workspace (those long metallic purple strips were really a pain to store!) and for a new set of birthday cards. I'm happy with how they turned out!

Hope you're able to get some Spring cleaning done in your workspace. Every little bit helps!

Thanks for stopping by!
- Kelly


w&wDT_kellygriglione_blog-sig


w&w-supplies

Tuesday, April 17, 2018

2018 Mega Sponsor Spring Blog Hop Begins Next Week!


Mark your calendars! We are so excited to be part of the upcoming 2018 Mega Sponsor Spring Blog Hop! The feedback we got from last year’s was incredible and are excited to be part of this again. We have 18 sponsors giving out prizes totaling over $550! Don’t miss out, so be sure to subscribe and follow us in this exciting event.

Date: Monday, April 23 (12 noon EST)
Ends: Friday, May 4 (12 midnight EST)
Winners announced: Friday, May 11 (12 noon EST)

Saturday, April 14, 2018

April Leading Lady Deepti Aggarwal | Take Two

Our April Leading Lady Deepti Aggarwal is back for her sensational second performance!  If you missed her smashing debut you must see it...CLICK HERE.   Today's amazing array of cards take on one single stamp set!

Ladies and gentlemen, Deepti...

Deept_Aggarwal_april2018

Hello Everyone!!! I'm so excited to be back here with my second performance... Before I move to my post, I want to Thank each one of you for leaving so much love for me here at w&w blog and at my blog...I'm really overwhelmed with the way you have poured your love..😘..Thank you so much.. For my take two, I have decided to focus on Winter Wishes with Evelin T Designs stamp set and stretched it further to challenge myself. I've made not one or two but four non - Holiday cards using this Winter Wishes stamp set 😁. It is so much of fun to stretch your stamp and use it all year round. So, Let's get started..


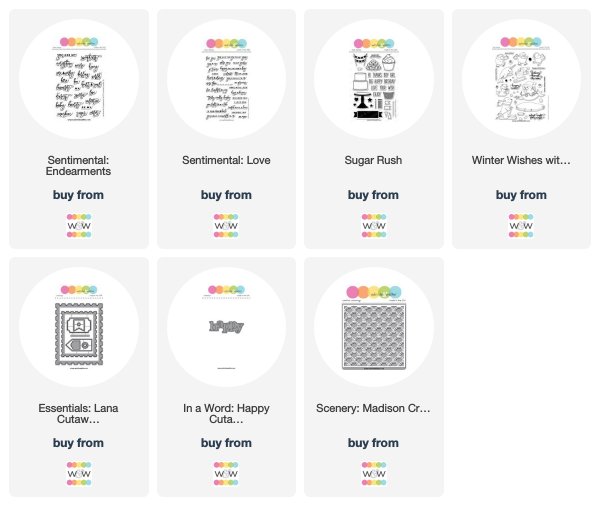
To make this card, I took A2 size white card stock and stencilled the background with  Scenery: Madison Creative Screenings using distress ink. Then I stamped and water coloured this cutie Walrus from Winter Wishes with Evelin T Designs and added some details  on its cap with sharpie pen. Further, I added glossy accent on the lights for some dimension. Once satisfied, I fussy cut it and  adhered it to the stencilled card panel with foam tape. Added the black strip of heat embossed sentiment from Sentimental: Love. Completed it by adding blue and clear sequins. Here is the close up..
 

For my second card, I did lots of masking. It was really fun to make this one... To start with , I took white card  panel, first I stamped my focal image and then masked it and stamped rest of the images around it by masking them further. Once satisfied, I die cut out the rectangle panel using Essentials: Lana Cutaways and water coloured it at some places.


Then, I adhered the masked panel on white note card and  added die cut out rectangle panel too with foam tape to give it some dimension. Meanwhile, I stamped this happy Narwhal from same stamp set  i.e. Winter Wishes with Evelin T Designs and coloured it. Added some glossy accent on its horn & belly for some interest. Adhered it to the stamped focal image with foam tape. Added the heat embossed sentiment from Sentimental: Endearments. Finally added some blue sequins to complete it.


I made my third card clean and simple.I always find it difficult to make CAS cards..But w&w bold cutaways are a great rescue..😁..For this card, I distress inked the background strip by masking rest of the card panel and splattered it with some water. Then I die cut out the happy word using In a Word: Happy Cutaway and distress inked it too.


Meanwhile, I stamped and coloured my focal image from Winter Wishes with Evelin T Designs and fussy cut it. Adhered the Happy word on the card panel and replaced the letter "a" with my focal image using foam tape. Added the birthday sentiment from  Sugar Rush stamp set and some sequins to complete it. Here is my final card for today. I really fell in love with this one, it came out so beautifully. I got the idea while doing my household chores..Is that happen with you too...?? I'm sure .A big yes...😉


To make this card, I took watercolour paper and created this galaxy background using gansai tambi watercolours, splattered it white gesso and glued it to white note card.Then I stamped and water coloured this bear from Winter Wishes with Evelin T Designs and partially fussy cut it. Adhered it on the card panel with foam tape. I've stamped some snow balls from same stamp set and fussy cut those to use it as a thinking bubble. Then I cut out a big bubble using a pair of scissors and stamped the part of bear image and coloured. Added the sentiment from Sentimental: Endearments and completed it by adding some sequins.


Here is the pic of all these cards together.


I hope you liked what I've created and inspired you to take out your holiday stamps and do some magic..And before you leave...don't forget to leave some love on my blog post here for a chance to win $30 Gift certificate from Winnie & Walter store. Thank you so much for stopping by!!

Hugsxx
Deepti Aggarwal


w&w-supplies

Friday, April 13, 2018

April Documentarian Jen Gallacher | Introduction

Our second Documentarian is none other than Jen Gallacher!  I have been a big fan of Jen ever since she was a Garden Girl at Two Peas (do you remember them?).   She's so warm, friendly and shares such excellent information and tips in her videos.  Her work is eye-catching, bright, creative, well-balanced along with being visually stunning.   Jen is not only an accomplished memory keeper, but makes beautiful cards and paper crafts.  I was really lucky to get a chance to say hello to Jen in person this past January and I am so thrilled she is our Documentarian this month!  

>>>ON SOCIAL MEDIA<<<

Blog: http://jengallacher.blogspot.com/
Instagram: https://www.instagram.com/jengallacher1/
Facebook: https://www.facebook.com/JenGallacherDesigns/
Pinterest: https://www.pinterest.com/jengallacher/
YouTube: https://www.youtube.com/user/TheJenGallacher

Now let's learn more about Jen and peek into her Documentarian Dossier!

>>>DOCUMENTARIAN DOSSIER<<<

Jen Headshot Vertical

Name: Jen Gallacher

Family: I have 3 beautiful kids and am married to my best friend, Brett.

Something you love about where you live? We live near a bunch of farms and have one of the most beautiful mountains nearby that I can see right out my craft room window.

Favorite (favourite) food memory? My mom makes me carrot jello any time I’m sick. It’s orange jello with shredded carrots. My kids thinks it’s the weirdest thing ever, but I seriously feel so loved when I get it.

Your favorite (favourite) color combination to create with? Right now it’s yellow and teal.

How did you begin documenting memories? Many times I start with products because that reminds me of a story I want to tell. Then I will go hunting for photos to tell that story.

Who and/or what do you most enjoy documenting? I most enjoy documenting my kids, but they are getting older so now I’m trying to include more of myself in my scrapbooks.

What is your favorite (favourite) way of keeping memories? I love scrapbooking that includes my favorite photos, a sweet message to my kids, and a mix of things that are beautiful and make me happy.

What tips/advice would you give someone just starting out? Don’t get overwhelmed. Just pick one story and tell it. Your style and your approach will evolve over time. Find the love first!

What 5 items are essential to you for creating (photos are a given and exempt)?   Small tone-on-tone patterned paper designs. Ephemera Packs. Enamel Dots. Phrase stamps. Something with texture: twine, crepe paper, tassels, etc.

When do you need to feel inspired, who and/or what inspire you? Pinterest and YouTube. I always spend about an hour at the end of the day getting inspired for the rest of the week.

Who are your favorite (favourite) documentarians? Oh sooooo many. Right now I’m loving Jen Schow, Lorelei from Rosey Posey Studios, Paige Evans, Vicki Boutin, Becki Adams, and soooo many more.

Check back next Friday for Jen's first project post!

Thursday, April 12, 2018

For a Very Special Person with Gayatri

Hey, This is Gayatri here with you today. I have a clean and simple card. I have used three different stamp sets from Winnie & Walter. They are Dotty About You with Lydia Evans stamp set, Kindness with Evelin T Designs and coordinating cutaways and finally, Sentimental: Gift stamp set.

gayatri_For a very special person1

I picked the smaller Cacti image from Kindness with Evelin T Design stamp set to stamp multiple times on white cardstock panel using copic friendly black dye ink. I used Simon Says Stamp Intense Black ink. Then I coloured the images using copic markers. I am not looking for realistic cacti here but colourful cacti as this is more a modern and clean looking card. After colouring the cacti, I added dots using Sakura Gelly Roll white pen. Then I die cut them all using the coordinating cutaway.

I wanted these cacti to be popped up into three rows and columns on a white panel. But I wanted something on the background to soften the stark contrast of the white background. Nothing dark but something subtle and small enough for the cacti to fit inside the stamped image. So I went through my Winnie & Walter stamp set to find a solid round stamp image. I did find a few of them but they were perfect round. I wanted something organic looking. So I chose the background image from the new Dotty About You by Lydia Evans stamp set. It was a solid stamp and roundish not the perfect round image. I was so happy when I found it.

I die cut a white cardstock using Essential: Katherine Cutaways and used Simon's Fog dye ink to stamp the image on the background to anchor the cacti. I then popped up all the die cut cacti using foam adhesives. The sentiment is from Sentimental: Gift stamp set which I white heat embossed on a strip of black cardstock and adhered on the middle of the card front. The panel is embellished with few clear droplets and mounted on a white card base using foam adhesives.
Here are a few closeups.

gayatri_For a very special person closeup1 gayatri_For a very special person closeup2
gayatri_For a very special person closeup


I really love the colourful cacti with the white dot details. I think the dots make the cacti pop and the subtle gray background behind the cacti anchors them, reduces the contrast as well as adds interest. Love how this card turned out. All w&w supplies used to make this card are listed below.

Thanks so much for stopping by. Have a lovely day!


My blog signature


w&w-supplies

Monday, April 9, 2018

April Color Combo with Heather H. (Challenge)

Good morning! Heather here stopping by this morning to share a new Color Combo Challenge with you! I recently had a special request for a custom card (and a rare opportunity of enough time to actually MAKE that custom card!) - so I pulled out my color combos and picked one that seemed perfect for the occasion. It was a birthday card for a girl, but couldn't be "too" girly!


Here is my color inspiration for this month - I just loved the blue and green color combo!


I started off by stamping my custom sentiment using Happy Birthday to You and Typecast: Cary, then blended Distress Oxides over it in Lucky Clover, Cracked Pistachio, Broken China, and Faded Jeans. The heat embossed sentiments resisted the ink and magically popped out of the background. I added some water splatters to get the lovely background effect as well.


I created a frame using Essentials: Lana Cutaways (for the postage edge) and Essentials: Katharine Cutaways (to cut out the center). These worked perfectly together to give me the frame effect I wanted. Finishing touch was a few Clear Droplets from Pretty Pink Posh - I love how they almost look like bubbles on that dreamy blue and green background!


Now - I have a few favorites from the last Color Challenge to feature! As always - you guys were amazing! After looking through all the gorgeous entries, I'm SOOO inspired to go create rainbows on EVERYTHING! You all seriously wowed me! On to the favorites...

First up - This gorgeous rainbow stunner from Rosali! That ink blended background is breathtaking - and so perfect for those giraffes! LOVE!


Next up, Trina P. created this BEAUTIFUL ink blended background - I love the effect of the blending - so fabulous! And those elephants are having quite the party!


It would seem backgrounds were a favorite technique with rainbows - and this one is so fun! LOVE the more splattery and artistic effect that Deepti created for her two giraffes on this card!


And then - moving on from backgrounds - I ADORE Anila's unique take on this challenge with layers of die cut cardstock peeking out below her dimensional sentiment! SOOO fun!


And finally, Maryam nailed the soft side of the rainbow in this dreamy beauty - just breathtaking!!! Stunning work!!!


>>>RANDOMLY CHOSEN WINNERS<<<

marlena_m_IMG_4457
No. 11 | Marlena M.
I love how playful and jubilant this card is and the use of black and white with the rainbow of colors is very dramatic.

And since we had so many gorgeous, colorful entries (and because I just feel like it and one the perks of being the boss at w&w is I can do these things on a whim!) I randomly chose one of the Heather's favorite cards featured above to also win as well!

No. 22 | Trina P.
This adorable elephant card by Trina is so joyous and her use of color behind the elephants is awesome.   

Marlena and Trina, please email us at info {at} winniewalter {dot} com with the subject "March Color Combo Challenge Winner" to claim your prize.

>>>CHALLENGE<<<

New challenge will post on the second Monday of each Month, and will end on the Friday before the next challenge begins to allow time to pick a winner and some favorite entries to feature.

Now it's your turn to play along!
  1. Create a new project using the April Color Combo. 
  2. Use at least one (1) winnie & walter product.  This can include Cutaways (dies), Creative Screenings (stencils/masks), printable/digital items, cut files and/or stamp sets.  Remember we offer freebies in our shop.  Our freebies can be used to create your project(s) for this challenge.
  3. Link up your project below using the InLinkz Link-up by 11:55 p.m. CST on Friday, May 11, 2018.  
  4. Enter as many times as you want before the deadline.
  5. This April Color Combo Challenge may be combined with other challenges found here on the w&w blog or elsewhere. 
One randomly selected entry will receive a $25 gift certificate to Winnie and Walter. YAY!!! I can't wait to see your entries! 


Thanks for stopping by - have a wonderful day!


w&wDT_heatherhoffman_blog-sig 2


w&w-supplies