Wednesday, March 23, 2016

Coming Next Week: Bringing Back the Love!

This is happening next week:

share the love graphic pinkfresh

Share the Love Week is returning!  Make sure to join us beginning on Monday, March 28.

There will be challenges (no worries you don't need either the Felicity collection by Pinkfresh Studio or w&w products to participate although we would love if you did), tons of inspiration and awesome prizes (some of the Felicity collection) generously donated by the incredible Kinnari of Pinkfresh Studio for participating in the challenges and a little prize from us here at w&w for one randomly chosen comment from Share the Love Week posts!

For those of you who entered the Guest Star contest from our Belated 2nd Birthday Bash Challenges...I haven't forgotten and I am working on choosing a winner.  Why did I give myself such a difficult challenge? lol

Happy crafting,
Shay.

Monday, March 21, 2016

Welcome Home Tweet One with Kate


 Hello. 
One of my favourite things about Winnie and Walter  products is how well everything can be mixed and match together.
Today I have used the new release stamp set LS Exclusives: So Tweet with Evelin T Designs with the In a Word: Home Cutaway.


I couldn't resist playing with these cute birds.
I stamped them in black archival ink so that went I water coloured them with my Inktense pencils the image wouldn't run.
Once coloured and dry I fussy cut them out.


I used the Essentials: Noelle Cutaways to make a panel.
Using some distress inks I lightly coloured the centre with a blending tool before splashing some perfect pearls mixed with water.
I had to mask the stamp sentiment so as I could place it both above and below the die cut.
The home is layered 3 times and then covered generously with clear wink of stella.


I love the sparkle from the perfect pearls but you can only see it at certain angles so I added some sequins to finish.
Thanks so much for looking.

w&w_kateTIR_blog-sig


w&w-supplies


Saturday, March 19, 2016

March Leading Lady Maria Fischer | Take Three

Our March Leading Lady, Maria Fischer is back for her triumphant third performance!  If you missed her smashing debut you must see it...CLICK HERE or sensational second performance focusing on the illustrated trend CLICK HERE.  Maria takes on another bold and preppy trend today with an array of delightfully creative cards!

Without further ado, Maria....


Hello again w&w fans! I'm so happy to be back for Take Three as Leading Lady and I must thank you all for your kind comments. Here's a big, squishy virtual hug. You've really made my day!

Today let's talk STRIPES.

I must admit I love 'em. And I must admit, they're not new. Stripes are classic actually. Maybe it's the three different variations of daughter's Breton shirts that I've been seeing every week in the laundry... but methinks stripes are "in" again. Just google "stripes fashion trend 2016". Wow. Big, bold, loud, flashy. Any way you like 'em apparently. Best of all mixed with something else!

Did you see Take Two where my theme was the ILLUSTRATED trend? Well these first two cards use a little of that, in the totally trendy "uncolored" style, but mixed with some big and bold stripes.

Card #1 and #2


So where did those stripes come from? I've stretched my dies by making stamps out of them. I die cut the solid True Multifaceted Border from craft foam and inked it up with Distress Inks, spritzing it with water before stamping. After scrubbing the leftover Chipped Sapphire off the foam before re-inking it, it dawned on me to spritz the leftover ink and stamp off on another piece of CS. And that's how Card #2 was born! TIP: Attach your die cut foam to an acrylic block with temporary adhesive. Distress Inks work well for a watercolor effect. Pigment inks work best for more thorough coverage.

Card #1 was finished off with a layered Ina Word: Hello Cutaway and a fussy cut tweetie bird and sentiment from LS Exclusives: So Tweet with Evelin T Designs. I die cut the panel for Card #2 using Essentials: Audrey Cutaways and washi taped and stitched it onto my cardbase. Using LS Exclusives: So Tweet with Evelin T Designs, I gave this birdie a fussy cut, heat embossed sentiment cloud over his head and some whimsical leaves from In Bloom: Maggie's Roses Cutaways, a fabulous set of dies thanks to its positives and negatives.

Care to venture a guess on how I created this next background panel?

Card #3

On a whim I cut the faceted border from True Multifaceted Border Cutaways from foam too. TIP: Add adhesive to your block and use it to pick up the die cut from cutting plate keeping all the pieces intact.


Thinking this geometric pattern might be good for a masculine card, I inked it up with olive dye ink and stamped it five times onto Neenah white cardstock. Trimmed the sides, stapled it to a kraft cardbase and added a layered Ina Word: Hello Cutaway. which I cut from an olive-inked CS scrap. Heat embossed a "happy" from The Big, The Bold and the Party onto it to add a touch of color. 

Continuing with the "stripes are good for masculine cards" line of thinking...

Card #4

... trimmed some strips of white CS, swiped yellow and rust ink pads over them and stamped secondary sentiments from Wishing You onto them. I heat embossed the main sentiment and three stars from the set in gold and adhered the strips with dimensional adhesive. Easy. And easy to change up the colors for a girly card too.

A design that always catches my eye is stripes paired with florals. Think Kate Spade. I decided to take some elegant gold foil striped PP and pair it with illustrated florals.

Card #5 and #6


Stamped floral images from In Bloom: Addie's Garden, Elsa's Flora and Anna's Flora in navy and coral pigment inks on white CS for Card #5. Cut Ina Word: Hi Cutaway and adhered it on a layer cut from foam. Card #6 was made by stamping the second generation images from Card #5 onto cream CS. The striped die cut was offset on a coral one. Do you make multiples when creating cards? I'm a slow crafter so it really helps me reduce the average time I need to make a card!

Whew! Stamping. Using patterned paper. I didn't even talk about painting watercolor stripes to create a background! So many ways to incorporate stripes into your cards. Hope I've inspired you to hit your craft room this weekend. And please stop by my blog if you'd like a chance at the gift card Shay has generously given me to give away.


And be sure to come back next Saturday. We'll be exploring METALLICS in Take Four...


w&w-supplies


Friday, March 18, 2016

Spring Coffee Lovers Blog Hop

Don't miss Kelly's 3D card HERE!
Spring Coffee Lovers Blog Hop
Happy Friday lovelies!

It's Shay here to share the happy news that we are sponsoring and participating in the Spring Coffee Lovers Bloghop organized by our friends at Coffee Loving Cardmakers that runs from Friday, March 18 - Friday, March 25.

This is a perfect time to get your coffee, tea and cocoa on with a spring theme!  

To find out more about joining in or just to enjoy the blog hop please CLICK HERE.  There are tons of awesome sponsors and prizes!

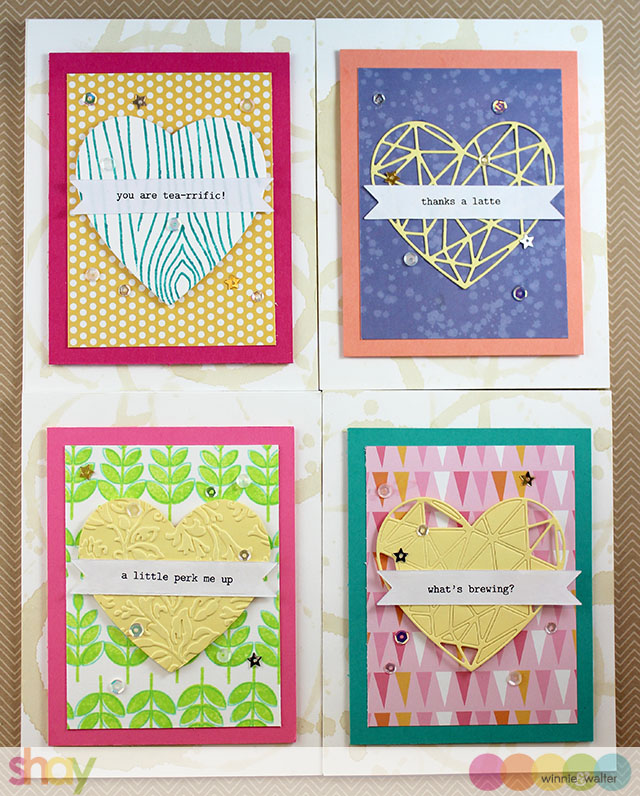
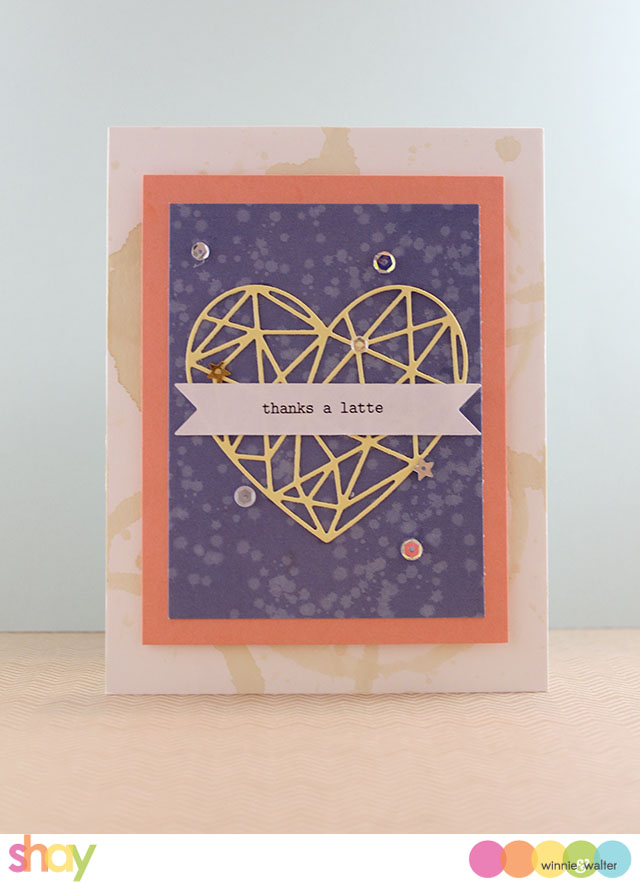
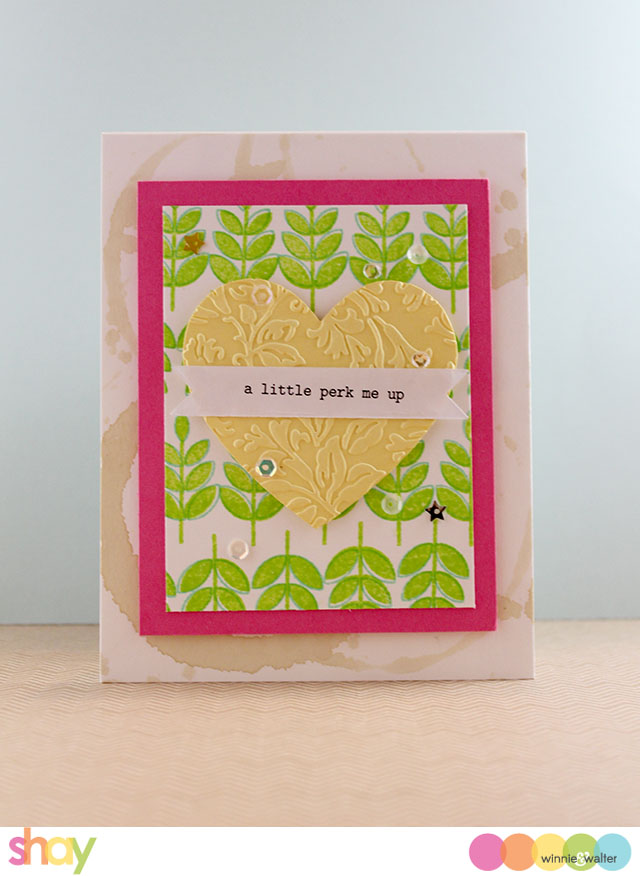
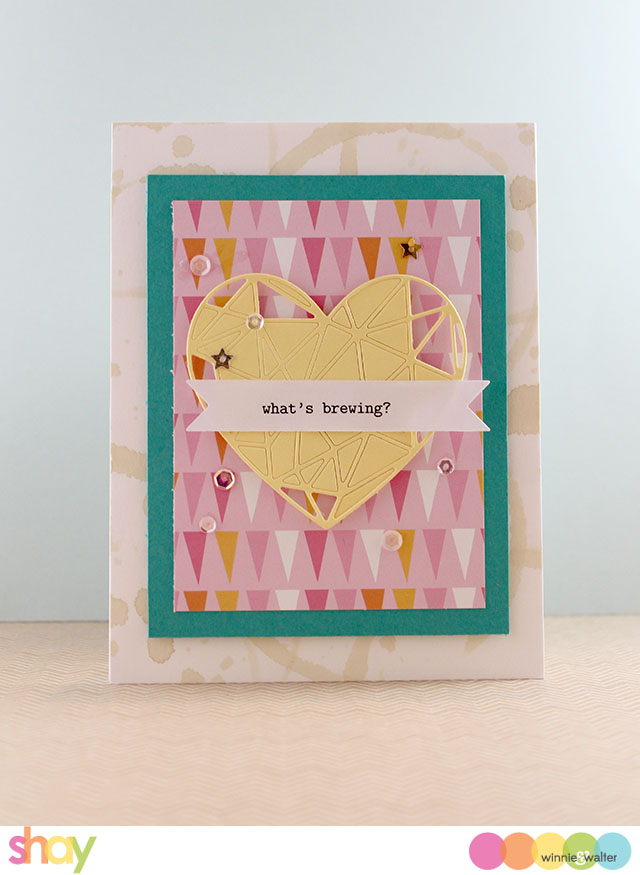
I made 4 simple, happy, brightly colored cards for today's blog hop.

IMG_3962

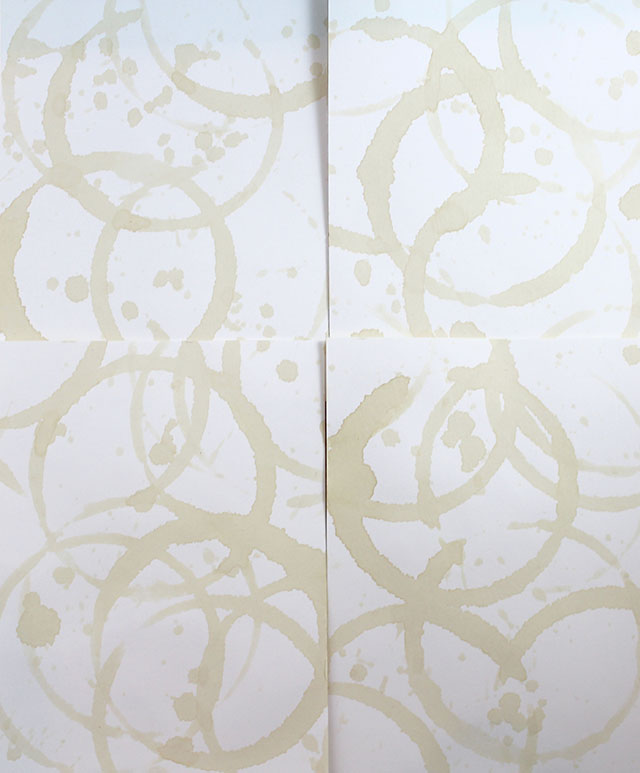
I began my cards by stamping coffee rings using my morning coffee (I made the supreme sacrifice for art) and my coffee cup and also flecked some of the coffee with my fingers onto four (4) 4.25 x 5.5 inch white cardstock panels.  I let them dry.  I love it and it is some of the most awesome smelling crafting ever.  I used creamed coffee so they are a very pretty pale brown, but if you want darker just use black coffee.

IMG_3960

I typed up some silly puny sentiments and printed them out.  I cut them all out with the larger banner from Essentials: Katharine Cutaways.

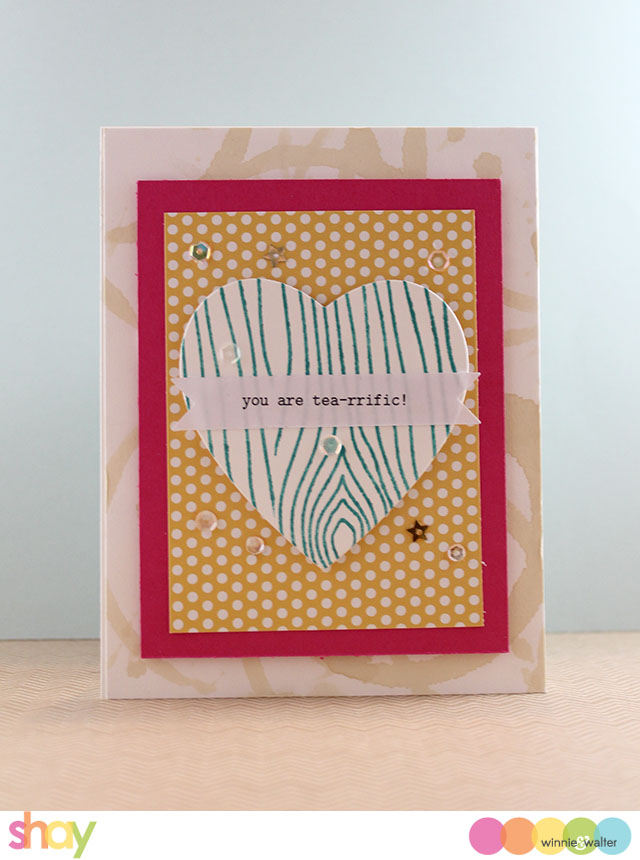
Next, I used some leftovers from my cardmaking from the February Belated 2nd Birthday Release, some patterned paper (sized at 3x4 inches) and colored cardstock (sized at 3.5 x 4.5 inches) to put together the cards.  The hearts are from True Multifaceted Heart Cutaways (yellow hearts) and Flawless Heart Cutaways (woodgrain heart).  The woodgrain heart was stamped with Scenery: Into the Woods and the leaf patterned panel was stamped with In Bloom: Eva's Favorite Flowers.  I put the cards together with adhesives including the ever-present foam dimensional adhesive.  Last I added some sequins.

These were so fun and a cinch to make.  Being able to easily change up the patterns, colors and sentiments for different occasions and styles make these coffee card bases so versatile.

Here's a look at each of the cards individually:

IMG_3963 IMG_3965 IMG_3968 IMG_3967

I hope you have a wonderful weekend and have a chance to relax with a cuppa of your favorite beverage.

Happy hopping!
Shay.


w&w-supplies

3D Big Hugs and Kisses with Kelly


Hi Folks! Last week I showed Winnie & Walter's Flawless Diamond in 3D; today I'm sharing a 3D card featuring the Flawless Heart Cutaway. This card uses the same premise, where you make any die into a 3D element by 1) cutting many copies, 2) folding them all down the middle, and 3) gluing the halves together.

   
The Flawless Heart Cutaway is particularly fun to work with, because in addition to all the negative spaces from the facet outlines, there is a solid middle that we can play up in our 3D model. I die cut 6 hearts from double-sided paper. The outside, faceted heart is folded so the green side shows, whereas the inside, solid heart is folded in the opposite direction so that the burgundy side shows. It's great how you can get two different colors without having to double your amount of cuts!

  
To make the base, I started with two of the solid Flawless Diamonds. Then I cut a slit from the top to the middle on one diamond, and the bottom to the middle on the other diamond, and slid them together.

    
Once the base is in place, flatten it out and stamp your sentiment, going right across the center. This sentiment is put together from The Big, the Bold, and Friends.

  
For reference, you can see all the different pieces here. Notice, one of the diamonds has a toothpick (colored green with Copics) sticking up from behind. This will be the base that the 3D heart sits, or spins, on. The toothpick is glued to the paper, and placed under something heavy while it dries for a nice, strong bond.

  
It's so nice how the heart just slides right on the toothpick, through the natural space that is left in the center. No adhesive is needed.
 

The dimension you get from the rounded heart with the solid inside makes me so happy!
 
  
The Flawless Diamond base is also cut from double-sided paper so that the rear view is equally interesting. With this being a 3D card, and visible from all angles, it was important for me to make sure the back wasn't plain.
 

I had this card on my desk for a couple days because I liked it so much, and ended up wondering how I could take advantage of all those delicate facets. Threading gold fibers through the outside spaces sounded like a good idea, so I thought I'd give it a try. While it does add another element and texture, I thought it might be too much, and distracted from the neat facets. Ah well, you never know until you try, right?!


It did look really neat from the top though!
 
 
Like the others, this one folds flat for mailing, even with the gold thread going through it all. 

I hope you enjoyed the different looks you can give your dies, just by multiplying, folding and gluing them together! I think I'm going to try the True Multifaceted Circle next, or maybe the star ... stay tuned!


w&wDT_kellygriglione_blog-sig


w&w-supplies