Monday, April 27, 2015

April/May 2015 Release | Coming Attractions

Note: 1 of 2 posts today.  The Big Giveaway post is HERE.   

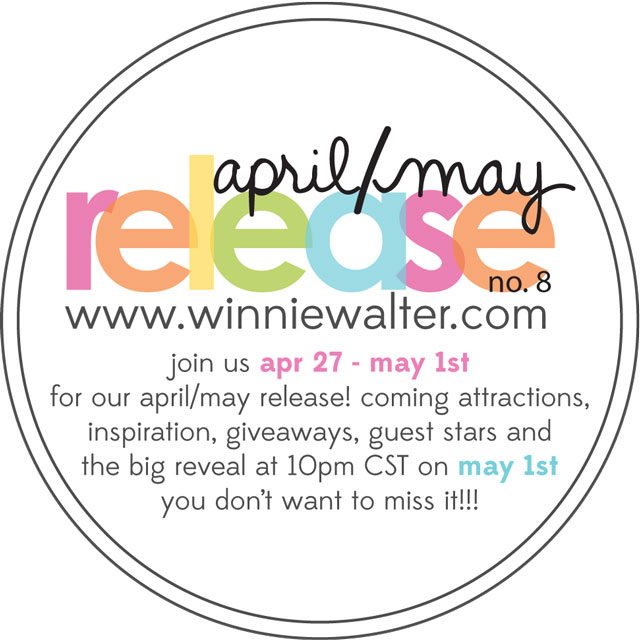
We are so excited to share with you previews of our April/May Release stamp sets.  We have 8 stamp sets and their coordinating Digital Elements releasing on May 1 2015 plus some cutaways!  We are releasing Sparkle for purchase as part of our April/May Release.

Let's get to the previews!

apr-may2015_1_inbloom_addie'sgarden
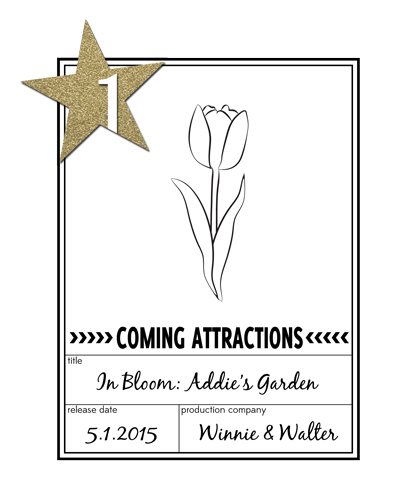
We are bringing on the flowers in a *big* way with In Bloom: Addie's Garden!  Julie has outdone herself with this stamp set full of beautiful blooms in the same style as the roses in The Big, the Bold and Extras!  This is the first in a series of all flower and leaves sets in this style and we could not be more thrilled!

apr-may2015_2_inbloom_lola'sbouquet
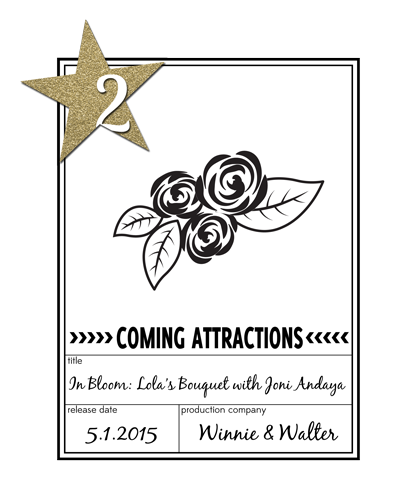
We are so excited to share In Bloom: Lola's Bouquet with Joni Andaya which we designed with the uber-talented Joni Andaya.  With a multitude of possibilities in little flowers, leaves and containers and unique layering options you know with Joni behind the design you will be making gorgeous projects!  Be sure to check out Joni's blog throughout our Release Week for more inspiration with In Bloom: Lola's Bouquet with Joni Andaya!

apr-may2015_3_miniscenerymultifaceted
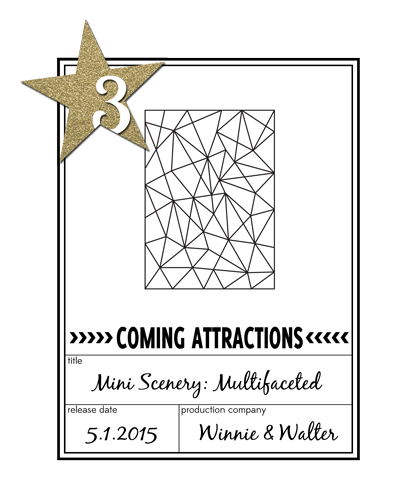
Mini Scenery: Multifaceted brings a very graphic little backdrop to your projects.  This stamp will work for projects for any gender and age!

apr-may2015_4_my-precious
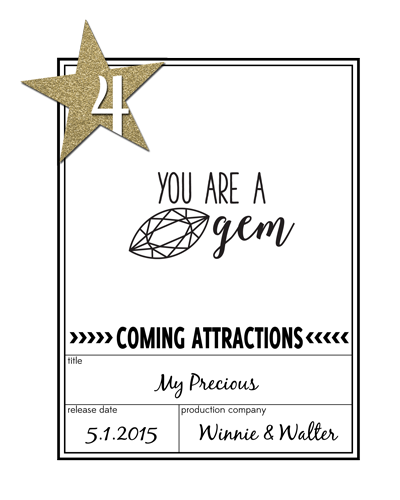
Gems are all the rage and we certainly love them too so we created My Precious to add a touch of glamour to your projects.  With some sentiments that will blend perfectly with other sets like Sugar Rush and Sparkle (releasing May 1) this is not only a beautiful stamp set, but a useful one too!

apr-may2015_5_true
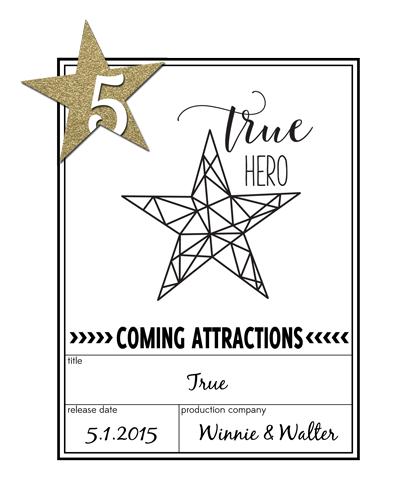
True is a perfect companion to My Precious and Mini Scenery: Multifaceted.  With faceted basic shapes and sentiments you can make a project for the guys and gals in your life including mom and dad!

apr-may2015_6_bigboldcomfort
We've added another set to The Big, the Bold series.  The Big, the Bold and Comfort is a "Texas" sized set with 5 big words!  This set will help you be there for friends and family when they most need some kindness in their lives.

apr-may2015_7_bigboldfriends
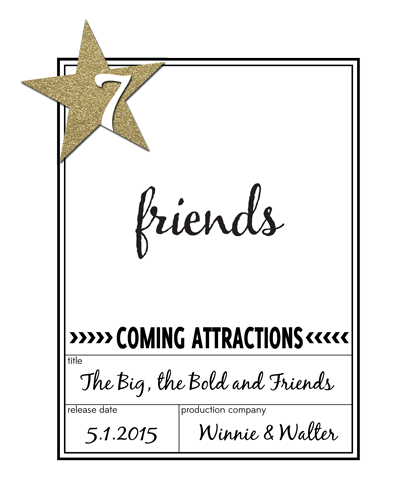
A compliment to The Big, the Bold and Comfort is The Big, the Bold and Friends.  Celebrate the friends by birth and choice in your life with this set!

We are so thrilled to share more with you over the next few days as we premiere the stamp sets beginning tomorrow, April 28, 2015.  The guest stars' and The Talent's projects are delightful!

What do you think?  Anything you are particularly excited about?   We would love to hear your thoughts.

April/May 2015 Release | The Big Giveaway

Note: 1 of 2 posts today.  Coming Attractions post is HERE

The Big Giveaway is where we randomly pick one (1) lucky winner to receive the stamps from our April/May Release and they are pretty darn awesome!  That's all eight (8) stamp sets + coordinating cut files!!

>>>THE BIG GIVEAWAY<<<

You don't have just one chance to win, but a lucky 7!  You can do as many or as few entries as you want.  Remember that if you take advantage of all 7 chances to win, you will have commented on this blog post 7 times.  Each chance = a separate comment.

Ways to enter:
  1. Comment on this blog post.  
  2. Follow us on this blog to the right through Blogger, by email or through Feedly or Bloglovin.  Leave a comment that you follow us. (If you already follow our blog, let us know!  And thank you.)
  3. Like us on Facebook.  Leave a comment that you like us on Facebook...we like you right back!  (If you already like us on Facebook, let us know!  And thank you.)  As a little bonus for liking us on Facebook we have some fan freebies...just check under the "like our page" tab.
  4. Follow us on Instagram.  Leave a comment that you follow us.  (If you already follow us on Instagram, let us know!  And thank you.)
  5. Follow us on Pinterest. Leave a comment that you follow us.  (If you already follow us on Pinterest, let us know!  And thank you.)
  6. Follow us on Twitter.  Leave a comment that you follow us.  (If you already follow us on Twitter, let us know!  And thank you.)
  7. Share about Winnie & Walter's April/May 2015 Release on TwitterFacebook, your blog or Instagram. (#winniewalter)  Leave a comment that you shared and thank you! 
You have until 11:59 p.m. (central standard time) on May 1, 2015 to enter.

All winners during our April/May Release will be announced by May 3, 2015.

Big hugs to you all!

Saturday, April 25, 2015

April Leading Lady Lydia Evans | Take Four

We are terribly sad that April is ending and that this is the last Saturday with our amazing April Leading Lady, Lydia Evans.  Thank you so very much, Lydia, for your exceptional work and being an incredible delight!  It has been a joy to have you as our leading lady.  

If you missed her smashing debut you must see it...CLICK HERE or her inky party of a second performance CLICK HERE or her third performance where pits the feminine vs. masculine CLICK HERE

Lucky for us all we have her final golden and dazzling performance today and she will be joining us for our April/May Release next week.  
Lydia-Evans_apr2015


Wow, wow, wow! What a ride this has been! I am super sad to say that this is my last Leading Lady post but I'm also really happy that I was given the chance to do this. So a big, big, huge, massive thank you goes out to Julie and Shay for letting me play over here on the Winnie & Walter Blog. 

Today I thought I would bring back a few of your favourites , gold and watercolour! Kind of a film with your favourite stars right?!?! Hehehe. I thought I would share different ways that I add gold and also some different watercolour techniques...... here we go....

First up...... Gold Embossing Powder and Distress Markers.

DSC050277

I firstly cut a piece of watercolour card using the largest of the Essentials: Katharine Cataways dies. To get the flower cluster where I wanted it I took the In A Word: Love Cutaway, placed it into place on my card layer and drew around it lightly in pencil. Once I removed the love die I could then see where the flower cluster needed to be. I used the tea-rose like flower and leaves from The Big, the Bold And Extras, and heat embossed the stamped images using gold embossing powder. When I was happy with the placement on the flowers I erased the pencil line and cut In A Word: Love Cutaway into place.

  DSC05027

I wanted to create a 'Spot-light' effect on the In A Word: Love Cutaway , so once it was cut I added colour to the 'love' die-cut only, using Distress Inks as a watercolour. I added this back into place with foam pads for some dimension.

Take 2.... Gold Craft Metal and Dip-Dye Watercolour Effect Background (oh and some gold splatters!)

DSC050355

To create the Dye-Dye effect back ground I cut a piece of watercolour card to size, I then added a deep pink watercolour to the top of my card, I cleaned my brush and while it was still wet I pulled this colour further down my card in so making this part lighter. I then cleaned of my brush again, and then pulled the lighter colour further down the card creating a gradient effect. I then left this to dry.

DSC05035

For my flower cluster I stamped and heat embossed in white the pom-pom flowers from The Party and the leaves from The Big, the Bold And Extras onto vellum and them cut them out before adding them to my card when it was dry. I then added some gold splatters .... I love adding gold splatters to my cards as it looks classy yet arty at the same time. For the beautifully golden sentiment I attached some gold craft metal to some white foam and then cut it with the 'thanks' die from The Big, the Bold and You Cutaways.

Next in the Trilogy..... Gold Foiling And 'Dropped In Watercolour' (I may have two to show using these techniques :) )....

DSC050399

For this I cut a piece of watercolour card the size of my card base and then stamped a sentiment and leaves from A Tree For All Seasons with VersaMark and added some WOW- Bonding Powder to the sticky ink and heat set it. I then covered this with some gold foil and ran through the Minc on setting 1. Once it was done I left it to dry for a couple of seconds before removing the foil piece, the foil will stick only where the bonding powder is.

DSC05039

Once I had my images and sentiment in place I taped the piece of card onto a flat surface and added some clean water over my sentiment, I then dropped in some watercolours in purple, teal and yellow and let them run. The colours will only travel as far as you added the clean water.

Part Deux of The Trilogy...

DSC05047

I love this technique so much and as foiling has got to be one of the big trends around now so I thought I would show you that these techniques can also be used on other projects as well as cards ..... how about these super cute 'print' I created?!?!

DSC05046

I did this in the same way as the previous card, but used the tree and birds stamps from A Tree For All Seasons with the same 'dropped-in' water colour as before, I adore how this looks like blossom on the tree.. swoon.

Before you guys run off I would love to know what you think of my cards, your comments mean the world to me. Also as Julie and Shay are so generous they have given me a $30 gift card to the Winnie & Walter store over on my blog, so if you hope over there and leave me some love I will choose a random winner from all the comments left on my Leading Lady posts through April,you have until next Saturday until I choose the winner.

w&w_30giftcard

I would really love to say a big thank you to everyone that has left such lovely comments they truly mean the world to me. And again to Julie and Shay ... thank you from the bottom of my heart it has been a pleasure to be able to play and share using your fabulous products.

Big hugs everyone and have a beautiful day!
Lydia xxx


w&w supplies used:

Friday, April 24, 2015

The Gossip Column with Taheerah Atchia No. 1 | Hot Gossips + Gossip Queen Announced

Welcome back, fellow Gossipers! We've been so thrilled to hear the buzz you've been generating about the first issue of The Gossip Column! Thank you all for your kind words, comments, shares, and your enthusiasm for this exciting new feature on the w&w blog!

Those of you who read the first column really seemed to enjoy the Colour Crush challenge and we had some truly amazing entries! Everyone picked some great colour combos and you certainly made it hard for us when it came to picking our winners!!

We thought long and hard, and finally arrived at our first ever Hot Gossips (runner-ups) and Gossip Queen (winner)!!

Drumroll please... 

cr2designs.1

CR2DESIGNS really wowed us with her creative combination of Toasted Almond, Tangerine Orange, Classic Blue, Aqua Marine, Lucite Green *and* the embossing also could count as Glacier Grey too, wow! The triangle grid approach and the amount of each colour really helped combine these colours with flair and without overpowering the design! CR2DESIGNS you are certainly Hot Gossip!!

diane_jaquay1

Diane Jaquay's bold, bright card combined Tangerine Orange, Classic Blue, Glacier Grey and Aqua Marine with style and panache! Her stamping is impeccable and I can't get enough of those chevrons!! Diane your work has Hot Gossip written all over it!!

And that brings us to our first ever Gossip Queen... 

michele_ferguson2jpg

Michele (I Card Everyone)... her card caught the eye immediately for the beyond elegant combination of Custard Yellow, Strawberry Ice, Tangerine Orange and Glacier Grey! Not only was it a mouthwatering palette of hues, but her design bowled us over for its clever design, stunning attention to detail and we loved the addition of the sequins for interest and the really clever addition of the strips of cardstock as the stems of the flowers! Michele you are our first Gossip Queen!!

Diane and CR2DESIGNS you both win a $15 credit to the w&w store, and Michele you walk away with a $30 credit! Congratulations!! Please contact info{at}winniewalter{dot}com to claim your prizes!!

Please join us in congratulating these fantastic ladies and their amazing creations!! Everyone's entries were of such a high standard and you all deserve the plaudits too!! Please do take some time to browse the gallery to see everyone's work - you can find them at the bottom of the first The Gossip Column here.

For all you Gossipers who are keen to get the latest scoop, issue 2 of The Gossip Column will be hot off the press on Friday 8th May! We'll see you back here to get the exclusive on the latest gossip then!!

'Til then - keep on gossiping!

Thursday, April 23, 2015

Fiesta | Celebrate with Heather

Good morning! Heather here from Houses Built of Cards again - to share another card I made using the same die from last week - I die cut it a couple times out of different paper trying to pick which one to use, and didn't want to let them go to waste, so I decided to put them to good use! :)


To start with, I die cut a panel of watercolor paper using Essentials: Katharine Cutaways, then used Peerless watercolors to color a bright and festive pattern. After it dried, I die cut the center with Big Bang Confetti Cutaways (I haven't separated the dies yet - so they were in a fun pattern already to die cut) - and kept the pieces as well. I assembled a shaker card filled with Silver 4mm sequins and chunky clear glitter. The word celebrate was cut with The Big, the Bold, and the Party Cutaways, once in black and once in white, then separated a bit for a shadow effect. I also layered some silver thread underneath the word die cut. 


Next, I used my first Winnie and Walter stencil - Scenery: Big Bang Sci-fi Star Creative Screening - and embossing paste to add a background to my kraft card base. Finished off with a few extra silver sequins, some distress inking around the edges of the card base, and then attached some of the pieces that I die cut from the watercolor image. In this next picture you can see the filling on the shaker element a little better. I really should have added more, but I usually add too many and was afraid it wouldn't shake if I over did it!


Thanks so much for stopping by today! Have a wonderful day!!!


w&w supplies used:


Tuesday, April 21, 2015

Spotlight On...Kimberly Rendino! Part Deux

spotlight-KimberlyRendino

We are so lucky to have Kimberly Rendino back with us for another post to make you want get down and party!  If you missed learning more about Kimberly and seeing her first pretty party projects CLICK HERE!

Now, it's Kim's time to sparkle and shine...

Fiesta cards by Kimberly Rendino | Winnie & Walter | kimpletekreativity.blogspot.com

I'm so happy to be back again today on the w&w blog - so many of you left such nice comments after my last post, and I appreciate every single one! Thank you! Today I'm going to share some Fiesta themed cards that go in the exact opposite direction as the pastel cards from my last post - we're going BOLD today, friends!

Bright Fiesta card by Kimberly Rendino | Winnie & Walter | kimpletekreativity.blogspot.com

First up is my favorite - the colorful one!   This card came together quickly - I inked the sentiment from The Party in a combination of light, medium and dark inks to create an ombre effect.   Love this!!   

Bright Fiesta card by Kimberly Rendino | Winnie & Walter | kimpletekreativity.blogspot.com

The confetti and streamers from the same set were stamped all along the edge, and I added in some stars from Scenery: Big Bang Confetti for good measure.   The panel was double mounted on black and red cardstock to make it really pop before I mounted it to the white card base. 

Next up is a card that would be perfect for a guy - as a matter of fact, my son told me he likes this one a lot ;)    Maybe that's a hint?!?

Bold  Fiesta card by Kimberly Rendino | Winnie & Walter | kimpletekreativity.blogspot.com

This was another super simple card to make.    The awesome chevrons from the Scenery: V for cheVron set were embossed in white and gold pointing to the sentiment from The Party.

Bold  Fiesta card by Kimberly Rendino | Winnie & Walter | kimpletekreativity.blogspot.com

That's all I've got for you today - I had a ton of fun creating all of these Fiesta themed cards using Winnie & Walter stamps, and I've certainly bulked up my stash of party/birthday cards!   

Huge - and I mean HUGE!- thanks to Julie & Shay for inviting me to be in the Spotlight this month. It's been awesome! 

xoxo

Monday, April 20, 2015

Saturday, April 18, 2015

April's Leading Lady Lydia Evans | Take Three

Our April Leading Lady, Lydia Evans is back for her third performance!  If you missed her smashing debut you must see it...CLICK HERE or her inky party of a second performance CLICK HERE.  Today's post by Lydia is quite a fabulous bout full of inspiration!
Lydia-Evans_apr2015 
Hello there and welcome to the weekend :) I'm so happy to here with you again on the Winnie & Walter blog! Today I'm really mixing it up .... and this weeks theme is... 'In A Word Cutaways: Masculine VS Feminine'. Now if you are anything like me I find making guy cards quite hard but using the In A Word Cutaways you can change up the colours of a gal card to a more macho one...

The first match is the In A Word: Cheers Cutaway ... and first into the ring is feminine...

DSC04961

To create the background I first added a pink watercolour to a piece of watercolour card cut with the largest Essentials: Katharine Cutaways die , before letting this dry and then adding a purple on top. I cut the 'cheers' twice out of coloured metal (pink and purple), and added these to a piece of vellum lining them up so the purple acted like a shadow to the pink. I then added some more sentiment using Sugar Rush with Stazon black ink. Some enamel dots and sparkling gems finishes the card.

On to the male version.....

DSC04968

I must say ... I think I like this one better, the colours I think that's what does it, right? So for this one I did the background in the same way but using turquoise first and the black. I used the same colours of craft metal as the background for the stacked 'cheers' and change the 'girl' to 'boy'.

Next match we have 'In A Word: Happy Cutaway'... again I created the female version first...

DSC04958

To start I cut a piece of white card using the largest of the Essentials: Katharine Cutaways , to cover the front of my card blank. I then stamped the solid balloon from The Party in lots of bright girly colours, I used dye ink and overlapped the stamped images so it would look as though you can see through the balloons and see the one behind. I added a string and bow from the same stamp set to each balloon -I love the look of the strings finishing on different levels.

Once all the stamping was done I used 'In A Word: Happy Cutaway' to cut 4 plain white 'happy's and then cut it again in place on my stamped piece. I then stacked all of these 'happy's up with the stamped one on top. I attached the stamped card layer to my card blank and then added the stacked 'happy' back into place. To finish the sentiment I stamped 'birthday' from The Big, the Bold and Party in black ink. To finish the card I added some clear sequins and some wink of stella and glossy accents the 'happy'.

Now switched up for a guy....

DSC04964

I cut the same card layer and used the same balloon stamp but this time I used blue and green inks. I created the stacked die-cut 'happy' n the same way and added grey enamel dots instead of sequins .

So which do you think won this round.... I'm completely on the fence for this one!

Last up In A Word: Love Cutaway... and I created the manly one first.....

DSC04963

To start I cut the smaller of the two frames from Essentials: Katharine Cutaways and using the large bold stripe from Scenery: Stripes I inked it with a dark red and stamped this into place about 2/3rds down my panel (which is landscape). I then stamped some more of the stripes either side of this red one with navy ink.

Once I was happy with the stripes I then took In A Word: Love Cutaway and cut this into place on the stamped panel. When it was cut I added 'you' from The Big, the Bold and You in white embossing powder into place. Then attached the stamped panel with the 'love' missing to my card blank with foam tape. While we do not need the actual 'love' that has just been die-cut this could be used on a tag (check out last weeks tags ;) ), but the landlocked areas in the 'o' and 'e' are needed and I added these into place using foam pads.

For the female version I stamped away from the nautical colours and went a little neon...

DSC04955

I created this in exactly the same way just swapping out the ink colours!

I think the guy one has my heart out of this duo.

Before you guys run off I would love to know what you think of my cards, your comments mean the world to me. Also as Julie and Shay are so generous they have given me a $30 gift card to the Winnie & Walter store over on my blog, so if you hope over there and leave me some love I will choose a random winner from all the comments left on my Leading Lady posts through April.

w&w_30giftcard

I would really love to know what you think of my cards and which ones are your favourites!

I hope you have a beautiful day and I will see you again soon.

Hugs Lydia xxx


w&w supplies used: